Today is Taylor's birthday and we all wanted to show her some love! Since we couldn't all be together in one place to throw a party, we're having a virtual Birthday Party Across the Miles for her, and you are invited! Just a fun little blog hop on a Sunday… We decided it would be cool to each choose a "fantasy" birthday present for Taylor! If money were no object…what would we buy her? Hmmmm. That was very difficult! Of course, she doesn't need stamps! Taylor is about to be a mom for the first time, and she works very hard…so I would give her this:
A day of pampering and rest and rejuvenation at a beautiful spa…for Taylor and her husband! What a nice way to have a birthday break, right? If I could, actually, I would buy this for all of us! hee hee.
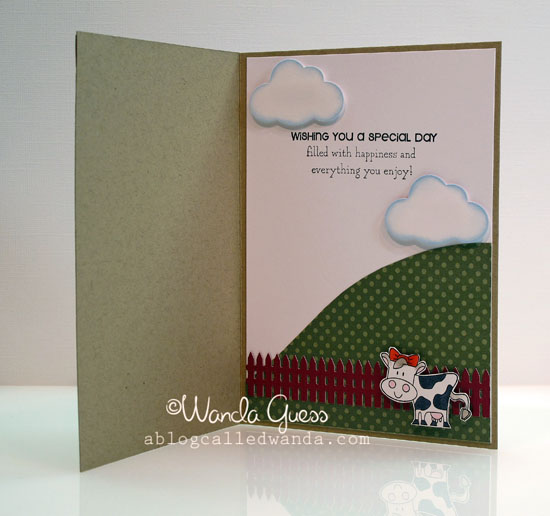
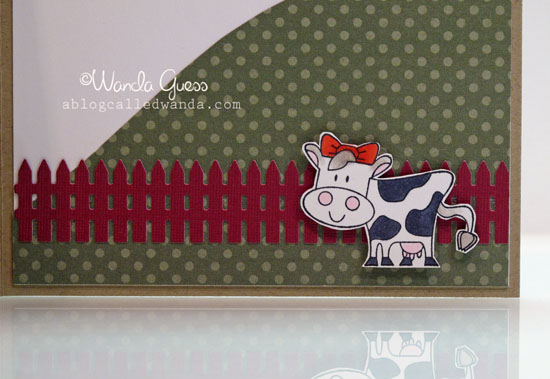
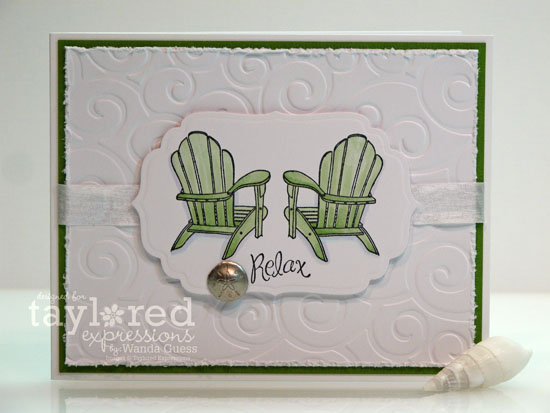
I sent Taylor a snail mail birthday card too…It's a card I made for the June TE release. Taylor loves this Green Acres stamp set! I doctored up the inside a bit to make it a birthday card. Hopefully she got it in time!
That's all I have for today! You should have arrived here from Jami Sibley's blog. And, the next stop is Tracy Clemente's blog! If you came here first, you can start at the beginning of the blog hop by going to Jami's first. She has the links to everyone's posts. If you have time, pop on over to Taylor's blog or facebook page and share some love with her too. She does a lot for us, and it's nice to do something for her!
Hiya! How was your week? I hope it was a great one! Lots going on these days…seems like everyone knows a grad or a bride… and vacations are starting… Guess we've officially arrived at Summer! After having freezing cold rain for over a week I am happy to say that it was 88 degrees here today in Sac-town… Which is just about perfect! It feels good to be warm and get some sun on my face. I went outside today and sat in the sun at lunch. I'm lucky enough to work near a park and near the river…lots of places to walk to. Really a gorgeous day!
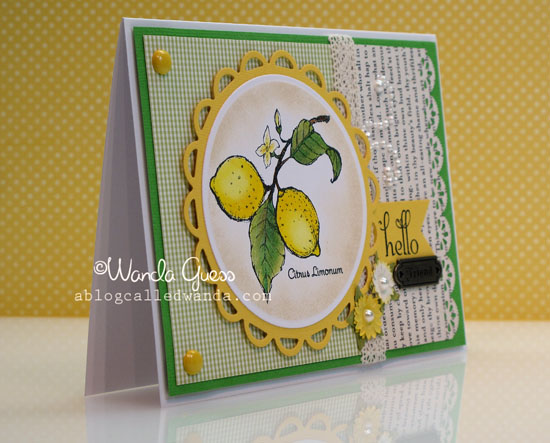
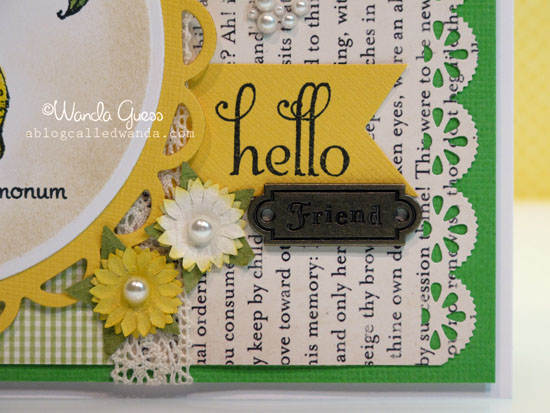
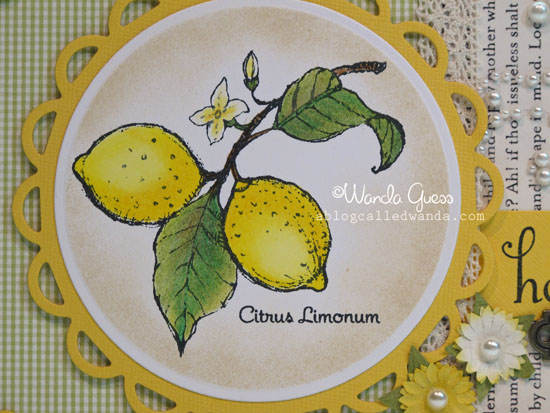
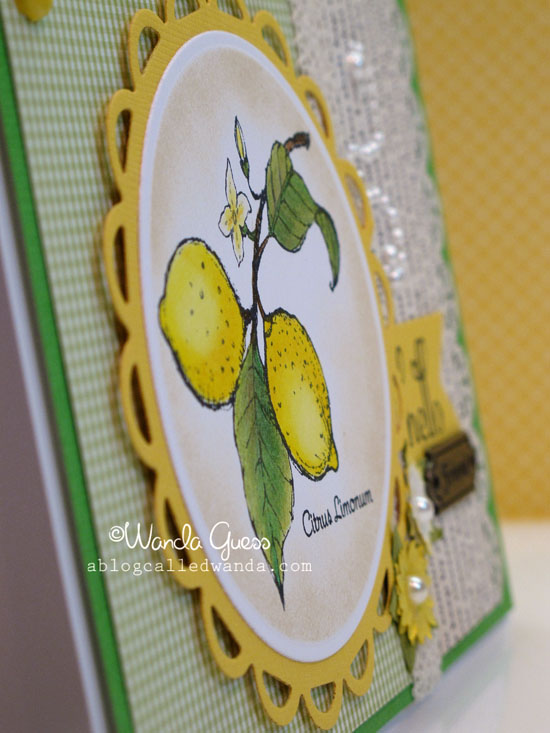
My friend Kat wrote a sweet comment on my bloggy blog a few days ago and I keep thinking about it. It really touched me and what she wrote is perfect for today's card. Thanks Kat! Mwah! As I wrote earlier in the week I had some time to sit down and color some pretty Flourishes images. Today I'm posting the second one – Lovely Lemons!
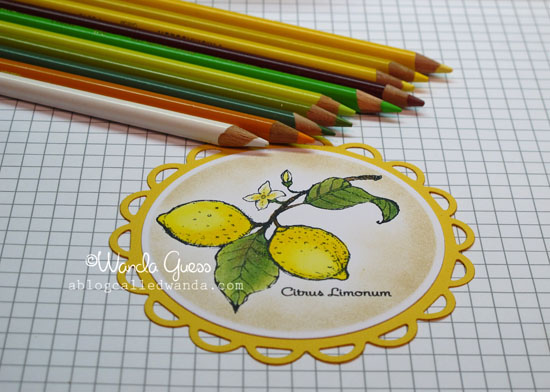
Here is my pencil palette for the image…a few shades of yellow and some shades of bright citrus green. You see there's an orange pencil in there… I used just a touch of orange in the darkest parts of the lemons to add depth. I also added a touch of brown to the leaves. I'm having fun re-experimenting with the pencils.
Some pretty paper flowers and, it seems, as of late, pearls on everything!
Here's a super close up of my colored image. I cut the circles out with my nestabilities and then sponged some distress ink around the edges. I was VERY tempted to get out some glitter… But I resisted!
Thank you so much for coming by today. I love that you are out there and sharing with me! This old blog makes me very happy. I was thinking today how grateful I am for all the new friendships I've made over the last year and a half. It's been such a blessing. I hope you have a great weekend!!
Hi Friends! Over the past couple of days I've had some time to relax and color some pretty images I've been dying to color! I have one to share today and I'll share the other one sometime later. I have been "Copic crazy" for a good little bit and so this week I decided to get out my colored pencils to change it up. Before I started using Copic markers, pencils were my weapon of choice!
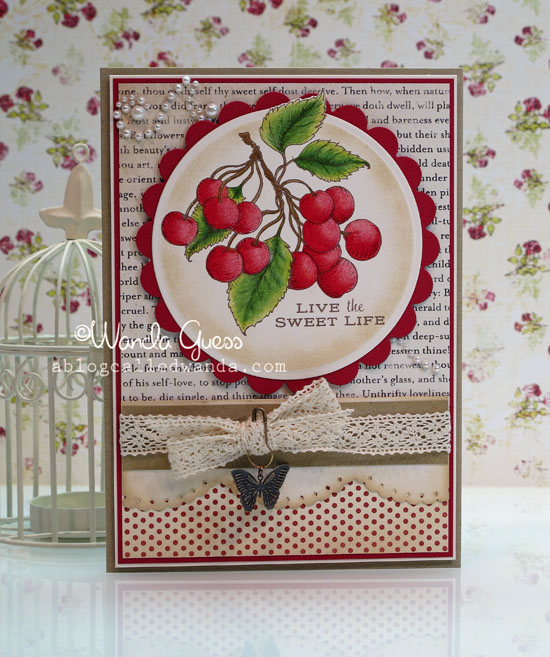
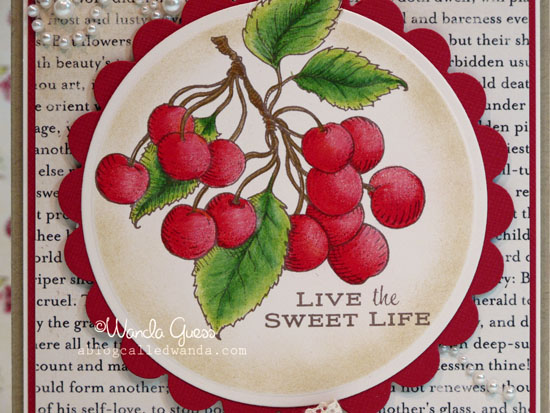
Today's card is made with a beautiful image from Flourishes. The sentiment is from the same set. Their stamps are just so beautiful and classy. I love anything botanical or fruit themed, so these cherries are right up my alley! I hope you're having a good week. Thanks for popping by!
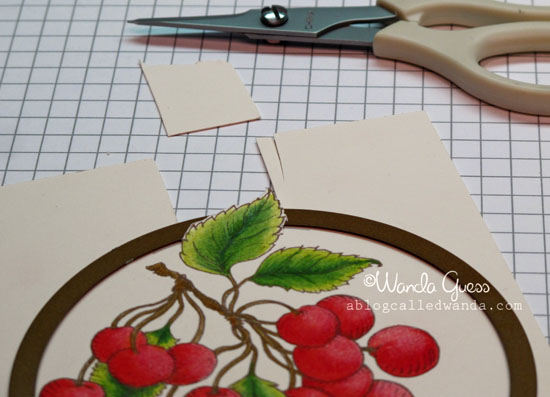
This is a new little trick I tried for the first time! I used my nestabilities but I left one part of the leaf outside of my circle! There are some great videos on Youtube about how to do this. I tried a practice one first and I'm glad I did! Cool, huh?
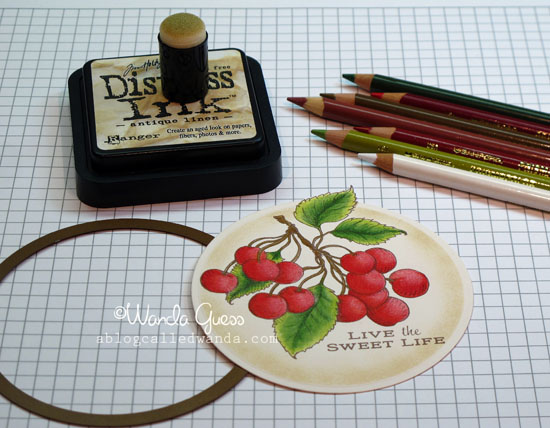
A very simple color pallete…those are all the pencils I used!
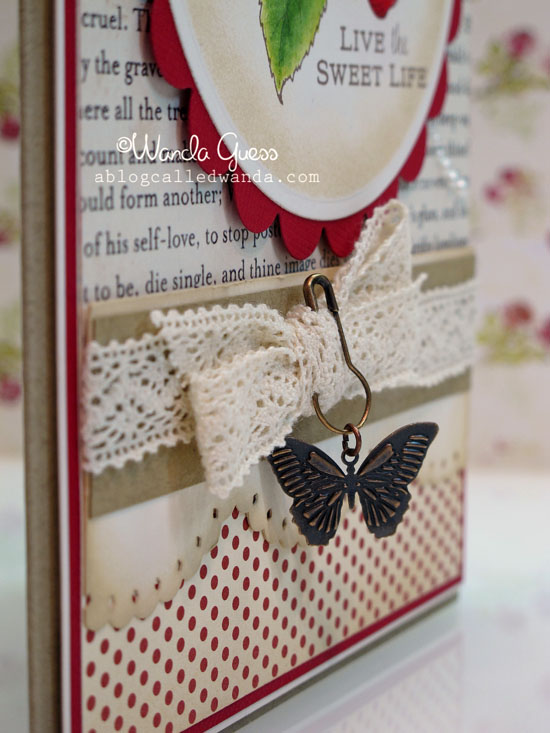
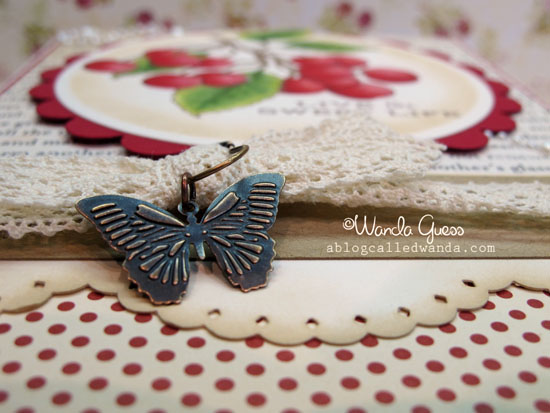
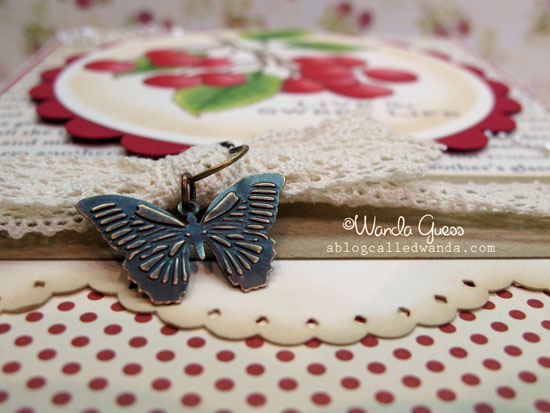
This pretty lace ribbon is from Stampin' Up. That little butterfly doo dad is from Pink Paislee. I think that polka dot paper is from Stampin' Up too. Can't remember.
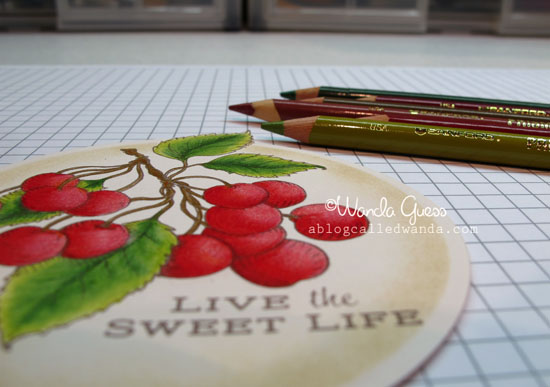
Here's a close up of my coloring… You can see that all my highlights are on the same side of each cherry, as if the light is coming from the right side of the image. I used just a touch of brown in both the cherries and the leaves to give some depth. I must say that I learned how to do this by taking colored pencil classes from the master – Dave Brethauer! Every time he teaches I take the class again…and always learn something!
Is it okay if I say that I really love how this card turned out? It gives me a good feeling, this one…
That's what I got for ya today! Take care peeps and come back soon!
Hi everyone! What did you think of all the Taylored Expressions craziness this past week? Whew! Lots of fun and lots of projects to share. I hope you are having a wonderful weekend. I just have some ramblings for today and some pix to share. You know how I like to do it…this and that. I had been hoping to share with you something different today – but that didn't work out – so I'm sharing how we made the best of it.
The DH and I met on a blind date! 18 years ago yesterday, to be exact! We were set up by a mutual friend and our first date was for lunch. Well, the rest is history as they say. We went out for eight and a half years before we finally tied the knot (our 10 year wedding anniversary is this year), so we always celebrate June 4th as an anniversary too. One of my favorite singers is Adele and we bought tickets to see her in concert at the Berkeley Greek Theater last night. We got a pretty hotel room too and were all set for a very romantic weekend. Unfortunately, Adele ended up cancelling the concert and the rest of her US tour due to illness, and it was POURING rain, and freeeeezing all weekend too. I had hoped to share some cool photos of the concert as well as of the historic Berkeley City Club…but that was not meant to be.
DH and I have fun no matter what we're doing as long as we're together. So…we spent the day shopping and hanging out. We had a very nice lunch at PF Chang's and had some fun at the art store and at the mall. I took a few pictures and some of them came out alright! Today's post is a just a little photo essay. Thanks for coming by to see me!
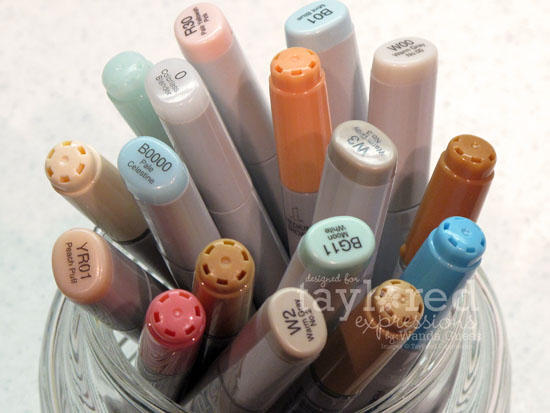
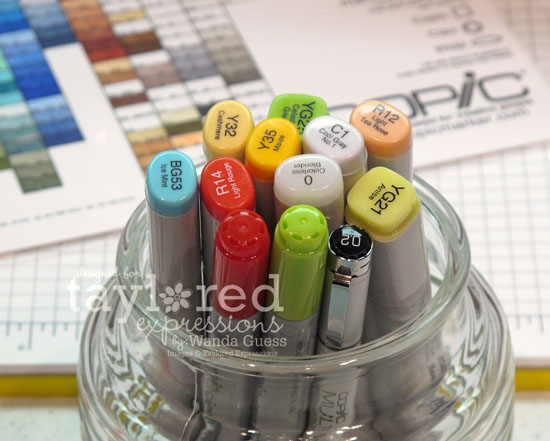
Out in the front of the art store we saw this cute pink scooter…named Buddy! hahaha. LOVE this. Inside the art store we found 350 colors of Copic Markers! hee hee. (I only bought five)…
Here's part of our yummy lunch…so warm and tasty on a cold rainy day…
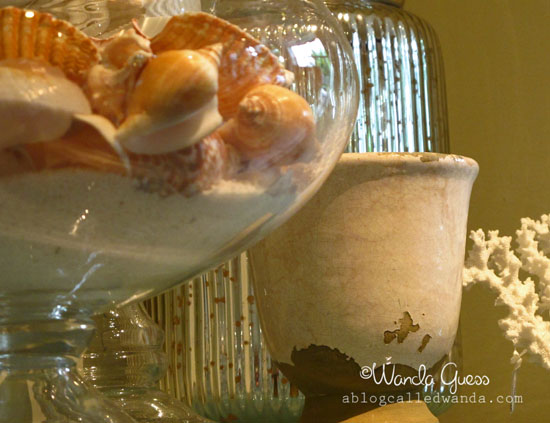
My favorite vignette from Pottery Barn! I could just move right in…just bring my clothes and some snacks and I'd be all set. This store is so gorgeous. I love the red, white and blue beach theme so much.
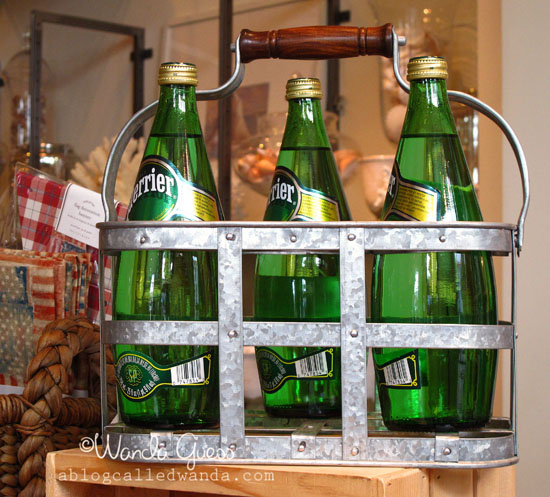
The green in these bottle just called to me…
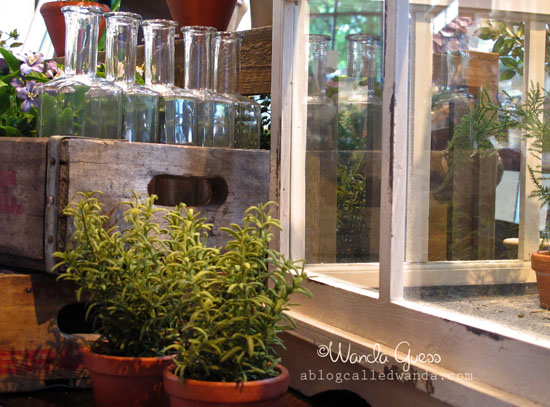
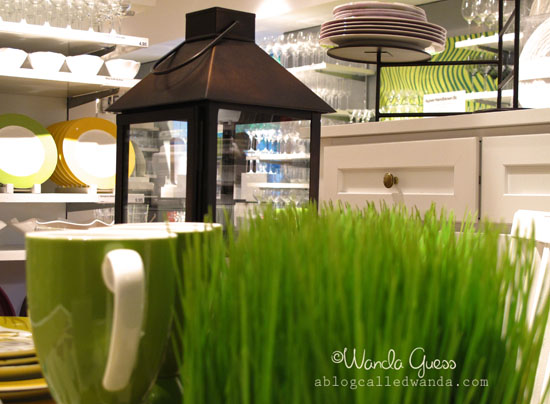
Here's a fresh little scene from Crate and Barrel…
The diffused light from clouds/rain is perfect for flower close-ups…
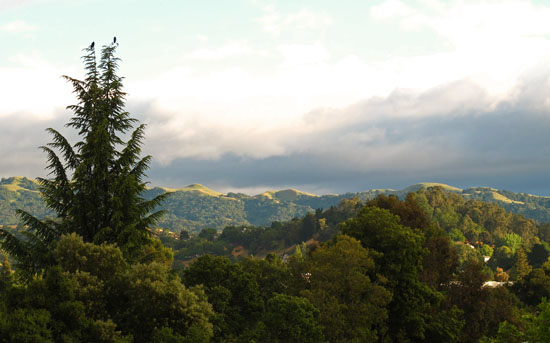
The sun came out for a little whle just at the end of the day. Everything was so fresh and clean and green. Felt good to breathe all the fresh air.
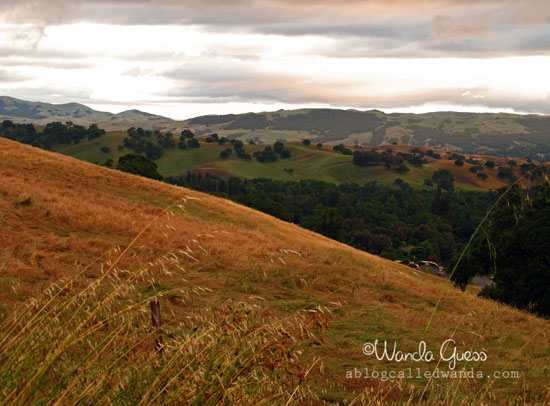
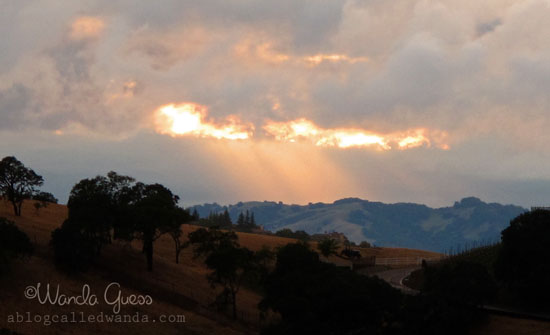
Before driving home we decided to drive up to the top of Mt. Diablo and see the sunset. It did not disappoint…The hills are amazing this time of year. This is looking south from Mt. Diablo towards San Jose.
Right before the sunset there was this amazing sliver of bright orange. It looked like a fire in the sky. Didn't last long. This is looking west out towards San Francisco.
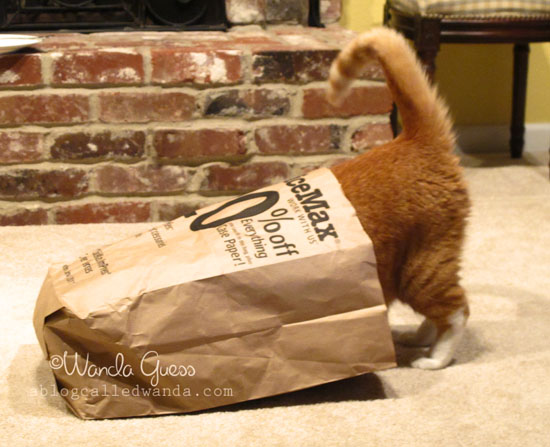
This morning Office Max was nice enough to put a little fort in the newspaper just for Buddy! He loved it right away! Silly cat. I wonder if he's 20% off, since he fits in the bag?
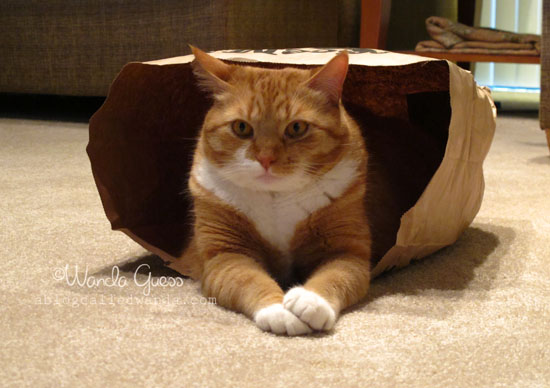
Why yes, I am quite comfortable. Thanks for asking. Could you please bring me some crunchies?!
See you soon! I have to craft up something to share with you guys this week! What are you working on?
* All of the NEW products are now available for purchase! Check out the Fresh out of the Oven category and Taylor's Blog for all the details!
* Did you win one of the Mystery Baker's Dozen Blog Giveaway? Go find out! The list of winners is on Taylor's Blog!
* Another chance to win… head on over to our forum and tell us your favorite stamp set from this release. We'll be choosing one person to win their favorite set FREE! You have until Saturday June 4th at 6 pm PST to enter to win
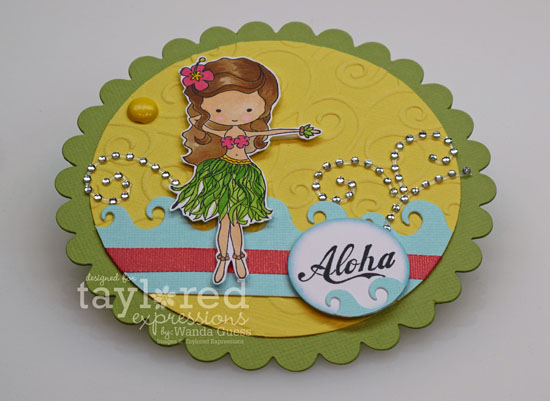
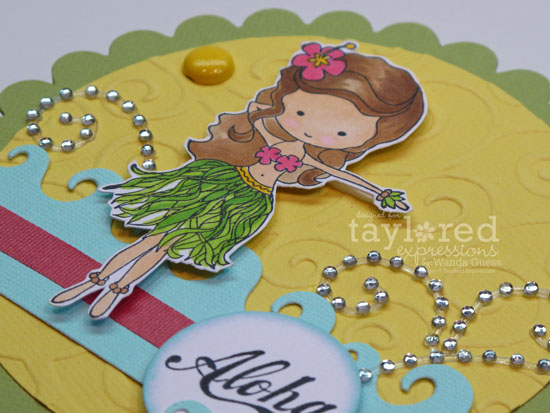
I have one last project to share with you today from the June release! The super cute "Moka Lani" – our very own little hula girl! LOVE. She was illustrated by Nancy McKinney as another addition to the Moka Collection. Are you loving those Mokas?? I also used the Wave Die again for this card.
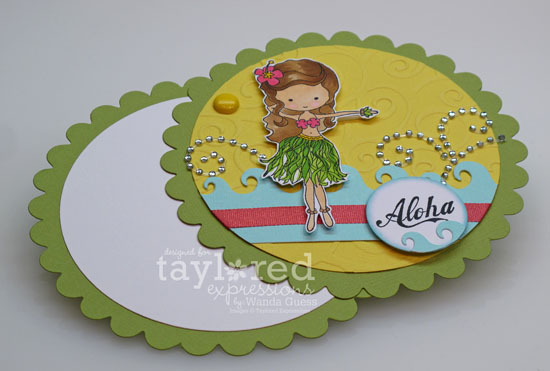
I love making these circle cards! Just cut two matching circles from your Nestabilities and put them together with a matching brad! Couldn't be easier! See that great wave die? That's a favorite! Used my Copics to color her in and there you have it! I cut a smaller circle of white paper to put on the inside.
Wow…that's it for me for the June release! What a fun whirlwind this has been! Thank you for checking out my projects and I hope you have been inspired to make some Summer cards. Take care! Happy Shopping! Click here to go to the TE STORE.
Please check out what the rest of the Design Team has for you on this release day!
* We have even more sneak peeks to share today! All of the new products will be available for purchase on Friday, June 3rd at 8am PST. (that's tomorrow!) You'll find it all in the Fresh out of the Ovendepartment in theTaylored Expressions Store.
* Join us as a fan onFacebook for an early peek at the stamp sets on Thursday night beginning at approximately 6pm PST.
* Special Early Bird Offer on Release day for the first 15 orders over $100. It's TOTALLY SWEET!
* Mystery Baker's Dozen Blog Giveaway: Each day one lucky blog commenter will be chosen by random draw to win a $10 TE Gift Certificate. Winners will be chosen from a different Baker's Dozen blog each day and all will be announced on Taylor's blog on Release Day! Be sure to hop around to see all the sneak peeks and leave comments on each blog for more chances to win! Limit one comment per blog per day please. Comments close Thursday 6/2 at 7pm PST for the drawings.
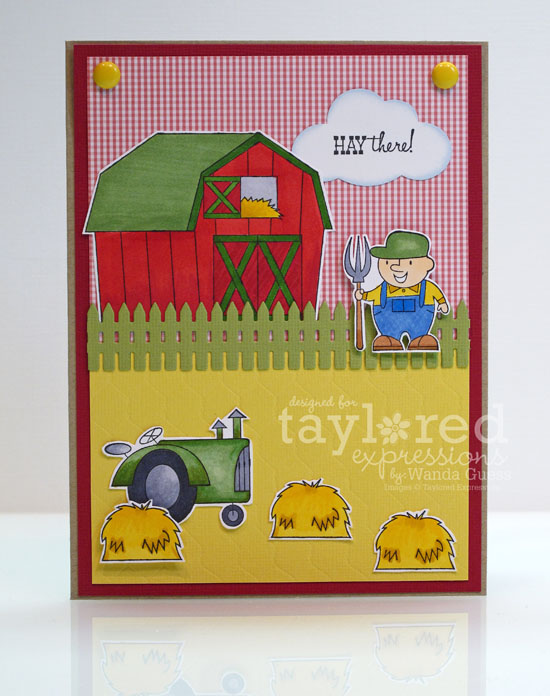
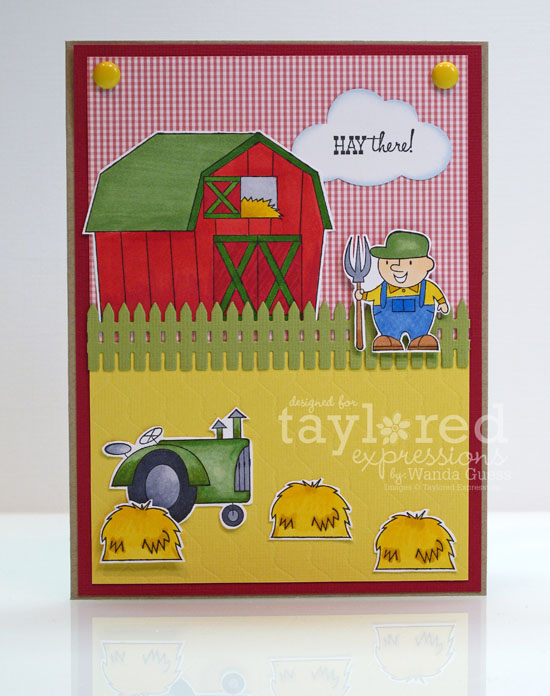
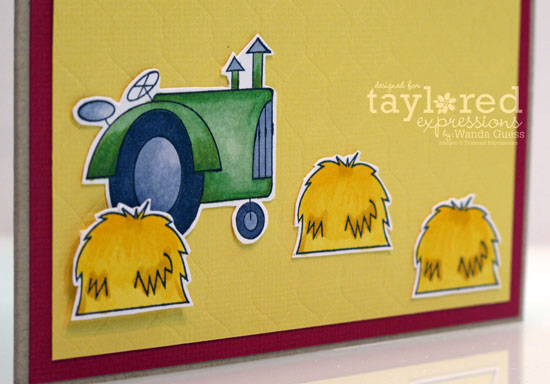
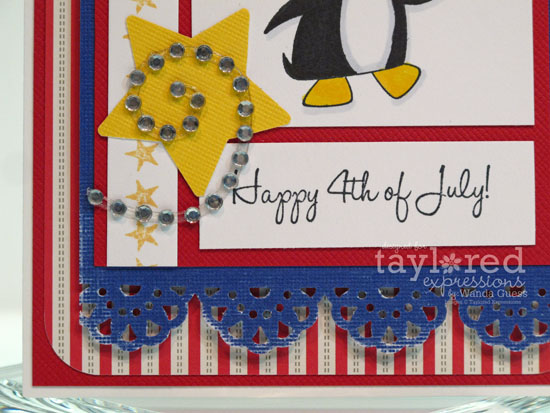
Today's cards feature two more awesome stamp sets from the June release: "Green Acres" and "Uncle Sam." "Green Acres" is a full size set of 24 farm inspired images drawn by the uber talented Doug Applegate for the Apple Doodle Ink Collection. "Uncle Sam" is a petite set featuring our adorable Penguin dressed up in his patriotic gear! He is also designed by Doug and has five images. These are perfect sets for 4th of July, picnics, and your summer adventure scrapbooking!
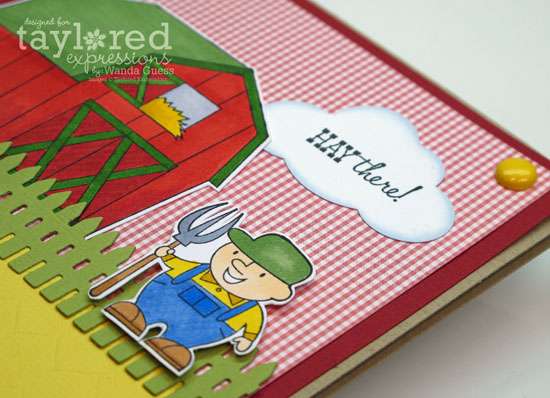
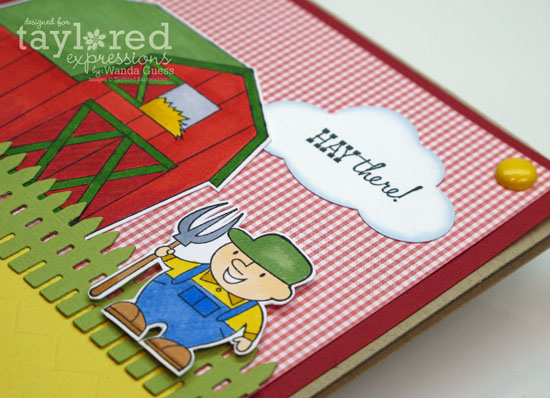
My first project features the "Green Acres" set! I had a super hard time picking out which images to use because they are all so great. You could make a million projects with this set! The sentiments are off the hook cute! I decided to use the little farmer guy and the "hay there" saying just to make a fun card to send for now particular reason.
LOTS of coloring on this one! I kept with a fresh color scheme of red, yellow and green to give it a farm fresh feeling. I added just a pop of blue on his overalls. That super cute fence die can be found here. I use that one A LOT!
Look closely at the yellow background paper! Can you see that chicken wire pattern? That is an awesome new Impression Plate that Taylor is releasing this month. One side of it has this chicken wire pattern and the other side has a wood grain pattern. SO versatile!
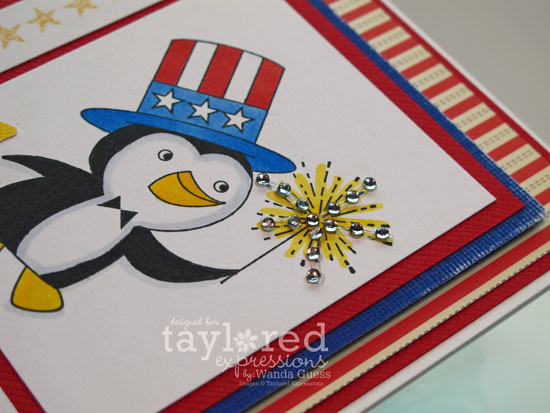
My second project is with the very patriotic "Uncle Sam" penguin! He is all ready to go watch fireworks and hang out! The sentiment is from another stamp set being released this month – "4th of July Wreath." I like the font a lot. I colored Mr. Penguin with my Copics and used some striped patterned paper from October Afternoon.
Tomorrow is release day! I'm so excited for you to see everything all at once! There is so much good stuff this month! Thanks again for coming by to see me today.
As with every day…please go and check out what the rest of the Baker's Dozen has for you!
* We have more sneak peeks to share today and tomorrow! All of the new products will be available for purchase on Friday, June 3rd at 8am PST. You'll find it all in the Fresh out of the Ovendepartment in theTaylored Expressions Store.
* Join us as a fan onFacebook for an early peek at the stamp sets on Thursday night beginning at approximately 6pm PST.
* Special Early Bird Offer on Release day for the first 15 orders over $100. It's TOTALLY SWEET!
* Mystery Baker's Dozen Blog Giveaway: Each day one lucky blog commenter will be chosen by random draw to win a $10 TE Gift Certificate. Winners will be chosen from a different Baker's Dozen blog each day and all will be announced on Taylor's blog on Release Day! Be sure to hop around to see all the sneak peeks and leave comments on each blog for more chances to win! Limit one comment per blog per day please. Comments close Thursday 6/2 at 7pm PST for the drawings.
Hi Peeps! Today it's wedding day for the June Taylored Expressions releasae! OMG Cuppie is getting married! How cute is that? EEK! Today I'm featuring the "Sweet Bliss" and "Moka Charlotte" stamp sets. "Sweet Bliss" is a full size set illustrated by the talented Cuppie illustrator Jessie Olson. There are 16 images in all. "Moka Charlotte" is illustrated by Nancy McKinney for the TE Moka Collection and is a mini set of five images. Both are perfect for June wedding parties and preparations. I know you're going to love them!
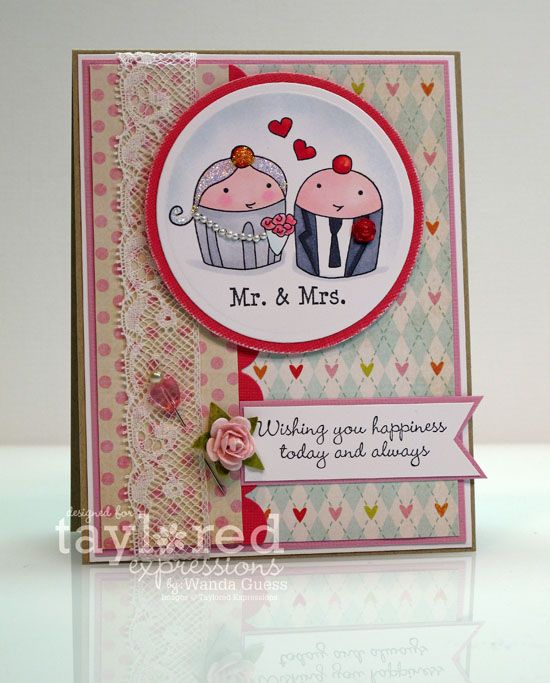
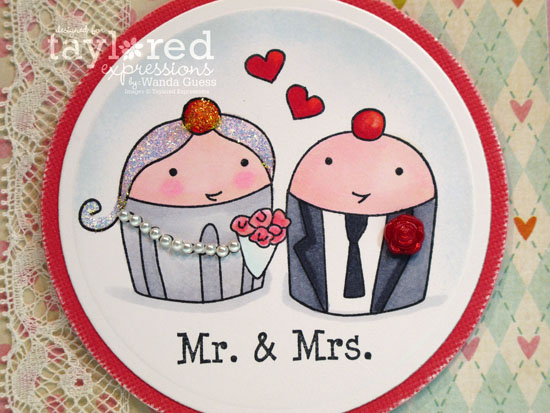
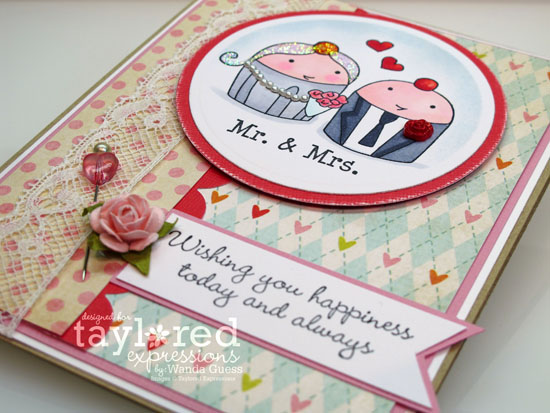
Here is my first card for today, Mr. and Mrs. Cuppie!!
Don't they make a fine couple? Hee hee. This just totally makes me smile! You'll see that Cuppie is wearing his tuxedo. I did not use black – since that would be too dark and flat. I used a few different shades of cool gray Copics. Don't you love her pearl necklace and shimmery veil? OMG. Love.
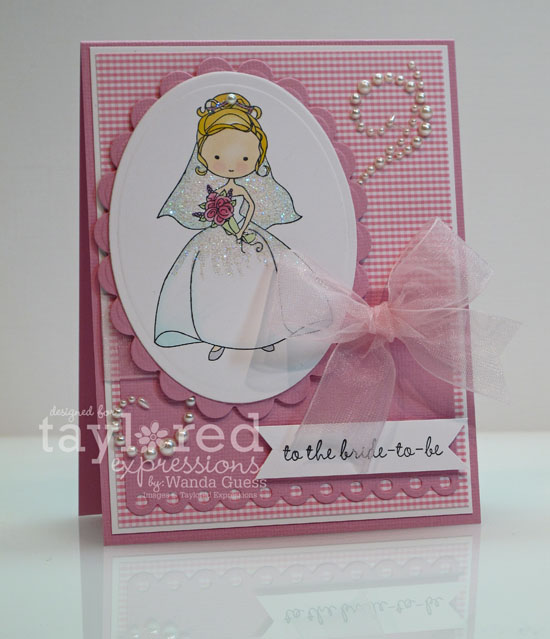
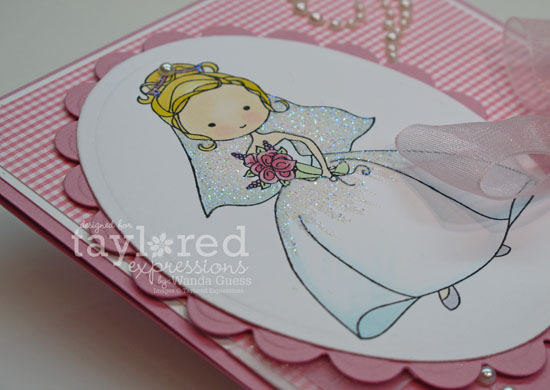
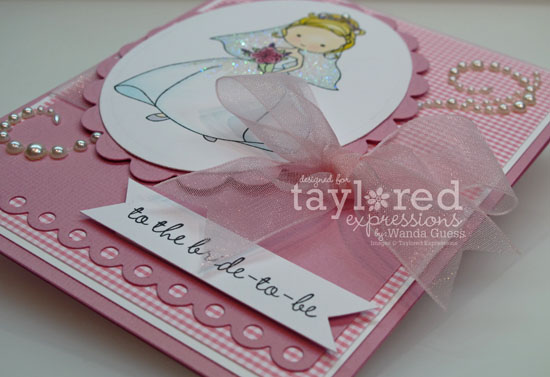
And here is the sweetest bride ever, Moka Charlotte! She is just innocent and beautiful and precious in her pretty gown. She makes a perfect bride. But, you could also make her a prom girl or a princess or a beauty queen! Some of the other design team members are featuring her groom today…Moka Jack. I decided to make a sweet pink confection of a card for her. I made this as a bridal shower card.
* We have sneak peeks to share Tuesday, Wednesday and Thursday! All of the new products will be available for purchase on Friday, June 3rd at 8am PST. You'll find it all in the Fresh out of the Ovendepartment in theTaylored Expressions Store.
* Join us as a fan onFacebook for an early peek at the stamp sets on Thursday night beginning at approximately 6pm PST.
* Special Early Bird Offer on Release day for the first 15 orders over $100. It's TOTALLY SWEET!
* Mystery Baker's Dozen Blog Giveaway: Each day one lucky blog commenter will be chosen by random draw to win a $10 TE Gift Certificate. Winners will be chosen from a different Baker's Dozen blog each day and all will be announced on Taylor's blog on Release Day! Be sure to hop around to see all the sneak peeks and leave comments on each blog for more chances to win! Limit one comment per blog per day please. Comments close Thursday 6/2 at 7pm PST for the drawings.
Today is Beach Day for our sneak peeks! TOO much fun! I have two sets to introduce to you! This first set is maybe my favorite TE set ever! I could have made 20 cards with it! It's called "A Day in Paradise" and it was illustrated by Nancy McKinney for the Whimsical Wishes Line. The set is a full-size TE set and has 21 images. It is very versatile and the sentiments are great. I love it because it has a Cape Cod feel to it…and I love all things Cape Cod! That's where the DH and I were married!
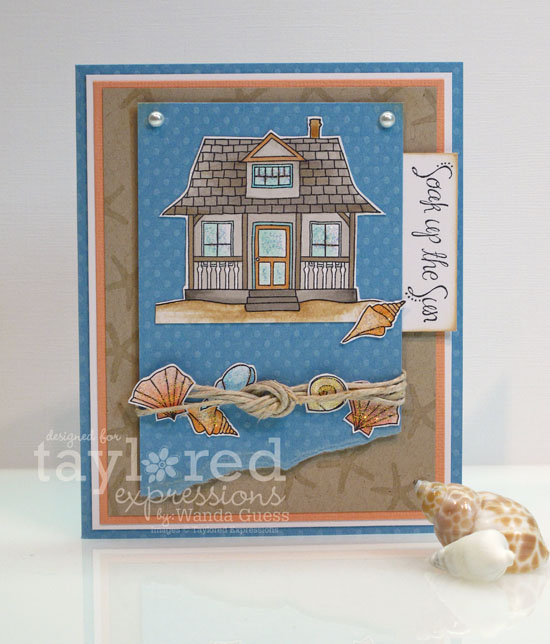
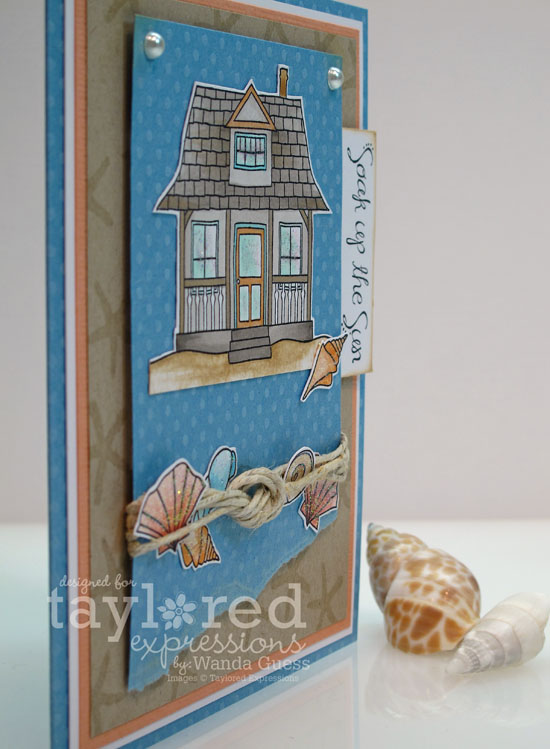
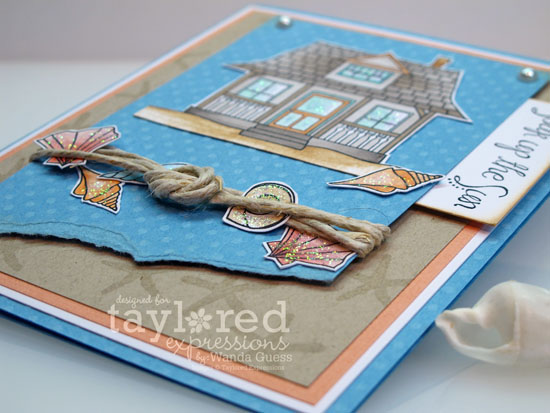
Here's my first card with this awesome set! I wanted a soft beachy vibe to go with this gorgeous beach house image. Don't you love it? I chose a color palette that reminded me of sand, sky and shells… I used some thick twine to mimic rope or nets.
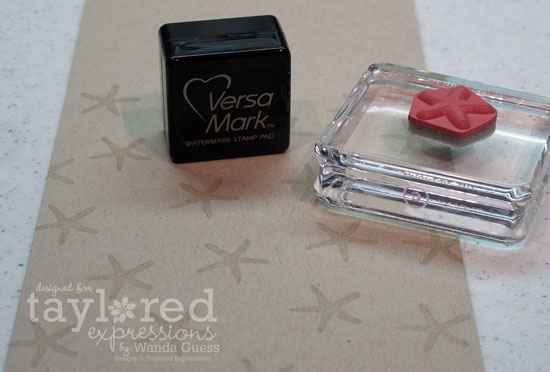
I used the small starfish image to create my own background paper using krat paper and versamark ink.
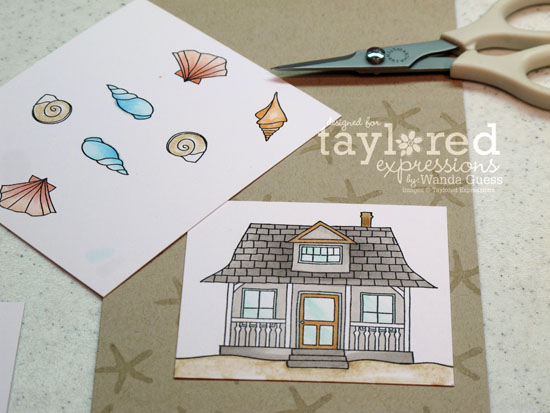
Here is everything colored in and ready to cut out!
I added some tiny bits of fine glitter to the windows and the shells to make it look as if they are catching the light of the sun!
I wish I could go to this pretty beach house right now! You are seriously going to love this set!
Here's my second card made with "A Day in Paradise" set. This time I kept it really clean and simple. I have been seeing a lot of cards out there in blog-land that have a lot of white space. I wanted to give it a try. This card reminds me of a spa day!
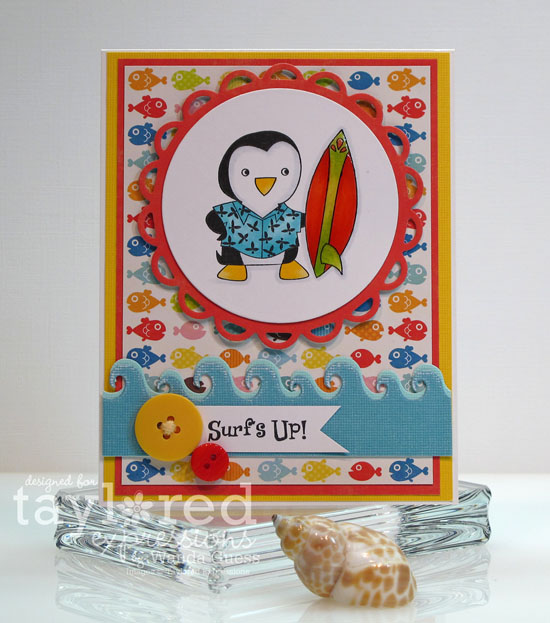
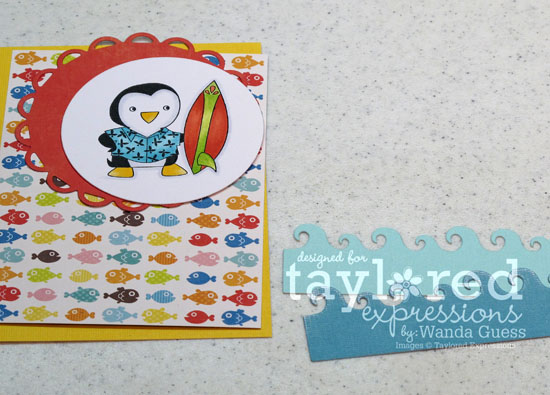
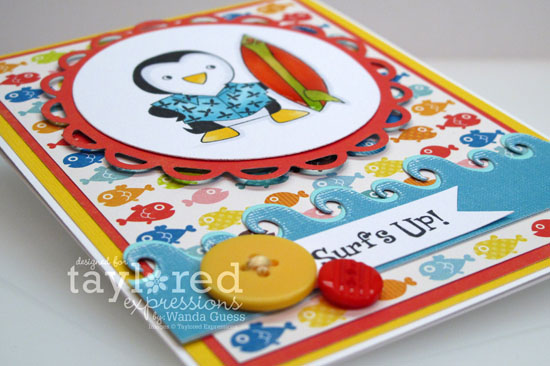
The second set I'm introducing to you today is called "Surf's Up!" And, you can see why! This is a Penguin Petites set illustrated by Doug Applegate for the Apple Doodle Ink line for TE. Each set had five images. I love the sentiments with this one! He was very fun to color!
Here is my Copic Palette for this card…bright and cheery!
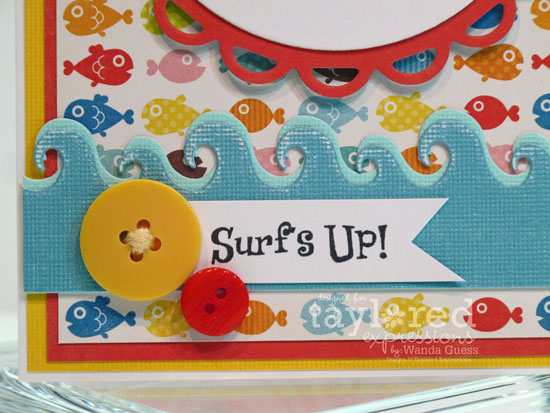
Taylor is introducing a new wave die this month too. LOVE it! It cuts such a nice crisp image and is the perfect size for cards. I will use it again on my last project for the week! For this card I cut out two waves to add some depth. You can see below how it turned out. Taylor also sells the Nestabilities die I used for my main image!
See how my little wave came out!? The font for this set is really adorable. The paper I used is a new pack from Echo Park called Splash! The little fishies were my favorite.
This little guy is so cute…and there is another stamp set this month with his little surfer penguin girlfriend! She's called Beach Belle!
Each of Taylor's stamp sets are made from very high quality deeply etched pink rubber and they all come trimmed and ready to use with your acrylic blocks. They come on a hard plastic index sheet that has binder holes for easy storage.
Okay, I've given you lots to look at today! The new sets are great and perfect for Summer. Tomorrow's theme is Wedding Day and I'll be back with more projects.
As with every day…please go and check out what the rest of the Baker's Dozen has for you! There are other cool stamp sets that I did not use today.
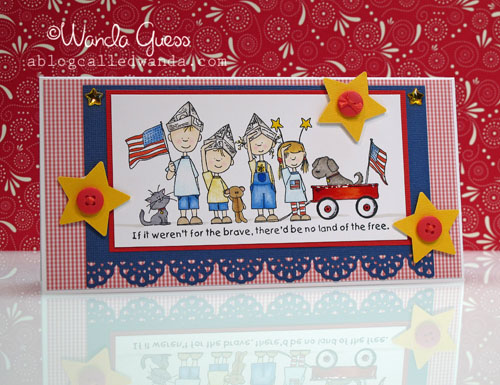
Happy Memorial Day Weekend! Let's not forget what that means to us as Americans! The true meaning of the day…to honor our heroes. I am the daughter of a Navy man myself. My husband is the son of an Army man. We definitely look up to our military heroes past and present at our house. In honor of the day I'm posting a card made with an adorable stamp image from Eat Cake Graphics. I had so much fun coloring this one.
Best wishes for a great Memorial Day and thank you to those in your family who are serving, or who have served our country. God Bless the USA!
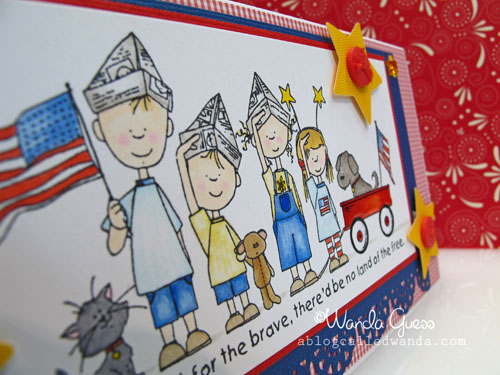
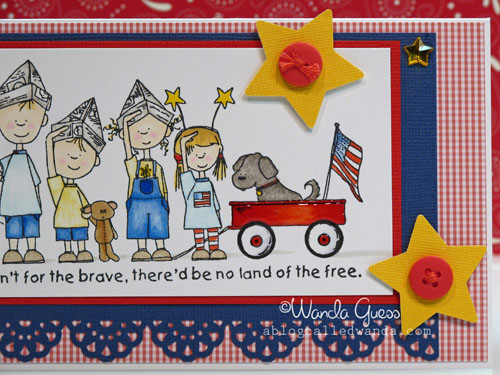
Don't they look so cute, like they're all lined up and ready for a parade?
I used my Copics of course in just a few shades or red, white, blue, gray and yellow. Kept the color scheme simple and clean. I put some diamond glaze on the wagon to make it shiny. Popped a few stars on there for good measure…
Hello! How are you? What do you have in store for the long Memorial Day weekend coming up? It's really almost Summer now. You wouldn't know it here. Yesterday it poured rain for a good part of the day. Then, I came home and was watching TV when they interrupted to say there was a TORNADO warning for a county not too far from us! WH-AT? That does not happen very often – thank goodness. What a wacky season this has been. I'll be ready for some sunny skies and long days. We don't really have solid plans for the weekend…we'll see what develops.
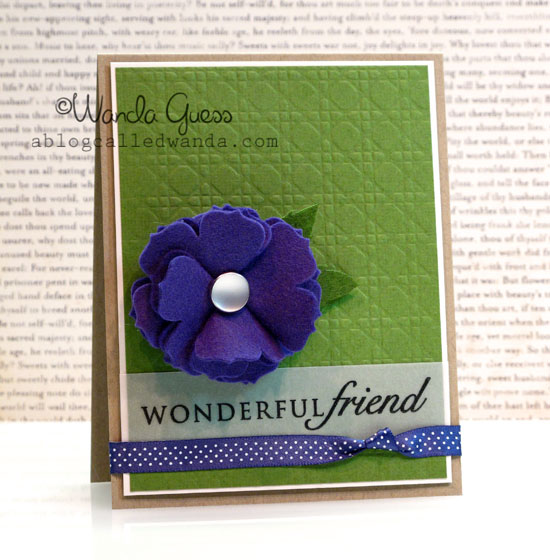
I have a card "project" to share today. It's two projects in one. A card, with a pin attached! I'm not normally into purple but I love this royal velvet shade from PTI. It's yummmmy. Dark blue purple. I was inspired by our hydrangeas out front!
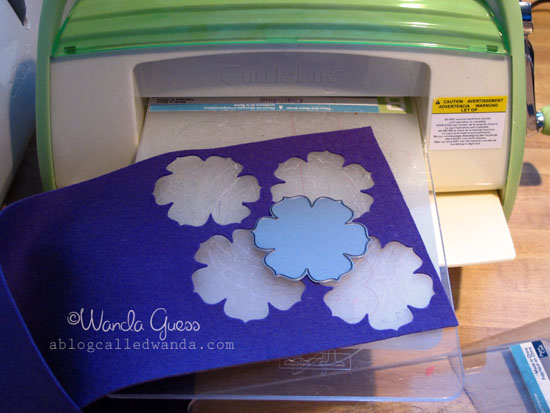
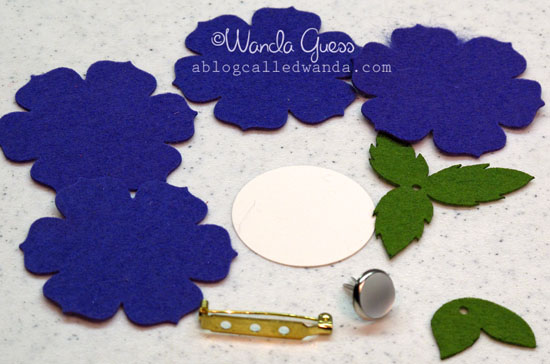
Here's how I made the pin… I cut four flower shapes from the purple felt with my Cuttlebug. I cut circles out of paper for the backing. Chose a pretty pearlescent brad for the center and some leaves…
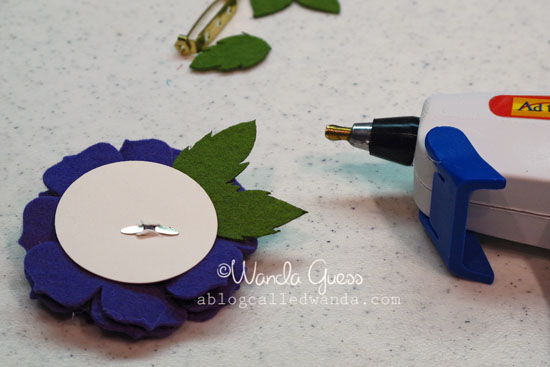
Layer the four flowers by folding them in half and then putting them over/under each other like how you would close a box. I used hot glue to hold everything in place. Be careful not to glue to the edge of the petals…you want them to stay fluffy.
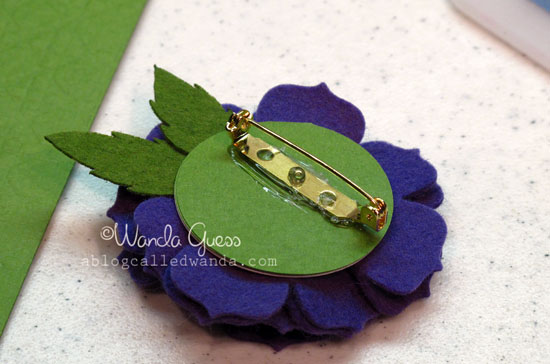
Here is one layer of the backing. I put the brad through the whole thing and then covered it up with the green circles you see below. Again…used the hot glue.
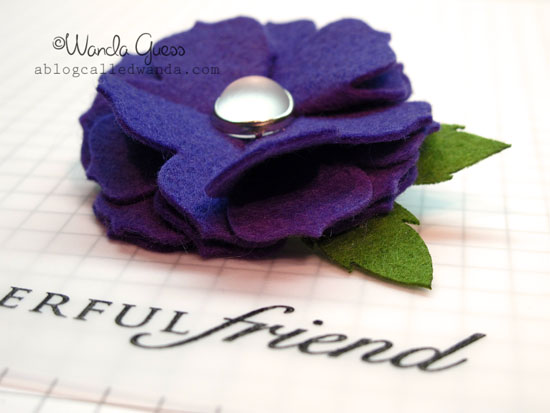
Voila! Here is my finished flower pin! Now, to put it on the card…
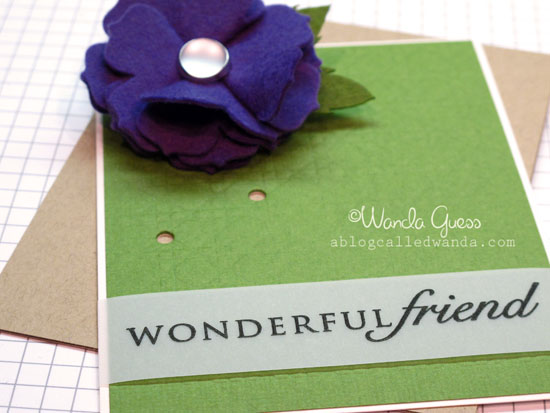
I layered my patterned paper pieces and then made two holes for the pin back to go through. Do you like the impression plate? It's new from PTI and looks like rattan or cane. Love. The sentiment was stamped onto a strip of vellum and then wrapped around the card. I mounted the green/cream piece with foam tape to allow room for the pin the be on the card.
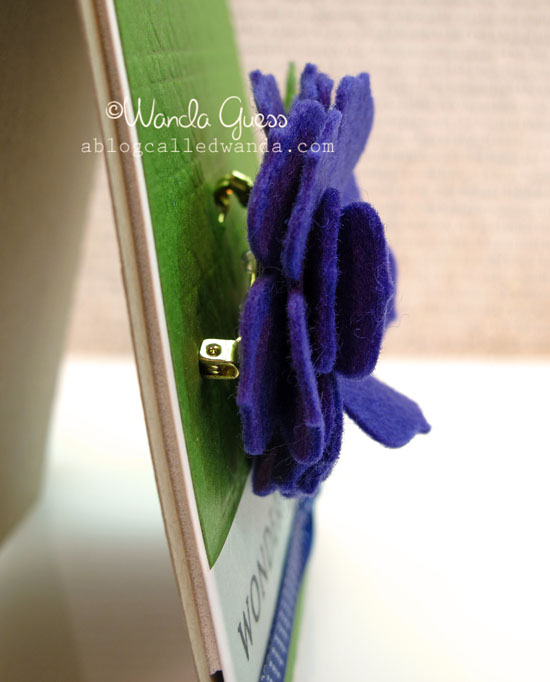
Here you can see the finished project from the side.
At the last minute I decided to add a pop of matching ribbon!
My inspiration from the garden…
Okee Dokee…that's what I got for ya today! I hope your week has been good and that your weekend is even better! Don't forget that Taylored Expression June Sneak Peeks start May 31st. I've been working hard on my cards. I think you're gonna like these stamps! Hugs.
Hi there bloggy friends! How are ya? How's your week going so far? I hope good! I want to start today by saying a giant thank you to everyone who left a sweet comment on Mark's guest blog! WOW. He was so thrilled to get all that blog love! That is exactly why I blog right there. It's ALL positive. We share our creations with each other, put them out there into the universe, and look what happens. Friends we know and friends we've never met say nice things to us. It's absolutely wonderful and uplifting and encouraging. Thank you. Hug.
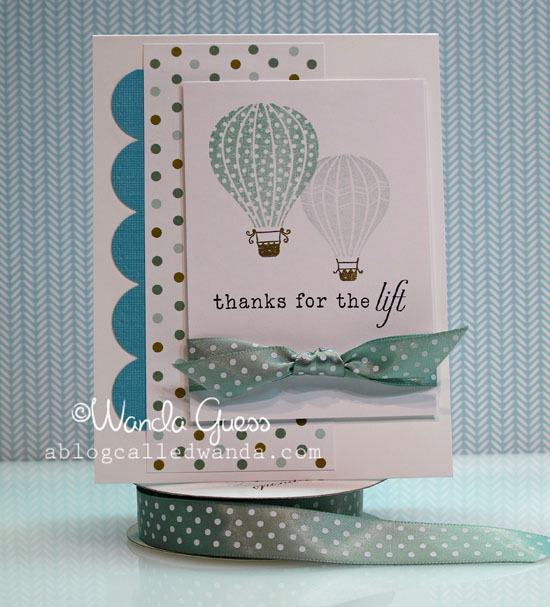
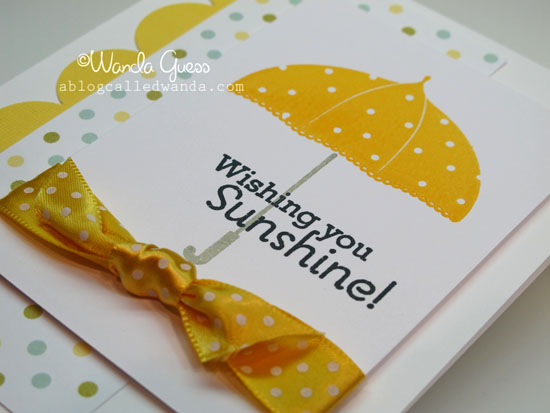
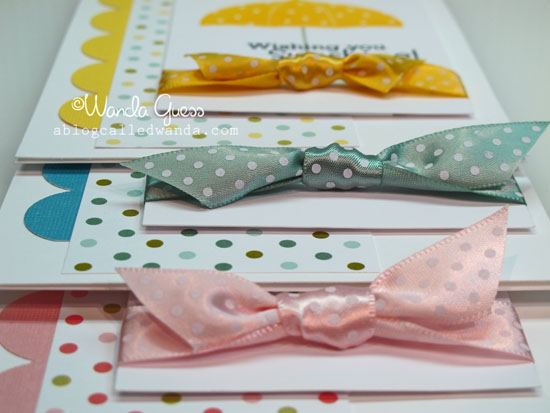
Do you ever see a card that someone has made and it just sticks in your head? You think, I need to copy that! Or you just love it? Well…I've had a card rolling around in my head just like that and today I'm going to share my take on it! The card I've been thinking of is THIS ONE from Her Royal Rubberness…Julie Ebersole. I love the clean design, the pop of color and just all of it. It's back to the roots of stamping…stamps, ink, paper and ribbon. Today I'm sharing a trio of cards I made along the same lines. The layout is going to be one I come back to over and over.
The stamps, polka dot paper, and ribbon are all from Papertrey Ink. I chose three different bright, pretty colors for Spring! I love to use Versamagic Inks with these solid image clear stamps…they just seem to cover so nicely and they come in a million colors. I could see making a bunch of these to give to someone as a card set. Do you like?
Hi there! The hubs is my #1 fan and supporter here at my bloggy blog…he has always encouraged me to blog away and never complains about all that time I spend in the craft cave. For some time, we've been talking about having him be a guest blogger to talk about his favorite place (Yosemite) and share his favorite pasttime (hiking). So…without further ado…my first guest blog! Have a great week!
Greetings! I hope everyone is enjoying the last bit of the weekend. I am fortunate to be the first guest blogger ever here at A Blog Called Wanda! For those that do not know me, I am Wanda's husband Mark, aka "DH." Some of my interests are nature, hiking (especially in Yosemite), collecting Silver Age Marvel Comics, making videos/slideshows….and I share Wanda's passion for Photography. Today I am going to share some Yosemite hiking photos and a video…I hope you enjoy them!
First up, here's a collage I made in Picasa of some of my favorite photos of the Valley floor.
These next three photos were taken on the Mist Trail along the Merced River on the way to Vernal Fall. It's called Vernal Fall (not Falls) because it only falls one time…straight down. Yosemite Falls, on the other hand, has three separate drops, so it's called Falls. Just a little trivia. Back in the 1800's the Mist Trail had wooden ladders to go all the way up. Now the steps are carved from the granite. Wanda has done this hike with me before. It's on the way to Half Dome.
This is the amazing view as you round the corner and see the first full view of the Fall. The trail is on the right side and you can see why it's called the MIST trail. There is a famous photo of John Muir taken on this exact spot.
The View looking down on the Fall. Can you see the people looking over the edge?
One year my friend Randy and I hiked to the top of Yosemite Falls in the SNOW. Here is a sign we passed on the way down. The hike is about 4 miles from the Valley floor. I'm not a small guy and I kept falling through the snow. This trip will not be repeated in the snow. We made it to the top though!
Here is a view of Yosemite Falls I took from Glacier Point. Glacier Point is at about 3200 feet up from the Valley floor. I have hiked up the Four Mile Trail which brings you to this amazing view. If you look closely, you can see the switchbacks in the trail on the left side of the Falls.
Half Dome is the most challenging hike in the park…and you can see why when you look at these cables. The cables come at the end of an 8 mile hike! There's only one way to the top! For added fun, go on Youtube and search for Half Dome Cable videos. Before I hiked Half Dome I had heard that it would change my life. After I hiked Half Dome, I found that to be true. It's a milestone for me.
Here is a photo of me at the TOP looking out over the edge of Half Dome! I'm not the Gilligan dude in the red shirt. I'm the guy in the blue shirt! This is over 4000 feet above the Valley floor. I love this picture. This gave me the priviledge of going to the Yosemite store and buying the shirt that says "I made it to the Top" and I wear it proudly.
Winter in Yosemite is a whole different place. No crowds. Different vistas and everything covered in snow and ice. Here is a cool shot of some frozen leaves, and below that another collage, this time of Winter scenes.
The famous Tunnel View! It's named after the tunnel right before it that was carved out of the granite in 1933. This view never gets old. The waterfall you see is Bridal Veil Fall. You can see Half Dome in the middle and El Capitan to the left. El Capitan is the largest piece of granite in the world. People come from all over the world to climb it.
I wanted to share one of my short videos too. This is the first video on Wanda's blog. Let's see if it works like it's supposed to!
Every blog post needs a picture of BUDDY! Here is my shot of him lounging on the back of Wanda's chair in the family room. Looking quite debonair.
Thank you so much for letting me bust in on all the stamping and crafting activities and share with you. Wanda will be back soon with more cards. Have a great week. Mark.
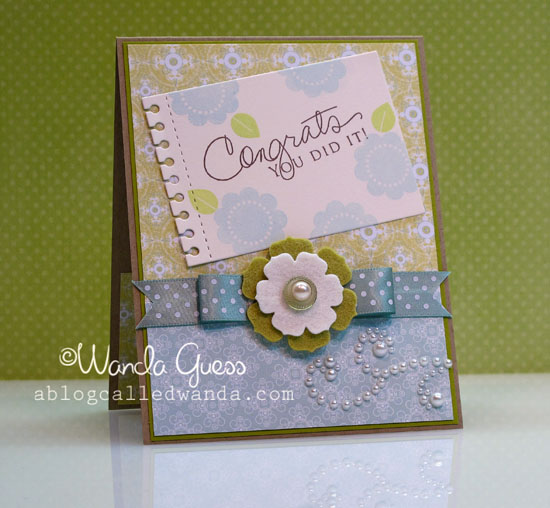
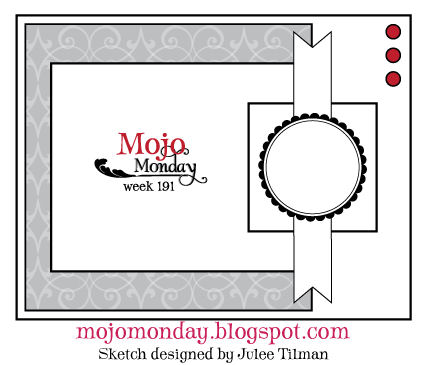
Greetings and Salutations! Happy Friday! (even though it is Thursday night…technicalities never stopped me). Today I'm posting a card I made for the Mojo Monday blog and sketch for this week! I don't recall that I have ever entered their sketch challenge! FUN! They have really cool sketches. I had a custom card order from a sweet chick at work who needed a Congratulations card… I turned to my PTI supplies for inspiration and then found the sketch over at Mojo Monday. Check it out!
Here's the sketch – I flipped it you see…
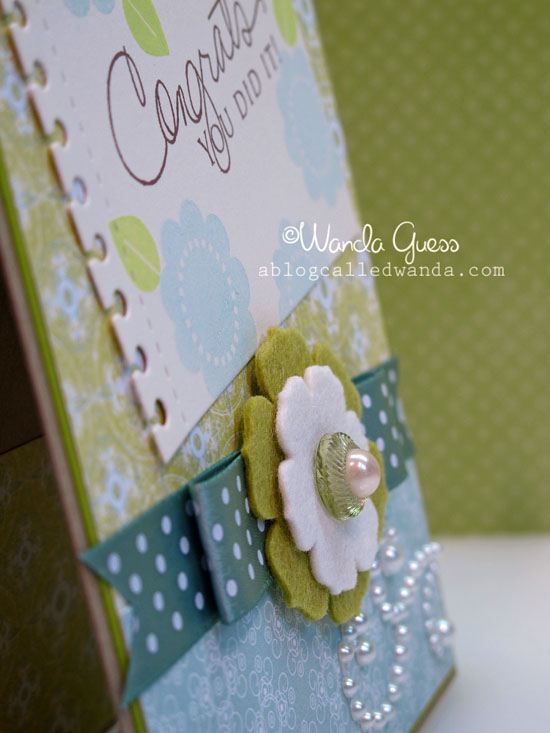
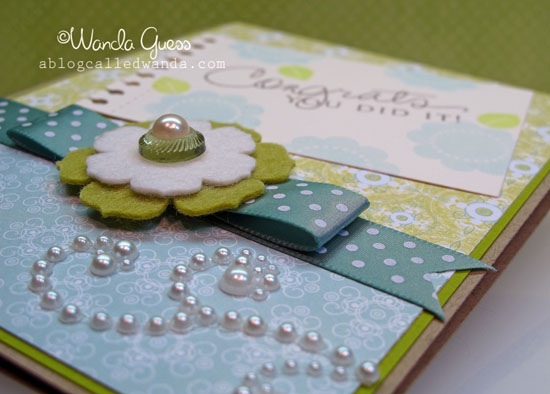
All of the supplies for this card are from Papertrey Ink! Love. The Pearls and button are the only things I got from my stash. The felt flower was cut from the PTI felt using one of their dies. The ribbon is my favorite color of theirs….it's called Hawaiian Shores…
I saw this neat ribbon trick on someone else's blog…really easy too! Just fold the ribbon over and tack it down with adhesive. It looks pretty when you put something over the top. You could also just put a bow there too.
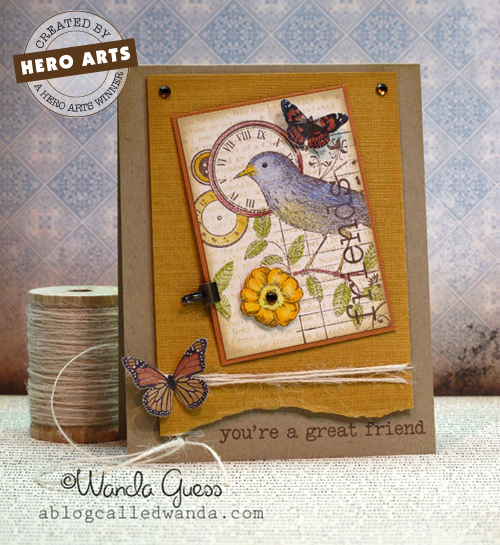
I was very honored and surprised to be selected as a Fab Five Winner again this week over at the Hero Arts Blog with the card below. YAY! I get to pick out more free stuff! THANK YOU HERO ARTS! Please pop over to their blog and check out the other winners. There are some neat cards to look at. I love seeing everyone's interpretation of the same "rules."
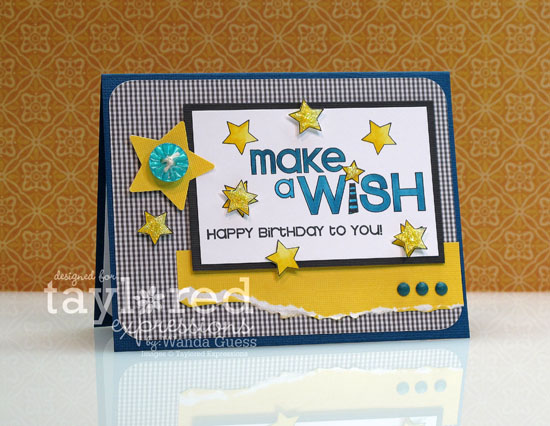
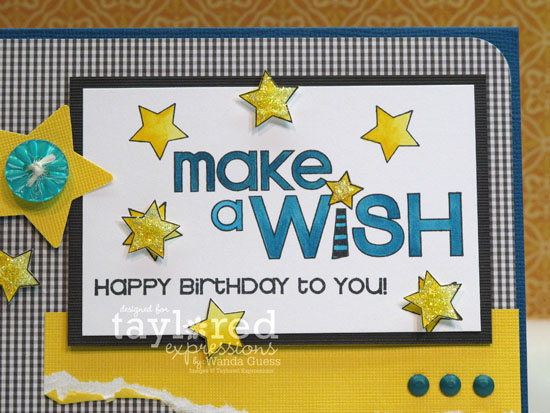
Another month gone by already? Yup…and that means time for the monthly Blast from the Past Blog Hop from Taylored Expressions! The theme this month was to use an older TE stamp set and make a project that was masculine. That is HARD for me! All my stuff is so girly and fru fru! I decided to make a birthday card for a guy using the “Make a Wish” stamp set!
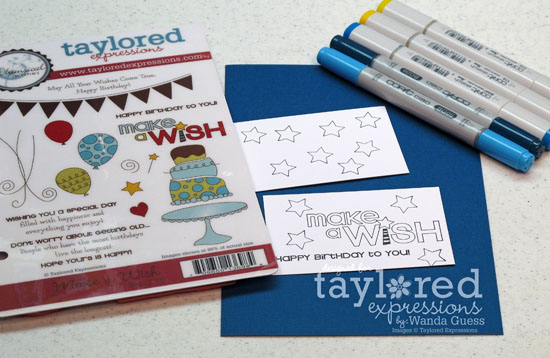
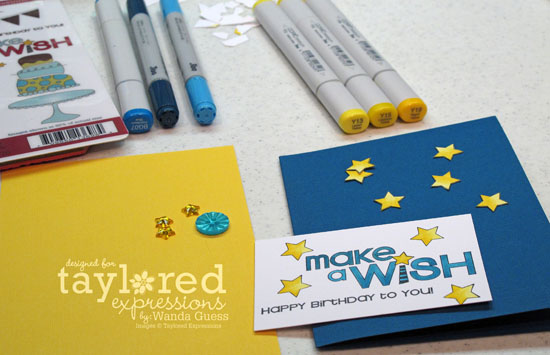
I used a ‘masculine’ color scheme of gold, teal blue and black as my foundation. Found my Copic markers to match my paper and started coloring!
Here is the awesome stamp set. You can see I combined two sentiment stamps to make my focal image and then added a bunch of extra stars to it. I stamped extra stars to color and put on the card later.
I consulted with the DH to make sure it was okay to add some glitter to the stars! My resident male opinion said it would be fine. Not too much though…
I used this sketch for my layout. I was having a block on how to do my card design. Did you know that on Taylor’s Blog she has a link to all of her sketches? I use them all the time. If you click on her blog and look on the right side bar you’ll see the links. I thought this one below was great!
This Blog Hop is a customer Blog Hop and I hope you will join in one of these times if you haven’t already! So much fun to see what everyone comes up with. See below for the list of projects this time around. Have a fab day!
Have you all been to visit the blog called Deconstructing Jen? I have been a big fan of Jen's for a long time. Her pencil coloring is OFF THE HOOK! She is an amazing artist! I've emailed back and forth with her a couple of times and I can tell you that she is also a very sweet person. Well, she announced that she is going to start doing a sketch challenge and I knew I wanted to be a part of her first "Deconstructed Sketch!" My card for today is for just that. It's a complicated sketch, which I like a lot. Check it out!
Here is the sketch image…I flipped it on it's side…
I used papers from October Afternoon's Farm Fresh collection and a cute image from Penny Black. The solid papers are from Bazzill. Of course I used my Copics!
I hope you will pop over and visit Jen's blog and…maybe even enter your own card for her very first sketch? It would be fun to give her a lot of support! Have a great week everybody! I'll be back on Wednesday with a card for the Taylored Expressions Blast from the Past Blog Hop…it has a masculine theme this month.
Hello everyone! Are you having a lazy-around-the-house kind of Sunday or a run-errands-til-you're-crazy kind of Sunday? We are having the lazy variety… Some laundry is in the dryer and I'm in the craft room mostly cleaning, but hopefully creating soon. I've had a nice weekend so far and thought I would just share some pictures with you today.
Yesterday one of my gal pals hosted us at her house for a girl day. It was fabulous! Relaxing and silly and just a plain old good time! We started out by having a make your own pizza bar. Isn't that the most fab idea ever? We started with Boboli pizza breads and then piled on the goodies. You know I love to take pictures of food - so I couldn't resist. And, trust me, it was just as good as it looks! 🙂
Here's mine before it went into the oven….LOTS of veggies!
And when it came out…
Are you hungry yet? I could eat this every single day I think…
After pizza we did a little bit of easy stamping and chatting…made some cheery Spring cards with this nice color palette and some favorite Amuse stamps.
After stamping we had desserts and played Scrabble (otherwise known as the game I lose every time) and had some champagne! Perfection if you ask me! I really must get better at Scrabble. I think I am improving from playing Words with Friends on my iphone. I have some friends who are killers! (You know who you are)!
The next set of pictures are from today in my front yard. This morning we had a full on thunder storm…which is extremeley rare here in Northern California. In fact, I'm not sure I've ever heard thunder that loud around our house. The lights flickered a bit and then it blew through in about an hour. As soon as it stopped raining I grabbed my camera to capture the just-after-the-storm light. It did not disappoint.
The hydrangeas are growing like crazy. I think there are probably about 200 blooms on two plants! The blooms are all in various stages. Some are completely green, some are all blue…and most of them are in between.
See what I mean about that glorious light!? I did not photoshop the color on these at all! When the sky is cloudy there are no shadows and no glare…just soft even light…mmmmm.
This is our front flower bed with all the pretty impatiens the DH planted last weekend. By then end of the Summer they will fill the entire bed and be about a foot tall!
I think maybe the thunder scared Mr. Buddy! He is in his cat camo tent with those giant eyes looking at me…am I okay??
Happy Friday everybody! We made it! Doesn't it just seem like some weeks are forever? That was this week for me. Glad to be home and done with my work week. Looking forward to some R & R with the DH and Mr. Buddy. Hopefully some stamping time too. What are your plans for the weekend? Our weather is gorgeous…85 degrees today. But, I hear it's supposed to be raining by Sunday. Spring! Whatever you're doing, I hope you enjoy the weekend!
A lot of peeps have emailed me asking about the new photo in my blog banner/header. I took that photo back in March on my work trip to Florida. CLICK HERE to see the rest of my photos from that trip. That is Miami Beach in all its glory. Isn't it splendid? My favorite is that cruise ship off in the distance. And, I love that blue color. When I took that photo I took it intending it to be a blog banner! I'm trying to think of that when I'm out and about…what shots would look good long and narrow?
Today I'm posting the last card of "Butterfly Week!" I hope you've had fun seeing all my butterfly projects. Today's card is back to the clean and simple style…with a pop of red! Take a gander…
The entire background is one stamp…from Hero Arts! It's so pretty. It has that text and then the pretty insects mixed in. Yum. I used a swirl stamp from Judikins to pop some red in the corners. The butterflies are stickers I got at Michael's. Really simple… I had the sewing machine out for another card so I decided to sew this one too. That's it!
Here is the entire "Butterfly Week" collection! TOO fun!
"Butterfly Week" continues here on the blog! I hope you have enjoyed my cards…I have had fun doing a theme and making things to share with you! It's Thursday already which means this long week will be over soon. I'm ready. Now. Anyhoo…we won't go there. Let's just share stamping and happy thoughts! Thanks for coming by today and I hope you are having a wonderful day.
I have two more butterfly cards to share…one today and one more for tomorrow. Today's card is back to the "more is more" kind of project! It's another shabby chic creation jam packed with all kinds of doo dads and things. Heck, I even got out the sewing machine! I had fun making some butterfly banners and then used this yummy paper from Bo Bunny. The paper gave me the idea for a color palette I probably would not have chosen…but I like it!
Here is the inspiration for my color paletter – this yummy orangey-peach color and a beautiful greenish aqua. The paper also has a mint green in it – isn't it delish?
Here's a close up of the top of my card. You can see I sewed my kraft layer right onto my aqua Bazzill card base. I tore the edges and added some distress ink. I put a small butterfly stamp in brown in the corner…again…more is more! The little doily is from Martha. The fleur de lis is part of that same Bo Bunny collection.
Here is the aftermath of making those banners! More layers = more yumminess! I enjoyed making them… Would I make 20? I don't think so! hahahaha.
You know I always have to add some pearl swirlys…I am in love with those! They just add a feminine touch to any project.
There's still time if you would like to join me for Butterfly Week by posting a card link in the comments! I know there are a lot of you who love them too and I would love to see your cards! Bye for now!
Hi peeps! It's day two of my self declared "Butterfly Week" here on the old bloggy blog! If you read my post yesterday you know that this week I'm making all Buttefly projects! I'm trying to make cards of different styles and color schemes to keep it interesting. Today's card is made with one of my favorite color palettes: Light Blue, Pink and Red. I combined it with Kraft for a clean and simple design. I hope you likey! This card layout would work with flowers, circles, anything really….
I used my Martha Stewart butterfly punch to punch out different butterflies. I used the amazingly cute, fresh and pretty paper collection from Girls Paperie called Kitch. Love.
I first stamped the large Hero Arts Friends text in light brown onto one side of my Kraft card base. After punching out my butterflies I put three little pearls down the center of each one. When I mounted them to my card I used foam tape.
You can barely see the text. I wish I would have used a slightly darker color…or maybe white? I'll try it differently to see what happens next time. The words are stickers from that same paper collection. LOVE.
Are any of you making butterfly cards this week too? One person left a link to hers already! Play along wtih me. C'mon…it'll be fun! You know you want to. Well, you know I want you to! Have a fabulous day all! Thanks for stopping by today!
Happy Monday! How was your weekend? I had a nice weekend…weather was good, got in some crafty time… On Saturday some of my friends and I held a Crafty Garage Sale! It was a pretty good sale and I got rid of some old stamps and stuff and made a little cashola…to buy more! We had fun hanging out together and seeing our friends come by. The weekend went by in a nano-second. Do you guys watch Amazing Race? Finale was great last night!! Love that show…we never miss it at our house.
So yesterday I was rummaging around the craft room trying to decide what to make and generally picking up stuff. The card I posted last had some pretty butterflies on it… I started to see a theme emerge… I have TONS of butterly crafty goods! So…I am declaring this week "Butterfly Week" here at A Blog Called Wanda! All my projects this week have a butterfly theme. I had soooo much fun creating these projects! Butterflies are a sure sign of Spring and flowers. I thought it appropriate!
Here is some of my butterfly stash!!!!
Here's my first card for the week. It's a shabby chic confection full of frilly, girly things. That gorgeous patterned paper is actually the packaging from some butterfly charms I bought! I opened the package and there it was…so nice!
Just a little bit of stamping…this card is mostly just paper crafting and combining elements together. That's one of my favorite things to do!
Do you feel like joining me for "Butterfly Week?" If so…put a link to your butterfly project in the comments section. I'd love to see what you're making too! See you soon!