Author: stampcatwg

  • Taylored Expressions September Sneak Peeks Day 2!

    1a 

    September Birthday Bash and Release

    • At Taylored Expressions we are celebrating our 3rd Birthday and you are invited to our Birthday Bash!
    • Sneak peeks Monday through Wednesday – lots of fun eye candy and
      inspiration!
    • All of the new products will be available for purchase on Thursday,
      September 1st at 8 am PST
      . You'll find it all in the Fresh out of the Oven Department at the Taylored Expressions Store.
    • Every order placed Thursday – Monday will include a FREE Party Favor.
    • To celebrate our 3rd Birthday, you have 3 WAYS TO WIN!

    1. Help Spread the Word! Grab our Birthday Badge from Taylor's
    blog and post it on your blog for the week. Then come back
    and leave a comment with a link to your blog to let us know you're
    spreading the word. You will be entered into a drawing for a $25 TE gift
    certificate.

    2. Join us on Facebook for an early reveal of all the new stamp
    sets Wednesday night beginning at approximately 6 pm PST. You will have until 8pm PST that night to comment to enter to win each new set.

    3. Join us in our SCS Forum for a contest that will begin Thursday morning.
    In the meantime you can see Baker's Dozen sneak peeks there and chat with us!

    Okay…now don't freak out on me…The next two days are HALLOWEEN projects! EEEEK! It's 100 degrees today here so Halloween is not on my radar yet! Okay, So I have to switch over to Fall mode because these sets are too much fun! Today's card features the Toil and Trouble stamp set! I also made a fun Halloween treat box…more on that later in the post!


    P
     

    These treat boxes are free when you order the new Project Pantry Kit this month! Yay! I added a spooky fence and a sentiment. Couldn't be cuter – maybe for your work group or a child's class?  

    Q
     

    I used the papers from the Project Pantry Kit for this card. They're from Echo Park's collections. Don't you just love them?? Nice creepy wallpaper I think!  

    R
     

    I used my Oval Nestabilities to creat my focal image. I added some orange rhinestones and a doilie to complete the vintage Halloween feeling. The bats are from the Moka Tabitha stamp set. You're gonna love that too!  

    S
     

    There is a new Impression Plate out this month! One side is cool spiderwebs (tomorrow's post) and the other side is a diamond pattern (see photo below). LOVE this. Harlequin, Diamonds, Argyle…Yes!  

    Ss


    T 
    Toil & Trouble is an awesome Halloween décor set. It works great for decorating the Apothecary Shelf too! Everything that would be inside a haunted house, or in a mad scientist's lab! Cool sentiments too. It was designed for the Whimsical Wishes by Nancy McKinney and is a full sized set on a 5.75" x 8.5" full color sturdy storage panel – includes 25 images/sentiments.

    The Spooky Fence Border Taylored Die  is 6" long and can be used for cards, scrapbook pages, and party favors/boxes.

    The Spooky Impression Plate is one metal embossing plate with 2 sides. Talk about ease of use and versatility! It's a breeze in my Cuttlebug! 

    Spooky Project Pantry – Basic Recipe Kit and Spice it Up Optional Ingredients – this is really a must have for Halloween cards and projects. Taylor is doing something a little different this month with the Project Pantry.

    As you know, the idea behind the Project Pantry is that when you want to bake up a yummy dessert you head to your pantry for the ingredients. When you want to create a sweet papercrafting project, you can head to our Project Pantry for all the coordinating elements. We've found that some of the best cake and cookie recipes are the ones based around a basic batter or dough recipe with lots of options to spice it up according to your tastes. This month we are offering our Basic Recipe Kit along with optional Spice It Up Ingredients that you can pick and choose from to build the kit just the way you want it.

    The Spooky Project Pantry Basic Recipe Kit is $11.95 and includes: Echo Park Apothecary Emporium 6×6 pad, 10 sheets of 8.5" x 11" cardstock in coordinating colors, and 6 yards of ribbon (2 yards each of 3 different styles). This is such a great value. 

    Optional Spice it Up Ingredients (choose any or all) are: Black Sparkly Fluff, Black/White Enamel Accents, Orange Rhinestones, Black Pearls, Halloween Button Assortment, Spooky Cardstock Pack, and Spooky Ribbon Bundle.  

    When you go to the Spooky Project Pantry in the store you will see the optional items linked under the Basic Recipe kit, so you can pick and choose what you'd like to add to your cart. We know you'll have fun customizing your kit!

    I know I just gave you a TON of information. It's just that there's so much fun stuff this month! It will all be ready for you to check out on Thursday Morning! Please take some time to see what the other "ghoulfriends" have in store for you today.  

  • Taylored Expressions September Sneak Peeks Day 1!

    1a 

    September Birthday Bash and Release

    • At Taylored Expressions we are celebrating our 3rd Birthday and you are invited to our Birthday Bash!
    • Sneak peeks Monday through Wednesday – lots of fun eye candy and
      inspiration!
    • All of the new products will be available for purchase on Thursday,
      September 1st at 8 am PST
      . You'll find it all in the Fresh out of the Oven Department at the Taylored Expressions Store.
    • Every order placed Thursday – Monday will include a FREE Party Favor.
    • To celebrate our 3rd Birthday, you have 3 WAYS TO WIN!

    1. Help Spread the Word! Grab our Birthday Badge from Taylor's 
    blog and post it on your blog for the week. Then come back 
    and leave a comment with a link to your blog to let us know you're 
    spreading the word. You will be entered into a drawing for a $25 TE gift 
    certificate.

    2. Join us on Facebook for an early reveal of all the new stamp 
    sets Wednesday night beginning at approximately 6 pm PST. You will have until 8pm PST that night to comment to enter to win each new set.

    3. Join us in our SCS Forum for a contest that will begin Thursday morning. 
    In the meantime you can see Baker's Dozen sneak peeks there and chat with us!

    I have TWO projects to share with you today! Let's kick the week off right! Hahaha. This month Taylor is celebrating her third year as a company! YAY! My first card is made with the uber cute Cuppie and his friends having a birthday celebration. Happy Birthday TE and Cuppie!

    J
     

    I wanted this card to have a retro 70's vibe to it and I love these colors together. The whole palette was taken from the new MME Vanity Fair 6×6 papers! MMMMM.  

    K
     

    Um, yeah, I used ALL those markers to color this image! You can see I chose my patterned paper first and then used it to pick my marker colors. Kept it right in front of me while I was coloring!  

    Jj
     

    So, I was trying to make my main focal image look like a Polaroid picture! What do you think? I'm not sure it totally worked out but I like the concept. Again, how yummy is that paper?  

    Kk 
     

    I added some glitter accents with Stickles and a fun party banner!  

    N


    L
     

    I hope Taylor is surrounded by sweetness on her Company's Birthday!  

    M 

    About the stamp Set: Sweet Party is a cute petite party set that pays homage to our very first stamp set - Sweet Celebration to help celebrate TE's 3rd birthday. Cuppie gathers his friends around to celebrate in style! It was designed by Jessie Oleson, and you get the party scene image plus 3 cute sentiments. Purchase this Petite stamp set (on a 3" x 5.5" full color sturdy storage panel) for $7.95 or get it for FREE with a purchase of $100 or more in the TE Store Thursday – Monday. WOOT!

    The second card for today is made with the new borders set with ice cream and cupcakes! (Anyone else thinking of that silly Baskin Robbins commercial right now?). The Build a Treat Borders set is so versatile! I used it today and I'll have another project to share using the same set on Thursday. I actually made two versions of the same card…and I have a fun "awning" technique to share.  

     A


    F
     

    Here's how I made that fun sweet shoppe awning! I started with the TE Medium Scallop Border Die…which is totally a necessity in my book. I cut out two pink and two white strips.  

    B
     

    I cut out the sections of pink… 

    C
     

    And glued them onto the white part… Easy peasy really.  

    D


    E
     

    The stamp set has a border of ice cream cones (top and bottom separate) and a border of cupcakes (top and bottom separate). The matching dies make it a quick and fun project. Don't have to cut them all out by hand. I'm all for that!  

    G


    I 
     
    The Build A Treat Borders were concepted by Sankari Wegman. This set will provide endless opportunities for building your own treats and borders. It was illustrated for the Whimsical Wishes line by Nancy McKinney. It is a full size set on a 5.75" x 8.5" full color sturdy storage panel. Build a Treat Borders includes 5 borders – each approximately 6" long with options for both coloring and solid stamping. Build a Treat Borders Taylored Die Set is a set of 3 dies – each 6" long – to build cupcakes and ice cream cones – coordinates with Build a Treat Borders and can also be used on it's own.

    Remember that TE stamps are made from top-quality deeply etched rubber in a cute shade of pink and come on EZ Mount already trimmed and ready to used with your acrylic blocks. There is a mini binder box available in the TE store to store them in!

    Please go check out what the rest of the team has in store for you today. There are other stamp sets that I didn't feature…and you don't want to miss anything!  Also, this month our guest designer is the amazing Jen Shults! WOWZA! Check out her blog here! I am such a fan. Welcome Jen!

  • You are SO special!

    Hellloooooooo! It's Thursday night…practically Friday! Yeah! I can feel a weekend coming on! How was your week? Did you manage to do something creative? I sure hope so! I hope all is well with you wherever you are today. I hope the world has been kind to you this week. I have a card to share using some more of my new MME Lost and Found 2 goodies that I got a couple of weeks ago. Can I even tell you how much I love this collection? OMG. YUM. Seriously. NO Seriously.  

    1
     

    This whole card started with this one piece of paper… I cut out the three shaped elements and used two of them on this card (I'm saving the other one for later!) The stripes are on one side and the polka dots are on the reverse side. It's all spark-a-lay too!  

    2
     

    Here are my card pieces ready to be assembled! I wanted to put a bow on it…but I am kind of bow impaired. They NEVER turn out the way I want! What is that? Some people make these gorgeous perfect bows…me…not so much! ha.  My finished card is a five inch square. I edged the cream base in a dark brown distress ink.

    3
     

    That little birdie is from Webster's Pages! Chirp chirp!  

    4
     

    I just adore this vintage-y hot air balloon image!  

    5


    6
     

    Just a reminder from me to you: You are SO special! Don't ya forget it either!  

    7
    This will probably be it for me until Monday. I'll be in the crafty cave getting ready for the Taylored Expressions September Sneak Peeks next week, which will be Monday through Thursday. We'll be celebrating Taylor's third anniversary as a stamp company! I know you're gonna love this release. There are some fun Halloween images and also some sweet treats. Thank you for coming by to see me!

    Birdie signature!
     

  • Memory Box Pretties…

    Hello! Um, not sure where Monday went…but here it is Tuesday already! I meant to post yesterday but the day really just got away from me. But, here I am again! I have a card to share today using some pretty Memory Box stamps and a cool technique recently shared by HRR Julie E.

    I wanted to take a minute to say a big THANK YOU to May Flaum for writing some very nice things about me on her blog on Sunday! I was so flattered that she likes my blog since I am a big fan of hers. I originally came to know May's work when she was on Tim Holtz's Design Team = awesome! Please take some time to go and check out her blog. And to all the new subscribers who came over – so nice to have you here!

    A couple of weeks ago I read THIS great blog post from Julie Ebersole and watched her equally wonderful technique video about reverse masking. It stuck in my head and I kept trying to think of the perfect stamps to use. Then it came to me! Memory box + butterfly + leaves! Yay! Julie always reminds me to get back to stamping and how clean and beautiful that is. Mwah.


    1
     

    The technique is reverse masking. I cut a shape out of the center of a piece of vellum with one of my Nestabilities. I taped it down over my cream cardstock and sponged the brown ink only on the edges. Then, I left the vellum in place and stamped my branches/leaves in Crushed Olive Distress Ink. LOVE that color.

    2
     

    Voila! Here's what you get when you take the vellum off!  

    3
     

    I got out the pretty Cocoa Butterfly stamp (and matching die) from my stash, and colored it in with some pretty shades of orange and gold and yellow.  

    4


    IMG_8347
     

    I popped the butterfly up on foam tape for some dimension. I roughed up the edges to give it some more texture and then mounted the whole thing on a pretty burnt orange card base.  

    IMG_8591
     

    I resisted the urge to bling, glitter, or ribbonize it… I'm happy with the result and would like to think of some more pretty ideas to use with this technique.  

    IMG_8592 
    Thank you so much for coming by today! I hope you have a fantastic week!  

    Birdie signature! 
     

  • Scramble Time!

    Hi! Happy Weekend! Today I got scrambled! Hahaha. I was sitting around in my pajamas this morning playing Words with Friends on my iPhone and I decided to check Twitter while I was at it… I saw a tweet describing a "90 Minute Scramble" from Hero Arts. What is that?? I wondered too! It's a fun event on the Hero Arts Flickr group!

    At a specific time (11am PST) they post a theme/challenge. You then have 90 minutes to make your card and post a photo of it! Well…I needed something to share with you all today so I thought…why not?! I'm in. I was trying to think of how I could prepare. So I got out all my Hero Arts stamps and set them on my counter. I got my Copics ready and a big stack of scraps! And then I waited to find out what the challenge was. Here's what we were given:

    "Today’s theme is “The Little Things.” I want you to create a card/project using those “little” pieces that come on a sheet of clear stamps or Clings that are kind of like a “fill-in” or are not the main image in the set. Create something with the smaller pieces. Also, the project should include at least one Hero Arts stamp."

    Here is my finished project: 

    3


    I used ALLLL the little pieces from the Just A Note set and then used the typewritten sentiment from another cling set. I made background paper using the scissors, thumb tack and paper clips! I used the pencil for my main image accent. I kept the color scheme nice and bright. The whole back-to-school thing is everywhere right now. I think that's why it popped in my head. No time for Copic shading either!  

    3a


    Here is the after effect of being scrambled! I had stuff everywhere! I kind of got in a panic when it came time to cut out all the tiny images…one hour had already gone by!

    3aa
     

    I managed to get my card assembled and photographed with about 12 minutes to spare! Yikes! I was sweatin' there for a bit. I'm happy with how it came out. It was really fun to participate and to see what everyone else came up with. If you'd like to see the post CLICK HERE. Maybe you'll want to do it next time??!! I will definitely do it again.

    3b


    I think this would be a nice card to send your college kid or to leave in a lunch box for your special tyke. I always love red, yellow and blue together.  The Scramble has a random drawing for a prize package…but that didn't happen yet. Have to check back in and see if I won or not. {Update – Nope! Didn't win this time around}

    3c
     

    And now, for something tasty and delicious! Yesterday was a particularly bad day at work. My computer crashed with a virus at around 9:30 in the morning while I was working on a giant and important spreadsheet. UGH. Black screen of death. The awesome IT guy and I tried for over two hours to fix it but couldn't. It's in surgery on his desk right now still. I had to go work in a conference room on a really old computer and try to re-create my work. NOT HAPPY. After work I stopped at the Paper Garden for a chit chat to cheer me and then I had the hubs meet me over at Starbucks for a Mocha Coconut Frappuccino. OH EM GEE. Much better.


    3d


    3e 
    Enjoy the rest of your weekend lovely bloggy friends! Thanks for visiting!  

    Birdie signature! 
     

  • Shabby Tea Room Week #75 – Polka Dots!

    Hi everyone! Well…you know I've been dying to get my hands on some of my new crafty stash from Sunday's shopping trip! Tonight I finally did! I cruised on over to The Shabby Tea Room Blog…only to discover that the theme for this week is….POLKA DOTS! Are you kidding me? Yay! Count me in. I sat down and got to work. I have been really wanting to try the whole grey/white/yellow color scheme so I started there with my paper selections. The rest just sort of flowed. I am IN LOVE with that new My Mind's Eye Collection!  Here's my card:

     1


    8_edited-1
     

    Here's how I got started…my design palette if you will. I really like to mix patterned papers and different textures…mmm…And there's my new border punch again… 

    2


    3
     

    I cut out my felt flowers with PTI flower dies on my Cuttlebug. I had to bust out the crop-o-dile to go through all those layers in order to be able to put the brad through. It worked great!  

    4
     

    I used one of the MME collection embellies for the center of my flower. I crumpled it up first to give it some more height and feeling. It also worked great for the theme because of the grey polka dots!  

    5
     

    I sort of create my cards like you would a mini scrapbook page layout. I try things and move things around until I get it the way I want it. Then I glue it all down.  

    6
     

    The aftermath! The sentiment is from PTI. I use those pearls all the time. Just cut off the piece that you need. I can usually get 3-4 cards out of one package. These are so yellow and pretty… 

    7


     9


    At the last minute I decided I had to add another flower and some butterflies! Everything is better with butterflies, right? Hee hee. At first I put some pale green leaves on my flower but it just didn't work. What do you think of yellow leaves???

    10


    11

    Thank you so very much for coming by my blog today! If you check out my counter in my side bar, you'll see that I am about to get my 150,000th blog hit!!! Can you guys believe that? I can't! From the bottom of my heart, thank you for all the bloggy love and all the sweet comments and encouragement. Have a wonderful day!  

    Birdie signature! 
     

  • Taylored Expressions August BFTP Blog Hop!

    Hello! Welcome to my stop on the Taylored Expressions August Blast from the Past Blog Hop! The theme this month is "Collectors Anonymous" as in crafty collecting! Well, I am a paper hoarder as good as the rest of them! I was inspired to create a craft card using some of my favorite stamps from TE! I based my color scheme on the plaid background paper and actually assembled my entire card before coloring my main image. That helped me get the colors right with my pencils! I hope you're having fun going around to everyone's blogs today. The complete list of blogs is at the bottom of this post.


    1
     

    This was the sketch for this month…designed by the super talented Sankari. I had to modify it a bit since my main image was too big. That's okay, right?  

    2
     

    Check out all of these fun crafty-related stamp sets!!!  

    3
     

    I used my Prismacolor pencils for this one since the images are so tiny. I added some pops of glitter glue to jazz it up some!  

    IMG_8325
     

    I'm not really sure, after 17 years of buying craft stuff, if it is cheaper than therapy! Hahahaha. I know it's more fun!  

    IMG_8326


    IMG_8327
     

    I added some glitter glue to my buttons also…  

    IMG_8328  


  • What a day yesterday!

    Hi friends! I hope you had a fabulous weekend! Mine was jam packed with fun things to do and friends to see and junk food to eat, and everything amazing! I don't have a card to share today since I was too busy to make anything. I wanted to share some pictures with you, though, if that's okay! Saturday I spent all day with some of my stamping friends! I've known most of this group for 16 years now! Wow. We had a fantastic time catching up, stamping and learning. Awesome day.

    Sunday the DH and I spent the day in Berkeley and then ended the day by going to see Adele in concert at the Greek Theater! OMG. The concert was postponed from June when we were originally supposed to see her. It was well worth the wait! Her voice is really indescribable. 1000% better in person than on the CD. Truly a gift. I have no words really. It was an intimate show outside under the stars on a beautiful full-moon evening. It was magical. I won't forget it!

    First stop yesterday morning was at one of my FAVORITE crafty hangouts – Scrapbook Territory! Yeah! They just got in a truckload of the new My Mind's Eye Lost and Found 2 collection. WOWZA! I think I went overboard and bought some of each color palette. YUM. Here's just a little taste of that goodness:


    10
     

    And I found this…Stamping Anya! I hadn't seen her before…and I got the last one! She will be fun to color up with my Copics for sure!

     11 
    While I was shopping and talking…I had the best timing, since the Cupkate's Cupcake truck pulled up right outside! Kristen ran out and got us cupcakes…(Thanks Kristen!) and I chose the Salted Caramel version… Now I'm not sure what could be better than having cupcakes AT the paper store???

    7

     
    You guys are probably wondering where the DH was during all this? He nicely dropped me off and then went off scouting out some photo opportunities down by the Marina where you have the perfect view of the Golden Gate Bridge and San Francisco! He came back for me later.  If you are ever anywhere near Berkeley you HAVE to stop at this store!

    This is a super cool display that has every color of the Tim Holtz Distress inks so you can see how the colors look next to each other. I love the graphic-ness of it all…

    8 
     

    There were some ladies working on amazing scrapbooks at the work tables. I had to take a photo of this creation. LOVE the yellow and grey together and all those patterns working together. I am inspired by this…so you may see some yellow coming soon!

    12
     

    And….finally….the highlight of the entire weekend! The Adele Concert! It was very hard to take pictures with such low light, but I got a few that capture the essence of the evening. She was wonderful. Her personality is spunky and delightful at the same time…warm and sassy at the same time. LOVE. Didn't think it was possible for me to be enamored more with her, but after this…I am.

    1


    2 


    3 


    4 
     

    Here's a video to share too! Keep in mind that videography is NOT my specialty! hahaha. She saved this song until the very very end…just when everyone was about to go crazy from not hearing it!  


    The concert venue is actually on the campus of my college! It was such a gorgeous evening, so after the concert we walked through campus taking night photos and trying to capture the cool full moon! That's the moon in the right of the photo. I didn't want to go home…I wanted to stay out all night!

    6
     

    On our way out of town to drive home we HAD to stop for a snack! I am one hundred percent certain that I am too old to be eating Strawberry Pie and soda at midnight! But I did it anyway! Sometimes you gotta be crazy.  

    9 
    Thank you so much for letting me share this all with you! I hope you like my little story and the pictures. Wednesday is the TE monthly blog hop and I have a card all ready for you! I hope that you have a great week!  

    Birdie signature! 

  • Knit to be tied…

    Knit Wit? Knit Happens? Close Knit? Ar Ar Ar…I'm totally cracking myself up. And, I'm probably the only one I'm cracking up! Today's Saturday, which means I am spending the day with some old friends and stamping and laughing and eating alllll day! Yay!

    One of my friends has left the corporate cube farm behind her and is following her dream of opening a knitting store! Can you imagine? I find this move so totally inspiring and amazing! I will see her today and so I wanted to bring her a card to celebrate this next step in her life!

    Last week I stumbled upon the cutest set of stamps at Joann's that was all knitting related! I snatched it up and then used one of the stamps to make this card! (I cleaned it really good afterwards!) The stamps are a little present for her too.  I hope that whatever you're doing today that it makes you happy!


    IMG_8296 


    I matched everything to this super cool paper from Memory Box. I love love love the retro color palette! That is my new edger punch in action again too. I colored the yarn in with my Copics and then put on some clear glaze to make the needles shiny.

    IMG_8298 

    I used my blo-pens to add some speckles to the white background and a sentiment from PTI. Simple and clean.

    IMG_8299 


    IMG_8300 

    Happy Happy Saturday!

    Birdie signature! 
     

  • Wishy Washy Wednesday…

    Hi! I couldn't for the life of me think of what to share today. I thought I could make this or I could make that…but nothing was coming out right. Ya know? I have one card I want to share, but I didn't give it to the person yet, so that's out. I finished a MAJOR project at work today so I'm sort of brain dead too. That doesn't help.

    So, I sat here in my craft room just mulling things over. Waiting for something to come at me and inspire me. Waiting. Hello? Bueller? Is this thing on? (I'm in a weird mood, too). I looked through some crafty magazines and surfed the web. Then I just got out some paper I love (MME Penny Lane Collection) and then a card happened! A card! And then another one! Imagine that! Don't mind me – hope you like the cards though, and I hope you are having a fabulous week. Thanks for stopping in.


    1
     

    I've been seeing this cool technique around a lot lately – where you cut out shapes and then pop up the top layer of your card to let another paper show through. I've seen all kinds of beautiful cards. I thought I would try it with some of my fav PTI flower dies. The cute pink and white check is actually the back side of the flower paper. LOVE. Couldn't be easier. I added some pearls and a birthday saying banner. It's so cheery and happy with those papers.  

    2


    3


    4
     

    I used the flower shapes that were left as a pretty decoration for the inside of the card!

    5
     

    Soooo…inspired by this cool paper collection…another card came out! I don't know where I got the notion to make one of those foldy rosette things. Haven't made one in a long time. I thought it would make a cute prize ribbon. I just kept adding stuff…

    IMG_8313


    IMG_8301
     

    I cut the edges of the strips of paper first to make a nice edge. The strips of paper are 12 inches by 1.5 inches. Scored the entire length each 1/4 inch.  

    IMG_8302


    IMG_8303


     IMG_8304


     IMG_8306
     

    The sentiment is from PTI and the edger is a new one I just got at Joann's. I like it already!  

    IMG_8314
     

    There ya have it! A couple of clean and simple and colorful cards for today! 🙂

    IMG_8316 

    Have you guys checked out Pinterest yet? It's this cooooool website that lets you create your own design and inspiration boards…then you "pin" things to them! It's the neatest thing. You can follow your friends and share your boards with people. It took me a little bit to get the hang of it but now I'm sort of addicted! Click HERE to go to see my profile and my boards! Let me know what you think!

    This weekend we are finally seeing Adele in concert at the Berkeley Greek Theater! The show was postponed from back in June when she got sick and had to cancel. I am BEYOND excited to go and have a date night under the stars with the DH! Is it the weekend yet? Talk to you soon everyone!

    Birdie signature! 
     

  • Giant Cupcake Birthday Card!

    Hi peeps! Greetings on this fine August day! I have a lot to share with you today. It was a busy weekend and I have a card to show ya. But first an announcement!  I am super excited to announce that I was the winner for Week #72 over at the Shabby Tea Room Blog! Yay! I have been a follower of this great blog since I started looking at blogs and it is one of the ones that inspired me to finally start my own. I have entered their fun challenges several times and I get so much inspiration from everyone's work. To be a winner is so cool!! I am totally thrilled! As a bonus, I will now get to be a guest designer for a week on Shabby Tea Room. My guest designer spot will be on October 3rd. Thank you Debbie!

    Str 
    Okay…now on to my card for today. It's a no-stamp Birthday card with a giant cupcake on it! I had fun creating this one. I went through all of my cards last week and discovered that I am low on Birthday cards so I need to start making some more. I gave myself the challenge of making a birthday card with NO GINGHAM PAPER and NO POLKA DOT PAPER! Are you worried I could do it? I was! I was inspired by the pretty patterened birthday paper from Imaginisce and used it for my color palette.

    IMG_8290_edited-1 
     

    This giant cupcake is a chipboard shape that I covered in paper, glitter glue and a button!  

    IMG_8291
     

    Here is my color palette and the chipboard shape.  

    IMG_8277
     

    I cut the top out of pink paper that matched the patterned paper and then sanded it to make it softer and give some depth.  My finished card is 8 x 4 inches…so that really is a giant cupcake!

    IMG_8278
     

    The bottom part was cut out of kraft paper and then run through my crimper… I had to dust off the crimper… It hasn't seen the light of day in a long time! I thought it was perfect to make this look like a cupcake wrapper though.  

    IMG_8279


    IMG_8280
     

    Now for the fun part! SPARKLES!  

    IMG_8282
     

    Now, I said I couldn't use Gingham paper or Polka Dot paper…. But did you see I sneaked those two things in anyway? Ha. I couldn't help it.  

    IMG_8292


    For the sentiment, I cut out a tiny strip from the paper and put it on a piece of the blue paper to make a banner. I also cut out one of the party hats. NO stamping on this card – just paper crafting. Sometimes I like that.  

    IMG_8293 
     Have a fabulous week bloggy friends!

    Birdie signature!
     

  • Life is Good!

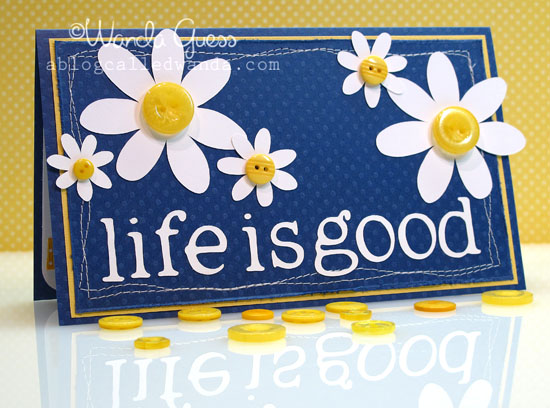
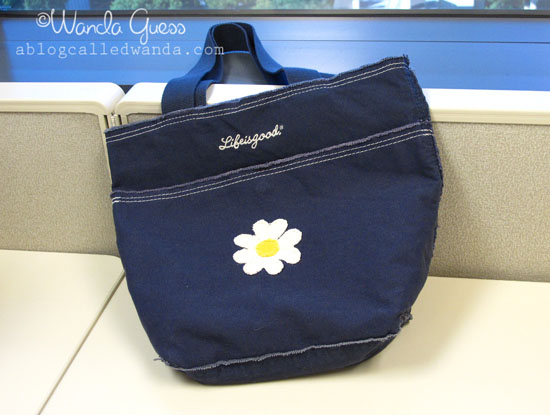
    Hi Friends! Happy weekend! Yippeeeeeee! This week was a bit rough – especially at work. Yikes. Lots going on at my job. Isn't that true of everyone's job right now? I was so happy to see this week be over and I had a very nice dinner with a sweet friend last night to start the transition into weekend time. I have a fun card to share with you today…inspired by, of all things, a purse! One of my gal pals at work brought in the most adorable purse and as soon as I saw it I was inspired. My little crafty brain cells started thinking up a card! It was mostly the color – bright and happy and vivid. You'll see…


    1


    2
     

    Here is the purse that inspired me! I loved the raw edge on the denim, and the crisp white stitching. Also, that pop of pure white and yellow is perfect in the simplest way. Love.

    2a


    2b
     

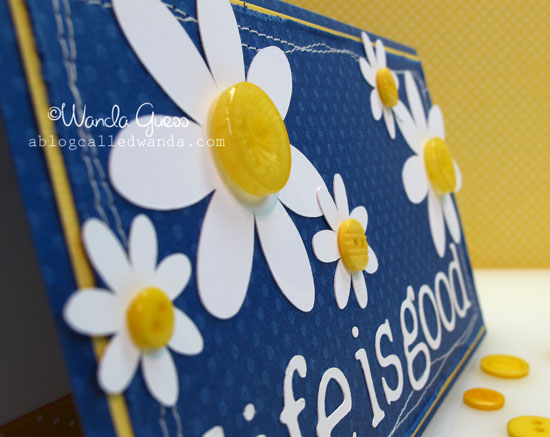
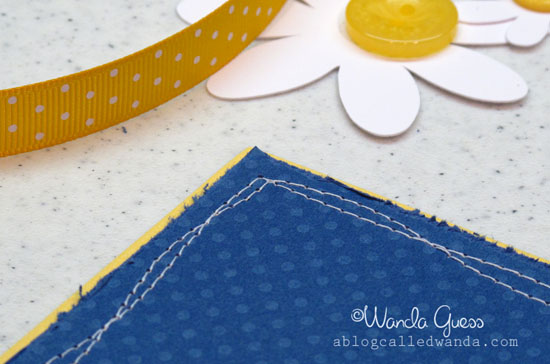
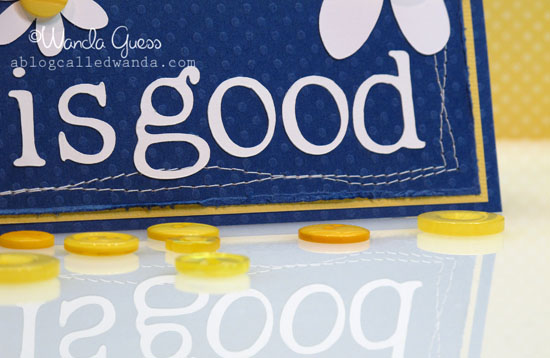
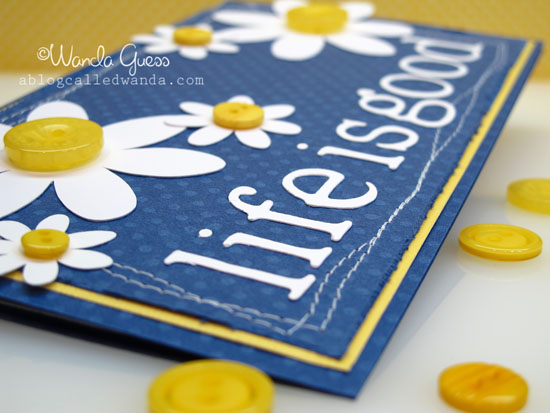
    I wanted to mimic the stitching, so I busted out the sewing machine and stitched a free form double border around the blue paper. The buttons are from Stampin' Up. I love their buttons.

    3
     

    The flowers and the words were cut out using my Cricut machine. I tried two different fonts and ended up liking the one that looks like typewriting (Doodletype). The flowers are from the George cartridge. I wanted to incorporate that yellow ribbon…but it didn't work out. I put three flowers on at first, but then I added more later. I couldn't help it.

    4


    5
     

    I hope that LIFE IS GOOD to you this weekend!!!

    6
     

    Here's a little tidbit from our dinner last night! Beautiful early evening light in the restaurant on a gorgeous plate of Caprese salad. MMMMM.

    7
     

    My sweet friend and her doggies Mezzo and Aria! I went over to her adorable house after dinner and we chatted some more…

    8
     

    And, then, when I got home, this is what I found passed out on my work table….HA! What do you suppose this one is dreaming about? Have a wonderful day everyone! Thank you for coming by to visit my blog. Mwah.

    9 
     Birdie signature! 

  • Taylored Expressions August Release Day!

     ThursdayAugust4th copy

    AUGUST RELEASE DAY!

    • All of the new products are now available for purchase! Check out the Fresh Out of the Oven category and Taylor's Blog for all the deets!
    • More projects from the Baker's Dozen to inspire you.  Just follow the link list below.
    • Another chance to win… head on over to our forum (link to sneak peek thread) and tell us your favorite stamp set from this release. We'll be choosing one person to win their favorite set FREE!  You have until Saturday August 6th at 6 pm PST to enter to win.

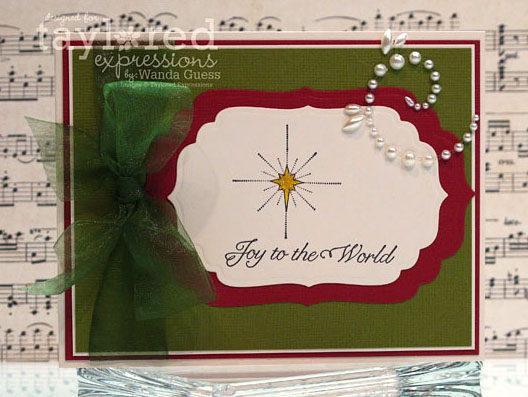
    Today I have one last card to share with you for release week! I made a third card from the Joy to the World set. I was inspired to make something clean and simple with that set. Something to have a quiet message. Very few supplies and lots of white space. Here ya go:

    22 JOY TO THE WORLD THURSDAY WANDA copy 
     

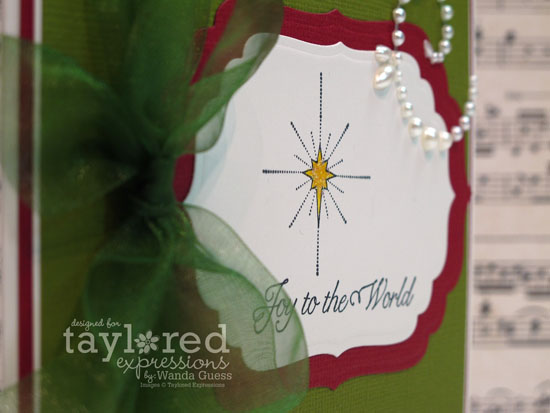
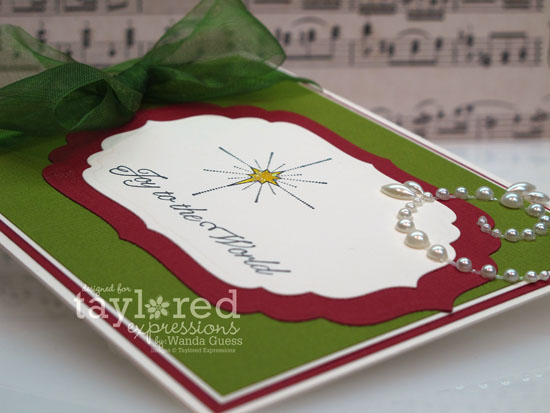
    For Christmas I am always drawn to shades of olive and cranberry. Just seems so classy and elegant to use those colors and some sheer ribbon. 

    23 
     

    24 JOY TO THE WORLD THURSDAY WANDA
    Thank you so much for spending part of your week with me and letting me introduce you to all these new stamps from TE! I hope you have a great day!  
     

    Here are the links to the other Baker's Dozen Designers! You will definitely want to see what everyone else has made!

     Birdie signature!

  • Taylored Expressions August Sneak Peeks Day 3!

    WednesdayAugust3rd copy

    AUGUST RELEASE AT A GLANCE:

    • We have sneak peeks to share and today's the last day before the release! All of the new products will be available for purchase on Tomorrow, August 4th at 8 am PST. You'll find it  all in the Fresh out of the Oven Department at the Taylored Expressions Store.
    • Join us as a fan on Facebook for an early peek at the stamp sets, as well as a SPECIAL Facebook GIVEAWAY, on Wednesday night beginning at approximately 6 pm PST.
    • Angel Bundle Prize Drawing: We're very excited to be supporting the Angel Tree with Joy to the World, the newest set in the TE Giving Tree Program.  If you'd like to be entered to win our Angel Bundle Prize Pack (Joy to the World Full Sized Stamp Set, Angel Kisses Taylored Card Kit, and the Musical Swirls Taylored Impression Plate) simply click over to the Angel Tree website and find the answer to this question: "Name the founder of Angel Tree."  E-mail Taylored Expressions with the answer in the subject line of your e-mail by Wednesday at 6pm PST.  The winner will be announced on Taylor's blog at approximately 10 pm PST Wednesday night.

    Today's sets are so fun! The sets are: "Wild West", "Moka Jesse", "Moka Jane", "Moka Angel", and "School A la Carte." That's a lot of stamps for one day! Be sure, today of all days, to check everyone's blog so you see all the sets. I am using Moka Jane and a sentiment from Wild West! 

    "Wild West* is a full sized set on a 5.75" x 8.5" storage panel  and includes 16 images/sentiments. It was illustrated by Nancy McKinney for the Whimsical Wishes line and perfectly coordinates with Moka Jane and Moka Jesse. The "Mokas" each come on a 3" x 5.5" full color sturdy storage panel and were also designed and illustrated by Nancy McKinney for the Moka Collection. Jane and Jesse each have 7 total images and sentiments, Angel has 5.

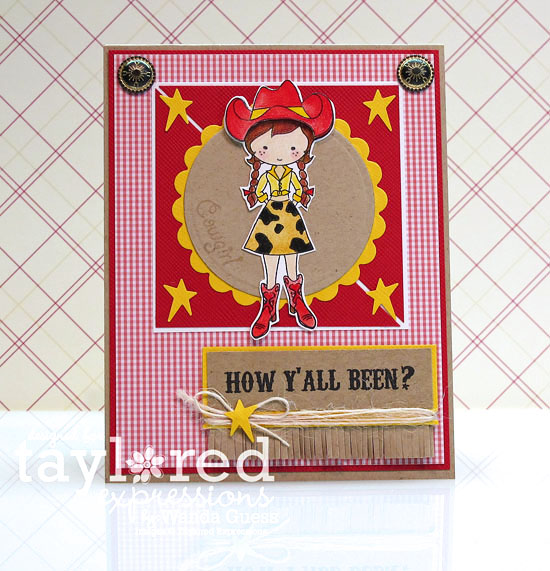
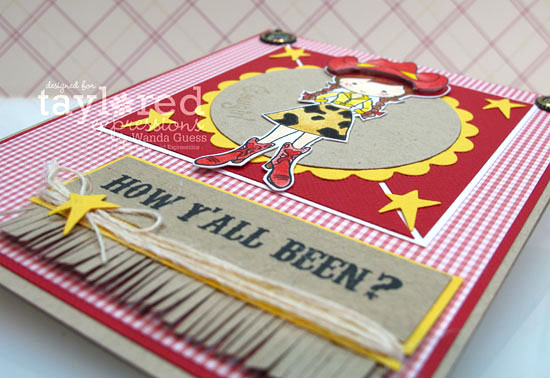
    And, introducing…Moka Jane! EEEK! She is so adorable with the big ole' cowgirl hat and those red boots! I colored her in with my Prismacolor pencils to make the colors really rich. The sentiment is from the Wild West set!  

    18 MOKA JANE WEDNESDAY WANDA copy 
     
     
    I cut out a second cowgirl hat and popped it up on some foam tape to add dimension to her. I like the fresh combination of red and yellow with kraft. Will have to use that again for sure.  

    19 MOKA JANE WEDNESDAY WANDA

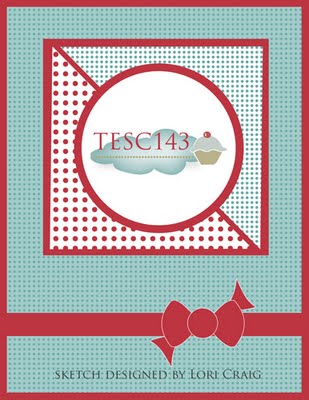
     I used the current TESC sketch #143 for my layout inspiration….LOVE this sketch.

    TESC143
     

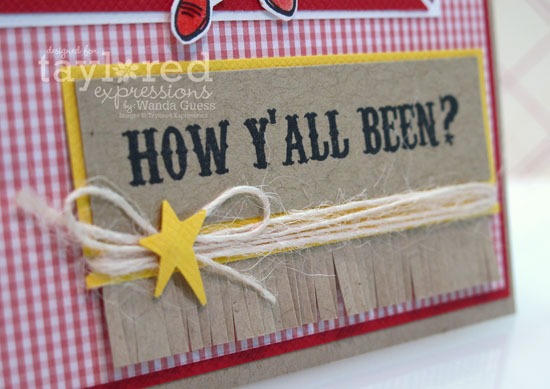
    Do you like my fringe?? hee hee.

    20


    21 copy


    Tomorrow is release day! Be sure to check back in. Here are the links to the other Baker's Dozen Designers! You will definitely want to see what everyone else has made!

     Birdie signature!


  • Taylored Expressions August Sneak Peeks Day 2!


    TuesdayAugust2nd copy
     

    AUGUST RELEASE AT A GLANCE:

    • We have more sneak peeks to share Today and tomorrow! All of the new products will be available for purchase on Thursday, August 4th at 8 am PST. You'll find it all in the Fresh out of the Oven Department at the Taylored Expressions Store.
    • Join us as a fan on Facebook for an early peek at the stamp sets, as well as a SPECIAL Facebook GIVEAWAY, on Wednesday night beginning at approximately 6 pm PST.
    • Angel Bundle Prize Drawing: We're very excited to be supporting the Angel Tree with Joy to the World, the newest set in the TE Giving Tree Program.  If you'd like to be entered to win our Angel Bundle Prize Pack (Joy to the World Full Sized Stamp Set, Angel Kisses Taylored Card Kit, and the Musical Swirls Taylored Impression Plate) simply click over to the Angel Tree website and find the answer to this question: "Name the founder of Angel Tree." E-mail Taylored Expressions with the answer in the subject line of your e-mail by Wednesday at 6pm PST.  The winner will be announced on Taylor's blog at approximately 10 pm PST Wednesday night.

    Today we're introducing TWO stamp sets! The first is "Embrace Beauty" and the second is "Bugabee!" There are very cool matching dies for both sets. LOVE.

    "Embrace Beauty" was concepted by Jami Sibley (yay!) and illustrated by Nancy McKinney for the Whimsical Wishes Collection. It is a full sized set on a 5.75" x 8.5" sturdy storage panel and it includes 9 images/sentiments. It was designed for use with Spellbinders Fleur de Lis dies, Spellbinders classic circles, and a 1 ¾” circle punch. One word for this – AWESOME! It also coordinates with the Summer Afternoon and Discover Your Wings full sized stamp sets if you have those already!


    7 EMBRACE BEAUTY TUESDAY WANDA copy 
     

    This set is so pretty! I love the font for the sentiments – don't you? The main image fits perfectly into a circle Nestie and then I added some more layers of color and finally that gorgeous Fleur de Lis Nestabilities set! OMG. I cut out the butterfly in a different color and added some glitter glue.  

    8
     

    This card has lots of dimension to it. I couldn't help myself layering…The inspiration was the MME designer paper!

    9


    10 


    The "Bugabee" set was concepted by Charmaine Ikach and illustrated by Taylor VanBruggen for the *TE* Collection (this is Charmaine's first stamp set for TE!) WOOOOT! It is a full sized set on a 5.75" x 8.5" sturdy storage panel and includes 27images/sentiments. It is a super fun set! You can combine and layer images to create lady bugs, bees, butterflies, and flowers.  big bold sentiments to create happy greetings. The matching dies are equally wonderful (I used the bugs and the flowers for my project):

    Bugabee Bug Dies – set of 6 dies to create layered ladybugs, bees and butterflies

    Bugabee Flower Dies – set of 6 dies to create flowers with our without the coordinating stamps

    Grass Border Die -  6 " long – this is a die you'll use and use and use!

    My card using "Bugabee" is a little different! I made a refrigerator card!!! When I first saw the stamps and the dies I thought…wow…those would make the cutest little magnets! So I knew I wanted to make magnets out of them. Then I was trying to figure out a clever way to give the magnets to the recipient… And, there you have it, a refrigerator card was born! hee hee. So funny.  


    11 BUGABEE TUESDAY WANDA copy
     

    I made the freezer and the fridge part open seperately! The swirls come with the set and are supposed to be for the flight of the bugs…but I used them to make some cooooolllddd air! Love the big, fresh, fun sentiments with this set.  The finished card measures 8 x 4 inches.

    12 BUGABEE TUESDAY WANDA


    I attached part of the little magnets to the fridge and the other part of the magnets to the backs of the bugs and flowers. The person can move them around. Or…I was thinking they would be cute on a cubicle ledge at work too.  They all come off!

    13 BUGABEE TUESDAY WANDA


    14


    Did you notice something important on my tiny shopping list!?

    15 copy


    Thank you for popping in. These cards were fun to share with you!  Here are the links to the other Baker's Dozen Designers! You will definitely want to see what everyone else has made!

     Birdie signature!


  • Taylored Expressions August Sneak Peeks Day 1!

    MondayAugust1st copy

    AUGUST RELEASE AT A GLANCE:

    • We have sneak peeks to share Monday through Wednesday.  All of the new products will be available for purchase on Thursday, August 4th at 8 am PST. You'll find it all in the Fresh out of the Oven Department at the Taylored Expressions Store.
    • Join us as a fan on Facebook for an early peek at the stamp sets, as well as a SPECIAL Facebook GIVEAWAY, on Wednesday night beginning at approximately 6 pm PST.
    • Angel Bundle Prize Drawing: We're very excited to be supporting the Angel Tree with Joy to the World, the newest set in the TE Giving Tree Program.  If you'd like to be entered to win our Angel Bundle Prize Pack (Joy to the World Full Sized Stamp Set, Angel Kisses Taylored Card Kit, and the Musical Swirls Taylored Impression Plate) simply click over to the Angel Tree website and find the answer to this question: "Name the founder of Angel Tree."  E-mail Taylored Expressions with the answer in the subject line of your e-mail by Wednesday at 6pm PST.  The winner will be announced on Taylor's blog a 10 pm PST Wednesday night.

    The first set for the August release is a pretty Angel set called "Joy to the World." The set was illustrated by Nancy McKinney as part of the Whimsical Wishes line of stamps. This is a full sized set on an 5.75" x 8.5" full color sturdy storage panel – and includes 21 images/sentiments. There are  beautiful images for Christmas cards and projects as well as year-round cards.  Also in today's release is a gorgeous Musical and Swirls Impression Plate and the Angel Kisses Taylored Card Kit! I've used all of these products on my two cards for today!!


    1 JOY TO THE WORLD MONDAY WANDA copy 
     
    The "Joy to the World" set is the newest set in the TE Giving Tree Program tbat support various charities. Giving Tree sets now come pre-trimmed just like the rest of our sets – no cutting needed!   $5 from the sale of each Joy to the World stamp set will be donated to Angel Tree from August 4th – October 31. TEGivingTreeLogo 
    Taylor chose Angel Tree as the charity to support this quarter because it's something she has been involved with for many years.  Angel Tree is a program administered by Prison Fellowship whose Mission is to seek the transformation of prisoners and their reconciliation to family and community through the power of the Lord.  Angel Tree invites churches to provide Christmas gifts to the children of inmates across the country.  Taylor would love to have you learn more about this charity so she planned a special prize drawing! If you'd like to be entered to win the Angel Bundle Prize Pack (Joy to the World Full Sized Stamp Set, Angel Kisses Taylored Card Kit, and the Musical Swirls Taylored Impression Plate) simply click over to the Angel Tree website and find the answer to this question: "Name the founder of Angel Tree."  E-mail Taylored Expressions with the answer in the subject line of your e-mail by Wednesday at 6pm PST.  The winner will be announced on Taylor's blog at approximately 10 pm PST Wednesday night.

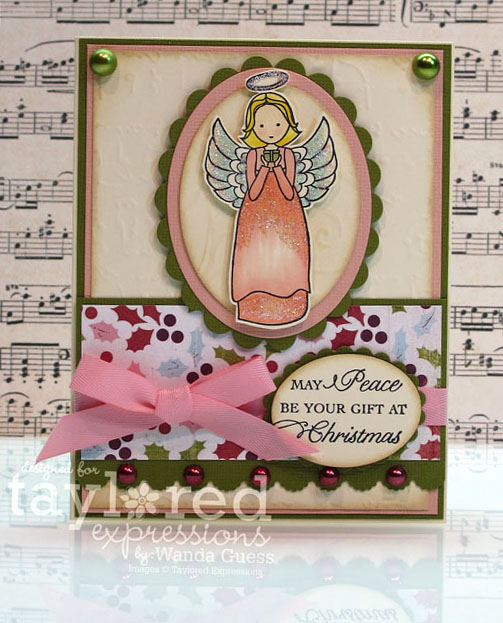
    For today's cards – you'll notice that I made two cards that are very similar. I wanted to show an "easy" card and a more difficult card made with the same supplies. The first one would be great to mass produce as Christmas cards and it is flat so it's easy to mail. The second one is kind of a "more is more" thing…with ribbon and blings and more layers.  


    2_edited-1 


    3_edited-1
     

    Here is my Copic color palette for the angels. I loved the pink in the paper so I wanted to pick that up in her dress.

    1a 


    Lots of yummy layers, ribbon, and bling! This is definitely "more!" Everything comes in the new Card Kit and it couldn't be easier to mix and match it all.

    5 


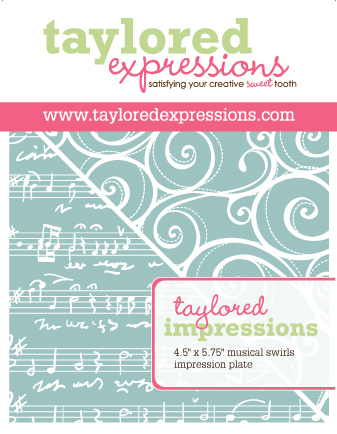
    The new Musical Swirls Impression plate is going to be a favorite of mine – I can already tell. I used the Musical note side for my background paper and the Swirls side for the cream oval under the angel. Here's a close up for you:

    6 

     Musicalswirlspackaging 
    Angel Kisses Taylored Card Kit: WOW! This is an amazing value at $16.95 and it includes all of the following:

    24 A2 Cream Envelopes and 24 Choice Buttercream A2 Card Bases
    24 Choice Buttercream Image Panels 4.25" x 5.5"
    24 pieces of coordinating cardstock 4.25" x 5.5" (4 colors, 6 sheets each color)
    24 pieces of Basic Grey Eskimo Kisses patterned paper 4" x 6"
    6 yards of twill (2 yards each of Wine, Artichoke, Carnation)
    1 package of Want to Scrap Maroon Pearls
    1 package of Want to Scrap Green Pearls

     Angelwishescardkit  
    With the kit, there will also be a downloadable inspiration sheet that will include 10 easy to re-create samples by the Baker's Dozen! Additional ribbon bundles available for separate purchase as well as a coordinating Copics kit!

    Remeber that all TE stamps are made from top-quality deeply etched rubber in a cute shade of pink and come on EZ Mount already trimmed and ready to used with your acrylic blocks.  

    Here are the links to the other Baker's Dozen Designers! You will definitely want to see what everyone else has made!

     Birdie signature! 
     

  • Some Summer Stuff…

    Okay…so it looks as if I'm all into butterflies again! (Remember Butterfly week a while back?) I just can't seem to get enough of those pretty creatures! They are literally popping up everywhere! Today's post is full of some Summer stuff – a couple of cards and some photos…stuff. I hope your weekend is a terrific one. We are doing house projects and a mountain of laundry. Hopefully later I can get some stamping in and maybe a movie. Thank you for visiting today! Taylored Expressions sneak peeks start again on Monday – August – wow. How did that happen? Anyhoo…

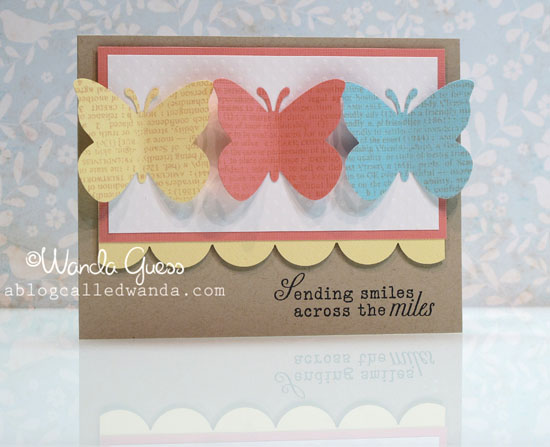
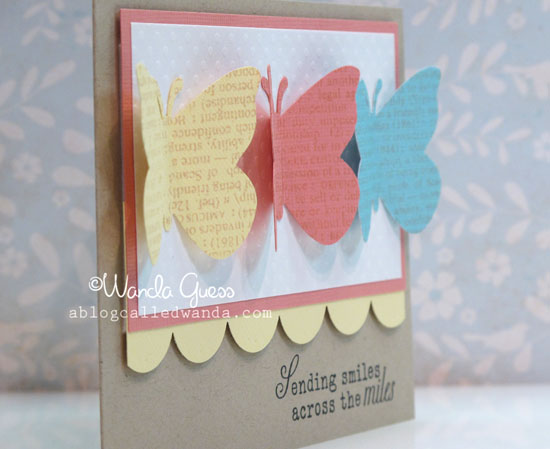
    First up, some butterfly cards. I was inspired recently by a pretty color scheme and wanted to do my take on it. Soft yellow, a pretty coral pink and a light blue. YUM. That's the first card here:

    IMG_8199


    A simple design – could be used with any sort of punch. Mittens for Winter, Flowers, Leaves… I added a pop of color along the bottom with the yellow scallops. I used light brown ink to put some text on the butterflies with the big Hero Arts Friendship text stamp. They seemed too plain without it. Glue down the middle only - to get them to pop off the page.

    IMG_8200


    IMG_8201


    IMG_8203


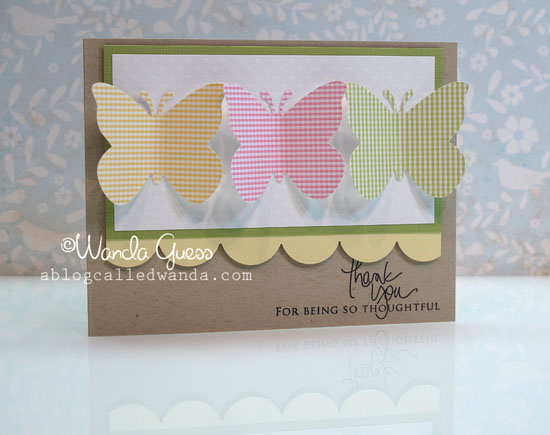
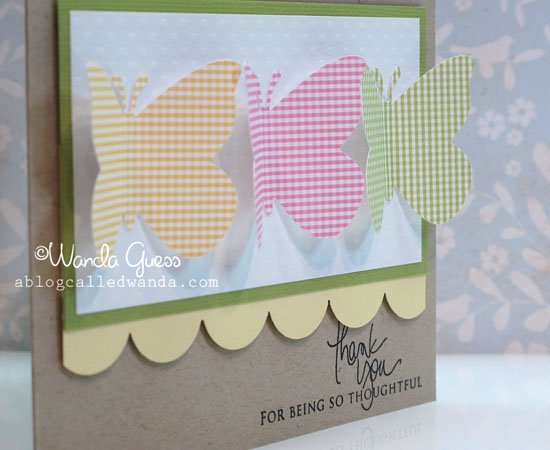
    Okay, so I was closing up shop after making the top card and something came into my head…GINGHAM! You guys know that comes into my head very often! hahaha. So I made the exact same card with gingham butterflies and substituted green for blue! Yay! The sentiments on both cards are from PTI.  

    IMG_8205


    IMG_8206


    IMG_8207


    IMG_8208


    The gingham butterfly card I made as a thank you card for my friend Jane who invited me up to the hills for dinner last night. I brought her a big bunch of sunflowers and that card. As I was driving up to her house I saw these AMAZING clouds in the distance. I had to take a snap out the windshield! Isn't that neat?  

    IMG_8215


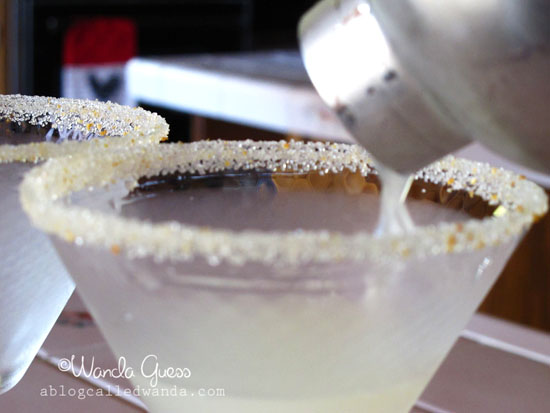
    And this is why Jane is my friend…(not really)…because she had lemon drop fixin's chilling in the freezer awaiting my arrival! Score! She found this cool lemon sugar stuff at BevMo and put it on the rims.

    IMG_8220


    Um, yes please!!!!!

    IMG_8221


    Wonderful! Drinks followed by a wonderful dinner and wonderful conversation late into the night. A perfect Friday evening.

    IMG_8222


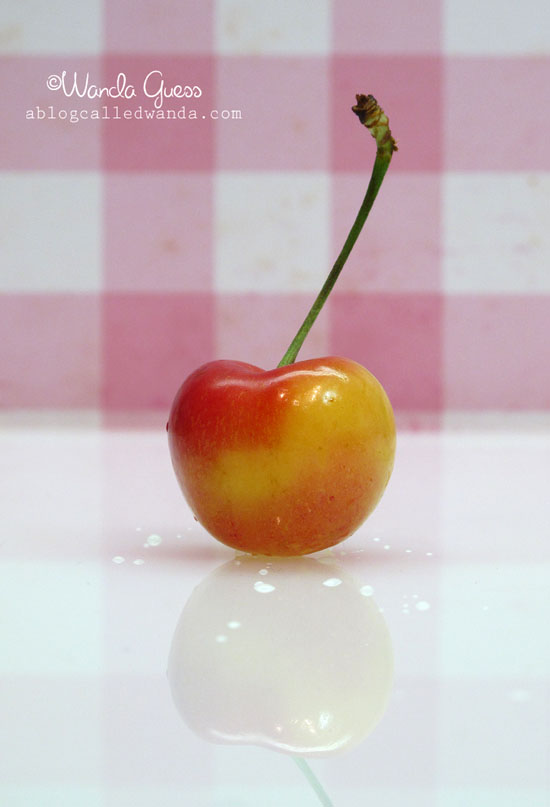
    I bought some Ranier cherries earlier in the week and went to eat them this morning and they were so lovely I had to take pictures. Yeah, I take pictures of everything! I think they're so colorful and simply perfect as only nature can do.  

    X


    Y


    Life is just a bowl of cherries! Happy Saturday!

    Z 
     Birdie signature! 

  • Have a Beautiful Day!

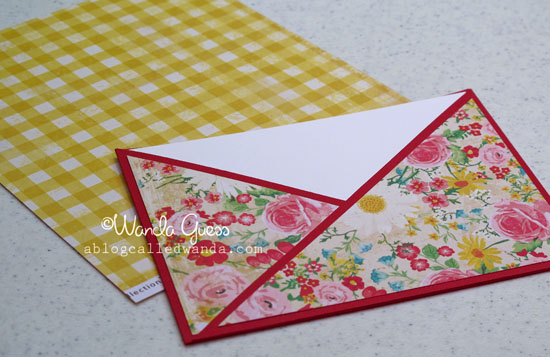
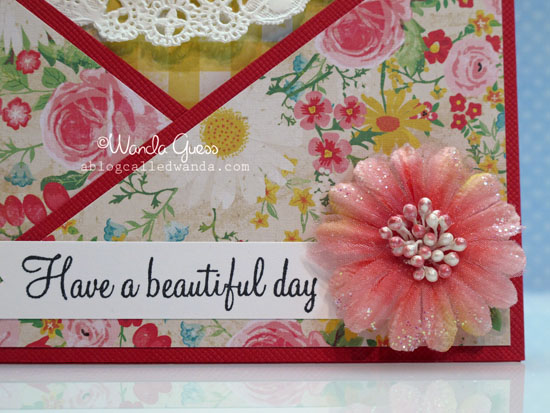
    Hello! Today I'm sharing a sweet birthday card I made for a sweet birthday girl! It's kind of a shabby chic confection sort of thing…full of color and girly goodness. I used one of my favorite card folds too. I used to make these cards a lot…but haven't for a while. You'll see what I mean. Hope you like it! Also, the week is going by at warp speed – so I hope you've had a great one! Thanks for coming by today! 


    A
     

    The inside pulls out! I added a birthday greeting and my own personal message after taking the pictures. I love this card design because you can go ca-razy with all your patterned papers! The sentiments are both from Amuse stamps.

    B 

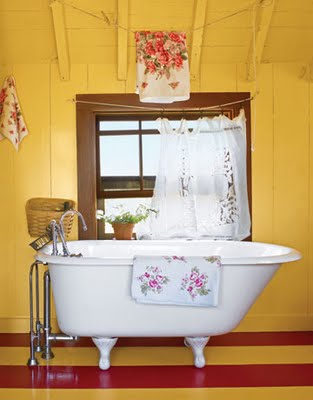
    This card is my entry for the Shabby Tea Room Blog Challenge Week #72! Look at this GORGEOUS inspiration image:

    Photo inspiration _72 
     
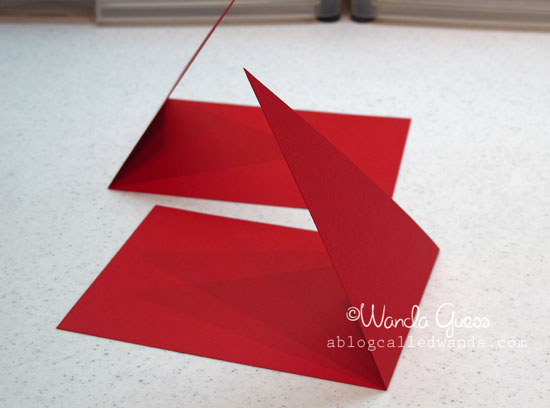
    The card starts as an 8 1/2 x 11 piece of cardstock scored down the middle, and cut in half the long way. Cut the triangle on your paper cutter but cutting the area in half. The two will then match up when you glue them together. Easy peasy!

    IMG_6862
     

    Don't you love all this yummy color?? I like that bright pop of red with the yellow and the flowers.

    IMG_6863 

    It needed something on the front, ya know! How about a bright pink flower? Why, yes, thank you very much!

    IMG_6967


    IMG_6969 
     Have a beautiful day, beautiful bloggy friends!
    Birdie signature! 

  • The Ocean….

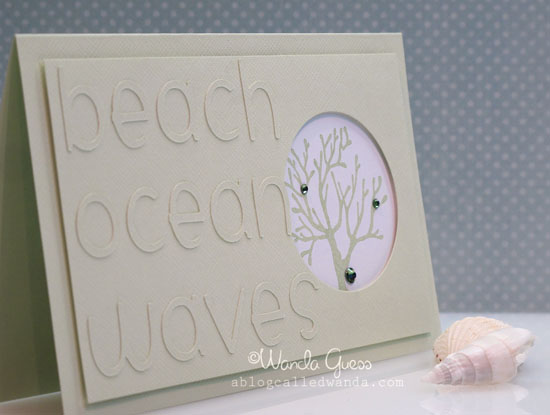
    Hello everybody! I hope that you all had a wonderful weekend full of summer fun! I am on my last day of a four day weekend and just hanging out in the craft studio making a card to share with you. My theme for today is the ocean…. Friday DH and I went for a marvelous, relaxing, wonderful drive to the Point Reyes National Seashore. We spent the entire day driving, talking, exploring and taking pictures. No TV, no internet, and, practically no people.

    I love the ocean. Really love the ocean. It is my favorite place to be. Sometimes I even get a physical longing to be near the sea. The fresh air, the fog, the cold, the sand, the smell. All of it. One day when I win lotto I will buy us a home by the sea. Until then, I am very lucky that it is just a short drive away. I took a lot of pictures on Friday (no surprise right?) and the pictures inspired me to make an ocean card this morning!

    1


    2
     

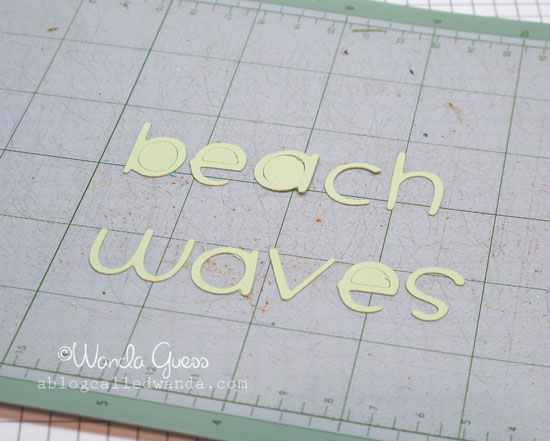
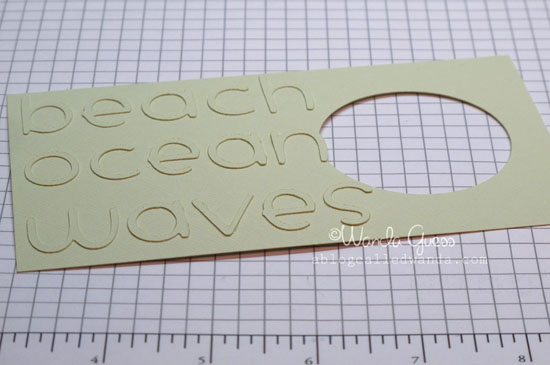
    I found paper in the lightest shade of beach-glass green. I cut out the words with my Cricut and glued them onto my background paper. (This idea was totally inspired by this post from Heather Nichols)  Yes, this did take forever…and required tweezers! I love the end effect though!

    3


    4
     

    I made the coral about five different colors and ultimately ended up using a green ink that matched the paper exactly. I added a few light green blings and mounted the top piece with foam tape. This card matches my mood. :-) 

    5
     

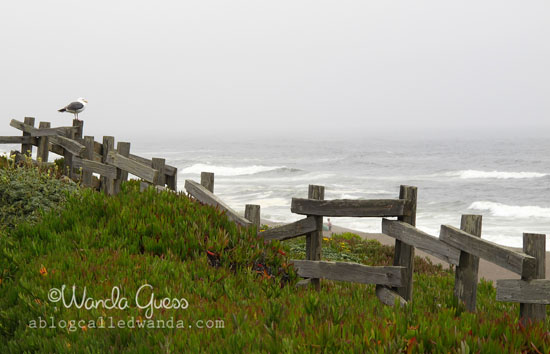
    Here are (some of) my ocean pictures from Friday. I hope you enjoy them! This first one is from North Beach.  

    6


    7
     

    This pretty algae is the other inspiration for my card. Not the color, but the shape and texture, made me get out that coral stamp. I loved how everything in this picture was in shades of tan, white, and stone. It was so pretty.  

    8


    9


    10
     

    This is Point Reyes Lighthouse. You have to walk about 1/2 a mile out and then walk down 300 stairs to get to it. I wasn't feeling up to the trek, but DH went and he took this awesome photo!  

    11


    This is looking down from the Muir Beach overlook. 12
     

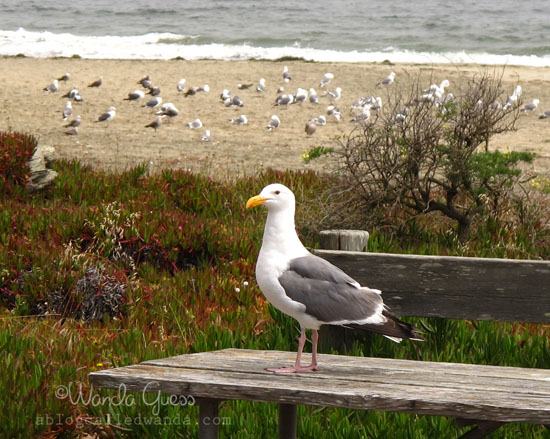
    Drake's Beach inhabitants!

    13
     

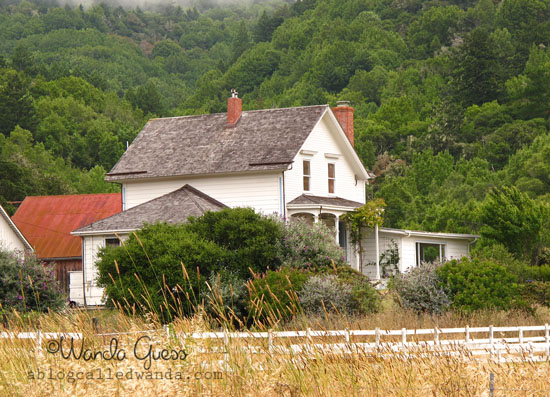
    The drive itself is lovely and peaceful…Isn't this a pretty house?  

    14
     

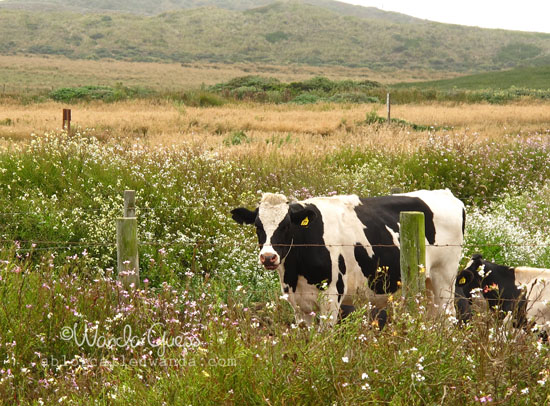
    All over the area there are working dairy farms that have been here for hundreds of years.  

    15
     

    Happy cows come from California!  

    16
     

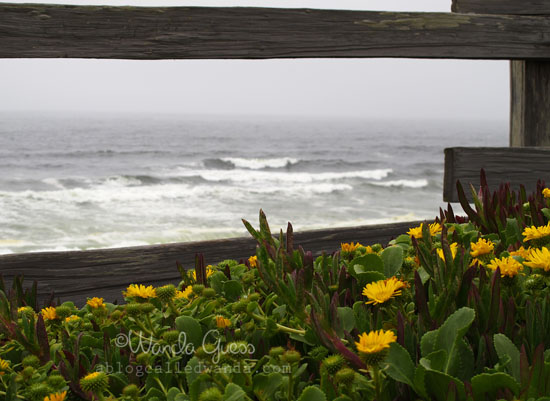
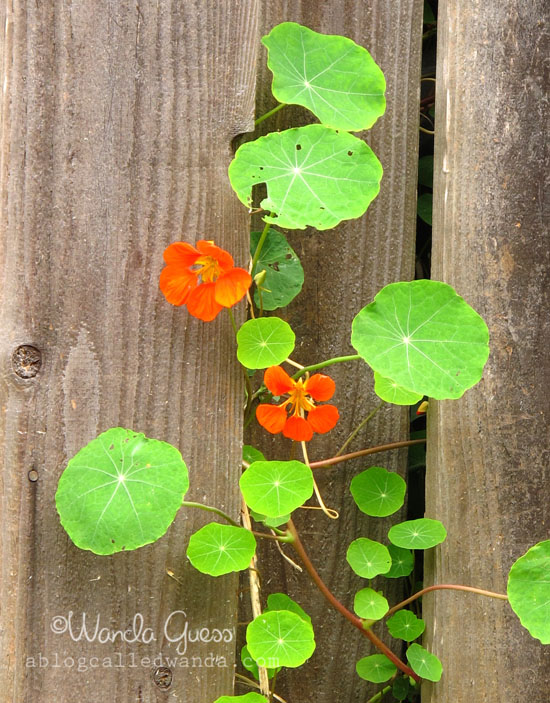
    The rest of the pictures are my favorite flower pictures from the day.   

    18


    19


    20


    21
     

    And finally…the lovely San Francisco Bay!

    22 
     

    DH makes these great videos of trips for us and he made one for me to share today. It's about three minutes long and has more of the ocean pictures…set to music.   


    I hope that you have a wonderful week! Thank you for popping by today – you make me happy!

    ImagesCA7AX9VL 
    Wanda 

  • Guest Designing for Scrapbuggy…Part two!

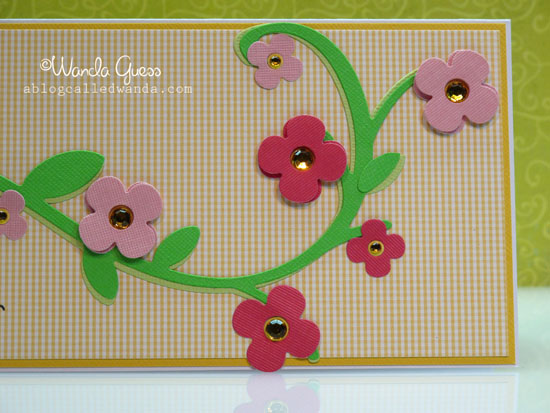
    Hi friends! Today I'm posting my second post as a Guest Designer for Scrapbuggy!  A while back I was contacted by the sweet owner of Scrapbuggy.com, Gia, and she asked if I would like to do some projects for her! Well…of course I said yes! She specializes in QuicKutz and she sent me some of her exclusive dies to play with. I posted some last Saturday and then this card today. Thanks again for the opportunity Gia! It has been so nice working with you!

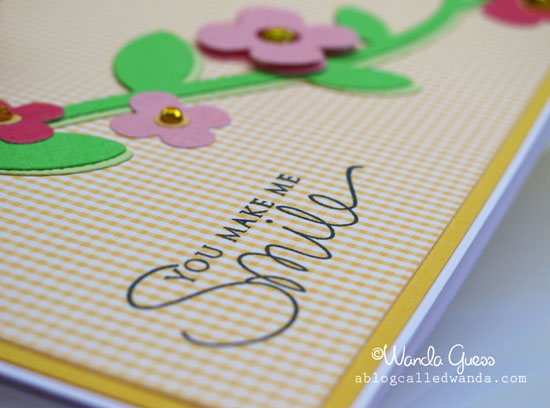
    This vine and flower die that she sent me is fabulous! It could work for a card, as I've done, or for scrapbook pages. It's large enough to cover a good size area. My finished card is 8×4 inchest to give you an idea of scale. I decided to make a happy summer card.

    A
     

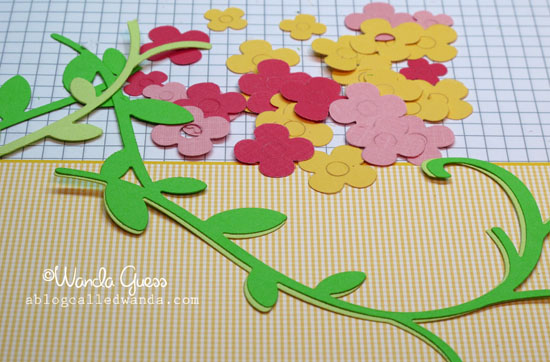
    I layered two different colors of green vine to add some interest and depth to the project. I used two shades of pink and then also popped up some of the flowers with foam tape. Added some yellow blings to the centers…voila!  

    B
     

    Here is my pile o' die cuts! Isn't this a happy sight?  Even though this die is on the large size, I cut everything out with my Cuttlebug.

    E


    C


    D

    Thank you for coming by the blog today! Have a very happy Saturday! I'm off to see some of my stamping gal pals in the bay area to have some pizza and gab the day away. I need to hear all about the Stampin' Up convention deets.  Cannot wait!!

    Birdie signature!