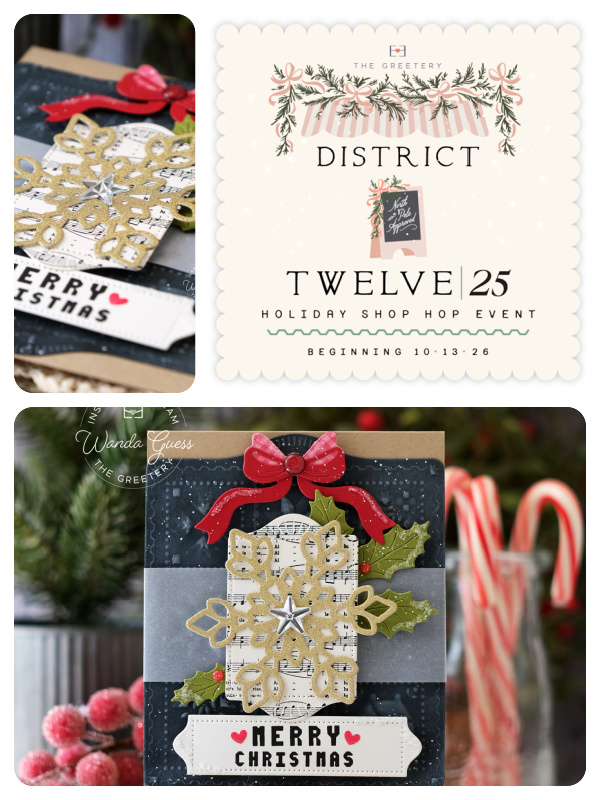
Woohoo! It was my pleasure to introduce the brand new District Twelve/25 Noel Needleworks Collection! If you scroll back to my last blog post, you can see all my projects from this part of the new release! If you have any questions – reach out!! Thanks for all the love and kind comments! Happy Creating! Can’t wait to see what YOU make!
And because a bunch of you emailed me individually (thank you) trying to figure out the commenting situation…I finally spent some time last night fixing that! Now, a comment box should appear at the bottom of all my posts! Whew. We have a lot more posts coming for The Greetery! I appreciate you guys so much!
If you would like to subscribe to my blog – and never miss a post – please sign up by clicking this link! I would love it! CLICK HERE TO SUBSCRIBE!
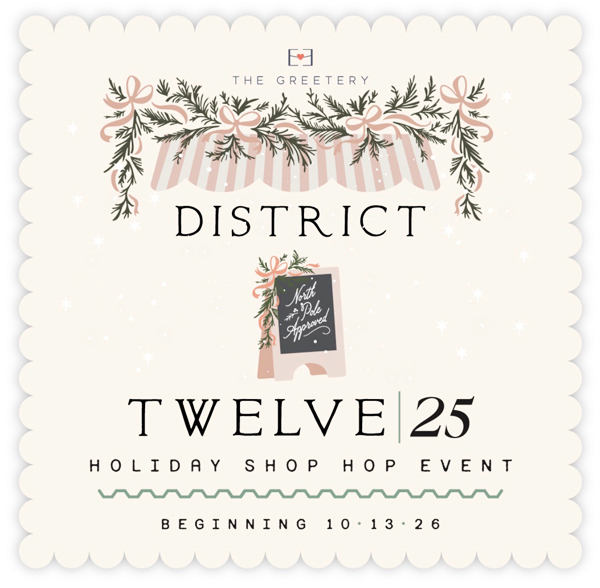
Hi everyone! It’s the most wonderful time of the year! Time for the Christmas Collection from The Greetery! This year’s collection is called District Twelve/25 and it’s MAGIC! There are so many new products! They are, as you would expect, classy and beautiful! It’s a huge release and this year Betsy decided to do something a little different with the release!
To quote Betsy: “We’re taking more of a bite-sized, slowed-down approach to our holiday release, but one that I am really excited about! We have 30+ new products waiting in the wings. For the past seven years, we have done one large, somewhat overwhelming (for me at least, and maybe for you too) release in October, and a smaller one in November. This year we’re taking a different approach… Beginning next week (today!), we’ll be taking a 6 week “Shop Hop” through District Twelve25…a line-up of quaint and cozy “shops”, filled with holiday goodies. Each “shop” is a themed group of products. Each week we will visit one shop…”
Today is the first day of the first week of the festivities! Today’s day is called Noel Needleworks! The entire design team and Betsy are sharing projects today. Then, this part of the new release will be available for shopping TOMORROW 10/15! Next week, we’ll do it all again. WOOHOOO! Ho ho ho indeed!
Today I’m sharing two cards made with the first set of new products. We are featuring the newest addition to the Capsule Collection. This new set of products is all built around quilting! Embossing folder, stencils, dies, stamps – all of it! And there is also a new addition to the Shortbread Shapes – which has a quilting theme as well. If you’re a seamstress or vintage girlie, you’re going to love this!
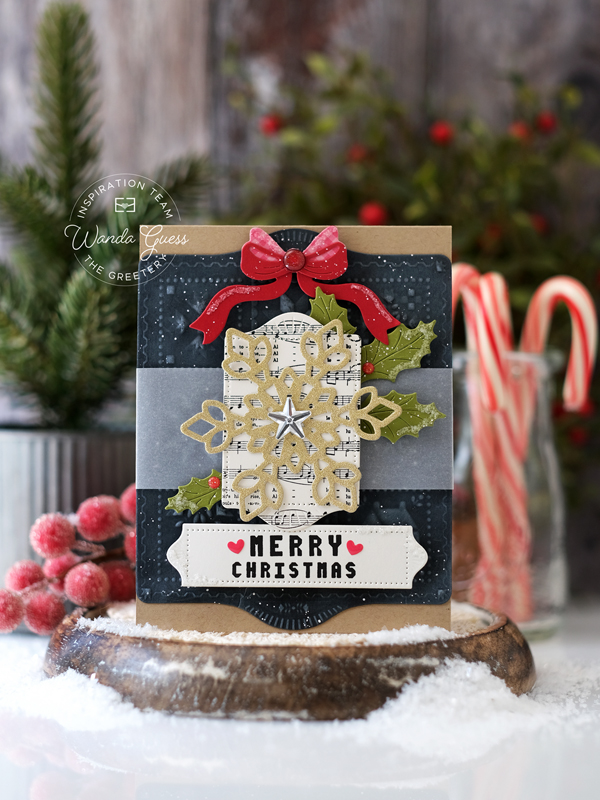
My first card today is a Christmas card that features the brand new Shortbread Shapes Quilt Blocks Embossing Folder. I combined it the brand new Capsule Quilt Shop Stamp Set, and many other favorite Greetery supplies. I created a classic traditional card with cream, red, and black – with pops of gold and green. My finished card is an A2 kraft card base. I layered the new embossing folder with black cardstock – inked with white ink to give that chalkboard effect!
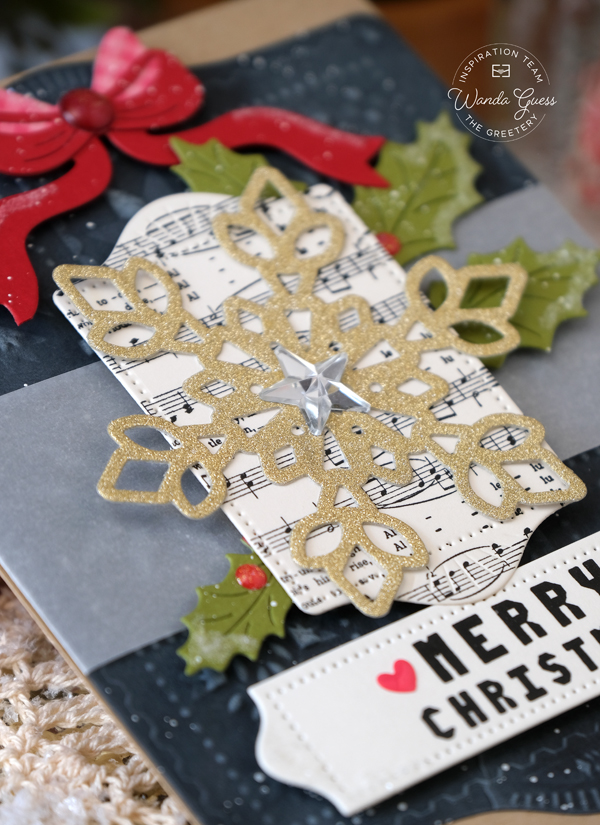
I used the beautiful Regency 2 Bow in red. I also used the Holly 2 dies to make some Christmas greenery. Here’s a close up of everything! I splattered on some snow and used chunky glitter too. All the good things for Winter!
The musical background is the Hymn Sing Stamp! I stamped it in cream with rich black ink to make my own background paper. LOVE! And a big gold snowflake fits on there perfectly….
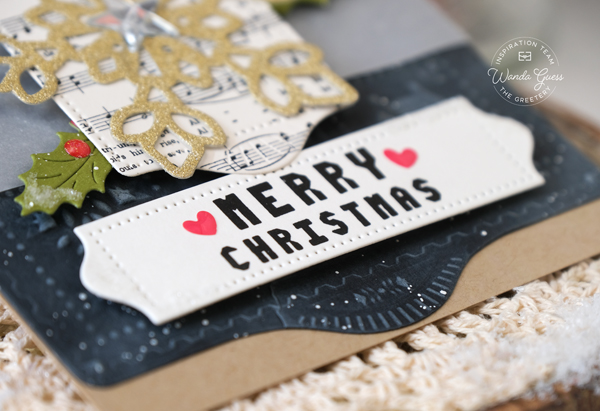
The new stamp set has lots of mix and match sentiments – and I chose Merry Christmas! (Of course)
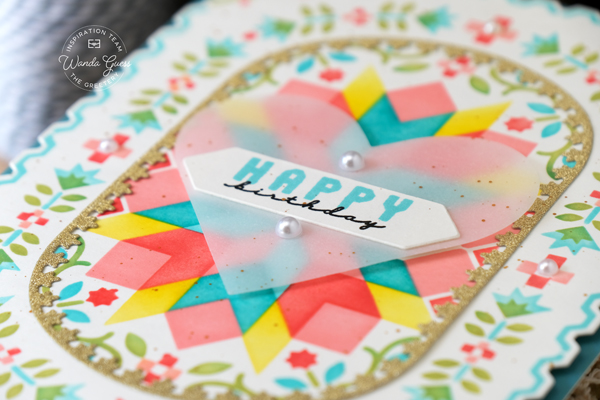
My second card for today is a birthday card with pretty pastel colors and pops of pearls and gold. This card features the brand new Capsule Quilt Shop Stencils and the new Elements stamp set. I also used the new matching dies. My finished card is a 5×7 card made from cream cardstock, covered in pretty teal cardstock – then that big stenciled panel. I used the Filigree dies to make a small gold border. I used the Whole Hearted Dies to create a vellum heart for my sentiment… I love the mix and match sentiments with different fonts!
I absolutely love Greetery stencils – they are PERFECT! They match up so crisp and detailed. I used shades of corals and teals with a little green and yellow. This would also be so pretty in Christmas or Valentine colors!
I used Distress Inks and blending brushes on a cream cardstock panel to create the pretty paper quilt!
That’s it for today’s post, and the beginning of fun weeks to come – exploring all the new products in the District Twelve/25 collection. Some tips about the new program…. The products in today’s post will be available tomorrow for shopping!
Each week’s products will be available as an easy-to-shop bundle, but the products will also be available individually! Orders will ship immediately (within our typical processing times) and will not be held/combined with subsequent releases. These are not limited edition products. Just like our other releases, if items sell out we will do our best to restock them as quickly as possible!
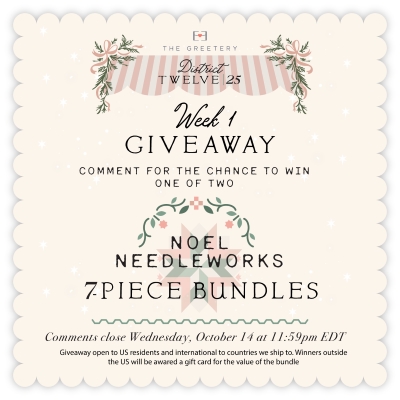
GIVEAWAY & PRIZE information is in the graphic below! Leave a comment to win a prize! Good Luck!
COMMENTING NOTE: On my new blog – to leave a comment, you must open the specific post first. Then the comment box will appear at the bottom. You can click here to make it easy!
Hey Boos! Happy Friday! I hope you’re having a delightful October so far! Today I’m sharing some fun Halloween cards for ya! I LOVE making Halloween cards! I’m running out of time. This month is going by so fast already. I wait all year for my favorite month!! This past Saturday, the 3rd, my hubs and I celebrated our 25th wedding anniversary! Yay! I am so blessed to have this man in my life! We had a lovely dinner out at our favorite restaurant Saturday night and this week we’ve been doing little adventures and celebrating together. You can see our adventures over on my Instagram!
We were scheduled to go on a good vacation this week, but I was laid off from my job in June – and that was very bad for my mental health and our finances. I’m grateful to report I got a new job a couple of weeks ago so I’m hopeful again that things are back on track. For the first time in my life I found myself without a job when I wanted one. This is no joke. The current job market is no joke either. If you know anyone looking for a job right now, please give them lots of grace and kindness. I’ve been truly humbled by this experience. Crafting and blogging has been my relief and fun.
Today I have Halloween cards from two of my favorite companies – Taylored Expressions and Concord & 9th! Oh yeah. Such cute supplies! There is not enough time to make everything I want to make!! So happy to share with you today.
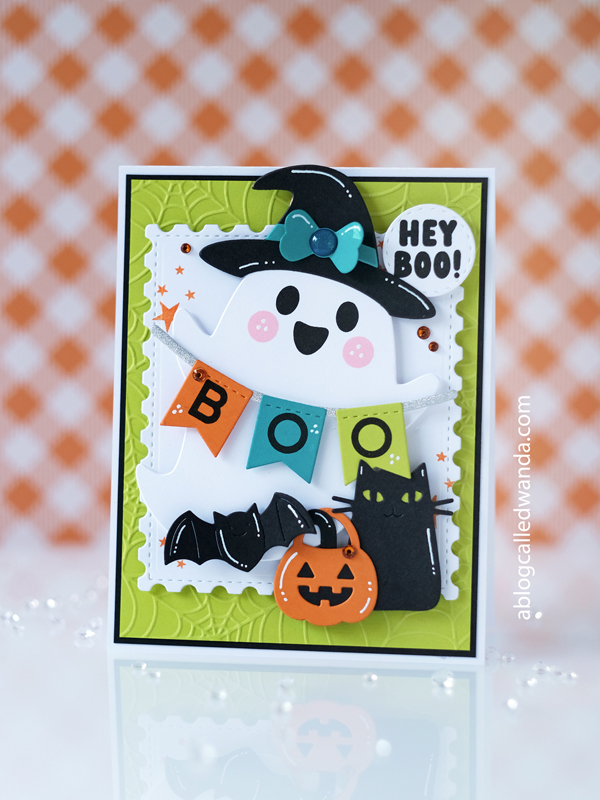
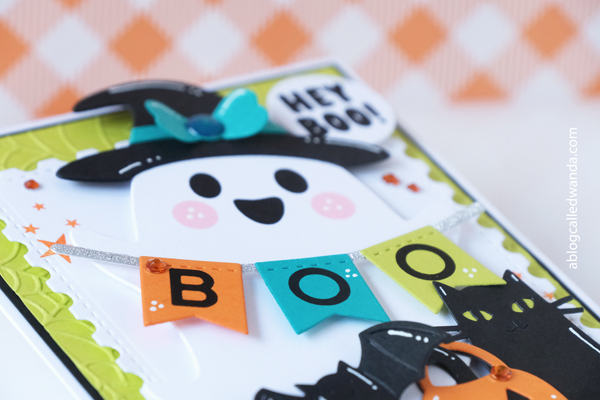
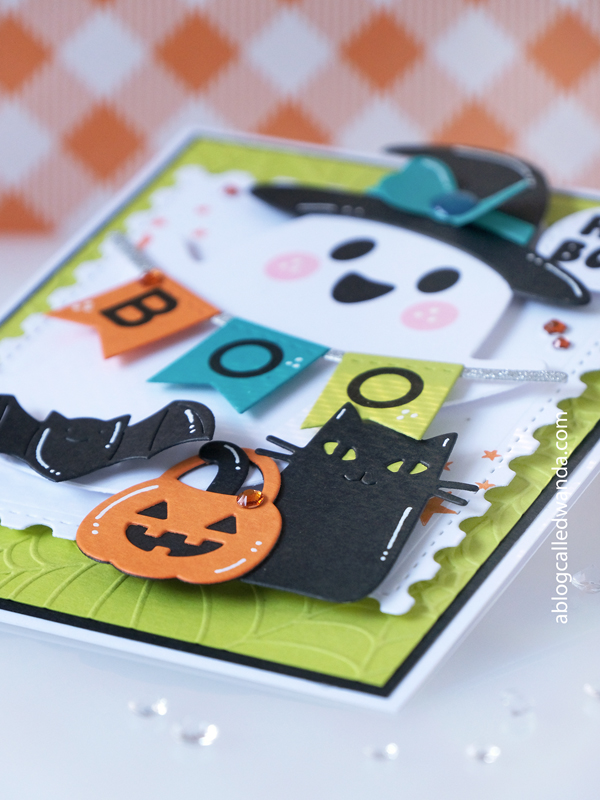
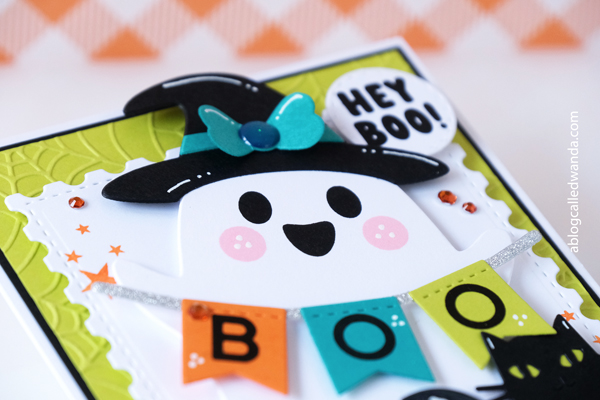
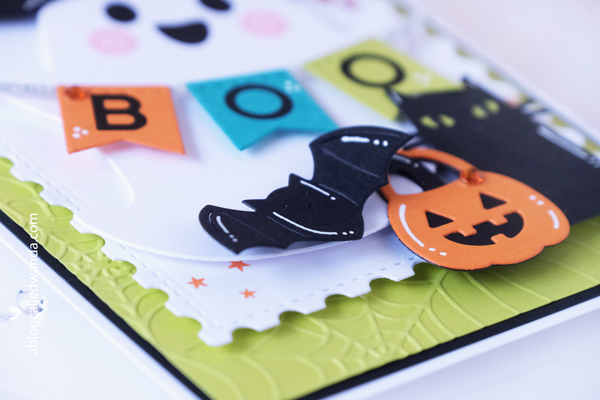
First up is this adorable ghostie bestie, made with supplies from Taylored Expressions! I used the Ghost Hugs stamps and dies to create this one. My finished card is an A2 white card base. I used a color palette of lime green, teal and orange and it’s so bright and vivid. The lime layer was embossed with a spider web embossing folder…. I die cut out the ghost, the cat (!!), the bat, the banner, and the pumpkin. I added white gel pen accents to everything. I stamped the face and the sentiment, the BOO and the little orange stars. A few colorful gems finished off the card. This one makes me smile!!
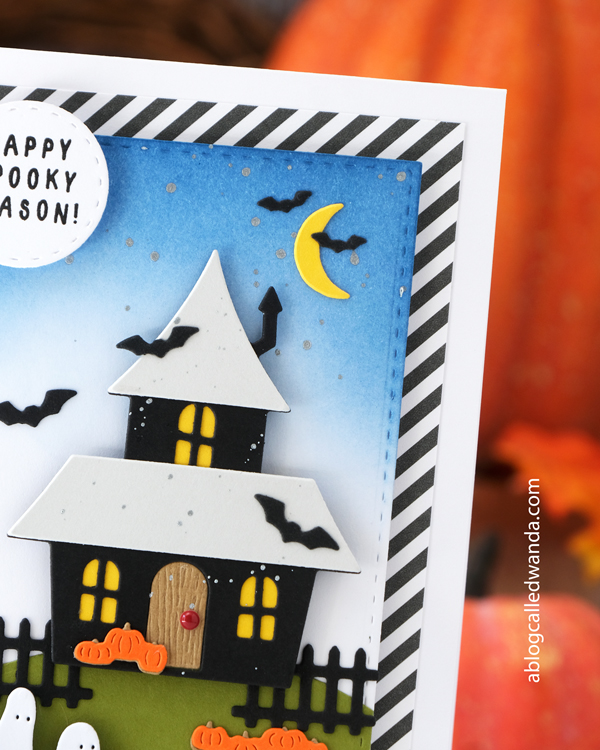
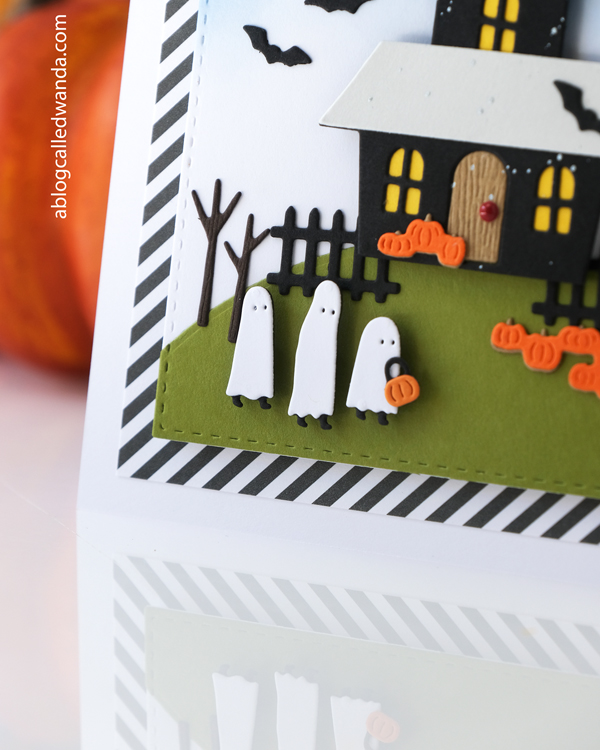
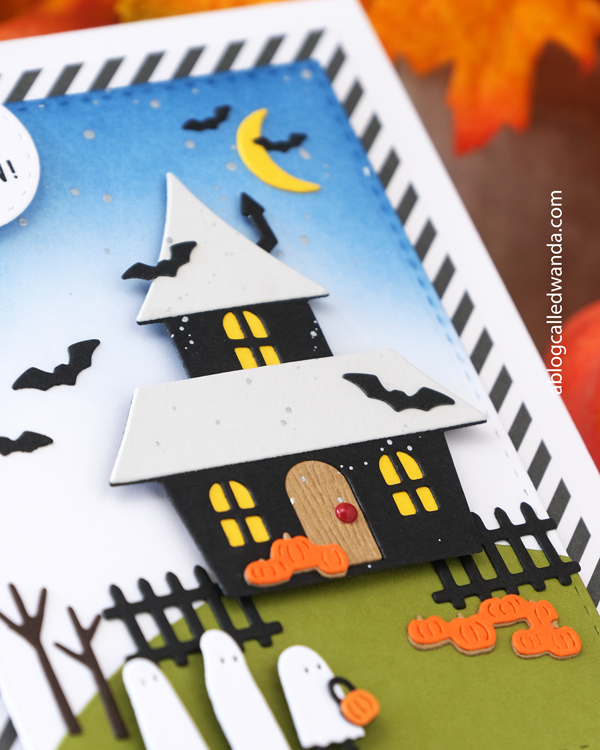
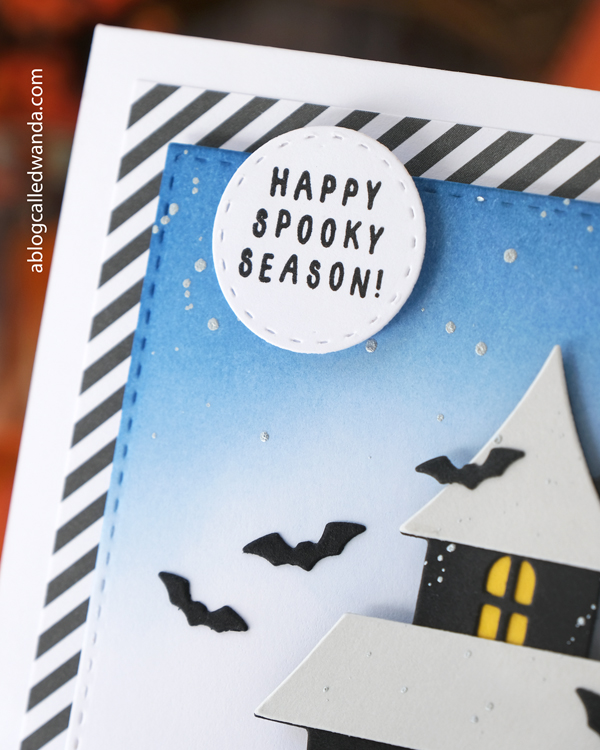
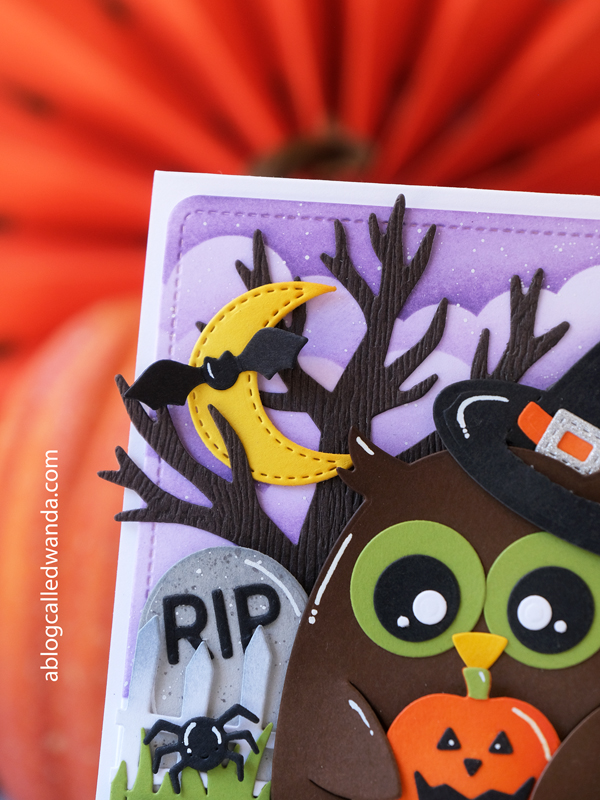
My second card today was made with supplies from Concord & 9th! Happy Spooky Season! This tiny haunted house and accessories are so fun. My finished card is an A2 white card base, layered with some stripes and then a white panel that I ink blended into a dusk evening sky! I used the Spook Alley dies to create a trick-or-treat scene… A teeny fence, little bats, and a little moon. And don’t get me started on those adorable ghosts!!
That’s it for today! Wishing you a wonderful October weekend! If all goes well, hubs and I are at the ocean today! It’s been over 100 degrees at our house all week (yuck) and we are definitely in need of ocean breezes! I will see you soon! XOXO
Hi creative and crafty friends! It’s my turn on The Greetery Blog today!! Happy Friday and Happy October! Also, tomorrow is my 25 year wedding anniversary! I love October! It’s officially time to make all of our Halloween crafts! The air is crisp (at least in the morning, ha) and the anticipation is here!
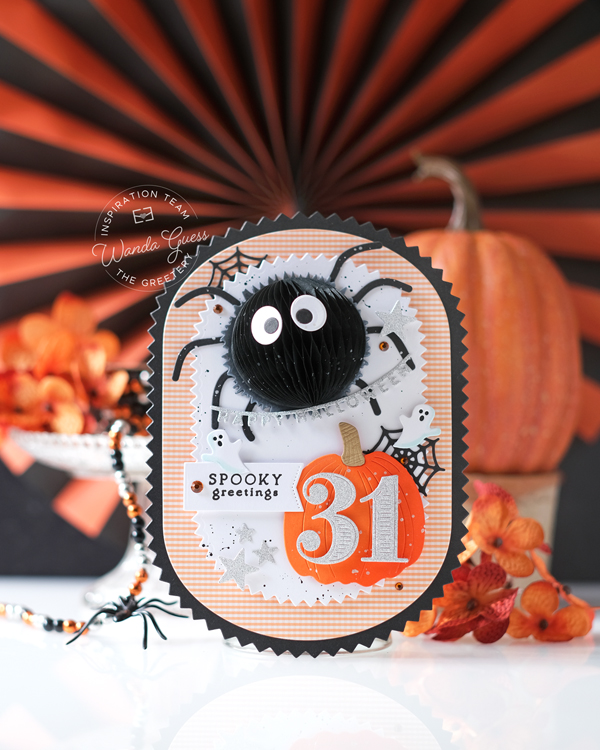
I do love everything Vintage and Cheery Halloween. So today I took the opportunity to use a lot of Greetery Supplies to create a fun Halloween card to share with you. My card was inspired by everything spooktacular! My card features that giant and cute Honeycomb Spider and one of the new Botanical Pumpkins, along with small accent dies from the new Eerie Avenue Dies. I mixed and matched all the fun things! Let’s get started!
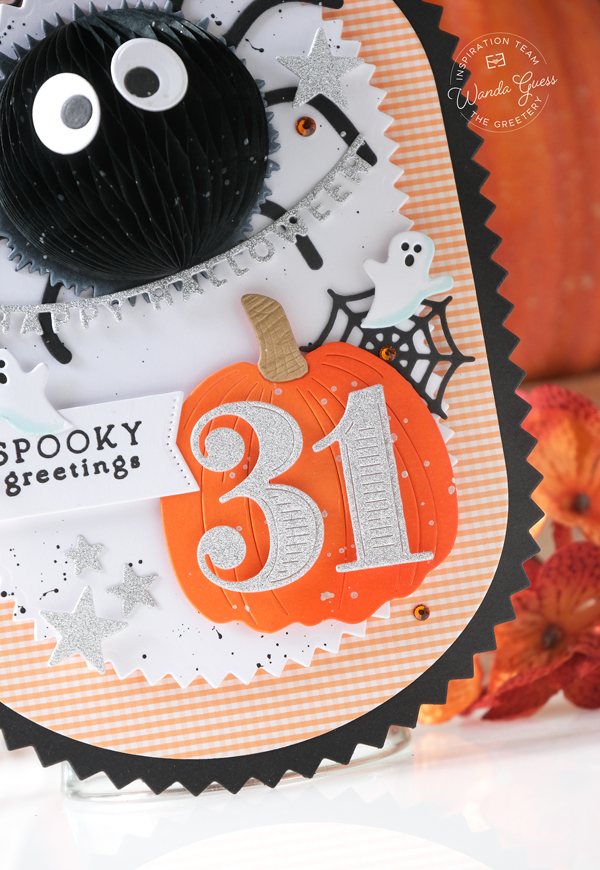
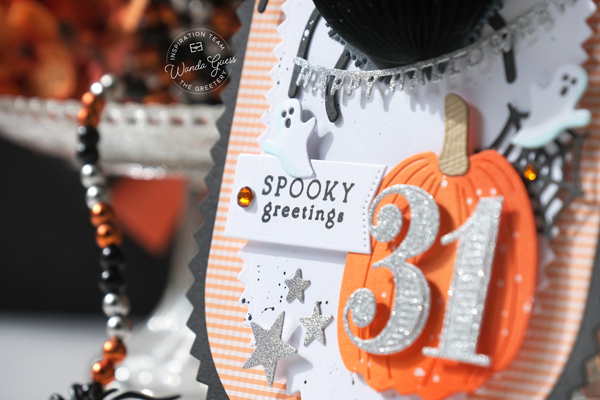
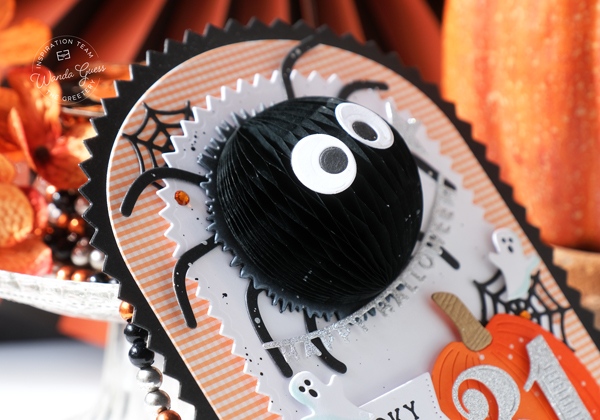
My finished card is approximately 5×7 and is made using the large Zig Zag oval from the Capsule Star Studded Borders. I used a few of the capsule shapes and layered black, gingham and white for the foundation of the card. I assembled the Honeycomb Spider and used the Halloween Honeycombs to make him black. I splattered on a bit of silver paint. I glued the eyes directly onto the honeycomb portion. Next I die cut out the Botanical Pumpkin and ink shaded it, and also splashed on silver paint.
I die cut the 31 numbers using the Bold Numbers Dies and metallic silver paper. Lastly I die cut out spiderwebs, ghosts and stars to accent the larger pieces. I used the Star Struck Die and the Eerie Avenue Dies. See how the spider is holding that fun banner in his legs!? Ha. The sentiment is from the new Simple Autumn Sentiment Mini stamp set. A few gems complete everything – I had to add more sparkle. I used foam tape to attach everything to the card.
That’s it for my project for today! Boo! Sending Spooky Greetings from my craft room to yours! I hope you have an awesome and creative day today. It’s my pleasure to share with you! I will see you soon…. In the meantime, happy crafting! XOXO
Greetings friends! This week, on Tuesday, was the first official day of Fall 2026! Yeah! My favorite season is here! We’ve been going to college football games already and the leaves are changing in my neighborhood. It’s still pretty hot here though! Longing for sweater weather and getting to wear cute fall clothes! Ha. It’s been a busy few weeks. We went to a great concert last weekend and we are enjoying the new season. There are new stamps arriving almost daily for Christmas (already) but that can wait just a bit.
Today I am sharing three FUN FALL cards I made with the awesome new Pretty Pink Posh release! There was a big Instagram Hop this week and today is my day to join the hop. CLICK HERE to leave a comment on my post for a chance to win a prize. I am so excited to share my projects from the release!! Let’s get to it!
I noticed after the last Greetery Release that I have a lot of new subscribers! Welcome! Thank you!
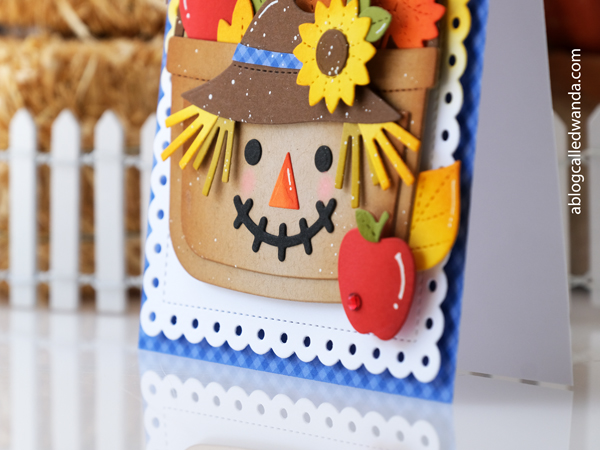
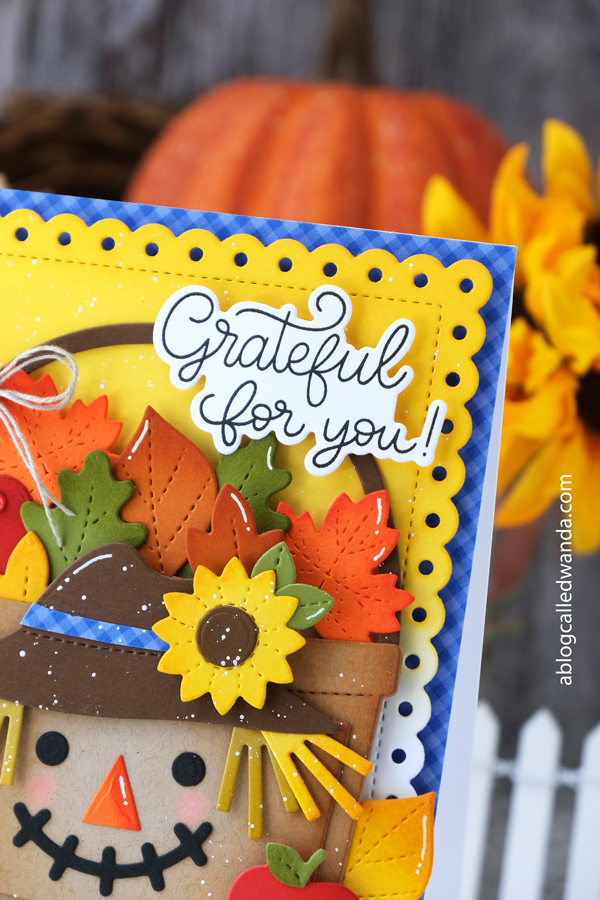
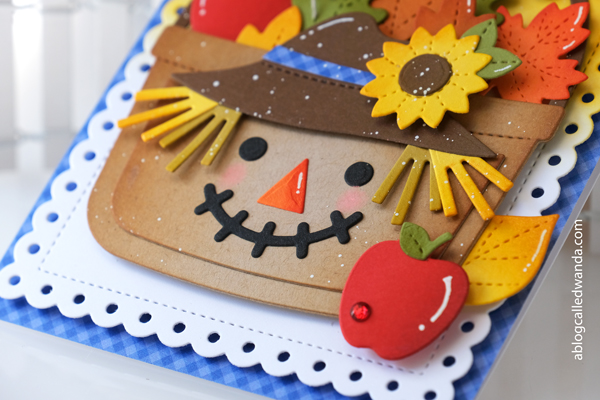
My first card for today features the brand new Fall Bucket Additions and the new Stitched Leaves (SO gorgeous), and also the new Happy Fall Stamp set! My finished card is an A2 card base covered in bright blue gingham (to offset all the warm tones). Next I layered an Eyelet Rectangle that I ink blended in honey yellows…. The star of the show is that adorable Scarecrow Bucket! I used the Candy Bucket Dies and added the Scarecrow accessories. I filled the bucket with leaves and apples. It’s the perfect Fall situation! The sentiment is from the new stamp set and I die cut it out with the matching dies. I gave him pink cheeks using some old craft chalk from my stash.
I ink blended around all the die cut pieces – I always love how that looks. I added a sunflower to his hat and splattered white paint on everything. I also added white gel pen accents. I made a little band for his hat using the same blue gingham paper. He looks happy I think!
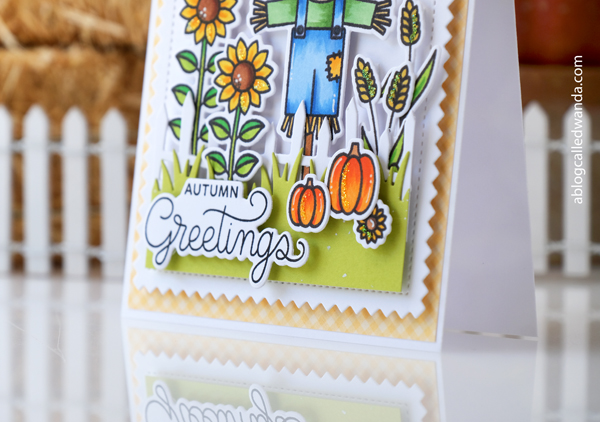
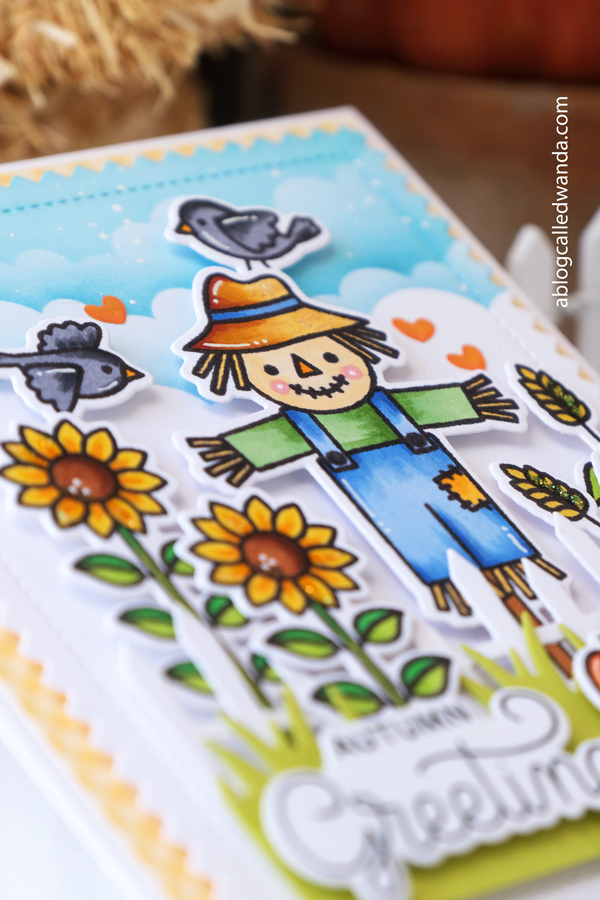
My next card features the brand new Fall Scarecrows Stamp Set along with lots of other PPP favorites… The fence, the grass, the cloud stencil, and the pumpkins! My finished card is a white A2 card base layered with yellow gingham, then a white Pinking Rectangle panel. I stenciled a bright blue sky for the background and it makes me smile! I stamped and die cut out all the pieces and colored them using my Copic Markers. I used white pen accents too and just a little bit of glitter. Isn’t this the happiest scene? I die cut some grass and combined it with the white fence and just kind of tucked the other elements into the fence. The sentiment is perfect!
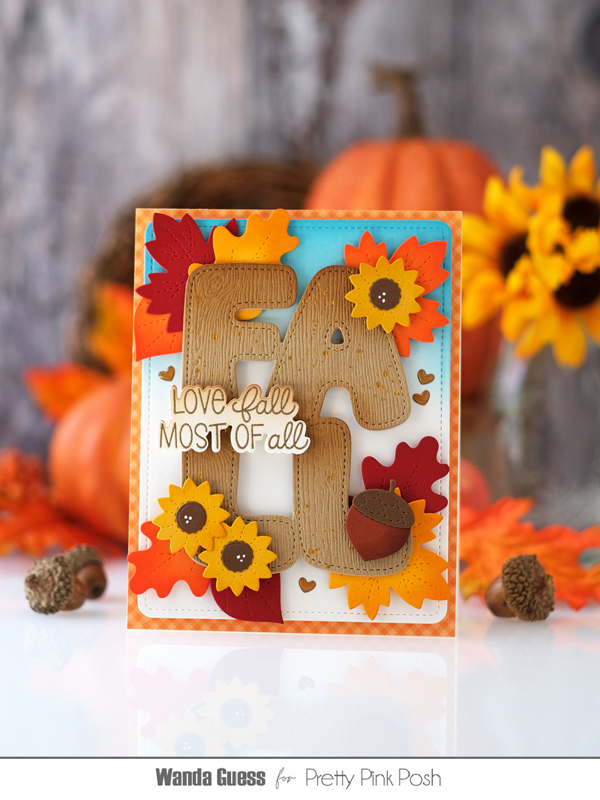
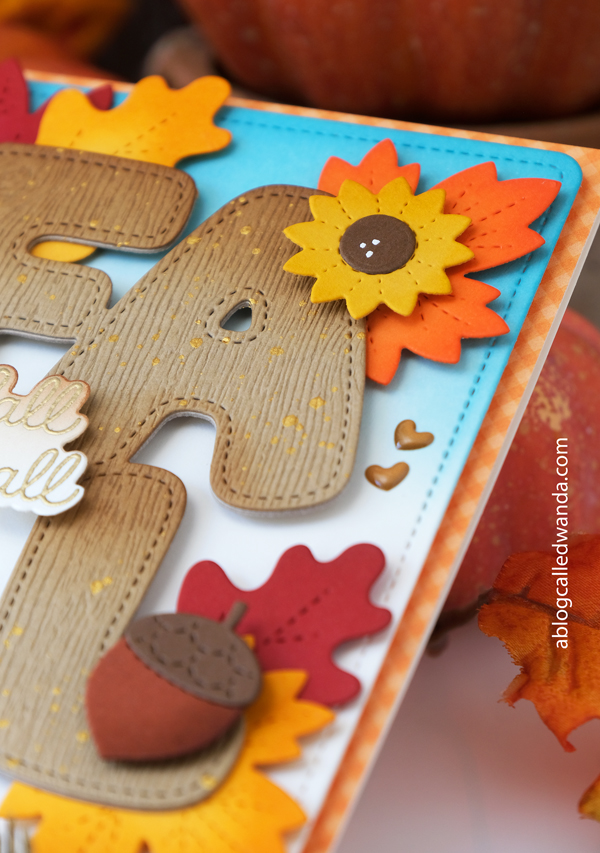
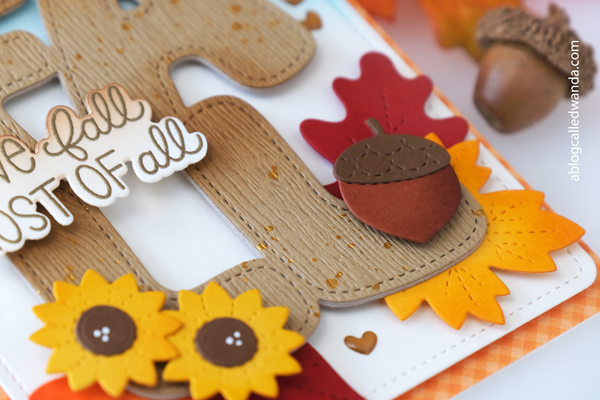
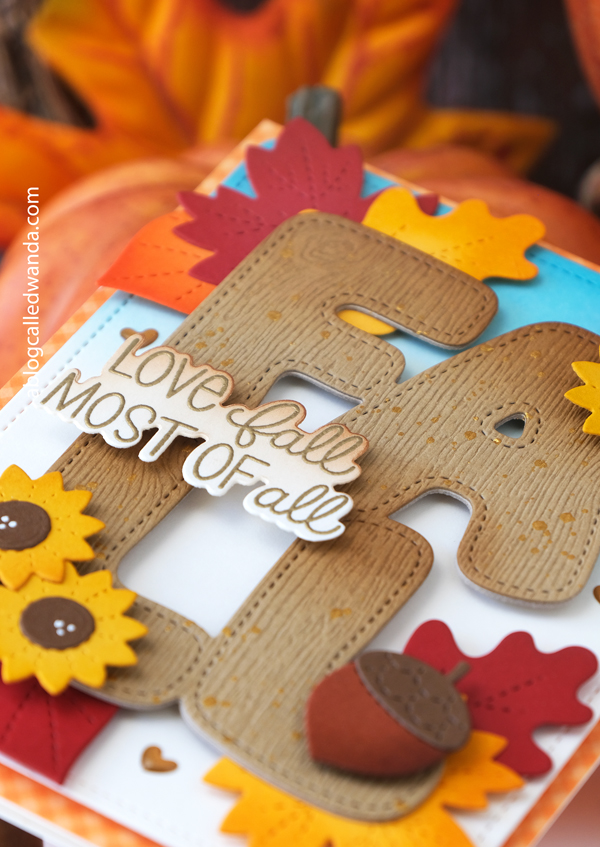
My last card for today is FAAAALLLLLL! hahaha. This card features the brand new Fall Word Shaker Dies, the new Stitched Leaves, the new Fall Holder Additions and the new Happy Fall Stamp Set! So much color!! My finished card is an A2 kraft card base, layered with orange gingham and then a Rounded Rectangle panel. I inked the rectangle with light teal to ‘ground’ the warm colors. I started by die cutting the FALL using woodgrain cardstock. I layered three of them to make it thicker and more substantial on the card. Next I die cut a bunch of leaves, sunflowers and an acorn from fall colors and inked everything with Distress inks. I splattered gold paint onto the woodgrain…. I heat embossed the sentiment in gold embossing to match the splatters. I attached the FALL word to the card and then layered the leaves in behind the word die. A few brown hearts finish off the card.
It is always always always my pleasure to share a new PPP release with you! I just love the happy stamps and dies that Paulina makes for us to play with. This particular release speaks to me since I love Autumn so much. I hope you’ve found some inspiration today and that you get out your supplies and craft!
Happy officially Fall! Take care and stay crafty! I’ll see you back here on Friday! XOXO
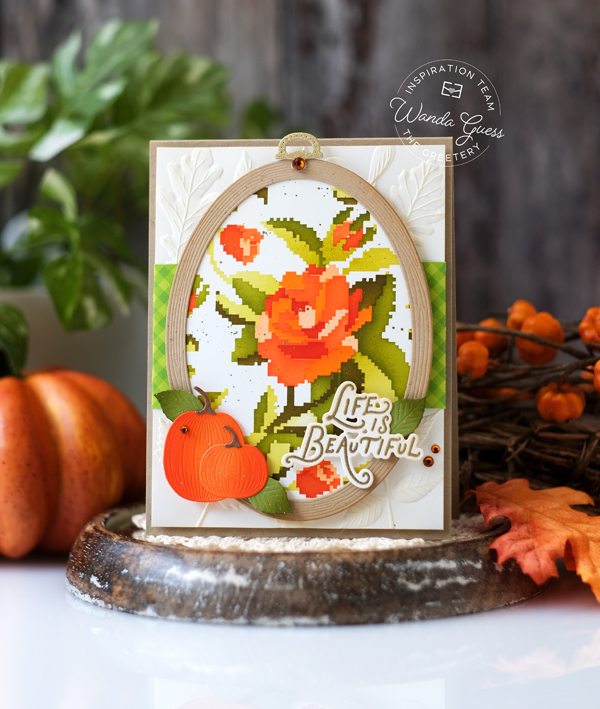
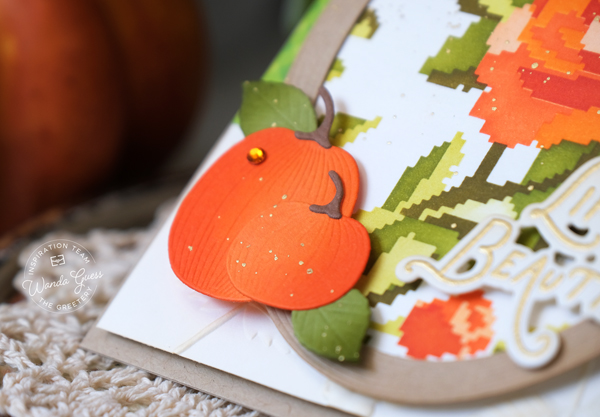
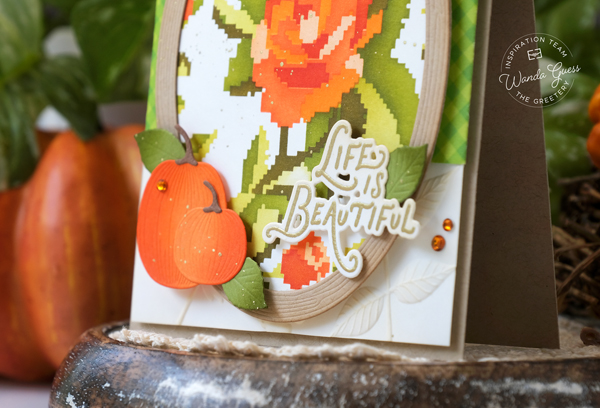
Hi creative and crafty friends! Happy Friday! It’s officially fully fall! We’ve been going to football games, and the mornings are cooler… I’m so excited! And, it’s my turn today on The Greetery Blog! I feel like it’s time to get ready for everything Autumn! I’m ready ready ready! My favorite season will go by so fast, so I have to get creating! Ha. I hope you are doing well and making some fun things in your craft room too. Today’s card was inspired by my love of cross stitch and my love of fall. I used the gorgeous Rose Tapestry Stencils in warm orange tones and combined it with a lot of other Greetery favorites. Let’s get started!
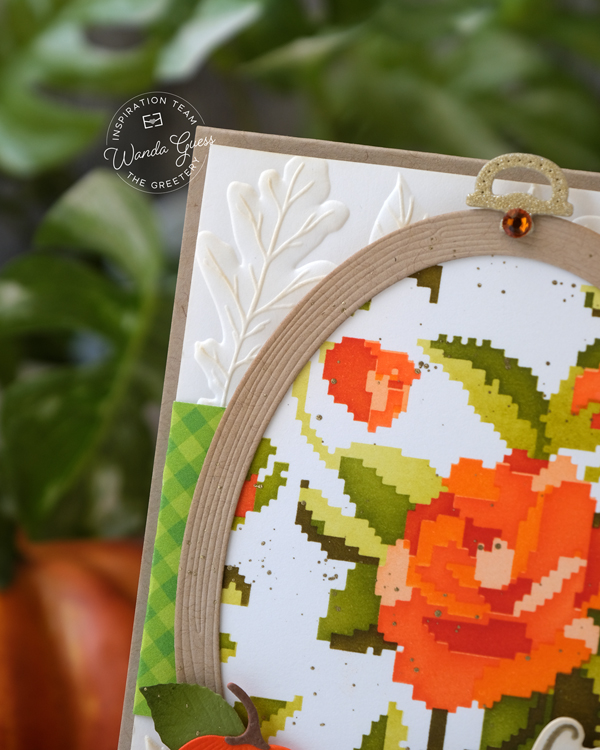
My finished card is a kraft A2 card base. I layered a cream panel that I embossed with the gorgeous Autumn Herbarium Embossing Folder. Then I layered a touch of gingham and then my hoop and ‘stitching.’
I started by stenciling the Rose Tapestry Stencils onto a cream panel. I used Distress Inks and blending brushes to get a nice even layer of colors. I then splattered warm gold paint over the top. I used the Hoopla Ovals Dies and the Hoopla Ovals Inserts Dies to create my embroidery hoop. I absolutely love how this looks – such creative products!!
I stamped and heat embossed the sentiment using the Rolling Hills Bella Terra stamp set and matching dies. So elegant! I used the Autumn Harvest and the Curio Autumn dies to add some pumpkins and leaves. I ink shaded my die cut pieces to add a bit of depth. I used a strip of green gingham paper to add a bit more color. The hoop is mounted onto the card using foam tape to make it pop. Finished up with a few orange gems.
That’s it for my project for today! I hope you are feeling the Autumn vibes with me! I loved using these stencils in pink tones when they were first released, and now I am loving them with orange. I hope you have an awesome and creative day today. Cheers to Fall Y’all! It’s my pleasure to share with you every month. I will see you soon…. In the meantime, happy crafting! XO Wanda
Happy Fall! So happy my favorite season is here! It was my pleasure to introduce the brand new and beautiful The Autumn Edit Collection to you this week! And, I hope you love it as much as I do!! YEAH! Happy Crafting!! If you scroll back to my last two blog posts, you can see all my projects from the new release! If you have any questions – reach out!! Thanks for all the love and kind comments! Happy Creating! Can’t wait to see what YOU make!
If you would like to subscribe to my blog – and never miss a post – please sign up by clicking this link! I would love it! CLICK HERE TO SUBSCRIBE!
First of all…. THANK YOU for all the comments yesterday on my post for Day 1! Wow – thanks for making me feel so good! I needed it. I appreciate every time you take the time to leave me a note. And I read all of them! THANK YOU!
Hi friends! Welcome back to Day Two of our showcase days for the Autumn Edit Collection new release from The Greetery! Did yesterday get you in the mood for the Autumn season? I am ready for apple cider and pumpkin carving and all the fall things. I am such a fall girlie!! I have three more projects today for you! Can’t wait…. Remember that release day is tomorrow, 9/9 at 10am EST. This is such a beautiful release! Classically Autumn! Let’s get started today… Thanks for joining me!
If you would like to subscribe to my blog – and never miss a post – please sign up by clicking this link! I would love it! CLICK HERE TO SUBSCRIBE!
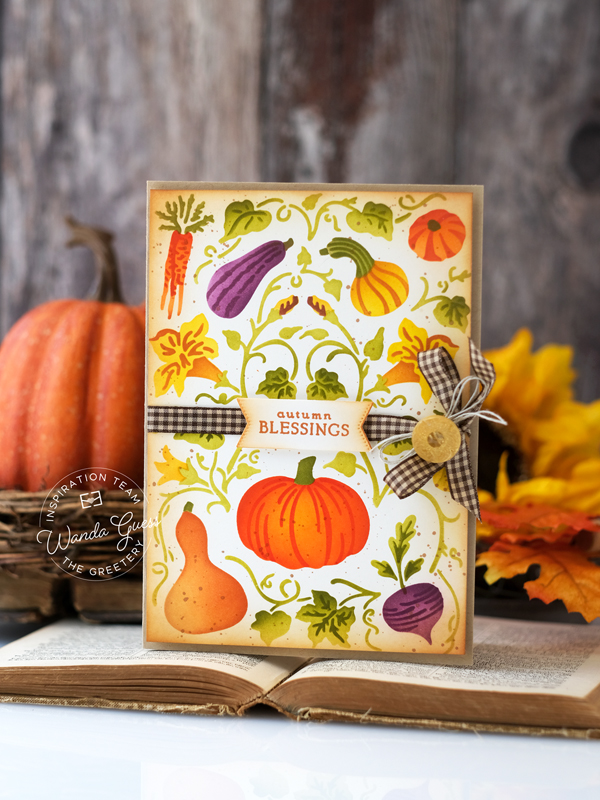
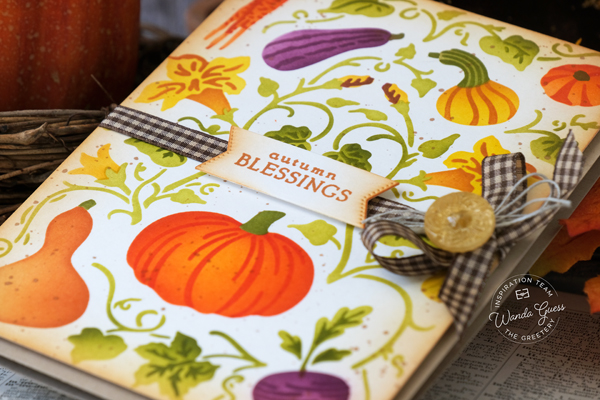
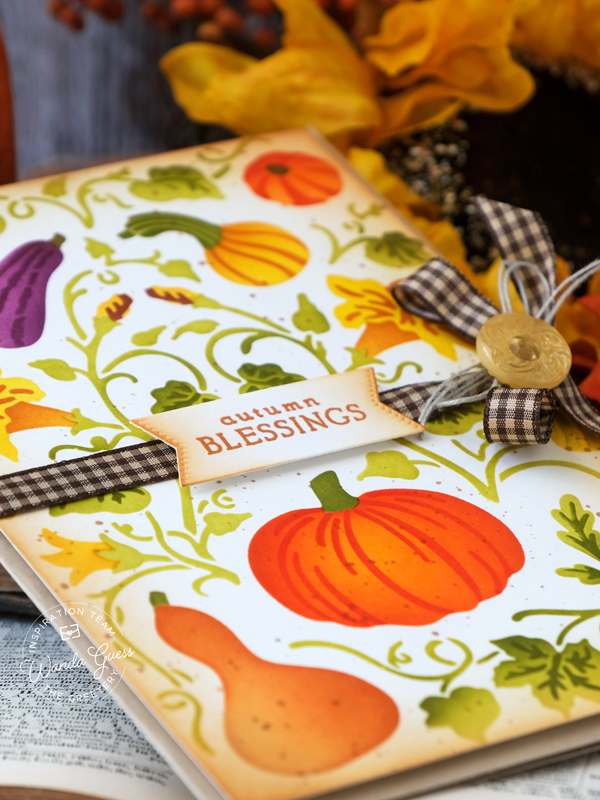
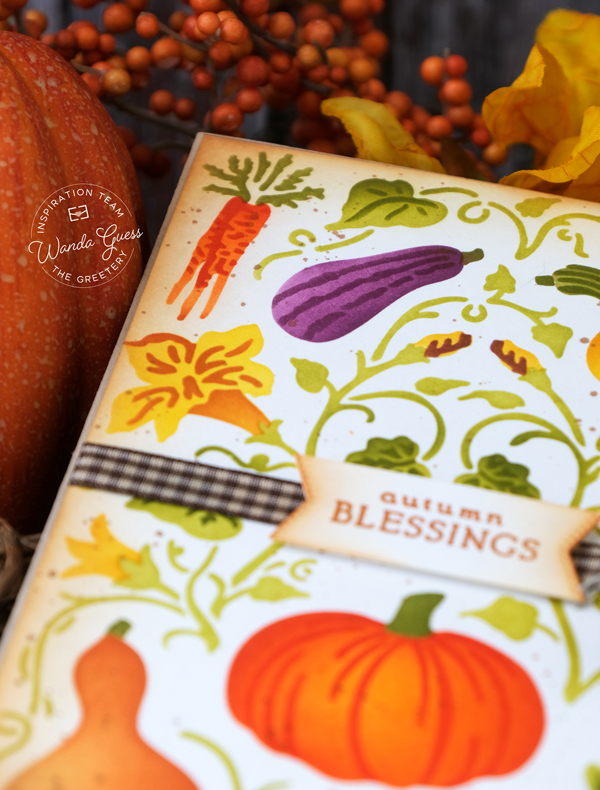
My first card for today is big and bold, and full of all the favorite colors of Fall! This card features the brand new Hand Picked Harvest Stencils! OH MY GOURD! This is SO pretty in person! Seriously, I had the most fun mixing and matching colors to stencil for this card! This is the entire panel…but there is also a matching embossing folder and a big die that cuts out all the different elements. (I can’t wait to see what everyone made with this one!)…. To me it ended up looking like an old vintage seed packet, so I left it as is, and made my entire card from that panel.
My finished card here is just slightly smaller than 5×7 and I mounted the cream stenciled panel onto a kraft card base. The sentiment is from the new Simple Autumn Sentiments Mini stamp set. I used just a few simple embellishments in order to feature those pretty, colorful images. LOVE this!!
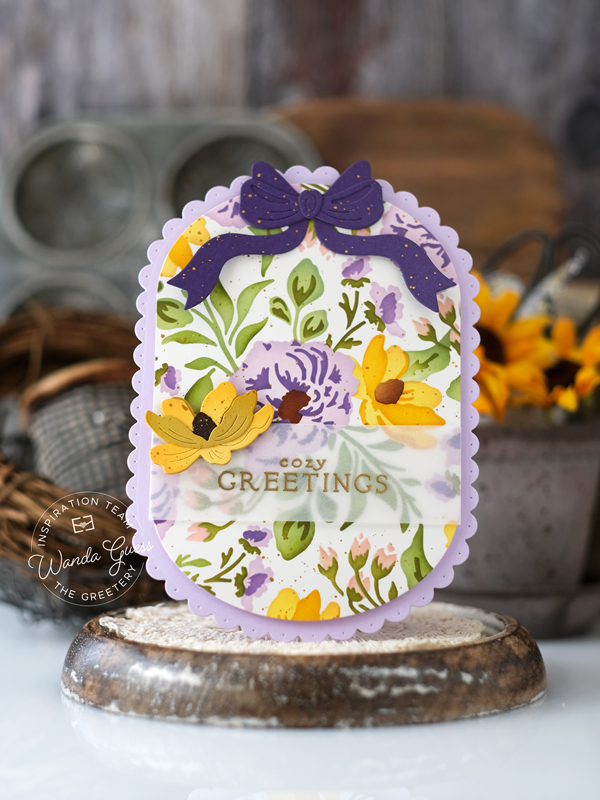
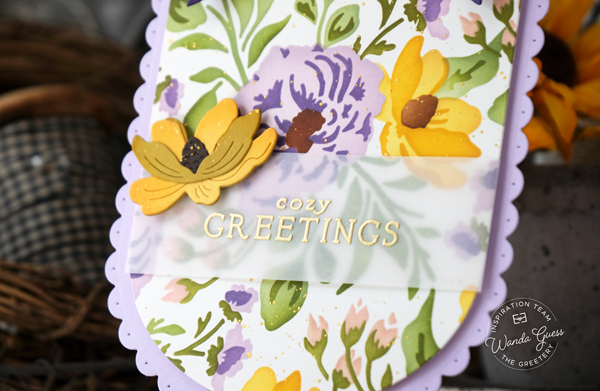
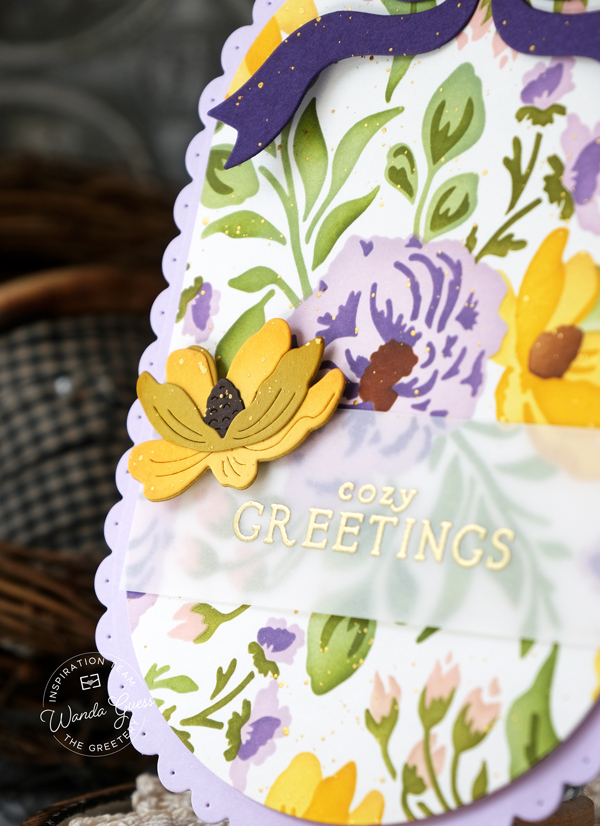
My second card for today is the only card that doesn’t have orange! Ha! One of my other favorite fall color palettes is golden yellow and purple…. This card features the brand new Wildwood Suite. There are Stencils, an embossing folder, and dies! I used the stencils and dies to create a pretty, cozy floral. I used the Capsule Basics as my layering pieces to create a sweet oval card.
I started this card by stenciling the gorgeous Wildwood Stencils onto a cream cardstock and then die cutting it out with the largest Capsule Basic die. I splattered on gold ink for a classy look. I die cut a purple bow using the Regency Bow 2 for a bit more color! For the sentiment I used the Simple Autumn Sentiments and gold embossed onto vellum. I die cut one pretty yellow flower as an accent. This card is perfect for any occasion! And I can’t wait to stencil these gorgeous florals in different colors.
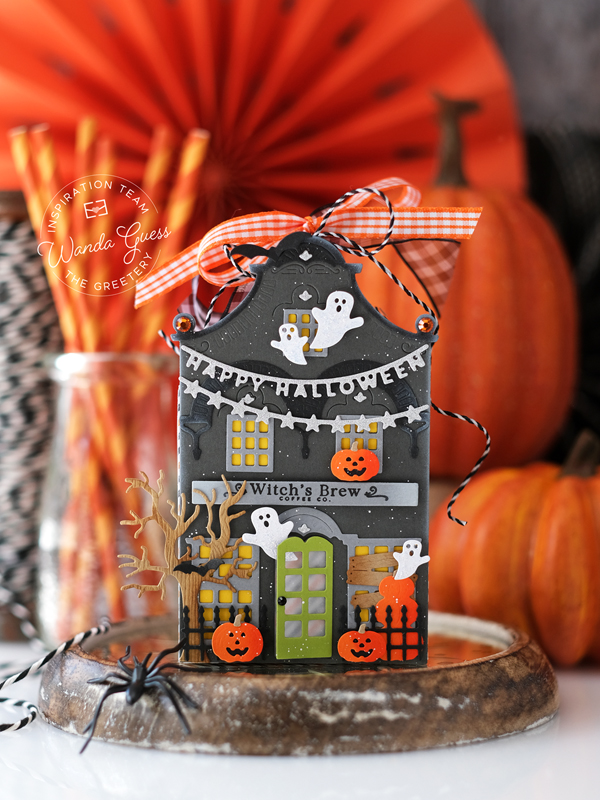
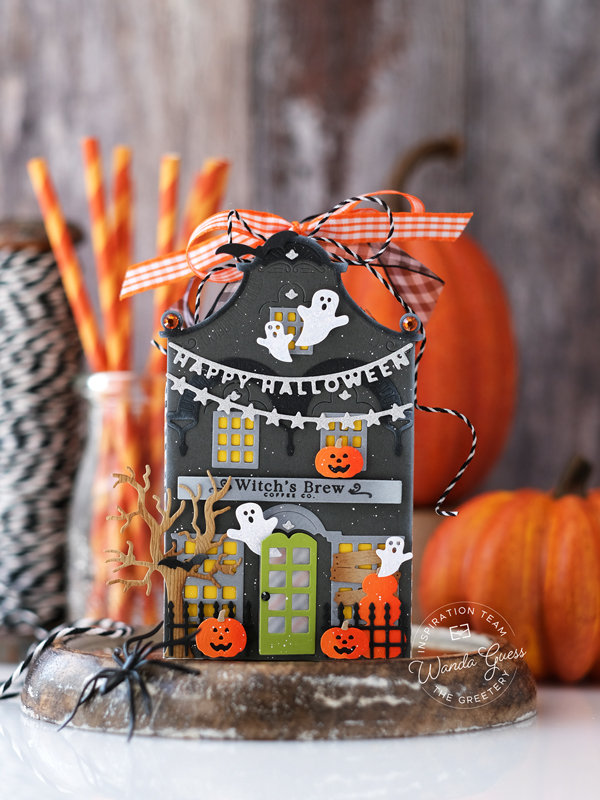
Okay, friends! One more final project for release week! Yeah! You know that I love Halloween and I love making treat boxes and bags…. Well, have I got a fun one for you today! This project features the brand new, latest addition to the Market Place series! This one is called Market Place Eerie Avenue! And it makes a (semi) haunted house! Gosh, it’s the best!
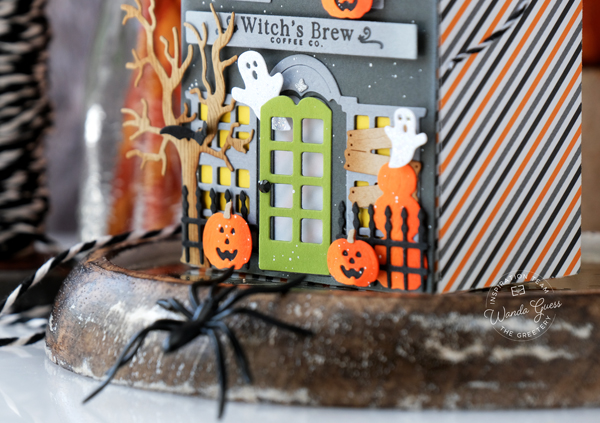
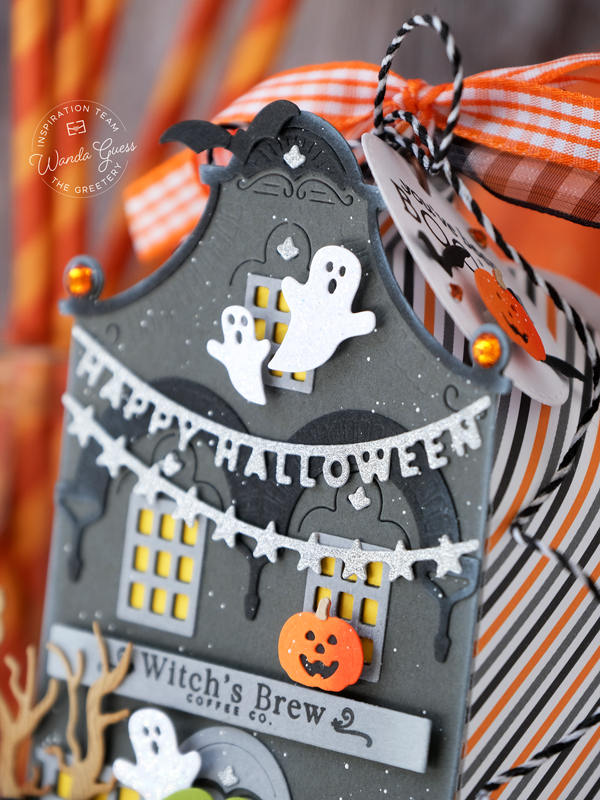
I used the Market Place 1 House along with the Large Arch Box and the new Eerie Avenue stamps and dies to create a spooky treat box. I just adore all the tiny little details and I know you will too – ghosts and bats and a tree and a little tiny fence, and pumpkins! Here is my treat box…..
Here’s a close up of some of the elements…. Little ghosties flying out of the windows. Boo! And the tiny banners… Of course my little house is a COFFEE shop! LOL.
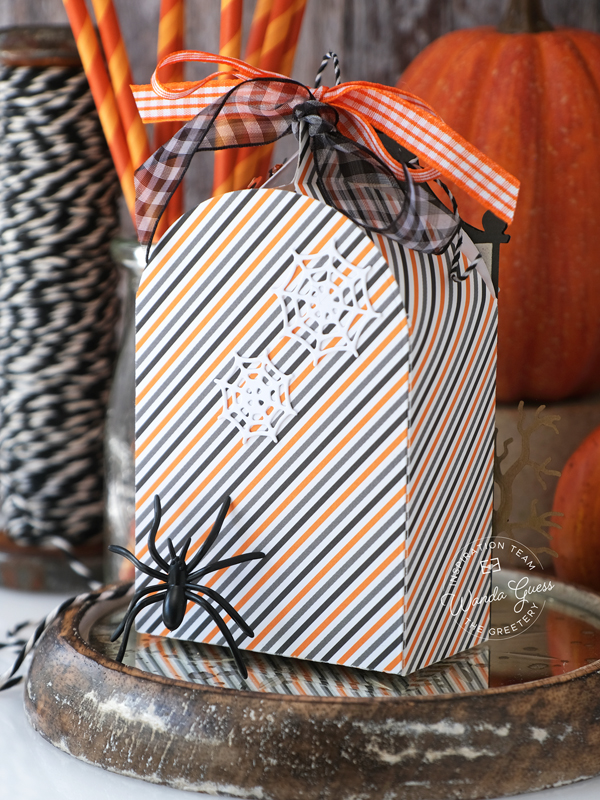
Here is the back of my Arch Box – I used some Halloween paper from my stash. The spiderwebs are part of the new die set. I tied the top using black and orange ribbons and twine…. Feels more festive that way!
I used a new stamp from the Simple Autumn Sentiments and a bat and pumpkin from the new dies to make a little circle hang tag for the top. You’ve been BOO’ed! Hee hee.
There are just too many details to list! That spook tree, and the boarded up windows, the fence, more pumpkins….It’s all fun and you can truly make it your own.
That’s it for today – and day two of our showcase of projects for the Autumn Edit Collection! Thanks for stopping by to share with me yesterday and today! It’s my pleasure to introduce the new release. TOMORROW is release day! YEAH!! Get your shopping list ready! Enjoy this new release and happy crafting!
Giveaway Information: The Greetery is giving away TWO $100 gift certificates each day (four total)! The comment deadline is 9/8 at 11:59Pm EST (comments from team blogs entered into giveaway). Winners announced on The Greetery blog on 9/9 at 7AM EST (right before the new products go live) GOOD LUCK!!
COMMENTING NOTE: On my new blog – to leave a comment, you must open the post first. Then the comment box will appear at the bottom. You can click here to make it easy!
Good morning my dear crafty friends! Happy Labor Day! Hope you have a nice day planned with family and friends – the official end of Summer – and the perfect time to think about Fall crafting! Guess what? I’m here today to kick off a new release from The Greetery! The new release is called The Autumn Edit! You know I love it already! Pumpkins and leaves, and pretty florals, and even maybe a haunted house! Lots of fun coming your way the next two days. Glad you’re here to share it with me! The design team will be showcasing our projects today and tomorrow and then release day will be Wednesday, September 9th at 10am EST. I have been so excited to show you everything! Three projects today, and three more tomorrow! WOOT! I’m hoping to inspire you and make you smile! Let’s get started, shall we?! The Autumn Edit begins….
If you would like to subscribe to my blog – and never miss a post – please sign up by clicking this link! I would love it! CLICK HERE TO SUBSCRIBE!
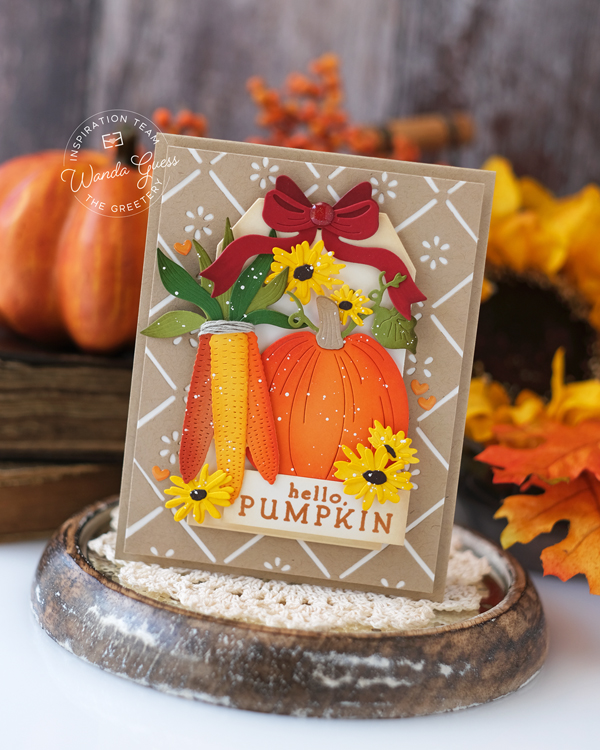
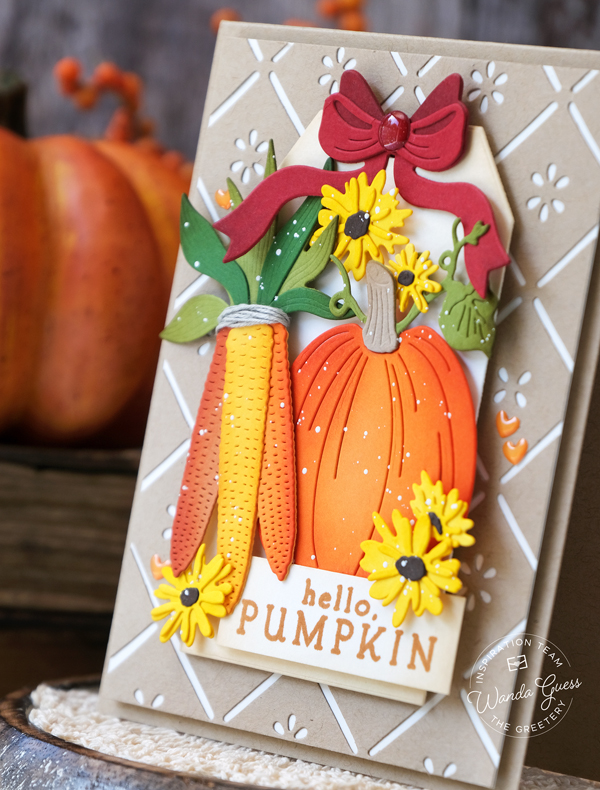
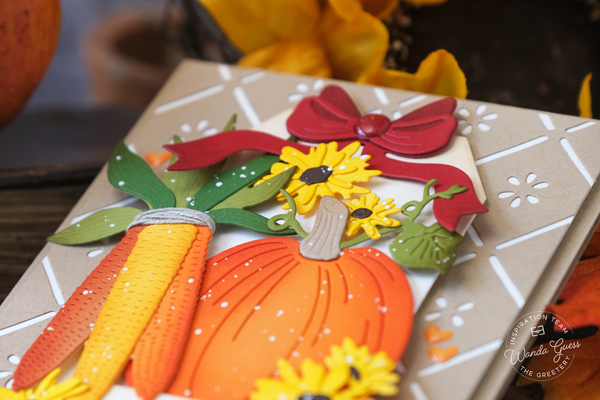
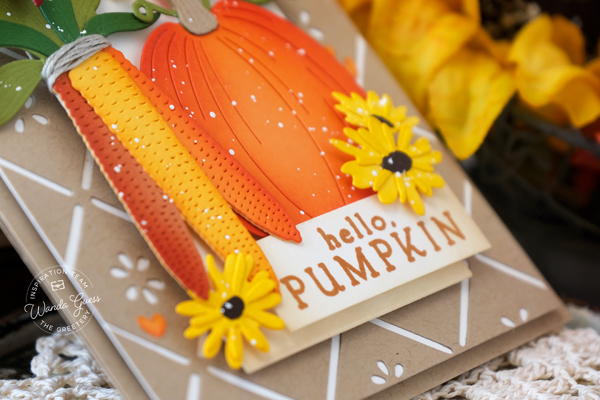
My first card for today features a few of the new Bigger Autumn Botanicals Dies – the corn, the pumpkin and the mums… SO pretty and so easy to mix and match into your Fall projects. I combined the new items with some previously released favs – like that pretty Cottage Tile Background… My finished card is an A2 kraft card base layered with cream and kraft and then a fall tag! The sentiment is from the brand new Simple Autumn Sentiments stamp set!
I die cut out all the pretty elements: the corn, mums, pumpkin and bow and inked the edges of everything with matching Distress Inks. I die cut out a tag using the Tag Team dies and this is the Regency Bow 2. It all goes together so beautifully! I arranged everything onto the tag using foam squares and created a fall arrangement….
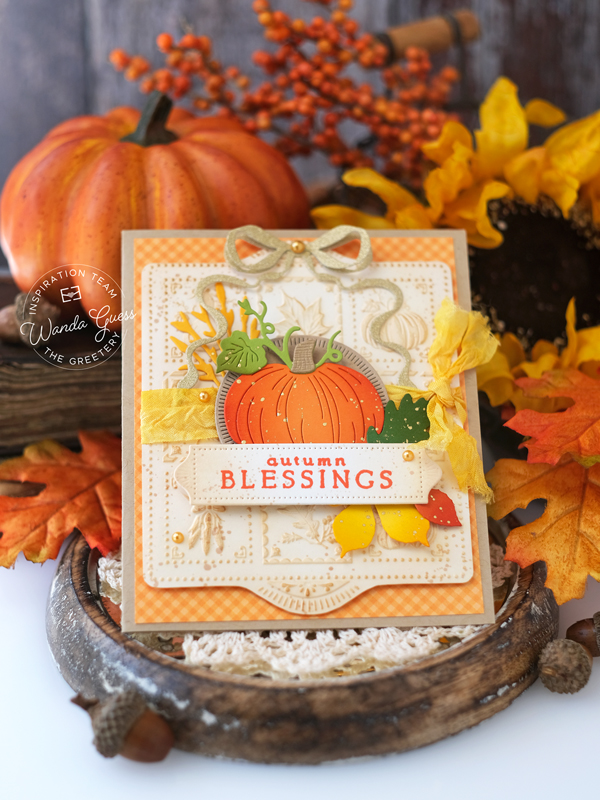
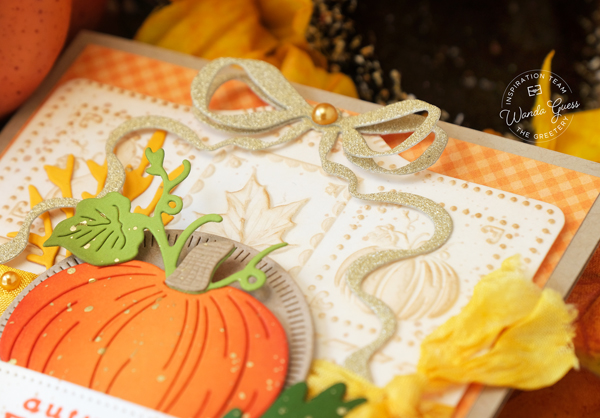
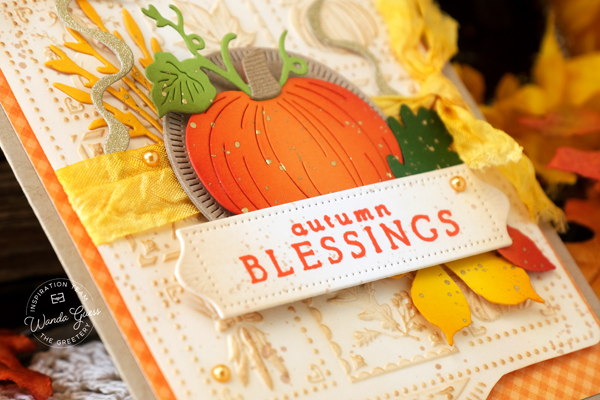
My second card for today is another Autumn bonanza! This card features the brand new Shortbread Shapes Autumn embossing folder and the new Bigger Autumn Botanical Pumpkin and the new Simple Autumn Sentiments stamp set. More fall colors and delicious textures from the gorgeous embossing folder! My card is a kraft card base layered with a bit of orange gingham and then the shortbread panel die cut from cream cardstock….
Here’s a close up of the elements…. I started by embossing and die cutting the backgound panel. Then I die cut out all the shakes and inked them. I coated them with pretty warm gold splatters too! I wanted this card to look vintage so I used some crinkle ribbon and warm brown ink blending in the background. I used foam squares to mount the elements onto the card.
A beautiful gold bow makes this card look complete! And a few pearls too! I am obsessed with all these warm hues and all that gorgeous orange!!
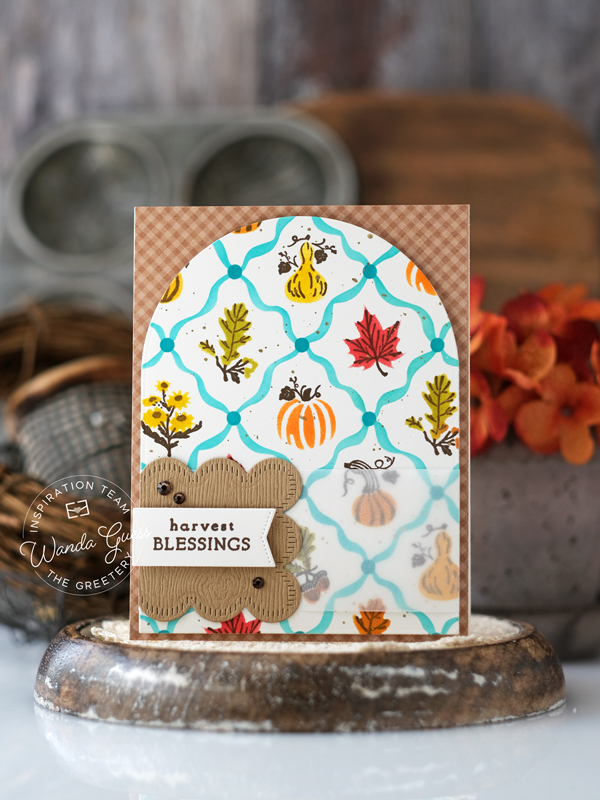
My final card for today features the newest addition to the Bitty Botanicals lineup! This card features the brand new Bitty Autumn Botanicals stamps and stencils. My finished card is a cream A2 card base layered with brown gingham. I stamped and stenciled the Bitty Botanicals and then die cut my panel into an arch! This card is clean and simple…. I used the previously released Diamond Ribbons stencil for the teal portions. (I love a pop of teal with fall colors!)
That’s it for today – day one of the showcase of projects for the The Autumn Edit Collection! Thanks for stopping by to share with me today! It’s my pleasure to introduce the new release. I will be back tomorrow with three more projects!! YEAH!! Don’t miss it!! Happy Fall Y’all!
Giveaway Information: The Greetery is giving away TWO $100 gift certificates each day (four total)! The comment deadline is 9/8 at 11:59Pm EST (comments from team blogs entered into giveaway). Winners announced on The Greetery blog on 9/9 at 7AM EST (right before the new products go live) GOOD LUCK!!
COMMENTING NOTE: On my new blog – to leave a comment, you must open the specific post first. Then the comment box will appear at the bottom. You can click here to make it easy!
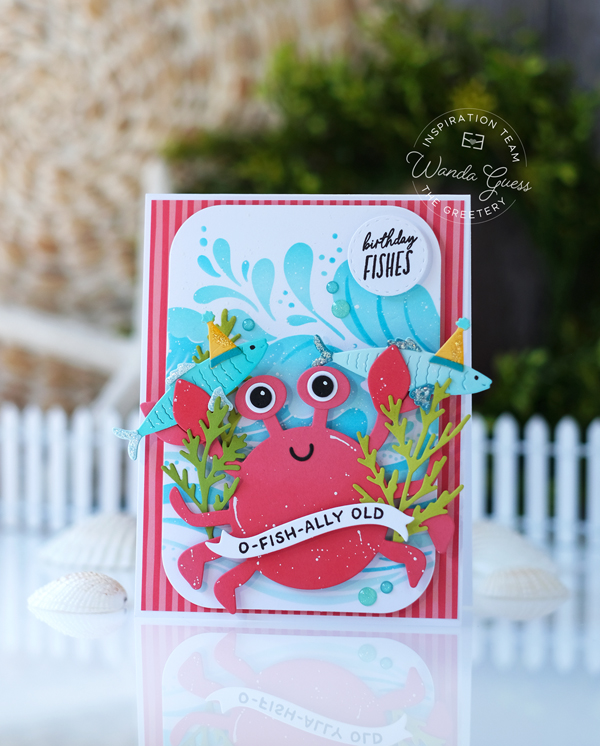
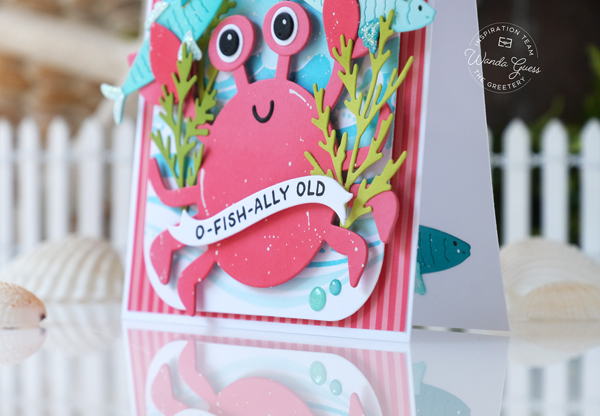
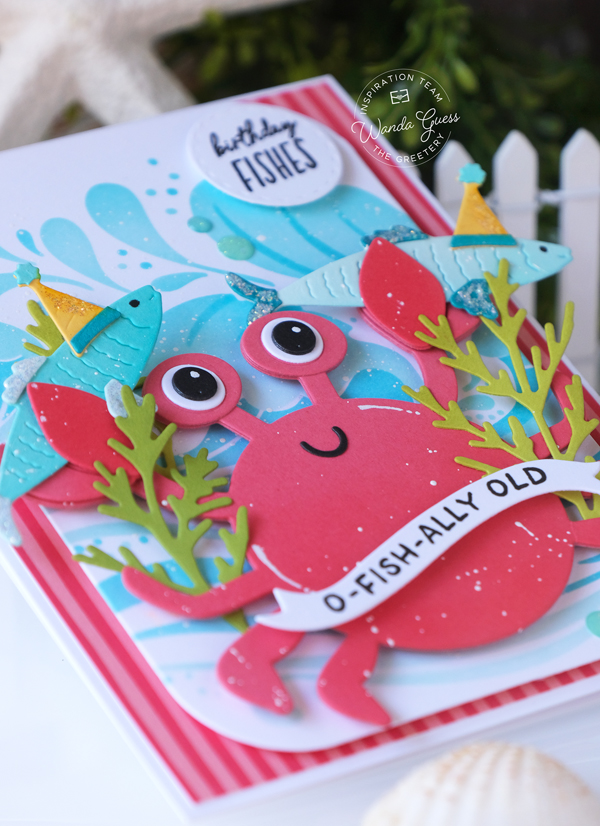
Hi creative and crafty friends! It’s my day today on The Greetery Blog! How has your Summer been? Can you believe it’s August!? Hot Summer nights, and maybe some fishing?! Today’s card was inspired by Summer colors and themes. Maybe one final blast of summer colors and themes? Not sure yet! I combined lots of old and new supplies from the Greetery to create a vibrant and silly birthday card – birthday fishes! My goal for today is to inspire you to look at your stamping supplies in a different way – for example – carrot leaves as seaweed!… Let’s get started!
My finished card is a white A2 card base. I layered some stripey paper from my stash (to evoke a beach umbrella)… I used the largest die from the Canned Dies to create my white background layer. I used the awesome Making Waves stencils to stencil the background waves. (I used only a portion of the stencil and that’s good too!) See, lots of uses for different items!
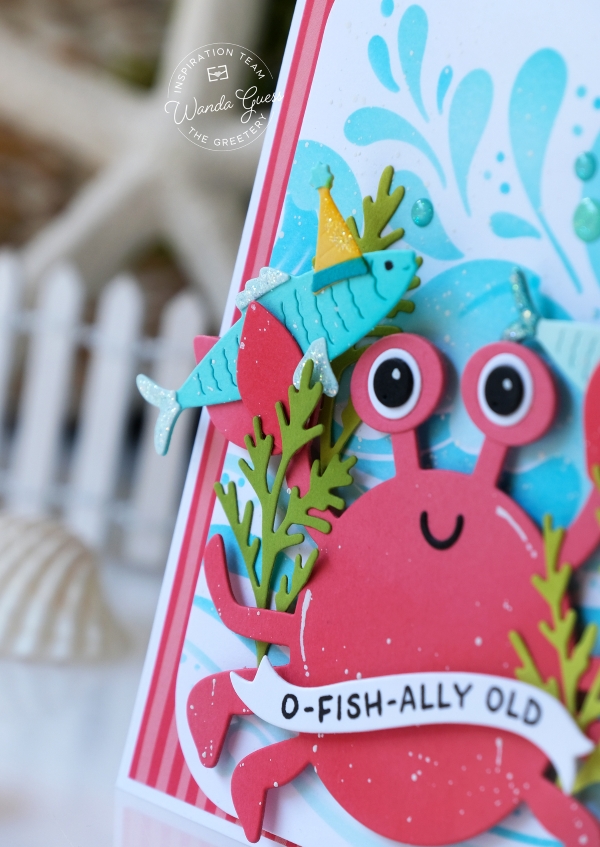
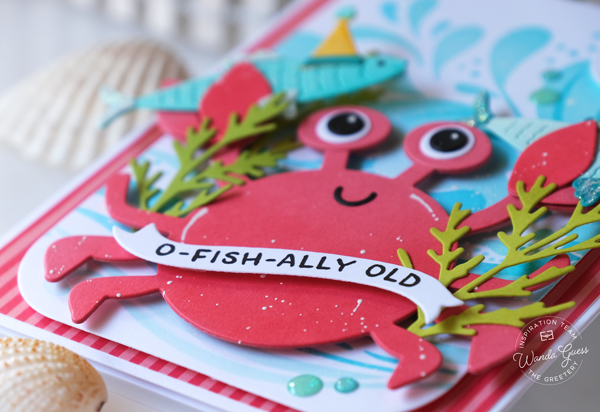
Here’s a side view of all the different layers! I combined different sentiments and I love the little banner one! I made my crab pink this time instead of red. I think she’s a girl crab. LOL. And that adorable little smile! Hee hee
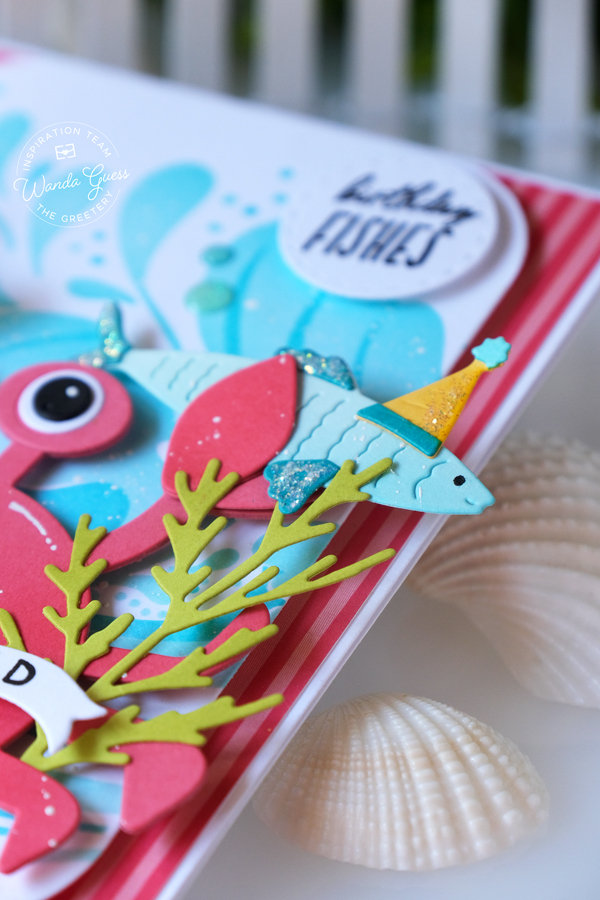
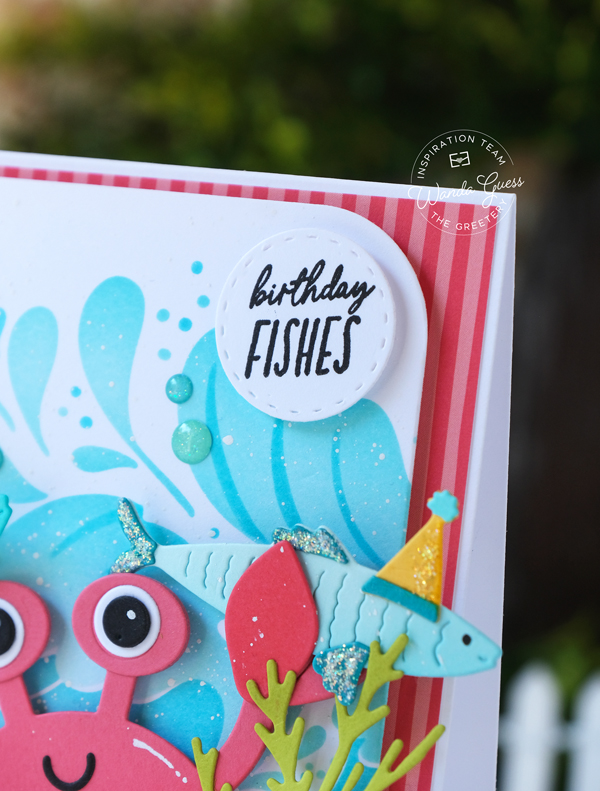
I die cut the Honeycomb Crab from salmon pink cardstock and die cut the fishies and party hats from the Something Fishy die set. I thought it would be so cute to have the crab holding up the fish! (This card makes me smile) I used the Botaniuts Carrot dies to make my ‘seaweed’ for some added interest. I used two sentiments on this card – from the Honeycomb Summer Sentiments and the Something Fishy Sentiments. I added some aqua colored enamel dots and glitter as my final touches. This will be a fun card for the fisherman/woman in your life!
Don’t you love that pink + aqua color combo? So fresh!
Have fun – get our your supplies and mix and match everything. Look at your dies in a different way – and who knows what you might come up with! That’s it for my project for today! I hope you have an awesome and creative day! Cheers to the end of Summer and all of it’s magic. It’s my pleasure to share with you every month. I will see you soon… In the meantime, happy crafting! XO Wanda
Hello friends! It’s August and that means it’s time to start Fall crafting! In crafty land, Halloween starts in August. I think someone coined the term Augtober! And I’m for it! One of my favorite Halloween releases every year is from Pretty Pink Posh – it never disappoints. We have had a streak of 8 days over 100 degrees so I am yearning for a cool breeze and sweater weather! Hee hee. I know some of you are Fall people too! Today is release day for the Halloween 2026 collection from PPP. I am sharing two cards today and then I’ll share another one on Instagram next week in the giant Instagram Hop! Yeah!
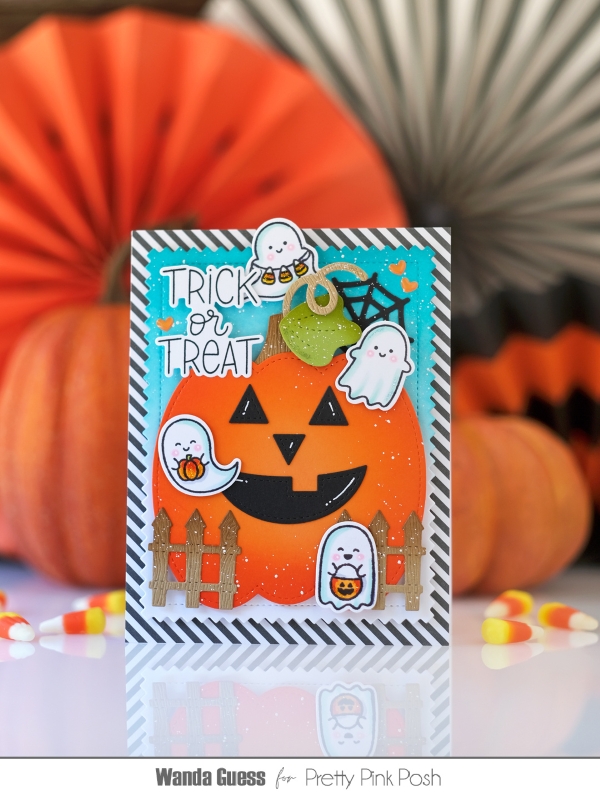
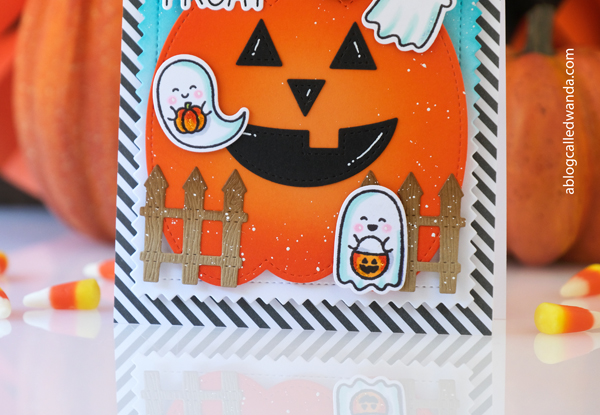
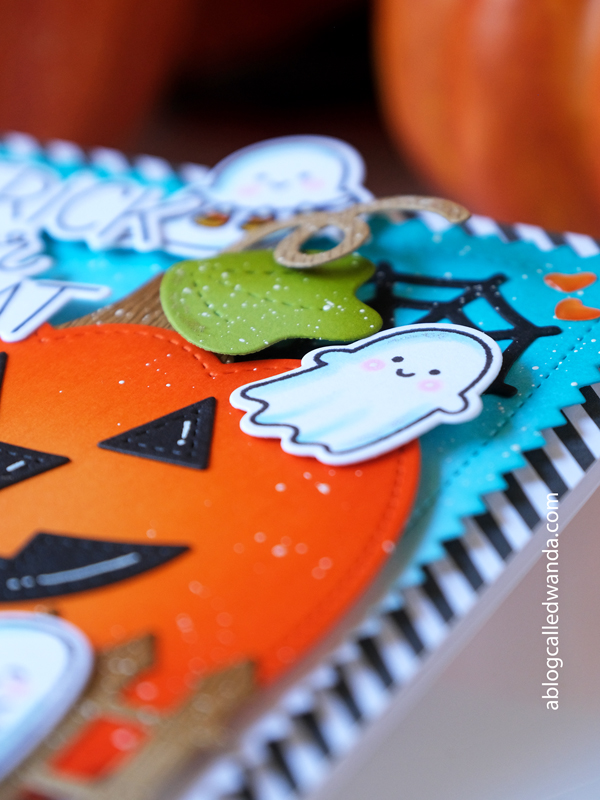
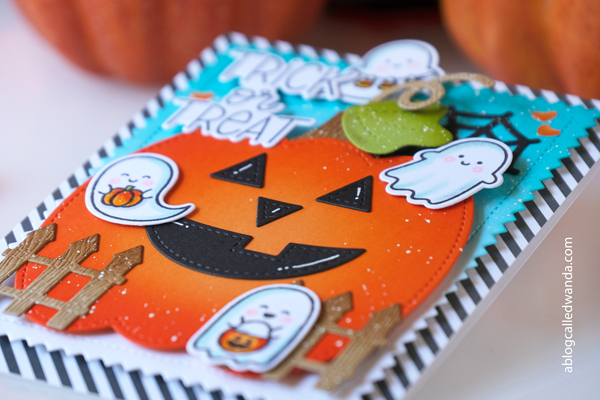
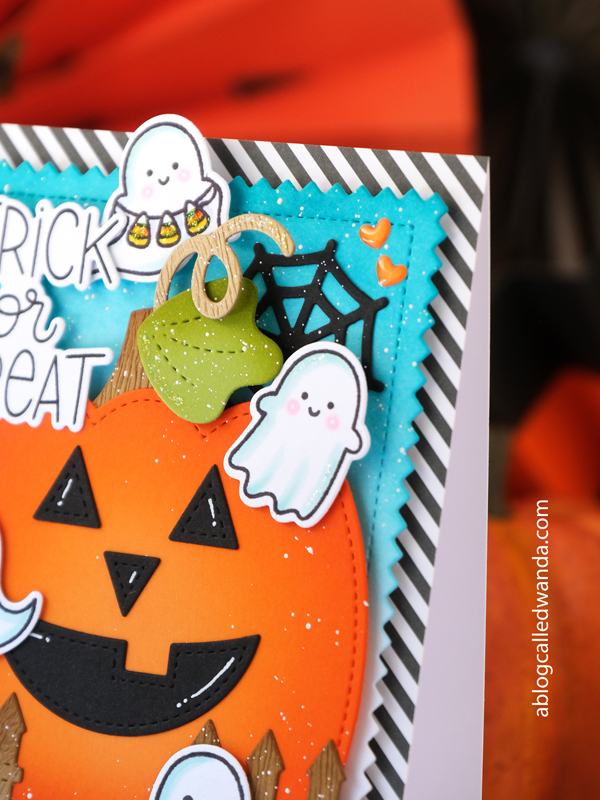
My first card is classic Halloween – pumpkins and ghosties! This card features the brand new Pumpkin Face dies and the brand new Mini Ghosts stamp set – among other wonderful supplies!! My finished card is an A2 white card base, layered with graphic diagonal stripes and then lots of color and cute elements…
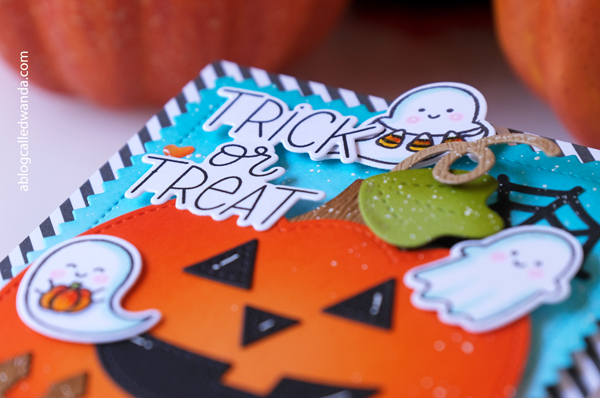
This card has a lot of fun parts! I started by ink blending the background with a pretty teal ink – orange and teal look soooo good together! I then die cut out that big pumpkin and ink blended that too. I die cut the fence, the leaves and the spider web and set those aside…
Next I stamped and die cut out those sweet little ghosties! I used Copic Markers to color them and then added some glitter glue to them… They are so tiny and cute!
I assembled all the pieces onto the card using foam squares for dimension. I added white paint splatters and some orange hears for good measure. I like the graphic look of the stripes behind all that color! This card is very cheerful!!
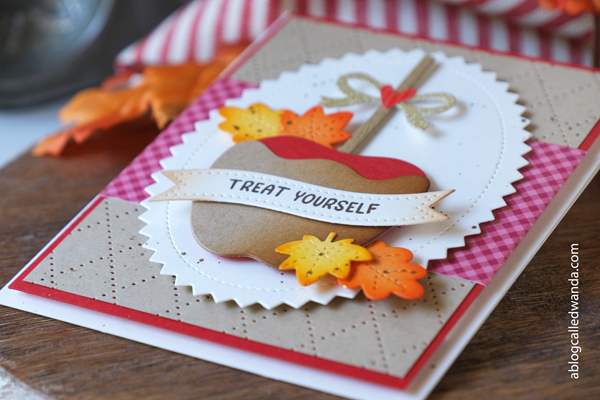
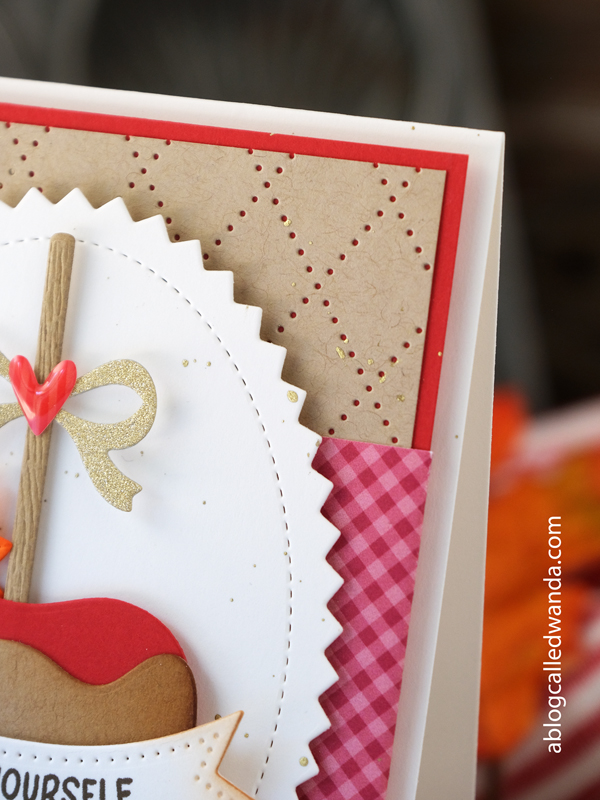
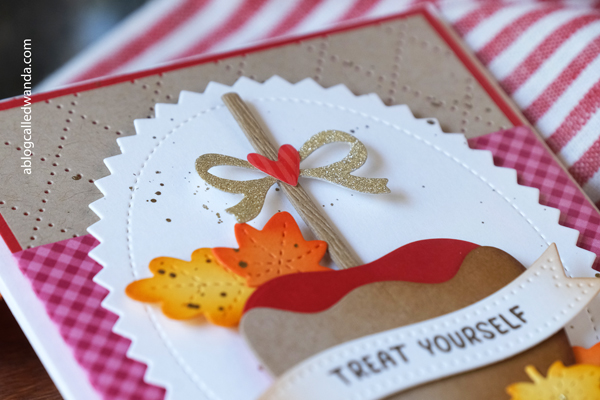
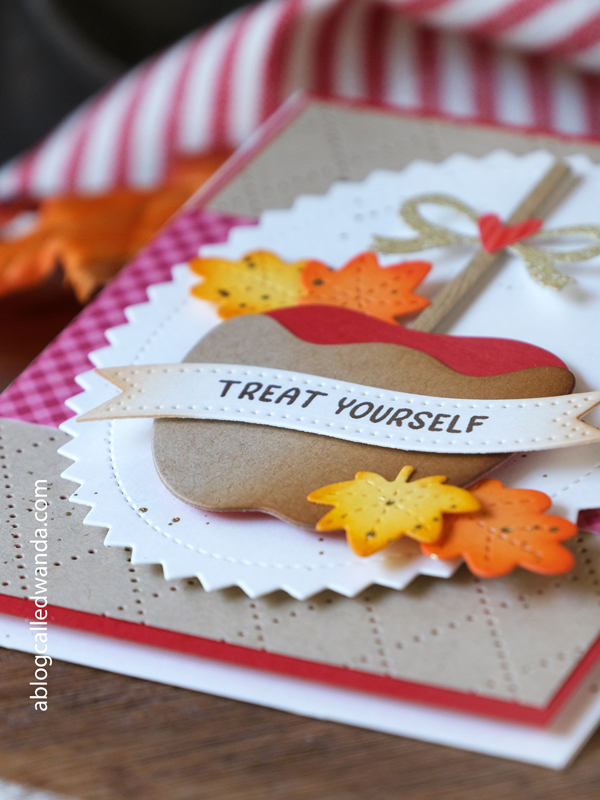
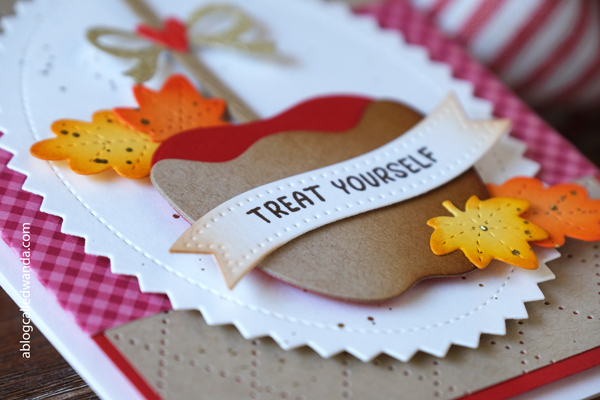
My second card for today uses the new Halloween supplies to make a FALL card! Complete with a yummy caramel apple and some fall foliage. This card features the brand new Halloween Apple Dies, the brand new Halloween Banner Greetings, and the brand new Pinking Ovals. My finished card is a cream A2 card base, layered with kraft and then more cream to feature that delish apple. I do really love kraft and red together, don’t you!?
I started this card by die cutting that pretty argyle background from kraft cardstock. Then I splattered on some gold ink and wrapped it with a strip of red gingham! I die cut the apple and the leaves and ink blended everything…. Those new Pinking Ovals dies are sooooo perfect! I am going to use those a lot! For the sentiment I used the newest addition to the Banner Greetings suite…
And just because…. Here is a sneak peek of my card for next week’s Instagram Hop! You’re going to love this one! (I do!)
I am wishing you a lovely, peaceful, creative day today. Sending lots of love from my craft room to yours. XOXOXO
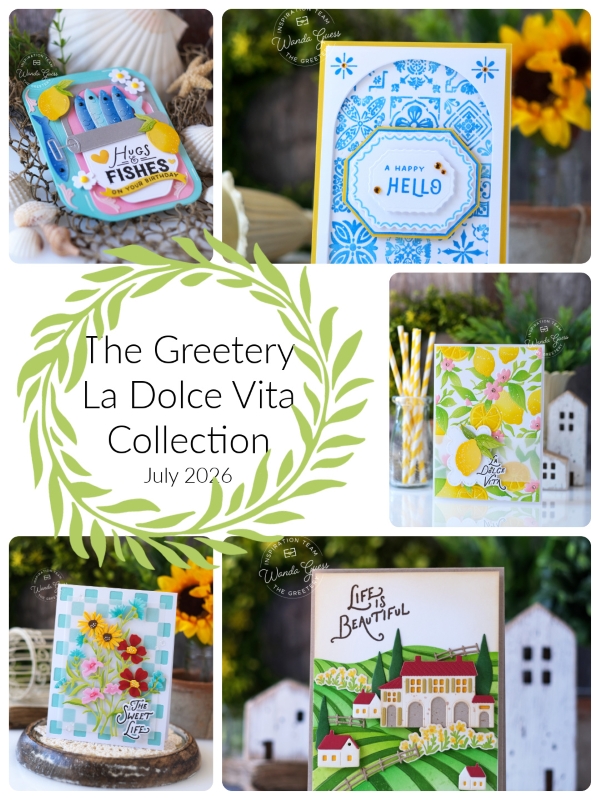
Living La Dolce Vita! Yay! It was my pleasure to introduce the brand new and gorgeous Dolce Vita Collection to you this week! And, I hope you love it as much as I do!! I’m in the mood for a trip to Italy now, how about you?! YEAH! Happy Crafting!! If you scroll back to my last two blog posts, you can see all my projects from the new release! If you have any questions – reach out!! Thanks for all the love and kind comments! Happy Creating! Can’t wait to see what YOU make! Ciao! A Presto!
If you would like to subscribe to my blog – and never miss a post – please sign up by clicking this link! I would love it! CLICK HERE TO SUBSCRIBE!
Hi friends! Welcome back to Day Two of our showcase days for the La Dolce Vita Collection new release from The Greetery! Did yesterday get you in the mood for an Italian vacation? I want to ride a Vespa scooter, and eat lemon gelato and stay in a villa now! The good life indeed! I have three more projects today for you! Can’t wait – more pretty themes…. Remember that release day is tomorrow, 7/10 at 10am EST. This is such a beautiful release! Classy and fresh! Let’s get started today… Thanks for joining me!
If you would like to subscribe to my blog – and never miss a post – please sign up by clicking this link! I would love it! CLICK HERE TO SUBSCRIBE!
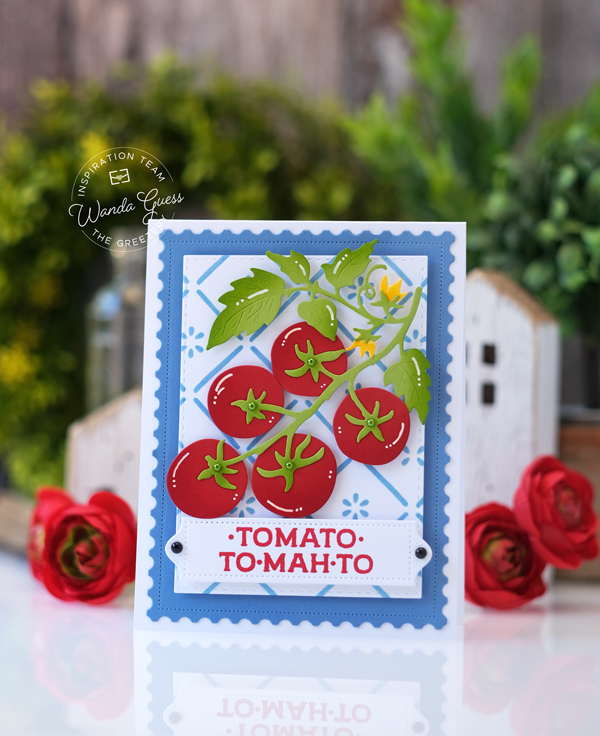
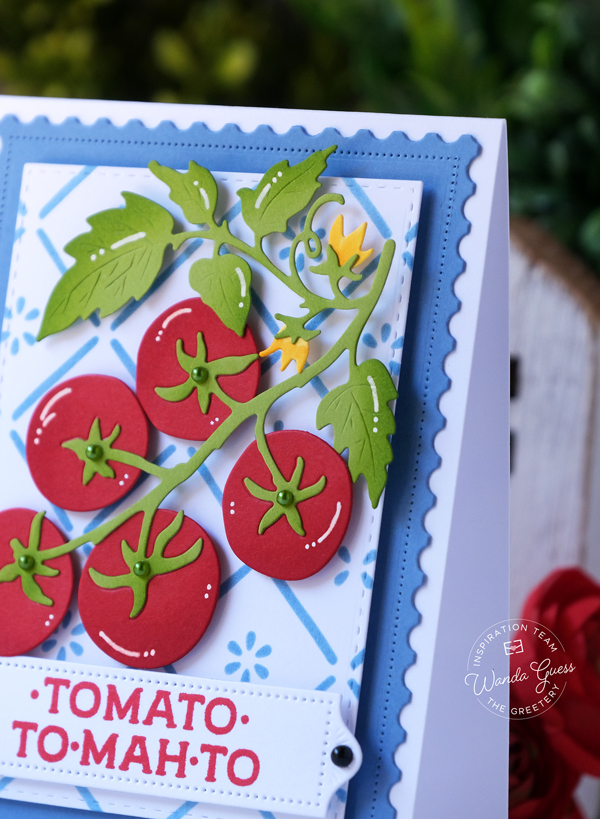
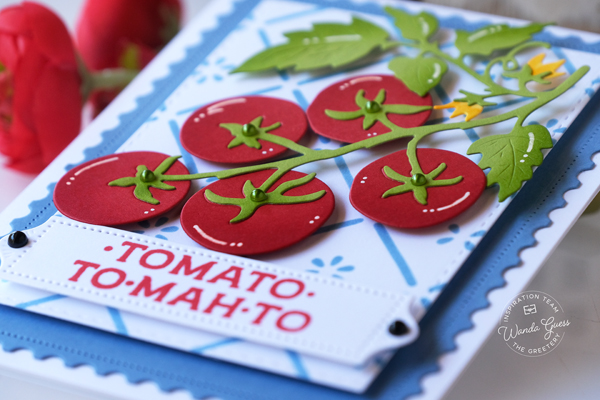
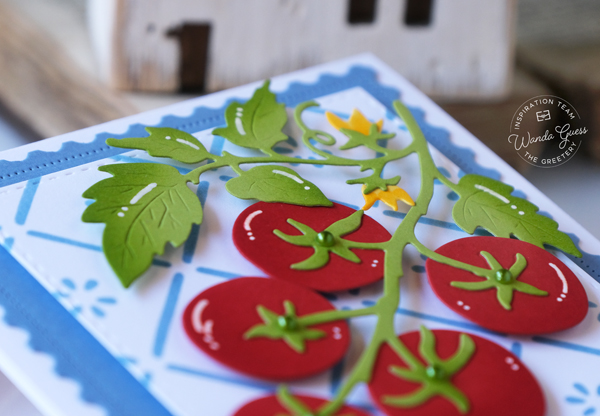
First up today – you say tomato I say tomato! LOL! This card features the brand new Tomato suite – there are stamps and dies! This card also features the brand new Bella Terra Stamp Set and the Tile Style stencils for the background. My finished card is a white A2 card base. I layered marine blue and then my stenciled panel – to feature those sweet vine ripened tomatoes! Just so fresh! This would be a fun hostess card if pasta is on the menu!! I die cut out all my pieces and assembled the tomato vine. I added ink shading and white gel pen accents to make it pop.
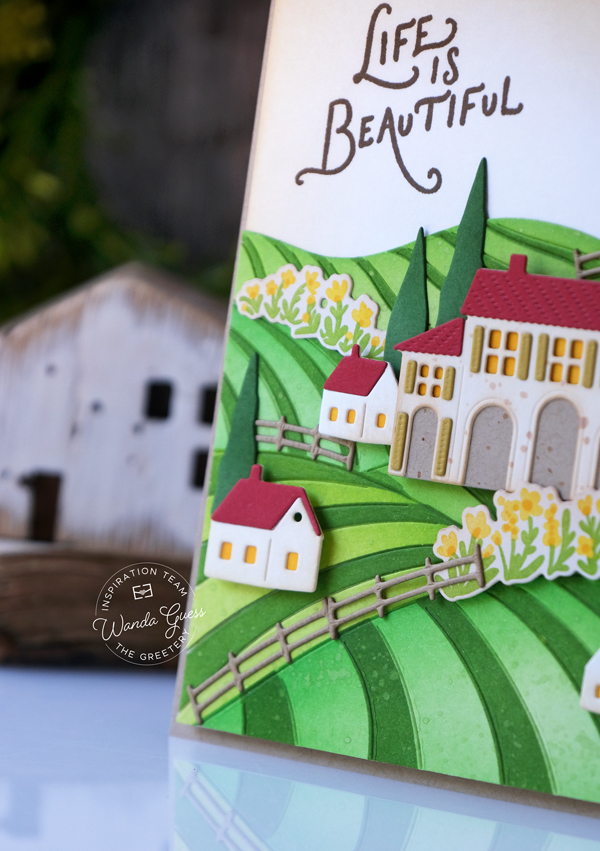
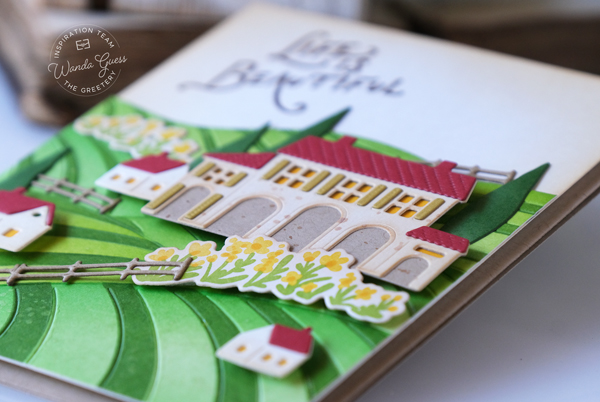
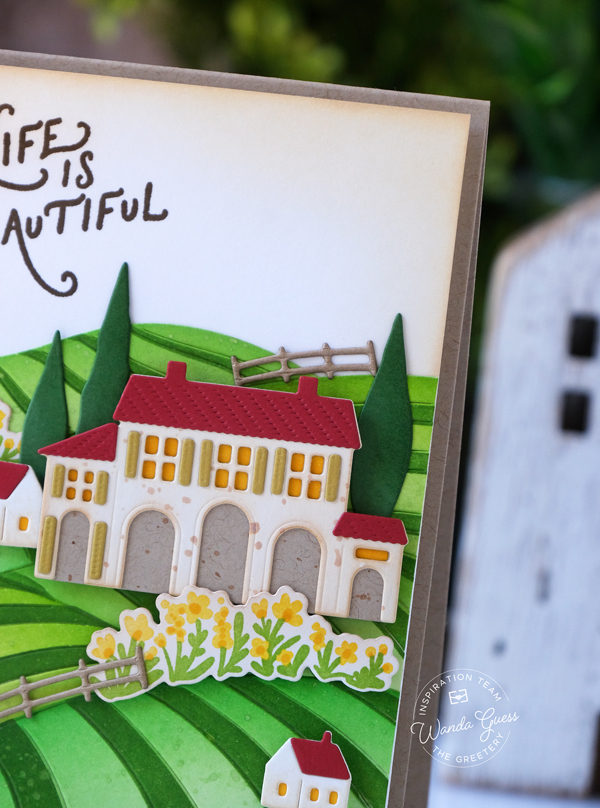
My next card features the brand new Countryside Villas that go together with the previously released Rolling Hills Suite! There are also new additions to the Rolling Hills products. I used the new Terra Cotta stamps and dies and the new Countryside Villa dies. I imagined a Tuscan home on rolling green hills with trees and flowers everywhere… Think “Under the Tuscan Sun” movie! I created green hills and then had fun adding flowers and fencing and tiny trees and that gorgeous villa! Life IS beautiful!
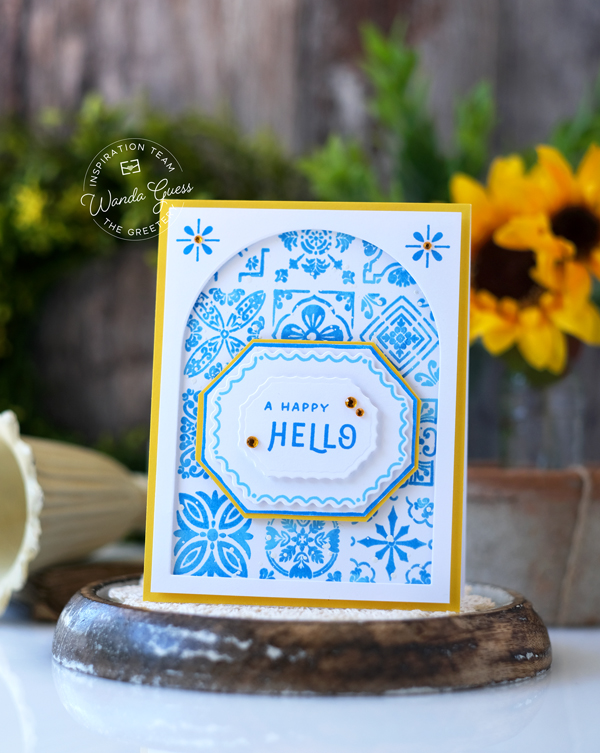
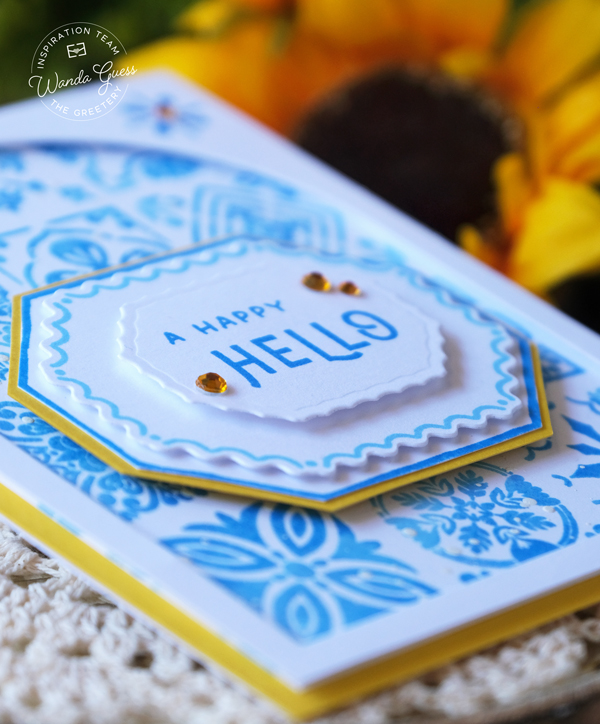
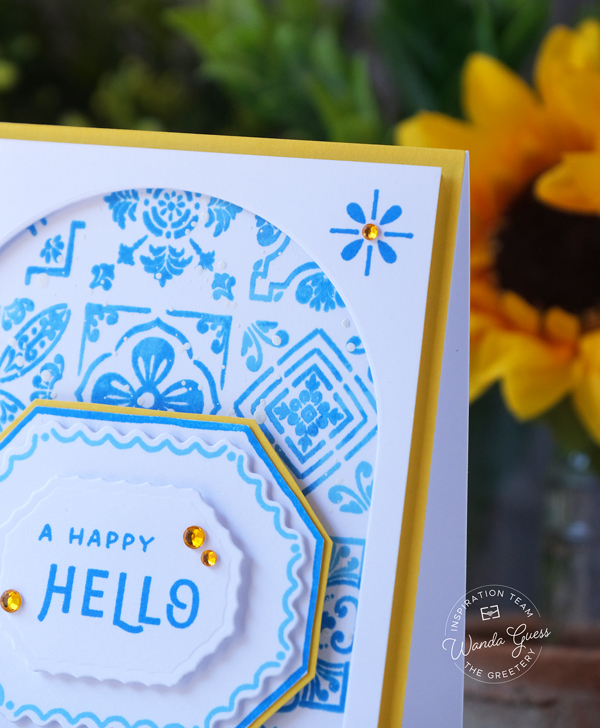
And lastly for today and for the week….This happy tile card that features the brand new Tile Style suite – stamps, dies, embossing folder…. I used pretty Mediterannean shades of blue and white… My finished card is an A2 white card base, layered with golden yellow and then those yummy tiles. I stamped the red rubber background stamp in blue, and then die cut an archway to go over it – to mimic architecture…
SOOOOO many ideas for these tiles – I am particularly excited to see how everyone else used these! Great for backgrounds!
That’s it for today – and day two of our showcase of projects for the La Dolce Vita Collection! Thanks for stopping by to share with me yesterday and today! It’s my pleasure to introduce the new release. TOMORROW is release day! YEAH!! Get your shopping list ready! Enjoy this new release and happy crafting! CIAO!!
Giveaway Information: The Greetery is giving away TWO $100 gift certificates! The comment deadline is 7/9 at 11:59Pm EST (comments from team blogs entered into giveaway). Winners announced on The Greetery blog on 7/10 at 7AM EST (right before the new products go live) GOOD LUCK!!
COMMENTING NOTE: On my new blog – to leave a comment, you must open the post first. Then the comment box will appear at the bottom. You can click here to make it easy!
Good morning my dear crafty friends! Something fabulous starts today! There’s a NEW release from The Greetery this week! Summer 2026 is happening! The new release is called La Dolce Vita – the sweet life! Think of an Italian Summer in a gorgeous villa….Think lemons, and pretty tiles, and flowers and and and tomatoes! Oh and sardines! This Italian motif/theme is really in right now, and of course, Betsy knocked it out of the park with new supplies for us. Totally on trend and modern! Stamps, Stencils, Dies, and MORE! Everything is evocative of a beautiful country life. I think you’re going to love it too! The design team will be showcasing our projects today and tomorrow and then release day will be Friday, July 10th at 10am EST. I have been so anxious to share everything with you! Three projects today, and three more tomorrow! WOOT! I’m hoping to inspire you and make you smile! Let’s get started, shall we! Ciao!
If you would like to subscribe to my blog – and never miss a post – please sign up by clicking this link! I would love it! CLICK HERE TO SUBSCRIBE!
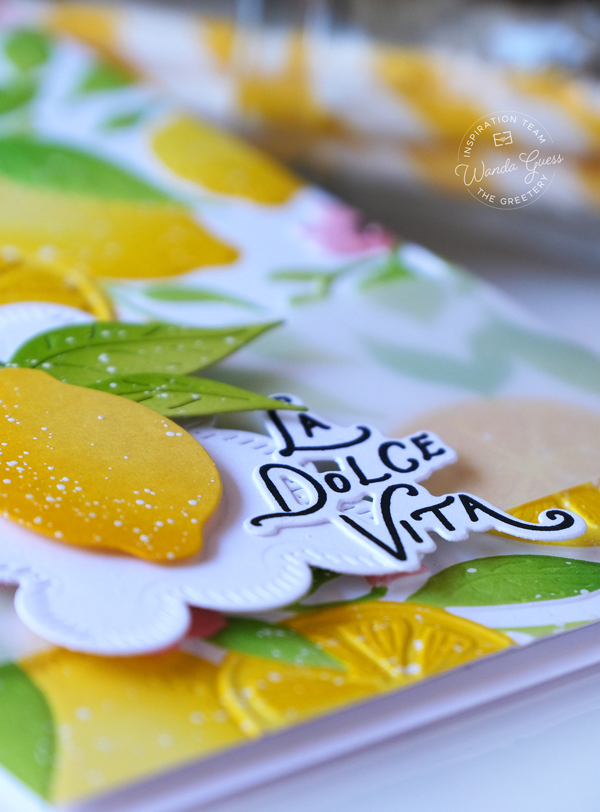
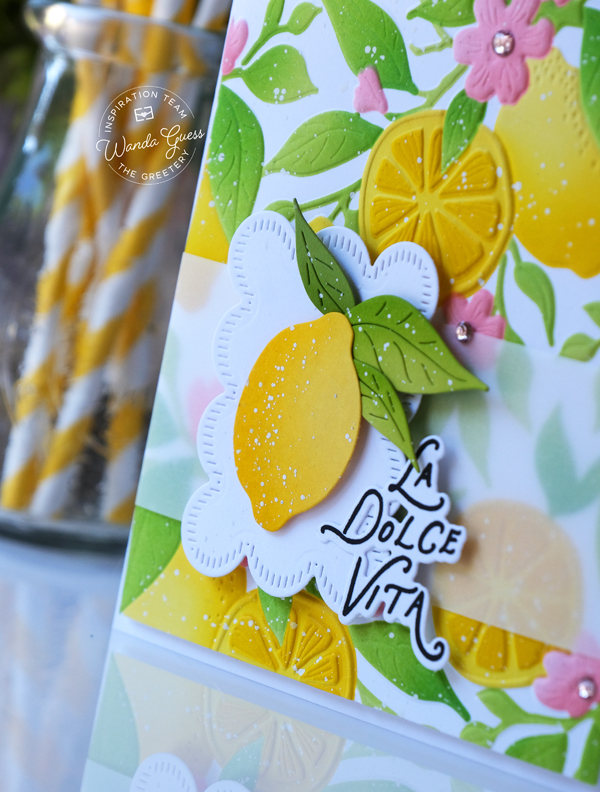
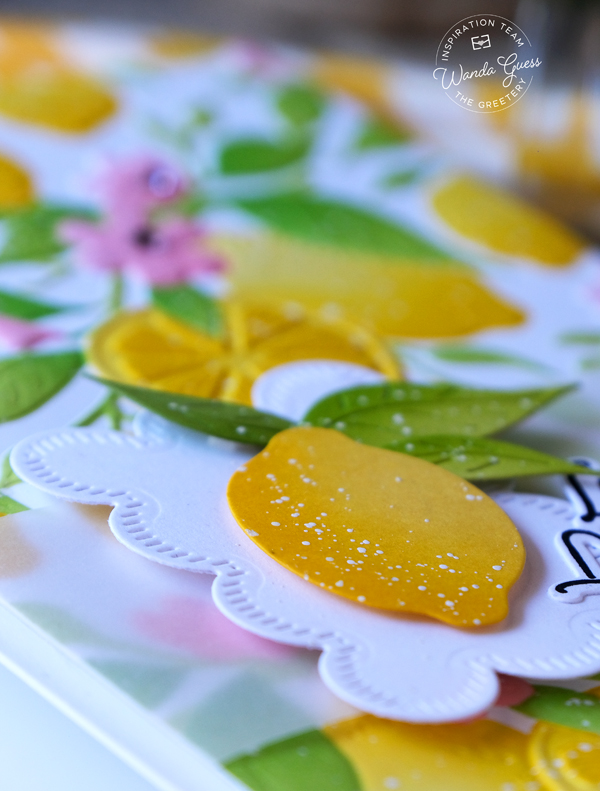
My first card for today features the brand new Citrus Fields Stamps, dies, stencils and embossing folder!! You can combine the elements however it suits you. I used the embossing folder (gorgeous) and the stencils for the background and then the dies for my accent. This card also features a brand new sentiment set!! My finished card is an A7 card (5×7) made from white cardstock. I stenciled that big background image and then embossed it after. I trimmed it down to fit the card front. I didn’t want too much over the top of it – wanted the embossing to show! I used a vellum strip, a lemon, and a sentiment to finish it off. One word comes to mind – FRESH! You can see all my supplies and ink shades listed in the supplies for today!
In this side view you can see that beautiful detail in the embossing. Dang, this is pretty!! It matches up so perfectly with the images… And I adore that beautiful lemon color palette. Now I am craving a Limoncello!
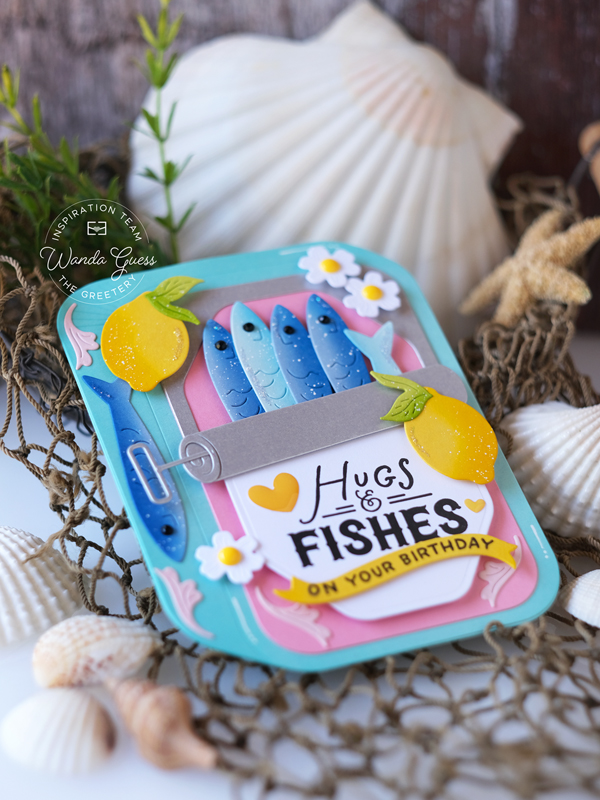
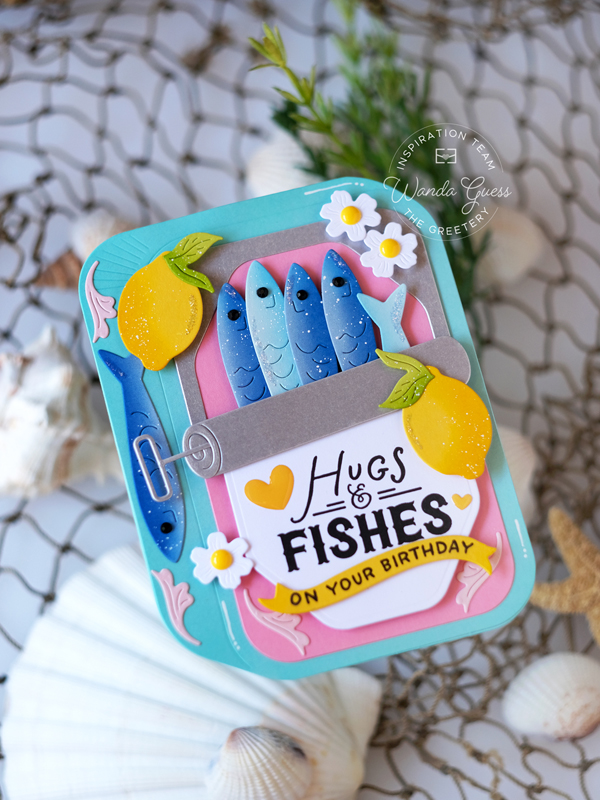
Okay, so this next card has a weird? FUN theme – sardines! Hee hee. Sardines are ON TREND so much right now – those cute beaded purses, and tshirts, and home decor. Who thought we would be making sardine cards?? Well, lemme tell ya – it’s SUPER cute! I had the most fun making this card! So many colors and pieces.
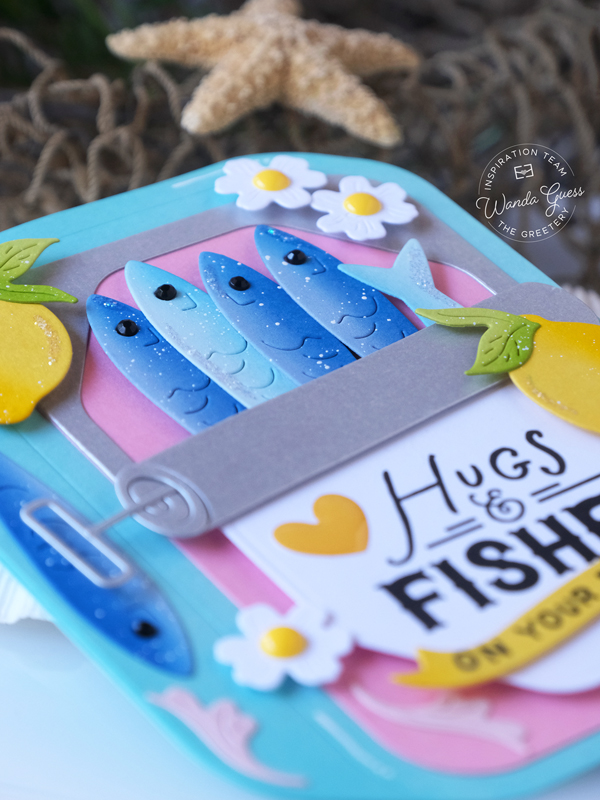
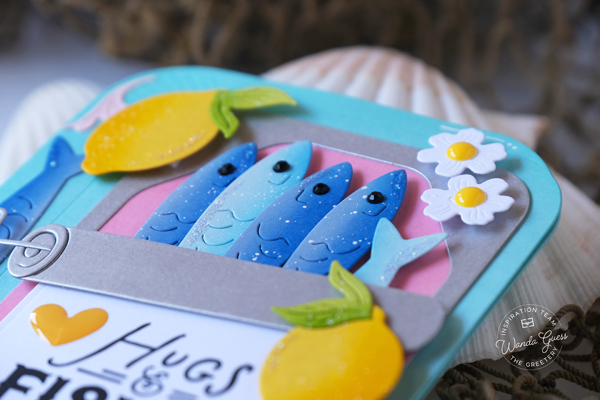
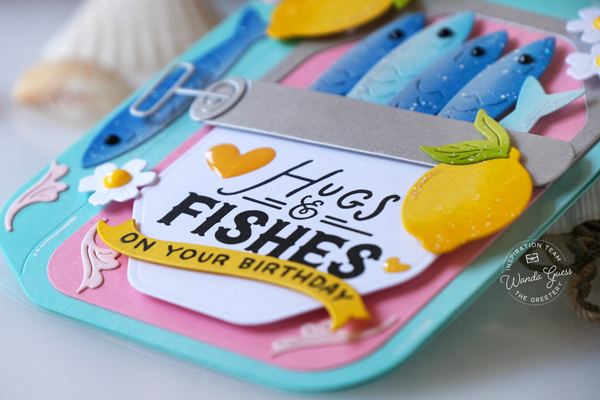
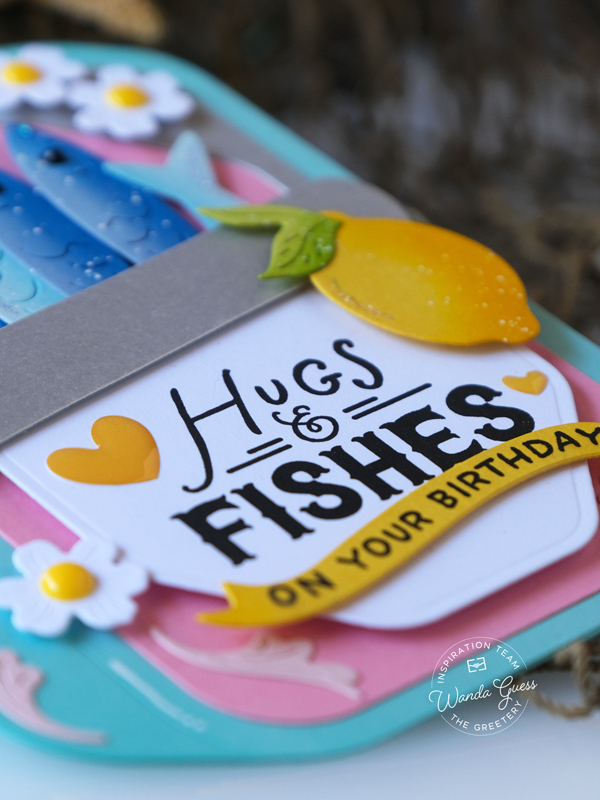
This card features the brand new Canned Dies, the brand new Ciao Bella Borders, and MORE! I even threw in some lemons. LOL. So this card opens and I made the card in the shape of the largest sardine tin die. It will fit into an A2 envelope. I chose all the fun happy Summer colors for this card. You could use a totally different color palette and make it super masculine too. So many different options here! I die cut out all the pieces and laid my card design out, then I inked and shaded everything and added enamel dots and splatters and glitter (oh my)…. The matching sentiments are SO perfect for this set!!
Here’s a side view – I attached two of the same background pieces to make it open – but you could definitely attach it to front of an A2 card as well. I used lots of foam tape to pop everything off the page…
The little fishies were so fun to make. I die cut them from blue cardstock and then inked blue ink on the top of their bodies and I inked white pigment ink onto the bottom of their bodies! Turned out cute! A little bit of glitter to make them look wet and shiny! The lemons and the flowers are from the new Citrus Fields Die set.
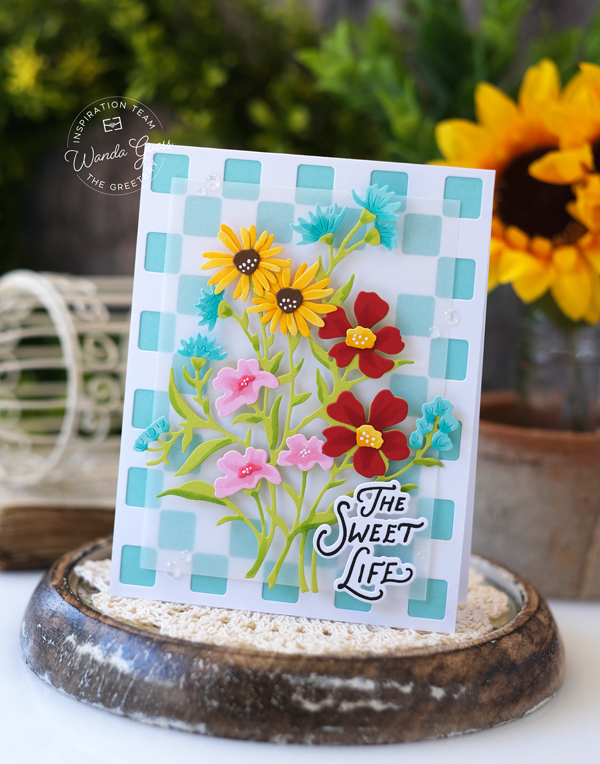
My final card for today features the brand new Coastal Cuttings floral dies and the brand new Checks out Dies! A brand new lovely floral to add to our Greetery collection – awesome! My finished card is an A2 white card base, layered with aqua and then the Checks Out die over the top in white. I also added a layer of vellum to make it pretty! I again used those fresh Summer colors and enjoyed the process of gluing the pretty flowers together… And another gorgeous sentiment too! Looks like you could just pick the wildflowers in the Italian countryside….
That’s it for today – day one of the showcase of projects for the La Dolce Vita Collection! Thanks for stopping by to share with me today! It’s my pleasure to introduce the new release. I will be back tomorrow with three more cards!! YEAH!! Don’t miss it!! Ciao bellas!
Giveaway Information: The Greetery is giving away TWO $100 gift certificates! The comment deadline is 7/9 at 11:59Pm EST (comments from team blogs entered into giveaway). Winners announced on The Greetery blog on 7/10 at 7AM EST (right before the new products go live) GOOD LUCK!!
COMMENTING NOTE: On my new blog – to leave a comment, you must open the specific post first. Then the comment box will appear at the bottom. You can click here to make it easy!
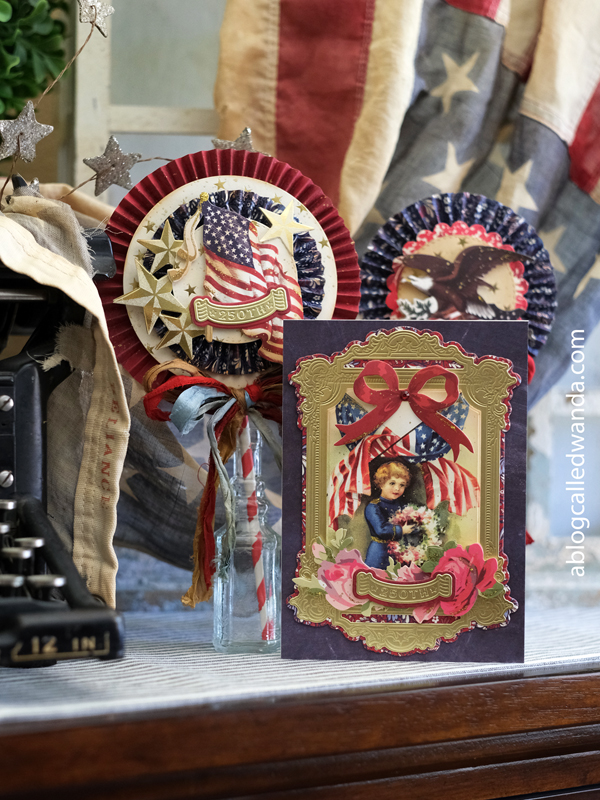
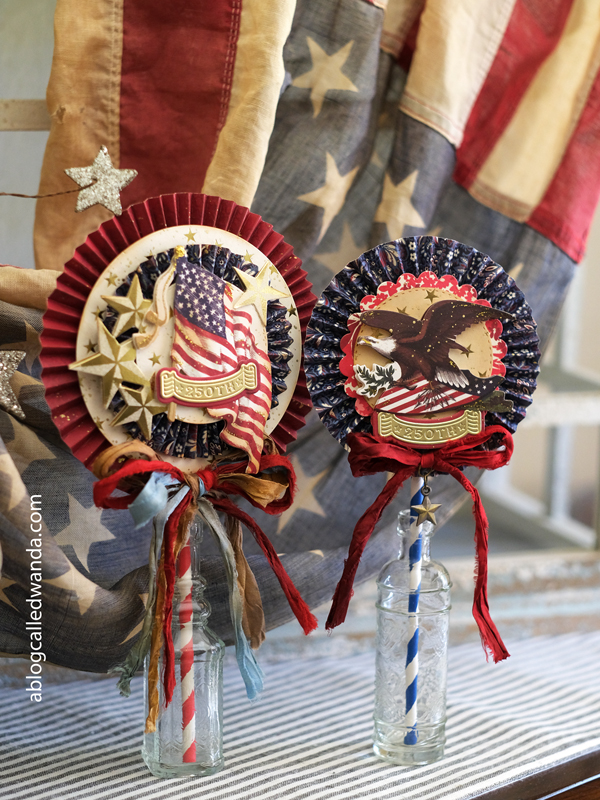
Hi there! Happy 4th of July! Happy birthday America! 250 years! Wow – it seems like yesterday we were celebrating the Bicentennial in 1976! Today is a fun holiday and a mindful one – how lucky we are to be Americans. I love making patriotic crafting projects: stitching, papercrafting, sewing, and more. I have a patriotic stitch that I just didn’t finish in time for the holiday. I probably have about a week or so left, and then I need to frame it. But…I did have time to bring today’s ideas to life in time for the 4th! I made two big rosettes/medallions and one card using my beautiful supplies from Anna Griffin. I bought everything directly from her website. I had fun playing around with the vintage images and themes…and those gorgeous ribbons from my stash…Lots of photos ahead. I am wishing you a blessed and happy holiday today! XOXO
Here are my three project together. I got that big vintage and tattered flag a few years ago at my friends antique store. I love the faded look of it, and it’s always on display in our house. These rosettes turned out way bigger than I had planned, but I am using them for home decor so I think it might actually be better that the are big! Lots of paper and supplies. I used the Anna Griffin Madison paper collection and the new Anna Griffin Pretty Patriotic Dies set.
I started by cutting the 12×12 paper into strips and then scoring each 1/4 inch. I folded the strips and then formed my rosette shapes… Lots of paper layers, gold paint splatters, gold glitter….Oh yeah! The rosettes are hot glued onto paper straws and then I also hot glued pretty ribbons to the bottom.
How cool is that pretty 250th die?? Love it in rich gold metallic paper!!
The finished card is a 5×7 card with lots of room! Hee hee… Layers of paper and ephemera…more glitter and more embellishments too!
That’s it for today! I will keep working on that Americana/Patriotic stitching project and hope to share that soon. Tonight we will be on a boat underneath the Golden Gate Bridge watching the fireworks and celebrating big! (Pray for no fog)! Take care and I will see you soon!
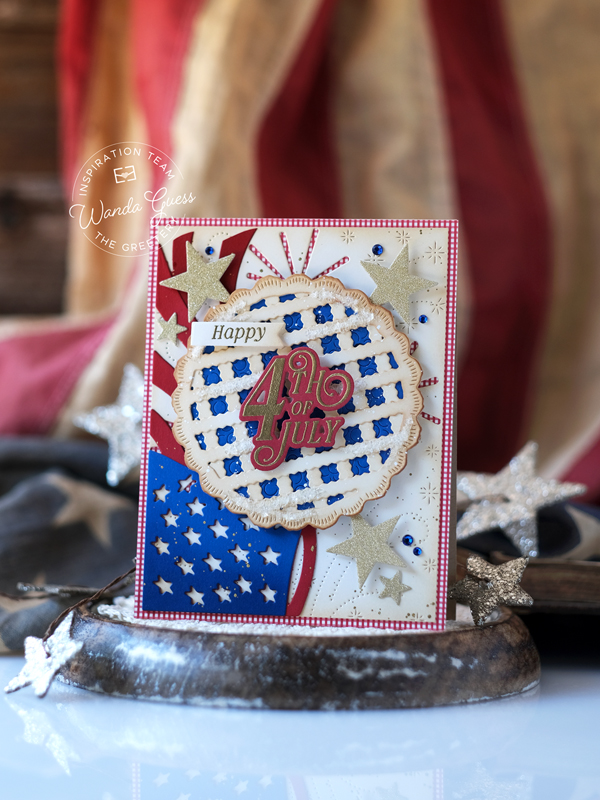
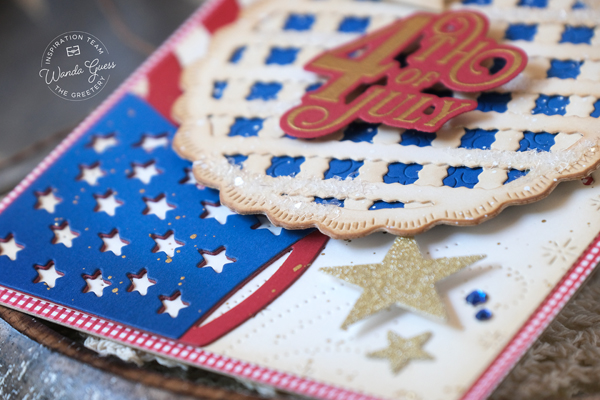
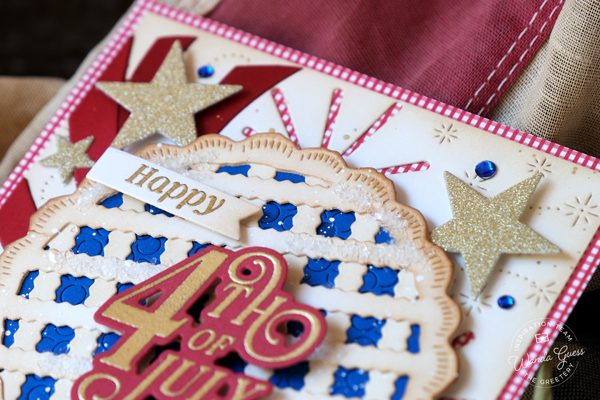
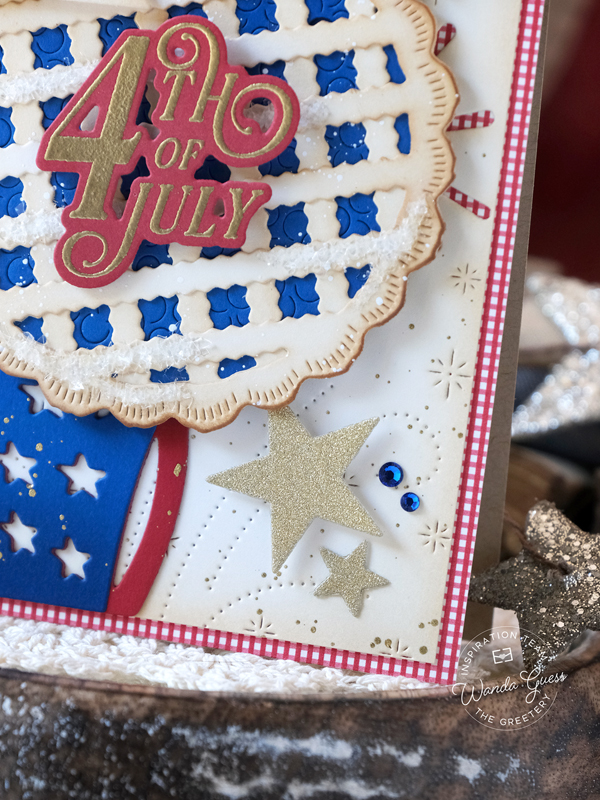
Hi creative and crafty friends! Happy Friday and happy 4th of July weekend! Today is my day up on The Greetery Blog. Happy Independence Day! I hope your Summer is going great so far. America 250 is very exciting, so I had to make another patriotic card. I feel like The Greetery has some of the most classy and beautiful patriotic products out there – don’t you? For my project I used lots of Greetery patriotic goodies and that big beautiful pie die!
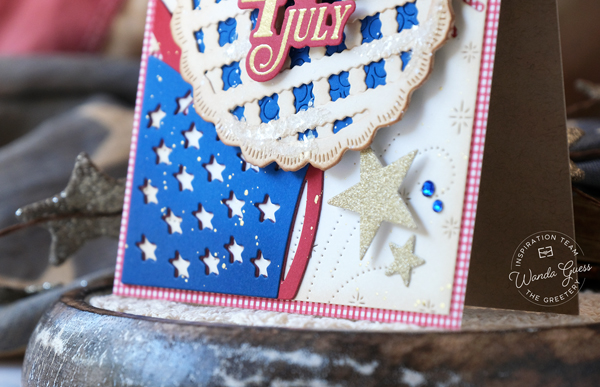
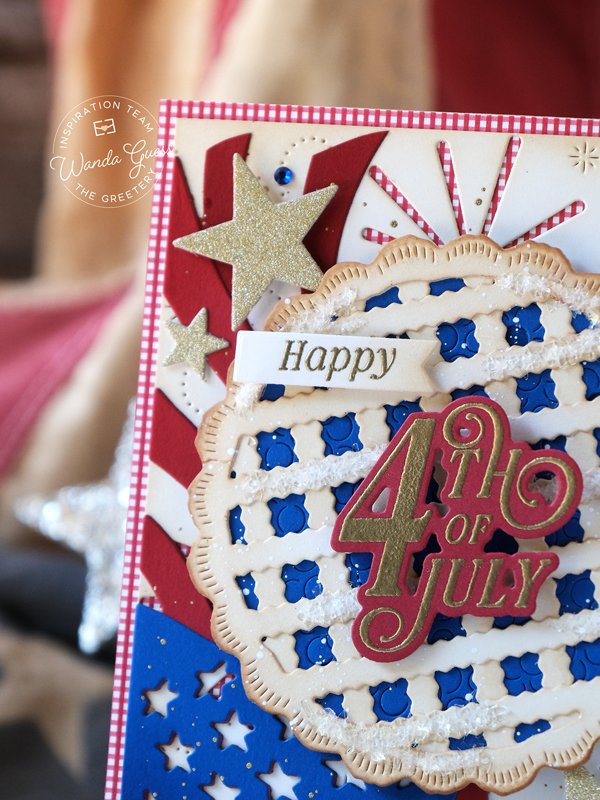
My finished card is an A2 Cream card base. I layered red/cream gingham paper and then I layered the Grand Finale Die. I let the gingham show through that layer and inked it up with Antique Linen Distress Ink. Next I die cut out all the pieces for the flag (Wave the Flag dies), the pie (To Pie For dies), and the sentiment and stars.
I assembled the Blueberry pie (almost as American as Apple Pie!) and coated it with some sugary glitter. To make it look like pie crust I inked the cream cardstock with Linen Distress Ink. I assembled the flag and splattered it with gold ink.
I gold heat embossed the sentiment from the Land Of Liberty stamp set and die cut it out with the matching dies. I added the word happy on a small banner. The stars were die cut using the Small Rustic Stars dies with gold glitter paper. I put everything together on the card front and used foam squares for some of the elements to pop up off the card. I added blue gems for a bit more sparkle.
That’s it for my project for today! I hope you have an awesome and creative day! Wishing you all the best for a fun and exciting 4th of July! Cheers to the rest of Summer! It’s my pleasure to share with you every month. I will see you soon… In the meantime, happy crafting! XO Wanda
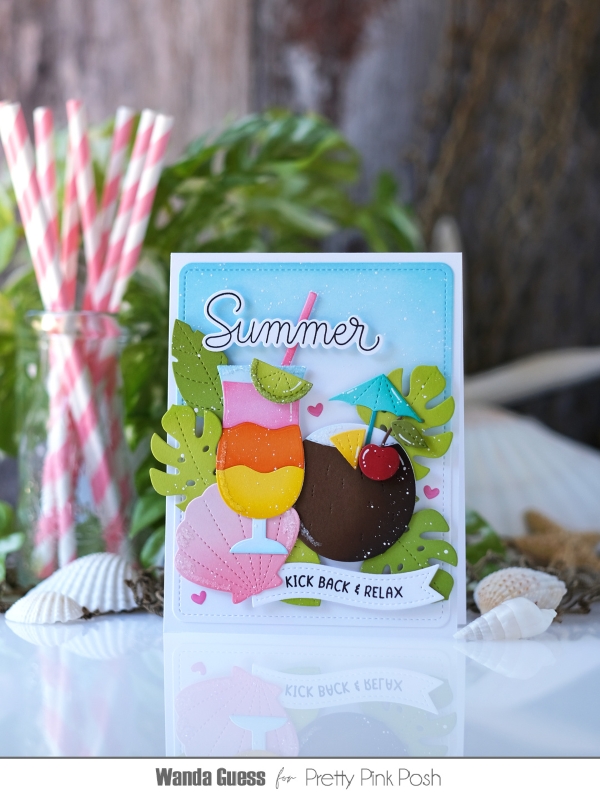
Hey hey heyyyyy! How’s your week going so far? We are having perfect weather here (fingers crossed) and I am super excited to go to a baby shower on Saturday. (I made another bear card!) I have been busy in the craft room and have been making cards and stitching and more! Today I’m here to share all my cards I made with the brand new Summer 2026 release from Pretty Pink Posh. Cocktails, flowers, flamingos, and MORE! It’s very fresh and cheerful – I love it all – of course! Let’s get started!
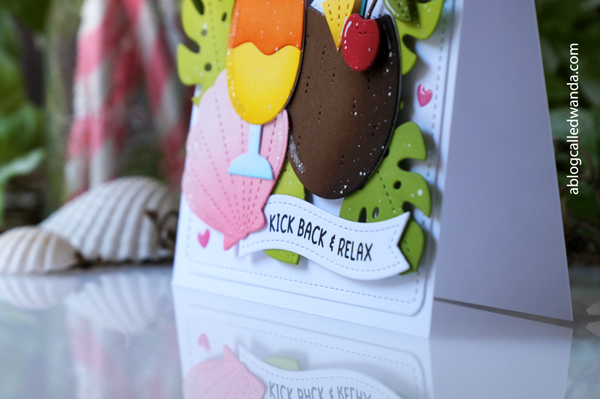
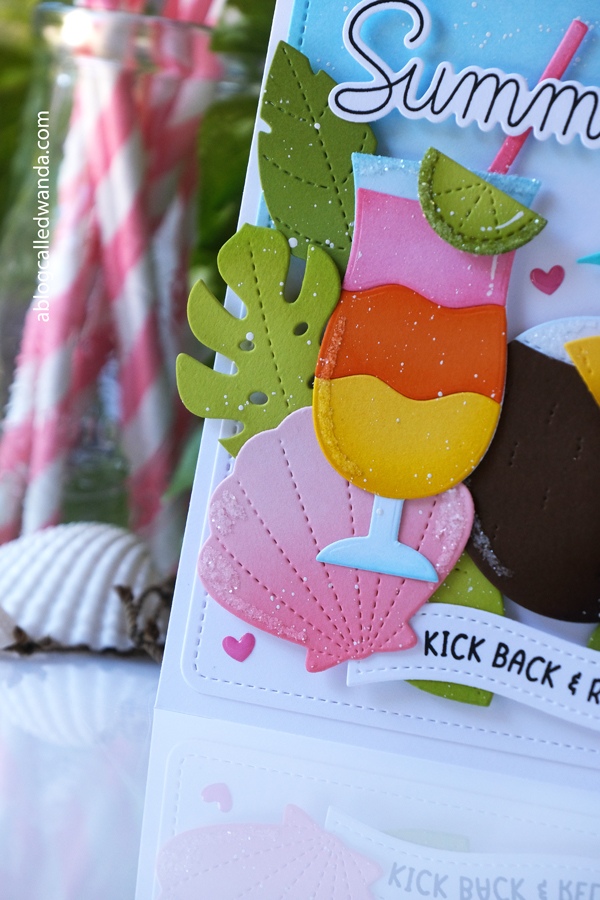
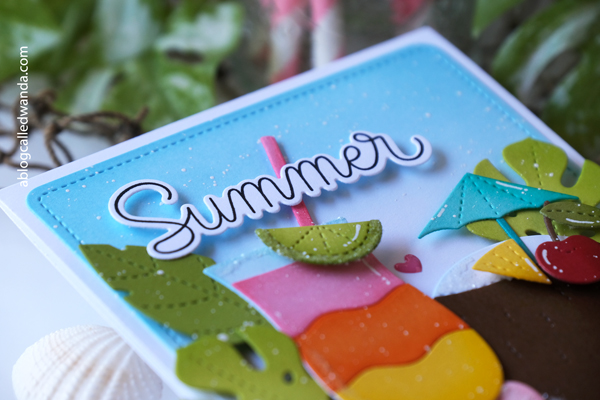
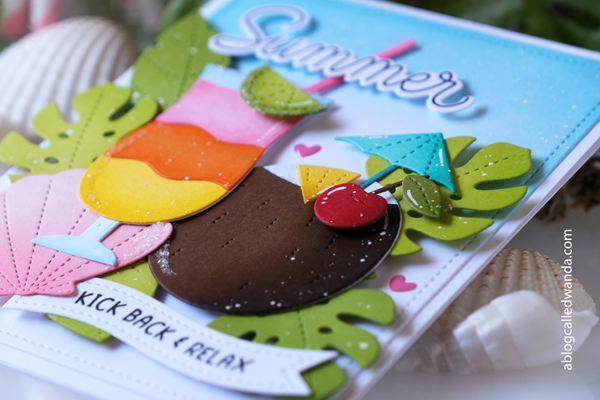
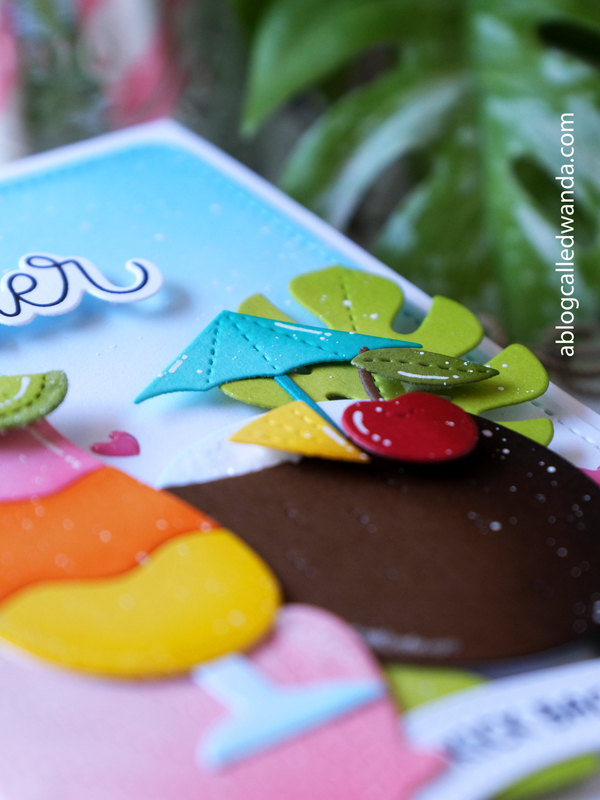
First up – cheers! Kick back and relax! Who doesn’t love a fruity tropical beverage?! I want to go on vacation now! Hee hee. My finished card is a white A2 card base layered with a white rectangle that I ink blended with turquoise ink…. I used ALL the bright colors on this one, and glitter too! This card is a party!
I die cut out all the pieces of the Summer Cocktails Dies, the Tropical Leaves Dies, the shell, and the banner. I ink blended all the pieces with subtle shading. I think this really makes die cuts pop! Here is a side view of my card so you can see all the layers.
In this photo you can see my glitter bits and the shading. I just kept adding stuff! The sentiments are from the new Happy Summer stamp set and the new Summer Banner Greetings stamp set. Everything is popped up with foam squares also.
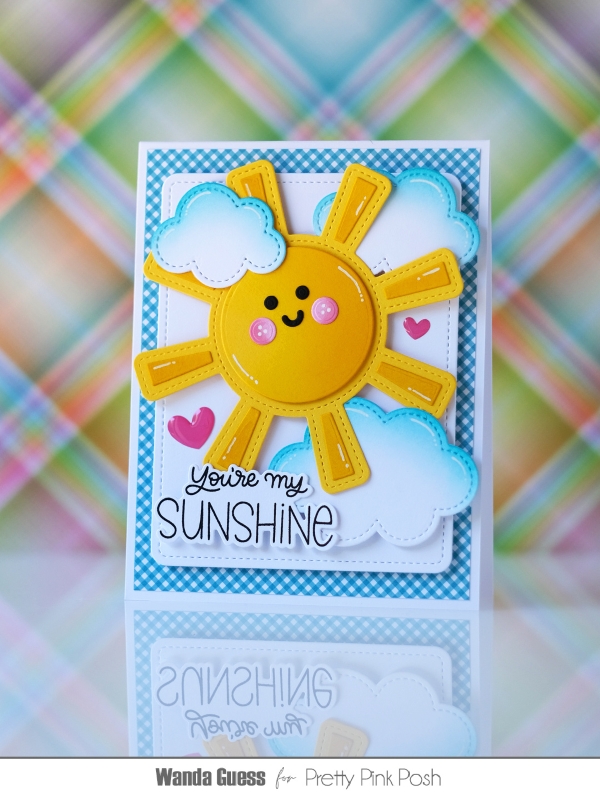
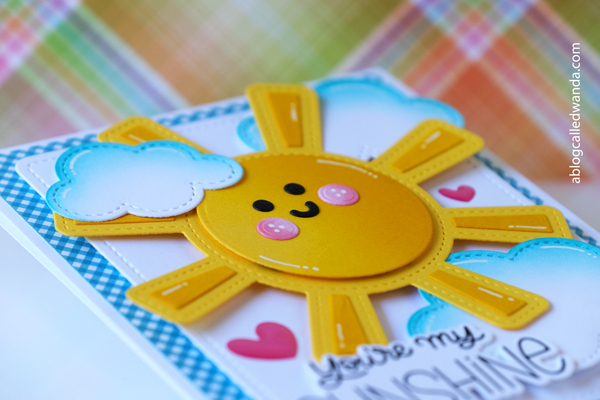
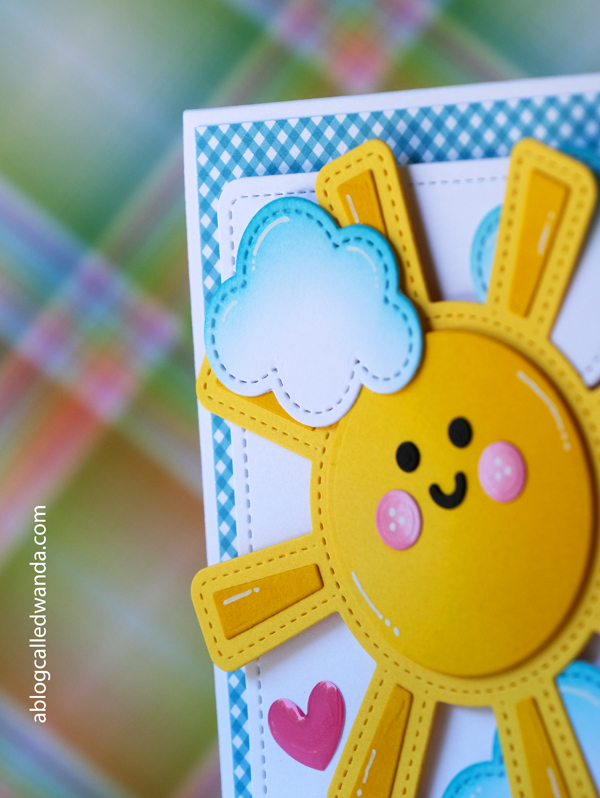
Next up is a BIG bold sunshine! This card features the brand new Sun Shaker Dies, and the Stitched Clouds dies. I kept it clean and simple, with a vivid color palette. My finished card is an A2 white card base, layered with gingham and a white rectangle. The sun is the big feature on this card, and the sentiment is from the new Happy Summer stamp set.
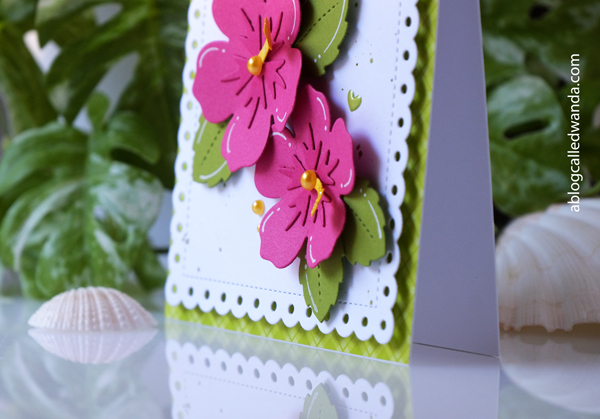
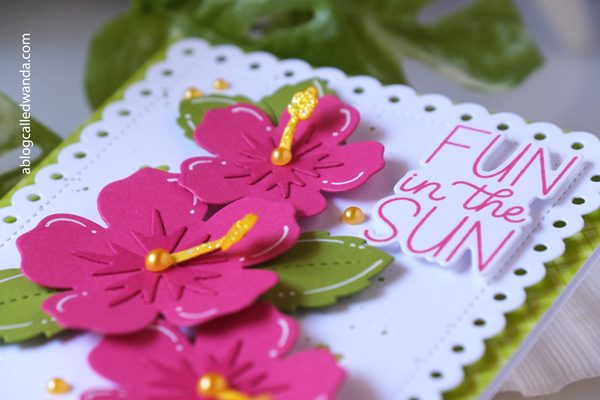
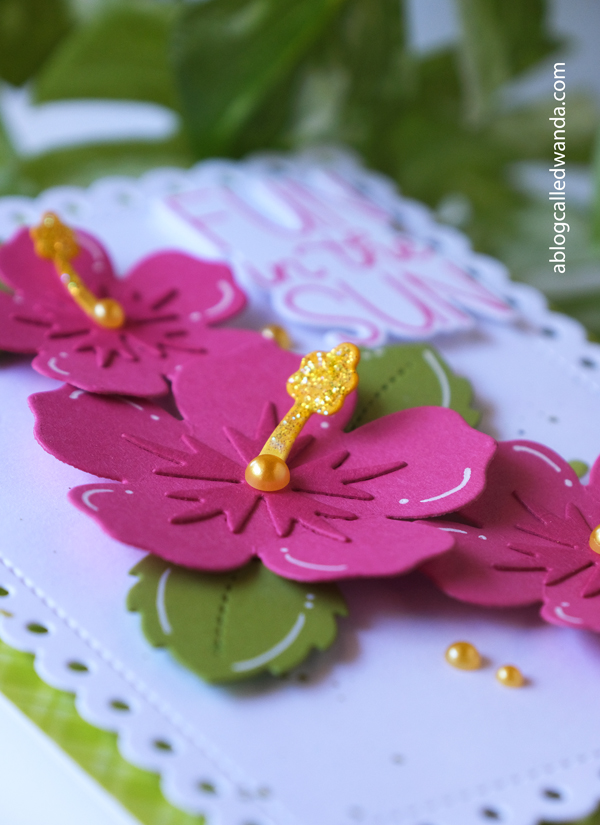
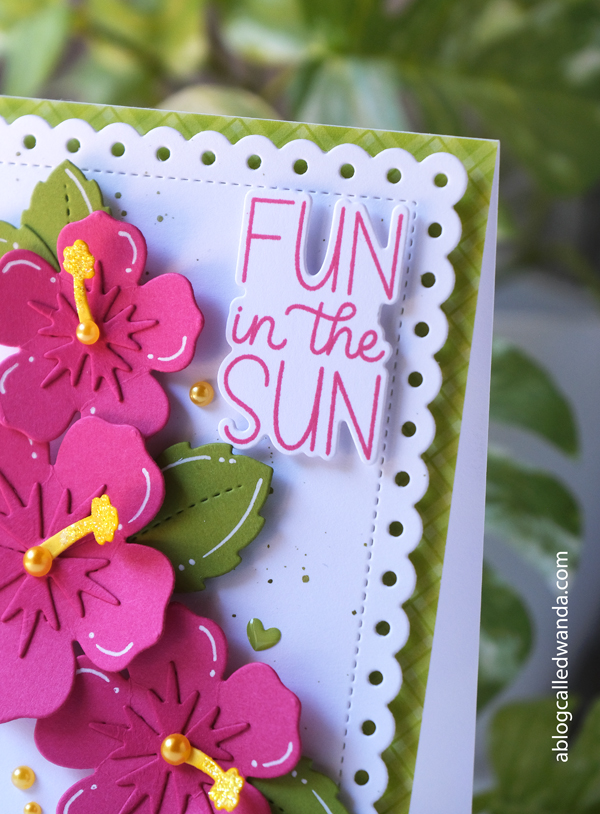
My final card for today features the brand new Hibiscus Flowers Dies! I also used a new sentiment. Again, I used big bold colors – hot pink and lime green – to evoke Summer! My finished card is an A2 white card base, layered with plaid and then an eyelet rectangle.
I die cut out all the leaves and flowers and gently ink blended them. I splattered on some green ink to the background and used an accent color of golden yellow. These flowers would look pretty in any color!
Okay friends! That’s it for today’s cards and today’s post! Hope you had fun with me sharing Summer cards today! Are you Summer crafting? What are you working on? All the new supplies are available now from PPP. The supply list is linked below for everything! XOXO
Hello friends! Happy happy Friday! I hope you had a great week and that you’re enjoying Summer time! We have had only a few hot days here so I’m surviving! Ha. One of my favorite holidays is the 4th of July, and this year is such a special 4th of July – America’s 250th! I’m trying to get in all my patriotic stitching, card making and other crafts with an Americana theme. Today’s card is SO fun and I can’t wait to share it with you. When I saw these dies for sale, I knew exactly the card I wanted to make! It’s an ode to Ralph Lauren and the iconic flag sweater. EEEEK!
On a fun side note, hubs and I are going on a boat cruise on the 4th of July to watch the fireworks go off from the Golden Gate Bridge! To be on the water during big fireworks has been on my bucket list. In the past, we have been on a boat in Lake Tahoe for the 4th, but never the bay. They have only done fireworks off the GG Bridge twice before! We need to pray for no fog that night! Yay!
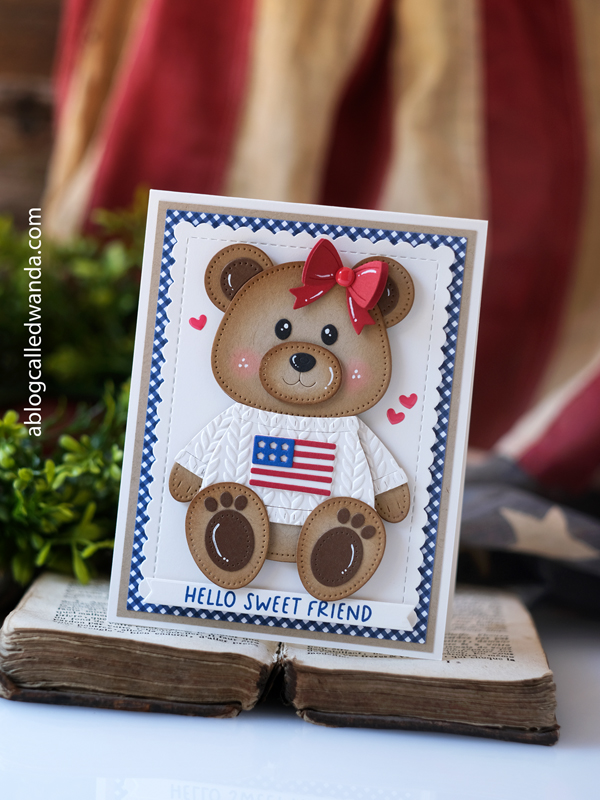
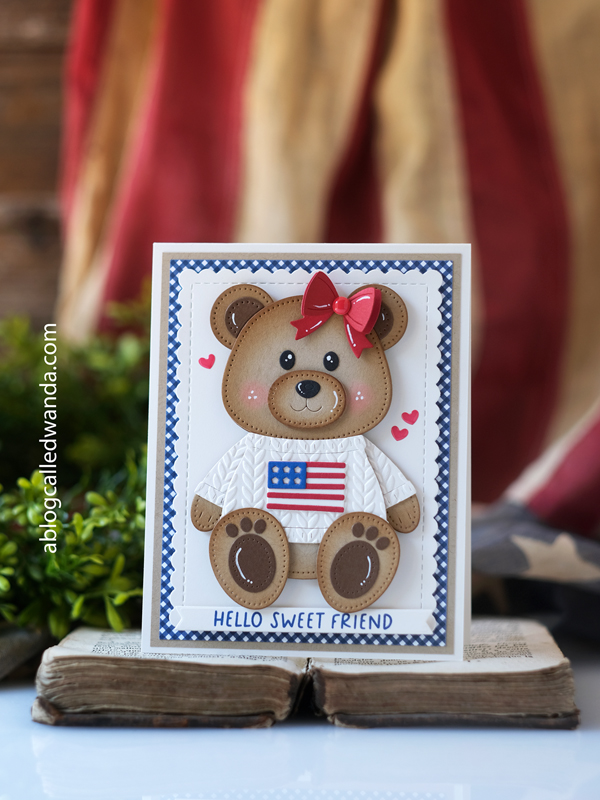
Today’s card features brand new (and back in stock finally) dies from our friends at Papertrey Ink! The Build a Bear dies are literally perfection. Baby cards, birthday cards, USA cards, anything that needs the perfect bear. I used a traditional red, white and blue color palette with kraft of course! Let’s get started.
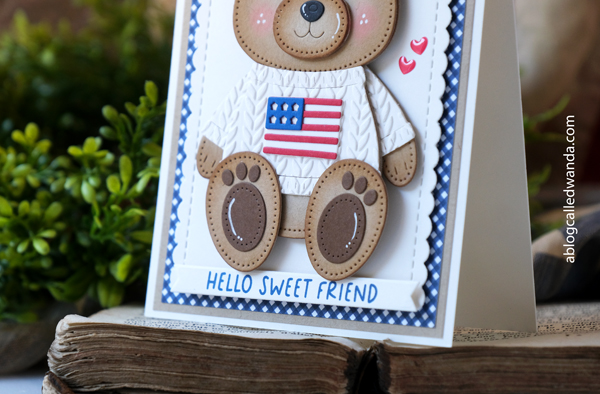
My finished card is a cream A2 card base, layered with kraft cardstock, then navy gingham, then a scalloped rectangle! LOVE the layers…. The star of the show is that adorable bear, and then just a simple sentiment. A classic red, white and blue color palette. Oh and some hearts as you know I love to do!
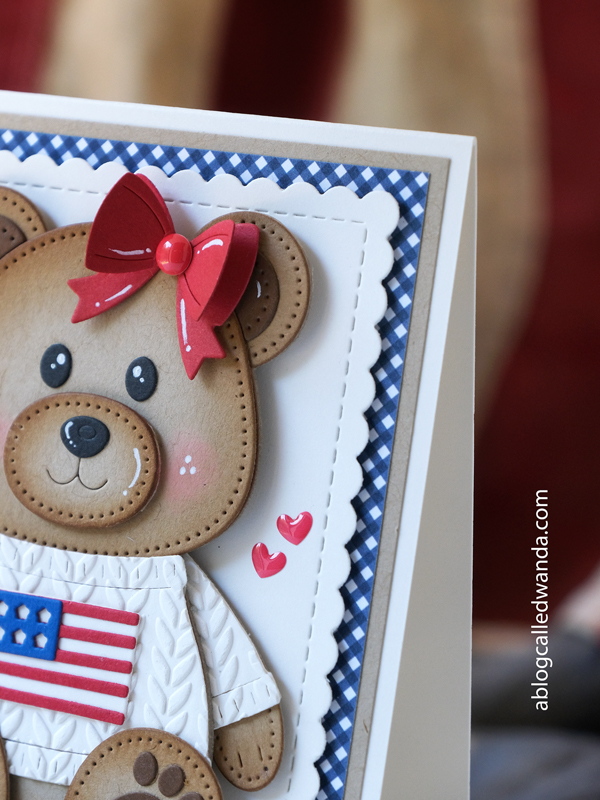
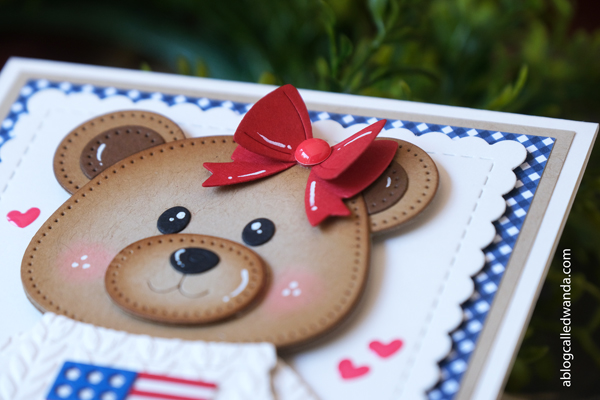
Here is a close up of my paper layers and also the bear. Pro tip: Instead of making a single layer die cut for a big piece, try doing 2-3 layers and gluing them together. All the bear pieces (body, arms, feet, face) are two layers of kraft paper glued together. It makes it so much sturdier and it just looks better. An easy tip to level up!!
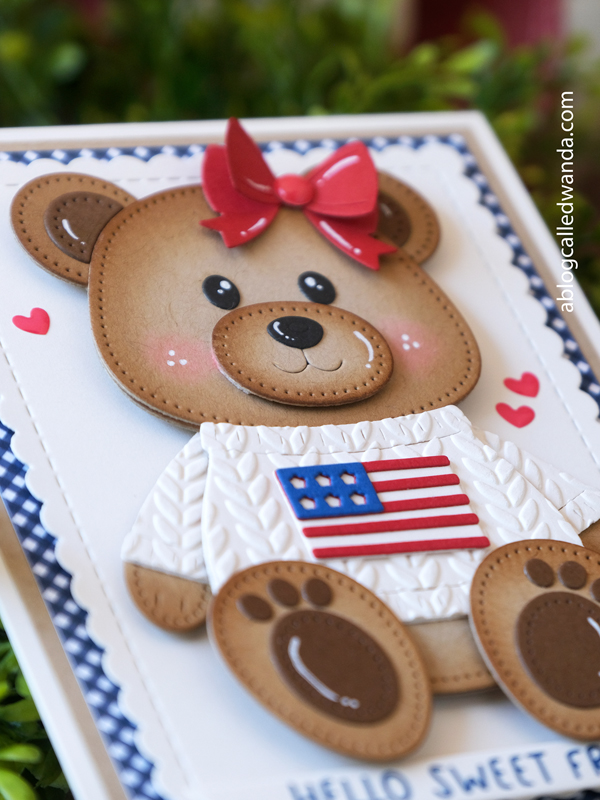
For her sweater (she is a Ralph Lauren girlie) I die cut the sweater pieces from cream cardstock and then ran them through an embossing folder that looks like cable knit! I looooove how this came out! I die cut the flag and the bow and assembled the entire bear together. (This one took some time to dry and finish)
I used a Q-tip and distress oxide pink ink to make her cheeks. I also inked the edges of all the pieces in brown distress ink and a blending brush. I added white gel pen accents at the very end of the process. The white gel pen works best if you wait until the ink blending dries completely.
The sentiment is from a C9 stamp set and I stamped it in cream with navy blue ink and then cut it into a banner. There’s not a ton of room here for a sentiment, so this worked out great.
That’s it for today’s post! I can bearly contain myself over this card! I hope you have an awesome weekend and a beautiful day. Keep on crafting! XOXO
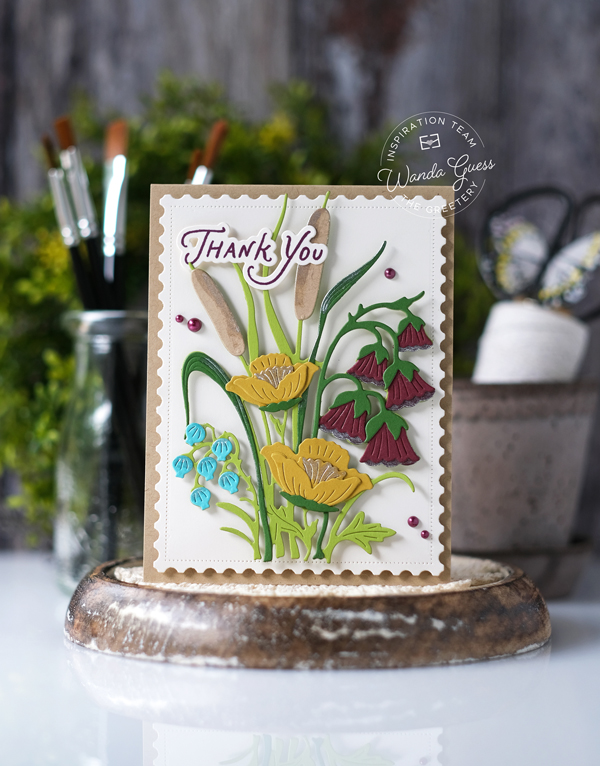
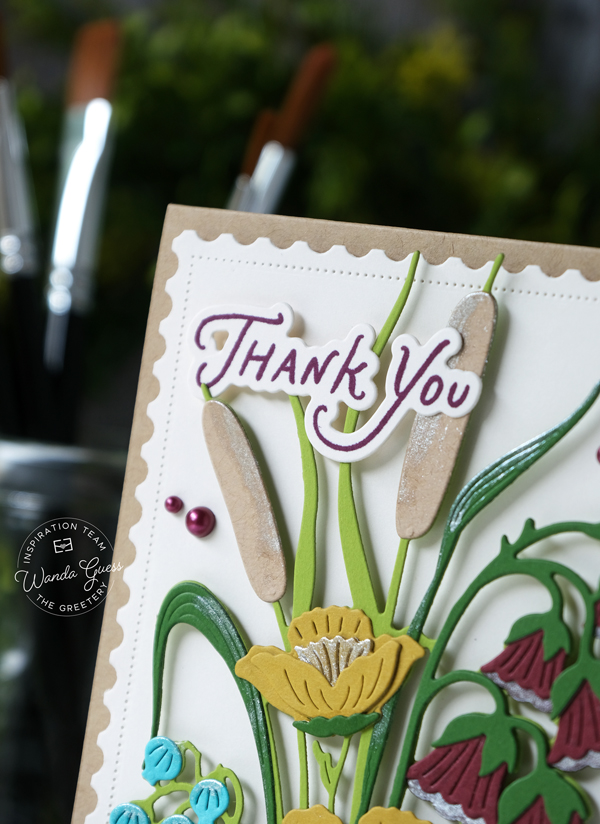
Hi creative and crafty friends! It’s Wanda here, and today I am up on The Greetery Blog. Happy Summer! Hope you’re doing great and having fun in the sun! I feel like you can never have enough thank you cards on hand, so that’s what I made to share with you today. I used the gorgeous Wild Wetlands dies along with a muted/vintage color palette. I love that the Wild Wetlands dies can be used in any color combination which totally changes the feel of the project. I have to remember to push myself to try new color combos…so I’m reminding you too!
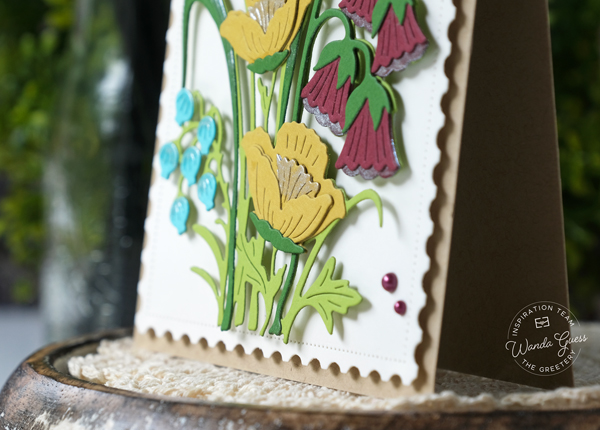
My finished card is an A2 Kraft card base, layered with cream (adding to the vintage feel)… My card’s focal point is that gorgeous floral spray – Wild Wetlands. I also used the brand new sentiment set from the last release – the Laid Back Basics. I really love this cool font. This card is pretty clean and simple and would be great for mass production. I also like that it can be used to send to a man or a woman for a thank you.
I started by die cutting out all of the flower pieces from the various colors. Then I used silver metallic ink to add details and shading. I used two shades of green to the spray which makes the dies have more depth. I stamped the sentiment in burgundy ink and die cut it out with the matching dies. I affixed everything to the card using foam squares. My finishing touches are just a few burgundy pearls.
That’s it for my project for today! I hope you have an awesome and creative day! Wishing you all the best as we head into the heat of Summer! When it’s hot, I like to hide out in my craft room! It’s my pleasure to share with you all the fun Greetery projects. I will see you soon… In the meantime, happy crafting! XO Wanda
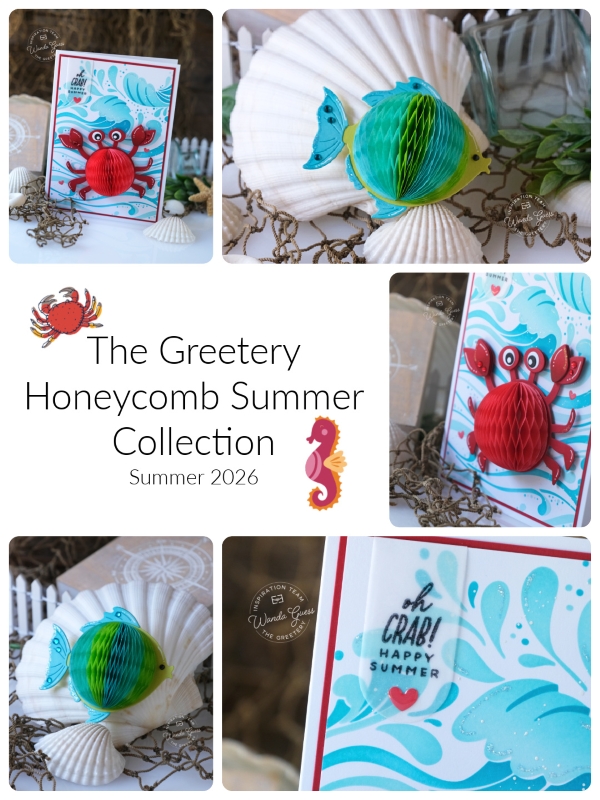
It was my pleasure to introduce the brand new and FUN Hey Honeycomb Summer Collection to you this week! And, I hope you love it as much as I do!! Why am I suddenly humming the songs from Little Mermaid? LOL. Happy Crafting!! If you scroll back to my last blog post, you can see all my projects from the new release! If you have any questions – reach out!! Thanks for all the love and kind comments! Happy Creating! Can’t wait to see what YOU make!
If you would like to subscribe to my blog – and never miss a post – please sign up by clicking this link! I would love it! CLICK HERE TO SUBSCRIBE!