Category: Papercrafting

  • Taylored Expressions July Sneak Peeks!

      ZJuly2012Release


    It's TE Release Week for July! We are doing the release a little early this month since next week is the 4th of July holiday and everyone will be out celebrating! Today we are going to show you ALL the new stamp sets, dies and impression plates, so make sure to hop around to all the Baker's Dozen blogs! Also, did you hear the news? We have two new members of our design team! YAY!

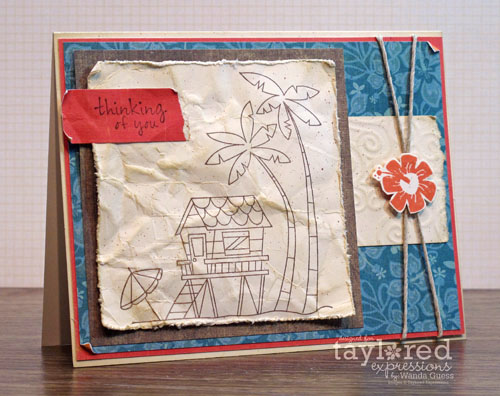
    Today I'm taking you away to Coconut Cove… Coconut Cove stamp set is from the Apple Doodle Ink line by Doug Applegate! Doug's Adorable Abodes #7  was concepted by Jami Sibley! Who wouldn't want to hang out on the beach in this hut and drink out of a coconut? I love this set because it's perfect for summer scrapbook pages and can also be made into masculine or feminine cards. It has great sayings and accent pieces!

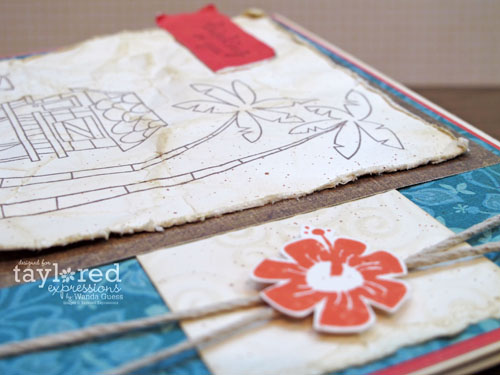
    I'm also going to be showing you a new Impression Plate – The Waves/Bubbles Impression Plate – this double-sided plate will work so well with all of the sets in this release!  Have fun with it. I'm using it in two projects this week! Here's my card for today…shabby beach…
     

    Wednesday1


    Here's a peek at all my layers and distressing! This was fun! All the papers are from the Paradise Beach Collection from Echo Park…and they're yummy! I love the blue together with that rusty orange.

    Wednesday2


      Wednesday2a


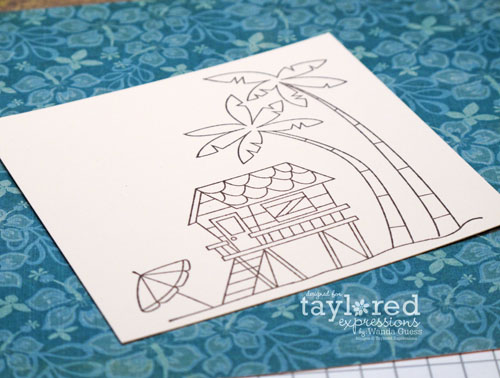
    Remember that all TE stamps are high quality red rubber – not clear – for a great impression every time. The sets all come on a full color storage panel and are packed with images and sentiments. Here's my process for distressing this cute image. I started with brown ink on cream cardstock.  
    Wednesday3


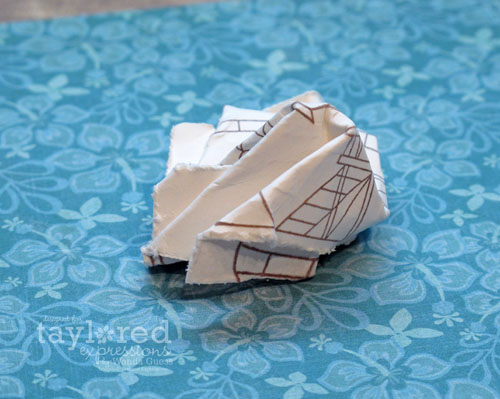
    Next I frayed the edges, spritzed the whole thing with water, and crumpled it into a ball!
    Wednesday4


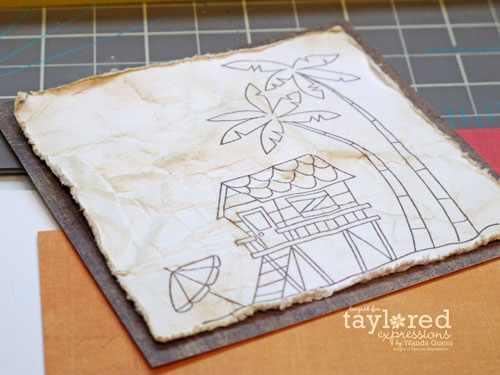
    After unfolding it carefully, I let it dry and then added distress ink around the edges and on the wrinkled parts. I kinda think it looks like part of a treasure map now! 🙂 I mounted the main image onto the brown paper – with foam tape.
    Wednesday6


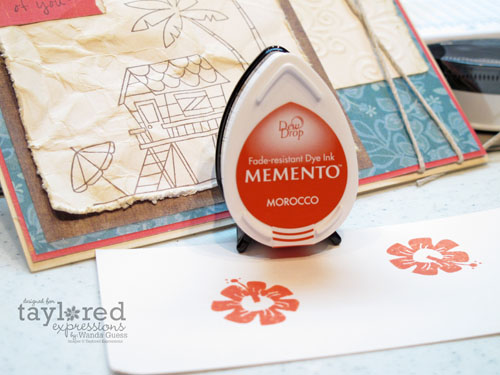
    This is one of the BRAND NEW ink colors from Memento! There are 12 new colors…and I just got them all from the TE store! Check 'em out. This orange is the perfect color for this project.
    Wednesday7


    Here you can see the waves side of the new impression plate – perfect swirls for summer waves… 

    Wednesday9


    Zzwavesbubblesimpressionplate[1]


    TE July Release details:

    • The Baker's Dozen has 4 days of inspiration, today through Saturday, featuring all the July Release products.
    • All of the new products will be available for purchase on Thursday, June 28th at 8 am PST. You'll find it all in the Fresh out of the Oven Department at the Taylored Expressions Store.
    • Join us as a fan on Facebook for a look at the stamp sets and a SPECIAL Facebook GIVEAWAY, tonight (Wednesday) at 6 pm PST.
    • Blog Giveaway – TODAY ONLY – Two lucky commenters will be randomly chosen to win a $10 TE Gift Certificate. Hop around to see the sneak peeks and leave comments on each blog for more chances to win. Winners will be announced on Taylor's blog on Thursday morning.


    Here's your link list for today!

    Charmaine Ikach

    Jami Sibley – DT Coordinator

    Jen Shults

    Jodi Collins

    Karen Giron

    Melody Rupple

    Nancy McKinney – Illustrator
    Regina Mangum

    Sankari Wegman

    Shannon White

    Shelly Mercado

    Stephanie Kraft

    Taylor VanBruggen

    Wanda Guess 


    Birdie signature!


  • The Gingham Bow Project…

    Hi blog friends! Happy Sunday afternoon…it's quiet around here and it's just what I needed. Busy day yesterday stamping and chatting with good friends and lots of driving. Today, it's a little time in the crafty cave and a silent house. The DH is off helping his brothers with some stuff. It's been a great day getting caught up on craft projects and laundry. Next I have to tackle my overflowing email inbox! I just can't seem to catch up on that!

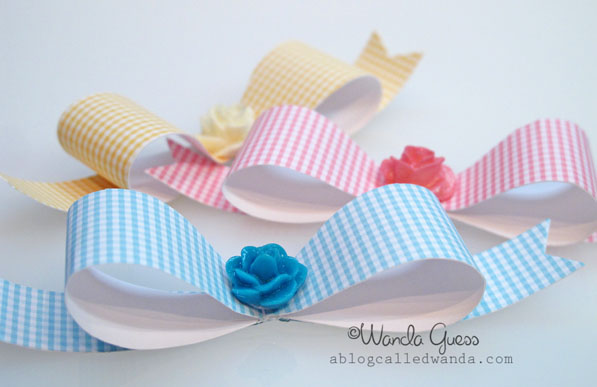
    I've been seeing lots of paper bows everywhere lately. The first one was on the cover of the current Stampin' Up catalog. Then on some other blogs…  I love the technique and wanted to try my own take on it. After some trial and error, I came up with some gingham paper bows that I really like! I hope you like them too. Thanks for coming by today!

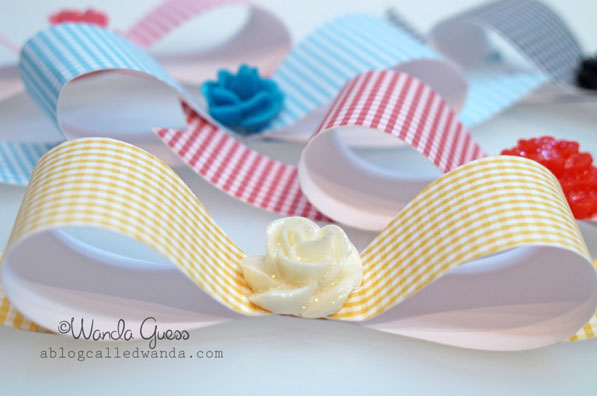
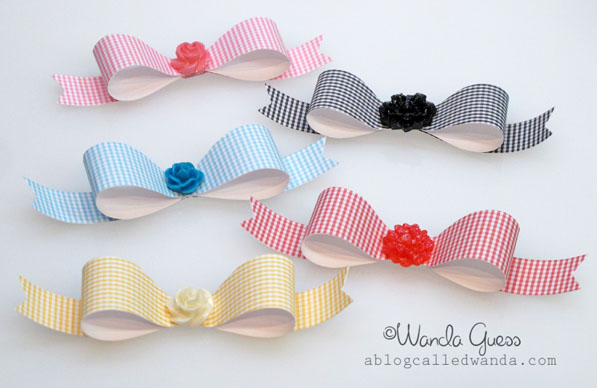
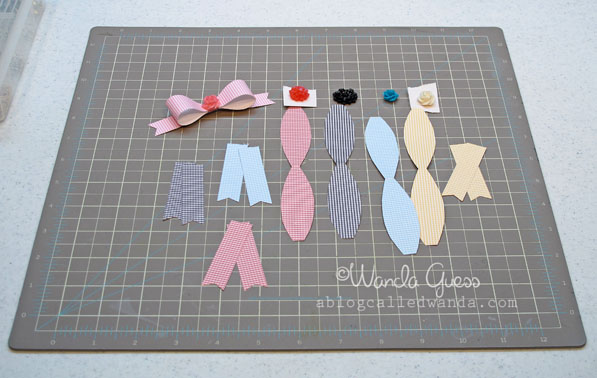
    Here are the final bows…and I'm going to go step by step for you so you can make some too!


    1


    I ended up making five in all…once I got the swing of it, they didn't take too long.

    2


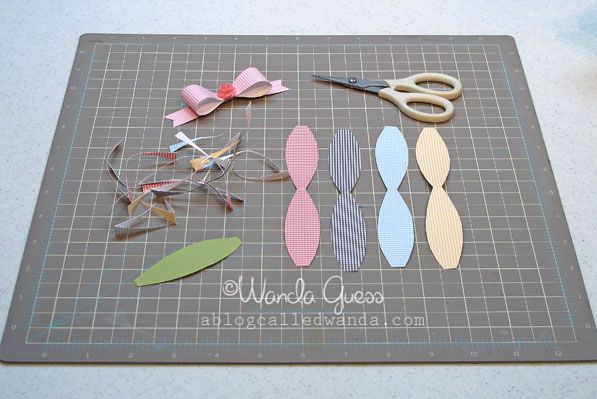
    Start with strips of paper one inch by six inches….then fold then in half….

    3


    You're going to free hand cut them into bow tie looking shapes. I made a rough template out of a piece of green cardstock (sort of a leaf shape) and then layed it on top of my fold and cut them out. The fold is the thinnest part as you can see in the picture. Don't worry about being too perfect with this. It will work out.

    4


    I cut the tails out using my MFT Flag Stax dies….Two for each bow. You can adjust the length to your liking.  

    5


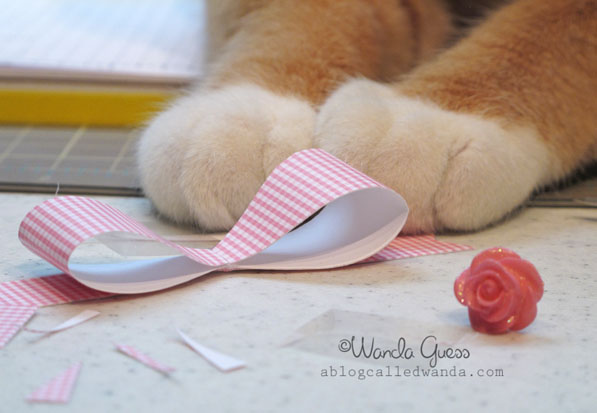
    Helping hands!

    5b


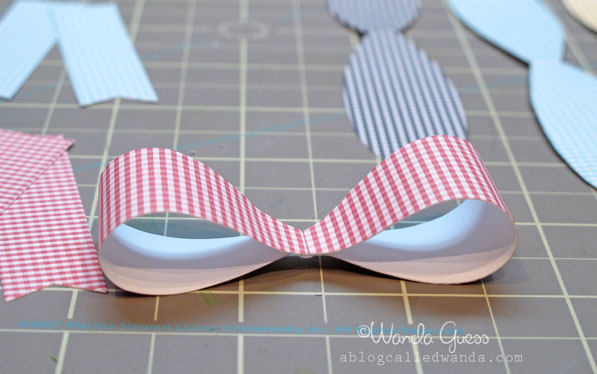
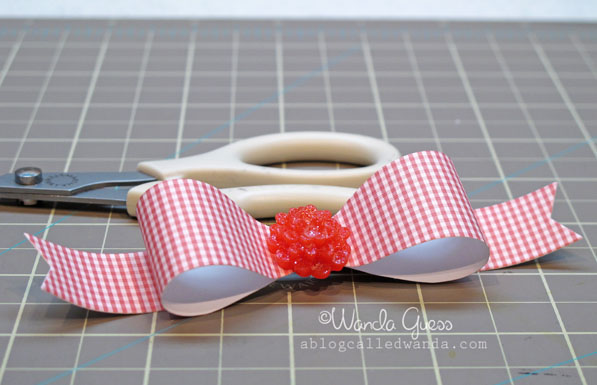
    Before gluing down my bows, I gently curved the paper with my fingers. This way, you will get a round shape instead of a crease when you glue the ends down in the center. I hope this makes sense…

    6


    Here are the bows glued in the center with a glue dot.

    7


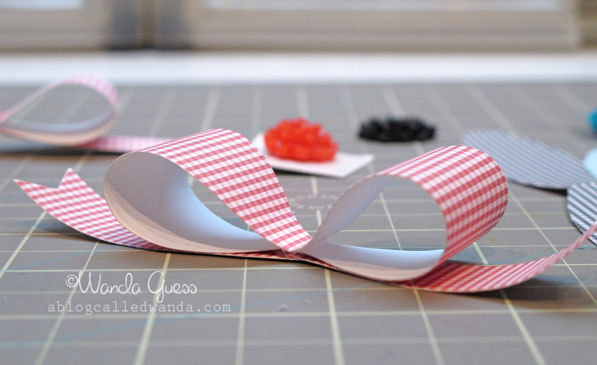
    Add your tails underneath using some more glue dots…

    8


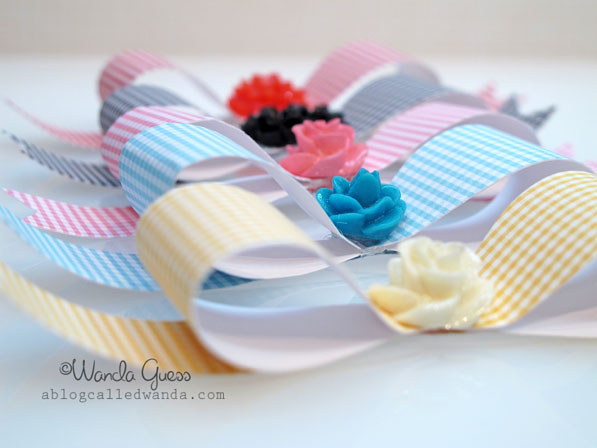
    The fun part is picking what you want for the center! I tried buttons, brads, flowers, rosettes, everything you could think of. I ended up liking these resin flowers the best.

    9


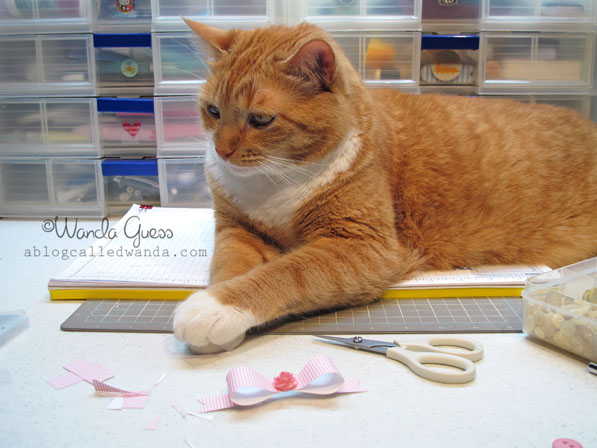
    No, Buddy, it's okay, I don't need more than three inches of space on my giant work table! LOL! He always has to be part of the action.

    9a


    Pretty bows, all in a row….

    10


    11


    So, now the question is…what to do with these bows!? I could put them on a package, or on a card, or on an envelope. I think they might be cute on place cards for a shower. What do you think? What would you do with them? And…will you try and make some too!? Have a fantastic week ahead. Love ya my bloggy friends!  

    Birdie signature!

  • Sweet yellow flowers…

    Hi peeps! OMG where did this week go? I think I saw it whiz by me in a flash, and I still don't know what the heck happened! How are you? Happy Friday! It's actually late Thursday night, so we'll go ahead and call it Friday! You don't mind, right? Hope you had a wonderful week!

    I had every intention of blogging all week and never got around to it. But, here I am! Just in time to share something for the weekend. I'm very happy because tomorrow I will be spending the entire day with one of my besties as well as my crazy gang of stampers that I've known for years and years….and I cannot wait! Yipppeeeee!

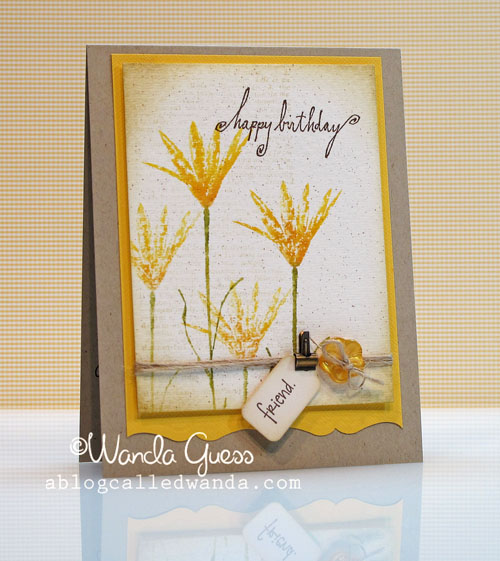
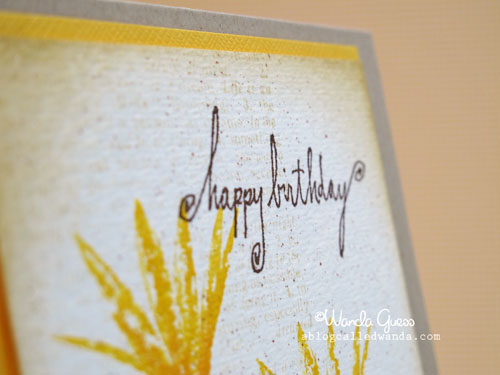
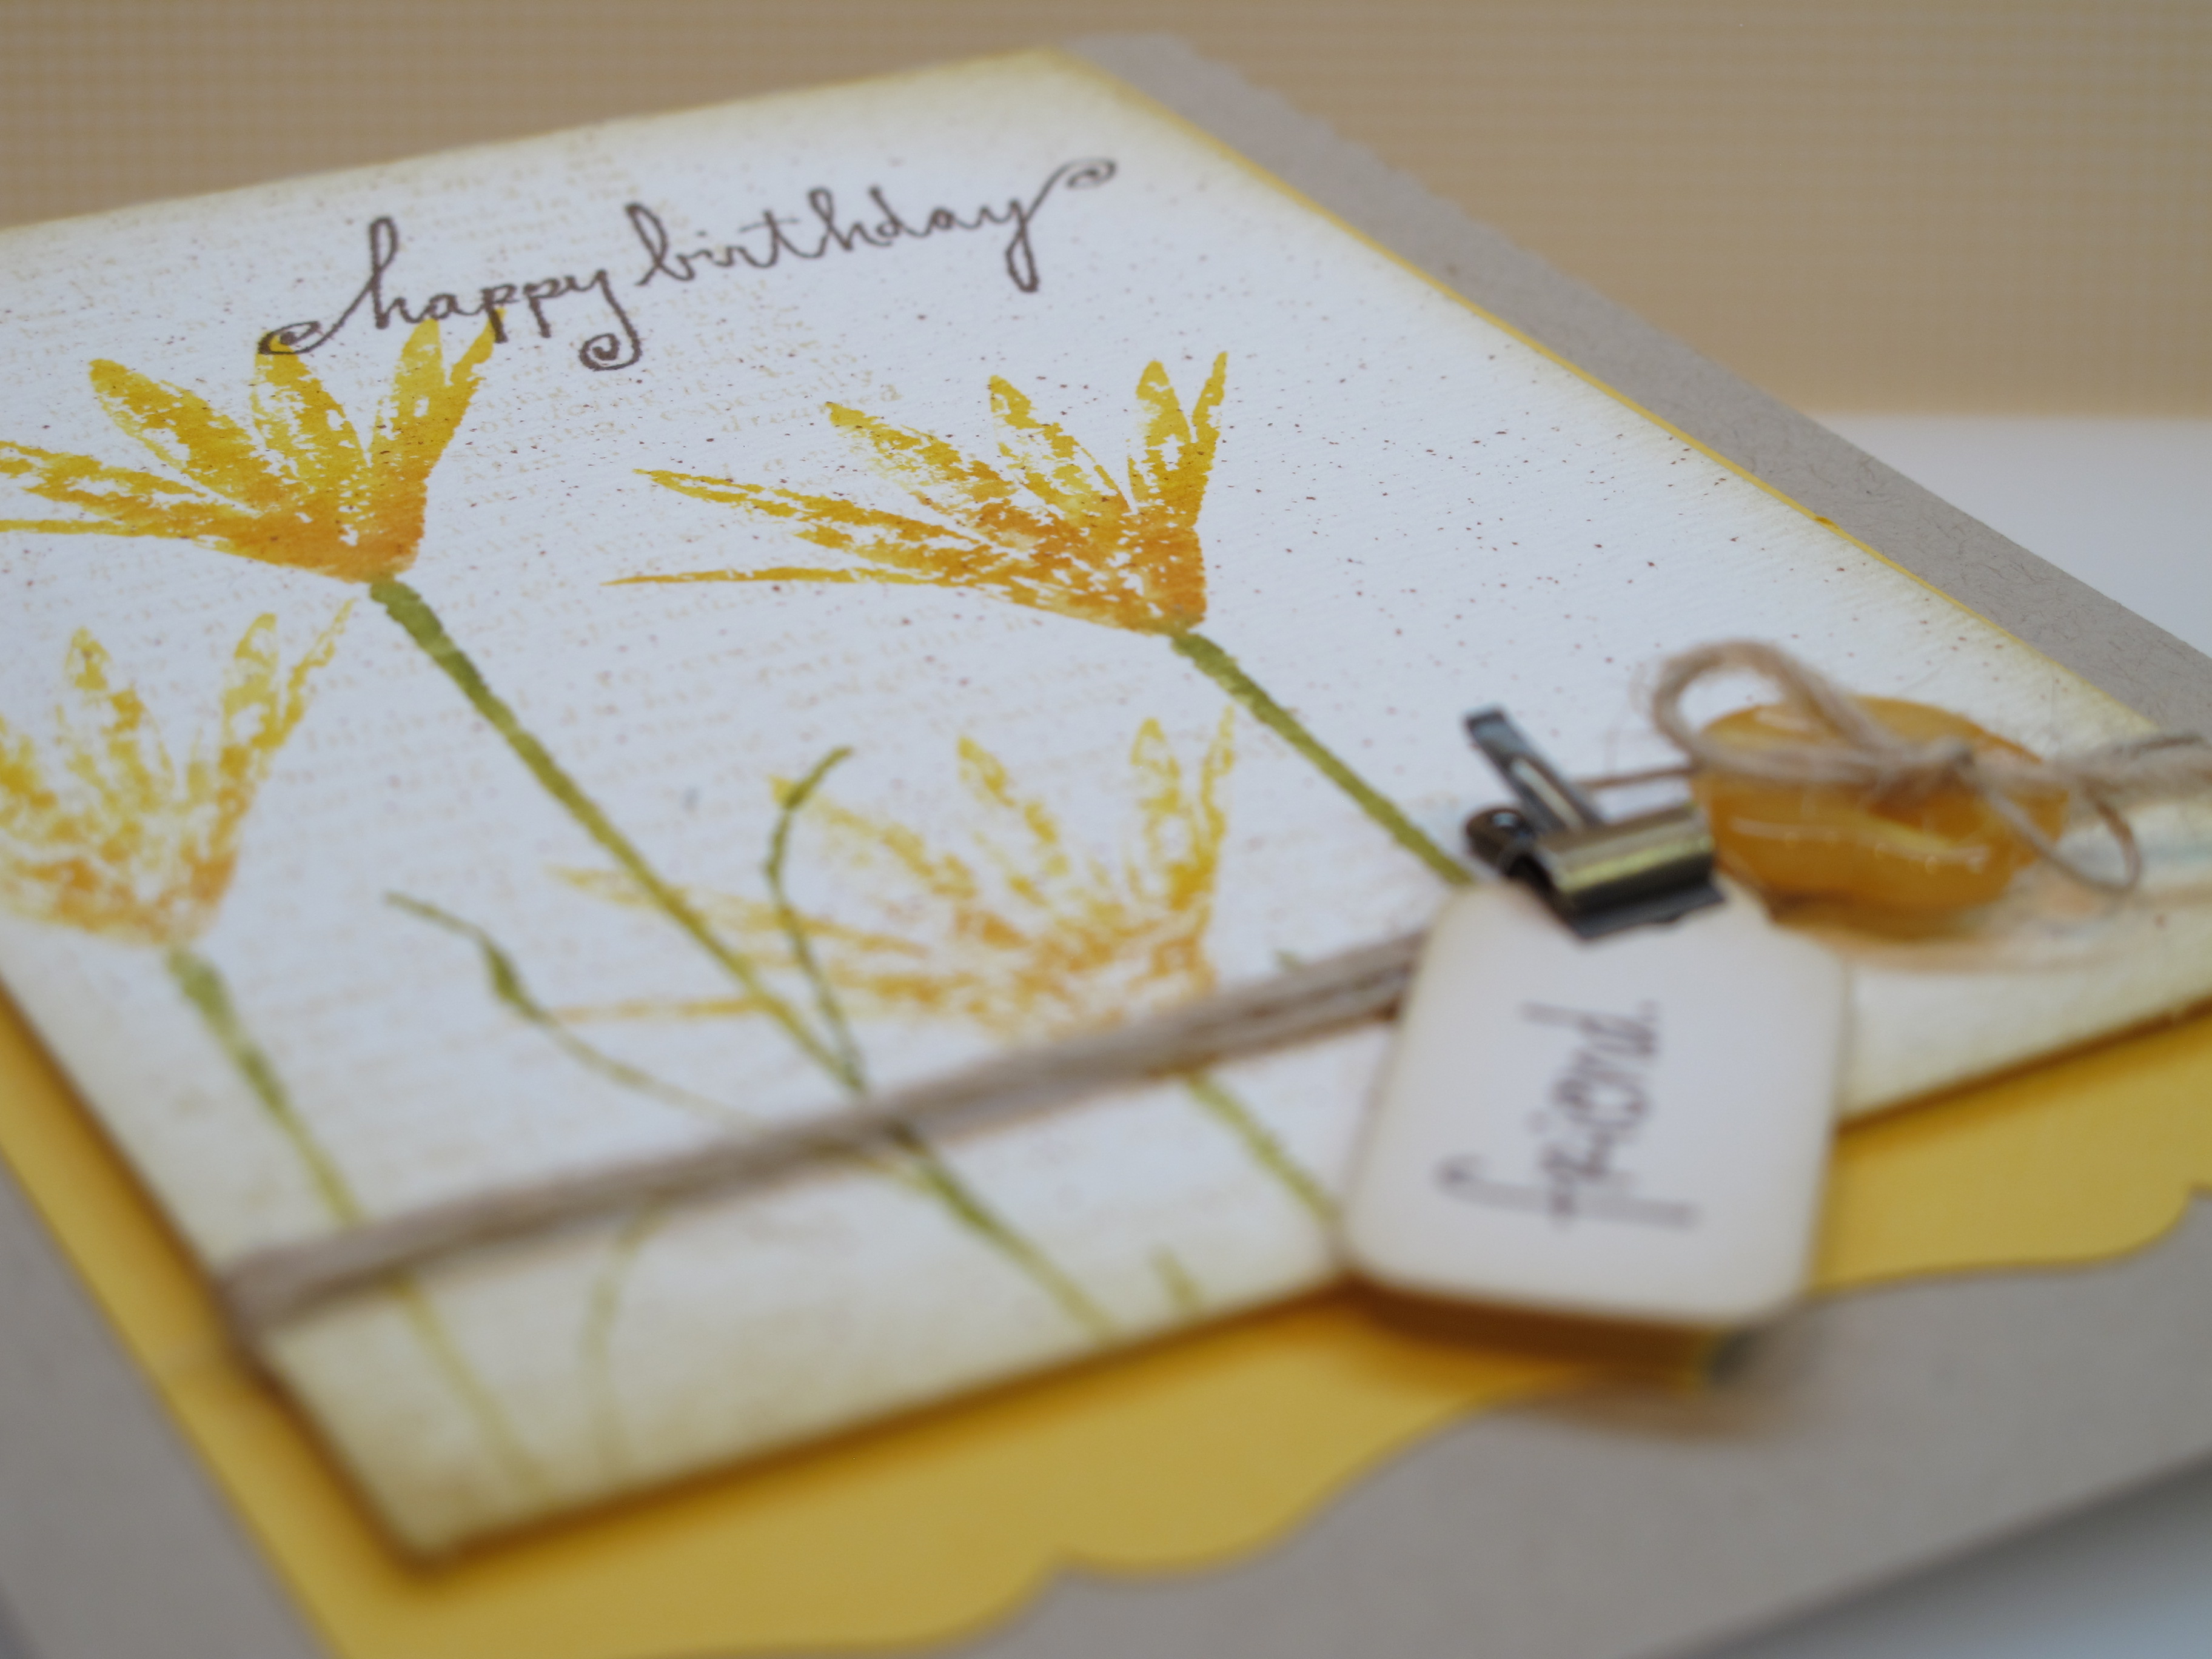
    The card I have to share today was made with some brand new Memory Box goodness. YUM. It's a birthday card I made for a co-worker last week and she's already opened it, so it's safe to post now. I used one of my favorite techniques to create a sweet, natural looking card. Hope ya like it.


    1


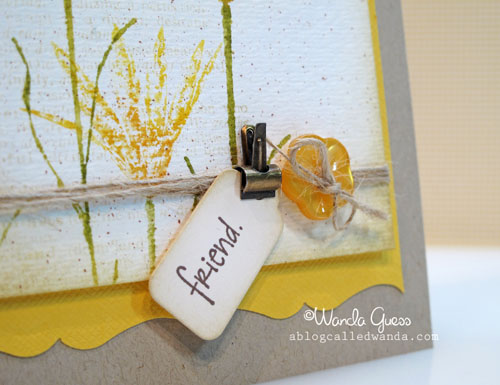
    You can see the text stamped on the left side in very light ink. I used watercolor paper and lots of distress ink and some speckles from my blow pen. That adorable little tag is from a die set from Taylored Expressions, and the clip was in my stash!

    2


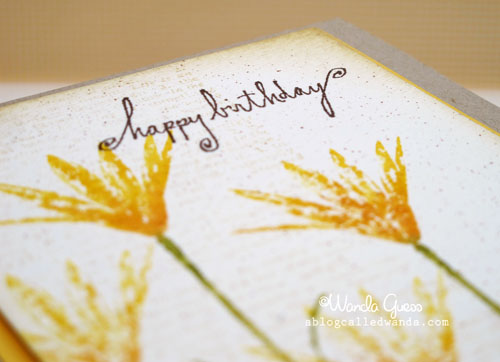
    Here's a close up…The flowers and the text are from Memory Box. I am sorry to say I don't know who makes the happy birthday stamp – I've had that one for years. I used my watercolor spritz technique to make the flowers blend into the paper.

    2a


    My set of supplies…. 

    4


    9


    I really just can't say enough how much I am enjoying these Tim Holtz Distress Markers…they are the perfect colors that I love and so nice to work with.  

    5


    I was able to stamp twice from each time I inked up the stamp. These new stamps are AWESOME! A bit of twine and a button just finished it all off…

    10


    I must say, that at the end of this crazy week, this is EXACTLY how I am feeling!! I just want to pass out and take a nap! LOL. Hmmm, I wonder why sometimes I don't really get that much stamping done?

    11


    Thank you so much for coming on by to see what I'm up to! I'm happy you're here. Have a blessed day and a fantastic weekend! XO.


    Birdie signature!

  • A Special sweet birthday treat for a special gal!

    Hi friends!! How was your weekend? It was H-O-T here in Sactown this weekend. Yowza! We escaped to the ocean on Saturday to get away from it and I'll have some nice, cool oceany pictures to share tomorrow or Wednesday. Did you do anything fun? Dad's Day, grads, weddings? Summer is fully upon us now and time for all kinds of happy celebrations! – Birthdays too!

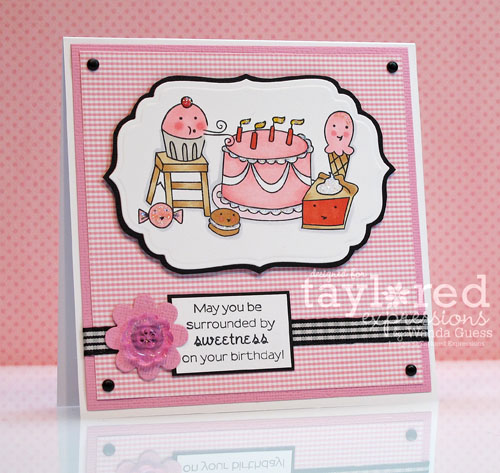
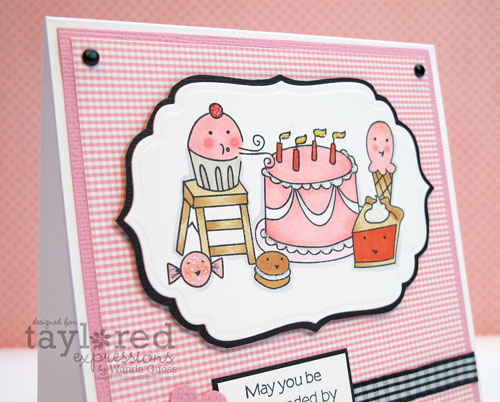
    Today I'm sharing a card I made for a special gal – Taylor! Last week was Taylor's birthday and so I just HAD to make her a cuppie birthday card, right? Of course! Her fav color is pink, and so you know how this turned out! A sweet pink card confection for a sweet lady!


    Taylorbday1


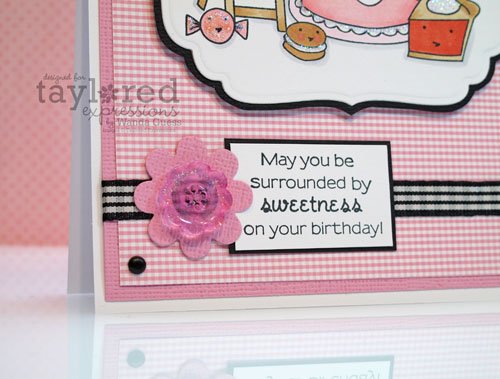
    I added some pops of black to ground all that pink. It doesn't take much and it frames the image nicely. Some tiny black brads and some gingham ribbon…

    Taylorbday2


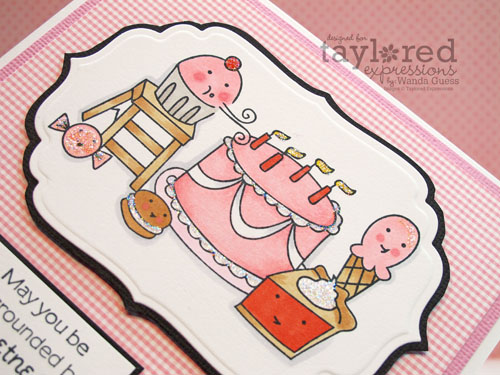
    I kept my Copic coloring very simple – just pinks, light browns and light red. I used my Nestabilities for the frame cut out. The stamp set is called Sweet Party! 

    Taylorbday3


    Can you see the little pops of fine glitter on the card? YUM! Makes it extra sweet!

    Taylorbday4


     Sweet Party


    Shaped Buckles


    So, Taylor, may you be surrounded by sweetness on your birthday….and every day! This one's for you, with love.

    Taylorbday5


    Thanks for stopping by the bloggy blog today! Have a super-fun-fantastic week!


    Birdie signature!


  • I’m berry happy it’s Friday!

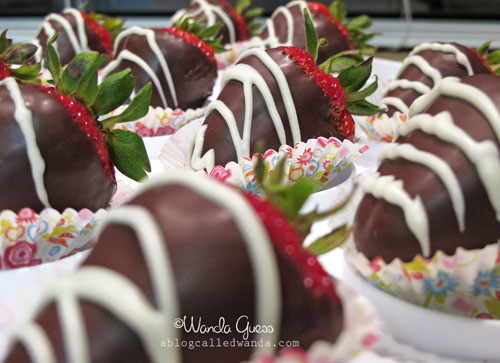
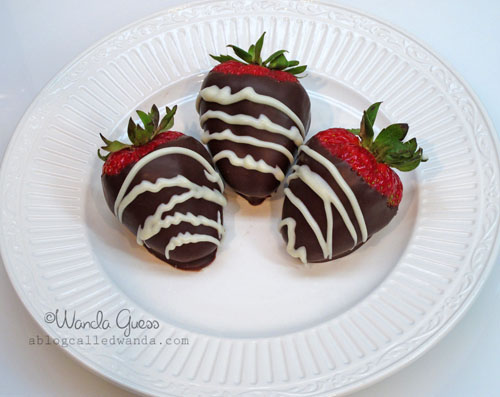
    Hello there blog friends! Happy Friday from me to you! I'm berry happy it's Friday and berry happy to share this post with you today! Have you had enough of my berry silly humor yet? Okay, I'll stop. But I was cracking myself up right there! LOL. Summer means strawberries and also cute crafty and tasty treats made with strawberries! I have both a card and a treat to share with you today. 

    I made a card using some awesome Papertrey Ink products, and then I'm also sharing my way of making chocolate covered strawberries – I made some this week for a co-worker's birthday.  I hope you have a super fun weekend of Summer stuff planned. Whatever you do, make it memorable!

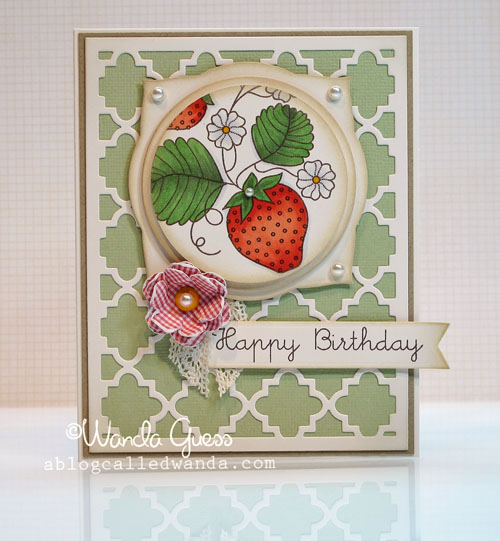
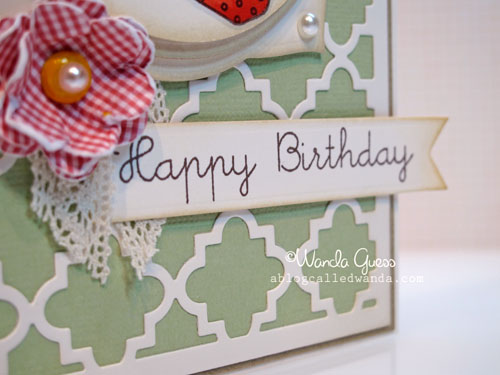
    Here's my card, using Papertrey Ink's Strawberry Patch stamp set and the ultra favorite Quatrefoil Die. All the paper is cream cardstock, not white, for an antique feeling. 


    1


    I went through ALL my flower doo dads and couldn't find one I liked for this project, so I made my own out of some gingham paper and a punch. I scrunched it up to make it vintage and then added a brad and a pearl. The brad was colored with my Copics to match exactly to my other coloring. The sentiment is also PTI. 

    2


    Here is a close up of my layers – cream + cream + cream = yummo! I like how this looks and I'll probably do this again.  

    2a


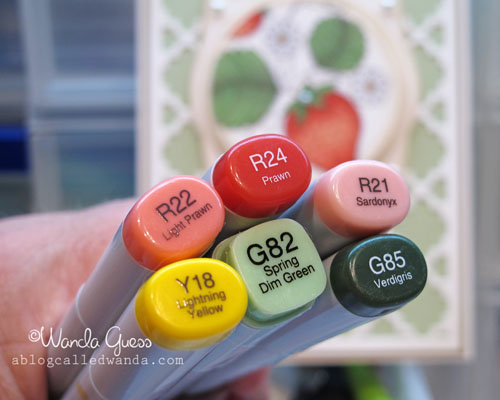
    Here is my Copic palette:

    3


    4


    Now for the snack section of our blog post today! Yay! I wanted to make my friend KS some strawberries for her birthday on Wednesday. Hadn't made them in a while and it just sounded so good. Strawberries are in season and there were some beauties at the store…Here they are all washed and ready to go.

    Tip #1 – make sure the berries are 100% dry before dipping them in chocolate! If there is any moisture, the chocolate won't stick and the chocolate may seize on you.


    IMG_3127


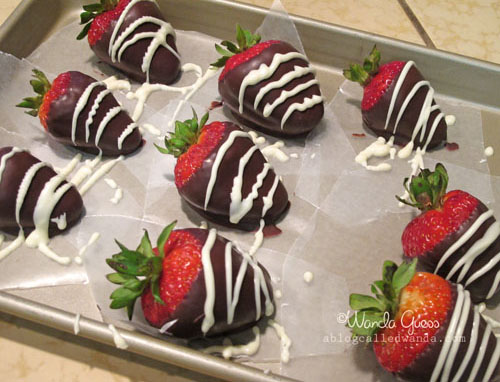
    Here they are after their first dip into some semi-sweet melted chocolate. Tip #2 – use good chocolate and add a smidge of Crisco to the melting chocolate – it makes them shiny!

    IMG_3141


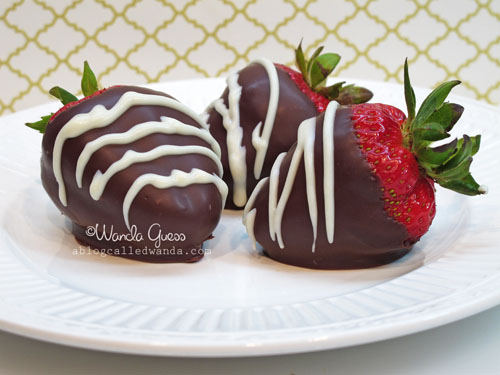
    And here they are after a little white chocolate drizzle… Tip #3 – let them cool in the fridge completely before adding another layer or a drizzle. Otherwise it all oozes together.

    IMG_3144


    Yup, they were just as delicious as they look!!! You know I had to eat the ugly ones…. Only the best survived the process! Hee hee. (Kinda like eating the rough edges off the rice krispies treats – yeah, you know what I'm sayin')

    IMG_3145


    To package them up for work, I used my trusty cupcake carrier. I put the berries into some pretty, small size cupcake liners so people could pick them up and have some way to hold them…. 

    IMG_3146


    IMG_3147


    Thanks berry much for coming by today – you're berry sweet to do so! Okay, I'm done now. Have a great weekend!  

    Birdie signature!


  • Happy Birdie Birthday! More KI Kit Goodness!

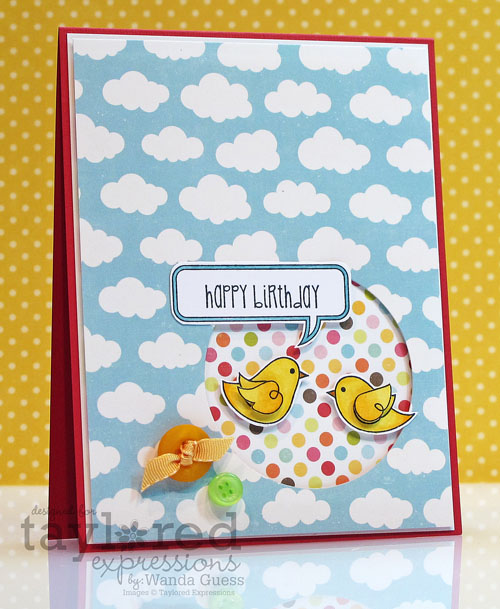
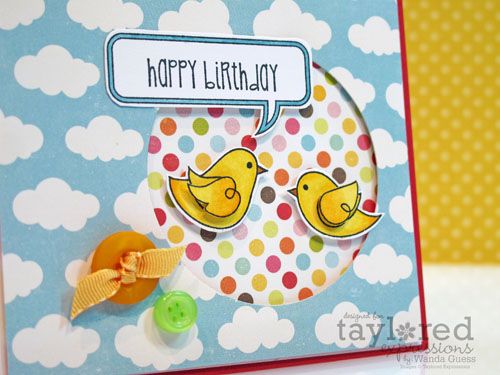
    Hellloooooooo! What's Up? How is your week going? Thanks for stopping in and hope it's all good in your corner of the world today! Today's post features some more love from the Taylored Expressions June KI Kit! You saw this on my blog on Sunday and I have one more happy project to share from this great kit. It's (sort of) clean and simple…I really wanted to keep it sweet with those little birdies and that adorable cloud paper. Hope you like it


    IMG_2944


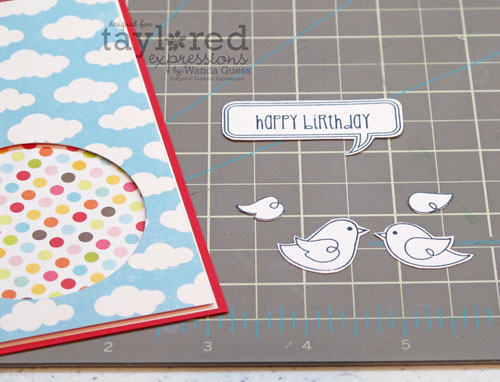
    I stamped and cut out those adorable birdies and colored them with my Copic Markers. I stamped them again and cut the wings out and popped them on some foam tape to give them some more depth. I ADORE the sentiments and the word bubbles that come with the exclusive stamp set that matches the paper. I know I'll be using them a lot – probably with Mr. Cuppie!  


    IMG_2945


    IMG_2948


    Here's a side view so you can see my layers. 

    IMG_2946


    IMG_2947


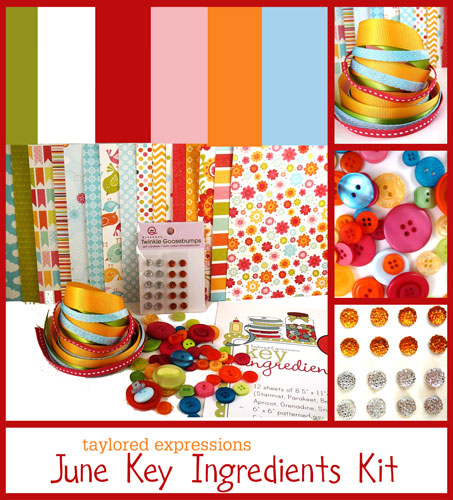
    Here are photos of the KI Kit, and what's included, and also the EXCLUSIVE stamp set that matches! Yay!  


    Zzzzz


    Zzz


    Here are all the deets on the KI Kit - The Key Ingredients monthly subscription helps you plan your crafty pursuits AND you enjoy a 10% discount on everything the TE Store has to offer! Shipping is included in the price of the monthly subscription and if you're within the U.S. then shipping on additional items is FREE! Another bonus is that all of the kit supplies are packaged together in an 8.5" x 11" plastic storage case! It's a great organizational tool to keep all of your coordinating supplies together and then once you're finished with the kit ingredients the cases can be used to organize lots of crafty items! The plastic storage case (a $3.25 value) is passed on to our subscribers absolutely FREE!

    For some more inspiration using this amazing June Key Ingredients Kit, check out my friends here: Sankari and Melissa! For all the details on this fabulous value, and how you can get the exclusive (and adorable) Delightful Day stamp set, check out The Key Ingredients Blog!

    Thanks SO much for stopping by!


    Birdie signature!


  • New stuff from Poppystamps!!

    Hi everyone! Did you have a nice weekend? I sure hope you did! Mine was a very productive weekend and fun too. I like it when I get a lot done around the house and still have time for some fun. Saturday we worked out in the front yard planting and pruning and fertilizing (and getting a sunburn). Then we made a run to Home Depot and out for lunch together. Sunday I re-did part of my craft studio with some Elfa shelving that a friend gave me when she moved (YAY Elfa), and then I stamped the rest of the day… Lastly I made one of my favorite dinners – taco salad! Whew, I'm tired just typing all that! LOL. It was great to get some things done. Back to work so I can rest today!

    Many of you know that I am the blog mistress for Poppystamps. Well….brand new dies are out from both Poppystamps and Memory Box, and lemme tell ya, they are awesome! I have two cards to share today made with the new PS dies. Hope you like 'em.

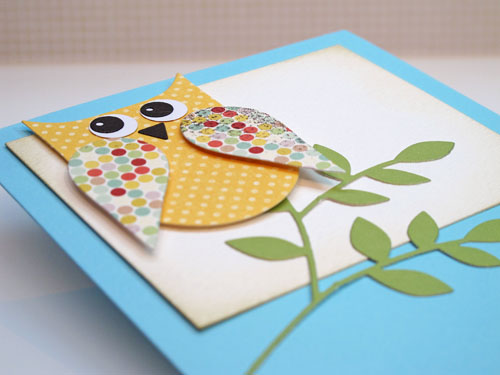
    First up is a card using "Clever Owl" and a new leaf die, along with some Memory Box papers and sentiment. Isn't he a hoooooooot?!


    1


    Here's a close up of the little owl. I mounted him onto watercolor paper and distressed the edges a bit. I know I will use this die a million times…

    2


    2a


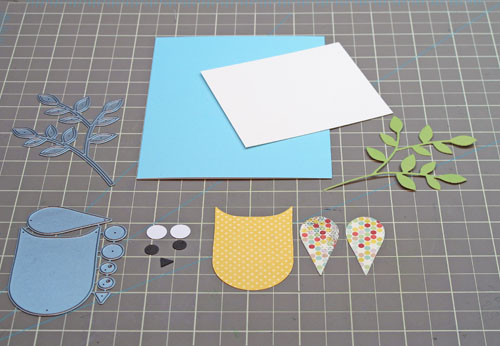
    I had to post a picture of the die and the little pieces. Isn't this cool? Only Dave could invent this! If I looked at that die, I would have no idea what it made! SO creative. I adore this.

    3


    IMG_3041


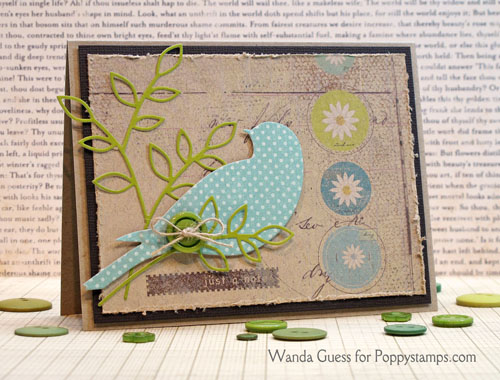
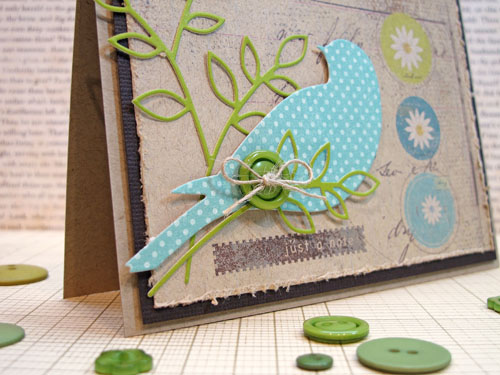
    The second card has more of a vintage vibe to it. The big bird die is called "Serene Bird" and could be used for so many things. I combined it with another new PS die and Memory Box papers from the Valise collection.

    1


    I distressed my edges and stamped the sentiment in brown so it looked like part of the paper. My layering piece is chocolate brown, but it came out really dark in the photo.

    2


    3


    4


    Here's a photo of Buddy helping with the Elfa project….

    Buddy elfa

    Thank you for coming by to see what I'm up to! I hope that you have a wonderful week and that you get to be creative and have some fun! XOXO

    Birdie signature!


  • Taylored Expressions June 2012 Release Day!

    99

    TE RELEASE DAY! 

    • All of the new products are now available for purchase! Check out the Fresh Out of the Oven Department to see everything in one place!
    • More projects from the Baker's Dozen to inspire you. Just follow the link list below.
    • Be sure to check the TE Current Specials page to find out how you can get FREE 4th of July Stamps with your purchase.


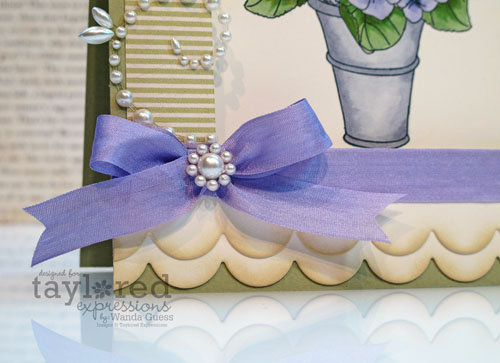
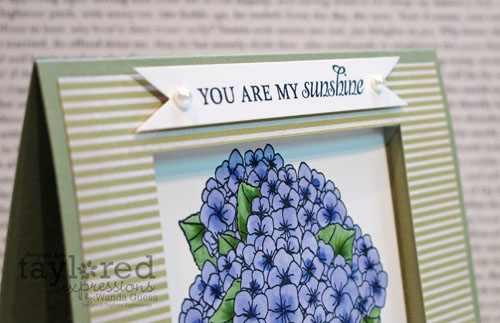
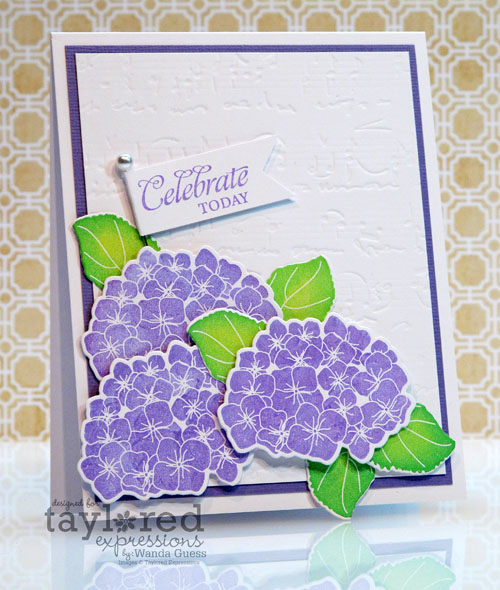
    Today is our release day and also day 2 of Hydrangea projects! YAY! Today's card features a set from the Whimsical Wishes Collection by Nancy McKinney and it's called Hydrangea Bouquet – It is a Petite set of 6…and it is the 3rd in our little Bouquet series. Coordinates with Forever in Bloom. Customers are loving these bouquets and so am I!  They are so versatile and make such pretty cards so easily! Also coordinates with the Mini Tags Taylored Dies.

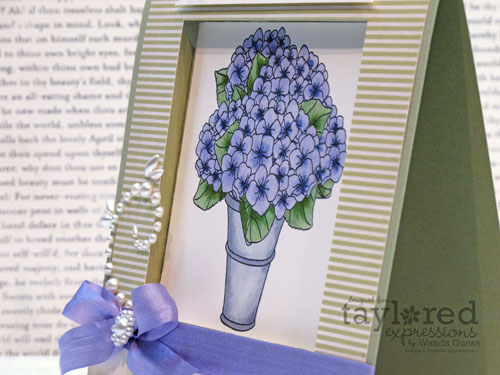
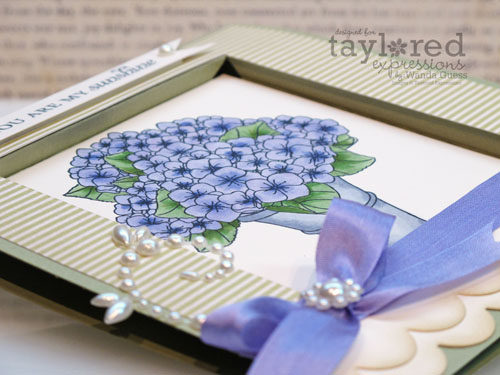
    Here is my card project for today… It's called a Recessed Window Card! There is more information below about how you can make one yourself! It's a nice card/gift for someone to put on their desk or table. I used a piece of striped paper from the MME Rosy 6×6 paper pack on the front and the popular Medium Scallop TE Die too! 


    Dthursday1 copy


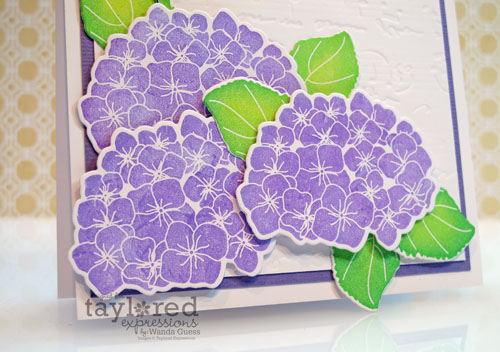
    Here is a close up of those yummy scallops and my coloring….

    Dthursday3a


    Once again, Taylor knocks it out of the park with the perfect sentiments…. This is a good side view so you can see the recessed window. My finished card is 5 1/4 inch square.

    Dthursday4


    Another side view of the window so you can see exactly what it looks like…

    Dthursday5


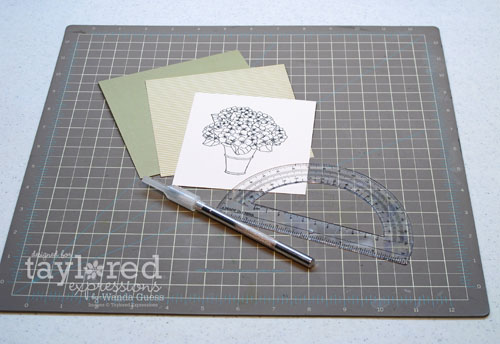
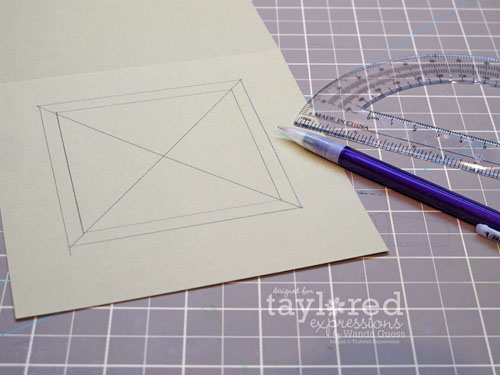
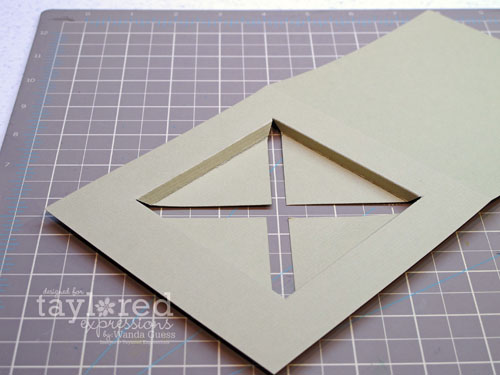
    Here is the LINK TO THE FULL TUTORIAL FROM SCS so you can go step by step on this one. I love it! It just takes a little time and some patience. It wasn't that hard, but you get a great result!

    IMG_2897


    This is how you make your window….

    IMG_2898


    IMG_2900


    What an awesome image to color! Here are my color choices for the flowers….

    IMG_2901


    When I went to put on my adhesive I turned my project over and this is what it looked like! I thought it was kind of neat, so I snapped a photo of it too!

    IMG_2902


    Here's the Medium Scallop Die….


    96


    Dthursday6


    Thank you, everyone, for another fabulous release week! I hope you've had fun and found some inspiration this week, and I hope you found some new stamps you want to ink up! Have a wonderful day!

    One last link list for the week: 

  • Charmaine Ikach
  • Jen Shults
  • Jodi Collins
  • Karen Giron
  • Melissa Sauls
  • Melody Rupple
  • Michele Boyer – Guest Designer
  • Nancy McKinney – Illustrator
  • Regina Mangum
  • Sankari Wegman
  • Stephanie Kraft
  • Taylor VanBruggen
  • Wanda Guess
  • Birdie signature!

  • Taylored Expressions June 2012 Sneak Peeks – Day 3!

    98

    JUNE RELEASE AT A GLANCE


    • We have sneak peeks to share Monday through Wednesday. All of the new products will be available for purchase on Thursday, June 7th at 8 am PST. You'll find it all in the Fresh out of the Oven Department at the Taylored Expressions Store.
    • Join us as a fan on Facebook for an early peek at the stamp sets, as well as a SPECIAL Facebook GIVEAWAY, on Wednesday night beginning at approximately 6 pm PST.


    I am so excited for today's and tomorrow's stamp sets….because they are all about HYDRANGEAS!! You are going to flip out over these new sets and dies too! You know how much I love hydrangeas!

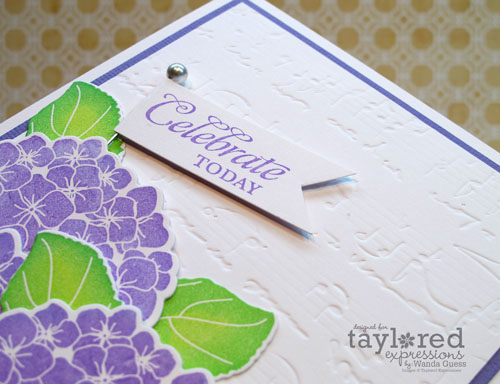
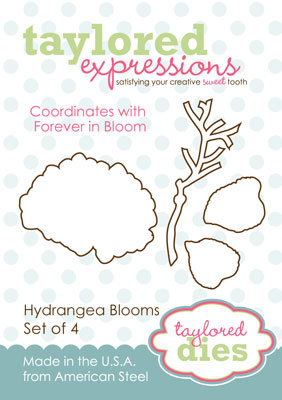
    Today I'm featuring a new set from the Whimsical Wishes by Nancy McKinney collection called Forever in Bloom – It is a Full size set of 16 images/sentiments. There are open line images to color plus solid images to ink up, rock'n'roll,  color with markers, and so many other stamping techniques to try. And of course we have a set of matching dies. Hydrangea Blooms –set of 4 dies to coordinate with
Forever in Bloom
. I used the stamps and dies together to make this card to share:


    Cwednesday3 copy


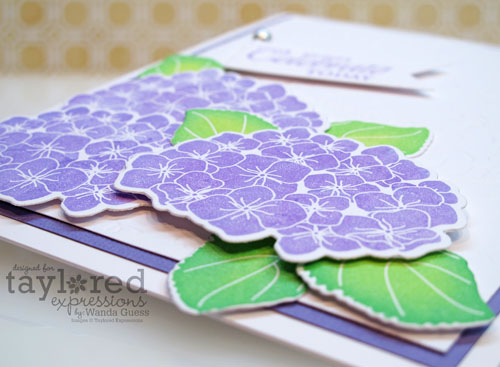
    See how perfectly the dies cut around the images!? This was so fun to make. I loved layering all those gorgeous flowers together with the bright green leaves…

    Cwednesday4


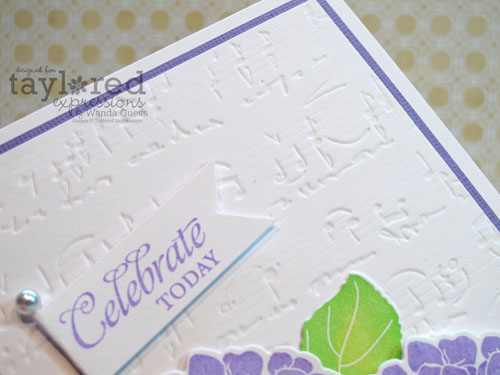
    The sentiments in this set are beautiful….I mounted mine onto a pearl pin. Can you see the Musical Swirls Impression Plate I used for my background? That's a favorite TE product from last Christmas and it's so classy.

    Cwednesday7


    Here are photos of the dies and the impression plate….

    94


    Musical Swirls Impression Plate


    I put one flower directly onto the background, popped the next one up on one layer of foam tape, and the third one is popped up on two layers of foam tape…Gives so much dimension!

    Cwednesday8


    Cwednesday10


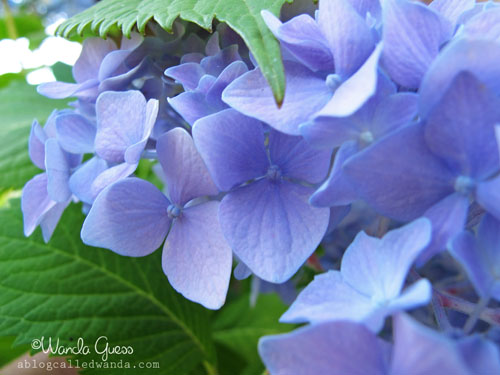
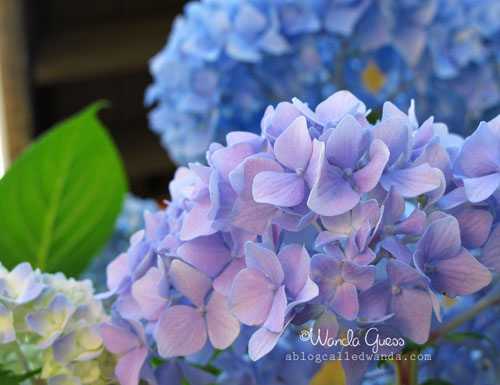
    So while I was in the craft room putting this post together…an idea struck me…so I grabbed my camera and headed out to my front yard to take some photos to share with you! As you see, I really am crazy about hydrangeas!! These are my prized Nikko Blues… Hope you enjoy a few pictures along with your card post today! hee hee.

    3


    2


    1 

    Now I have already seen everyone else's projects for today….and I'm telling you that you need to get going and take a gander! Wow! Have a blessed day and thanks for stopping in!


  • Charmaine Ikach
  • Jami Sibley (DT Coordinator)
  • Jen Shults
  • Jodi Collins
  • Karen Giron
  • Melissa Sauls
  • Melody Rupple
  • Michele Boyer – Guest Designer
  • Nancy McKinney – Illustrator
  • Regina Mangum
  • Sankari Wegman
  • Stephanie Kraft
  • Taylor VanBruggen
  • Wanda Guess
  • Birdie signature!

  • Taylored Expressions June 2012 Sneak Peeks – Day 2!


    98

    June Release At a Glance

    • We have sneak peeks to share Monday through Wednesday. All of the new products will be available for purchase on Thursday, June 7th at 8 am PST. You'll find it all in the Fresh out of the Oven Department at the Taylored Expressions Store.
    • Join us as a fan on Facebook for an early peek at the stamp sets, as well as a SPECIAL Facebook GIVEAWAY, on Wednesday night beginning at approximately 6 pm PST.
     

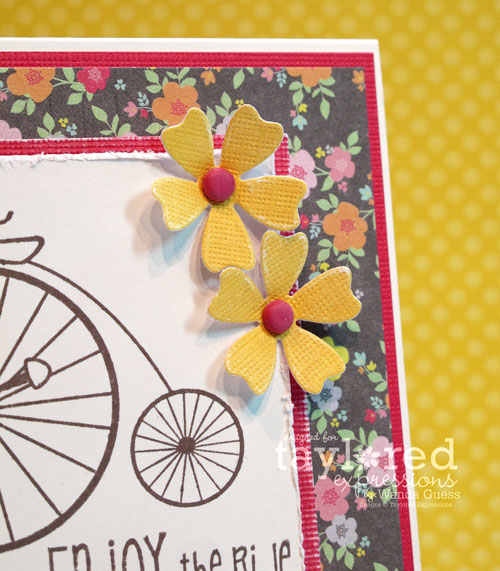
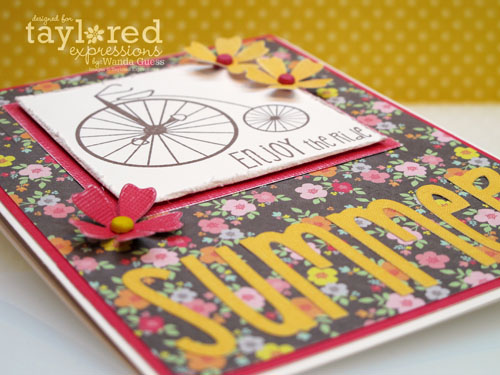
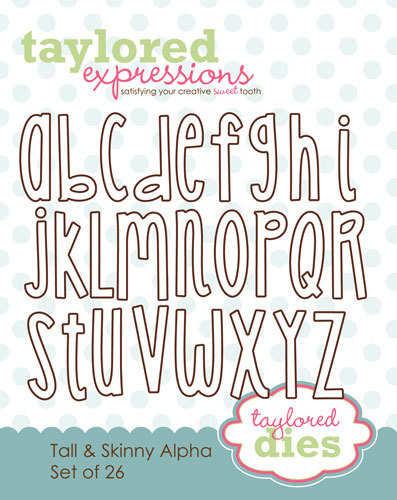
    Today I'm featuring a new set from the Embracing Grace Collection by Emily Burger…and it's called Bikes & Trikes – It is a full size set of 20 images/sentiments This set was Jami's concept and Emily took her ideas for images and sentiments and knocked it out of the park with her quirky style! I'm sure you'll find a ton of reasons and occasions to use this cute set! The Tall & Skinny Alpha Taylored Die Set coordinates with the font used here. And I used the dies in my card – love!!
    I wanted my card to have that LA-sixties-endless-summer-beach kind of vibe! I used the pretty paper from the Neapolitan 6×6 paper pack from Dear Lizzy,  which is available in the TE Store. It's fab. I made some groovy flowers using new dies and then topped it off with an awesome new alphabet die set.


    Btuesday1


    I know I keep saying it…but I'm crazy for this alphabet! It's the perfect size for cards OR scrapbook pages! It's fresh and fun and happy –

    Btuesday4


    Here is a close up of my fun flowers made using the new Petal Pop Ups 2 Dies:

    Btuesday2


    New Dies for today:

    Tall & Skinny Alpha –set of 26 – coordinates with
 Bikes & Trikes.
 (I'm crazy for this die set!)

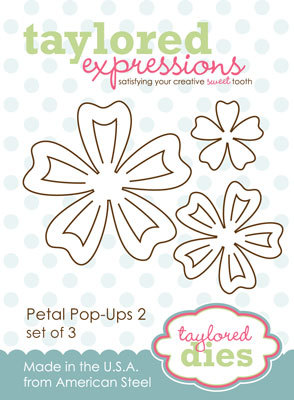
    Petal Pop-Ups 1, 2, & 3 –three unique sets (each set has 3 dies) to create fun 3 dimensional flowers. The inner portions of the flower will not cut all the way out, but will remain as part of the larger flower and can be popped out to easily create dimension. I used the small flower from #2 on my card today!


    97


    95


    Happy SUMMMMMMMMMER!

    Btuesday6

    I'm ready for Summer now…and we're just getting started! Here are the links to the rest of the projects for today's release festivities: 


  • Charmaine Ikach
  • Jami Sibley (DT Coordinator)
  • Jen Shults
  • Jodi Collins
  • Karen Giron
  • Melissa Sauls
  • Melody Rupple
  • Michele Boyer – Guest Designer
  • Regina Mangum
  • Sankari Wegman
  • Stephanie Kraft
  • Taylor VanBruggen
  • Wanda Guess
  •  Birdie signature!

  • Taylored Expressions June 2012 Sneak Peeks – Day 1!

    98
    JUNE RELEASE AT A GLANCE:

    • We have sneak peeks to share Monday through Wednesday. All of the new products will be available for purchase on Thursday, June 7th at 8 am PST. You'll find it all in the Fresh out of the Oven Department at the Taylored Expressions Store.
    • Join us as a fan on Facebook for an early peek at the stamp sets, as well as a SPECIAL Facebook
    • GIVEAWAY, on Wednesday night beginning at approximately 6 pm PST.


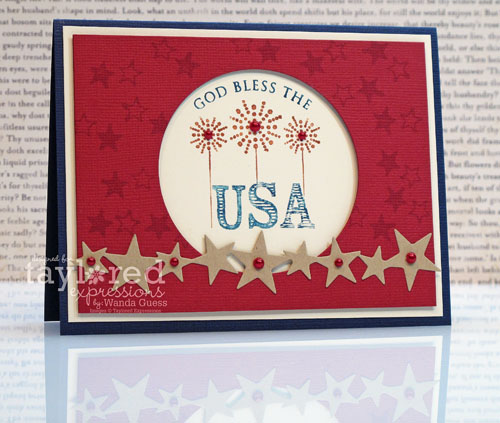
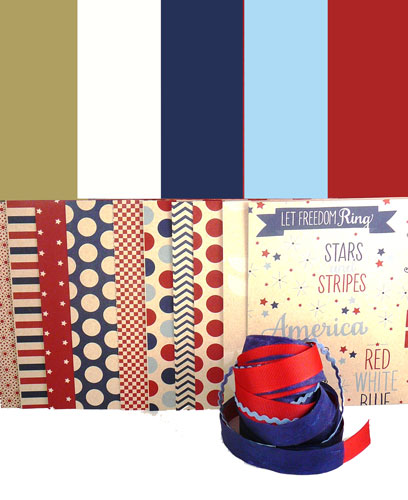
    We are introducing and featuring lots of patriotic stamps and supplies for all of your 4th of July projects! Today's cards are all about the red, white and blue! I love the two stamp sets that I'm featuring so much. The Project Pantry for June is amazing!! I've used the 4th of July Project Pantry papers and ribbons for my cards today.

    From the *te* by Taylor VanBruggen collection, we have some 4th of July Word A la cartes – There is a new one this year and it joins our ever-growing series of Word A la Carte stamps which are perfect for cards, invitations, scrapbook pages, party decor and so much more. We are also bringing back 3 previously released A la Carte stamps: Happy 4th, Celebrate Freedom, and God Bless America.  These stamps will be available for purchase and will also be part of the Release promo – choose one free for every $50 spent (before shipping and tax.) Details will be on the Specials Page.


    Amonday1


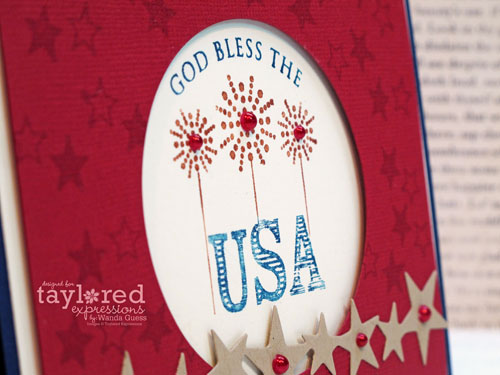
    I used the Project Pantry papers for this one…and that red is so rich and beautiful! I borrowed the little stars stamp from the Yankee Doodle Homestead stamp set (featured below) and stamped it all around in Versamark ink to make my own background paper!

    Amonday2


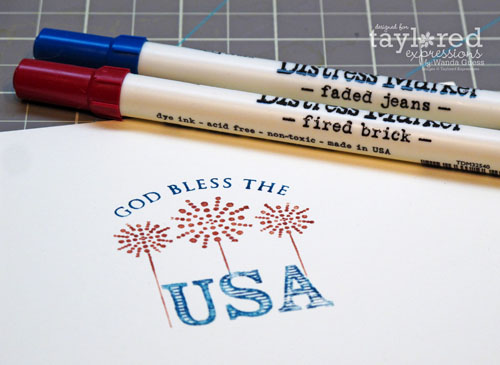
    I colored the stamp using the new Distress Markers from Tim Holtz! Taylor has them ALL in the store now! These are fantastic…and these two colors are the perfect Americana colors, don't you think?

    Amonday4


    Here is the Border Die featured above in kraft paper…

    96


      Amonday3


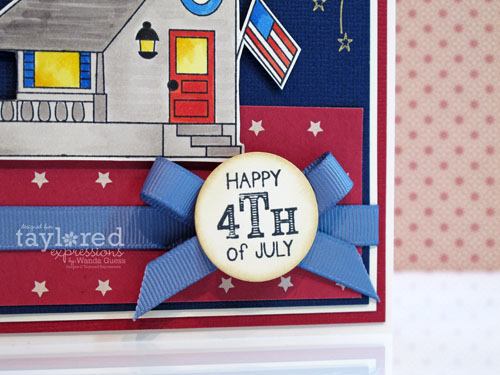
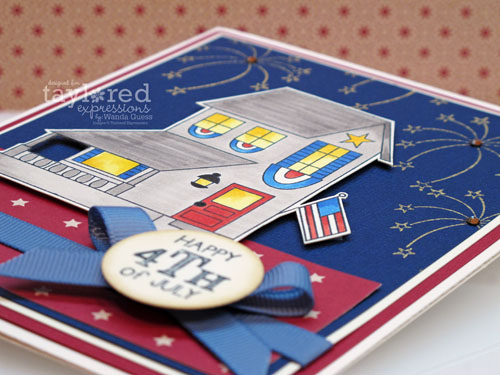
    The next set I'm featuring today is called Yankee Doodle Homestead! It's from the Apple Doodle Ink by Doug Applegate Collection. This is Doug's Adorable Abodes #6 -concepted by Jami Sibley – Celebrate our country's freedom in style! Who wouldn't want to come to a party here? This set is for everyone who loves Americana! It's perfect for July calendar pages too! 

    Amonday5


    It was super fun to create this little 4th of July scene to share with you! Again, all the papers and the ribbon are from the 4th of July Project Pantry for this month!

    Amonday6


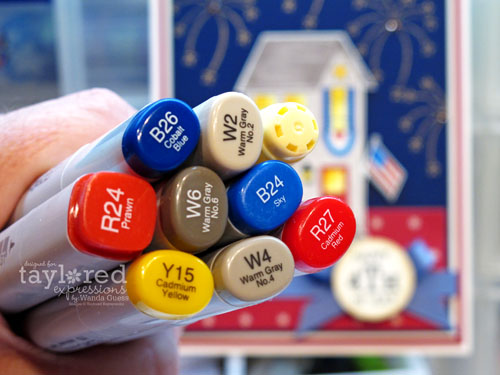
    Here are my Copic choices for this project….

    Amonday7


    After I colored my home, I mounted it on some foam tape. I stamped some fireworks in gold on that beautiful dark blue paper…

    Amonday8


    I love the font on the sentiments for this set – seems sort of Colonial or something to me – it's great! It's the same font on the card at the top of this post so it all works really well together. Love that about Taylored Expressions!


    Amonday9


    There are more stamp sets for today too! Be sure to check out everyone else's projects (link list below). These sets would also be great for our "Cards for the Troops" projects, dontcha think?

    The 4th of July Project Pantry 411: 

     4thofJuly2012
    Remember that our TE Sets come on a full color panel and store perfectly in our Mini Binder Boxes (4 sets to a box). Full size set panels are 5.75" x 8.5" and jam packed with images. Mini set panels are 4.75" square (CD size). Petite panels are 3" x 5" for $7.95. (6 Petite sets fit into a Petite Storage case). We offer more rubber images in a set than most companies at a comparable price, and TE stamps are RUBBER and are of amazing quality – not clear stamps!

    Here's your Link List for today! WAHOOOOOO – look at all our special guests!!!

    Birdie signature!


  • Flip Flops!

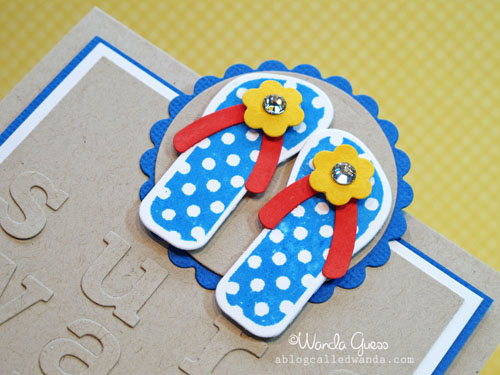
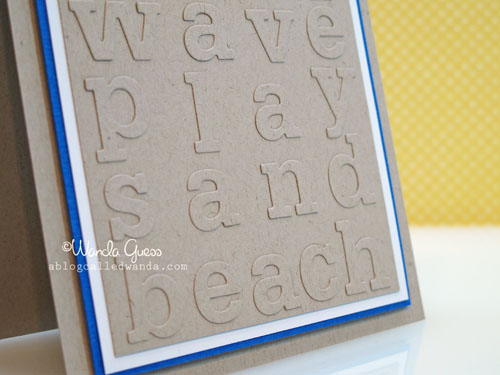
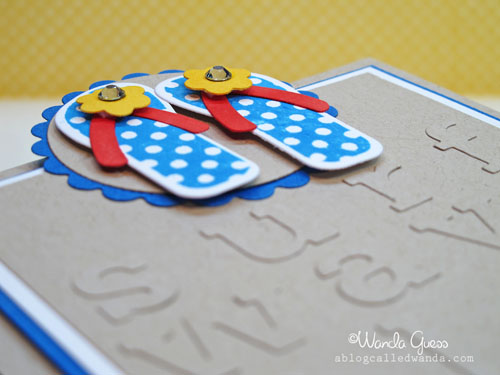
    Hi friends! Well….our city had our first 100 degree day of the year today! Whew. No wonder I'm in a beach card mood! hahaha. Happy official start of summer I guess! Ready or not, here it comes! Today's card started out in my head as one thing and ended up going a different direction. That happens quite often to me. I thought it was going to be aqua and kraft only….but then I didn't end up using aqua at all.

    So, I was inspired by the adorable new set from PTI – called Flippin' Out! Who can resist it? Not me. So fun and so perfectly Summer - I'll be using it a lot I'm sure. I was also thinking back to one of my favorite cards I made last Summer (CLICK HERE) and wanted to do that technique again.

    So this is what I came up with:


    1


    Instead of aqua, I ended up using a medium shade of royal blue and then popped in some red and yellow – very happy! Don't you love the matching dies? Cute little flowers for the tops of the flip flops. ACK!

    3


    This is my planning stage….

    5


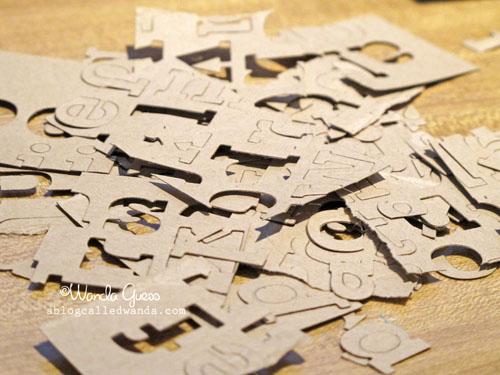
    Lots and lots and lots of tiny scraps….

    7


    And you get this effect. I used my tweezers and a glue stick – yep – it took me a while too! The letter dies are also from Papertrey Ink (PTI).

    9


    I like the contrast of a bright pop of color next to the kraft. I was trying to give the effect of sand and beach with using the kraft paper. Not sure…In my head this was a whole different card. There are so many adorable samples using this stamp set that I think I'm feeling like 'how could I make something better?' Do you feel like that sometimes?

    13


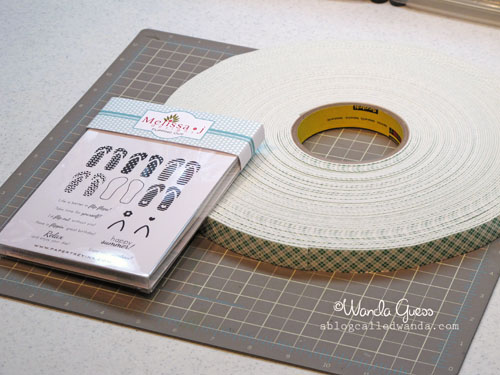
    In case you ever, for one minute, thought that I was not completely serious about my foam tape…check this out! LOL!

    25

    I hope this week was good to you. Thanks for listening to me ramble on. Have a super weekend and thank you for stopping by! 

    Birdie signature!

  • By the sea…where I long to be… Happy Start of Summer!

    Hello there friends! Are you enjoying the last bit of your long holiday weekend? Did you have a good one? I sure hope so. My weekend was spent mostly in the craft studio here at home, stamping and relaxing. It was strange weather here – we actually had rain on Saturday! Go figure. Memorial Day weekend marks the official start of Summer, so I thought I would start making Summer cards!  My very favorite place to be is by the sea…any type of ocean… The sea calms me and restores me. I've always been that way.

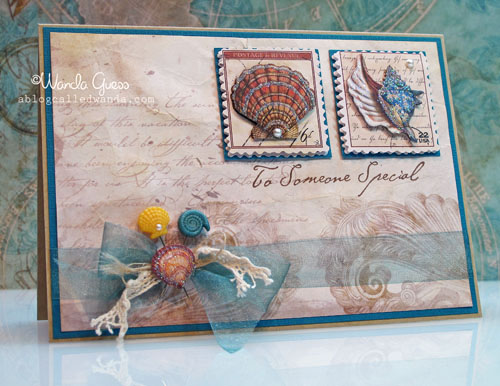
    One of the most beautiful collections I saw at CHA in January was this new Travel Collection by Tim Coffey for K & Company. It's just gorgeous… Paper, stickers, stick pins, all of it ocean related. I found it at Joann's and bought one of everything! And, I'm being good and not hoarding it!! I made two cards to share today using the same techniques. I hope you like them!

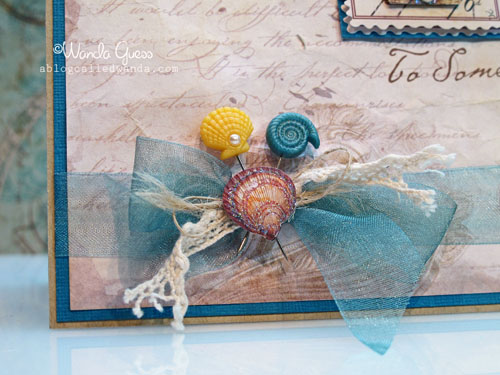
    This first one uses cool colors and has more of a masculine feel to it. I had so much fun choosing which stickers to use.  


    3


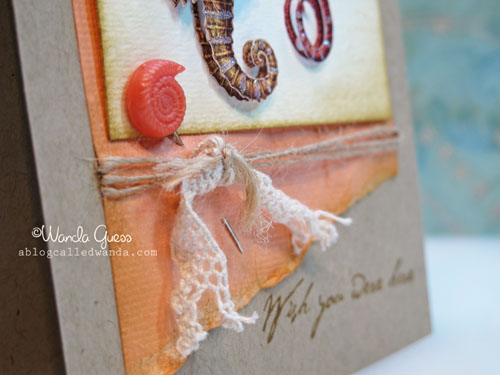
    For this part of the card I used silk ribbon, natural twine, and some crocheted ribbon. Then I added a shell sticker and two stick pins.  In order to get the crocheted ribbon to look like rope/nets, I scrunched it in my hands and then unraveled the ends of it. I rather like this technique for 'shore' cards.

    5


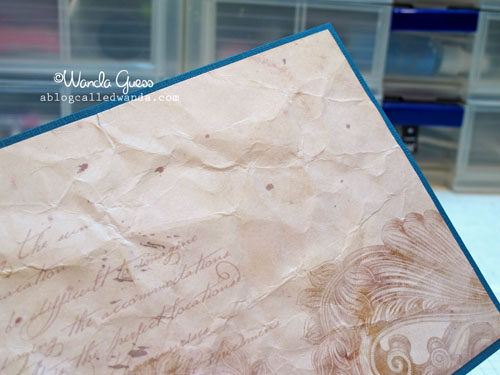
    This paper is from the 12×12 paper pad. I crinkled it and then smoothed it back out. Then I added some distress inks. I was going for an old map feeling.  

    9


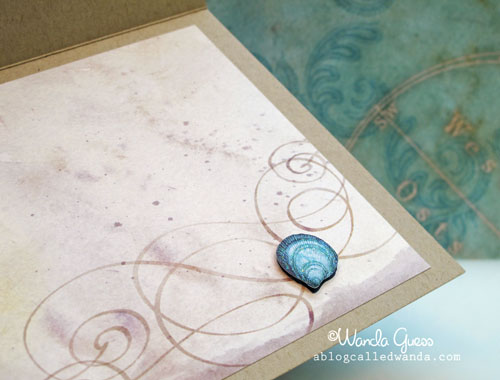
    This is a quick peek at the inside of the card. It's another piece of that same 12×12 paper and then one little shell sticker.  

    11


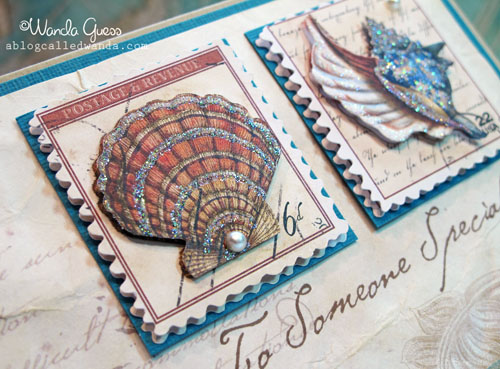
    Here is a close up of the big shell stickers. I added just a tiny border of teal. the sentiment is from an old Stampin' Up set!  

    13


    15


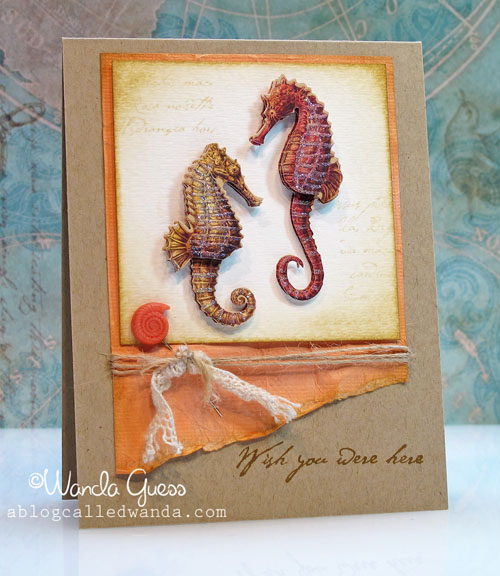
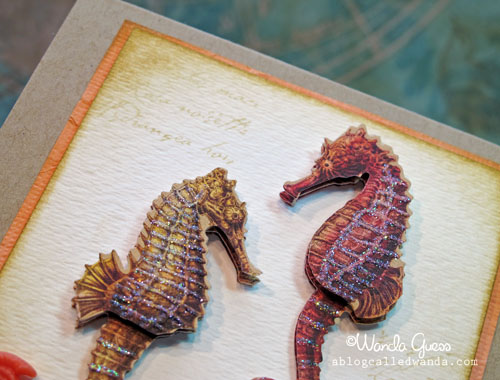
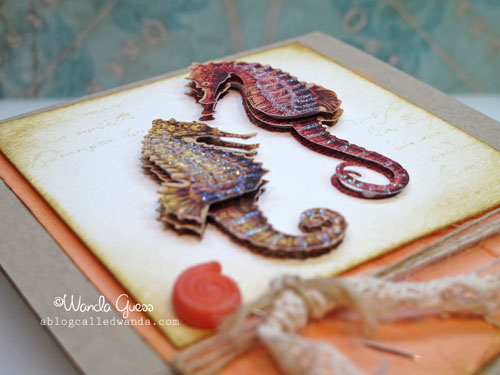
    The next card uses the same collection and the same techniques, but has a totally different feel to it. I can't decide which card I like better! I started with the two seahorse stickers. The cream base they are on is actually watercolor paper so it's nice and thick. I distressed the edges with two colors of distress inks and then lighty stamped a background stamp or words on it.  

    24


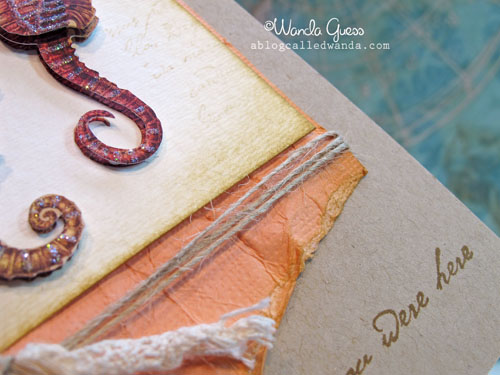
    On this card, I also crumpled the paper first and did the same technique to the crocheted ribbon…. This card is more of a CAS design though.  

    26


    Here is a close up of the watercolor paper…

    28


    30


    32

    Thank you so much for coming by my blog today…always so nice to have you visit! Have a super week and here's to Summer!   

    Birdie signature!

  • You are a picture perfect friend!

    Hi friends! It's almost time for Memorial Day weekend! Yay! Three days of rest and relaxation….just have to make it the rest of the week. What do you have planned? I'm not even sure what we're doing! But it will involve sleeping in, that much I know for sure! And probably some stamping!

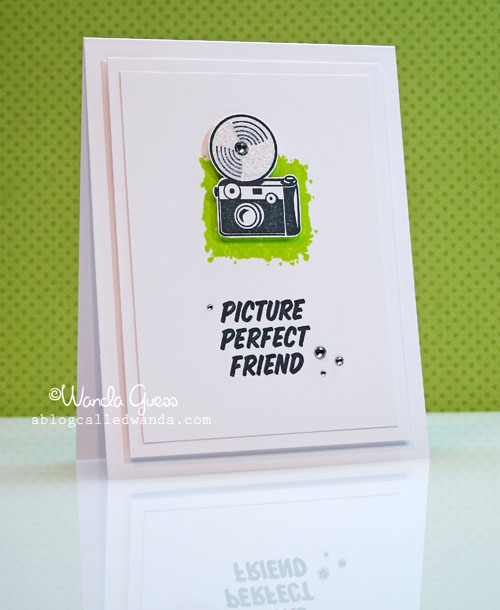
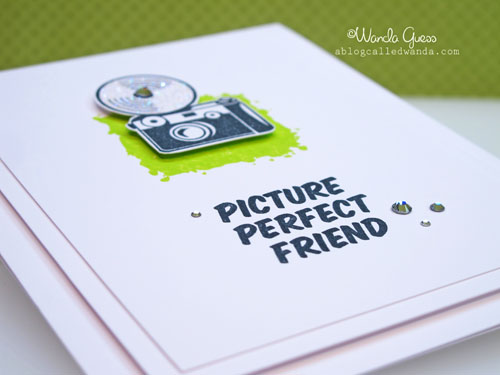
    When I was cleaning out my craft studio getting stuff ready for the garage sale last weekend I went through all my old Stampin' Up sets. I have such a hard time getting rid of those. Some I've had for 15 years or more! They feel like old stamping friends. I found these cute stamps that are part of a travel set from 2006 and decided to make a card with them to share today! It's a CAS design – lots of white space, and a pop of bright green…


    1


    Oh snap! Gotcha! I put some ultra fine prisma glitter on the flash and a pretty gem in the center. The background stamp is from Paper Inspirations.  

    3


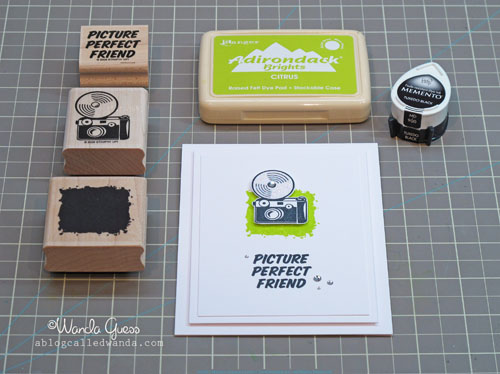
    Here are my supplies…clean and simple… 

    5


    I think this is such a great sentiment for a crafty friend who likes to take pictures. I added some more gems here and there for a bit of sparkle. All that white space kinda makes me nervous…it's hard for me to walk away! hee hee.  

    9
    Thanks for stopping by!!! See you soon!!! Enjoy the rest of the week. I can't wait for the American Idol finale tonight! I was really rooting for Joshua though….


    Birdie signature!

  • New goodies and some show and tell….

    Hi everyone! I'm in the craft studio winding down the weekend. Where did it go? I'm not sure, but I do know it was a lot of fun! The big crafty garage sale yesterday was a huge success! Thanks to everyone who came out to shop and visit. We had quite a crowd. This is the fourth time I've done this and I made the most money this time around. It was awesome! It was good to see friends and fellow crafty girls. There were nine of us selling stuff and afterwards we all went out to a nice lunch together and paid for the whole thing in $1 bills! hahaha. After lunch I decided I had to spend some of my cash on new crafty products! Took a trip down to Stamper's Corner and saw my pals there, saw the lovely and talented May F teaching a class, and bought just a few things.

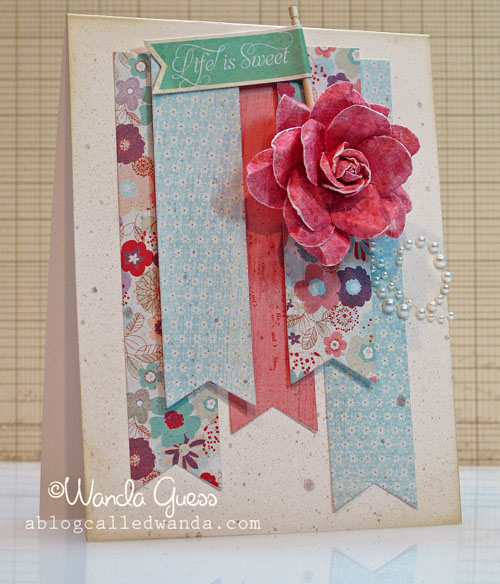
    My card for today was made with my new goodies I bought yesterday. Paper from Basic Grey's collection called What's Up and some new dies… These new dies may just be the key to the crafty universe. I was STOKED when I found them. You'll see in a minute….

    I was inspired by this card from Pinterest…and I love banners…. 


    1 copy


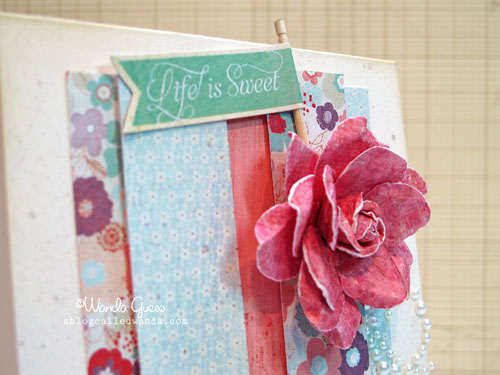
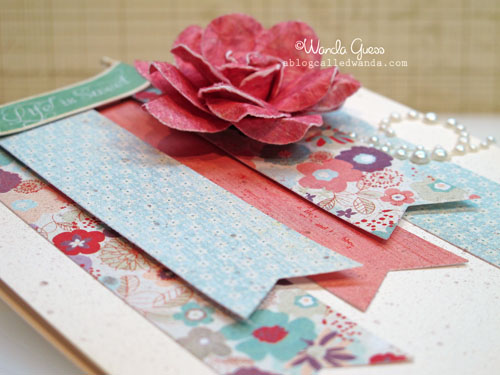
    I used a cream cardstock base and lightly edged the base with Antique Linen distress ink. After I put the entire card together I spritzed the whole thing with Cappuccino Perfect Pearls Mist. You can see the splotches from the mister. The little flag is part of the Basic Grey collection and the flower is from Prima.

    2


    Here are the new dies, and my other supplies. The dies are from MFT and they're called Fishtail Flag Stax! OMG! Perfect flags every time!!! Are you kidding me? YAYAYAYAYAY!!! New favorite thing. Someone didn't want to move his big furry self so I had to shoot around him!

    3


    At the last minute I added a little spray of pearls… 

    4


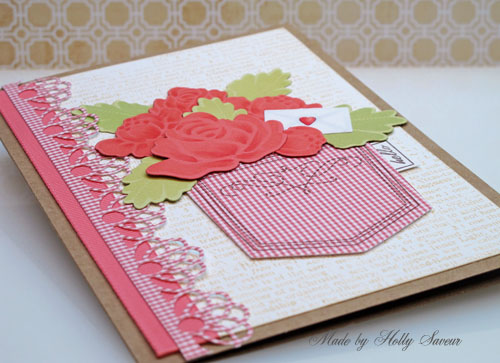
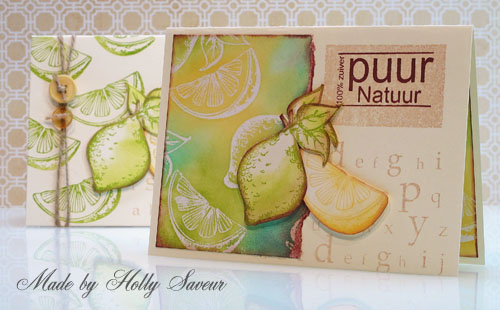
    I am so lucky to have the most sweet and wonderful pen pal!! She and I became friends through my blog! One of the best things about having a blog is meeting so many amazing, kind and talented people from all over the world. Holly is from the Netherlands and is a fabulous paper crafter. I get the prettiest things in the mail. Last week I got a package from her and the cards inside blew me away! I had to share them with you. 

    5 copy


    I can feel the love that went into this card.

    6 copy


    These are so cool and fresh and happy…

    7 copy


    So totally beautiful, right? Sigh.

    8 copy
    Thanks for stopping by and I hope you have a wonderful week ahead of you. XOXOXO


    Birdie signature!

  • What’s up? Paper Smooches cards for today…

    Hi everyone! Happy Friday Eve! (also known as Thursday!). I have a busy weekend planned and stuff to do and so I thought I would post now (instead of my usual Friday night post) and share these fun cards I made last weekend. A while back, I bought some adorable stamp sets from Paper Smooches! Don't you just love her stuff? My stamps have been sitting in my craft room and I finally used them! I love it when that happens. I have three cards in one post since I just wanted to share them all. Hope you like 'em. Kim's style lends itself to clean and simple. 

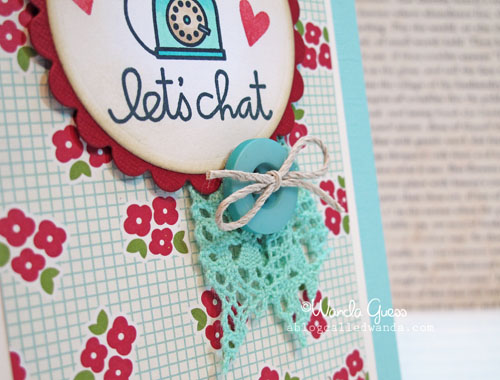
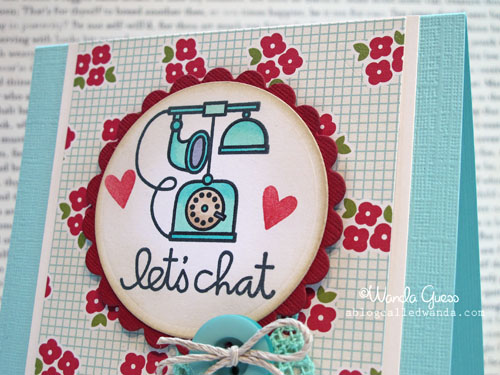
    I think this one is my favorite of the bunch, so I'll show it first…Let's chat! Such a cute image and that handwriting font for the sentiments is so great! 


    1


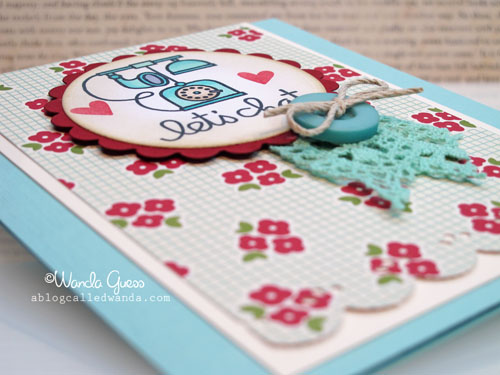
    I really always love aqua and red together, and the color scheme for this card was inspired by that pretty patterned paper. I found matching ribbon and a button in my stash.  

    3


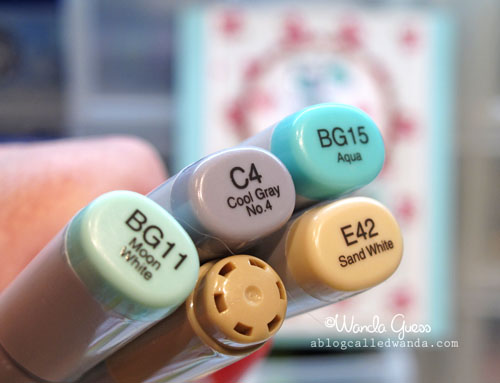
    Here are my Copic colors for this card….

    5


    7


    It was fun to try to make this image seem vintage. I stamped on cream cardstock to make it not so bright and also lightly distressed the edges of my circle.  

    9


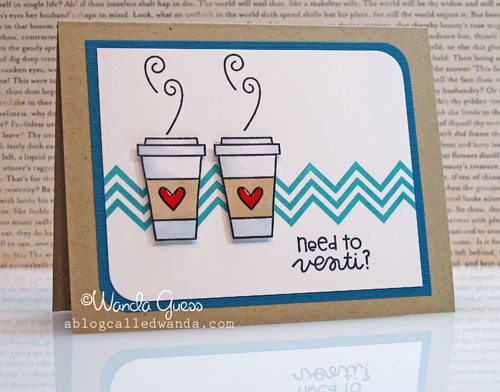
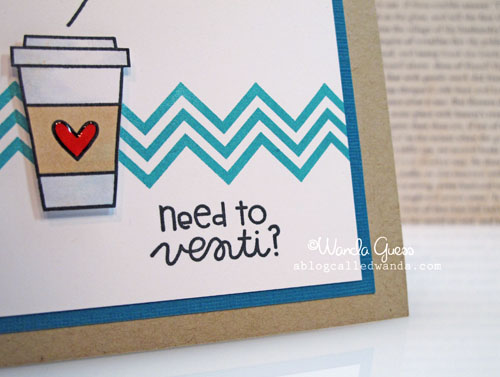
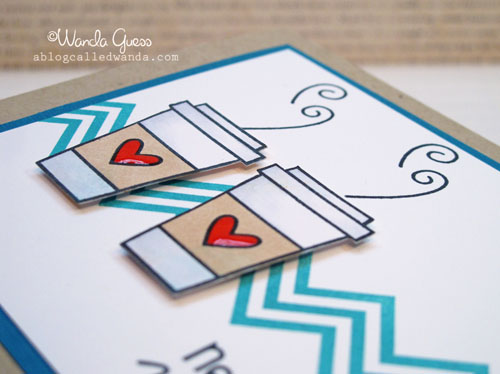
    This next card came together with more of a possibly masculine flair. I combined the chevron background with some pretty teal ink and then added just a pop of red to the hearts.  

    IMG_2828


     How freaking adorable is that sentiment??? LOVE. 

    IMG_2829


    To add some depth and dimension, I added a few coats of clear glaze just to the red hearts….

    IMG_2830


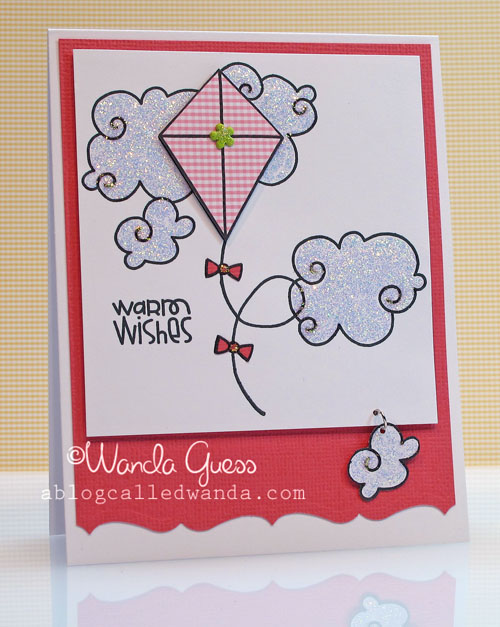
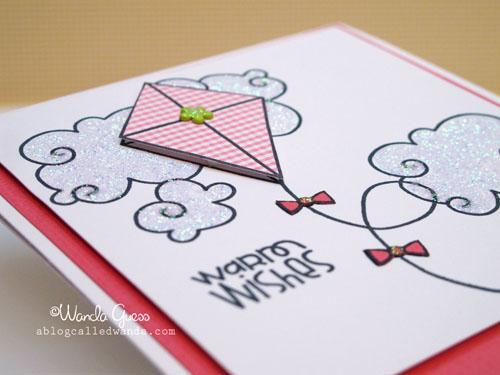
    Now, last but not least, a pretty kite card! The clouds and kite are all one stamp and then I added the sentiment from another set. One thing I love about the Paper Smooches stamps is that they stamp so crisp and clean – the very first time out of the package. For this one I thought those clouds needed to be spark-a-lay! What do you thinK?  

    IMG_2833


    IMG_2836

    Okay friends, that it for today! Tomorrow is a full work day and then Saturday is the big crafty garage sale. I'm still going through things and trying to get ready. Hope to see some of you there. Have a great weekend! Mwah.  

    Birdie signature!

  • Hello Sunshine!

    Hi Bloggy Friends! Hope you had a wonderful weekend, and for those of you who are moms, a very Happy Mother's Day! We had a nice weekend. Saturday we went to a movie double feature! Haven't done that in many many years. It was fun. It was super hot outside on Saturday so it felt good to be inside the A/C all day. First we saw Avengers and it was excellent! (some of you might remember this post about my DH and his love of Marvel). Then, we saw Dark Shadows….also excellent. I was already a huge Johnny Depp fan, but this put me over the edge. I think it might be my favorite role of his ever. Really fun movie.  Have you seen either of these? I can honestly say I would recommend both. The rest of the weekend I continued to get ready for the big stamping garage sale next Saturday! I have loads of goodies to sell. 

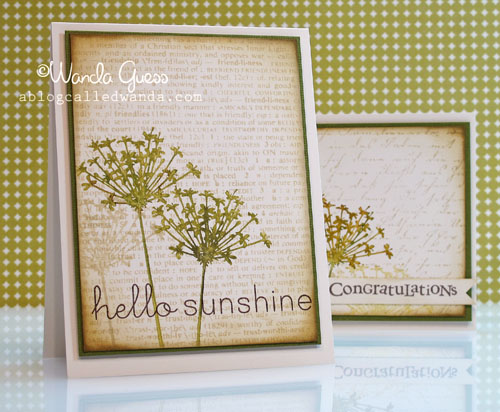
    Today I'm posting two cards I made last week with the same stamps and technique. I was inspired by THIS POST from the lovely Jill. Her work is amazing and I am always 'inspired by' her. I love the way she stamped the music and then put flowers over the underlying image. I used words for my background image….


    1


    The card base and the main panel are cream cardstock instead of white. I think this makes the cards warmer. I stamped the Friends Background (from Hero Arts) onto the cream paper using Linen Distress Ink. It faded into the perfect soft shade. For the other card I used the French background stamp, also from Hero Arts. 

    3


    I distressed the edges of the main panel using two shades of brown, for more depth. I am in love with my Distress Markers, which I used directly onto the stamp. 

    5


    You can see that I also stamped the flower image in Linen Distress Ink to give some more interest to the card. 

    7


    I used four shades of green in these two panels. The stamp is from Amuse….

    9


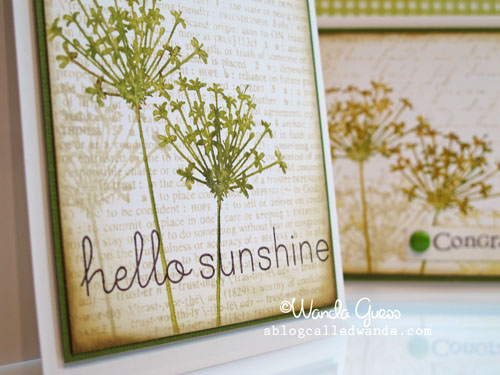
    This sentiment is from Papertrey Ink! I adore the fonts on this one and it just seemed the perfect, simple, finishing touch. 

    11


    I'm really trying to mix up my stamping lately, and do more clean and simple designs. You know how your taste and style kind of change from time to time? I am loving getting 'back' to stamping basics every once in a while.  Best wishes for a fantastic week ahead! 


    Birdie signature!


  • Gingham Sweet Treats!

    Hi friends! Did you have a good week? Hope you did! It was another busy week here and Spring is in full swing and the weather is getting warm. Looks like a nice weekend on tap. I wish all of you that are moms a very Happy Mother's Day on Sunday!  So, I was trying to decide what to make and I was blog surfing and guess what I found? This post on the Moxie Fab World Blog – with a Gingham Challenge! Are you freaking kidding me? A gingham challenge??!! If you've stopped by here on more than one occasion, you know that I am gaga for gingham… That settled it. Now, I had to come up with a fresh new way to use it!

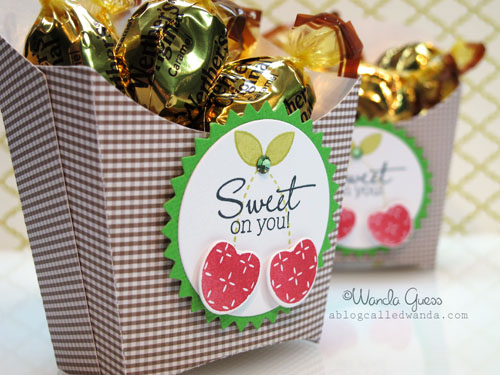
    I had purchased this cool Fry Box Die a couple of weeks ago at Paper Garden and it was sitting on my work table. An idea started forming…I went back through my PTI stamps…and the idea grew… And here you have the final project! Some happy gingham treat boxes!


    1


    I made my fry boxes out of brown and white gingham paper. I thought it was sort of a country feel to match the fruit images! The stamps are from an adorable set from Papertrey Ink! LOVE those fruits!

    2


    I popped up the little cherries with some foam tape and added a little green bling to the leaves. The circle dies and the matching cherry dies are all also from PTI. Seems so fresh to me…

    3


    Here is the die. If you cut a sheet of 81/2 x 11 cardstock in half, you can get two fry boxes from one sheet of paper. Awesome!

    4


    I used these new Colorbox Ink Pads….

    5


    6


    I'm Sweet on YOU my bloggy friends! Maybe you will pop over to the Moxie Fab World blog and enter your own gingham creation!? I know I'm not the only one around here who loves gingham!

    7


    Have a blessed day and a most wonderful weekend! Thanks for coming by to see me today!

     Birdie signature!


  • Taylored Expressions Calendar Challenge – May!

    CalendarChallengeBadge

    Today it's time again for our cool new calendar projects from Taylored Expressions and I am having such a good time making my pages each month! The Baker's Dozen Design Team will be sharing calendar goodies and ideas with you throughout the entire year, so be sure to check out everyone else's projects too.

    Refer over to Taylor's blog to get all the info to play along with us each month. There will be a linky at the bottom of Taylor's post and it will remain open all year, so you have the option to go back and catch up if you start playing late. For everyone who plays in 10 or more of these monthly calendar challenges in 2012, there will be a random draw for a TE prize pack valued at over $150!!! Click here to go to the TE Calendar Department and see all the goodies.

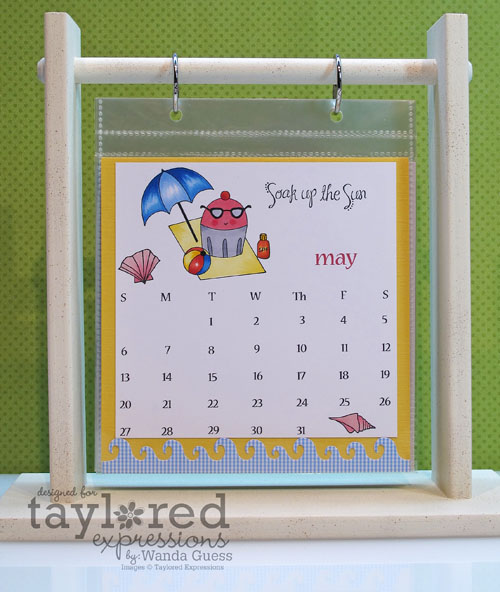
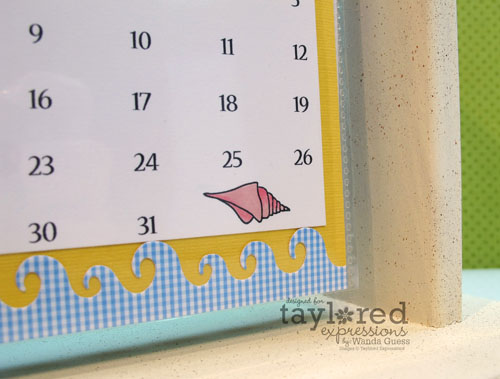
    I chose to make the "Frame Your Imagination" calendar and use Cuppie as my theme! The stand for the calendar comes in raw wood and then you can paint it whatever color you choose. I painted mine kind of an antique white and then speckled some brown onto it to give it some character.

    CLICK here for the calendar standCLICK here for the page protectors and CLICK here for the page inserts. I like this a lot because the finished pages are 6×6 and that gives a lot of room to stamp!

    Here is my May Calendar page….Cuppie is already primed for Summer! :-) 


    1


    I used the Wave Border Die for the bottom and two of my favorite TE stamp sets!

    2


    Here are my Copic colors for this project – so bright and cheery!

    IMG_2792


    A Year of Sweets 2 and A Day in Paradise – they go together nicely for a beach scene!

    IMG_2793


    Waveborder2


    I colored Cuppie one shade darker than I normally do…he has a bit of a sunburn! hee hee. You know, the first time out of the season and all.

    IMG_2799

    Thank you for popping in today to see my calendar page. Links to everyone's projects are below…have fun!

  • Charmaine Ikach
  • Jodi Collins
  • Melissa Sauls
  • Melody Rupple
  • Sankari Wegman
  • Taylor VanBruggen
  • Wanda Guess
  •  

    Birdie signature!

  • Lavender Birthday Cameo….

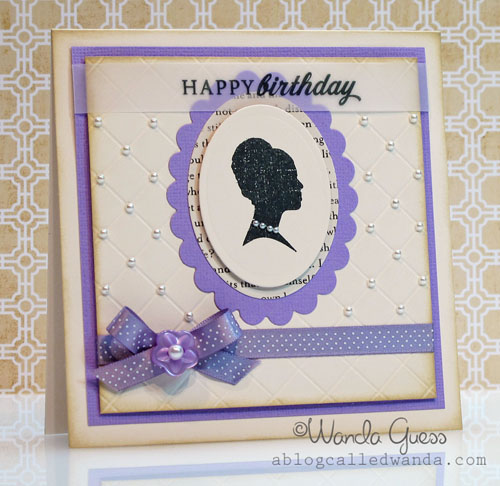
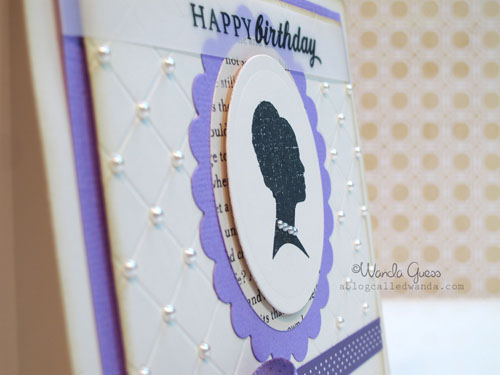
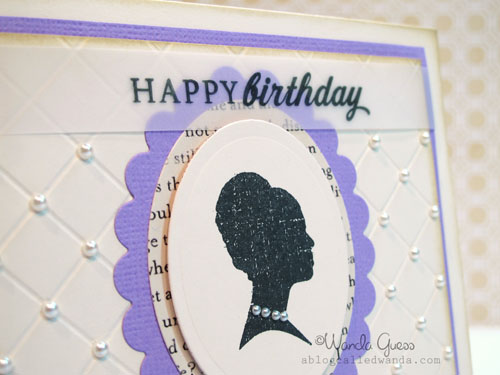
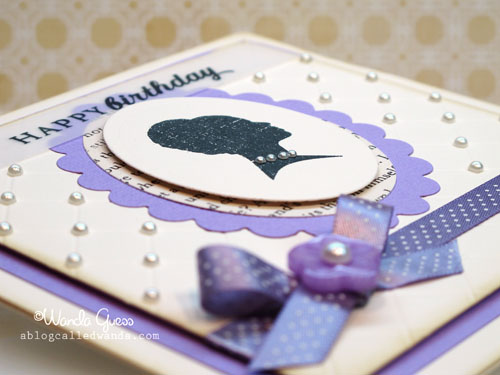
    Hi Friends! Whew…I was a bizzzzzzy bee this weekend in the craft studio! How about you? Did you do something creative? Fun? I spent the entire day on Saturday in my creative place and made some fun stuff to share with you. I got out ALL of my Papertrey Ink supplies and just let them talk to me. You know what they said? "Make a cameo card!" LOL. I love PTI's stuff so much, and I have gobs of it. Why do I forget to play? Anyhoo…here is my card for today!


    1


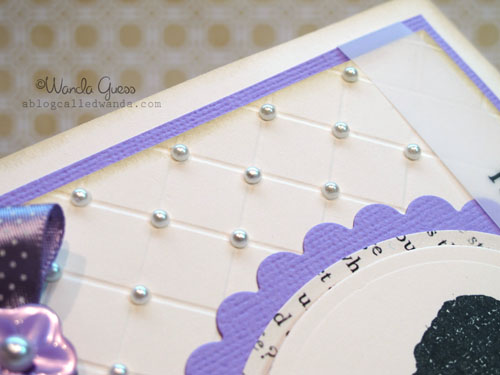
    Today's card definitely takes a "more is more" approach! Ha. I used lots of different techniques on this one! I kept thinking of things to add and I couldn't help myself. First up, I scored my cream layer on my MS Score Board. I tried it first with an A2 size sheet of paper. Um, yeah, that didn't really go so well… Thus, my card ended up being a square! Much easier to score evenly, every 1/2 inch!

    3


    I had just gotten this pretty "Winter Wisteria" colored ribbon in my last PTI order. It's the perfect shade of bluish-purple. Yum. I found some matching Bazzill in my stash. That button is from Doodlebug. I added a pearl to the center. Okay, so most of you know that I am severely bow-impaired. I don't know why I didn't think of this sooner! Duh! For this card I tied a bow separately and got it all nice and pretty and then put it over a strip of ribbon!!! That way I didn't have to fight with tying the bow on the card! I'm sure everyone already knew that….haha.

    4


    I used the Happy Birthday sentiment from a different set and stamped it on a sheet of vellum. I gave our little lady a nice necklace.

    5


    6


    8


    This is the craft room disaster area – in which I had all my PTI goodies out of their bins and on the floor! You might say this is the "during" photo!

    49


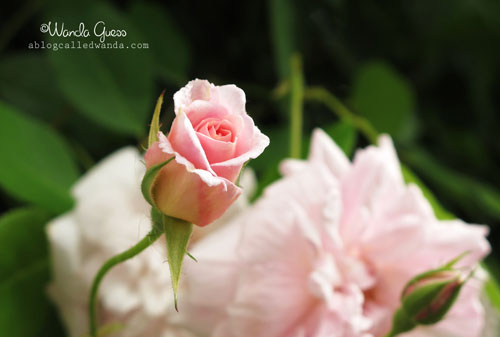
    One last picture for today. A wee tiny rosebud I came across last week in my travels. Just the softest shade of pink…ahhhhh.

    50


    One of the other things I did this weekend was to go through my entire room searching for things to sell at our fourth annual Crafty Girl Garage Sale, which is Saturday, May 19th. If you live in Sac-town, let me know and I'll email you the address. There are eight of us selling this year! It's always a good time, and lots of good crafty stuff to buy! 

    Thanks for coming by to see me here! I hope you have a wonderful week!

    Birdie signature!