Category: Papercrafting

  • Fresh!

    Hi! I was trying to think of what to title today's blog post…and I looked at my photos and the words that came to mind were crisp and fresh. Interesting, but I decided to go with it. My card is crisp blue and white and I'm sharing some fresh lemon cupcakes I made too. Crisp. Fresh. There ya have it! Thanks for coming by to see me today.

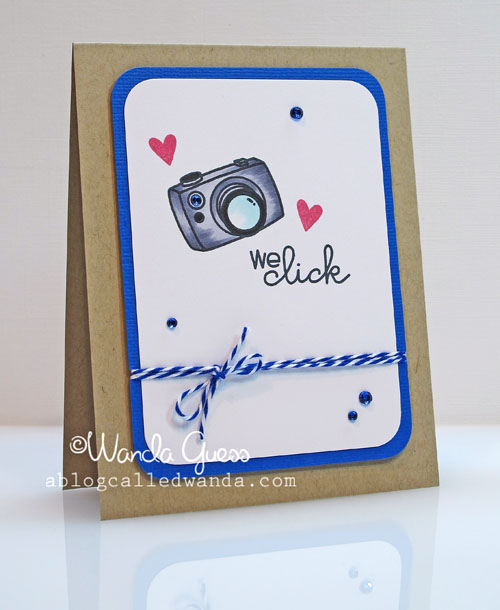
    I was super tired last night and felt that the most I could muster was a CAS card… Not too much coloring or layering. I just didn't have the energy. What I did have was this adorable stamp set from Paper Smooches, so I inked it up!


    5


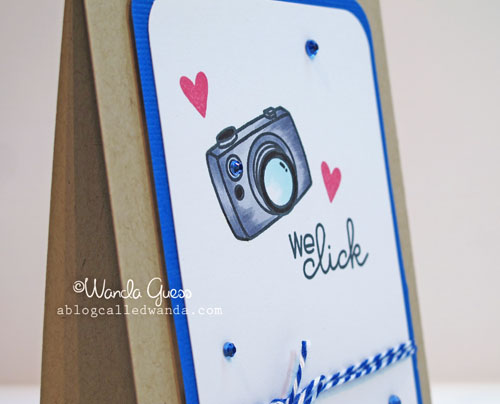
    I love this camera and that cute sentiment! I used a bright blue paper and the hearts are kind of a watermelon color just to add a punch of a different color.

    6


    How freaking adorable is that stamp set?? Very!

    7


    8


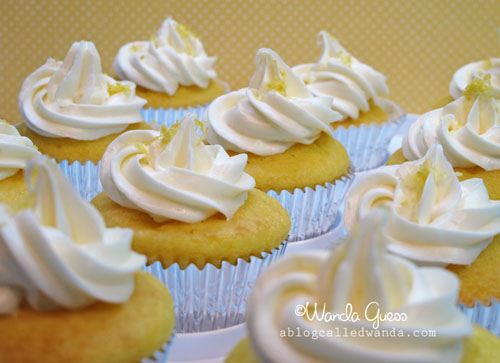
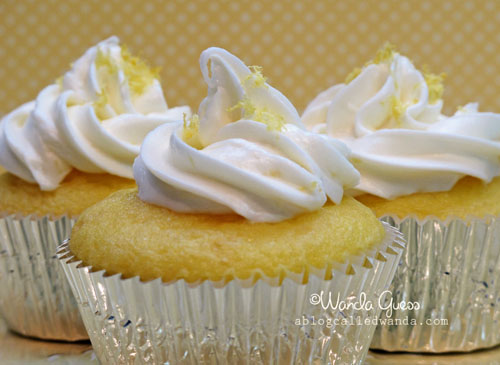
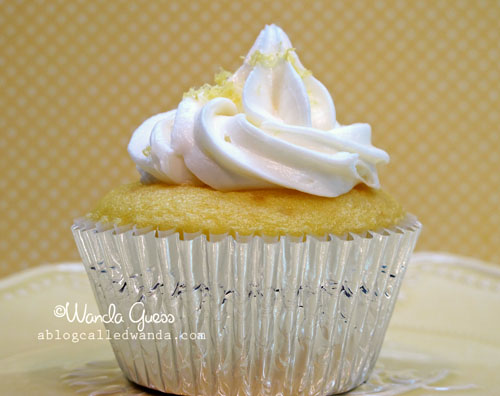
    We had a birthday in my office this week, so you know I had to make cupcakes! I never miss a chance to make treats! These are lemon cake with lemon frosting. So fresh! For the frosting I used a plain white frosting recipe then added a teaspoon of lemon extract and some fresh lemon zest. Then I added some more lemon zest on top for garnish.

    4


    3


    1

    That's it for today! Have a wonderful day everyone!  

    Birdie signature!

  • My newest obsession – hexagons!

    Helloooooo! Did you have a great weekend!? I sure hope so. I had a really nice weekend with just the right amount of business and quiet. The hubs and I went to Berkeley on Saturday and spent a very nice day together. I was volunteering – reading scholarship applications – on campus and the DH was nice enough to drop me off where I needed to be (in the rain) and then pick me up later. We also went to Scrapbook Territory and Paper Source, where I got some new crafty goodies. On the way home, we stopped in Davis and had a most lovely Italian dinner – really just such a nice day together. Sunday was spent in the craft cave making some projects for Poppystamps and to post here. A fine rainy day at home…perfect.

    My newest crafty obsession is hexagons! Have you noticed? They're everywhere! Such a cool shape and they have an old fashioned vibe. I even started a hexagon Pinterest Board!  People are making the cutest things! I was very inspired and today I'm sharing my first project – I'm sure there will be more to come! I have a million ideas in my head right now…


    A1


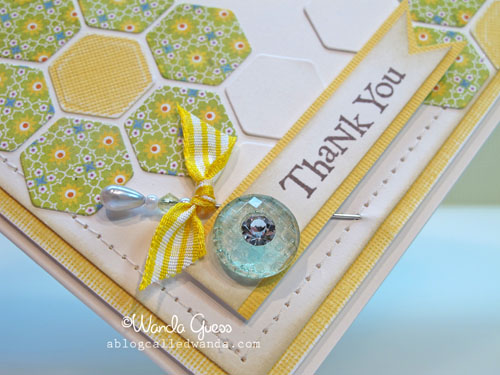
    I went for the shabby-chic-grandmas-quilt look for this card. I picked colors I like for Spring – happy, cheery colors. It's really easy to form the hexagons together – just like quilting – into flowers.

    B


    I sewed around the edges of the cream base to add more home-spun feel. I distressed the edges and also sanded the yellow paper…

    B1


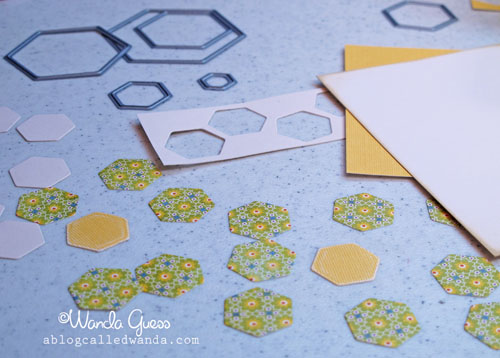
    Here is the die set I used to make this card. I found this on eBay – fifteen different sizes in one kit! Perfect! The biggest one is huge – probably won't use that one! I like that there are teeny tiny ones too.

    C


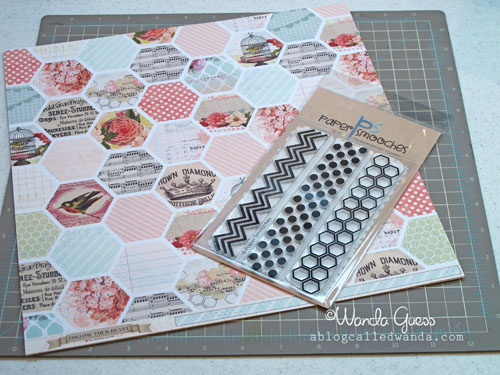
    Here are a couple of the other hexagon things I have on my desk right now….

    D


    So, yeah, I had to cut out each hexagon one at a time…took a while!

    E


    Ready for assembly!

    F


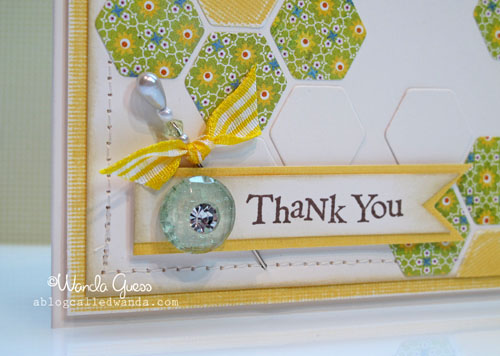
    I used some of my favorite embellies – ribbon, buttons, and pearls, to make a finishing touch on my sentiment.

    F1


    H


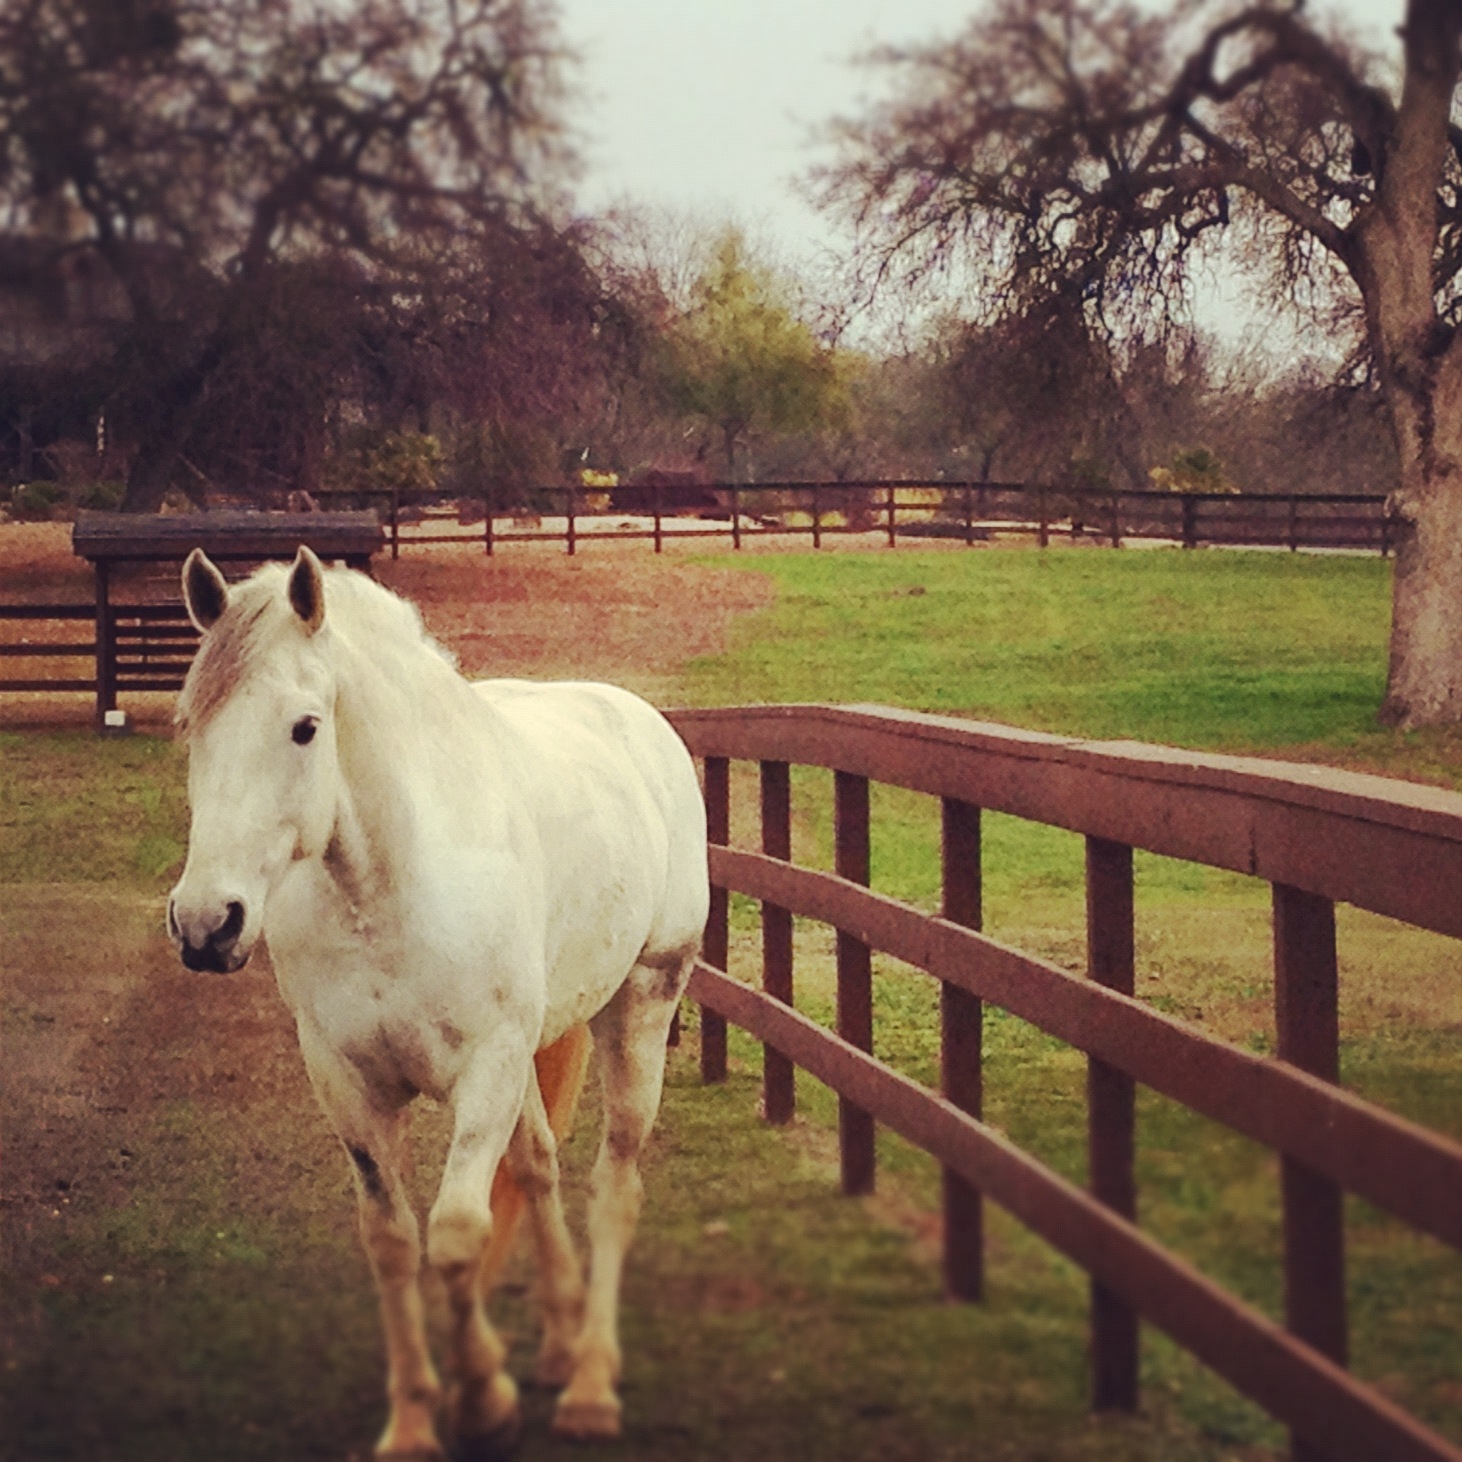
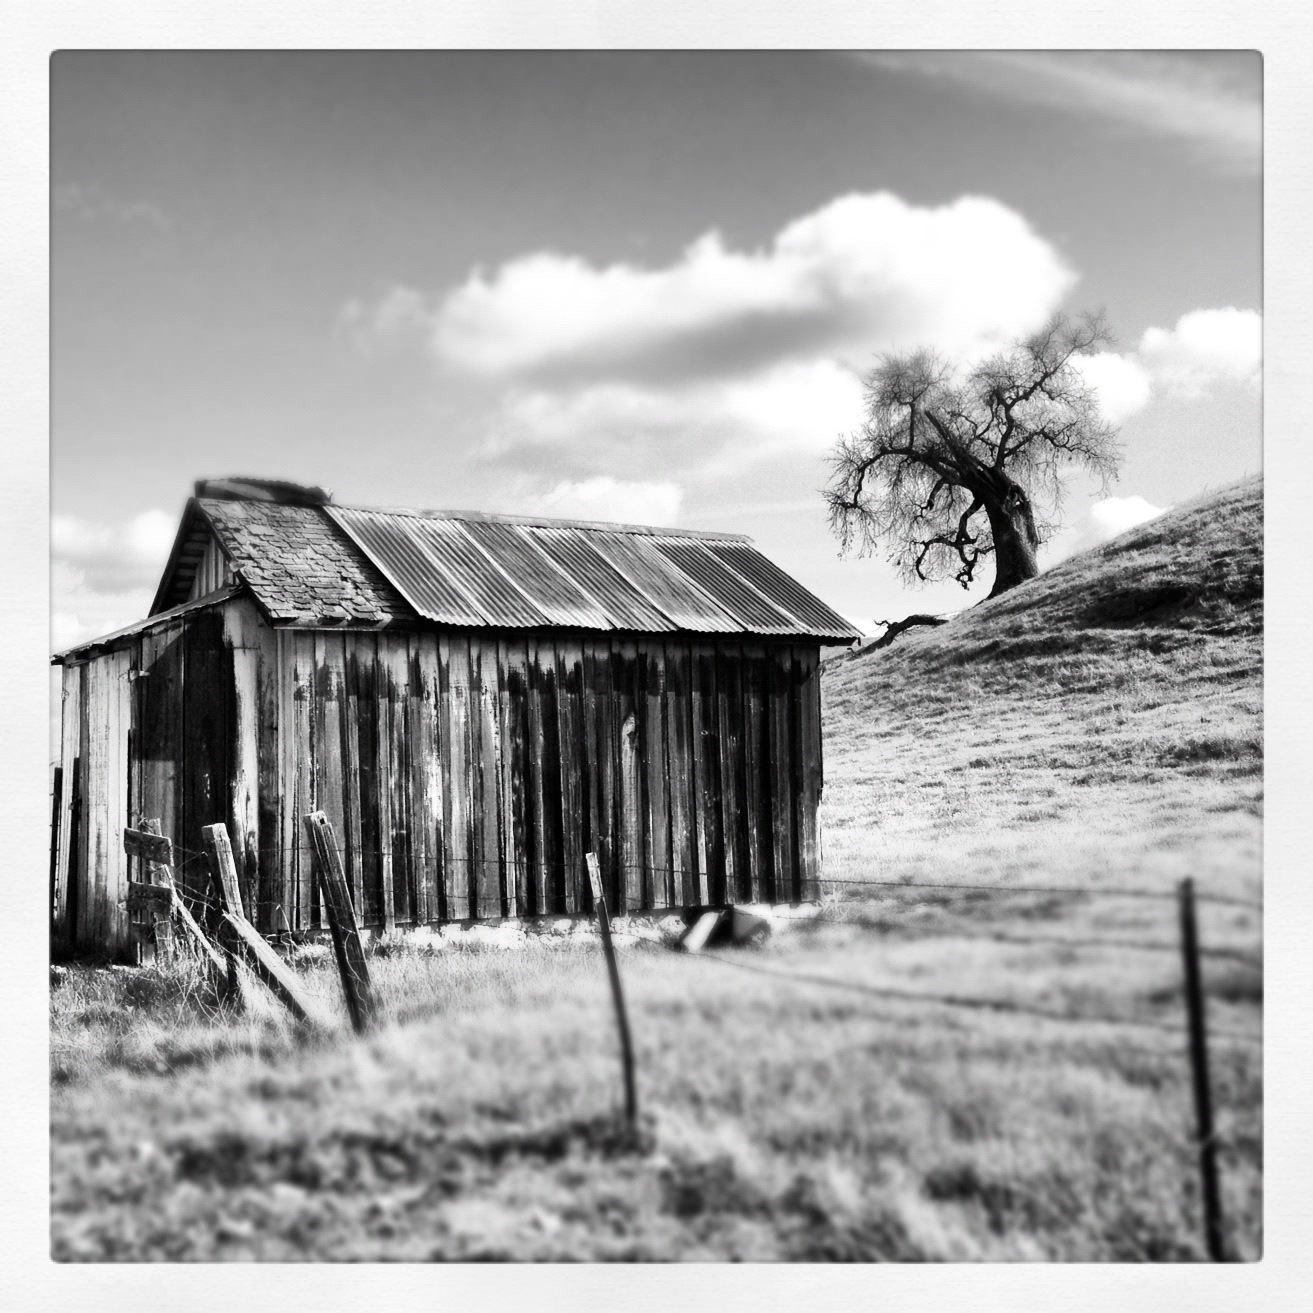
    I have some Instagram photos to share today too. CLICK here if you want to follow me on Instagram! It's one of my favorite iPhone apps and I use it all the time. If you have an Instagram account let me know, so I can check out your photos too! All these photos were taken and 'processed' directly from my phone. LOVE.  The past two weeks I was on the road for work in the Central Valley and managed to get a few good snaps…

    This first one is Lake Kaweah, near where I was working – the rain clouds were rolling in….

    5


    My co-workers and I had a really nice dinner one evening….

    3


    This was one of the trees out in front of our work site…with a beautiful blue sky.  

    4


    This next one was taken on campus on Saturday…

    6


    This was my favorite photo of the day on Saturday – looking back at the main library and the Campanile Tower which is the center of campus… I really like the Instagram effect on this one.

    2


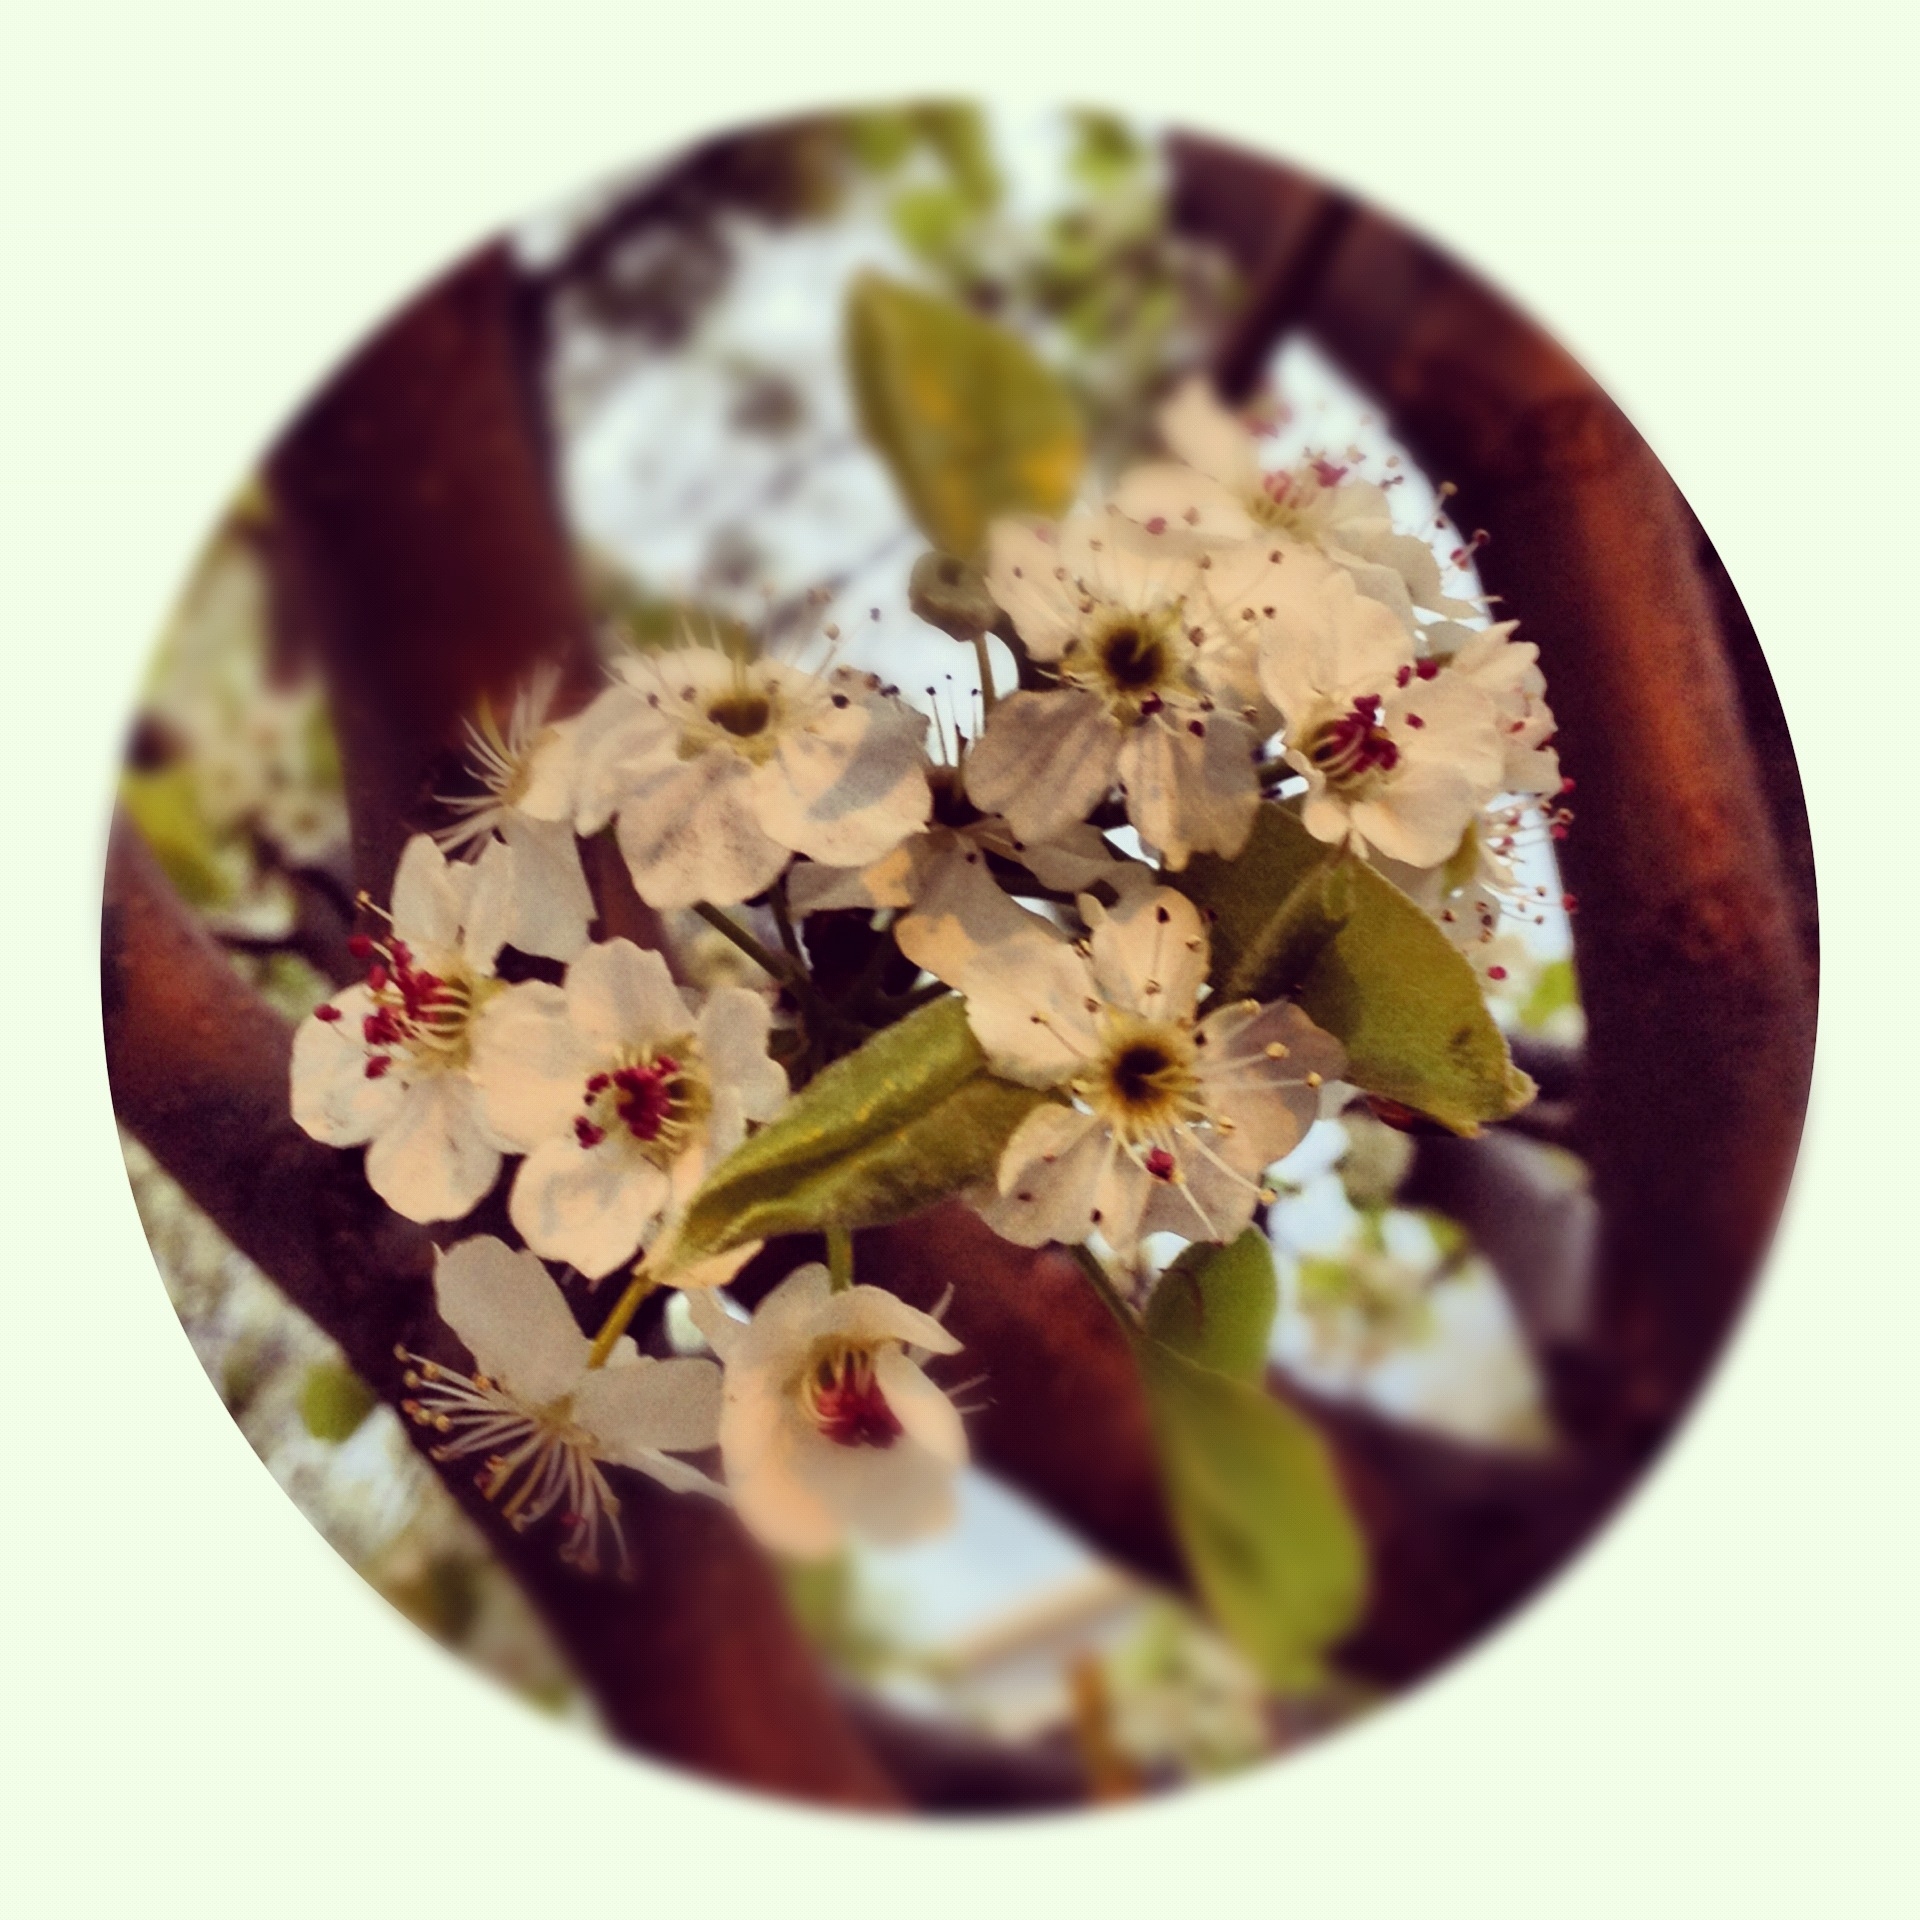
    More beautiful blosssoms we found in Davis…

    1


    Whew…okay…that was a lot of info for a Monday! I hope you found something you liked here today. I appreciate you stopping by and I hope you have a fantastic week! XOXO 

    Birdie signature!


  • Top O’ the day to you, my bloggy pals!

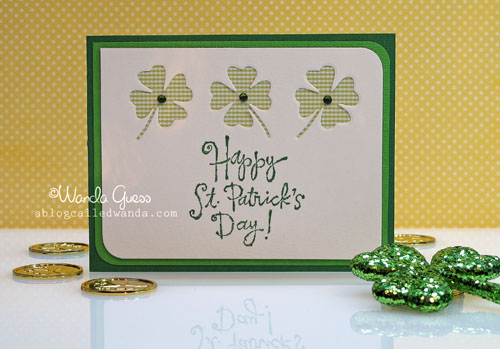
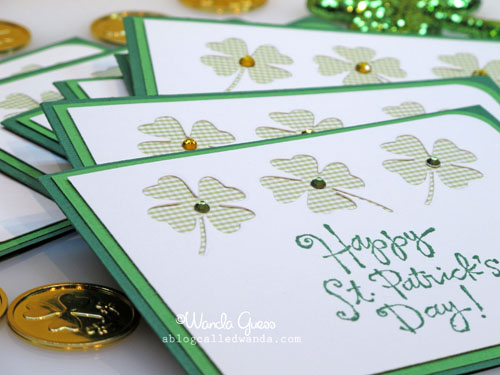
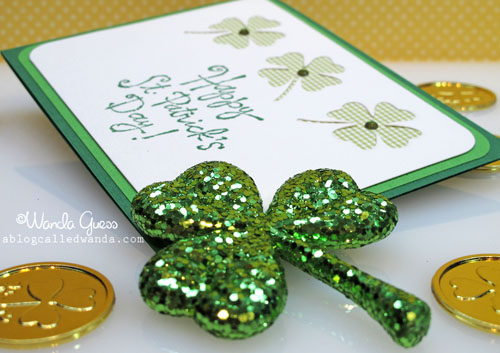
    Happy St. Patrick's Day! I'm not Irish, but that isn't gonna stop me from celebrating a holiday! Especially since I love green so much! It's a good excuse to wear green, make cool green projects and generally be happy…so why not!? Are you doing anything special for St. Patty's Day? 

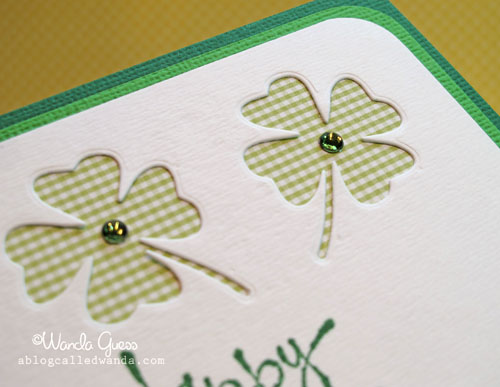
    I promise after today I will retire my new favorite stamping/card making technique! I've been using this one to death lately. Time to move on! Hahahah. I LOVE using dies to make cut outs on cards. Can't.get.enough. But, I realized when I did it again for my St. Patrick's Day cards…that maybe it's time to put it away for just a minute. LOL. Do you get like that? Obsessed with one technique? Okay, and don't say it, but I used gingham too! ACK!


    1


    This pretty four leaf clover die is from Memory Box!

    2


    Here are all my cards finished and read to mail. I put yellow blings on some of them…can't decide if I like green or yellow better!

    3


    4
    Have a happy celebration!

    Happy St. Patrick's Day!

    Birdie signature!


  • Happy Retirement Card!

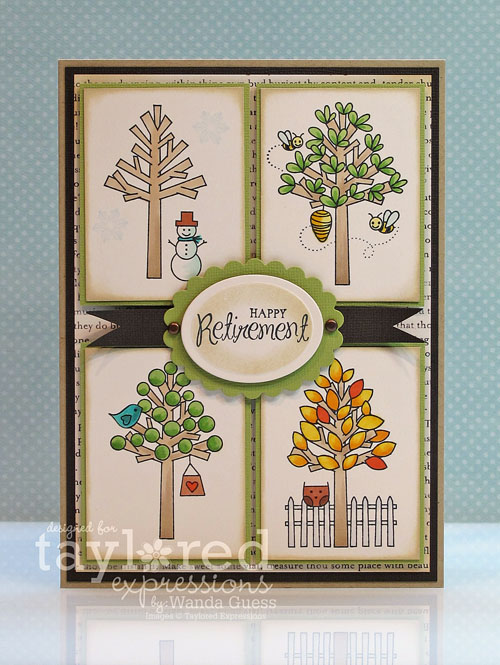
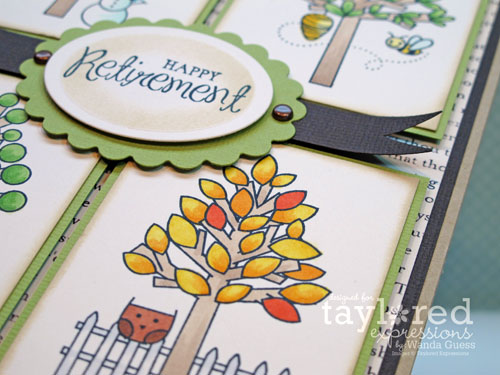
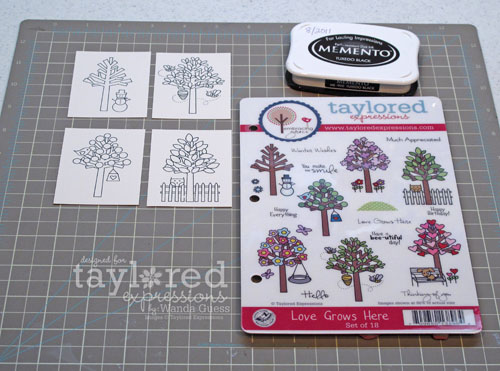
    Greetings! Today is one of my days to post for Taylored Expressions! Welcome! Today's card was made with one of my favorite TE Stamp Sets – Love Grows Here. I adore this set! I used it to make a masculine card today for my boss' retirement. I have a couple of tips for making this set look masculine. This idea for a layout has been in my head since this set was released. Hope you like it!

    This was one of those cards I didn't want to make. My boss is awesome…caring and fair and kind. He is the rock of our department and he will be missed. He was in my original panel interview and then hired me. I wish him nothing but the best as he enters this new chapter of his life… I wanted to make him a special card.

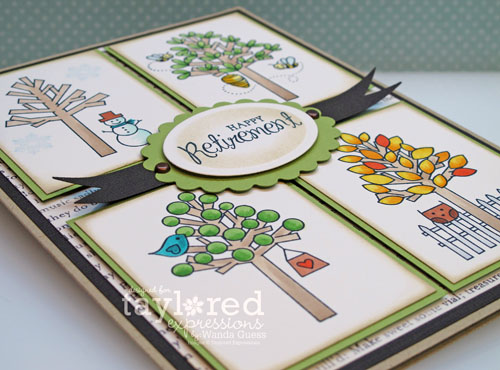
    I thought a "four seasons" them would be nice for a retirement. I stamped four of the tree images onto the same size cream cardstock base and then colored them with my Copics.  

    1


    Masculine colors of olive green and brown… You might notice that the tree trunks are all colored the exact same way with the same colors. This unifies the images. I also used the same greens on both of the green trees, for the same reason. I didn't get too crazy with the colors.

    2


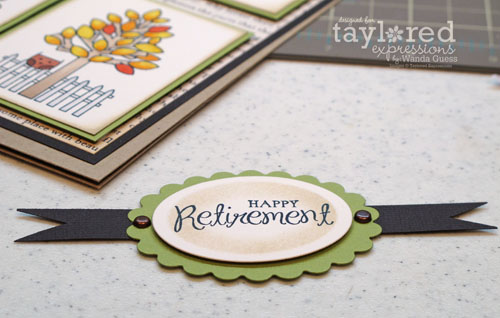
    The "Happy Retirement" sentiment is from THIS SET…another one of my TE Favorites! I stamped it onto an oval and created my own embellishment. I curved the tips of the brown part up for some dimension. Copper brads also add a masculine touch.

    2a


    3


    This is how I color!

    4


    5


    This card has LOADS of layers on it. Went through a lot of foam tape! LOL.  

    6


    7


    8

    We had a nice retirement luncheon for him and by next week, he'll be relaxing with his grandkids and doing good works in the world! I mailed the card to him because I knew if I gave it to him in person I would start crying. Best of luck to you CD! 

    Thank you for coming by today! Be sure to scope out this stamp set in the TE Store!  

    Birdie signature!

  • Sending love your way!

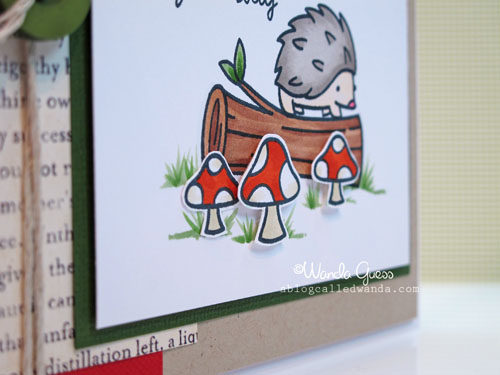
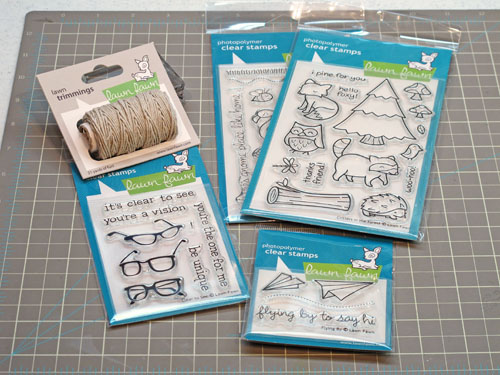
    Hellllloooooooo! How are ya? I'm happy to share this card with you today! While I was away last week, my new Lawn Fawn goodies arrived in the mail! WOOT WOOT! I had all day Saturday to stamp and blog (and laundry) and I really wanted to ink up these little stamp sets.  My favorite one is called Critters in the Forest, and I like it the best because it has a hedgehog stamp….and those little mushroom stamps! EEEK! So cute. So I made this card:


    1


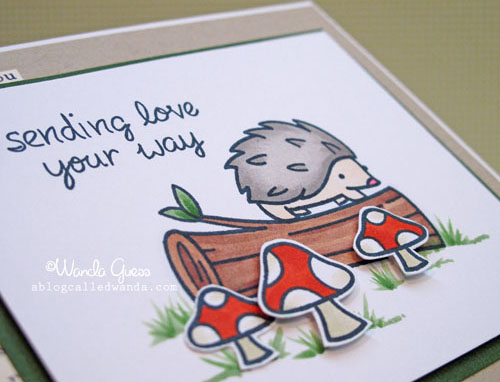
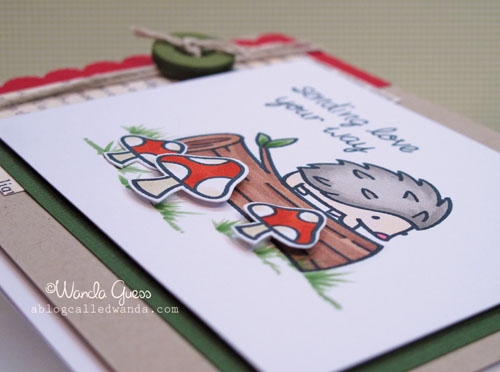
    How cute is that hedgie? TOO cute! I inked up the mushrooms, colored them, and cut them out. Two of them are popped up on foam tape for dimension. I added the grass with my Copics. Lawn Fawn also makes that awesome twine. It's not furry…love that.

    2


    I met Kelly and the gang from Lawn Fawn at CHA. They are all just as sweet and adorable as these stamp sets! I couldn't wait for the new ones to come out.  

    3


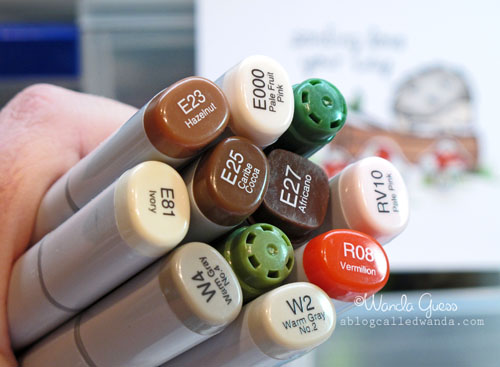
    Here is my Copic palette for this project: Turns out that E81 is the color of mushrooms! LOL.

    4


    I used warm greys for the hedgie and three shades of brown for the tree trunk. I thought about adding some clear glaze to the mushrooms, but left them as is.

    5


    6


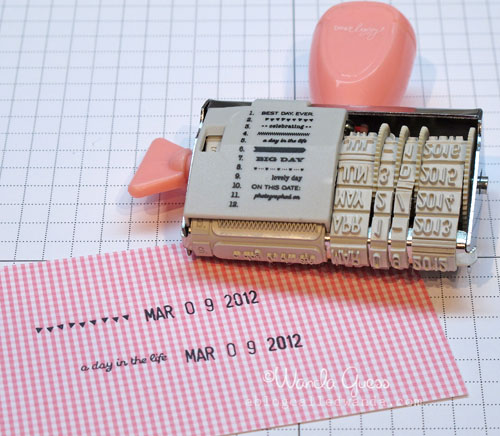
    This also came in the mail last week…this fun date stamp from Dear Lizzy!

    7


    While I was stamping and blogging, Mr. Buddy was chillaxing on the sofa… Don't you feel sorry for him, like his life is SO hard?

    8

    Carry on! Have a wonderful week. See ya soon!  

    Birdie signature!

  • Shabby Blue Birthday!

    Happy Weekend! YAY! Whew, this week was a hard one for me! I was out of town for work all week, with a nasty allergies-sinuses-cough thing going. Man, was I happy to get home last night and see my guys and sleep in my own bed. There's really nothing like that is there? This morning I got up early to take care of the laundry and unpacking and now it's crafty-bloggy time! How are you? Hope you all had a nice week.  

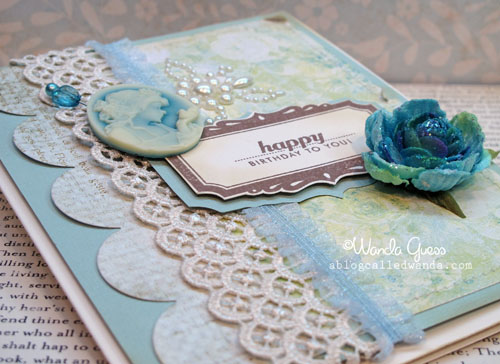
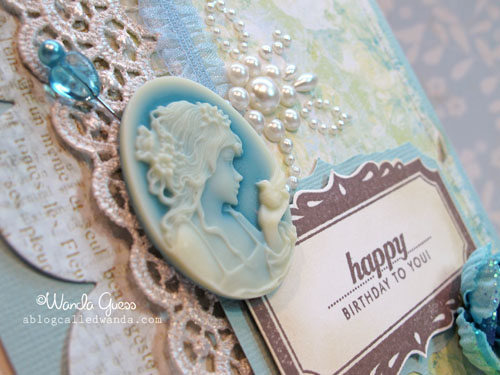
    I can finally share this birthday card, now that it has reached it's recipient! I made this shabby chic birthday card for my wonderful pen pal Holly, who lives in the Netherlands. Her favorite color is light blue and so that was my starting point for her card. I have been saving that pretty Webster's Pages Cameo just for her! The sentiment and frame is from the new PTI Anniversary set for this year.


    1


    Shabby chic is alllllll about layers and lace and pearls! I adore all this blue together….it's so soft and sweet.

    1a


    The blue flower is from my Prima stash. I am not sure, but I believe the patterned paper is also from Prima.

    2


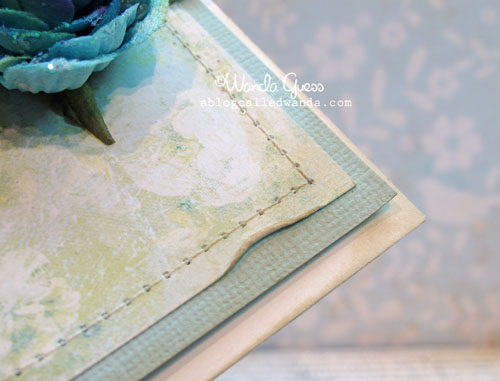
    Machine stitching on a card, to me, always feels more home-made and nostalgic. Here you can see I distressed the corners and also crumpled some of the top layer of paper.

    3


    IMG_1640


    Holly's birthday was earlier this week, and she let me know that her card arrived safely, so many miles away… It was full of hugs and good wishes too. Happy Birthday Holly!

    Thanks for stopping by here today – enjoy your weekend! XOXOXO 

    Birdie signature!

  • Taylored Expressions Calendar Challenge – March!

    CalendarChallengeBadge

    Today it's time again for our cool new calendar projects from Taylored Expressions and I am having such a good time making my pages each month!  The Baker's Dozen Design Team will be sharing calendar goodies and ideas with you throughout the entire year, so be sure to check out everyone else's projects too.

    Refer over to Taylor's blog to get all the info to play along with us each month. There will be a linky at the bottom of Taylor's post and it will remain open all year, so you have the option to go back and catch up if you start playing late. For everyone who plays in 10 or more of these monthly calendar challenges in 2012, there will be a random draw for a TE prize pack valued at over $150!!! Click here to go to the TE Calendar Department and see all the goodies.

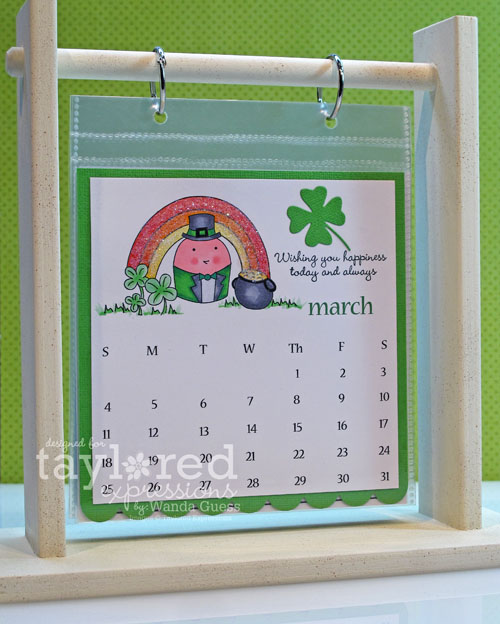
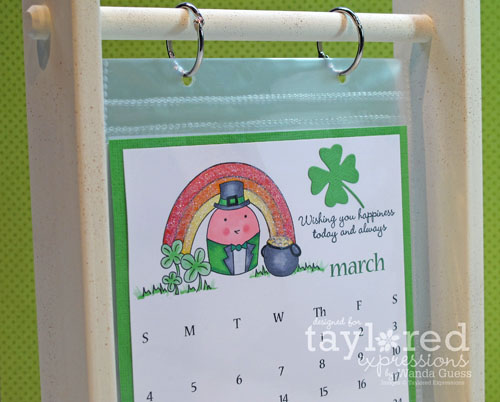
    I chose to make the "Frame Your Imagination" calendar and use Cuppie as my theme! The stand for the calendar comes in raw wood and then you can paint it whatever color you choose. I painted mine kind of an antique white and then speckled some brown onto it to give it some character.

    CLICK here for the calendar standCLICK here for the page protectors and CLICK here for the page inserts. I like this a lot because the finished pages are 6×6 and that gives a lot of room to stamp!

    Here's my page for March:


    1


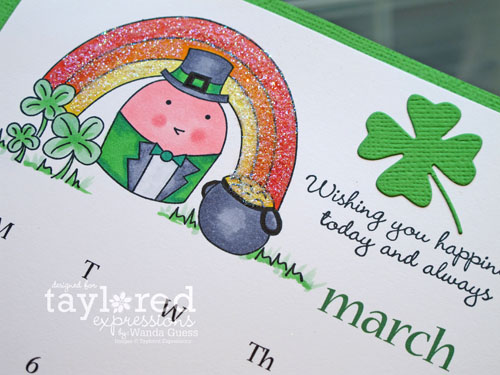
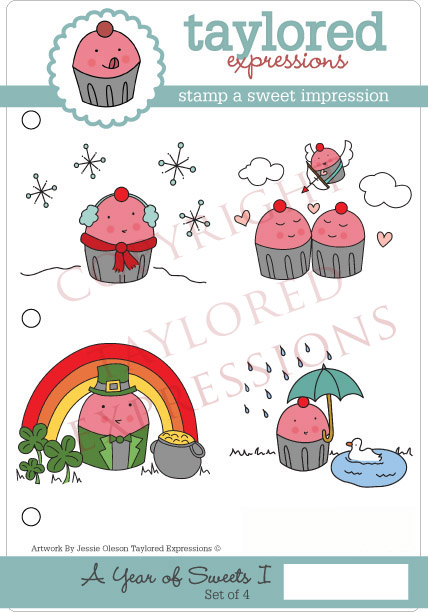
    Isn't cuppie just too too adorable in his little green leprechaun tuxedo? You have to giggle at this! I added lots of ultra fine glitter to the rainbow!  

    2


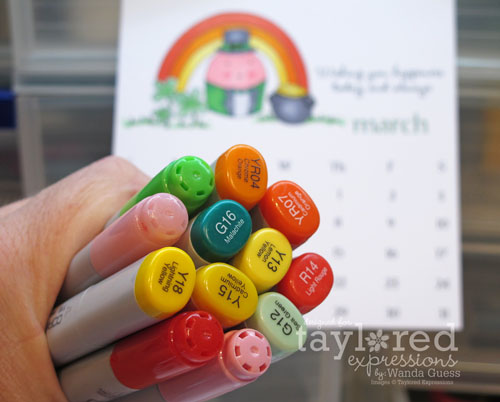
    Here is my Copic Palette for this project:

    3


    4


    Here is the image of this stamp set…I had to share, because I really love it so much! I used it for my January calendar page too.

    A%20Year%20of%20Sweets%20I

    We have been having loads of fun getting projects ready for our monthly calendar event. Please take some time and hop around to see what the rest of the Design Team has for you today!  

  • Charmaine Ikach
  • Jami Sibley )
  • Jen Shults
  • Jodi Collins
  • Melissa Sauls
  • Melody Rupple
  • Sankari Wegman
  • Taylor VanBruggen
  • Wanda Guess
  • Birdie signature!

  • Moxie Fab – Cure for the Winter Blues – Challenge!

    Hi peeps! Today I'm posting a card I made for the Moxie Fab World Blog! I love their challenges, and it's been too long since I entered one. This month's challenge is Cure for the Winter Blues… The challenge was to make a project using navy blue as the predominant element. Right up my alley!

    When I think of navy blue, I automatically thing navy and white, nautical, crisp colors, pops of yellow or red… I adore navy and white together. So that's what I knew I wanted to use. Next to decide what images and embellies. I was having such a hard time deciding….so I went with whatever was sitting on my desk! I rather like the result.


    1


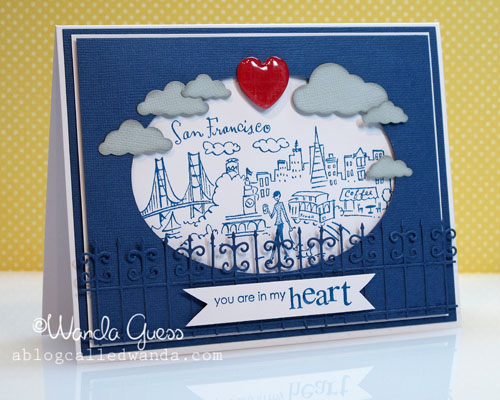
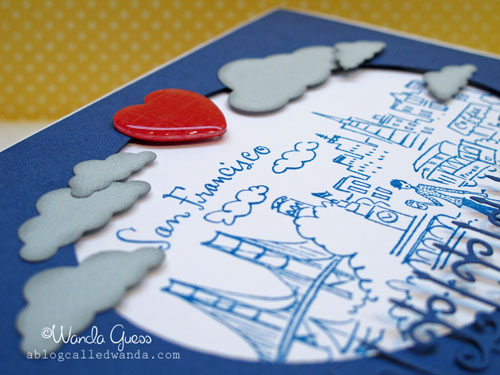
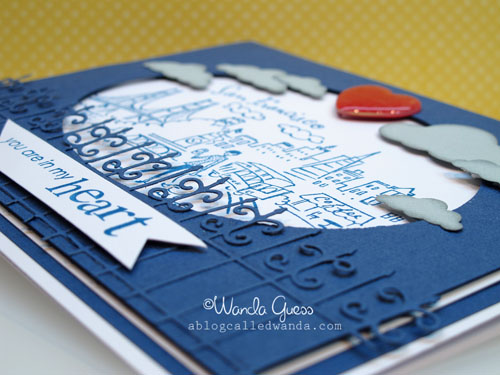
    I had this brand new San Francisco Stamp from Penny Black on my desk and it called to me! I stamped it in navy blue ink and didn't color it. That was hard – to resist the urge to color! The fence die is new from Memory Box and that was sitting on my desk too. In the back of my head was a photograph I took last year in San Francisco….you can see the photo at the end of my post.

    2


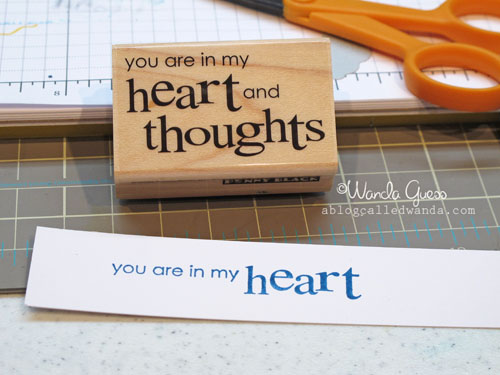
    I wanted a sentiment that referred to leaving my heart in San Francisco. I had this stamp in my stash. I use it all the time. I got out my stamp-a-ma-jig to line up my words. I blocked off part of the stamp and inked it and then blocked off the other parts that I didn't want. Voila…this saying in a line!

    3


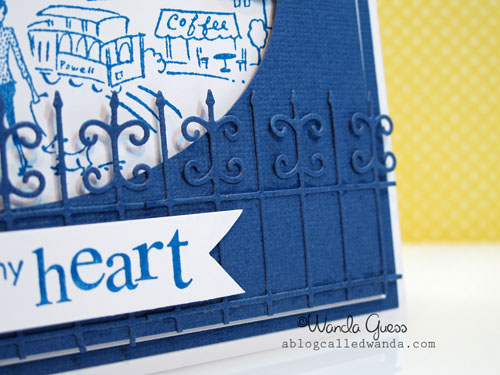
    Here's a close up of that teeny tiny fence!

    4


    I popped a bright red heart on the top using my Epiphany Shape Studio Heart 25 tool and some red paper. Added some grey clouds (a Memory Box die) to look like foggy San Francisco clouds and that finished it off!

    5


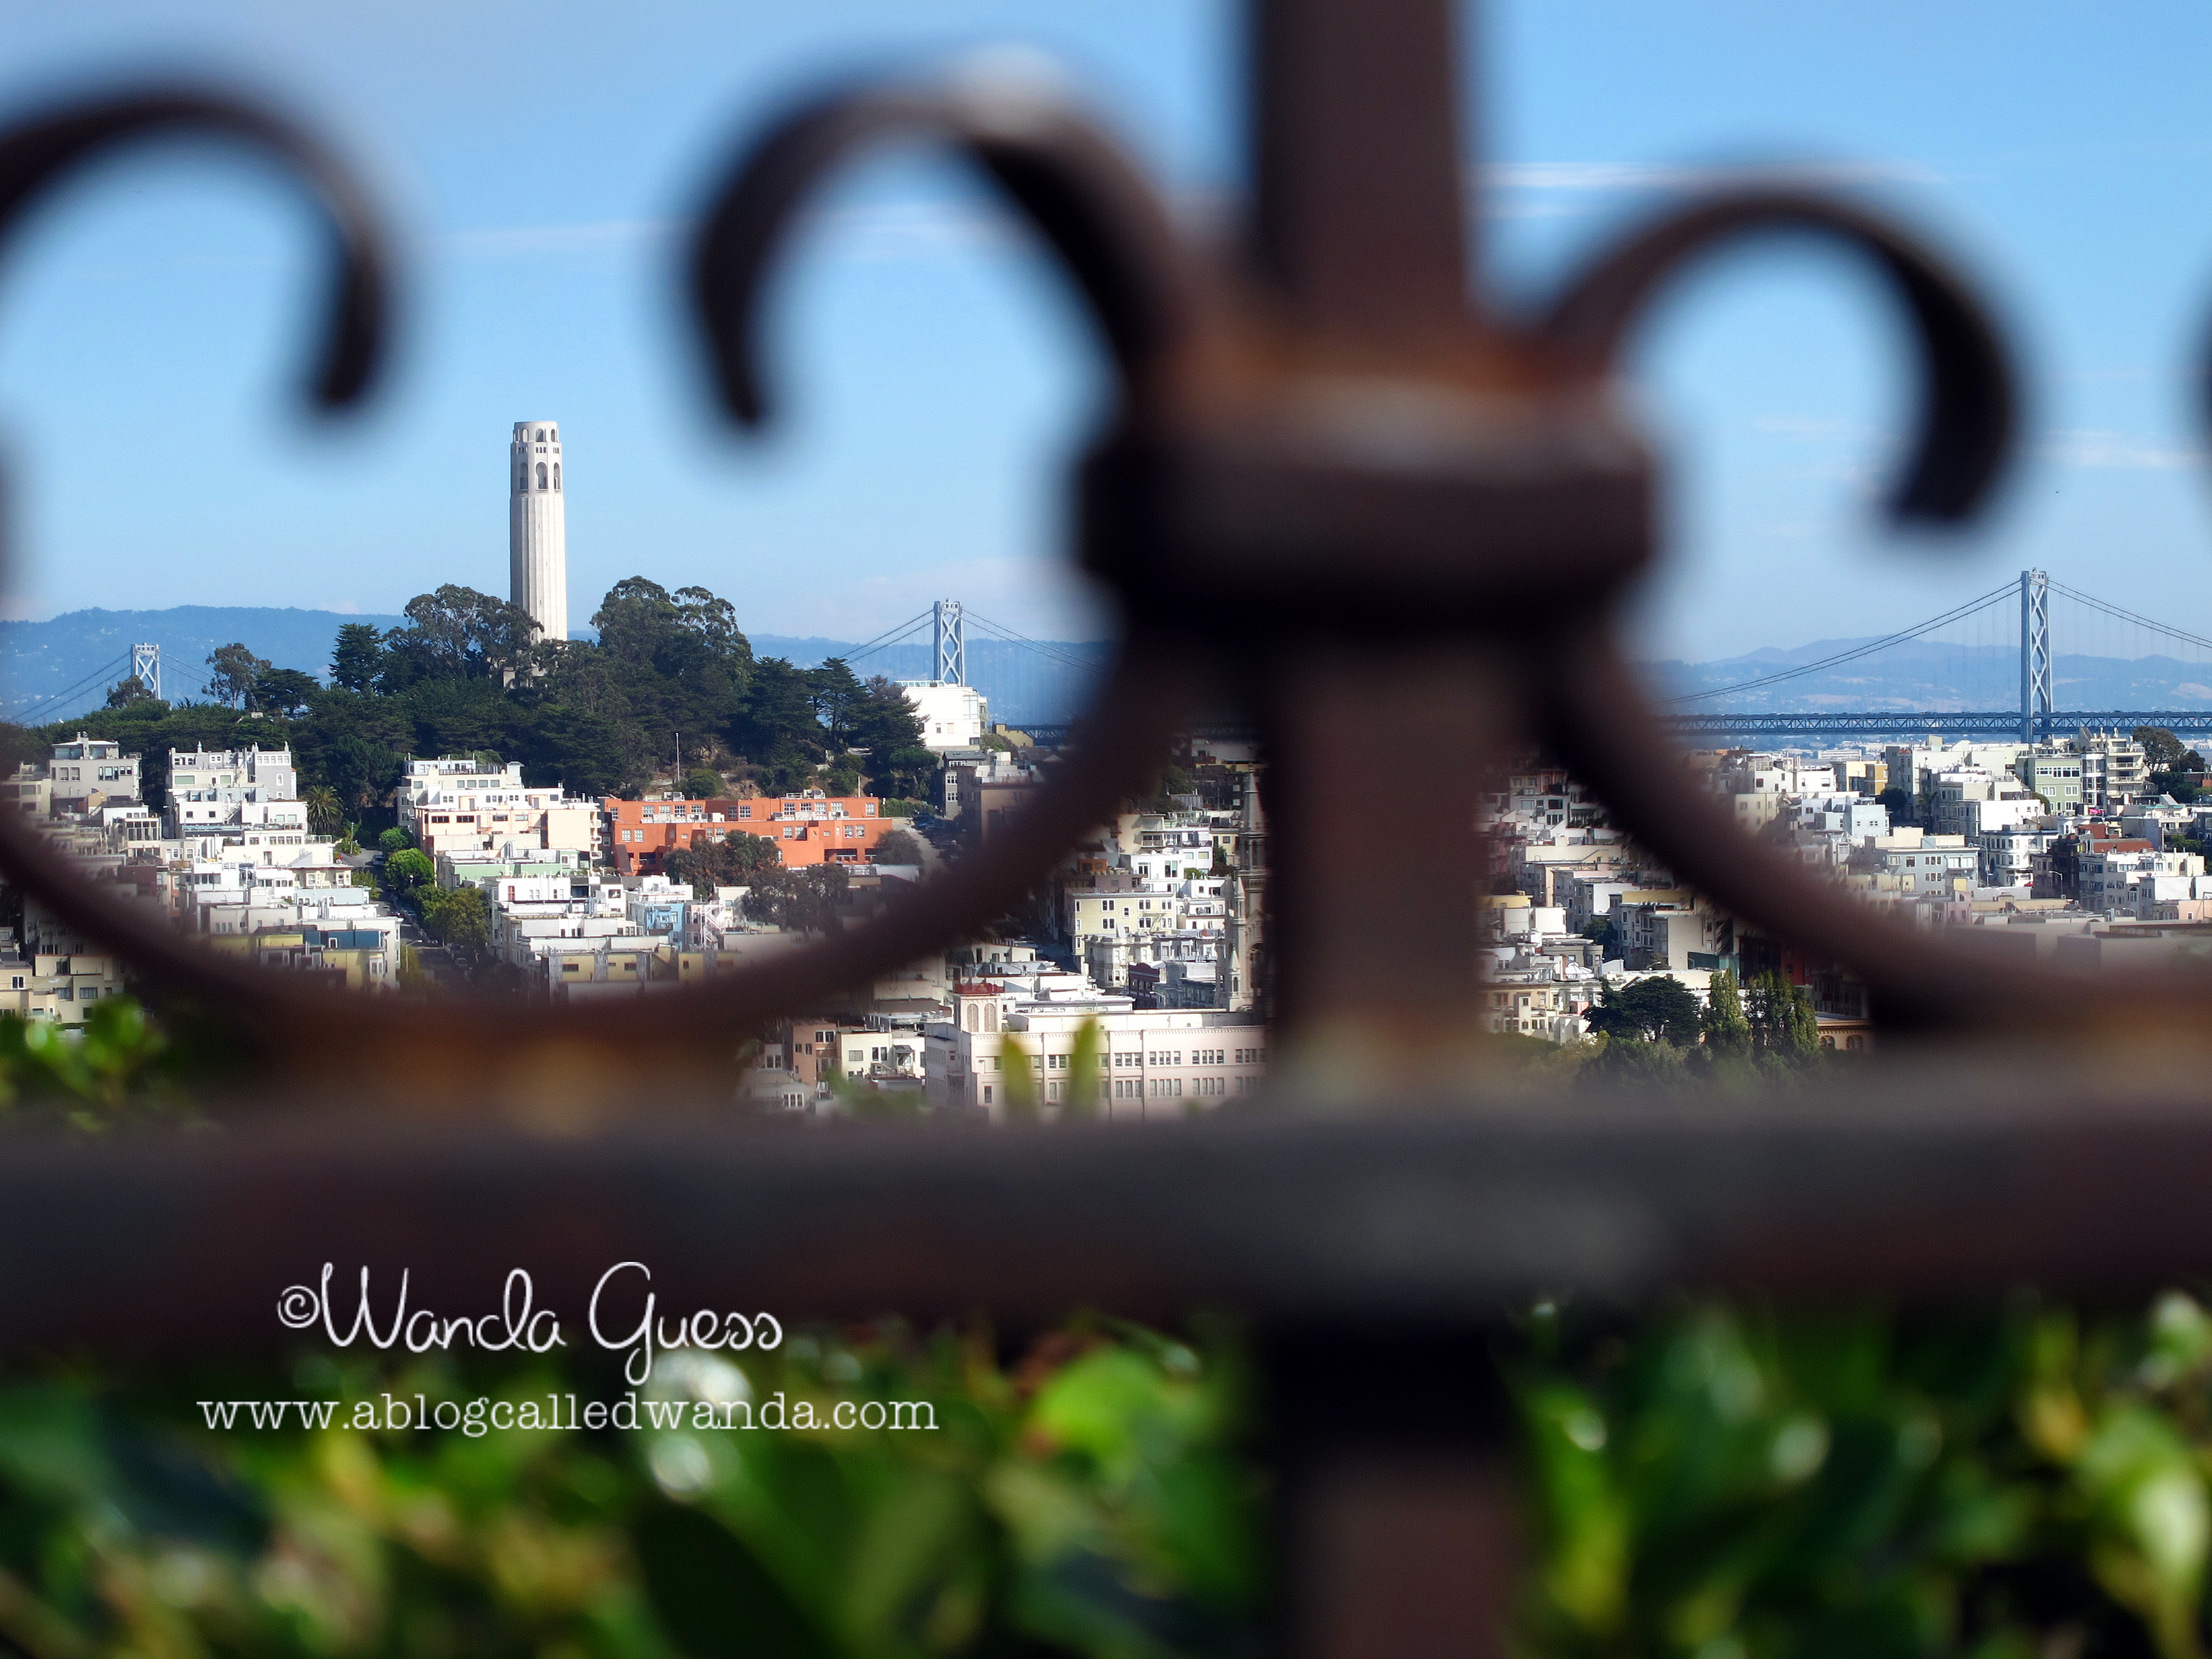
    Here is the photo I was referring to! Cool, huh? I took this from the top of Lombard Street looking out at the Bay Bridge and Coit Tower to the East.

    IMG_3900

    Thanks for coming by my blog today! You have until the 11th if you want to enter the Cure for the Winter Blues Challenge! Join me? CLICK here for the deets. Have a wonderful day. 


    Birdie signature!

  • A Simple Thank You…

    Hi Friends! Whew….what an interesting week I had and so full! Today I believe I am what you call… exhausted! Yeah, I'm pretty sure that is what this is called. It was certainly a busy week here on the bloggy blog with all the wonderful new things from Taylored Expressions! Did you end up getting anything? Also, for work I was running around like a chicken with my head cut off. Two days at one location, one day in the office, one day flying to Los Angeles and back (in the same day!). Yup, I'm a tired girl. My boss is retiring and we had a really nice luncheon for him on Wednesday and emotionally that was hard. He is the heart of our department and we'll miss him. I made him a nice Retirement card that I'll share with ya next week sometime.

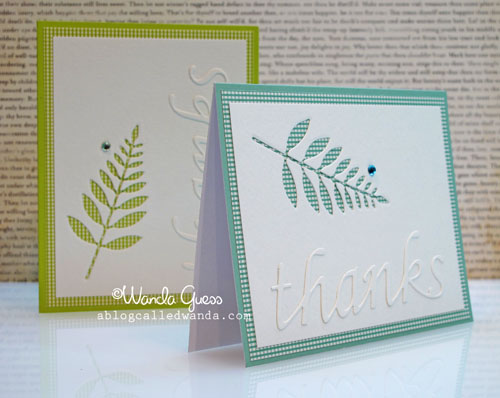
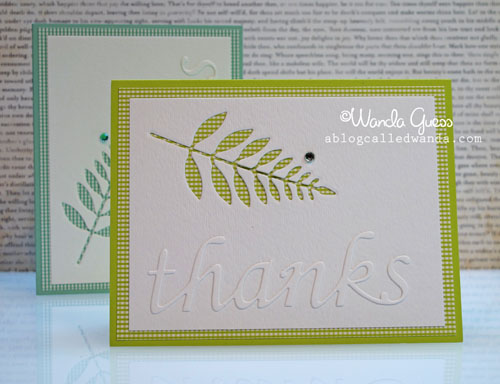
    Today I'm sharing some CAS (Clean And Simple) Thank You cards made with Memory Box and Poppystamps dies and papers. I used two of my favorite colors too. It's nice to have the need for Thank You cards! I'm thinking of making more of these as a set for a present! 


    98


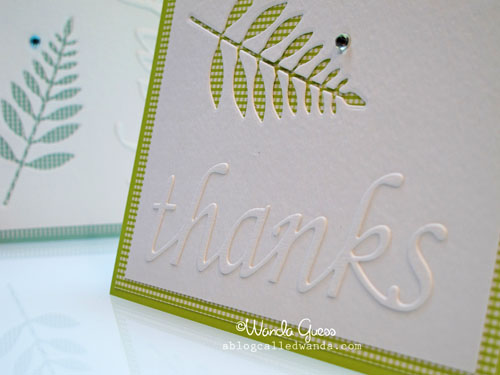
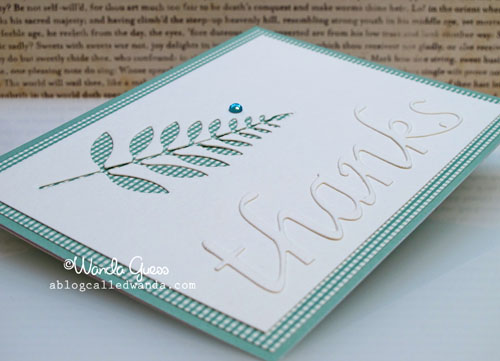
    I used cold-press watercolor paper for both my background and my word cut out. It's not stark white – but creamy white and has a wonderful weight and texture. I thought it was nice with this natural image cut out.

    B


    I made the cards so that they could face either way….with the 'thanks' going either vertical or horizontal. I can't decide which way I like it best. I added just one little bling to each, in the matching shade to that great Memory Box gingham paper….

    B1


    C


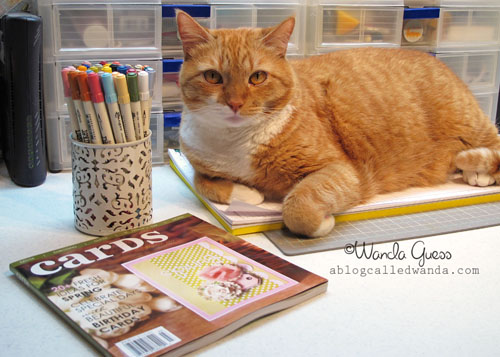
    My little craft room assistant is patiently waiting for me to go back out in the family room and serve as his human couch. Until then…he's perusing the new Cards magazine and scoping out my new Distress Markers! Hee hee. What a good boy!  

    IMG_1641
    Thank you so much for coming by today! I hope your weekend is fantastic! Are you feeling creative today? What are you working on? I would love to know. XOXO

    Birdie signature!

  • Taylored Expressions March Release Day!

    TESneaksBadgemarch2012

    TE Release Day!

    • All of the new products are now available for purchase! Check out the Fresh Out of the Oven Department to see everything in one place! WOOOOO WOOOOO!
    • More projects from the Baker's Dozen to inspire you.  Just follow the link list below.
    • Be sure to check the TE Current Specials page for Release Weekend Specials and Bundle Deals! 
    • Did you win one of the Mystery Baker's Dozen Blog Giveaways? Find the list of winners on Taylor's Blog.


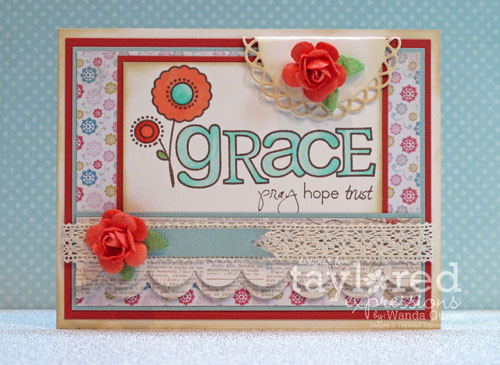
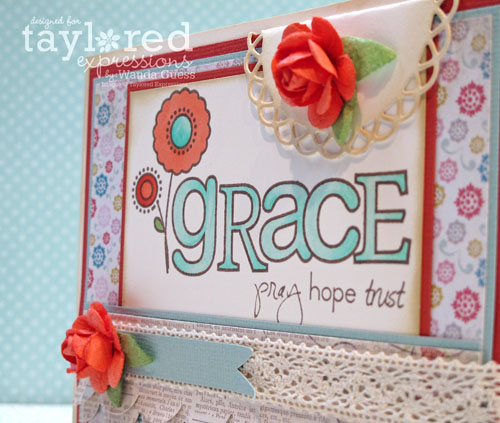
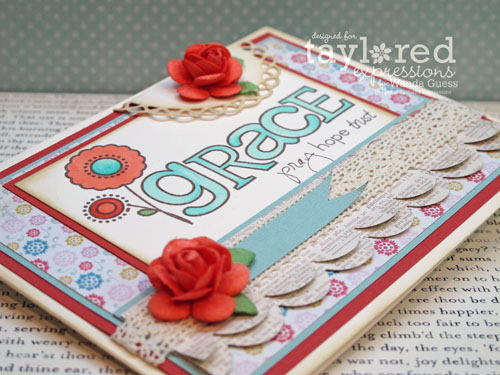
    Today I am featuring the Grace A La Carte stamp and also I added a sentiment from the Faith in Bloom set! Embracing Grace is by Emily Burger, and Emily has lent her unique fun style to these Bible verses and words of encouragement and combined them with lots of cute and quirky blooms.

    There are three new A la Cartes from the *te* Collection also, and I'm using Grace a la Carte. These all nicely coordinate with Faith in Bloom.


     Grace1


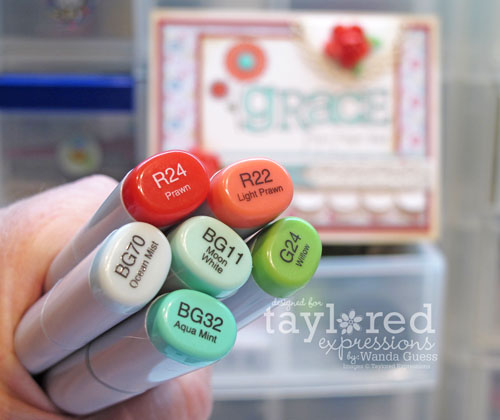
    Today I went full-on shabby chic! I got out the flowers from the KI Kit from February (awesome) and some pretty lace and some favorite papers from My Mind's Eye! Used the color palette taken straight from the paper. I adore aqua and red together!

    Grace2


    Here is my Copic palette….

    Grace3


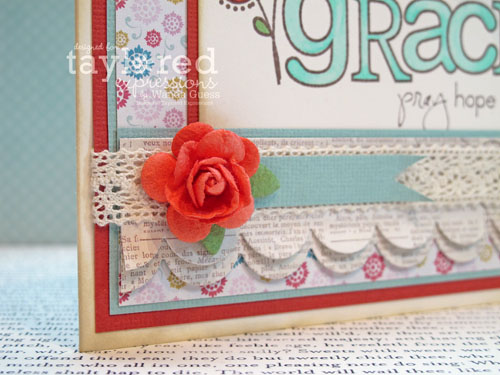
    I used my wonderful small doily die from TE!!! I distressed everything with a little amount of Fine Linen distress ink.

    Grace4


    Grace5

    The papers are My Mind's Eye Lost and Found – Rosy 6×6 collection pack. I also used the KI February Kit for the flowers. MMMMMMM.  

     Layering Doily - Small


    Thank you for playing along with us this week!! Be sure to see if you won anything by going to Taylor's Blog. Have a wonderful day! Happy Shopping in the TE Store!  

    Here are your links to the projects for Release Day!

  • Charmaine Ikach
  • Jami Sibley
  • Jen Shults
  • Jodi Collins
  • Karen Giron
  • Melissa Sauls
  • Melody Rupple
  • Nancy McKinney
  • Regina Mangum
  • Sankari Wegman
  • Stephanie Kraft (guest…woot!)
  • Taylor VanBruggen
  • Tori Wild
  • Wanda Guess
  • Signature

  • Taylored Expressions March Sneak Peeks – Day 3!

    TESneaksBadgemarch2012

    March Release At a Glance

    • We have sneak peeks to share Monday through Wednesday.  All of the new products will be available for purchase on Thursday, March 1st at 8 am PST. You'll find it all in the Fresh out of the Oven Department at the Taylored Expressions Store.
    • Join us as a fan on Facebook for an early peek at the stamp sets, as well as a SPECIAL Facebook GIVEAWAY, on Wednesday night beginning at approximately 6 pm PST.
    • Mystery Baker's Dozen Blog Giveaway: Each day, one lucky blog commenter will be chosen by random draw to win a $10 TE Gift Certificate.  Winners will be chosen from a different Baker's Dozen blog each day and will be announced on Taylor's blog on Release Day!  Be sure to hop around to see all the sneak peeks and leave comments on each and every blog for more chances to win. Limit one comment per blog per day, please.  Comments for the drawings close Wednesday 2/29 at 7pm PST.


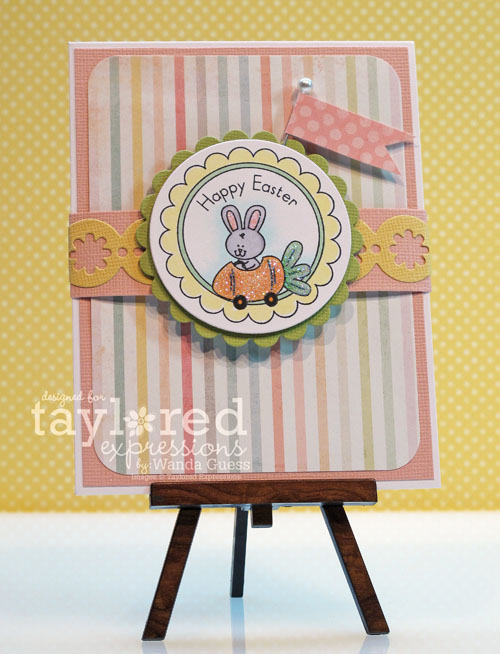
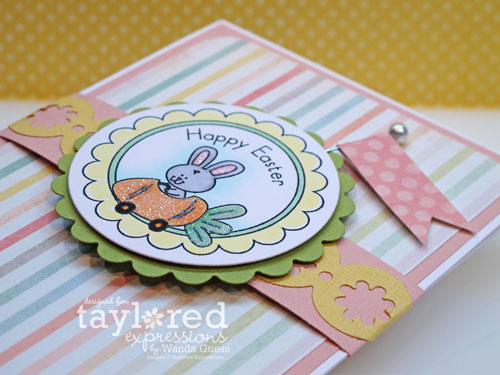
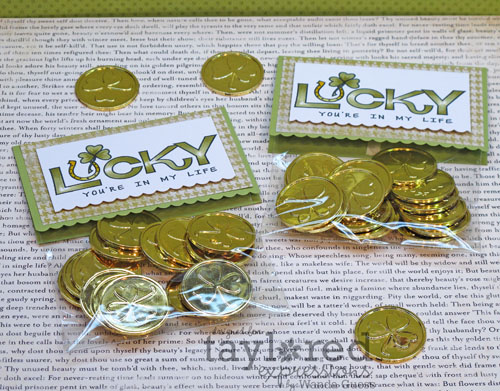
    I am sharing two projects today for Spring – an Easter Card and some St. Patrick's Day treat packages! Top o' the morning to you! Today we are introducing 2 new full sized sets (Faith in Bloom, Totally Tags Spring), plus the 4 new A la Cartes (Faith, Grace, Hope, Lucky). 


     Easter1


    Easter2

    This fun Easter card was made with the Totally Tags – Spring Stamp Set and was designed for Apple Doodle Ink by Doug Applegate! It's a new set of tags to coordinate with the Totally Tags dies…great for all sorts of cards and treats for Easter and Spring!  It Coordinates with Hello Spring and Easter Joy

    I used the Happe Easter tag image to create a "belly band" card! Have you ever made one of these? You just make a simple background card, and then jazz it up with a pretty wrap around band. You should definitely try it. I used the new Jumbo Flower Die to make my band pop! Here it is all disassembled…


    Easter3

    That sweet striped paper is from the new My Mind's Eye Howdy Doody 6×6 paper pack. I think I could use gobs of those pastel stripes – for every project.

    Easter4

    Jumbo Flower Border


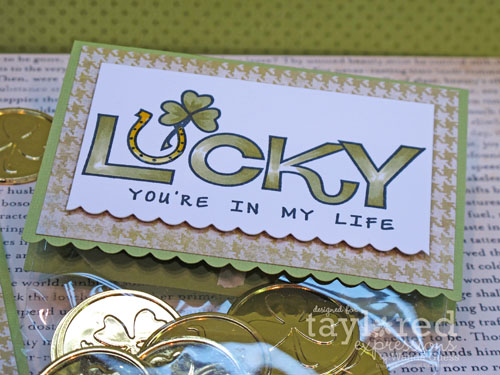
    My second project to share today is made using the Lucky A la Carte stamp, which is from the Whimsical Wishes by Nancy McKinney collection! It's great for St. Patty's Day as well as telling someone how much they mean to you! I decided to make some fun little treat bag toppers for St. Patty's!

     Lucky1


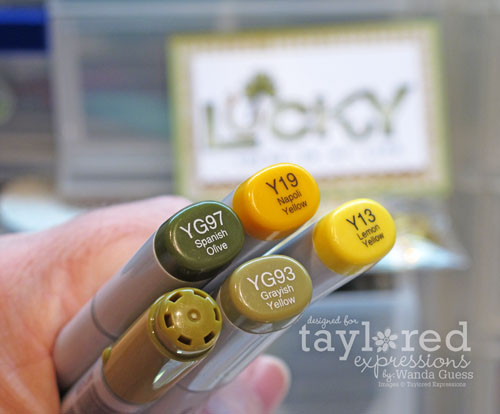
    I found some fancy gold coins at Michael's to put inside! I colored my image with some olive green Copics and then made a gold horseshoe – and added some clear glaze to it.  

    Lucky4

    Here are my Copic color choices…. 

    Lucky2


    Here are my supplies! The paper is from the My Mind's Eye Vanity Fair 6×6 paper pack.

    Lucky3


    Lucky5

    Okay….that's it for today! Tomorrow is Release and Reveal Day! Be sure to come back and see all the sets and dies in their entirety…and SHOP!  Here's the blog link list for today!

  • Charmaine Ikach
  • Jen Shults
  • Jodi Collins
  • Karen Giron
  • Melissa Sauls
  • Melody Rupple
  • Regina Mangum
  • Sankari Wegman
  • Stephanie Kraft (guest…woot!)
  • Taylor VanBruggen
  • Tori Wild
  • Wanda Guess 
  • Signature

  • Taylored Expressions March Sneak Peeks – Day 2!

    TESneaksBadgemarch2012

    March Release At a Glance

    • We have sneak peeks to share Monday through Wednesday.  All of the new products will be available for purchase on Thursday, March 1st at 8 am PST. You'll find it all in the Fresh out of the Oven Department at the Taylored Expressions Store.
    • Join us as a fan on Facebook for an early peek at the stamp sets, as well as a SPECIAL Facebook GIVEAWAY, on Wednesday night beginning at approximately 6 pm PST.
    • Mystery Baker's Dozen Blog Giveaway: Each day, one lucky blog commenter will be chosen by random draw to win a $10 TE Gift Certificate.  Winners will be chosen from a different Baker's Dozen blog each day and will be announced on Taylor's blog on Release Day!  Be sure to hop around to see all the sneak peeks and leave comments on each and every blog for more chances to win. Limit one comment per blog per day, please.  Comments for the drawings close Wednesday 2/29 at 7pm PST.


    Tulips1


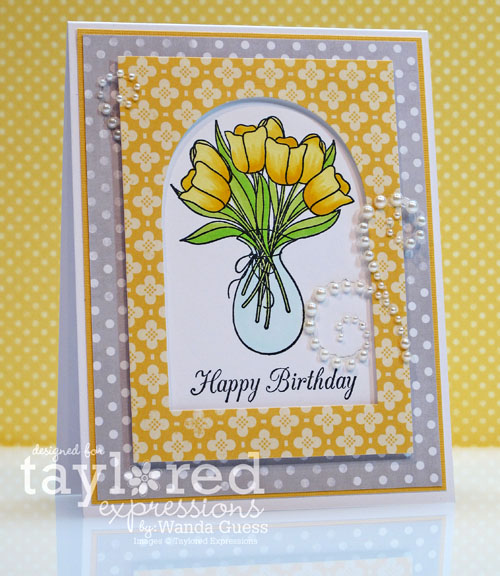
    Today we are introducing THREE new Mokas and a beautiful Whimsical Wishes set, all from Nancy McKinney! I'm using the Spring Tulips Stamp Set – which is a lovely petite set. It's so soft and pretty and I adore this main image. The sentiments are very nice also.

    Tulips 2

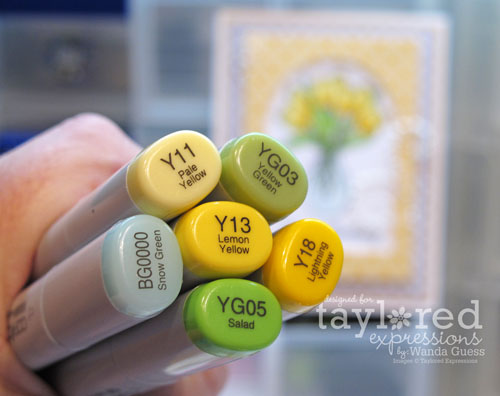
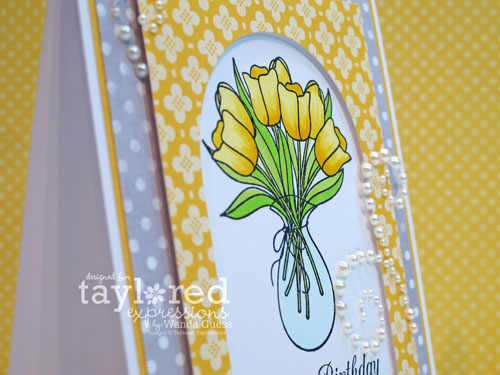
    Here is my Spring Copic palette…who wouldn't love a bunch of pretty yellow tulips right about now?

    Tulips 3

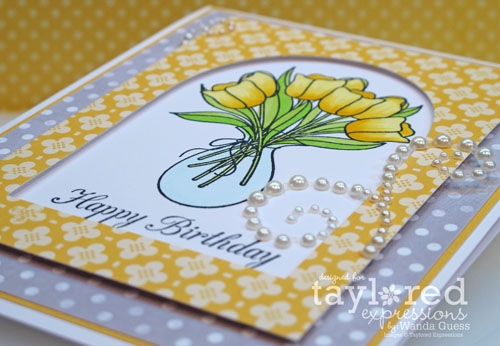
    Grey and Yellow as a color combo was HOT last year and I love it! I found these two pretty papers in the My Mind's Eye Be Amazing 6×6 paper collection. Maybe my favorite new papers for the season?? I cut out a window for my focal image and at the last minute added some pearls. Although I made mine a birthday card…dontcha think this would be a lovely Mother's Day card?

    Tulips 4

    Even though I am not using a Moka today – I want to fill you in on a cool new addition to our Copic Coloring Chart for hair and skin… We have added the skin colors to the chart this month.  The Coloring Chart was designed by our very own (amazing) Jen Shults and it's a  FREE DOWNLOAD! Check it out!

    Here are the links to everyone else's projects!

  • Charmaine Ikach
  • Jami Sibley
  • Jen Shults
  • Jodi Collins
  • Karen Giron
  • Melissa Sauls
  • Melody Rupple
  • Nancy McKinney
  • Regina Mangum
  • Sankari Wegman
  • Taylor VanBruggen
  • Tori Wild
  • Wanda Guess 
  • Signature


  • Taylored Expressions March Sneak Peeks – Day 1!

    TESneaksBadgemarch2012

    March Release At a Glance

    • We have sneak peeks to share Monday through Wednesday.  All of the new products will be available for purchase on Thursday, March 1st at 8 am PST. You'll find it all in the Fresh out of the Oven Department at the Taylored Expressions Store.
    • Join us as a fan on Facebook for an early peek at the stamp sets, as well as a SPECIAL Facebook GIVEAWAY, on Wednesday night beginning at approximately 6 pm PST.
    • Mystery Baker's Dozen Blog Giveaway: Each day, one lucky blog commenter will be chosen by random draw to win a $10 TE Gift Certificate.  Winners will be chosen from a different Baker's Dozen blog each day and will be announced on Taylor's blog on Release Day!  Be sure to hop around to see all the sneak peeks and leave comments on each and every blog for more chances to win. Limit one comment per blog per day, please.  Comments for the drawings close Wednesday 2/29 at 7pm PST.

    Sooo, without further ado….here's my first card for Release Week!  

    Cottage 1

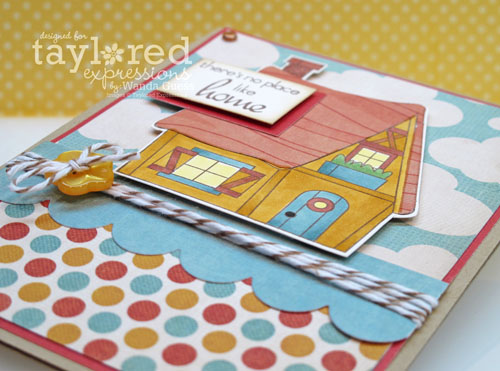
    Today we are introducing  two new Adorable Abodes – Royal Digs and Spring Cottage along with NEW DIES! I'm using the Spring Cottage Stamp Set from Apple Doodle Ink! This is Doug's Adorable Abodes #3 – a sweet little cottage with a wishing well and bunnies celebrates Springtime and the new beginnings of a new home! This would be perfect for March or April for calendars if you're doing a calendar project with us.


    Cottage 2

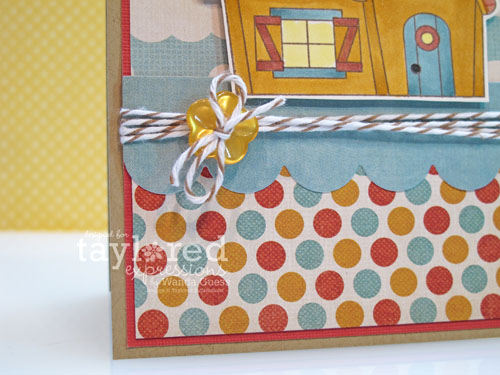
    I used my Copic Markers for the cottage and then paper pieced the roof out of some great wood-grain paper! There really is no place like home! I used some brown/white twine and a matching button. I kept this card towards the masculine side. Love this color palette – all inspired by the pretty patterned paper collection from My Mind's Eye.

    Cottage 3

    The paper is the "Away We Go" Collection 6×6 paper pack from My Mind's Eye. LOVE. Also, I pulled out an old favorite from TE – The Medium Scallop Die – to make my border.  As you know, I use this one all the time!  

     Medium Scallop Border

    Always remember that TE stamps are high quality red RUBBER mounted on foam. All you do is stick them on your favorite blocks and you're good to go. All the sets come on a full color panel and store perfectly in our Mini Binder Boxes (4 sets to a box). Full size set panels are 5.75" x 8.5" and jam packed with images for $21.95.  Mini set panels are 4.75" square (CD size) for $12.95.  Petite panels are  3" x 5" for $7.95. (6 Petite sets fit into a Petite Storage case) Have fun looking at all the other projects from the rest of the Design Team! XO

    Signature

  • It’s a hodge podge blog!

    Say that three times fast…hodge podge blog! Haha! Today I'm trying to get organized and get my craft studio into some semblance of order…which seems to be a major task right now! I wanted to do a blog post and share some things, though. These are just some random cards and photos that never got posted for one reason or another…so I'm lumping them all together. A little of this and a little of that! I hope you are having a great weekend so far. Thanks for stopping by!

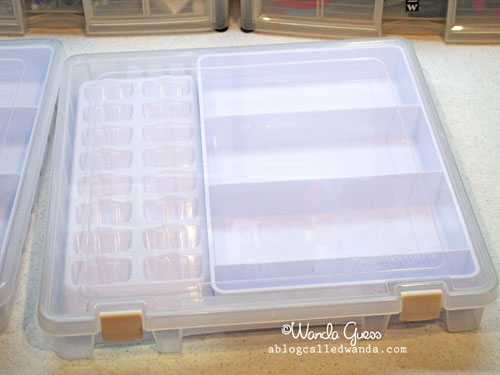
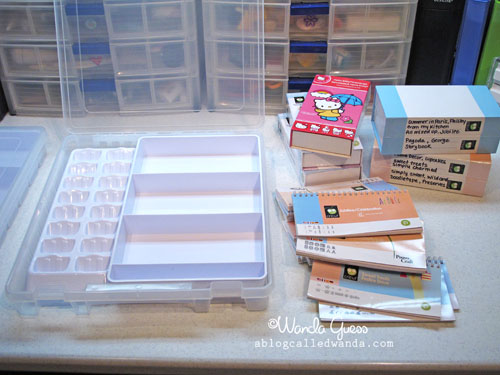
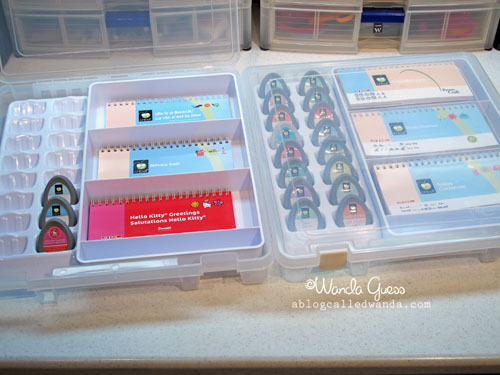
    First up I'll share a little organizing I did a few weeks ago. I am just a wee bit OCD…okay a lot OCD. Organizing makes me happy and relaxes me when I'm stressed. I know I'm not the only one out there right? I love The Container Store… All my photos are in matching bins organized by year… All my stamps are categorized by theme… You get the drift! One thing that has always escaped me was a good way to organize my Cricut stuff. Well, recently I found these Iris containers at Joann's Crafts and they did just the trick!

    Here is the empty container: 

    IMG_0541


    Here is my stash of Cricut cartridges:

    IMG_0543


    Here is the final result! I have found that I am using my Cricut a lot more now that I can easily access my cartridges and booklets. Love it!

    IMG_0545


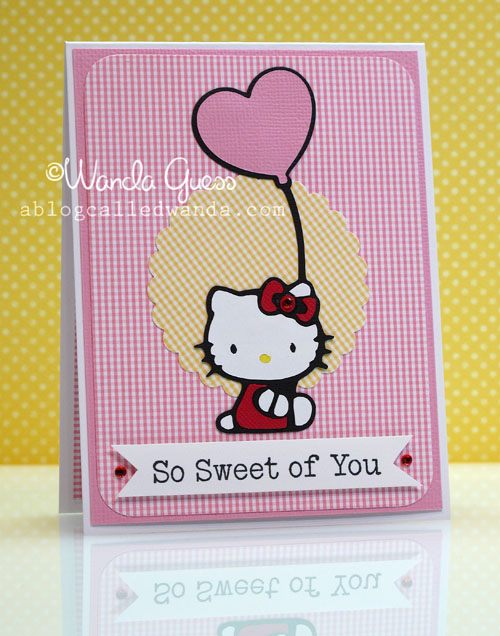
    Next up a couple of cards that I hadn't shared yet! I made this Hello Kitty creation to send to sweet GG who had mailed me some awesome Hello Kitty swag! Thanks again Rachel! We have bonded over HK! I used my Cricut to make it…and some cheery gingham paper.

    IMG_8233


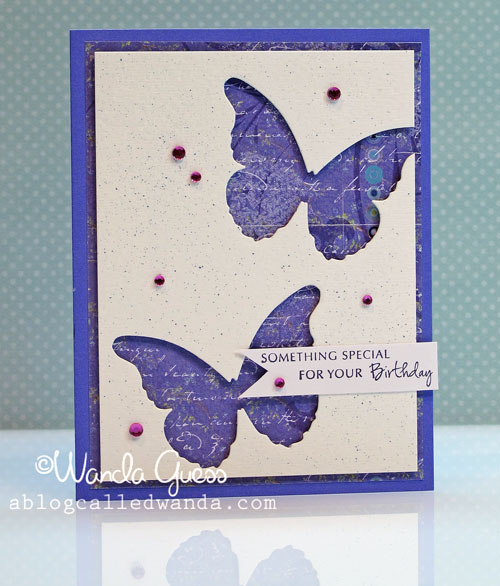
    You might remember this next card…I did THIS version in red a while back. I made another version in purple for a friend's birthday this week. I adore this layout and that Darla Butterfly die from Memory Box!

    IMG_1590


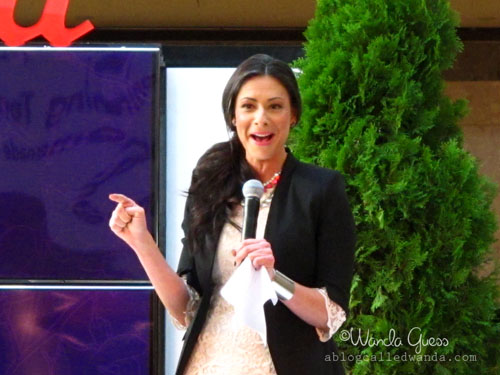
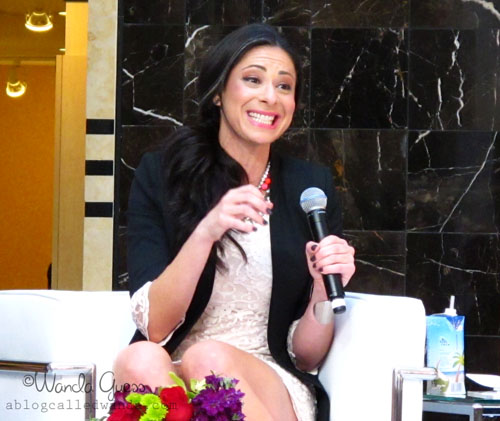
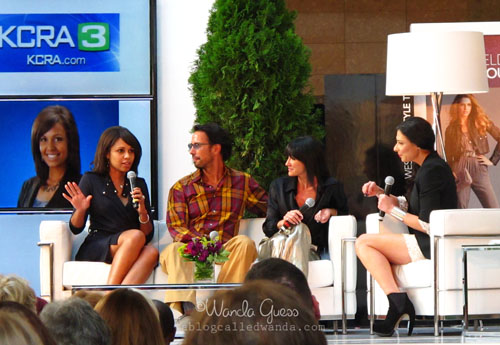
    Next up is just a fun story to share… Our local Shopping Mall had a big fire in October of 2010. A good portion of the mall was closed for over a year and it kinda sucked! The mall had a huge re-opening party late last year and Stacy London was there! I LOVE 'What Not to Wear' - mostly because of Stacy. Love her exhuberance and her happy demeanor! Well…the hubs heard on the morning news that she was speaking in about an hour!!! I hurried up and got dressed and dashed over to the mall just in time to see her. SHUT UP!!!  

    1


    She said "SHUT UP" about 100 times…and she really is exactly like she appears on the show. Very funny and helpful and VERY pretty.

    2


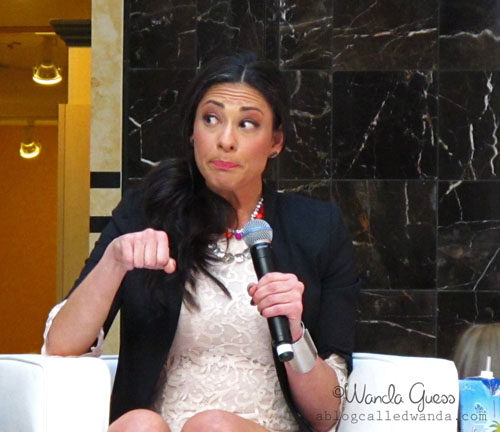
    I took about 50 pictures…and there is not one picture in which she is not making some silly face! I think this one is my favorite. You want to talk about being animated!!

    3


    4


    Or maybe this one is my favorite?

    5


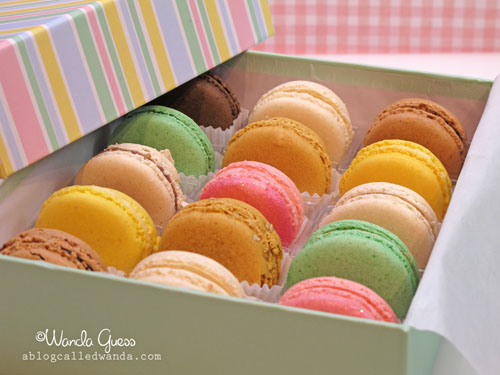
    Lastly, I took a picture of some yummy treats the hubs sent me for my birthday in November - from Sucre in New Orleans! MMMMMMMMM! I wish I had some right now!

    IMG_0539

    Well…I promised you a hodge podge! I hope you had fun sharing all these things with me and that you found something you liked! Please be sure to come back on Monday for the start of Taylored Expressions March sneak peeks. Toodles!  

    Birdie signature!


  • A good deed story and a card…

    Hi friends! How are you? I'm hunkered down in my craft studio for the next two days…I gotta get some stuff done! That's okay with me though. Kitty is in here with me and I have some tunes going on my iPad and it's all good. The hubs is relaxing in the family room. A perfect day. I made today's card as a thank you card for a good deed that someone did for me last week. It's a nice story.

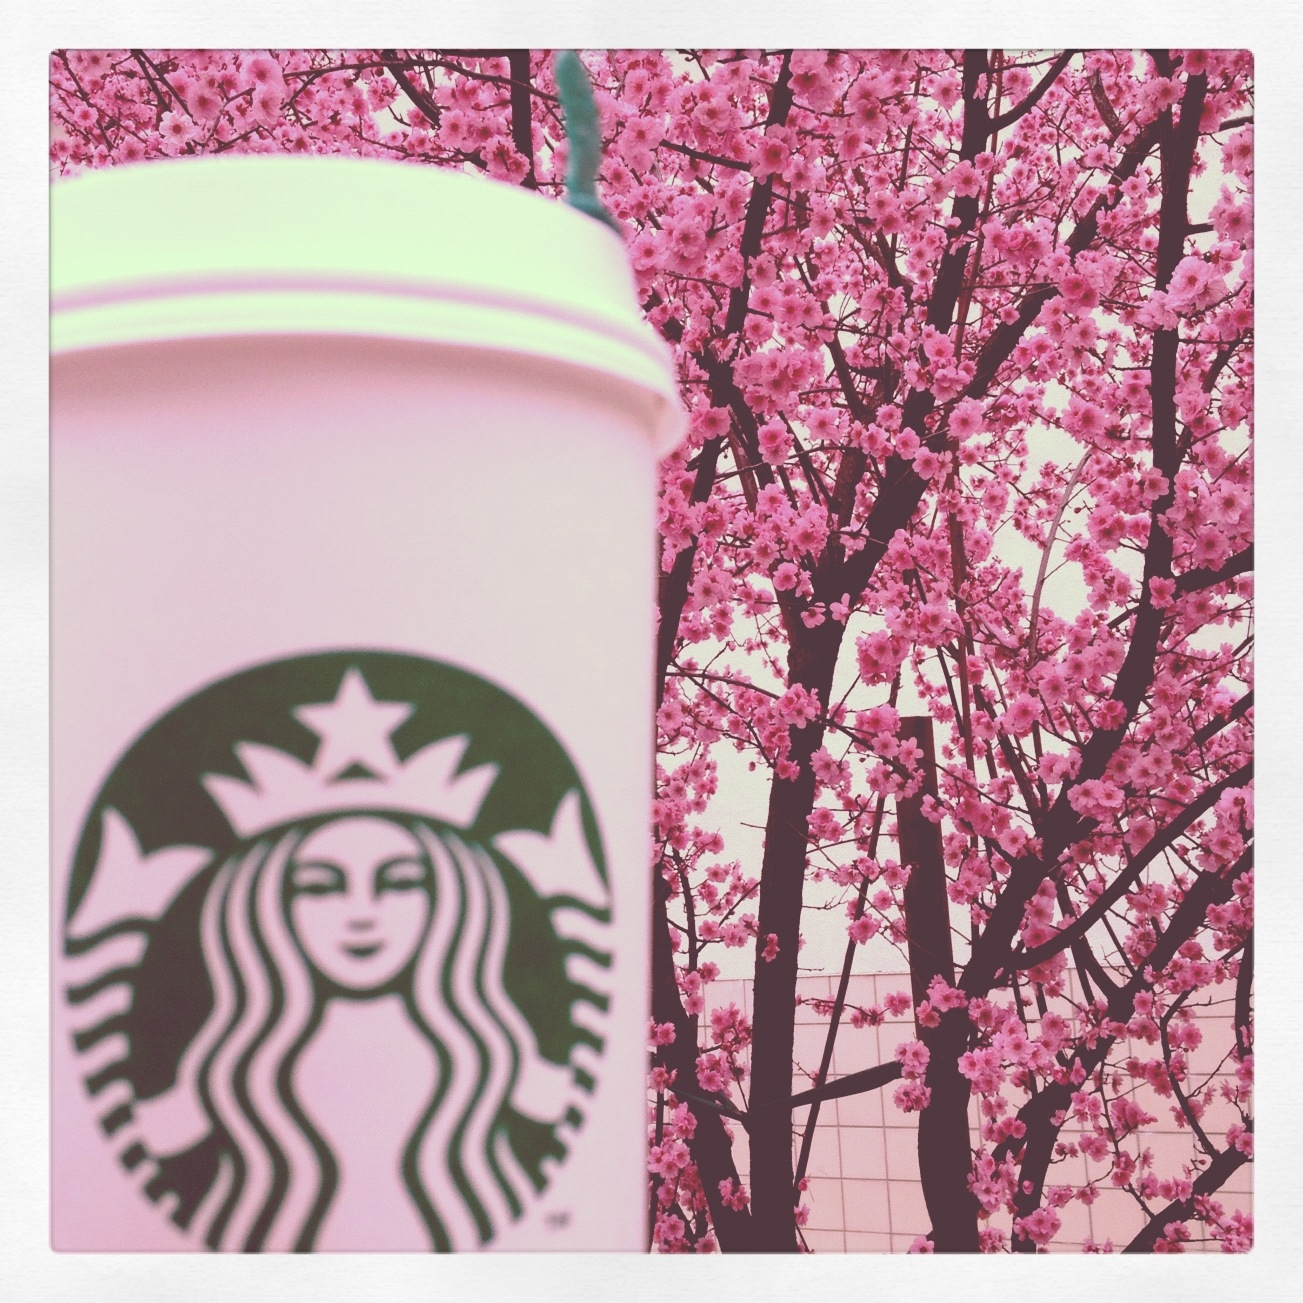
    I'm sitting at my desk at work last Thursday afternoon and feeling sort of sleepy due to Excel spreadsheet overload…so I got on my iPhone and wrote a facebook post saying "I wish Starbucks delivered." That's it, forgot about it, and kept going. Well…down the hall in another department a sweet co-worker read my post on her phone and wrote me back that she would go and get us Starbucks and deliver it!!! There's a Starbucks about 3 blocks away from our office…and she needed some fresh air… SO how great is that? Technology + facebook + sweet co-worker = Starbucks delivery! What did we ever do before iPhones? Don't answer that…don't speak of it…LOL.

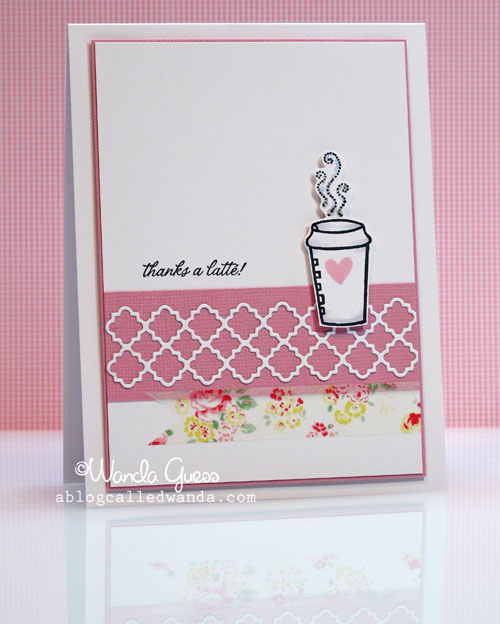
    So here's the card I made her to say "thanks a latte" to her for going and bringing me a much needed Venti Soy Caramel Macchiato! Her favorite color is pink…


    1


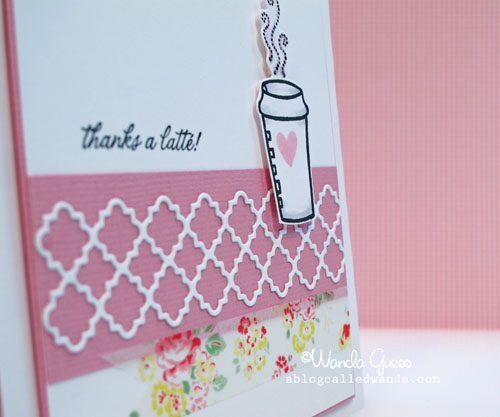
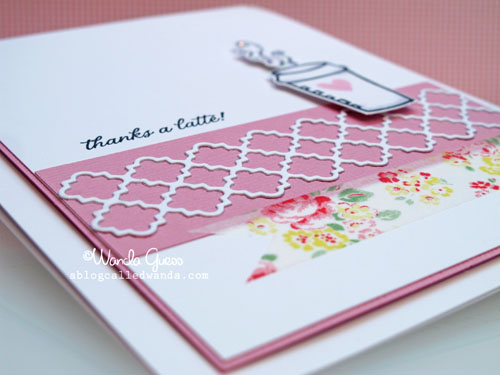
    This trellis (called Tessatina) die is a brand new die from Memory Box for Spring…I am in love! It looks very nice and crisp against this pink. This quatrefoil pattern is without a doubt my favorite new stamping 'thing' and it's popping up everywhere. Hero Arts has a new stamp (Studio Calico) with this pattern coming out soon. I saw it at CHA. YUM.

    2


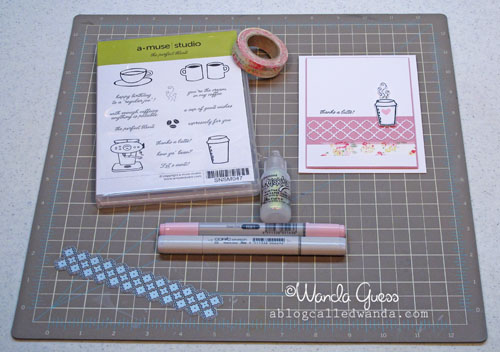
    Here are my supplies…The stamp set is from Amuse Studio and I cannot remember (sorry) where I got this pretty washi tape. I put a touch of Stickles on the little steam clouds. Two Copics is all. R81 was a perfect match for this Bazzill paper.

    3


    This is what I put on the inside of the card….

    4


    5

    This past week I got five new email subscribers! That puts me at 225 peeps who are kind enough to let me pop them an email when I post something new! This is very very touching to me and I'm really glad you're here sharing with me. Thank you! Have a great day everybody. 🙂

    Birdie signature!

    Pin It

  • Sunflower Happy Birthday! TESC #152!

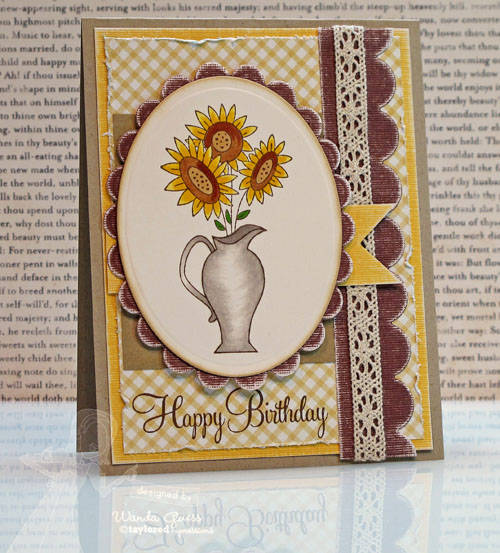
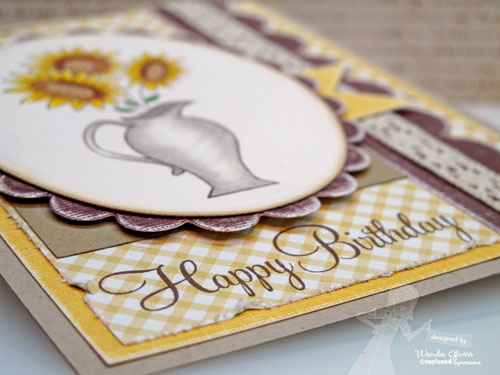
    WOOO HOOO! It's Friday! Hope it was a great week for all of you and that fun times are ahead for the weekend! I have Monday off for President's Day so it's a three day weekend for me. I have plans for brunch with a gal pal tomorrow and then I need to stamp like a crazy woman to get my projects all done! Thanks for coming by today. It's my day to post for Taylored Expressions so I used the awesome sketch from TESC #152! You still have time to enter your card for the sketch challenge….and you could win a prize! CLICK HERE for details!

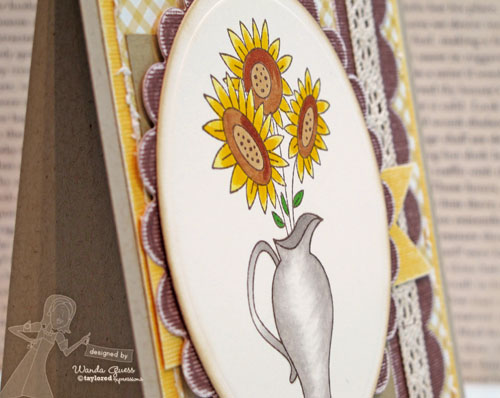
    I made sort of a shabby-country-chic sort of creation! I used new papers from My Mind's Eye and a Fall stamp set and a pretty shade of golden yellow. I'll put my supply list at the bottom of the post.


    1


    3


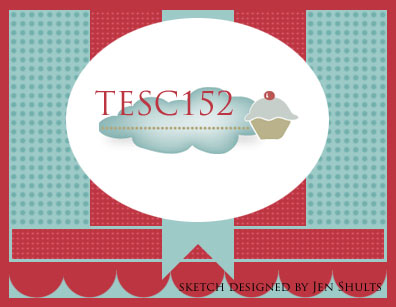
    Here is the sketch image. I flipped it up on it's side since I wanted to use the oval the long way to fit my image better. COOOOOL sketch…it's a keeper!

    TESC152

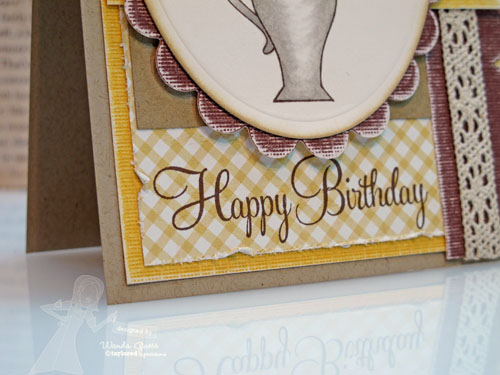
    Here is a photo of my supplies…I used the "Thankful" set – which is traditionally for Fall! You can get more use out of your sets if you try to see them in a different light. The apples could be for a teacher card too and I love the sentiments with that set. I used the Happy Birthday words from the "Embrace Beauty" set because I like that font.  

    4


    Here is my card before the focal image. I sanded the brown paper and the gold paper to make it softer and more shabby-licious! hee hee.

    IMG_1517


    IMG_1518


    Here is my Copic Palette…

    IMG_1519


    IMG_1522


    IMG_1523

     Supplies – all from Taylored Expressions:  

    Thankful Stamp Set

    Embrace Beauty Stamp Set

    Medium scallop die

    Copic Markers

    MME  – Be Amazing 6×6 paper pad

    I hope you have a most fabulous day friends!  

    Birdie signature!


  • Happy Valentine’s Day 2012! XOXOXO!

    Whew….I have a lot to share today! I had a super fun, busy weekend full of friends and laughter and food and crafting and pictures and oooh boy. I needed to go back to work to rest up! Hahaha. Happy Heart Day to you and your family. It's Valentine's Day! I'm sorry it's here because I feel like I was just getting in my crafty groove with hearts and stuff. I put all the Valentine crafty things away last night…until next year. I have one last card to share with you for the holiday.

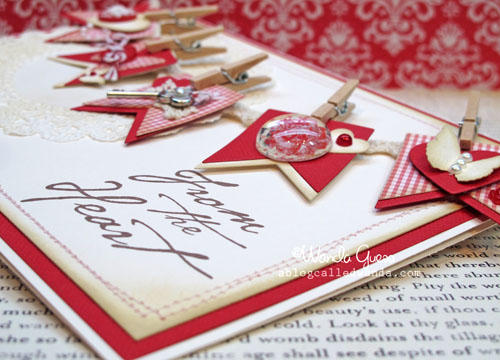
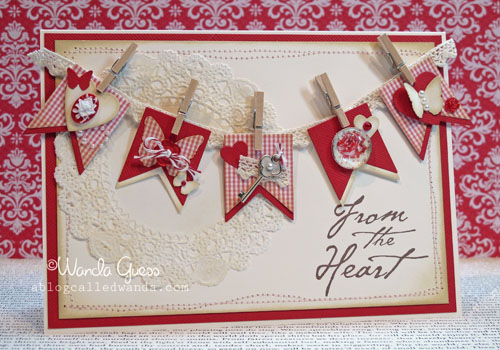
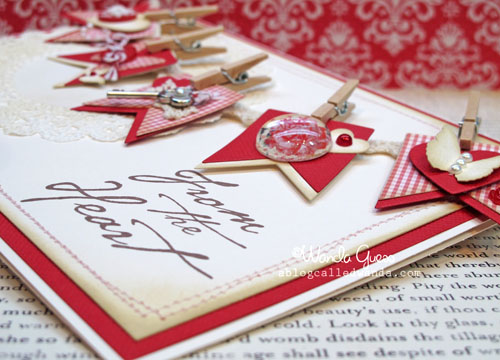
    As you probably know…I love banners! I'm crazy about 'em actually. Love them on cakes, and cards and hanging up for a party and all that. I even have a Pinterest Board called Banner Madness (click here). I wanted to make a pretty red and cream banner card so I got out some supplies and went to town with it! This card is definitely "more is more!"
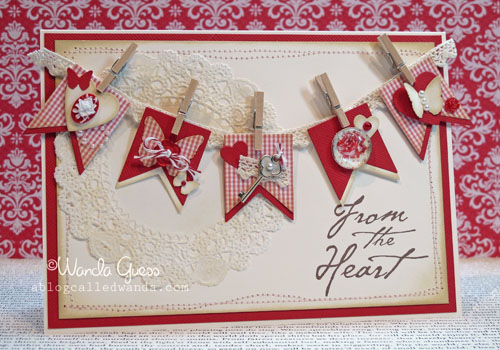
     

    01


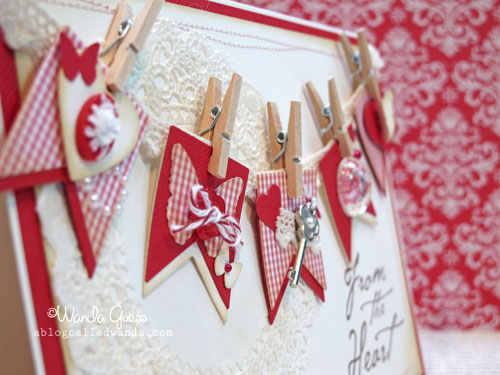
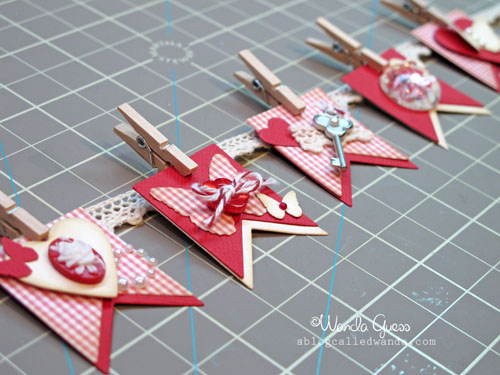
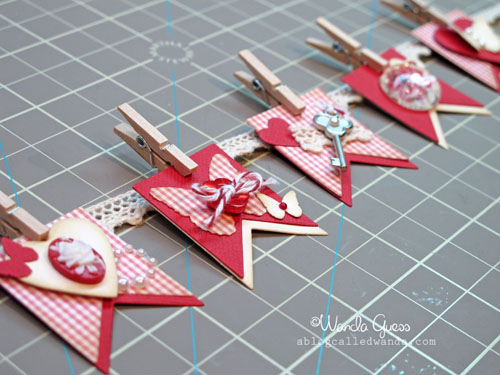
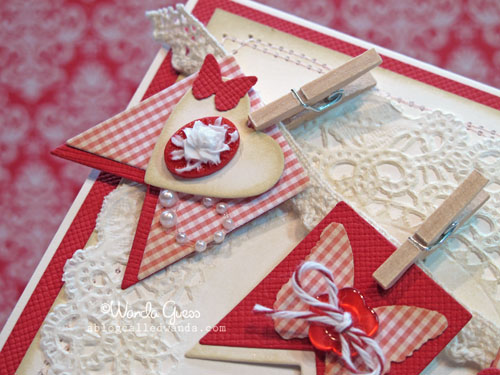
    Each little banner is different, but they are all unified by using the same papers, hearts, and butterflies. I adore crisp, bright red with cream.
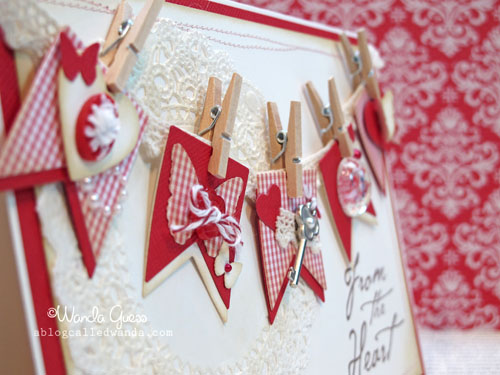
    01a


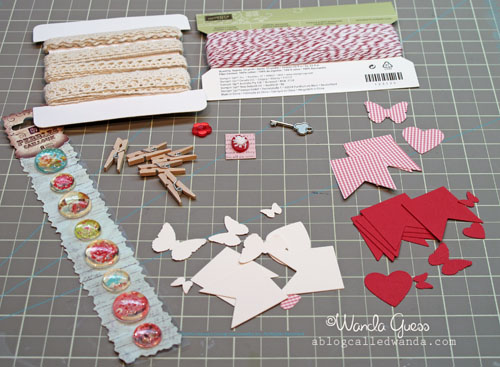
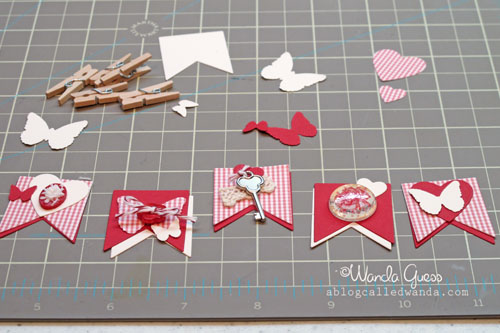
    Before I started, I went around the craft room and got out all kinds of yummy things I thought would go together. The pennants were cut from a Papertrey Ink die set and the hearts are also a Papertrey Ink die set. The butterflies were punched from Martha Stewart punches. The beautiful lace ribbon is from my sweet pen pal Holly in The Netherlands! I had to pretty much tear the whole room apart to find those teeny tiny clothespins!!!
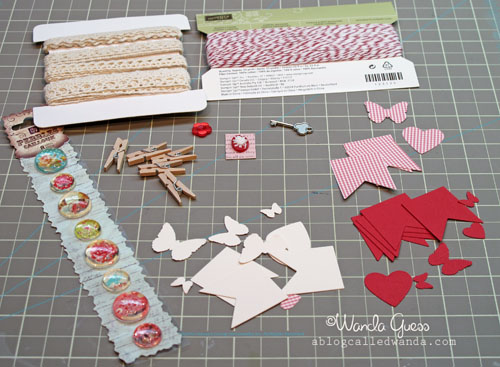
    01b


    This is the process of laying everything out first to see what looked best…before gluing it all together. I decided to layer two colors on each pennant.
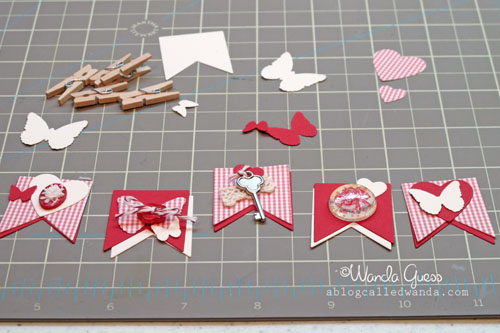
    01c


    Here they are all strung on a pretty piece of lace. I inked the edges of everything with linen distress ink just to make it look more vintage.
    01d


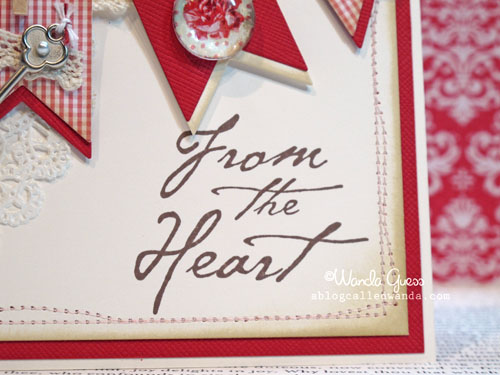
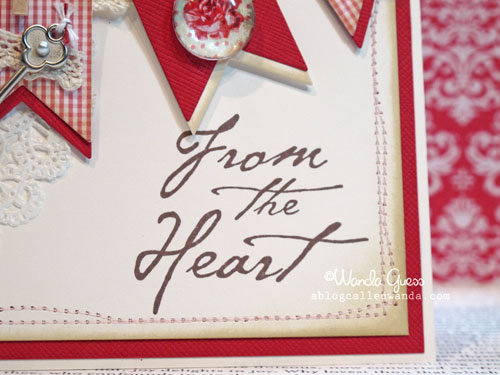
    I busted out the sewing machine and made a free form edge around the cream paper. The message was stamped in brown ink.
    01e


    01f


    01g


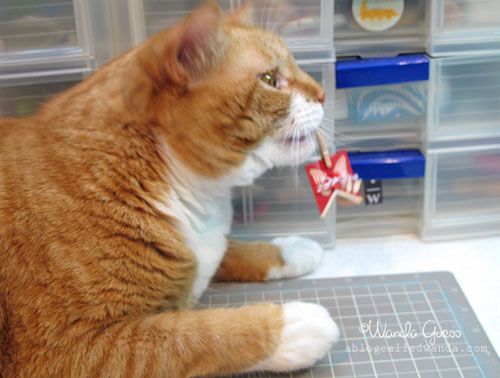
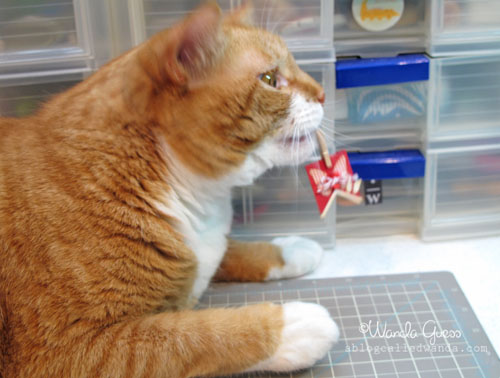
    Now, somewhere along in the process, Mr. Buddy decided to hop onto my stamping table and have a look…and he liked this one the best! Bad kitty!
    01h


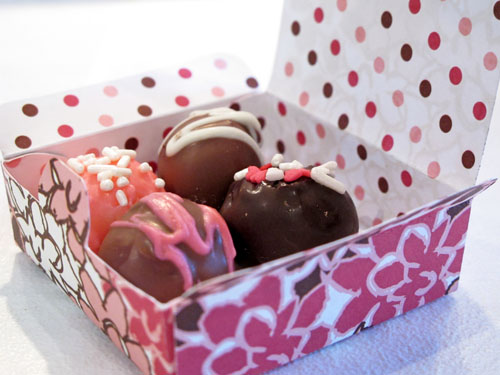
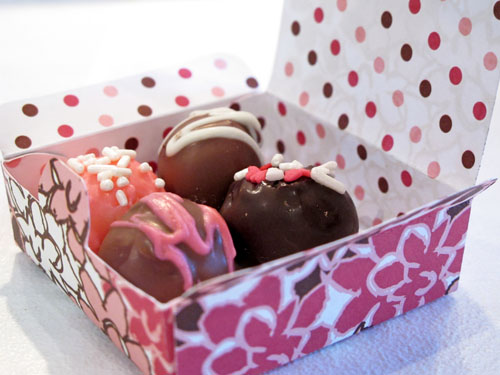
    Friday night my friend CJ met me at Paper Garden to take a class from the fabulous Ms. Julie Ebersole! CJ is an amazing baker/cake decorator. She brought me the most adorable (and delicious) little box of truffles she made! Aren't the pretty? They tasted so goooooooood!
    02b


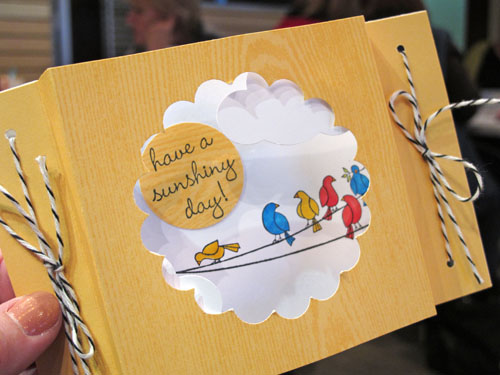
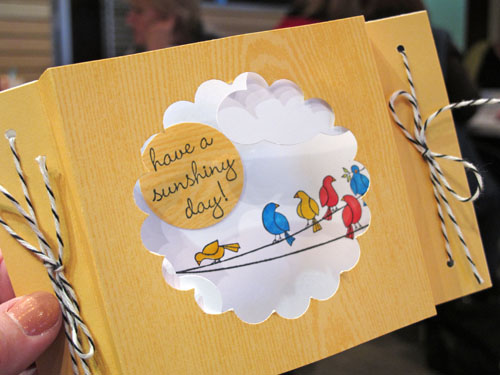
    In class, we made five fun fold cards. I think this idea was my favorite. The card lays flat for mailing but then pops up into a little diorama. SO cute! I will be making some more of these – I have some ideas in my head already. Thanks for a great class Julie!
    02d


    Saturday I spent the day with some of my stamping gal pals….all day….eating yummy food and stamping and laughing and being silly and carefree! Sunday the hubs and I decided to do our Valentine's Day celebrating. It's too hard to go out on a Tuesday night with the crowds and such…so we just did it a little early. First we went for a nice long drive in the car just to relax and snap some pics. Then we went for a tasty dinner at PF Chang's! Had great service and a wonderful time. Made it home in time to watch the Grammys. It was a perfect weekend!

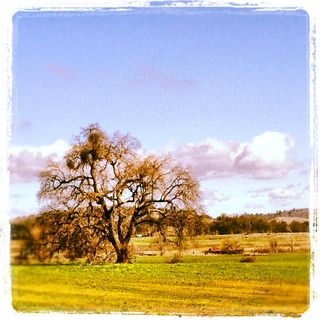
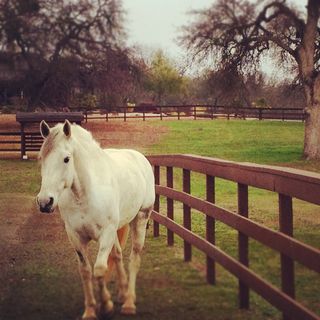
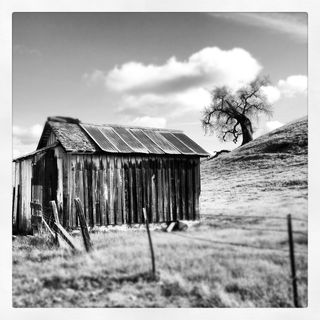
    Some of you might know that I LOVE my iPhone. No, I mean like I REALLY love my iPhone! hahaha. I have about 20 photography apps and like to try different things with my phone photos. One of my favorite apps is Instagram. I like the different filters and effects and I like the fact that you can "follow" people's feeds and and share your pix. You can CLICK HERE to see my Instagram stuff. I thought I would share some of my favorite photos from Sunday's drive. 
     

    10


    20


    21


    22


    23


    25


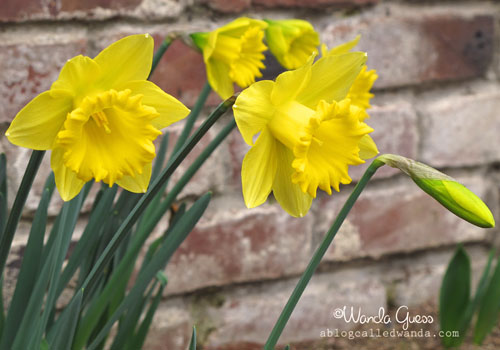
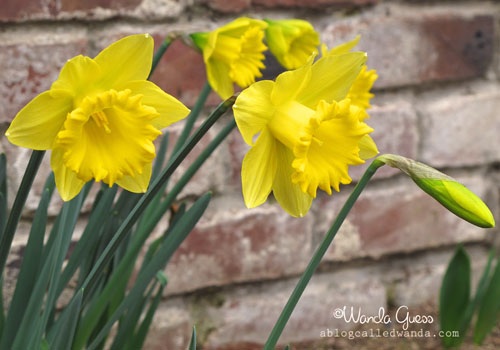
    One last picture…our daffodils have started blooming in our front yard! They are so fresh and bright and perfect right when they bloom. Makes me happy!!! Okay, that's enough of my yammering on for one day.
    33

     HAPPY VALENTINE'S DAY!!!

    Birdie signature!

    Pin It

  • Taylored Expressions February Release week – Key Ingredients Part Two!

    February2012BlogPostBadge

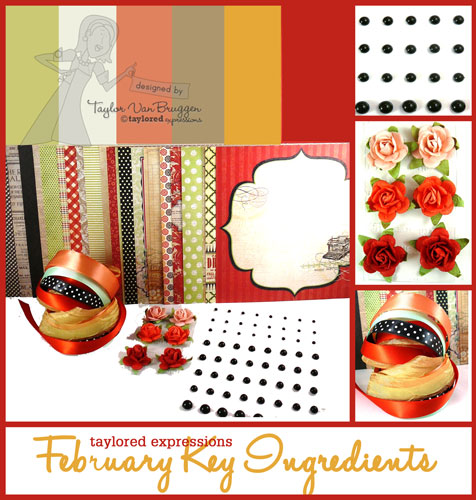
    More fun today and more projects using the brand new Taylored Expressions Key Ingredients Kit and exclusive Vintage Dreamer stamp set! Here's a photo of the kit in case you missed it on Friday…lots and lots of goodies in there! If you subscribe you get a box full of matching card coordinates every month!

    KI photo

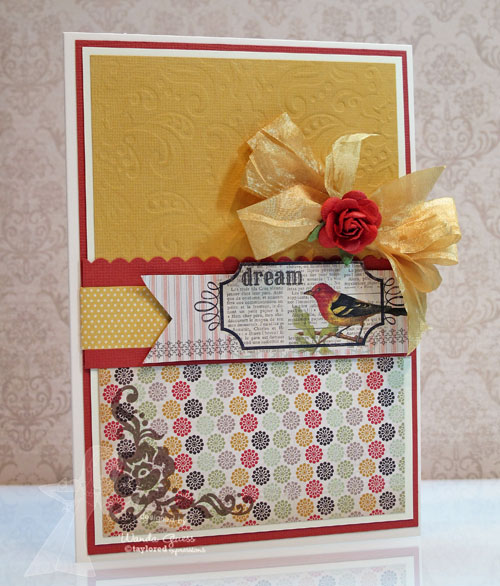
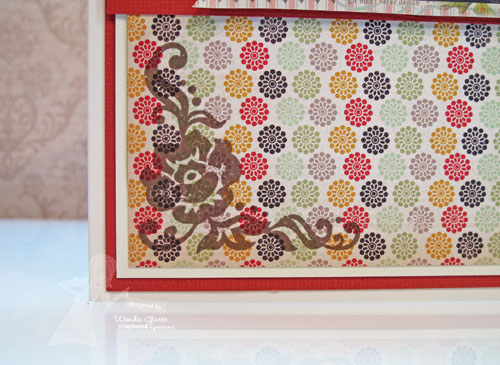
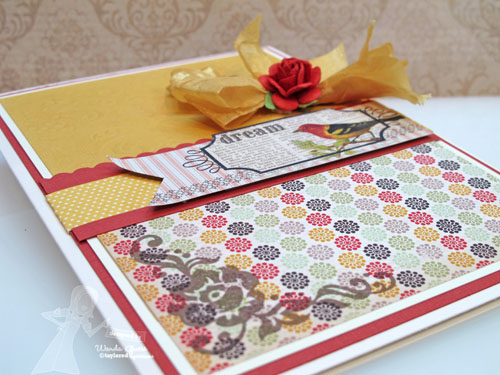
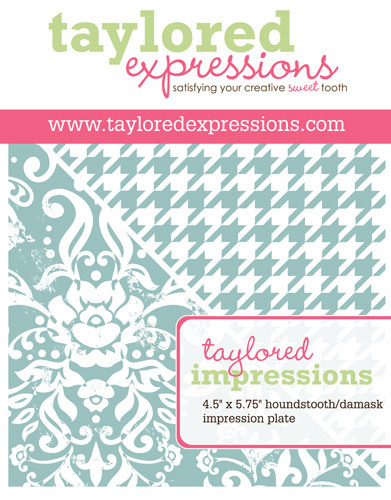
    Here is my project for today – again featuring the KI kit, the new stamp set, and the new impression plate! Yeah! I truly love all this new stuff! I used the damask side of the impression plate for the top of my card and then sponged a tiny bit of distress ink to make the detail stand out more. That seam binding ribbon is so yummy….

    1


    The birdie image was cut from one of the pieces of the patterned papers and then layered over some other matching papers. Taylor really did such an exquisite job matching everything…

    3


    This is one of the stamp images and I stamped in brown directly onto the patterned paper.

    6


    5


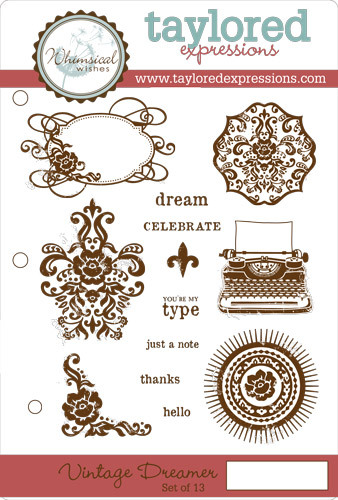
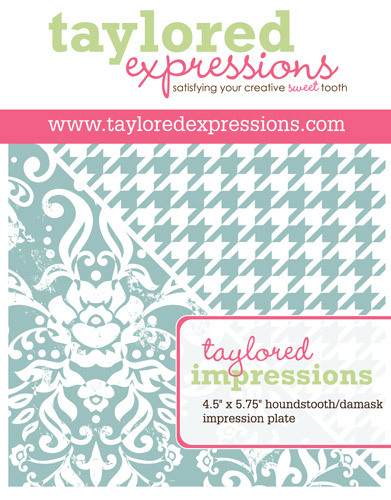
    Just so you can have another look…here is the stamp set image and the impression plate image!

    Vintage dreamer photo


    Impression plate photo

    Thank you for stopping by today! Here are your links for the day:

    Key Ingredients Blog: http://www.thekeyingredients-blog.blogspot.com/

    Projects for today:

  • Taylored Expressions February Release week – Key Ingredients!


    TE February Mid Month Key Ingredients Release!


    • Key Ingredients Info and Inspiration – From February 10-15  you can learn all about this fantastic kit club and see samples from the Key Ingredients Design Team and the Baker's Dozen! Click here for all the info and start at Taylor's blog each day for all the inspiration.
    • February Key Ingredients featuring My Mind's Eye Lost & Found – Rosy begins shipping February 15th. Enroll now!
    • Exclusive Vintage Dreamer Stamp Set – find out how you can get your crafty little hands on this stylish new set at 50% off for a limited time!
    • Win a Key Ingredients Kit – you can win the March Kit to try out, or have a month added on to your current subscription. See Taylor's blog for all the details and to enter to win! It's easy! 


    The quality and value of the Key Ingredients kits is amazing!  - each month you will get enough coordinating product to make 16 or more cards! They are fun, pretty and easy to use.  I am in love with the Vintage Dreamer Stamp Set and that it is exclusive to KI Subscribers! Enroll in the Key Ingredients Subscription program and take advantage of the opportunity to purchase Vintage Dreamer at 50% off!

    Many more details will be posted on Taylor's blog. The Vintage Dreamer Stamp Set will be available to KI Subscribers ONLY. It will be available throughout 2012, but it will be at 50% OFF only through 3/10/12. On 3/11/12 the price will return to regular retail of $21.95. 

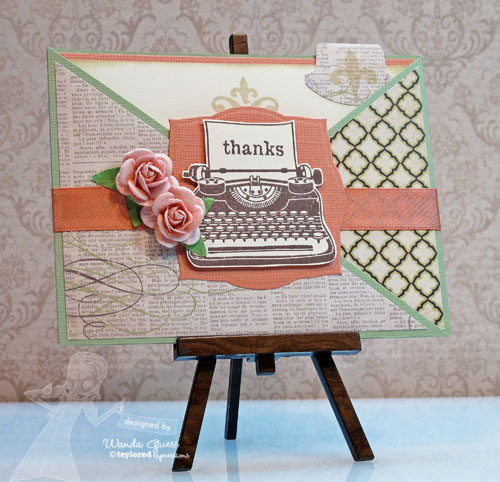
    Okay, now I am really excited to share my projects with you! This month's kit and stamp set ROCK! It's a different look for us at Taylored Expressions and it's wonderful! kind of shabby chic and vintage! I hope you like it too!  My first card is a criss-cross card. I love this card design and I use it when I really want to show off lots of patterned papers. It's easy to make, but looks impressive when it's done!

     7


    This photo shows the part that you write on that goes inside the folded piece. I lstamped one of the images onto the cream card base in a light distress ink and then scalloped my bottom edge.

    7a


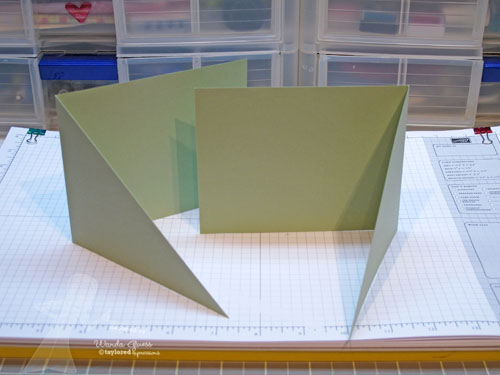
    To make the card base, score an 8.5 x 11 sheet of cardstock in half the short direction and then cut it in half the long direction. Then, on your paper cutter, cut a triangle out of each piece so that they cross when you adhere the two pieces together!

    9


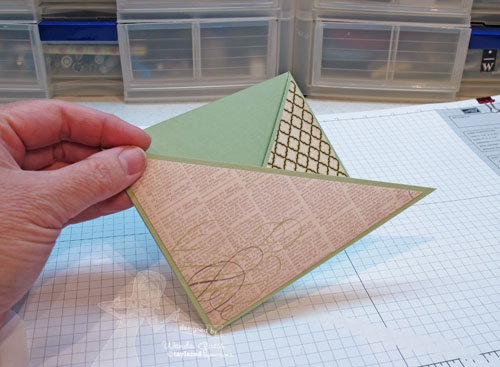
    Now the fun part! Putting on matching patterned papers. So great to mix and match patterns and this kit is perfect for it. I use the triangles left over from my cardstock to make a template for my layers.

    10


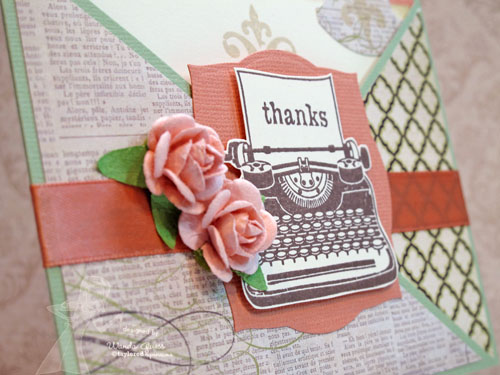
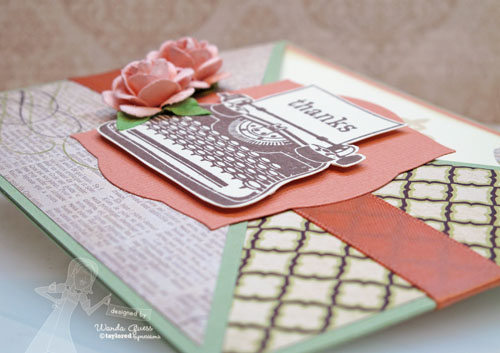
    Here it is all decorated with that beautiful typewriter image and some ribbon and roses… 

    10a1


    10b


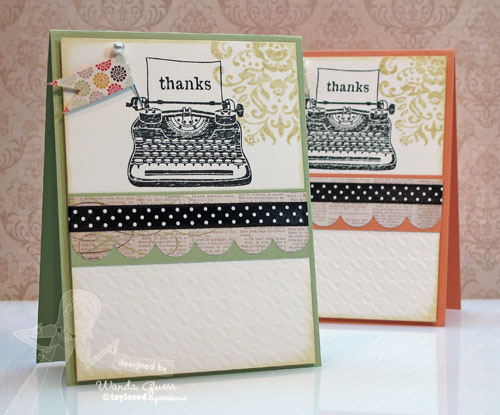
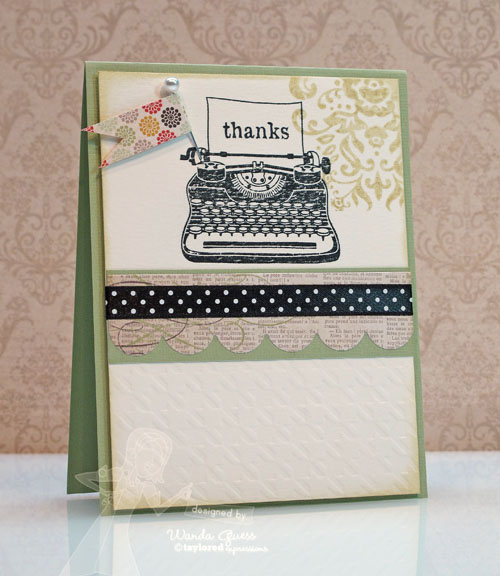
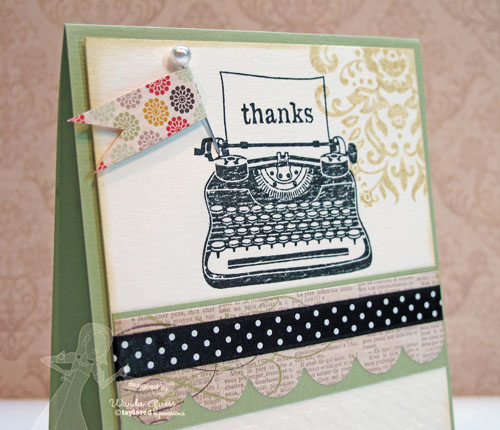
    Well…after I made that first card, I couldn't stop myself! I had to make more! I used the same soft color palette of peach and mint green and made two more thank you cards for some special ladies. I stamped on watercolor paper which makes it seem even more vintage-y. Look at the bottom of the cards…houndstooth! This was made with the brand new Impression Plate! LOVE it!

    11


    12


    IMG_1360


    IMG_1359

    Here's the 4-1-1! Please check out the images below of the KI kit, the stamp set and the new impression plate!  Paper, Ribbon, Flowers, pearls…oh my!  

    KI photo


    Vintage dreamer photo


    Impression plate photo

    Here is the Linky List for today…spend some time with us looking at everyone else's great projects! SO much fun because the Baker's Dozen has teamed up with the Key Ingredients Team this week! YAY!  

  • Be Mine…

    Hi friends! I hope you're having a great week so far! I'm popping in today with TWO cards to share! I feel the need to keep making Valentines, but then there's other stuff to post too! This week I found the time to make a card for PTI's Make it Monday and I wanted to get that posted tonight to share with you. Later in the week is some shabby chic goodness from Taylored Expressions!

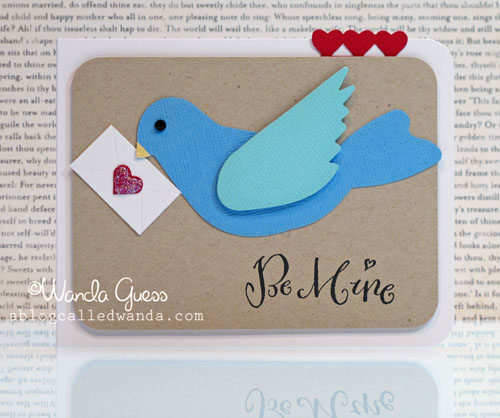
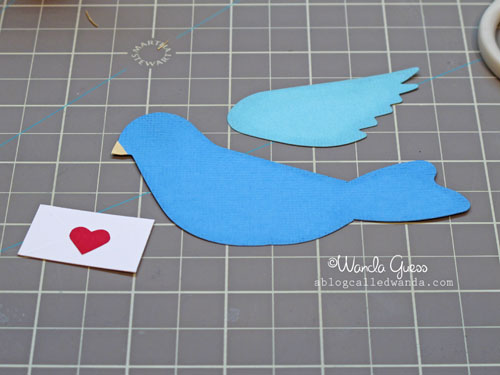
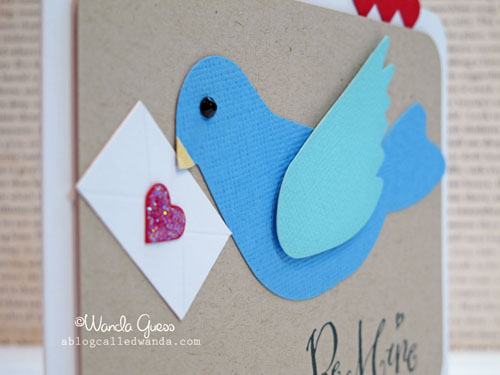
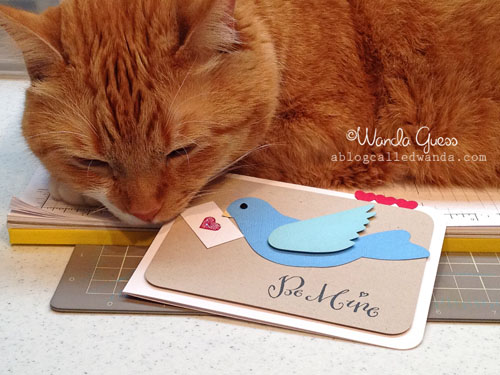
    My first card for tonight is a happy Valentine. I got this idea from some fun stickers I saw at Michael's. They were little birdies holding love notes. I decided to re-create the idea using my big birdie Sizzix die and then I hand made a love letter for him to carry!


    1


    The sentiment is from Paper Source. I love that font and have it in many sayings!

    2


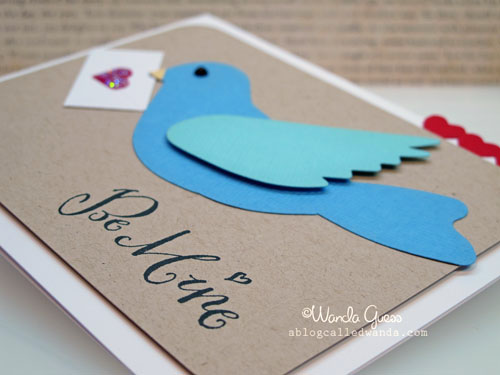
    Here are my pieces. I cut a small piece of white paper and then scored it with my bone folder to look like an envelope. Then I put a nice red heart on it. I inked around the edges of the blue parts with some light blue chalk ink.

    3


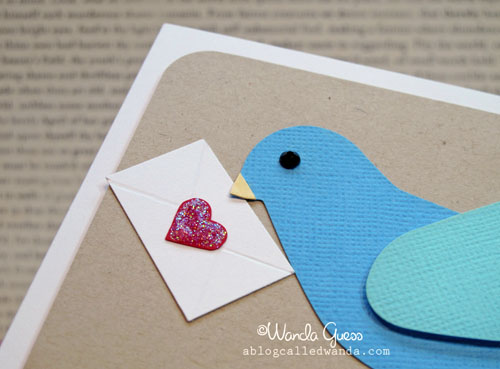
    I had to add some glitter! His eye is a black gem from my stash. the red hearts above are part of a Martha Stewart edger punch.

    4


    5


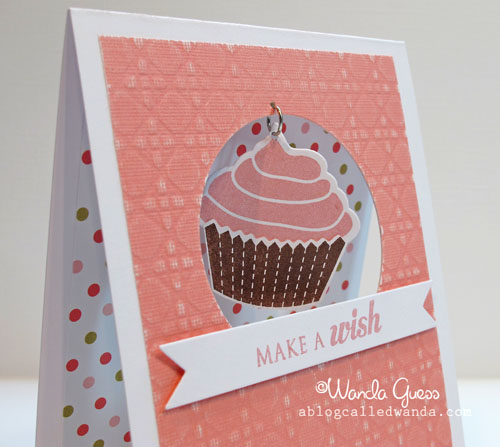
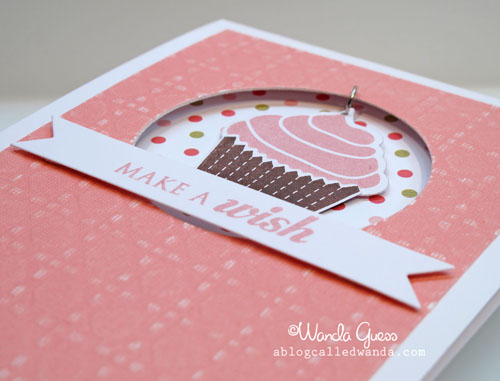
    My second card for today is a cheery birthday card with a cupcake! This week's Make it Monday Challenge #52 at PTI was to stamp both sides of a die cut and use both sides in your project. There are some really clever people out there – the other entries are awesome! CLICK here to take a peek… And, you still have the rest of the week to get your card in!

    1


    I cut out the die cut shape for the top and bottom of the cupcake and then stamped both sides in pink and brown and attached them. In order for you to see both sides of it, I used a jump ring to attach it to my circle cut out! It kind of swings around in there!
    IMG_1368


    The impression plate, the polka dot paper and the stamps/sentiment are all from various PTI supplies. I adore this cane impression plate. I used white core paper and then sanded it to make the design stand out more.
    IMG_1369


    Photo
    Thanks for coming by today! Big hugs from me and Buddy!  

    Birdie signature!