Wishing you and your loved ones a
VERY MERRY CHRISTMAS!
From my home to yours!

Love, Mark, Wanda & Lucky Guess


Wishing you and your loved ones a
VERY MERRY CHRISTMAS!
From my home to yours!
Love, Mark, Wanda & Lucky Guess
Happy Easter 2018!
From our home to yours with good wishes!
Crown Him with many crowns,
The lamb upon the throne:
Hark! How the heavenly anthem drowns
All Music but its own!
Awake, my soul, and sing
Of Him who died for thee,
And hail him as thy matchless King
Through all eternity.
Crown Him with many crowns
Crown Him with many crowns
Hi everyone. Today is a super super sad day for me. And, when I'm sad, I write. When I'm happy I write too. I journal almost daily and it helps me sort out my thoughts and feelings. Tonight I'm writing a sad blog post to honor my sweet furry best friend – Buddy. He passed away today and I'm heartbroken and I don't know what else to do but write. So many of you loved him from reading my blog over the years and I know a lot of you feel like you knew him too. He belonged to all of us, with his big furry face. He was eleven years old….gone too soon for sure. I was hoping we would have 6-7 more years with him. But God had a different plan. Maybe someone up in heaven needed him more than we did. Or maybe his purpose was fulfilled already by loving us. Don't the great ones always go too soon? He was fine on Tuesday, and then he got very very ill suddenly, and there was nothing to be done. The vet office was kind and wonderful with me, and him. We all cried together for him. I'm still in shock. Our house feels so quiet and still and empty.
I've had cats as pets my entire life. One thing I knew right away, Buddy was different. Special. One of a kind. A legend. He was seriously the best cat ever. He brought us love and companionship and laughter and warm fuzzies. We don't have kids, so he was our kid. We doted on him and spoiled him. And he returned unconditional love in return. He came on command, he gave hugs in the morning, he followed us from room to room and always had his tail straight up in the air. He was a happy, gentle, sweet soul. If you've ever had a pet that touched your heart so strong, I know you understand. I feel like we only get one of those in our life. Buddy was my best friend. He always laid on my work desk when I was stamping. I think I will miss that the most. It's not even real yet.
I felt like I needed to share this – to honor a life that touched my life very deeply. He had a good life and he gave us more than we gave him. We feel totally blessed that he chose us as his family. We adopted him from the Sacramento SPCA and I'm going to make a donation in his name. We always say that we didn't save his life, he saved ours. We will meet him again in heaven one day! XOXO
This photo is the exact moment we met. I think he and I were made for each other. So glad Mark captured this with the camera. He was so tiny.
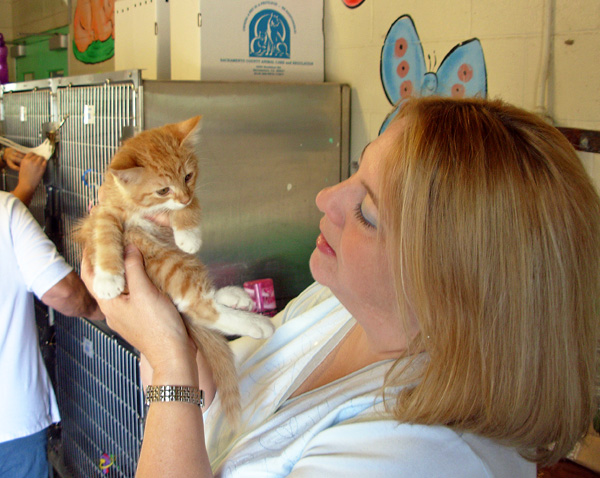
And this is one of the last photos I took of him – last Saturday. So regal and proud.
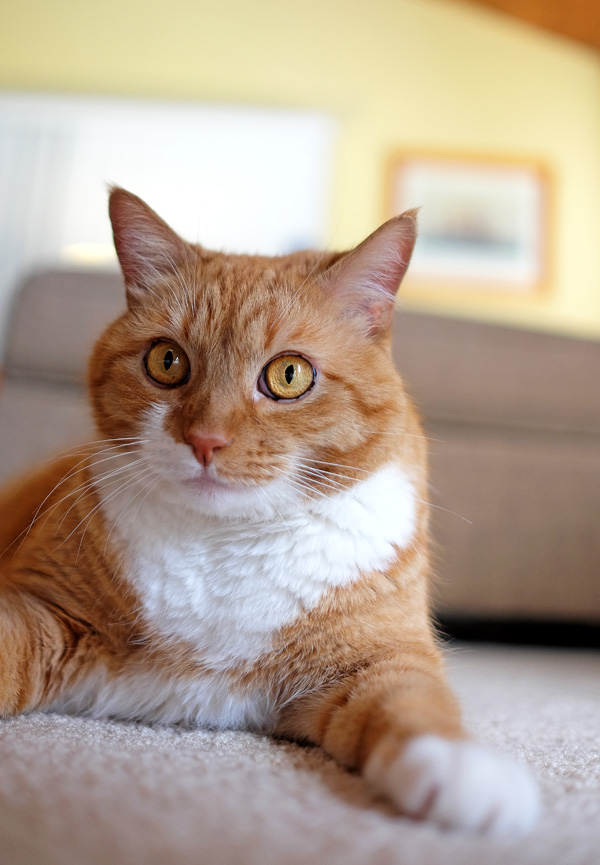
Say a little prayer for us and if you go out this weekend, raise your glass and cheers to Buddy.
Hi friends! Sending you good wishes, love, and prayers for a happy and peaceful Thanksgiving Day. You are a blessing to me – every one of you who joins along on this blog journey of mine – and I'm so grateful for all of you. Happy Thanksgiving! XOXO Wanda and Mark Guess (and Buddy too).
"Grateful for each hand we hold
Gathered round this table.
From far and near we travel home,
Blessed that we are able.
Grateful for this sheltered place
With light in every window,
Saying welcome, welcome, share this feast
Come in away from sorrow.
Father, mother, daughter, son,
Neighbor, friend and friendless;
All together everyone in the gift of loving-kindness.
Grateful for whats understood,
And all that is forgiven;
We try so hard to be good,
To lead a life worth living.
Father, mother, daughter, son,
Neighbor, friend, and friendless;
All together everyone, let grateful days be endless.
Grateful for each hand we hold
Gathered round this table."
– Mary Chapin Carpenter – Thanksgiving Song Lyrics
HAPPY THANKSGIVING 2017
Hi everyone! It's Monday…and it's July 10th. There is huge significance in this date on the calendar for me, and I wanted to take just a few moments to write about it here. My blog is my creative space, but it has also served as kind of a life journal for me over the past eight years. I journal here, and write my thoughts about important events, and I like to go back and read to see where I was and how I was feeling – as well as how my art has changed over time. Today is the two year anniversary of the day I took the biggest leap of faith in my entire life and quit my very secure and steady corporate career of 30 years to become a self employed creative professional! It's like another birthday – the day I started the journey to become my true self and integrate my life with my work. The leap of faith that confirmed who is in charge, and confirmed that I will always be provided for. There is not a day that goes by that I do not think of how major this life change was. I'm filled to the brim with gratitude, and a feeling of responsibility to honor the ONE that makes it possible. All glory and power to God for blessing me with the opportunity to live this new kind of life!

People ask me all the time what it's like to be a creative professional and to make my living as a photographer/blogger/designer. There is no easy answer to that question! It's the hardest thing I've every done, but it also makes me so very happy. It's really hard to earn a living this way. I do not want to sugar coat it or act like my life is perfect in any way. I am so at peace though. Truly at peace with where I am and what I'm doing, and the opportunities that come my way. I'm grateful for every person that hires me to create, write, photograph, blog, etc.
There have been about a million lessons in the past two years. It's been a real roller coaster of high highs and low lows. People have shown up for me in ways I never dreamed of. People have also burned me in ways I never dreamed of. No one talks about the non glamorous parts of being your own boss lady! Contracts, and asking people to pay their invoices, and broken appointments… It's all a process, but there is way more good than bad. My life is simpler now. I stay home a lot, I cook for us a lot and my husband and I are closer than we've ever been. We spend time together here at home, instead of out running around shopping and spending money. I have decluttered our home and our lives. It's wonderful. And it feels more meaningful to me. I may not be able to live this way forever since I am not earning a big income, but the break has been amazing. I am forever changed and the past two years have allowed me to regroup and breathe and think and BE. I spend a lot more time in reading and studying the Bible and in prayer. I feel compelled to use what has been given to me (1 Peter 4:8-11) to bring glory to God.
My life and my work are now the same thing and that's what I was striving for. Before I always felt like two different people. Monday through Friday Wanda and Weekend Wanda. In my corporate life I had to be hard and factual and analytical almost all the time. But the real me is much softer and gushier and more emotion and people oriented. Now, I work at midnight sometimes, and sometimes I can go out and play in the middle of the day. Not having my time structured for me is awesome. I am not a morning person, and this new life allows me to wake up and get my day started without having to fight road rage at 6am on the way to the office. Total blessing! I miss my steady paycheck and I miss the office camaraderie, but not a lot else about that life. Now, I have a really cute furry office assistant and I listen to music all day! I have been given the gift of time. Time to learn new things and meet new people and be more present with my friends.
Gratitude is the center of my day, and being a faithful steward of God's grace is my goal. I'm a work in progress and that's totally okay. I celebrate this two year milestone by planning my week ahead and hoping for new opportunities and jobs, and new ways to encourage and engage others through my works and my words.
I wish you a happy week ahead! XOXO
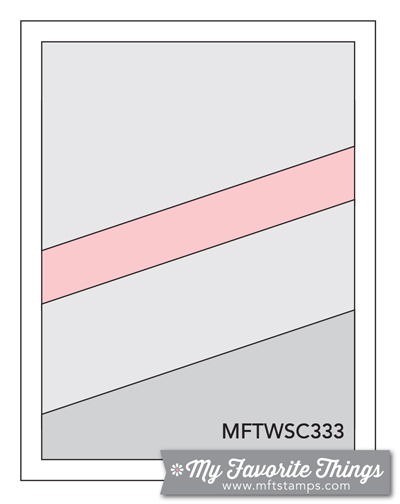
Today I'm sharing my third card as the guest designer over at the My Favorite Things Wednesday Sketch Challenge for the month of May! I always love to join the wonderful gang over at MFT! CLICK HERE to go to the sketch challenge page. So…what is the Wednesday Sketch Challenge? Each week MFT shows us a new layout to jump start our creativity. This week is challenge #333. You can create cards, scrapbook layouts, home decor, treat containers, mixed media, etc. using this week's sketch! Be sure to link your project at the MFT blog for a chance at the weekly My Favorite Things Gift Voucher worth $15. Use whatever supplies you'd like in your interpretation of the sketch but remember, if you use MFT supplies, you can win up to $20! I hope you will make a card and join the fun with me this week…and the rest of the month! This month has five Wednesdays, so I still get to do two more! Yippeeee!
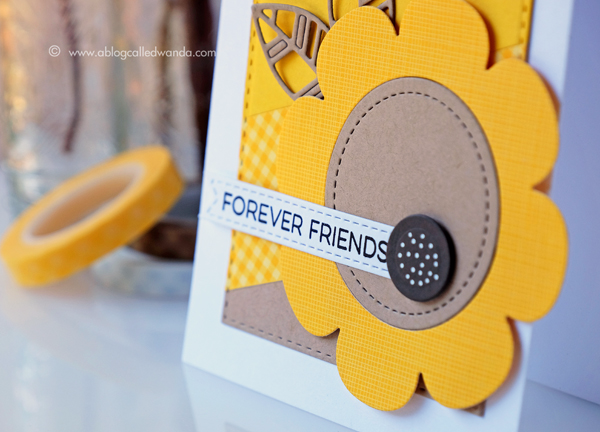
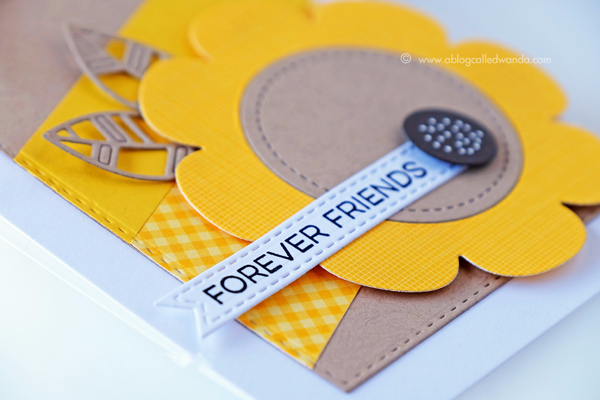
For today's card for the MFT Sketch, I'm using the brand new Flower Shaker Dies! Instead of making a shaker, I used the dies to make a giant sunflower as the focal point of my card. And, I used bright shiny yellow! I love yellow in Spring and Summer crafting! This would be pretty in any color combo though. The sketch this week has a cool diagonal stripes configuration which I know I'll use again. Let's get to it!

And here's the sketch for this week! Often, when I am having a hard time coming up with a card idea, I will look up the MFT sketches and see if something strikes my fancy. It almost always does help start my creativity flowing! Just pick a sketch, and pick out a favorite stamp set – and create!! Also, another trick? Turn the sketch sideways for a different layout! Shake it up a bit to make it yours! 
I started my card with a crisp white A2 card base. Then I built my diagonal stripes out of kraft, yellow, and gingham papers. I wanted a really nice crisp and pretty edge so I used the stitched rectangles die to cut out the color layer. It looks so nice! Then I used the same colors to die cut a gorgeous giant flower to match!

I kept the color palette super clean. Just yellow, white and kraft…and one pop of dark brown for the flower accent. I stamped the sentiment onto a stitched banner and attached it across the flower. The flower center has white gel pen dots for emphasis.
One of my favorite go-to accents is twine, with a pretty matching enamel dot glued to the center!

Thanks for joining me today! Big thanks to the awesome team at MFT for inviting me to stamp with them this month – it's an honor! See you right back here next Wednesday for more MFT inspiration and a new sketch. Take care, until we meet again! XOXO And make sure to enter your own card on the MFT Challenge blog!!!

Hi everyone! Today I'm here to share some projects made with the lovely new 2017 Papertrey Ink Anniversary Stamp Set! It's called Grand Finale – and it's a beauty! What is an Anniversary set you ask?? Well, the anniversary stamp set is released once a year, and is a special customer appreciation set that can only be purchased with PTI reward points. Rewards points are earned by shopping all year with us at PTI. CLICK HERE to see how it works!
This new set is so beautifully modern and pretty. I love all the florals, and the leaf motifs are spectacular. I have to honestly say that I was overwhelmed with ideas for this set. It was super hard for me to focus and decide what to make! So I decided to keep it really clean, simple and classy and do some one layer cards using the bits and pieces. Sometimes I overdo it with my cards, and it's good to come back to graphic and clean once in a while! I made three cards to share with you! If you don't have enough rewards points to get the anniversary set this time around, these cards can be replicated with any of the gorgeous Floral stamp sets from PTI!!
Click over to the Official Papertrey Ink Blog for even more inspiration. Thanks for stopping by today! Hope you're having a wonderful week.
I used the beautiful A2 Noted Scalloped die to make a Kraft card base for this first card. then I layered with bright white cardstock. I used one of the flower elements to randomly stamp flowers, centers, and dots on the white layer. I used colors to look like sunflowers (I love sunflowers!). The sentiments for this set are in a beautiful font, and I stamped the hello in rich black ink. I accented the card with some pretty twine and a black enamel dot at the top. The white layer is affixed to the card base using foam tape.


Next up is this card with lots of white space! I love it when other stampers make cards with lots of white space. But, to be honest, it kind of freaks me out! LOL. Here's my take on a very graphic card with no layering! The only layer on this one is made with the beautiful banners dies from PTI. The hello fit perfectly onto it! (Supplies at the bottom of my post). I used bright cheerful colors of green, red, and teal. I added a few red enamel dots for accents.

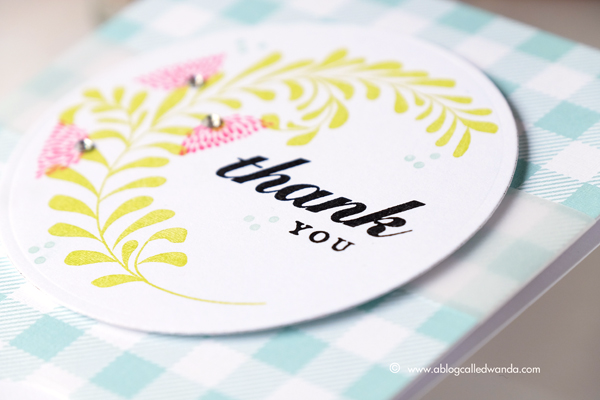
I adore the gingham paper from PTI! I thought it would pair nicely with this set, too. For this card I used the Edgers Dies. These come in a set of two – one for each card orientation: vertical or horizontal. They make a beautiful edge on your card, or layers. I stamped the large round leaves onto a circle die and then stamped the cool flowers in a bright pink I added dots of blue to match the gingham paper. You can see I used a small strip of vellum under the circle for a bit more interest. A few clear gems were added at the end of the process.

Have a super fantastic wonderful day! Nice to see you! XOXO
Hello everyone! Today is my second of four posts this week introducing the brand new Papertrey Ink April 2017 stamp release! WAHOOOO! Today I am sharing two cards I made with new stamps and dies from the collection. CLICK HERE to see everything new! I literally have been sitting on these cards for a couple of weeks and it's so fun to share them with you now. One card is made using the latest edition to the Psalms collection and one card was made with a super cool and hip set of circled symbols. Thanks for joining me again today!
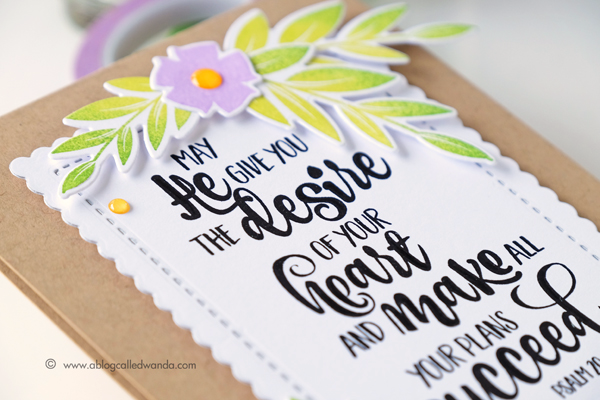
First up is a floral, natural card made with the Year of Psalms April stamp as the main focal point. Such a beautiful verse in wonderful fonts! I featured the stamp using the new Mix and Mat Scallops Die and then accented the main piece using flowers and leaves from the Gran's Garden stamp set! Supply links at the bottom of my post.
I started with an A2 card base made from Classic Kraft Cardstock. I die cut the scalloped mat from crisp white paper and then stamped the verse in rich black ink. It fits perfectly! Since the words in the sentiment are not all straight across I used the PSALM word at the very bottom of the stamp to line up everything and get a straight image.

After I stamped the verse, I stamped and die cut several flowers and leaves from the Gran's Garden Stamp Set. You can see the leaves are two toned… I did this by inking the same stamp in two colors before stamping onto the paper. I love this effect and use it quite often. The matching dies make it a dream to cut out and make your project look crisp and finished.
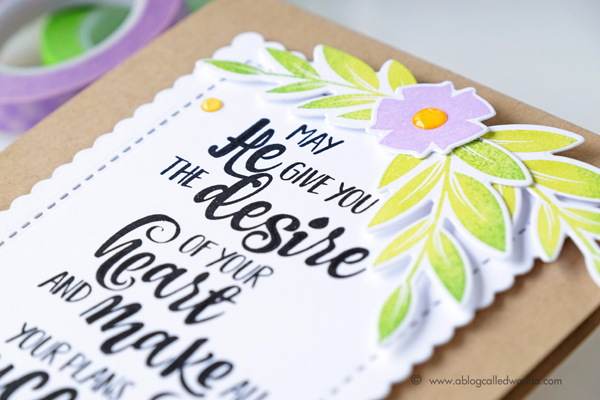
I attached the flowers and the leaves to the card using foam tape. I added glittery enamel dots to the centers of the flowers for another pop of color.
Next up is a bright and cheerful card with a rainbow color palette, stamped with the new Circled Symbols stamp set! LOVE. Gosh, this is so hip and on trend. I looooove it. There are loads of symbols that work together to spell out sayings! You can create your own fun puzzles. Like Deer Friend or Mr and Mrs. I chose to use lots of the symbols and splash them across the page in a random pattern with rainbow colors!

After I stamped the main circles in color, I went back with the outline circles and stamped them in rich black. Lastly I added sprinkles of small stars and hearts. I always love a good typewriter font! This is perfect and I'll use this sentiment a lot I know! I added some rhinestones to finish off the card and mounted it onto a Pure Poppy card base for another pop of red.

Okay – that's it for today! I have TWO more days of projects from the new Papertrey Ink release! I hope to see you tomorrow friends! Be sure to click over to the Official Papertrey Ink Blog for more inspiration today. XOXO
Wishing you and your family a very
Happy Easter 2017!
Blessings and love from the Guess Family!

Hi friends! Happy first day of Spring 2017! I know a lot of you are still waiting for Spring to arrive and I'm sending you loads of sunshine and flower filled wishes from Sacramento. I spent a week in Chicago in March many years ago. Until that week I never realized just how fortunate we are with our weather. It was below freezing every day that entire week, and not a green leaf or bloom in sight! This year, we've already had all of our daffodils bloom and go, and now have a yard full of tulips and crocus. And a face full of pollen! Achooooo! It's all worth it though, to see the seasons change. Especially this year since we had alllllll that rain. I'm feeling the love right now! I'm ready to craft with flowers! I hope you have a great week ahead of you!
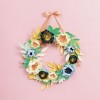
Today I'm sharing a different kind of project – a paper flower wreath! I made it form the Pastel Petals Wreath Kit from Paper Source! I LOOOOVE their wreath kits. I think I've made five or six over the years. They are so pretty and fun to make. I used to have to drive 75 miles to a Paper Source, but now we have one about 10 miles from my house! Needless to say, I spend a lot of time there! It's a happy place for sure. I bought this wreath kit a couple of weeks ago and have been dying to make it.
Here is a photo of it hanging on our front door!

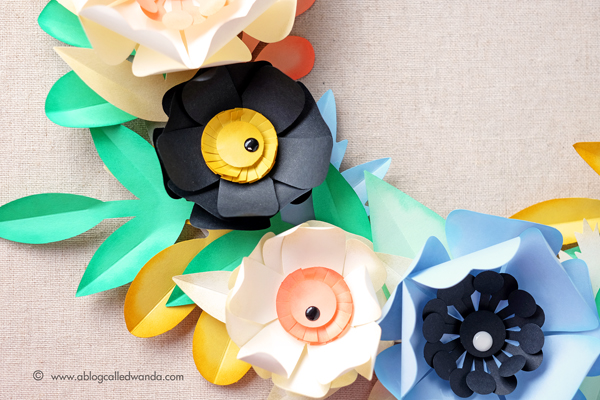
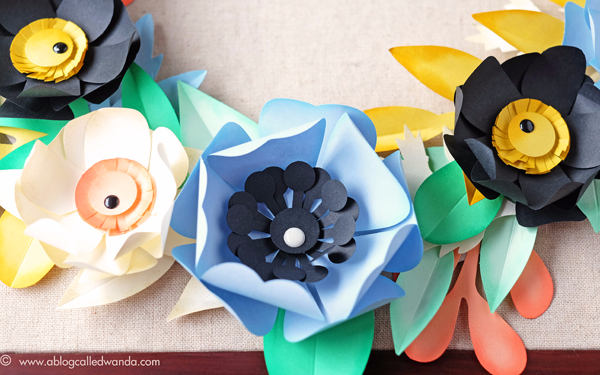
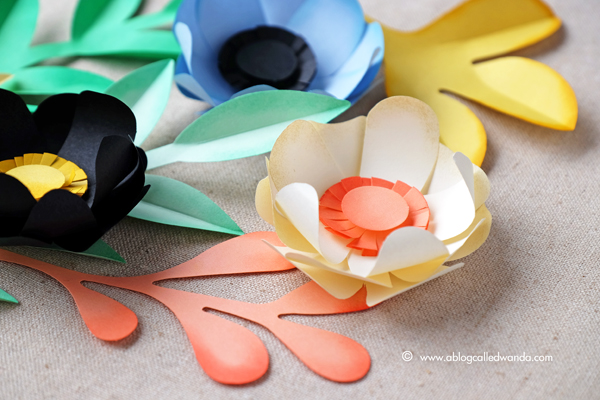
Here are some close up photos of the flowers and leaves. I'll talk more about how I made it farther down in the post….
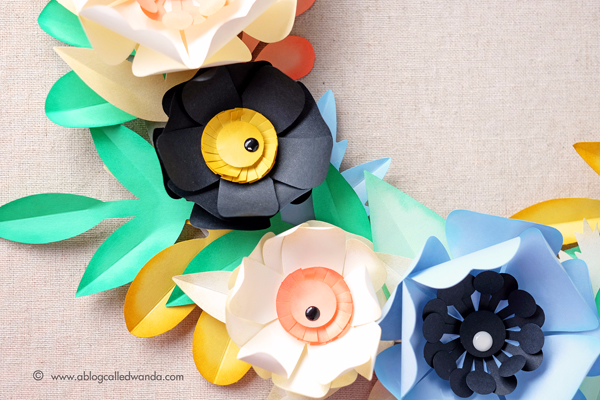
Now this color palette is not one I would normally choose, and I think that might have been what drew me to the kit in the first place. Totally unique colors with a pop of jet black and a touch of gold shimmer. It's all so pretty together.
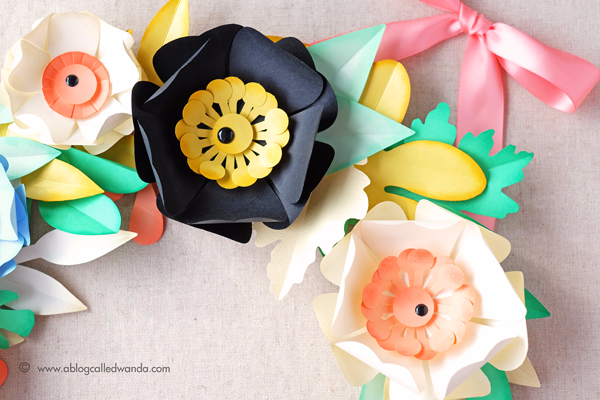
I made the project exactly as outlined in the directions included with the kit – with only two exceptions. I added the Distress Inking around the edges, and I added a few black and white Doodlebug Enamel Dots to the centers of the flowers. I really liked the extra look of a bit of shine on the centers. I was thinking about maybe adding some Rock Candy Distress Glitter, but then decided no on that.
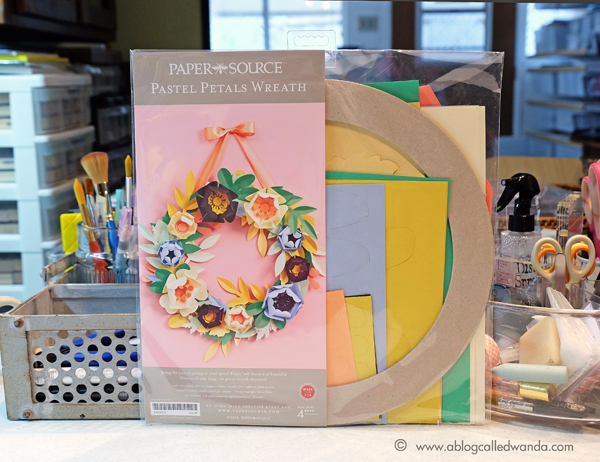
Here is what the Pastel Petals Wreath Kit looks like when you buy it. Everything is included except double stick tape and a bone folder! They even give you awesome (Super Sticky) foam squares and more than you would ever use. The wreath form and the ribbon are included too. They thought of everything. I used the photo on the front of the kit as my guide for placement of my flowers.
Below is a collage of the steps to make the wreath. I think the 'hardest' part was punching out all the parts! They are already cut out, you just have to separate them from the main paper. I decided I wanted to ink the edges of my flowers and leaves to add a bit of dimension to them. That part took a while. I found perfectly matching distress ink shades! Full supplies list at the bottom of the post. On the back of the kit there are directions as to exactly how to assemble the flowers. It's fool proof.

To start assembling the wreath, I first attached the largest leaves in a ring. I attached everything with the enclosed foam squares. After I put down these big leaf sprays, I put the flowers on next. Then I used all the other leaves to fill in the open spaces and parts where you would see the wreath form. I had tons of leaves left over too! So there is plenty to work with.


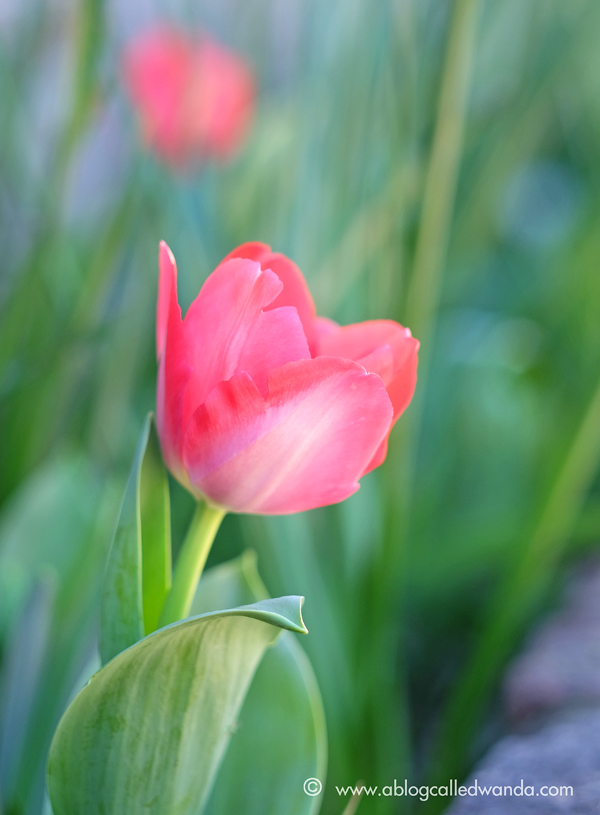
I thought I would finish with just a couple of photos from our front yard! Happy Spring!
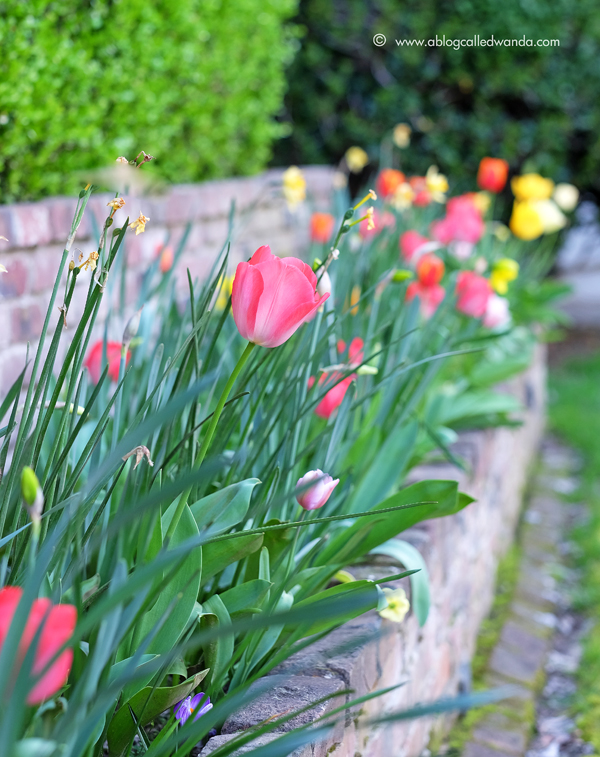
Thank you for spending part of your day with me! I'll be back soon, but I'm not sure with what! LOL! I'm all out of projects for the moment. Let's see what I come up with! For sure I'll be back on Saturday as part of a fun blog hop! But hopefully I'll see you before that! I'd love to know what you're working on right now in your studio. I think I need to start thinking about Easter. XOXO
SUPPLIES FOR TODAY!
Hi everyone! Just checking in here – sorry to be a stranger the past few days! Last week there were so many blog hops and releases and projects! OH my! It was a fun ride and I totally appreciate each and every kind comment you left on all my blog posts! Bless you! Really some awesome new things right? I love being that busy and creating like that – and of course, sharing!
Tomorrow I leave for Phoenix for a week to attend the awesome CHA – Creativation Show! Yes, they moved it to Arizona this year. That means I"m not driving, which means I have to pack efficiently. Uh Oh. I can't wait to see all the new and exciting products from all of our favorite craft companies. I also cannot wait to hug all my crafty friends. It's like one big reunion every year when we see each other in person instead of on emails and video chats! It's wonderful. I am very blessed to be traveling as part of the Simon Says Stamp team again this year. That means I get to hang out with my colleagues for an entire week. I will be writing blog posts for the Simon Says Stamp blog with photos of the newest items and news from the show floor. Please tune in over there each day to read all about it!
I will be on Instagram and my Facebook page as much as I can sharing with you and updating you on what I'm seeing. I'll write a recap post when I get home. Here is my recap from last year – CLICK HERE.
Other than creating we've been keeping a lot profile here in Sacramento. It's been raining non stop pretty much. We've been nesting and enjoying the cozy fire. This weekend we did get out and go to a Vintage Market and for a drive since the sun came out. Our flowers are already blooming in the front yard – the camellias are always first!
I'm sure I will come home next week feeling tired and inspired! It's the best! Let me know what you are up to! Take care and I'll be reporting from Phoenix!
LINKS:
SIMON SAYS STAMP BLOG (updates from the show floor)
A BLOG CALLED WANDA FACEBOOK PAGE
Here are just a few random photos from the past week to share!
Here is a photo from our drive this weekend. This was taken in Newcastle California! See how green and lush everything is because of the rain!

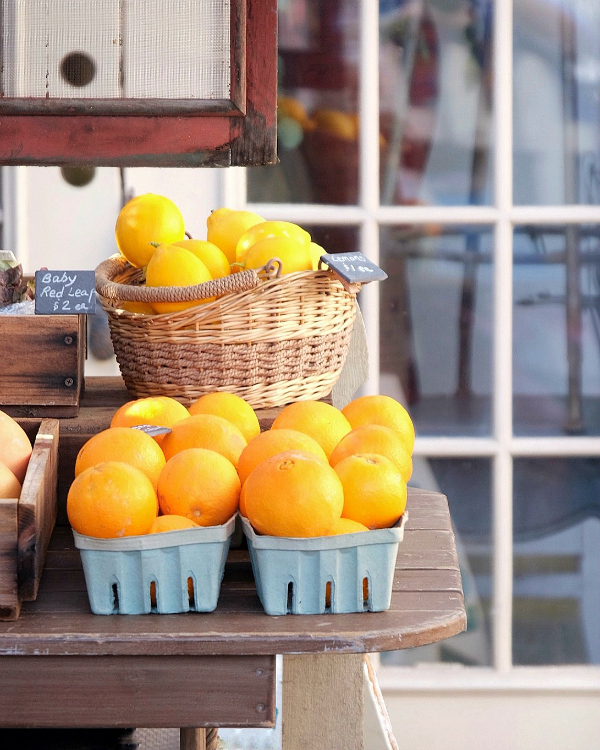
This was one of my favorite photos I took at the Vintage Market – someone had a little fresh farm stand too!
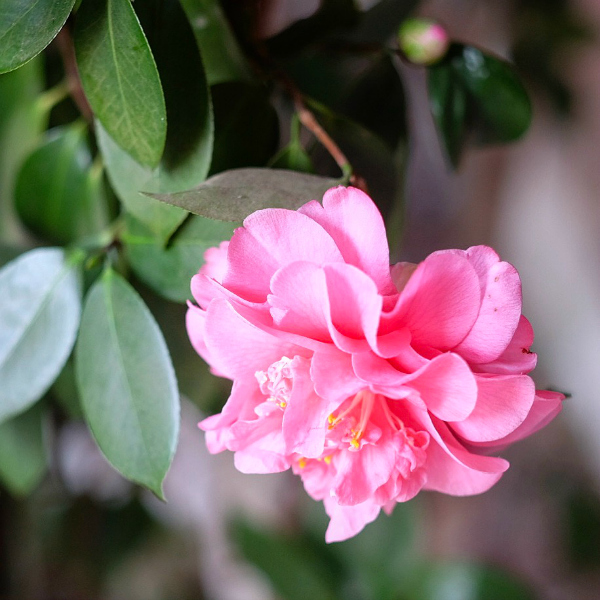
This beauty was the first camellia to bloom in our front yard this year!
And of course BUDDY! He was freaking out because my husband was outside on the back desk sawing and chopping things! His eyes almost popped out of his head! He really is the most handsome cat!! His tenth birthday is coming up – I can't believe it. We got him when he was a teeny baby kitty.


Hey Loves! In case you're keeping track – yes – this is the third blog hop this week!! YEAH! Today, it's time for a super fun blog hop with my Simon Says Stamp friends! We are celebrating the launch of the Simon Says Stamp Hey Love collection! Full of hearts and flowers and beautiful word dies… Something to make everyone happy and cheerful on this winter day! CLICK HERE to see the entire collection! There are 14 stops on the hop today – full of ideas and inspiration for you. Have you started your Valentine crafting yet? Or are you still recovering from Christmas!? I've been creating a lot with this release already, and I'm happy to share another project with you today. If you're new to my blog, welcome! I hope you've arrived from the talented Heather's blog!
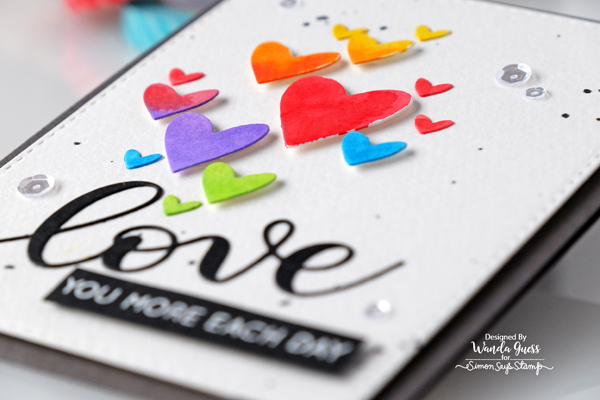
For today's card I finally executed an idea that's been in my head for a while. I made some pretty watercolor hearts using the SSS Exclusive Clipping Hearts Die as my template. I always love a rainbow card – in any form!

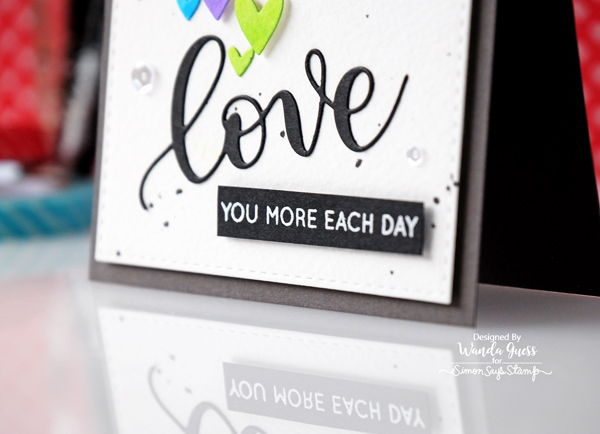
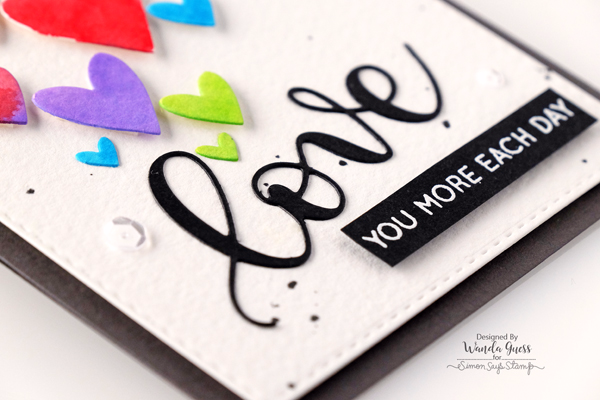
I started with a dark grey card base, cut to A2 size. Next I die cut a Stitched Rectangle out of watercolor paper. I added black paint splatters to that piece later. Next I die cut the "love" sentiment out of black cardstock. And I also white heat embossed the rest of the sentiment onto black paper.
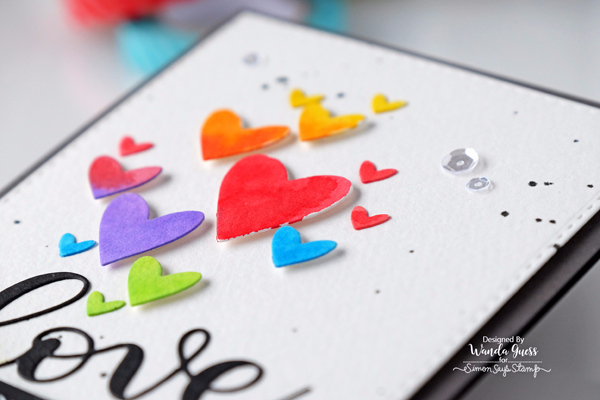
I used pretty shades of mini Distress Inks to watercolor the hearts. Kept it sort of loose and free. On some of the hearts I blended two colors together. I knew I wanted the largest heart to be red, so I arranged my rainbow colors with that in mind. The bigger hearts were attached to the card with bits of foam tape.

I die cut the Clipping Hearts Die out of watercolor paper and left it attached inside the paper as you see here. That made it a little easier to color and manage the tiny pieces.
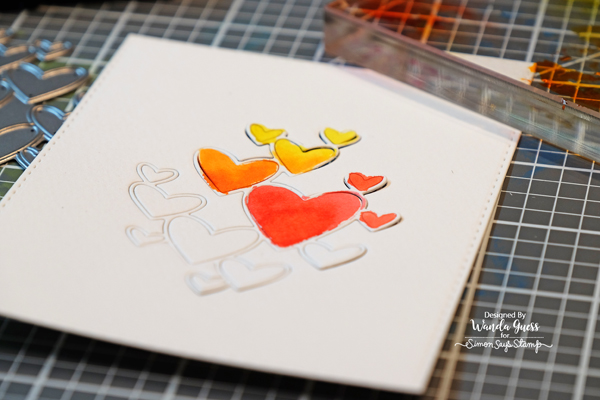
Once everything was watercolored and dry, I used the outline of the hearts to put them in place on the background layer. I wanted to use the design layout of the original die.
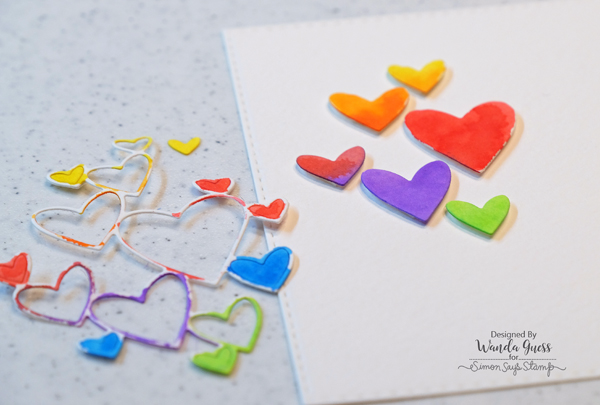
Here are my rainbow color choices! This card layout would be pretty in any color combination!

I added a few sparkly sequins to my finished card – you gotta have some bling!! The love word is glued on with clear glue and the other sentiment piece is attached with foam tape.
PRIZE ALERT PRIZE ALERT PRIZE ALERT!
Leave a comment on this post for a chance to win a $25 gift certificate to Simon Says Stamp! Every single blog on the hop will have one winner! Names will be randomly selected, and posted on the SSS Blog on Monday the 16th. Good luck! Enjoy the hop!
Next up on the lineup is the wonderful Nina-Marie! Full link list is at the bottom of my post! Have a great weekend! I'll be up on the SSS blog on Sunday this week, with a Weekender with Wanda feature. Tomorrow is the launch of the new SSS Card Kit! See you soon!
SUPPLIES FOR TODAY!
 |
 |
 |
 |
 |
 |
 |
 |
 |
 |
 |
 |
 |
 |
 |
 |
 |
 |
 |
 |
 |
 |
 |
MERRY CHRISTMAS TO MY BLOG FAMILY!
FROM OUR HOME TO YOURS,
WISHING YOU A BLESSED HOLIDAY!

Luke 2:7-14
7 And she brought forth her firstborn son, and wrapped him in swaddling clothes, and laid him in a manger; because there was no room for them in the inn. 8 And there were in the same country shepherds abiding in the field, keeping watch over their flock by night. 9 And, lo, the Angel of the Lord came upon them, and the glory of the Lord shone round about them: and they were so afraid. 10 And the angel said unto them, Fear not: for, behold, I bring you good tidings of great joy, which shall be to all people. 11 For unto you is born this day in the city of David a Saviour, which is Christ the Lord. 12 And this shall be a sign unto you; Ye shall find the babe wrapped in swaddling clothes, lying in a manger. 13 And suddenly there was with the Angel a multitude of the heavenly host praising God, and saying, 14 Glory to God in the highest, and on earth peace, good will toward men. AMEN!

Hey there crafty friends! Welcome to my blog, and to the Simon Says Stamp Diecember 2016 new release blog hop! Yeah! So happy to have you here today with me! You may have arrived from the lovely and talented Jessica's blog. I hope you enjoy the entire hop – I love these crafty women and their amazing designs. I can't wait to do the hop myself. Yesterday SSS released this AMAZING new line of die cuts for all occasions. Diecember is the month to celebrate the fact that we love using die cuts on our cards and other projects. There are some awesome new word dies, and some really innovative new designs. Hope you have fun today! CLICK HERE to see the entire new release!
PRIZE ALERT: Each stop on the hop will be awarding a prize of a $25 GIFT CARD to SIMON SAYS STAMP! Yay! To enter to win here on my blog, please leave a comment below telling me about your Christmas cards! Are you done? How many did you make? Are they all the same? I'd love to hear what your tradition is, and I know everyone will enjoy reading each others' comments.My Christmas cards are done and in a box on my desk…I do not like the addressing part so I am procrastinating right now! I write a Christmas letter every year too! Good Luck. I will pull my random winner Sunday night and notify you by email on Monday!
If you've visited my blog before, you know that I usually can't stop myself at one project… And today is no different. I am sharing a Christmas card first, and then some all-purpose general greeting cards to keep on hand in my studio. You can never have enough thank you cards or hello cards! Supply links are at the very bottom of my post.
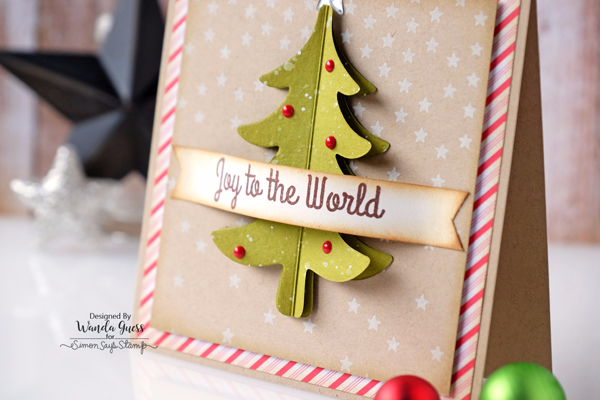
First up, I reaaalllllyyyyy wanted to use this cool Fold Over Tree Die! It's the perfect size and scale for the front of a card and would also fit beautifully on a gift tag. I die cut the die along the fold of my green cardstock to get an entire tree. I cut two of them this way and layered them together. Take a look!
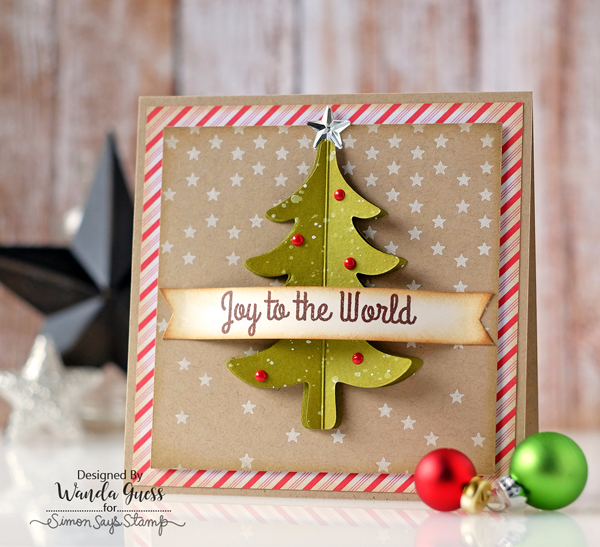
Once my trees were die cut, I sprayed them with white spray and set them aside to dry. Next I stamped my stars background stamp in crisp white ink onto kraft cardstock. And set that aside to dry. My finished card is 5 x 5 square. I stamped the sentiment onto a piece of cream cardstock and hand cut that into a banner to go across my tree.

For my accents I used a Tim Holtz Mirrored star and some Doodlebug Enamel Dots for ornaments. SO festive!!

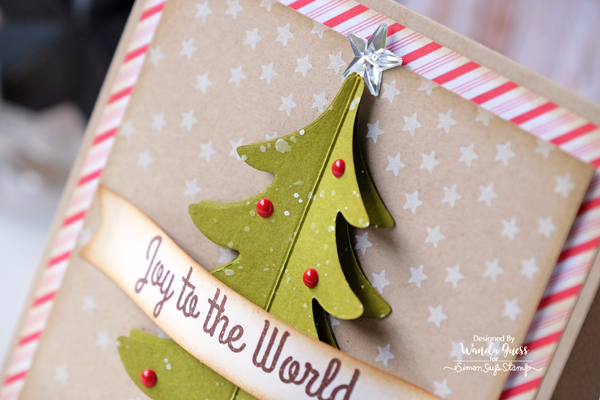
I adhered the ends of the word banner with some clear glue. I keep some little clips in my studio to hold things like this together while they are drying. Makes it nice and secure!

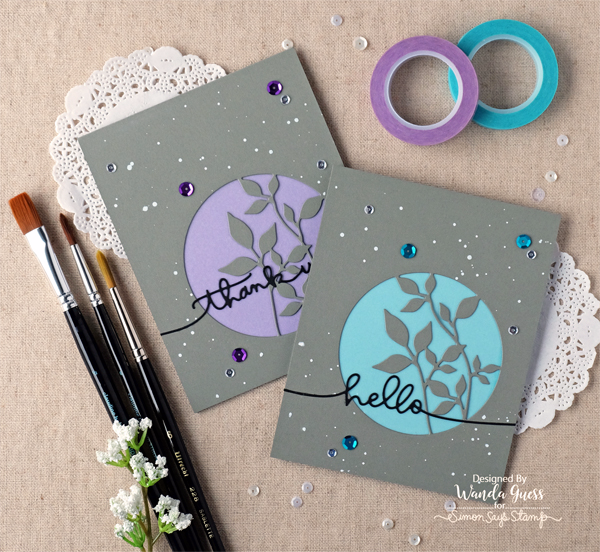
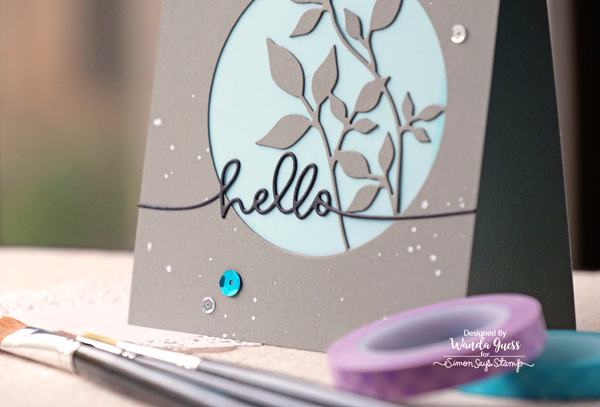
It's almost time to put away all the Christmas crafting items and so I wanted to share a non-holiday related project today too! I used pretty rich gray cardstock with the gorgeous new Circle Leaves Die. I love this look! I added a layer of vellum behind the die cut and then layered colored cardstock behind that. It seems very elegant and could be for a man or a woman. These new word dies are going to get a LOT of use in my studio! LOVE.
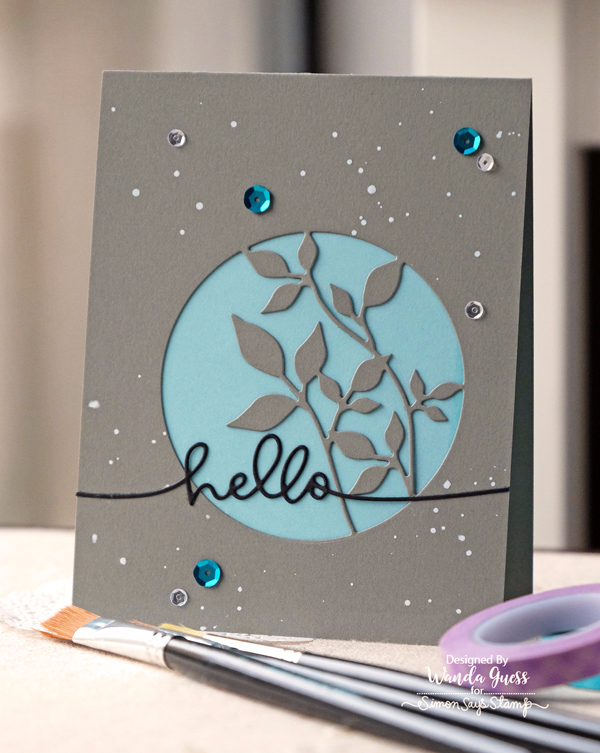
I am seriously loving spraying everything with white ink right now! Ha! It's very hard to photograph the vellum – it looks prettier in person I think. I accented the cards with some matching sequins too. This would make a lovely card set to use as a gift in a box! The new Handlettered Greetings dies are so delicate and pretty. My prediction is that these will be the first item to sell out!!!
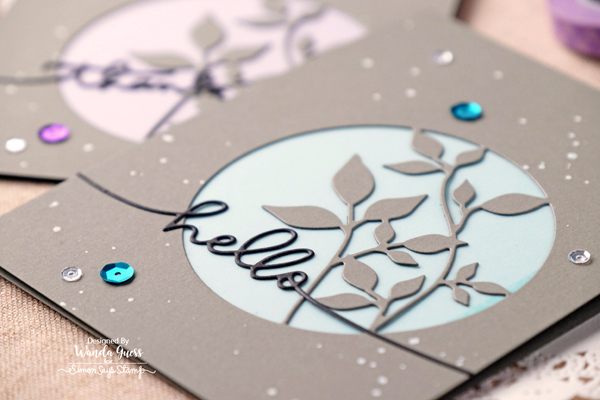
These die cuts cut like BUTTER! So crisp and pretty!
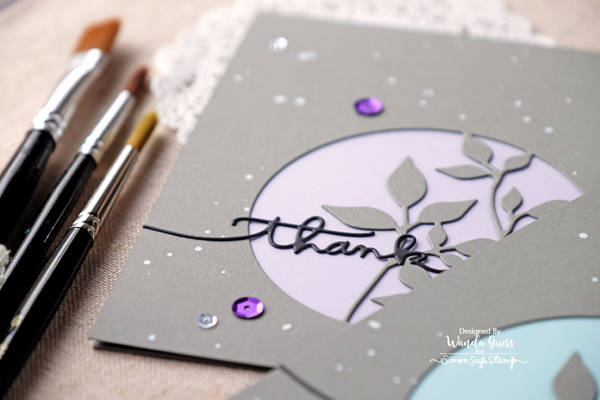
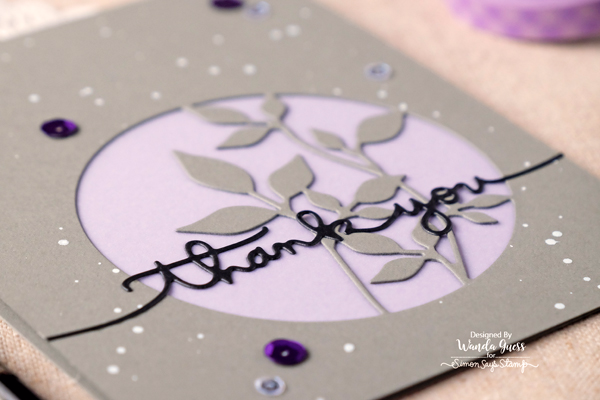
THANK YOU friends for coming by on the hop today! Happy Diecember! I hope you have an amazing weekend! I will be up on the Simon Says Stamp Blog on Sunday with a colorful and fun ensemble of cards using Hero Arts Products! Hope to see you then. XOXO
NEXT UP ON THE BLOG HOP IS LOVELY HEATHER!
CLICK HERE TO SEE THE ENTIRE NEW RELEASE!
SUPPLIES FOR TODAY'S PROJECTS ARE BELOW!
 |
 |
 |
 |
 |
|
 |
 |
 |
 |
 |
 |
 |
 |
 |
 |
 |
 |
 |
 |
 |
 |
|
 |
 |
 |
|
|
 Hi there! Happy Weekend! Welcome to the Holiday Release Week Blog Hop from Simon Says Stamp! There are so many new and fun products that launched this week! So, we had to have a blog hop to share it all with you! The projects on each blog today were made from the three new product lines that came out this week. Yahoo! Lots of creative inspiration for you today. You should have arrived here from Jessica's blog! The full link list of bloggers is at the bottom of my post! Thank you for coming by today – happy to have you here in my creative place!
PRIZE ALERT!!! PRIZE ALERT!!! PRIZE ALERT!!!
Leave a comment on this blog post and you are automatically entered to win a $50 Simon Says Stamp Gift Certificate! Thank you to SSS for their kindness and generosity! I will draw the winner Monday morning (the 21st) at 9am PST and notify the winner via email. GOOD LUCK! Each Blogger is drawing a $50 winner, so make sure to leave comments on every blog for more chances to win! Plus, we just really love hearing from you!
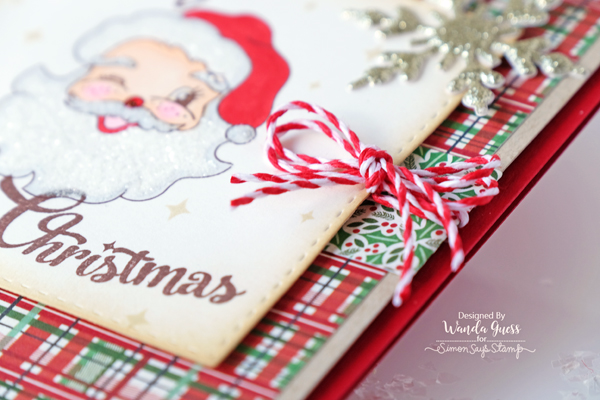
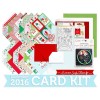
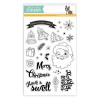
I'm sharing two cards with you today. Both cards were made with the supplies from the Limited Edition Holiday Card Kit (supply links below). I really love the stamp set that comes in the Holiday Kit. It's called Swell Christmas! It has the cutest retro Santa in it! And the best vintage inspired sentiments!! Oh, and I reallllllly love plaid paper! LOL.

All the papers for this card are included in the kit. I started with a pretty red card base and layered kraft cardstock on top. Then I layered the plaid paper and one strip of holly paper. I layered pretty Lawn Fawn Cord to make a pretty red and white bow. The sparkly stickers are part of the kit! I die cut a piece of cream cardstock with the Stitched Squares Dies to stamp on. I stamped in brown ink instead of black. That gives more of a vintage feeling to the project. I colored Santa with my Copic Markers and then gave him a glitter makeover! I used the tiny accent stars stamps in Antique Linen Distress Ink to give a soft background.

These stickers are puffy and delicious!!

A close up of my paper layers….

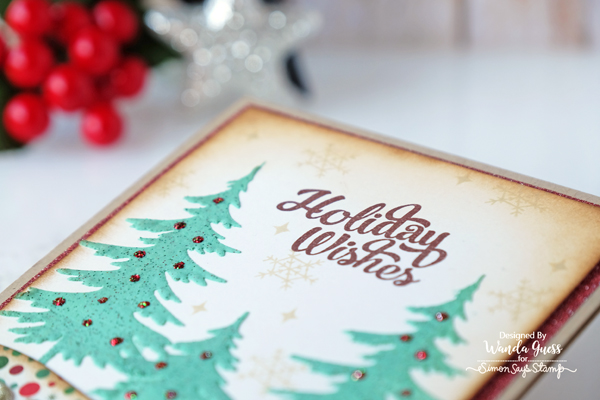
Next up is my second card, which I made using the enclosed Tim Holtz stencil and the included texture paste! I made a little forest scene and then embellished with more sparkly stickers and the included shimmer paper (in red).

I used the Simon Says Stamp Stitched Slopes and Hills Dies to make the bottom polka dot border for the trees. I edged everything with a sponge dauber and distress inks.

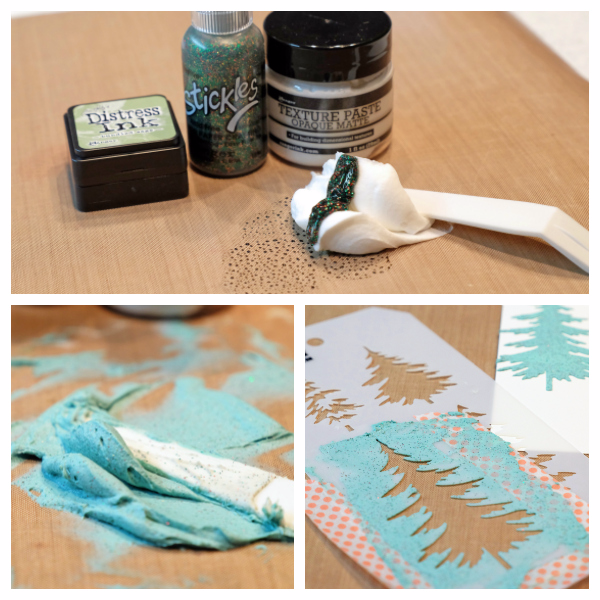
So this got kind of messy!! In the Holiday Card Kit you will receive beautiful green Stickles and two green mini Distress Inks, and texture paste! Yeah! So, I got this crazy idea to mix a bunch of stuff together! I mixed the inks, the Stickles and the texture paste into a pretty green goo. I used this along with the stencil to make my trees! FUN. It was a good experiment! (They don't always turn out good!)
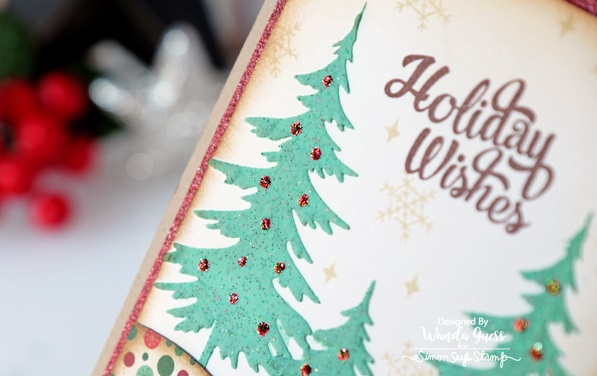
For my last step I used the included red Stickles to add ornaments to the trees!
Okay, that's it for me today! Thank you again for coming by! I just know you are going to enjoy the rest of the hop. Next in the hop lineup is my Simon Says Stamp partner Nina Marie!!
BLOG HOP LINKS! Enjoy the Hop!
 |
 |
 |
 |
 |
 |
 |
 |
 |
 |
 |
 |
|
|
 |
|
 |
|
|
|
 |
 |
 |
 |
 |
|
|
|

Hello crafty peeps! It's that time again – time to reveal the newest, latest, and greatest card kit from Simon Says Stamp! YAY! I look forward to the 14th of every month, because I can't wait to share projects with you. I hope you get excited too! In case you're new to this, Simon Says Stamp releases a card kit every month and it contains a combination of things – stamp set, dies, paper, embellishments, cardstock, and tools. Each kit also contains an inspiration sheet you can use to get started on cards right away. You can Subscribe to automatically receive it every month, or you can choose month to month if you want to buy one. CLICK HERE for the information page about Card Kits!
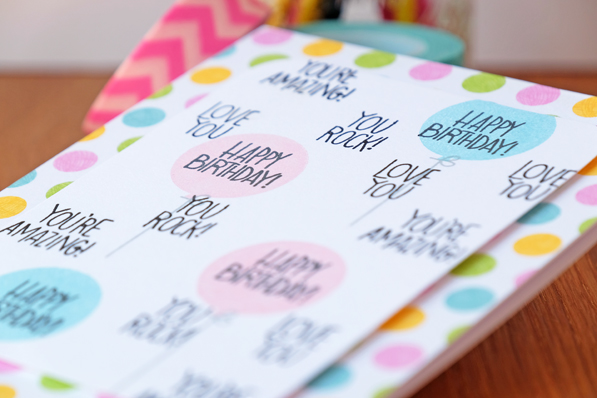
This month's kit has pretty pastel shades and lots of things you need to make sweet and perfect birthday greetings. The kit also has something really fun! Scratch off stickers! Yes, you can make your own surprise greetings! The stamps fit perfectly under the rub on stickers. The colors this month are right up my alley! I hope you love it too. I made four totally different cards to share with you today. See, I couldn't stop myself!! LOL
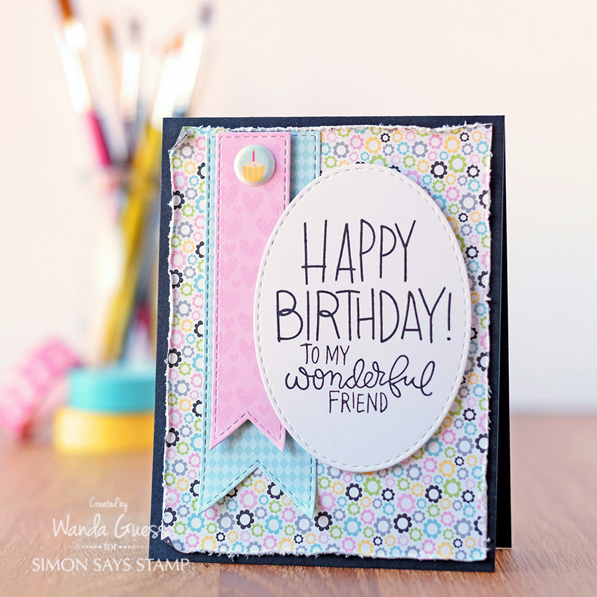
First up is a shabby chic card made using several of the included patterned papers! I used a rich, black card base, and layered some distressed paper for a country feel. I used the SSS Stitched Banners and Stitched Ovals dies to complete the look. Black ink really offsets all the color. I combined two of the sentiment stamps to make one larger sentiment.

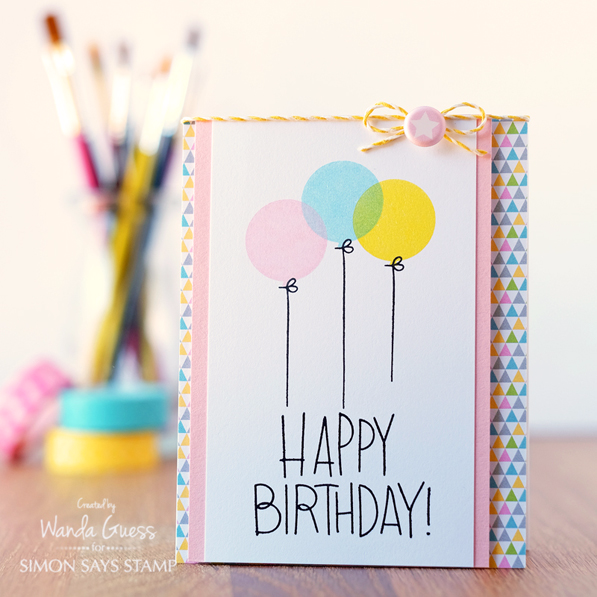
Next up is a soft and sweet balloon card! This is a great CAS card layout that works for any stamps! I love the overlapping ink colors and the simplicity of the bold words. I finished off the card using one of the included stickers and a bit of pretty yellow and white twine.

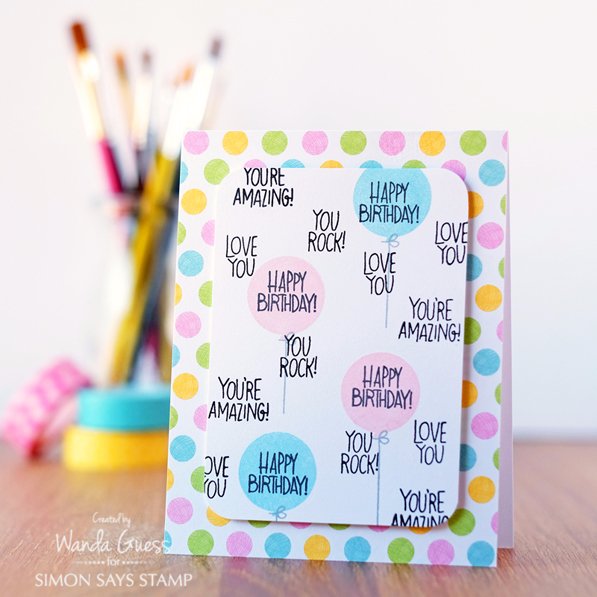
Next up, I tried using the balloon stamps with some watercolor paper and distress inks! This came out soft and lovely! I used grey ink to make the balloon strings to keep it simple. Then I layered patterned papers behind my focal image panel. I am really loving the sentiment stamps in this set! I used Distress Ink pads directly on my stamps and then spritzed them with a water mister before stamping them onto the paper. This gives more of a blurred edge and a nice effect.


This last card is super fun and cheery! I stamped a bunch of the smaller sentiment stamps randomly on a piece of white cardstock. Then I layered the balloon stamps over the 'happy birthday' words! Some polka dots complete the happy feeling to this one!
Thanks for stopping by today! CLICK HERE to see the card kit and to order yours! All the details are there on the shopping page! Take care and have a great week ahead!! XOXO


SUPPLIES FOR TODAY'S PROJECTS:
 |
 |
 |
 |
 |
 |
 |
 |
 |
 |
 |
|
 |
 |
 |
 |
 |
 |
 |
 |
 |

Hi everyone! I'm super happy to be joining the lovely ladies of the Wednesday Challenge Blog as a guest this week! The theme is Fun with Felt, and we ALL know how much I love making felt projects with the SSS Plush Dies. I'm glad they invited me to join them this week! CLICK HERE to go to the Wednesday Challenge Blog and check it out. I hope that you will be inspired to create your own felt project and enter the challenge! You have all week until next Wednesday.
THIS WEEK'S THEME:
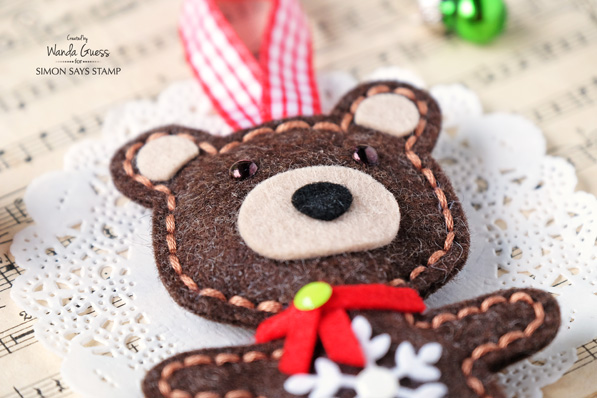
Okay, so here's my project! I made THESE BEARS when the felt dies first were released and always had the idea in the back of my mind to make a Christmas ornament bear. So, for today's share, that's what I did! I made the bear a nice rich brown (he's a California Grizzly! LOL) and then gave him a nice red scarf. I used the Snowflake Banner die to make a fluffy white snowflake for his tummy. Before I sewed him together I added a pretty gingham ribbon to use to hang him on the tree.

I added Doodlebug enamel dots for his eyes, and as accents for his snowflake and scarf. I wanted to put just a little pop of green somewhere on the project.

Hope you've enjoyed my little feltie today, and I really hope you decide to play along in the challenge too! Have a wonderful week! I'll see you around soon! XOXO

May you have…
The gladness of Easter, which is Hope
The promise of Easter, which is Peace
The spirit of Easter, which is Love.
Easter blessings and wishes for peace
from our home to yours!
Mark and Wanda Guess
2016
Hey crafty friends! Welcome to the Simon Says Stamp Spring Plush Blog Hop! Woooooot Wooooooot! We are going to have big fun today with all these new dies and loads of inspiring projects from everyone. I'm the second stop today – right after the Simon Says Stamp blog. The full blog hop blogger list is at the bottom of my post. In true Simon fashion, there is a goody bag prize to be given away on every blog! Be sure to comment on all of them to increase your chances of winning some goodies. The names will be drawn on Monday, March 7th, so you have the weekend to hop away. Did you see my post from yesterday? There are three other projects! And…I'm sharing MORE today! I told you I couldn't stop making felties! The new release is full of wonderful Plush/Shape dies that can be used with Felt, Fabric, Paper, Fun Foam, or whatever else your imagination can come up with. I am really crazy about the felt so that's what I've used for my projects. Enjoy the hop and have a wonderful day and weekend! Thank you, as always, for coming by today! At the bottom of my post are the links to the products and the blog hop list.
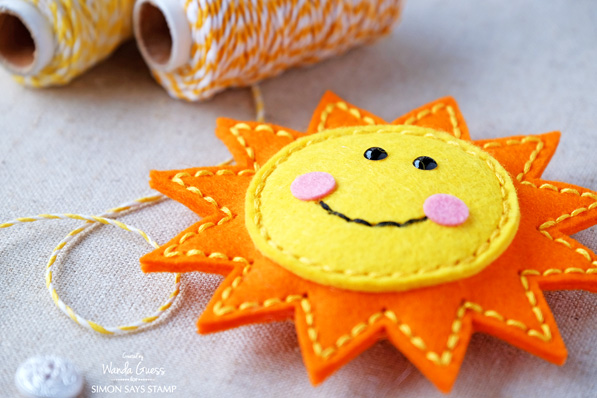
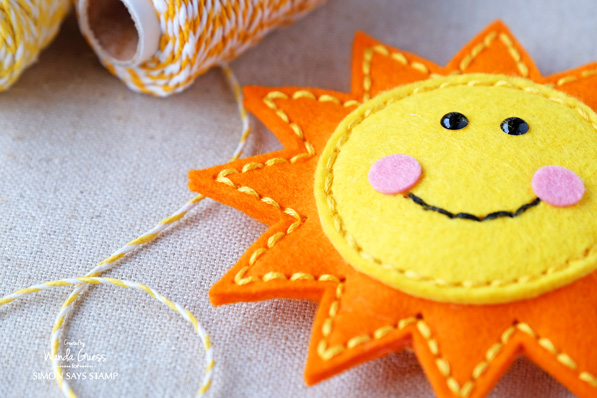
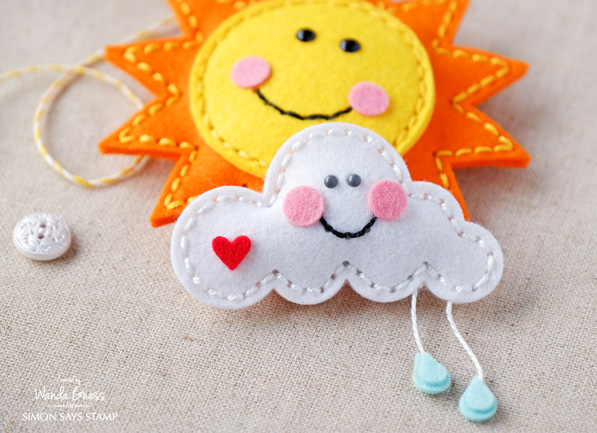
I found this Happy Sunshine Die completely irresistible!!! He is soooooo cheerful! I love the little cheeks and his beautiful sun rays…. I paired him with the Little Cloud Die because I thought they looked cute together!! Hee hee. I'm thinking this would make the start of an adorable mobile for a nursery…. Too sweet.

For the yellow portion, I cut two pieces of felt because I wanted it to look a little thicker. I stitched the two yellow layers onto the top orange layer before stitching the two orange layers together. His pink cheeks and eyes are glued on with Fabric Glue. I used enamel dots for the eyes because…well, just because!
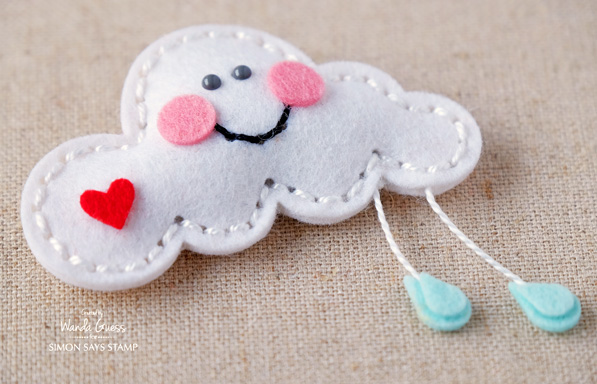
I added some cheeks to the little cloud also. I attached the raindrops with embroidery thread and glued them together with Fabric Glue.

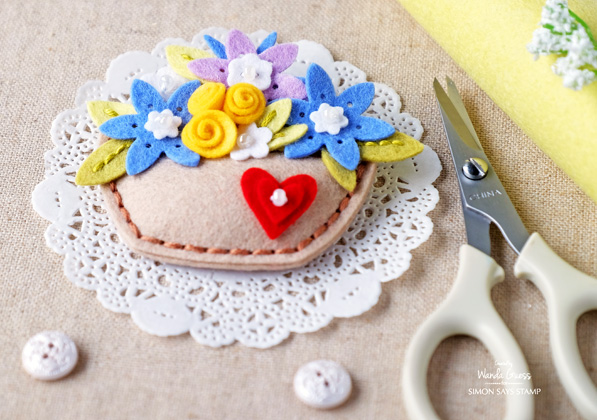
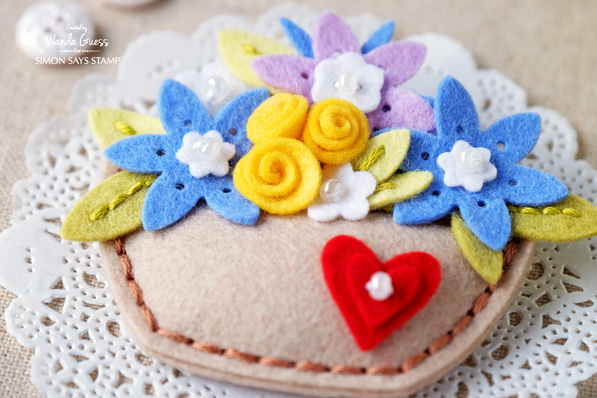
In my post yesterday I talked about how much I love to wear denim jackets and pins…. So this next item is another felt pin. I used the bottom of the Springtime Basket die to create a flower pot and then filled it to the brim with felt flowers of all kinds and colors! The little roses are a die that you roll and then glue together to make it 3D.
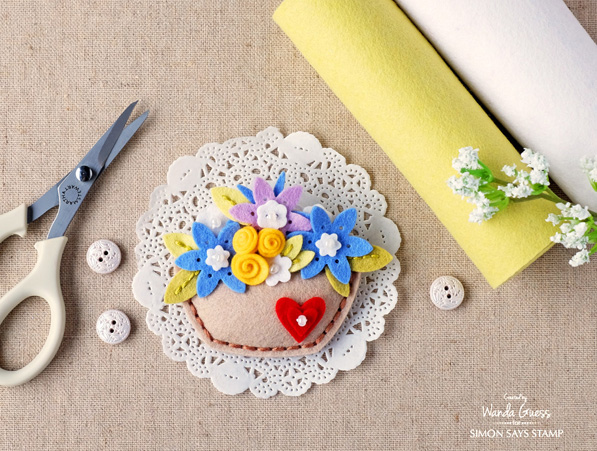
After I stitched the flower pot part together I die cut a paper circle and slipped it inside. That is what my flowers are glued onto so they can be higher than the pot. I then glued a pin back onto the paper circle. I used watercolor paper to make it nice and sturdy.

I'm thinking I will definitely be wearing this on Easter with my lime green jacket!


Thank you so much for hopping by today!
Have a beautiful, creative day! XOXO

Hey everybody! Wowza, it's been busy in my studio the past week or so! I've been up to my eyeballs in FELT and loving every minute of it! If you follow me on Instagram, you know I've not been good at keeping a secret! I'm so excited that this release day is finally here and I can share some fun projects with you. The entire Spring Plush Release is live now (links at the bottom of my post) and there is a BIG Blog Hop tomorrow too! The release is a series of Plush Dies created with Felt crafting in mind, but you can use paper, fabric or anything else you can dream up. I'm posting some things today, and some more tomorrow. Yay! It was super fun to create with felt instead of paper for this release – use some of my sewing techniques and just have a good time with it. I literally stayed up until 2am one night because I couldn't stop making felties! I know you are going to love it too. I have a sneaking suspicion these are gonna sell out FAST! Get 'em while they're hot!
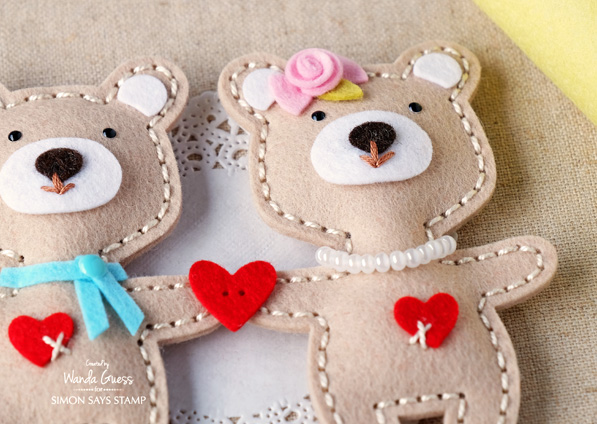
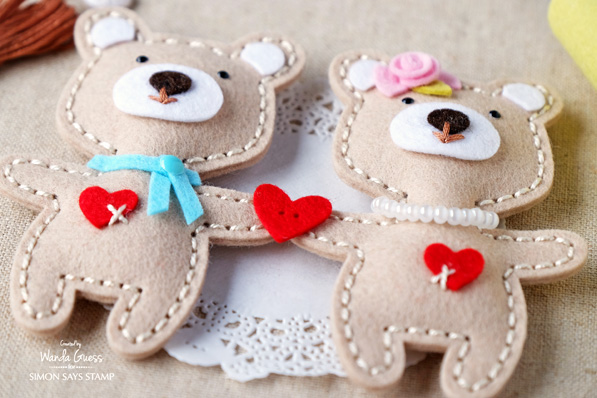
First up is my favorite new die – the Happy Bear! OMG so sweet! I made the one bear with the blue scarf and then I thought he needed a girlfriend, so I made another one! I gave her a pink bow and a pearl bead necklace. Aren't the adorbs?
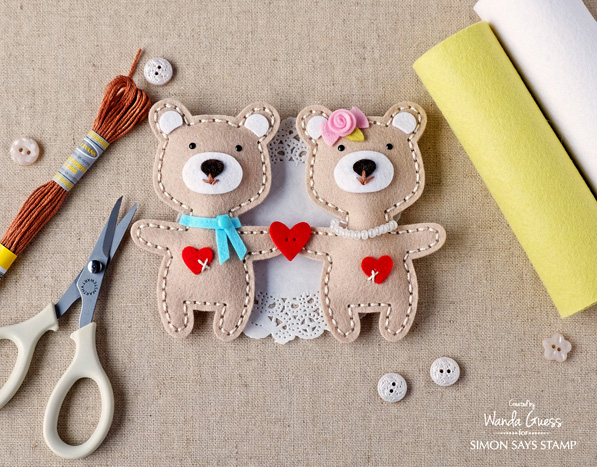
The dies all have circles cut out already for your stitching! That makes it really easy to get nice, even, perfect stitches. You can choose a straight stitch or a blanket stitch (example further down in my post). I love that it looks so professional. For the ears and the face parts I used Fabric glue. Easy-peasy. For their eyes, I wanted them shiny and cute so I used black Doodlebug enamel dots!

I put just the tiniest amount of stuffing inside them (quilt stuffing from the fabric store). You can also leave them flat. If you don't have batting or stuffing at home you can use cotton balls. You really need a small amount.


I LERVE them! I added a little stitching for their mouth and nose. Just three stitches, but I think it made a difference. Her necklace is some pearl beads strung on a piece of thread and then attached to her neck.

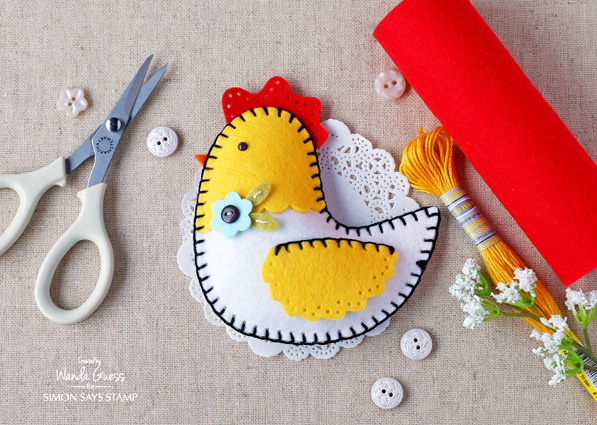
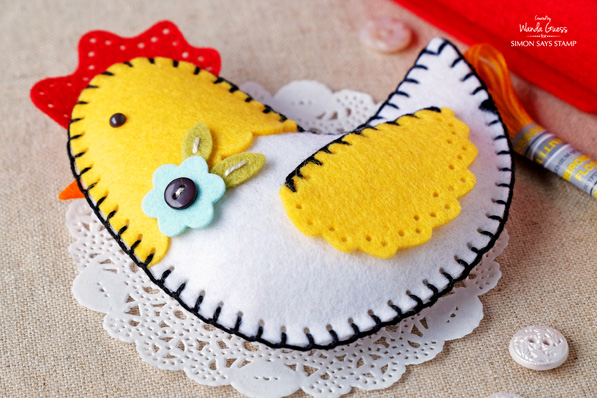
Next up is this adorable Springtime Chicken Die! I wanted her to look country and sort of Mary Engelbreit inspired so I used vivid yellow, red and touches of black. For this one I used a blanket stitch. If you don't know how to do this you can find a Youtube video to watch – it is very simple, once you get started! I really like the little scallop edge on her face. She comes with the flowers and leaves too!
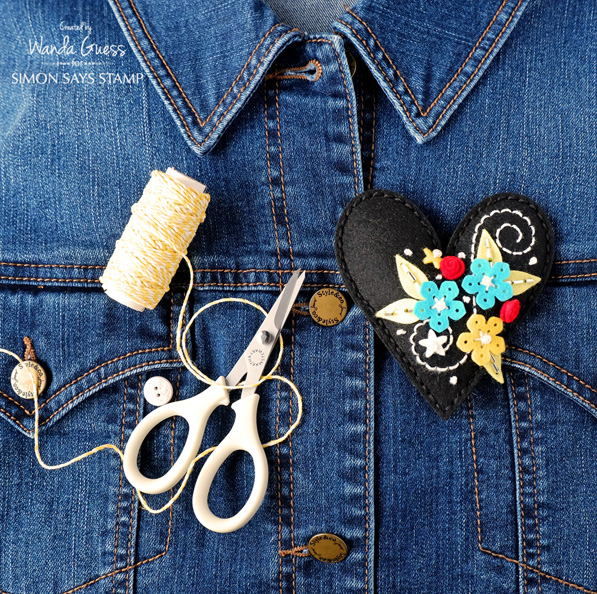
For my last project for today I made a felt heart pin using the Blooming Heart die. I wanted to try a bit of a different look so I started with black felt and black thread. I think this makes it sort of elegant, and then the flowers really pop! This is a pin – I just attached a pin back to it. I love to wear a denim jacket and I love pins so I will be sporting this one for sure! (I have another pin to share tomorrow). You could attach it to a package too.

Okay, so that's it for today! But…be sure to come back tomorrow to see MORE FELT and participate in the BIG BLOG HOP! I will be getting up early, because I can't wait to see what everyone else made! Have a great day! XOXO