Author: stampcatwg

  • Hula Time!

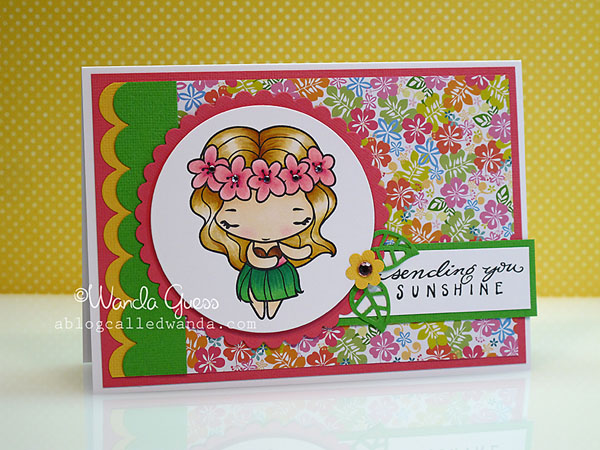
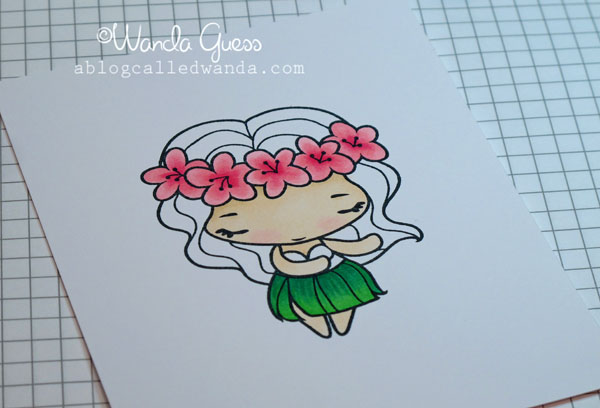
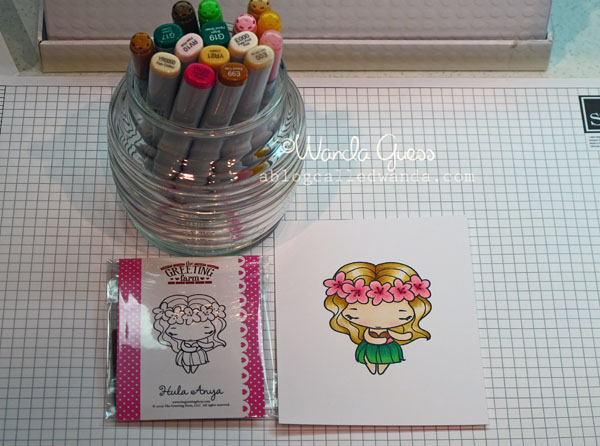
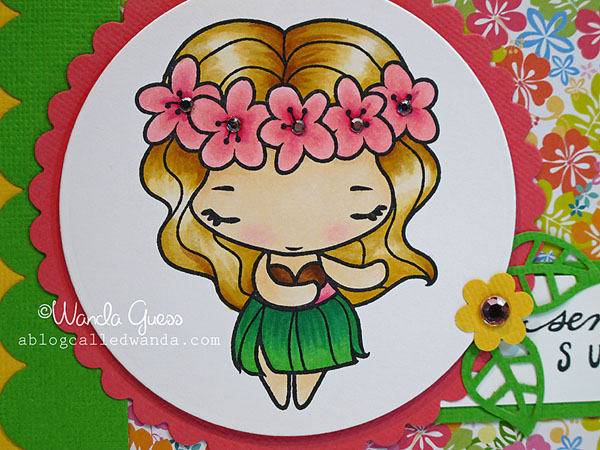
    Hey! My craft room has been in Winter mode for a long time, and it's been raining cats and dogs here in Northern California… So today I'm sending you a little bit of sunshine in the form of Miss Hula Anya! Don't you wish you could get on a plane straight to Hawaii right now? Me too! Let's go! Oh, yeah, there's that…work. It was a good idea though!  I hope my card cheers you and warms you.

    Today's card is my first official iCopic DT card. I hope you like it. Please make sure to visit the iCopic blog to see what is going on with the other designers too! I am putting the card pictures first and then I am posting A LOT of pictures of the coloring process if you want to check that part out too. Thank you for coming by to see me. Have a great day! Aloha!


    IMG_5331


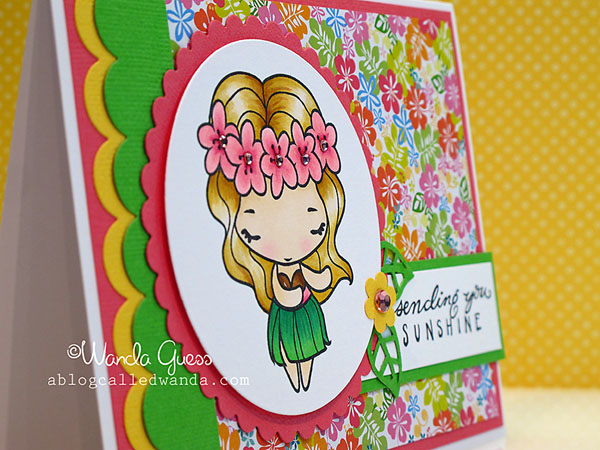
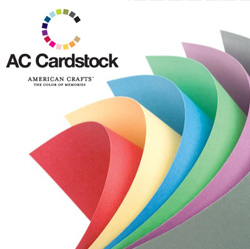
    She is so dang cute! I put some pink rhinestones in the center of the flowers in her hair. I used some punches to add a flower and leaves to the sentiment. It seemed kind of plain without it. The paper is from the AC Cardstock "tropical" collection – which I use often.  
     IMG_5332


    IMG_5324 


    I am new to these Anya images and I have three so far. They are really fun to color and there is one for every occasion. The other two I have are a Geisha and a Mermaid. I'm enjoying trying some new images!

    IMG_5333


    IMG_5335 


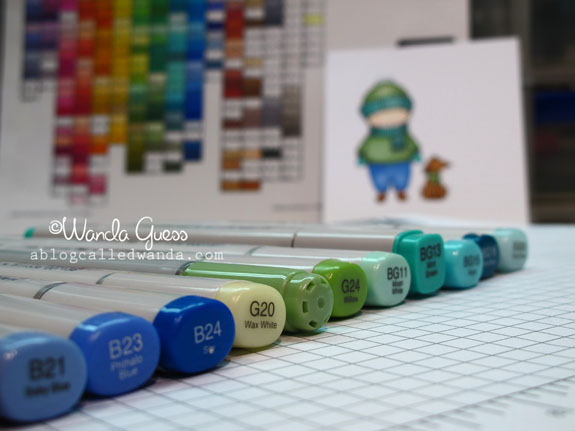
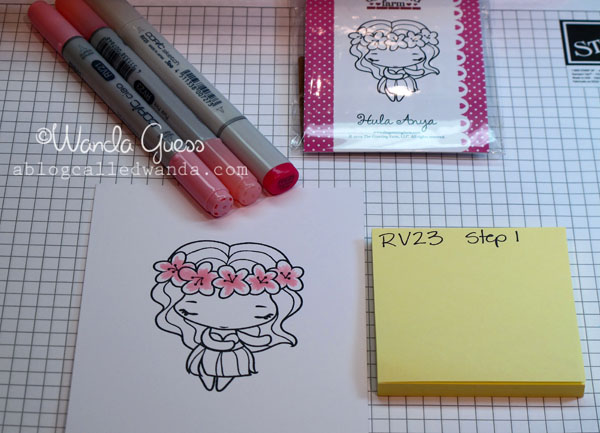
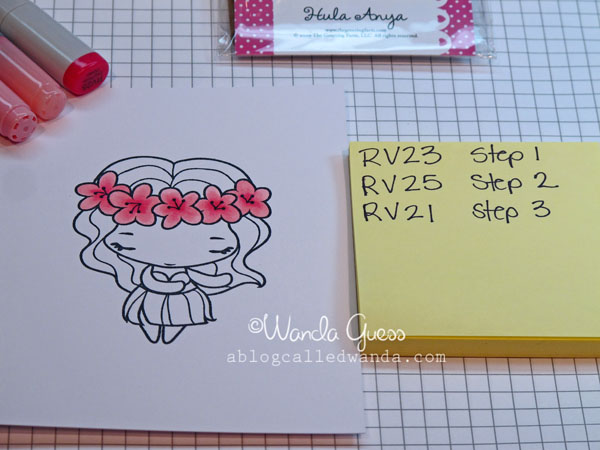
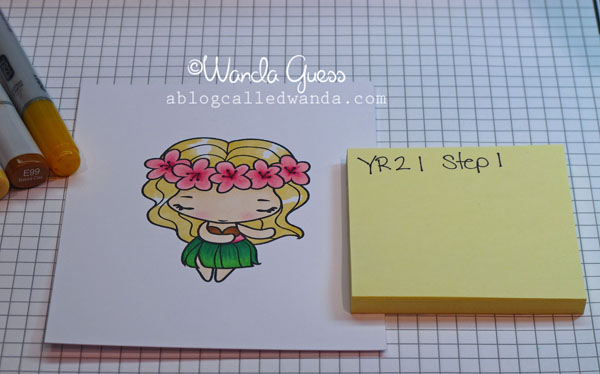
    Here are the coloring process pictures. I hope this will help out! If you have questions, or if there's something you want me to demo in the future, please leave a comment or send me an email! Start by coloring in with your first color. I chose the medium shade of what I was coloring.

    IMG_5312


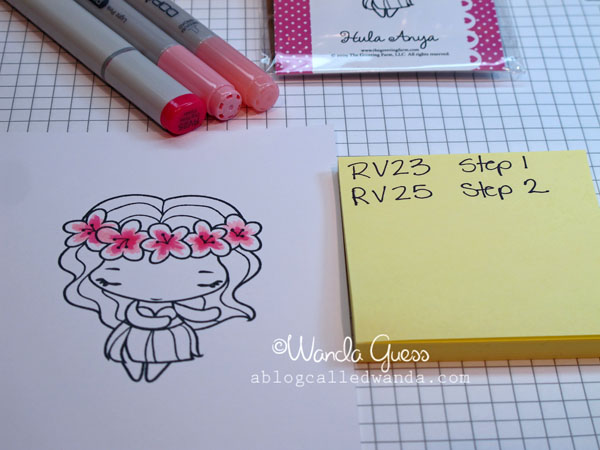
    Add some darker low lights in the center…

    IMG_5313 


    The go back and blend over the entire image with your lightest color. This will melt all the colors together. You can also go back and add more dark if you want – adjusting to your taste and style.

    IMG_5314
     

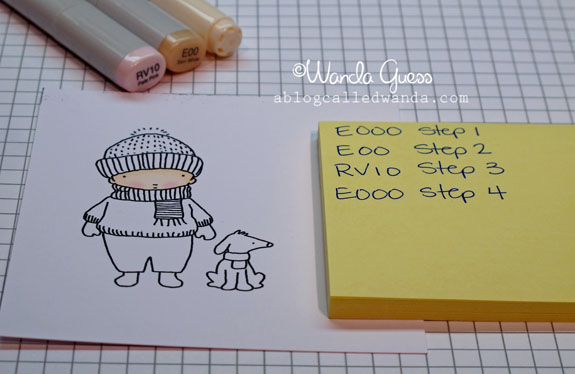
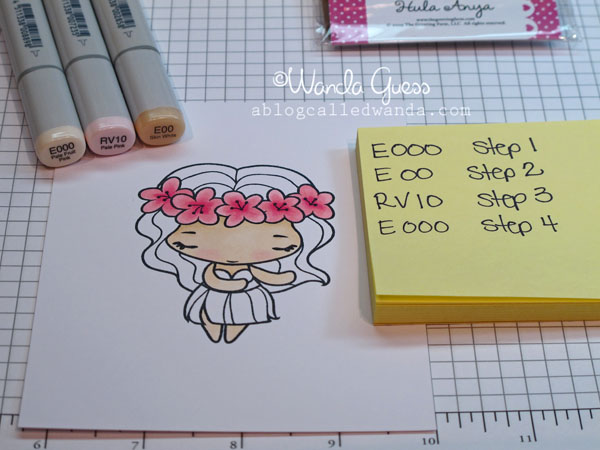
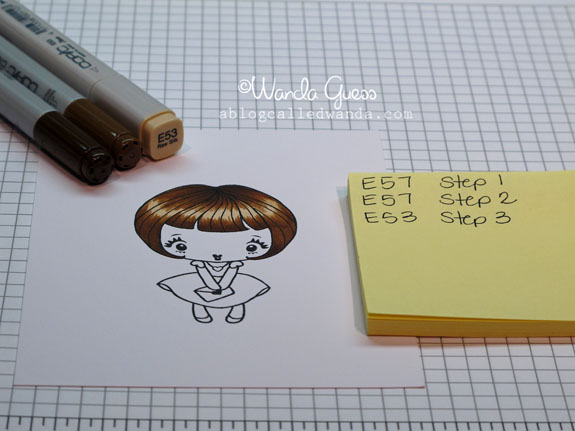
    For faces, I like E000, E00 and RV 10. Again…blend with your lightest color…

    IMG_5316 


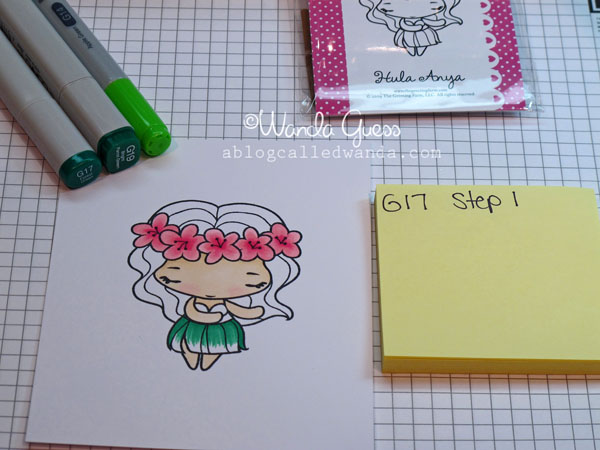
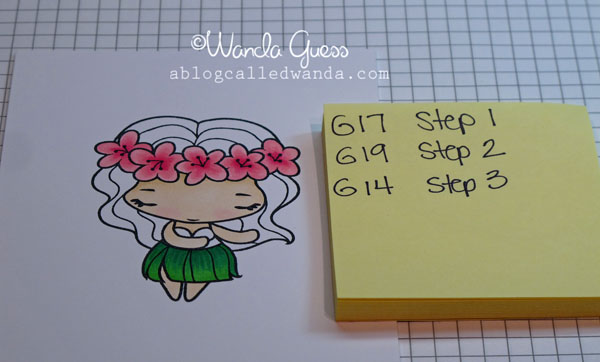
    For her grass skirt, I started by making strokes to mimic what I thought a grass skirt would "feel" like. Then I went back and blended in the lighter colors.

    IMG_5318


    IMG_5319 


    IMG_5320 


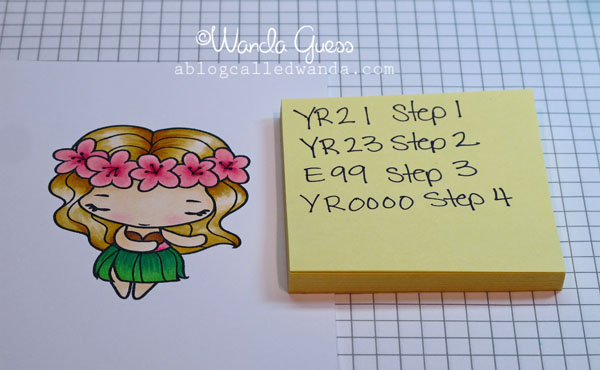
    The hair is the most difficult part! I'm still practicing this and trying to get better every time I color. I started with a nice medium golden yellow. The reason the hair looks shiny at the end is because I left white space to show the light hitting her head.

    IMG_5321 
     
    Here's the end result!

    IMG_5322 

    Birdie signature! 
     

  • May your day be just a bit sweeter! iCopic Color Challenge #11!

    Hello! Life is starting to get back to normal, what with the holidays officially being over and all. I took today off from work to regroup, clean house and get caught up on blogging! Tomorrow…solidly back to reality. Uh Oh.

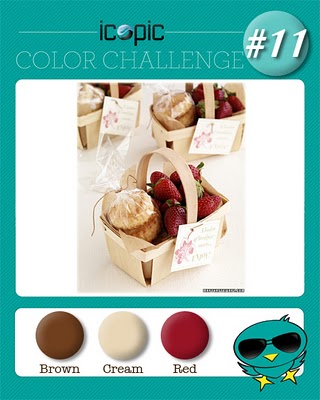
    This week marks the start of my time as part of the iCopic Blog Design Team! WOO WOO! We are starting off with a GREAT color challenge: Red, Cream and Brown. Love that. Click here to go to the Color Challenge Page for the iCopic Blog! Later in the week (Wednesday) I will have my first post to share with you. Wednesday will be "my" day over at iCopic, and I hope you will follow along with me!


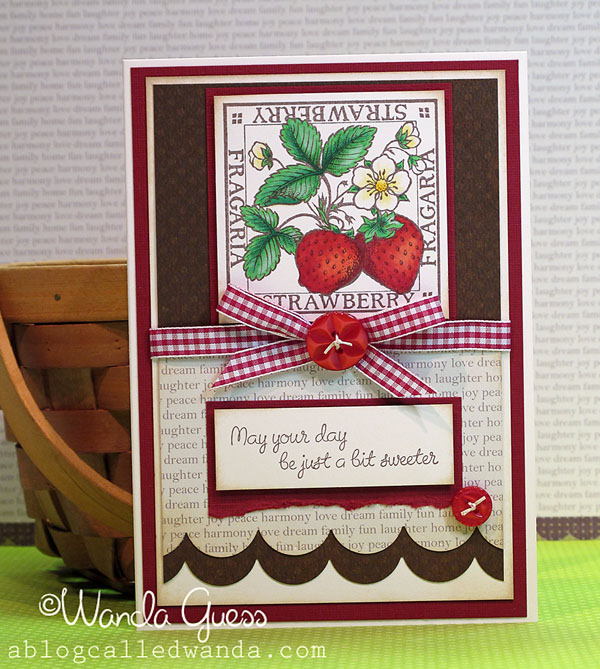
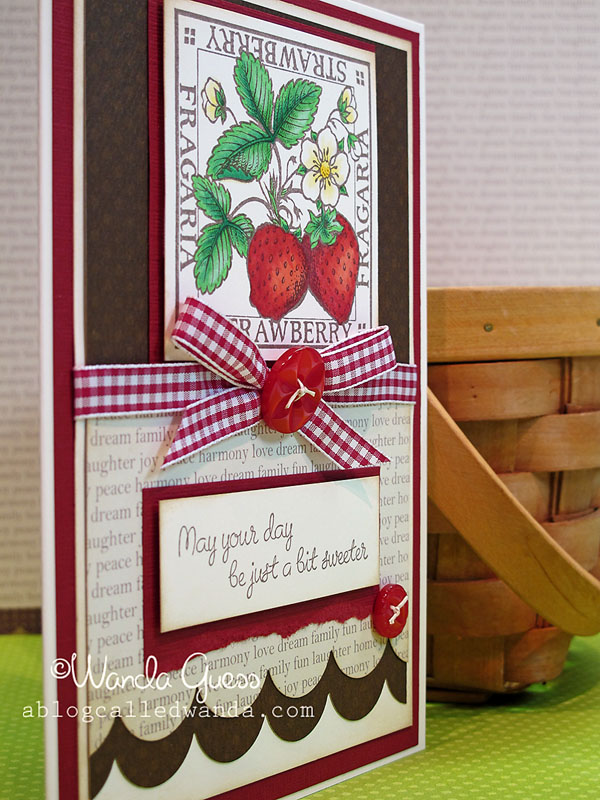
    Today's card using the color challenge combo:

    IMG_5339


    Here is the color challenge inspiration image. I was immediately drawn to using the strawberries and the basket. I love this color combination. I know I will use it more often. I used a pretty cherry red color and brown ink.
     
    Icopic_cc11
     

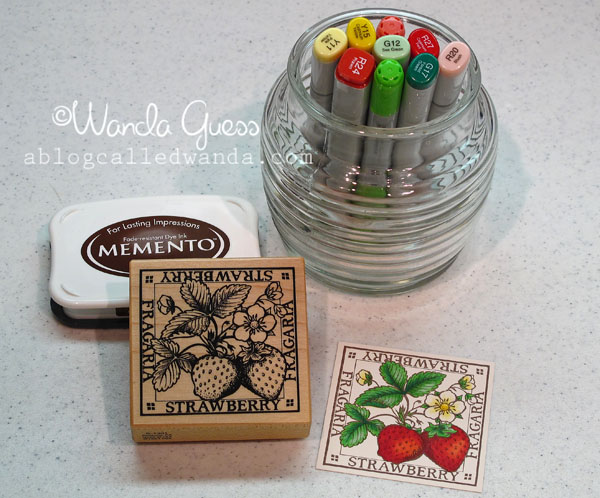
    I used an old PSX stamp that I love and my trusty Copic Markers. The colors I used are: R27, R24 and R20, G17, G14 and G12, and Y11 and Y15. Red and black are the two hardest colors to blend and shade. Try blending in some pink with your reds to lighten them up a bit.

    IMG_5338


    IMG_5340


    IMG_5341 
     
    Birdie signature! 
     

  • Happy New Year!

    Happy New Year to everyone! Time for some reflection, and then, a look ahead. It was one year ago exactly that I started this blog. I had no idea what I was doing or where it was going. I only knew that I wanted to blog and share and be part of the online crafty community. I could not have imagined what has happened in the last year here. The experience has been so rewarding and fun, and most of all, positive!

    In the past year, I have written 195 blog posts, received 889 comments from readers, and had 30,324 "hits" here at A Blog Called Wanda!

    I have met the most wonderful, creative, and kind women in the past year. Perfect strangers who took the time to say something nice. Some of you have ended up being friends who are now part of my day to day life. We share so much in common even though we are all around the country and the world. That is the most meaningful experience of all. I feel really lucky to have met you.

    I think that putting my creations out there for all to see has made me become a better stamper. A more intentional stamper…trying to get out of my comfort zone. It's a risk to put your creations out to be judged! But, nothing risked, nothing gained…and I have gained a lot by doing so! Some fantastic opportunities have come my way to be a guest designer or a Design Team Member…and I've won a few contests along the way too. More fun than I could have dreamt.

    I could go on and on, but I will spare you! I feel very fortunate that you all take some time out of your day to visit me and see what I'm up to. It makes a huge difference in my life. Thank you! I love blog comments, so please say hi if you're here!

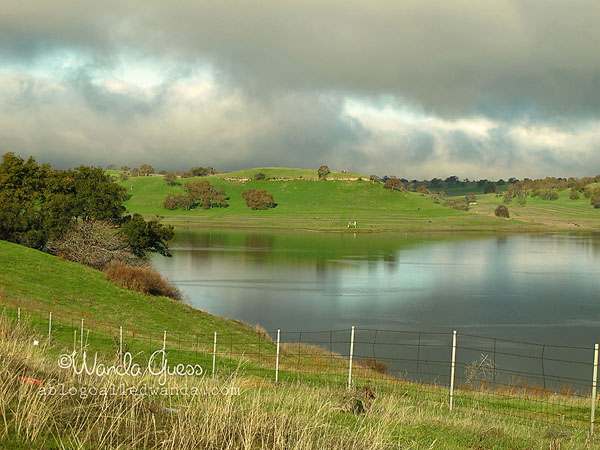
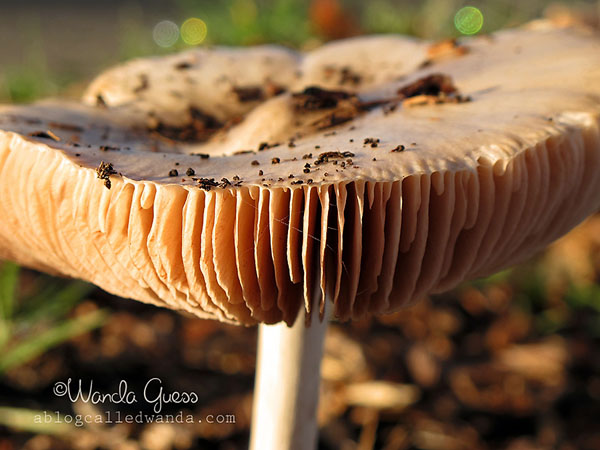
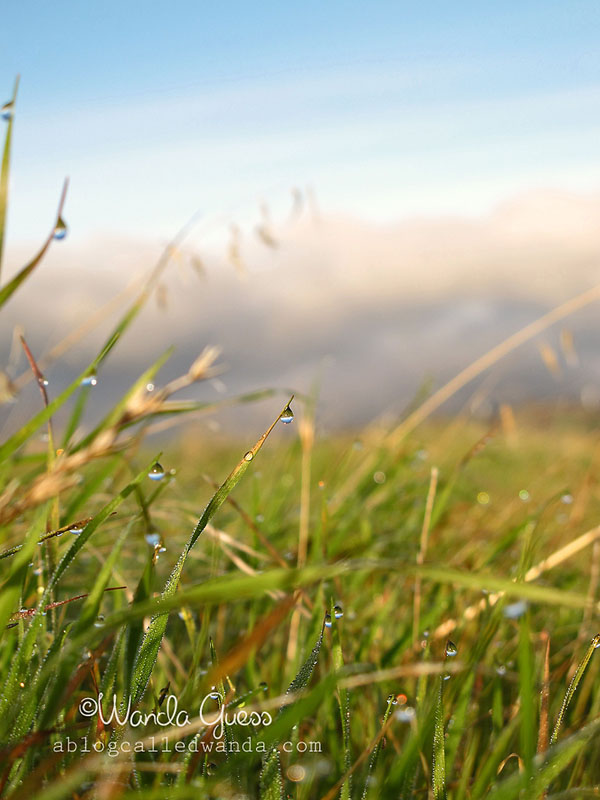
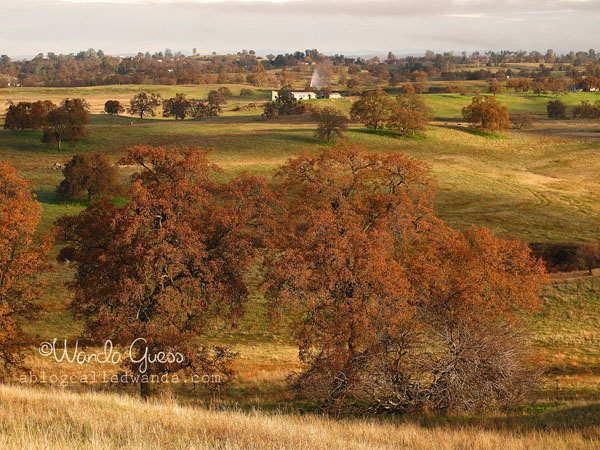
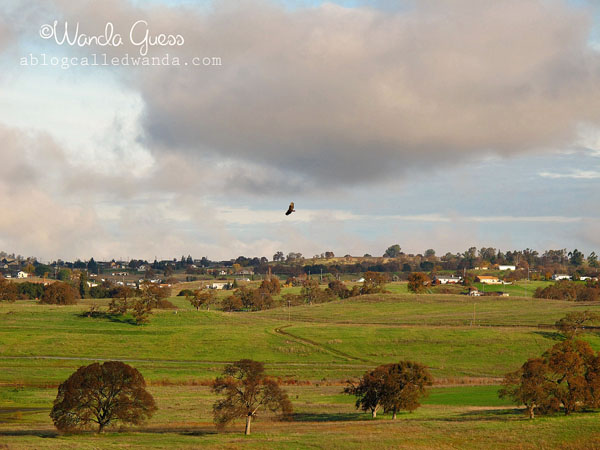
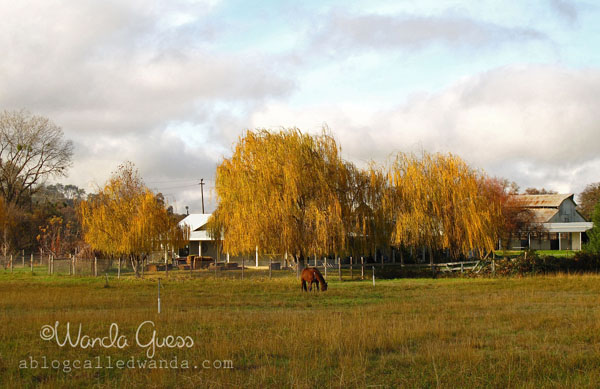
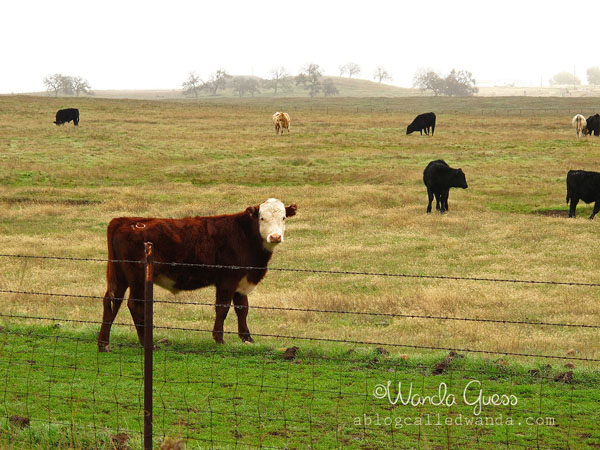
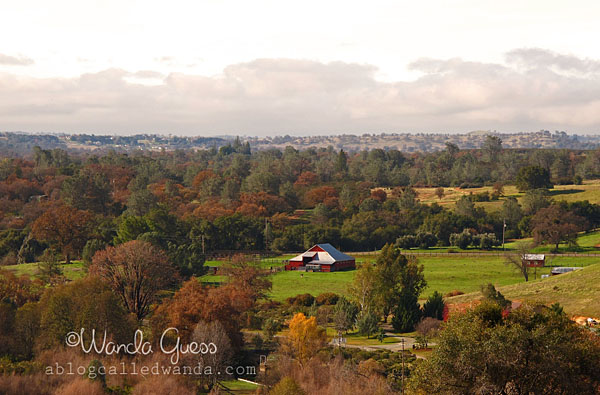
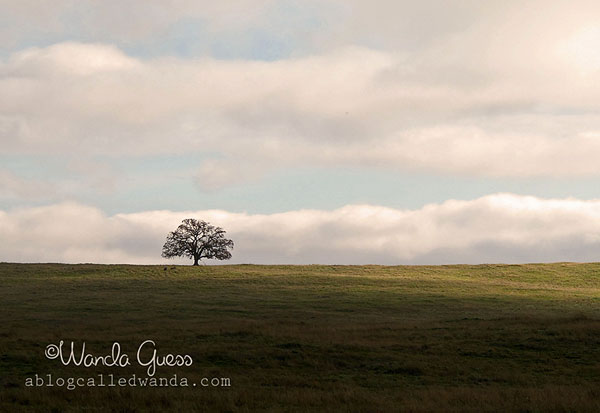
    Three weeks ago was the DH's birthday and his wish was to get up early and go on a photo shoot up and around the pretty Gold Country of Northern California near our home. I have to tell ya, I didn't want to get up at 5am on my day off, but the payoff was well worth it! The light that day was spectacular. It had rained the day before and there was a thick layer of gloomy fog burning off. Made for the best pictures I feel I've taken in a long time.

    I decided to save them for New Year's because as a group they gave me a "fresh start" sort of feeling. A feeling of quiet and peace and new beginnings. It's hard to explain, but maybe after you look at them you will feel that too. They just seemed right to start the new year. I hope that 2011 brings many blessings to you and your families this year!


    1 


    2 


    3 


    4 


    5 


    6 


    7 


    8 


    9 


    10 


    11 


    12 


    13 


    14 


    15 


    16 


    17 

    CHEERS TO MAKING 2011 OUR BEST YEAR YET!  

  • Stuff I can’t live (stamp) without!

    Hi there! Well, here we are…almost to another year! Hope your week was a good one and I hope you have a fun and happy time tomorrow night, whatever you're doing! Today's post does not have a project, cuz girlfriend is tired tonight!  From time to time, people will email me and ask me what kind of camera I have, or what kind of ink I like best, etc… I wanted to take some time to answer those questions and I wanted to share my favorite crafting supplies! If you have a question about something, please don't hesitate to email me or leave a comment after a post…I'll be happy to help!

    Every crafty girl has those few things that she cannot live without. These are mine:

    1. My camera is a Canon G11 that the DH bought me for Christmas last year. I am never without it in my purse or in the car…she goes everywhere! LOVE this camera. Small enough to fit in your bag and it is fully manual or automatic.  


    Canon_g11_powershot
     
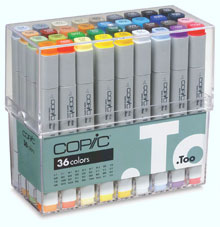
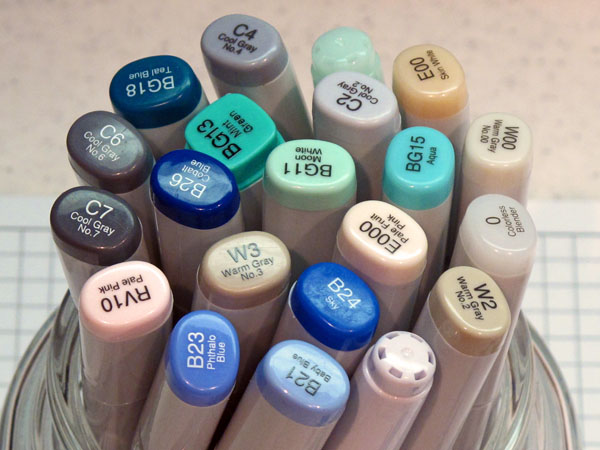
     2. Come on now, you knew Copic Markers were second, right? Hee hee. Ever since discovering these markers, life has not been the same. Best. Tools. Ever. 


    Copic_marker_set2 


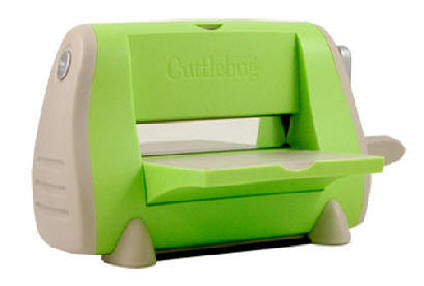
    3. My trusty Cuttlebug! I use it all the time with my embossing folders and my Nestabilities. Also, lots of stamp companies are starting to make dies and this is small enough to leave on my desk.
     

    Pro-cuttlebug
     

    4. My Genesis Paper Cutter…Where do I begin with this? Everything you've ever heard about it is true. It was very very expensive and worth every penny. These used to be hand made by a family in New England somewhere and when you ordered it you got put on a waiting list…it took ten months to get it! That was about 6-7 years ago. Now, they are advertising instant shipping! I have never had to sharpen it or do anything to it. Cuts like a dream.
     

    GenesisphotoED 


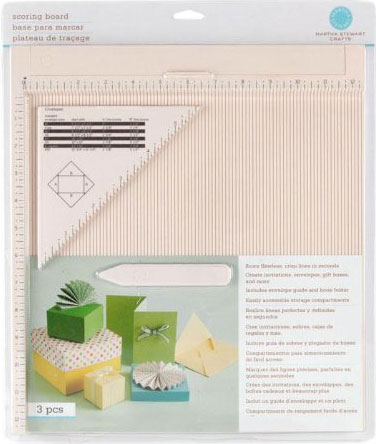
    5. Martha Stewart Scoring Board. Gotta love Martha…and this! It even comes with an envelope template. Buy it at Michael's with a 40% off coupon! 

    Martha-Stewart-Scoring-Board-Large 


    6. My favorite go-to inks, especially for stamping my images when I am going to use my Copic Markers. Gives a nice, crisp image and doesn't bleed with my markers. Comes in a ton of colors.

     Memento%20Tuxedo%20Black%20copy 
     
     
    Distress inks for, well, distressing! haha. Love this color for sponging around the edges to give that shabby chic feeling.
     
    Tim19497 


    7.  Lately, this is my favorite cardstock. I like that it is packages in three different sizes and by color families. My favorite ones are "tropical" and "primary" colors. Stores nicely and is colored all the way through. Vivid, pretty colors.


    Ac_cardstock


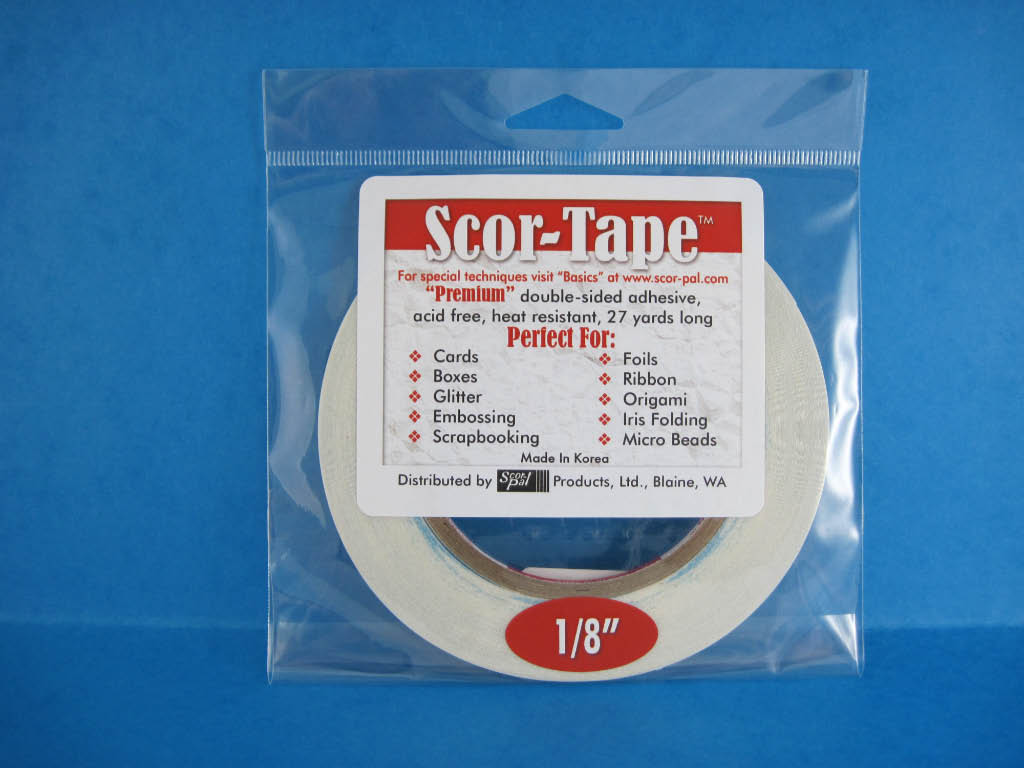
    8. Scor-Tape! Egads, how did I live without this before? This is great stuff. Comes in many sizes and is super strong. You can tear it with your fingers so you don't have to use scissors like some other double sided tapes. I like it because I can adhere a very heavy piece of a project and it won't come apart.
     

    Scor-Tape%20201


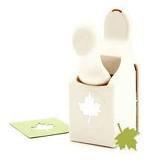
    9.  Martha Stewart craft punches! Oh, Lawdy…don't get me started on this… I did an entire blog post already about my obsession with these. Fun times.


    ImagesCAOFP9PZ


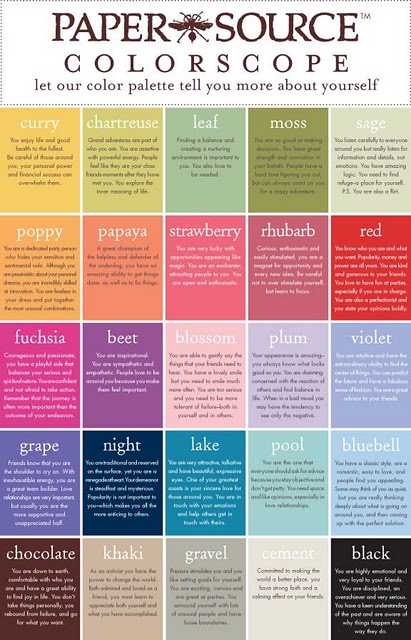
    10. Paper Source note cards/paper and envelopes in yummy colors. I like buying big, thick, juicy envelopes from them in colors that match my projects exactly. The closest Paper Source store is about 80 miles away so I don't make it there as often as I would like. This place is incredible. The store is a visual extravaganza for us paper lovers. Check it out!


    Colorscope_0109 

    I won't even try to decide what my favorite stamps are, or what my favorite kind of patterned paper is…because I love them all! There are so many great stamps and paper collections! I try to mix it up in that regard and try different things. I hope you had fun reading this post. I would love it if you would leave a comment and tell me what your favorite tools are! That way, we can all learn from each other! I'll be back this weekend with some photographs I've been saving for you and an end-of-the-year wrap up post. Hugs. 

    Birdie signature!
     

  • Just the Ticket Birthday Cards!

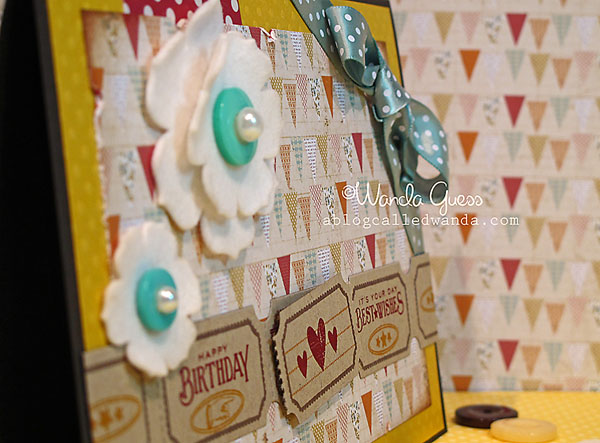
    I had me some fun in the old craft cave yesterday bustin' out lots of supplies and making a ginormous mess while creating these two cards. I had stamps, paper, ink, felt, buttons, pearls, ribbon, dies, more stamps…flying everywhere. I used some of my fun Papertrey Ink (PTI) supplies for these shabby chic birthday cards and I have been itching to use this pretty banner paper too. Thanks for coming by today to see what I'm up to. Are you ready for 2011??

    Here is the first card:


    A


    The stamp set is called "Just the Ticket" and has fun sayings and borders to use on your cute little tickets. The die cuts out your paper perfectly and then you can stamp right inside. Marvelous! The ribbon is PTI in the color Hawaiian Shores.  

    B


    This die cuts out perfect blossoms. I used PTI cream felt. It is the perfect shade of winter white. I put a button in the center and then a pearl on top.  

    C 


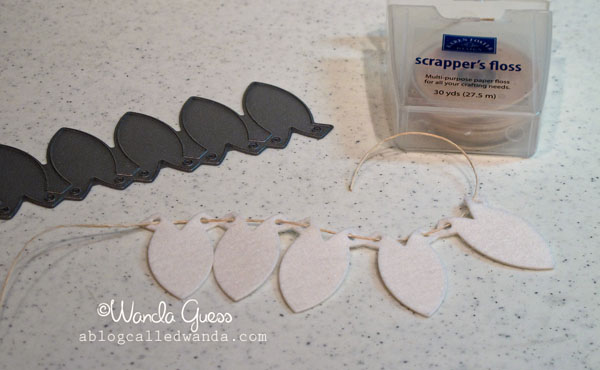
    This is another flower die from PTI. This one you thread some ribbon or floss through the holes and it gathers together into a three dimensional flower! This is the small size. The kit comes with three sizes and I think they all fit together if you want to go big!

    D


    How fun are those ticket stamps??? ACK.  

    IMG_5304


    IMG_5305


    I want to make a bazillion of these flowers!! Wouldn't they be cute on a hat or on a sweater? I can think of so many things to do with these little gems.  

    IMG_5306


    Here is my second card – using the other type of flower:

    IMG_5307


    IMG_5309


    This photo is included to share with you what a hard scrabble life my poor kitty has. I bet you feel all sorry for him out there fending for himself…NOT.  Yes, that is the famous Mr. Buddy under the covers in bed! (With the electric blanket on). He's looking at me as if to say "I don't know where you're gonna sleep, but I am quite snuggly thank you very much." So hilarious.  

    Z 

    Have a wonderful day everyone!                                    

  • New Year’s Hedgies!

    Greetings and salutations! Christmas has come and gone again…really hard to believe…and next week we will enter another decade! I hope everyone had a great Christmas day! Santa brought me a Mad Men Betty Draper Special Edition Barbie! Score! I also got some yummy candy and a gift certificate to my LSS. Score! It was a calm and peaceful day for us. Mr. Buddy is happy that everyone is home to keep him company for a few days. I have already read one book and am 3/4 through another one. It feels good to relax a little and slow down.

    Some super cool, fun, exciting, neat-o news for today! I am a HUGE fan of the Blog "Inspired By" by Jill Foster. LOVE her blog. She finds other cards/bloggers that she likes and then makes cards inspired by them. Guess what? She is inspired by ME this week! YES! I'm so honored and can't wait to see what's up over at her blog every day. I hope you will check out her blog too…she is AMAZINGLY talented and I know you'll love her work.

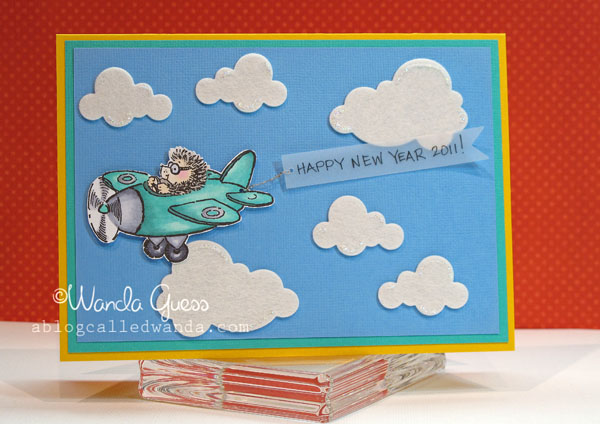
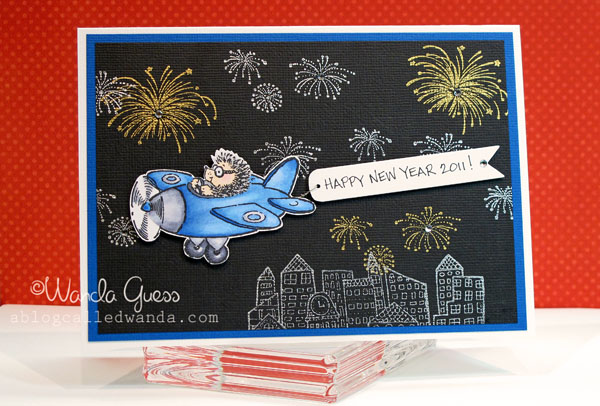
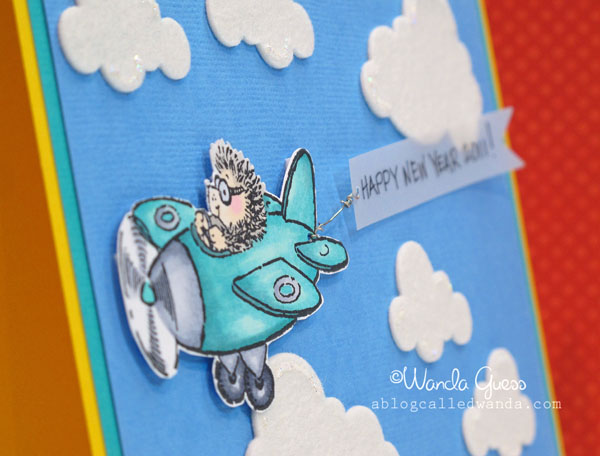
    Switching gears today I have two cards I made with the same stamp and the same theme – New Years! I used the adorable stamp from Penny Black called Hedgehopper. He's so funny in his little airplane. It is meant as a Valentine's stamp, but I made my own banner to fly behind him to announce a New Year's greeting instead.

    Here is the "day" version using a bright color scheme, some PTI felt clouds and an aqua airplane:


    A


    Here is the "night" version using some metallic fireworks, some blings, the cute Hero Arts townscape and a blue airplane:

    B


    C


    E


    F


    G


    H 
     Birdie signature! 

  • Merry Christmas to you

    From my family to yours…we wish you a very Merry Christmas and many blessings in 2011.

    Nativity 
    Now there were in the same country shepherds living out in the fields, keeping watch over their flock by night. And behold, an angel of the Lord stood before them, and the glory of the Lord shone around them, and they were greatly afraid. Then the angel said to them, “Do not be afraid, for behold, I bring you good tidings of great joy which will be to all people. For there is born to you this day in the city of David a Savior, who is Christ the Lord. And this will be the sign to you: You will find a Babe wrapped in swaddling cloths, lying in a manger.” And suddenly there was with the angel a multitude of the heavenly host praising God and saying "Glory to God in the highest, And on earth peace, goodwill toward men!" Amen!
    Luke 2:8-14

  • Merry Christmas Mittens…

    Hi everyone! Happy Christmas Eve Eve! This will probably be my last post until next week so I can relax and take some time out for festivities. I hope that each and every one of you has a wonderful Christmas with your friends and family gathered near to you. I hope Santa brings you stamps and that everyone you love is safe and healthy. Merry Christmas!

    Before I post my card, I have some BIG NEWS to share with you! I have been selected to be on the first ever iCopic.com Design Team! CLICK HERE FOR THE WEBSITE! They sell Copic Markers and stamps and ink and all kinds of wonderful stuff. They are also getting ready to open a store in the LA area. I'm excited about giving this a try. My time on the team will be three months and I will be posting projects made with their stamps and Copic markers. I hope you will follow along with me on this journey! More information to follow!

    Okee dokee…now for my last Christmas card of 2010:  


    Aa


    Mittens! Made in shades of cream, kraft and brown… You know all season I have been trying to mix it up with my color schemes for the holidays. This time I wanted it subtle and soft. I used my Cuttlebug and a Sizzix die to make these ADORABLE little mittens out of PTI felt. MMMMMM. Here's how they started out… 

    IMG_5165
     

    Ya know I had to add lace, ribbon and a little silver bell! I also made a snowflake embellie out of two punches, a button and some kraft twine…The snowflake background is an embossing folder and then I smudged some light brown ink over the top so the flakes would pop through.

    IMG_5167


    IMG_5185


    IMG_5186


    IMG_5187


    IMG_5189 copy


    IMG_5172

     Good-bye Christmas stamps….until next year…

    Christmas banner signature 
      

  • Sending Holiday Cheer!

    We are in the Christmas home stretch now! Only a few more days til Santa squeezes down the chimney to bring us some new stamps and paper! I have two more Christmas card projects to share with you this week and then we're moving on to some non-snowflake related items! hahaha.

    Today's card is of the CAS variety. What is a CAS card? Clean And Simple design. I love this type of design, but I tend towards the GOAYSSAMAGM design (Get Out All Your Stamping Supplies And Make A Giant Mess) cards! Or, as I like to say, more is more. So for this one I've toned it down and used some pretty patterned paper for my focal point and a sweet sentiment.


    A
     

    The tag and sentiment are from Papertrey Ink and the snowflake background stamp is from Amuse. The patterned paper is October Afternoon. Real Red and Kiwi Kiss inks from Stampin' Up and Brilliance white ink.

    B


    C
     

    This is a sweet little birdie I spotted at the mall Saturday night. Isn't he cute?

    D
      

    Christmas banner signature 

  • Collage Snowflake Card!

    Today's card was inspired by two beautiful cards I saw and saved. Do you ever see someone's cards and go "I NEED to try that!"? Well, that's what happened when I came upon this neat technique of stamping and then embossing and then inking… The results are cool! You could do this with so many different images and seasons. Love it!

    The two cards that inspired me are this one from Lin's gorgeous blog, and THIS CARD from Flickr. I really encourage you to check them out! And, give this a try!

    Here is my finished card. The bottom image is a big collage stamp from Hero Arts. Then you emboss images over the main image…and then get inky!

    A 


    I thought that my chalk inks worked very well for laying down the final colors. I used a palette of blues and lavendars. You can see that monster collage stamp here!  

    B
     

    Here, I've stamped my main image in black. Then I did snowflakes in clear ink and clear embossing powder over certain parts of the image. I also stamped dark blue snowflakes randomly.

    IMG_4966
     

    You can see where I clear embossed the snowflakes…now that I'm putting down that first layer of light blue ink. It's neat, because you can see the words underneath the clear part.

    IMG_4968


    IMG_4970
     

    This is a close up of the finished main image before I started to bling it up and before I cut it down to card size.

    IMG_4975


    Img_4976
     

    My sentiment was stamped and then cut out with the "fancy labels" Nestability set. I stamped little tiny snowflakes over the words. Sheer lavendar ribbon finished it off.

    IMG_4979_edited-1


    Z


    IMG_4982


    It's VERY stormy, rainy and windy here today. We are all snuggled up in the craft studio blogging and organizing. Mr. Buddy is fascinated by the rain and I caught him in a cute pose looking out the window at who knows what. Isn't he adorable!!?? Maybe I'm biased but I think he is the cutest cat in the universe! (Doesn't every mom say that?) hahaha.

    IMG_5199 copy 
     Thank you for coming by the old bloggy blog today.

    Good to see ya! Have a great week ahead!


    Christmas banner signature  

  • Stacey’s Stamping Stage Curtain Call #60 – Peace for Christmas

    Howdy! Is it Friday? Yup, I think it is! I lost track this week…but here we are. One week closer to Christmas and holiday fun. Is your shopping done? Are you ready? I think I'm about 90% ready so that's good. I'm more relaxed this year than normal and I'm not sure why. But I'm happy about it! This weekend we have some last minute shopping and errands. I'm working next week too. I hope you have a great weekend in store for you.

    Today's card is my entry for Stacey's Stamping Stage Curtain Call #60 Challenge. I love Stacey's blog and she picks great images to go with her color challenges. Given that the last card I posted took me FOR-ever to make, I thought with this one I would take it down a notch and do something elegant and more simple. You can't go wrong with this pretty color palette for Christmas, and the image made me think of a traditional Christmas feel. So…here's my card…


    A_edited-1


    Here is the Challenge Inspiration Image:

    Curtain_call_60_at_weddingsfresh


    B


    The "Peace" stamp is from an OLD All Night Media set that I've had for years. The flowers are from Prima and the patterned paper is Basic Grey. The stamp image has these little dots around the word and I thought…hey…why not add some bling! So I used pretty golden rhinestones to add some pop. Olive green is a favorite color of mine…

    Aa


    C


    Bb 
      Christmas banner signature 

  • Hero Arts Winter Contest – Christmas Village!

    Whew…I'm so excited to post this card! Monday was my day off and I spent the better part of the day creating this one! Seriously, I think it took me like five hours! Stamping, coloring, cutting, glittering, more cutting, more stamping, more glittering! Hahaha. Hero Arts is having a contest for December with a color challenge of kraft, cranberry, slate blue, pine green and white. I used all five! The contest also called for "adding shine" and I did that in the form of glitter. The prize is $50 in products! Woo Woo! Wish me luck! I had a lot of fun making this one and I hope you enjoy it. Thanks for stopping by today.


    A


    Dec_theme_500 


    B_edited-1


    The first thing I did (after choosing my Hero Arts stamp set and stamping the images in black) was to pick out markers in the challenge color palette. That way, I knew I would just color all the houses in those shades. This also made the finished project look uniform and eye catching. Yup, I used ALL those markers! It was fun mixing it up on each house. I love this set!

    C


    D


    E


    The next step was to make my background for this wee village. I stamped the trees in Adirondack Bottle Green ink which is a nice deep pine green. I stamped the snowflakes in Brilliance White ink.

    F


    I had to add some bling to my snowy scene by making my own glitter mixture. I took some plain chunky white glitter and added Prisma Glitter to it. Before I put the glitter on, I edged the snow in a light blue ink.

    Ff


    Here's my scene…now the hard part…trying to fit all those houses on there! Hahaha. My finished card is 4.25 x 8.5 inches. Sometimes you just need more room to stamp, ya know? I put the scene on a kraft base, then a layer of cranberry.

    G 
     

    The houses all have prisma glitter where the snow parts are. It's really hard to photograph glitter…trust me I tried! When I mounted the houses onto the card I put them on with double sided foam tape so they pop up off the card.

    Gg


    Hhhhh


    Hhhh 
     Christmas banner signature 

  • Coffee & Christmas Lights…

    Tonight I'm sharing with you one of our favorite holiday time traditions…Coffee and Christmas Lights! For years now, every winter, we go out scouting for the best holiday light displays! It's so much fun and I look forward to it all year. We try to go as many different nights as possible. The evening always starts with a trip to Starbucks for a Peppermint Mocha! (of course, right?) Then we pile in the sleigh, I mean truck, and head out. The DH drives all the time so I can look and relax. It's wonderful time together. We are so lucky that there are several places in Sac-town that go all out for Christmas lights. Last night's destination was downtown… They even put a map in our local paper! So, sit back and put your feet up…and I hope you enjoy the pictures!

    THIS is where it all begins….mmmmmm….

    A_edited-2


    Our beautiful State Capitol building and tree…. 

    DDD


    E


    FF


    FFF


     We have a little tiny ice rink right in the middle of downtown….

    G


    GG


    GGG


    GGGG


     This is one of my favorite places to go….

    HH


    HHH


    I


    And again….mmmm….

    II 
     And to all a GOOD NIGHT!

    Christmas banner signature
     

  • Peppermint Bark!

    Today I have a treat to share…and some stamping! One of my favorite treats to make and share at Christmas time is Peppermint Bark! MMMMMM. I love anything minty and chocolatey. Peppermint Mochas…York patties…and Peppermint Bark. It's super easy to make (although really messy) and a nice treat to give others. Everyone seems to like it. I had fun this year documenting the process for you and making some cute tags to put on the boxes and bags. I hope you decide to try it!

    All you need to make Peppermint Bark is Chocolate, Candy Canes, and Peppermint Extract! How easy is that? I like to buy Ghirardelli Chocolate because it seems more creamy to me. Don't use old chocolate because it won't melt nicely.

    Melting chocolate is simple, but you need to take your time so it doesn't scorch. I make it in the microwave! I like to use pyrex glass for the melting process. Put all the chocolate chips in the dish and microwave for about one minute. Stir and then microwave again at 30 second intervals…stirring each 30 seconds. To make it shiny, you can add about a teaspoon of crisco to the chocolate.

    A 
     

    Once your darker chocolate is melted (you can use milk chocolate or semi sweet or dark – your preference! I like to mix semi sweet and dark together) spoon it onto a cookie sheet lined with wax paper. spread it around to try to get a nice even layer. Then put it in the fridge. You want it very hard and cold before doing the next step.  

    B


    Now, the fun part! Smashing candy canes! Put them in a freezer bag and take out your agressions! Hee hee. You want some little chunks left for decoration. Now, melt your white chocolate same as the darker chocolate. After your white chocolate is melted, put in 1-2 teaspoons of Peppermint extract and candy cane chunks and stir, stir, stir!

    C 


    Take the darker chocolate out of the fridge and spoon the white chocolate on top. I like mine very separate, but some people wait for the hot white chocolate to melt the dark chocolate and swirl it. After you put on the white chocolate mixture, sprinkle more candy cane pieces on top! Then stick it back in the refrigerator.

    D


    This time around, I tried making some in this little silicone mini muffin thingee I have. It ended up making them like little candies instead of the traditional bark.

    F


    Let it cool for a long time – at least a few hours. Take your bark out of the fridge and break it into pieces. Now it's ready to eat!

    G


    I wish my computer had smell-o-vision so you could smell the minty-ness of this! It smells so fresh and yummy. Doesn't taste bad either (of course I had to taste test it, right?)

    I


    Here's how the little candy ones came out:

    Iiii


    Iiiii 


    Next, to start on the tags! I used this cute set from PTI – Tiny Treats Xmas – for the first set. I used Kiwi Kiss and Real Red inks from Stampin' Up and a giant punch I have had for years.

    IMG_4937


    For giving out, I used some of these boxes from Wilton. They are about four inches square and I found them at Joann's Crafts in the cake making section. Line the box with wax paper in case the chocolate melts.

    IMG_4946


    Ready to go!

    IMG_4948


    IMG_4952


    I ended up making three kinds of tags…of course, all with a peppermint theme! These were all the stamps I had that were candy cane related! Do you love that little penguin guy? SO cute!

    IMG_4959


    I used a few Copics for the image. I added glitter glue to the white parts of the candy cane and his hat. I put two leaf punches together to make it look like a wreath on the bottom.

    IMG_4962


    I only had a few of the boxes, so the rest of my treats went into cello bags and glassine bags. I stapled them shut and then double-sided taped the tags onto the front. Pretty!

    IMG_4963


    IMG_4965


    MERRY CHRISTMAS!

    L 
     

    Christmas banner signature 

  • Snow globe girlie!

    Whew! Friday it is! Two weeks before Christmas and one day before the hubs' birthday. Dang…talk about busy bees. This week went by in a flash. DH gets a wee bit jealous every year since my birthday seems to last an entire month and the poor dear only gets one day. So in honor of him, this week we have been celebrating the six nights of Markukkah aka Markmas. He has been taken out for dinner each night and also given a present each night! It's been a fun treat for us…and tomorrow is his birthday. Happy Birthday darlin'!

    My card for today is a little Christmas snow globe. I had fun trying out different images inside the adorable snowglobe until I found just the right one. It seems easier than it was to get something in that darn thing. The snow globe stamp is from Memory Box and the girl/bird is from Amuse. Hope you likey. Hope your weekend is full of joy and merriment for the season.


    A
     

    I decided to go really bright, bold and cheery with this card. This shade of citrusy clear green is one of my all time favorite colors. How can you be in a bad mood when you see that color?

    B
     

    My Copic palette:

    C
     

    I had to bust out the stamp-a-majig to fit her in there just perfectly! Every time I get it out I think to myself…self…you need to use that more often! 🙂
    D 
     

    I put some chunky white glitter on her coat and hat and on the tree. I used some stickles glitter glue to add some snow inside the globe. Use BG000 to edge the circle…to make it look like glass.

    E


    F


    G 

    Christmas banner signature 
     

  • A Card for a new soldier…

    Today's card is a patriotic card I made for a young, brand new soldier. One of my favorite things to do is custom cards for people. (Actually it probably is my favorite kind of card to make!) A really nice lady I work with has a son who is in boot camp right now. She had me make a card to send him, to let him know he is sorely missed at home. Also, today is Pearl Harbor Day, so I thought I would post this card in tribute to all our veterans, current and past. It was nice to get out some other stamps besides snowflakes and trees and ink up some stars and stripes!
     

    A


    The font for the word Jeremy is called "Top Secret" and I found it on dafont.com! I love that site…free fonts everywhere! I am sort of a font junkie and I always will look to find just the perfect one to fit the idea I'm cooking up. Definitely check it out. I highlighted the link for you!

    B 
     

    Partial supplies list… The stamp set is called Vintage USA and is from Close To My Heart. I like the vintage-y masculine feel to the set. Three different sizes of stars and love the flag image. I also used my versamark ink for the stars that are on the red paper background. I forgot to put that in the photo.

    C


    IMG_4729


    I jazzed up the envelope (just a little!!) to make it match the card. Printed his name larger and matted it on a piece of navy cardstock. Went a bit crazy with the stars… 

    IMG_4730


    I printed the inside on the computer also and then left some room for writing…added some of the patterned paper to tie it together. I hope he likes the card and that it reminds him that he is doing a good thing! 

    IMG_4731 
    Lots of love, until we meet again… 

     Christmas banner signature 

  • A cozy cabin Christmas card!

    Hello! Christmas is rolling right along! The little craft room elves (me) have been busy working around the clock making Christmas cards. How come every single year I say I'm going to start waaaaay ahead of time and every year I don't start waaaaay ahead of time!? I'm not as behind as last year. It all gets done, though, somehow. How are you coming along on your Christmas cards? It's been a good weekend so far and now I'm just wrapping some presents, making cards, and catching up on emails and blogging. Kinda wish I didn't have to go to work tomorrow…

    Today's card was made using a pretty stamp from Amuse. The entire circle is one big stamp. There are so many things you could do with it. To me it kind of looks like a snow globe without the bottom part.


    A


    Aa


    B


    Supplies…Not too many markers this time! Just a little bit of coloring and not really any shading involved. I used BG000 for the outline of the snowy hills. After I stamped and colored the image, I cut it out. Then I smashed the entire image into the Glue Pad and covered it (and me, and everything else) in microfine crystal glitter!

    C


    Layered dusty green, red and brown to pick up the colors in the cabin and trees. Stamped the snowflakes and the sentiment in Brilliance White Ink. Need to let that dry for a long time if you use it. The bottom layer was edged with a Martha Stewart punch. It's very spark-a-lay!!

    D


    Hh 
     

    Christmas banner signature 

  • A pause from the Christmas craziness!

    Christmas craziness is in full swing now! I have had fun activities and parties and get togethers three days this week already! (Yay!) Combine all that with shopping, wrapping, stamping, addressing, and shopping, and shopping…and a girl just needs a break! Today I am posting some Winter snow pictures I took last week and I'm taking a moment to breathe…a la Oprah Magazine's Breathing Space! Ahhhhhhh. A brief respite from the crazies…

    Respite: a reprieve: a (temporary) relief from discomfort; a pause from doing something (as work); suspension: an interruption in the intensity or amount of something; a pause for relaxation. Yes, that is exactly the word I was looking for! Have a great weekend everyone!


     A


    B
     

    Bb


    C


    F


    H


    Hh 
      

    Christmas banner signature  

  • Season’s Greetings! Waltzingmouse Challenge #25!

    Season's Greetings everyone! Today I have a fun card to share that is my entry for the Waltzingmouse Stamps Sketch Challenge #25! I have been a fan of Claire's stamps for a long time but this is my first time entering one of her challenges. I encourage you to check out her blog and her website. Her stamps are beautiful and elegant and also fun. Really high quality clear stamps that stamp like a dream. The entries into her sketch challenges are great – lots of her fans are from Europe so you get a different flair to the cards which I really enjoy.

    As you've probably noticed, I've gone a little crazy for the Penny Black stamps right now. I am in a total coloring phase and just have been having a great time trying to get things just right. It's making me practice and relax and get in the zone…

    Here is my finished card:

    A 


    B
     

     Here is the Sketch Image:

    WMSC25


    A close up of my coloring…I didn't take a picture of my pen choices this time because, basically, I used every pen! It took me a long time to get the red and brown just right. These are by far two of the hardest colors to work with. Her face is my standard E000 and RV10. I used G000 for the edges of the white part of her hat to give some dimension without adding color. After coloring in the image, I added pops of glitter glue and then stamped some snowflakes in a really light blue ink.

    IMG_4714
     

     My supplies:

    C


    IMG_4716


    To tie the sentiment back to the main image, I used the same snowflake stamp on top of my words. Of course, it also needed some BLING! hahaha.

    IMG_4718
     

    This is a combination of the snowflake punch (turquoise) and some pre-made embellies from my girlfriend Martha. I added some more BLING to them too!

    IMG_4719


    Christmas banner signature


  • Cozy Christmas House!

    Hello! Today is my last day of freedom… I have been off work for 20 days and tomorrow is when I have to go back. I have enjoyed my turn at domestic bliss, staying home, getting lots of things done, cooking, stamping and sleeping in. Now – back to reality and 5:00 in the morning wake ups! Argh. It's gonna be a tough transition. I must say that I do like my job very much. It's just that I hate morning! hahaha. I'll let you know how it goes. For today, I am enjoying some last few peaceful hours in the craft room and making cookies for the DH. Buddy is by my side. Life is good.

    I bought a gorgeous Impression Obsession Christmas stamp a while ago and really love it. Actually, I love all of the images in their "house" series. I have three of them, including this one. You may recall this card I did a while back for my friend Jilli Bling, using one of the stamps. Here is my card for today…

    A


    B


    That's a whole lotta markers for that one little house!!! This is my work space while coloring. I put my markers right in front of me so I can see all my choices. I wanted pops of red since it's for a Christmas card, and pretty shades of olive green… 

    C


    D


    I added micro fine crystal glitter to the tops of all the windows, steps, and roof. you can barely see it in the pictures, but it just makes the card look a little softer…like fresh snow!

    Ee
     

    The glossy sticker with the sentiment and the holly were embellies in my Christmas stash. I added some gingham ribbon, because I wanted that vintage feel.

    Eee


    F 

    I got my Etsy store up and running on Saturday. So far, there are only four cards for sale on there…just testing the waters with that. Check it out! Click on the link in my left sidebar… I am very open to any tips or suggestions anyone has on this topic!


    Christmas banner signature