Tag: distress inks

  • Tropical Leaves – watercolor style!

    Hello my dear crafty peeps! Hope you're having an awesome week! I went out to dinner with a girl friend last night and we had such a lovely conversation. She is so super busy, and I hardly ever get her all to myself, so it was a real treat. Don't you love that? We got caught up on loads of gossip and it was wonderful!  It's hotter than heck here still and I'm hibernating indoors as much as possible. The great studio purge of 2016 was under way all weekend. OY. I got rid of a lot of old paper, and old cards… And made a big bag of things to sell later too. Now I feel like I can think again in here. I am definitely at my most creative in a tidy space. I went to Container Store yesterday and picked up a few odds and ends. I'm sooooooo happy we finally have a Container Store in my town. Now I can just go buy what I need and not have to drive 80 miles each way. Yay! I'm trying really hard to get organized before the big holiday crafty season begins. You know what I'm saying!! Next week is August! For you local stampers, the Sacramento Rubber Stamp Convention is this weekend! I'll be working the front table – so say howdy!!

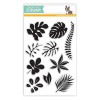
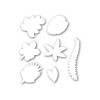
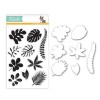
    The last Simon Says Stamp release was quite possibly my favorite release ever! I'm saying now, and I'll probably say it again… My absolute fav thing from the release is the Tropical Leaves stamps and dies. They are sooooooo pretty! (CLICK HERE for my other post made with these stamps). I have had the idea in my head of water coloring these stamps and I finally sat down and made some cards in that style. Hope you enjoy! I made two – with different word dies and different colors. Everything else is the same!

    I started with a nice crisp white card base. I die cut a Stitched Rectangle from Slate Cardstock and another one from Watercolor paper. Then I used mini distress ink pads to ink the stamps and stamp them onto the watercolor paper. I used a water brush to slightly soften the color and move it around. After the leaves were completely dry, I went back with pretty blue ink and watercolored the background. The trick to this is to let one layer dry first, so the leaves and the background don't blend together. 

    Simon Says Stamp Tropical Leaves stamps and dies. Card by Wanda Guess. Among the Stars product release Summer 2016. Distress Ink water coloring


    Here is the other color scheme! Same technique… Can't decide which one I like better!!! 

    Simon Says Stamp Tropical Leaves stamps and dies. Card by Wanda Guess. Among the Stars product release Summer 2016. Distress Ink water coloring


    I die cut the Painted Hello and Painted Thanks dies from crisp black cardstock. You can see that I added spritzes of bright white mist on both the card and the die cut. I really love this look! I don't know why, maybe it looks artsy or something? I also added just a few sequins to each card. The word dies are layered on with tiny strips of foam tape. 

    1


     To make my watercolor background, I smushed two colors of blue ink onto a clear stamping block. With my water brush, I added just a touch of water and to the ink and then picked up the  color with my brush. Easy and fun! 

    1


    1


    1


    This one orange leaf didn't stamp perfectly, but I just left it. Seems sort of batik?? That carved pumpkin distress ink is my favorite orange for sure. 

    1


    Simon Says Stamp Tropical Leaves stamps and dies. Card by Wanda Guess. Among the Stars product release Summer 2016. Distress Ink water coloring


    1


    To assemble my cards I adhered the slate cardstock panel first with tape runner. The top, watercolor layer, is attached with foam squares for a bit of height and dimension. Have I ever made a card without foam squares? I think not!! LOL. 

    1

    Thanks for stopping by! Have an awesome day and I'll see you soon! I have two projects on the Simon Says Stamp blog this week – one on Friday and another one on Saturday! Take care. XO

    REMINDER! RANGER SALE! Everything Ranger is on SALE at Simon Says Stamp until 7-29! Great time to stock up on Distress Inks, paints, stains, watercolor paper….EVERYTHING! Use code CHEM25. Click on the link below to go straight to the Ranger section of the store. YAY! 

    Ranger sale
    1 

    SUPPLIES FOR TODAY:

  • Watercolor Hydrangea with Distress Inks!

    Hi there! Happy Weekend! How are you friends? What's new? As you've probably noticed, I've been busy crafting up a storm! Dang, it's been paper and ink and stamps flying everywhere in my studio lately! It's all soooo very good! In addition to my post here today, I also have a post on the Simon Says Stamp Blog – a really cute Ice Cream Truck card! EEP – click here to check it out!

    Today, here, I'm posting my final project made with the new SSS Release from last week – Among the Stars (at least my final project for now!) I made this totally elaborate and very dimensional card using the new Hydrangea Petal Dies. This card really was a labor of love…late at night, with my pretty Distress Inks, like a mad scientist in her laboratory. The result is pretty fun and I'm excited to be sharing it with you. 

    The die cut for this flower is actually three of the same shape in four different sizes, perfect for layering and building a hydrangea flower. I've outlined my steps in photos later in the post, but here is a look at the finished card. I'm going to have to either hand deliver this one, or send it in a box! 

    Simon Says Stamp Among The Stars release. Hydrangea Petals Die. Card by Wanda Guess using Distress Inks and watercolor paper.


    Here is a close up of the petals and leaves. The card base is white, with just a half sheet of patterned paper to accent the flower. Everything was die cut using watercolor paper, and everything was colored with water and Distress Inks. Exact colors listed at the bottom of my post. Pretty pearls accent the centers of the buds and the leaves. This card has an old fashioned feeling to me, and pearl accents seemed like the right touch. 

    1


    Here is a side view so you can see how it is all put together. I used glossy accents to hold the flowers in place. You can see that each little bud is pushed right up against the next one, to make it look really nice and full, like a real hydrangea. The sentiment is clean and elegant and stamped in rich black ink. 

    1


    I started by painting a couple of sheets of watercolor paper in different shades of purple, violet and blue. In these step out photos, you'll notice that the petals look a lot more purple than in the final project. When I finished, I decided that I wanted more blue, so I added more paint later – that's the reason! After my paper was dry, I die cut as many petals as I could out of the watercolored paper. 

    Simon Says Stamp Hydrangea Die. Project by Wanda Guess. Distress Inks on watercolor paper.


    1


    I knew that I didn't want the petals to be flat, so I used the end of a rounded paint brush to gently push the centers in and therefore raising up the petals. This is what they looked like after that step of the process. 

    1


    1


    This is the fun part! I glued them together in layers and clusters. This is where I added more blue paint too! 

    1


    I wasn't to exact in my placement of everything. I don't think it matters in this instance – just keep building until you get a flower the shape you like! I watercolored some Clustered Leaves and added them underneath the flowers for pop of bright, fresh green. 

    1


    1


    1


    1


    1


    1


    1

    Thank you so very very much for stopping by today to see this project. I'm hoping I inspired you to spend part of your weekend being creative! Have a lovely day! XOXO

    1
    1


    SUPPLIES FOR TODAY'S PROJECT!

  • It’s Summer – I’m ready for ice cream!

    Hey party people! How was your Memorial Day Weekend? Nice to have a few days with the family and friends at the beginning of summer isn't it? I worked most of the weekend, which is so strange because it's the opposite of my 'old' life! I don't mind one bit though. I had a most awesome work assignment on Sunday helping Brenda photograph her Christmas Classics Collection for Sizzix that will be coming out soon. (Yes, we are talking about Christmas already!) I love to collaborate and we had a fun and productive day. It is super HOT here right now and it's supposed to be over 100 degrees for the next 5-6 days too. Guess I'll be staying inside! YUCK! I never was a hot weather person…. and now that I have reached a certain age…. I like it even less! 

    Because of the holiday, and because it's so hot, I was inspired to make a Summer card today! I used two of my favorite Simon Says Stamp Summer themed stamp sets – Pool Play and Cone Building. I adore these two sets for all the season's cards. They are fun and cheerful and sure to make you smile. I used a brand new paper pad too, and it just may be one of my favorite paper pads ever. (link at the bottom of my post). It's called "Sunny" and that's just what it is!  The patterned paper inspired the colors for the card. 

    Wanda Guess for Simon Says Stamp. Cone Building stamp set and Pool Play stamp set. Distress Inks. Ice Cream Card


    I started by stamping the ice cream cones with Distress Inks onto the smooth side of watercolor paper. Then I used a water brush and wet the ink and softened the edges a bit. I used a post it note for a mask on the top part of the cones so that the ice cream sits on there just right! I used bright green, orange and pink – pure Summer! I stamped the sentiment with Archival black ink. I wasn't sure if I was going to add some ink splatters, so I used waterproof ink just in case. 

    1


    This heart image comes with the Cone Building stamp set so I added a few accent hearts in matching green ink. And, you know, some sequins!

    1


    The white paper layer is attached to the card with foam squares. This is an A2 card. I love the striped paper for this card because it totally reminds me of an ice cream shop! 

    Wanda Guess for Simon Says Stamp. Cone Building stamp set and Pool Play stamp set. Distress Inks. Ice Cream Card


    1


    Wanda Guess for Simon Says Stamp. Cone Building stamp set and Pool Play stamp set. Distress Inks. Ice Cream Card

    Best wishes for a wonderful week ahead!

    Happy Summer! XOXO 
    1

     
  • Papertrey Ink May 2016 Customer Blog Hop!

    Hi crafty people! How are you? How's your week going? Happy Humpday! It's the 25th of the month, which means that it's time again for the awesome and inspiring Papertrey Ink Customer Blog Hop! I am always happy when I have time to enter this one. The hop is open to everyone and anyone! There is an inspiration image, and the only rule is that you have to use at least one PTI product (no problem at my house!!) The inspiration image this time spoke to me right away. I'll talk about that more later in my post. I hope you will bust out the stamps and enter your card too. Everyone's cards are always so beautiful. Have an awesome day! XOXO6a00d8341c64e753ef016302de13ad970d-450wi

    Here is my finished card! I used the Painted Petals Anniversary stamp set and my trusty Distress Inks… Combined the inks with lots of water and tried to re-create the soft feeling of that gorgeous inspiration image. 

    Papertrey Ink Customer Blog Hop for May 2016. Painted Petals stamp set. Card by Wanda Guess.


    Here is a close up of the colors and how I layered the flowers. You can see I added just a few white sequins too! To make the flowers I used different colors of mini Distress Ink Pads and then stamped onto watercolor paper. Right after stamping, I used a paint brush and lots of water and mixed the colors together. This is one of those projects that I think looks better in person. It's really vivid!!

    PTI Painted Petals stamp set. Card by Wanda Guess


    Here is the inspiration image. Don't you LOVE all those soft beautiful colors blending together? Besides making me wish for a popsicle, it totally inspired me. I chose to use the color palette from the picture. I also loved the red and teal speckles, so I used that too! Finally, instead of using one sentiment and doing it in black – I used grey ink! 


    6 PTI blog hop inspiration image


    Here's a close up of the sentiment. After I stamped the large word, I used my water brush to soften the edges…. You can also see my speckles in red and teal. That really adds something to the overall look. 

    6a00d8341c64e753ef016302de13ad970d-450wi


    PTI Painted Petals stamp set. Card by Wanda Guess


    6a00d8341c64e753ef016302de13ad970d-450wi

    Thanks for stopping by today! Looking forward to seeing all the other cards and I hope to see YOUR card over there too! CLICK HERE to go to the Papertrey Ink blog to see the blog hop post! 
    6a00d8341c64e753ef016302de13ad970d-450wi

  • Succulents are in right now!

    Hey friends! Checking in to say howdy and get caught up. How are you? How was your week? My week was very low key and quiet. Got some things done around the house and got some rest. It is warm here already – Summer is coming for sure. I've kind of been in a bit of a funk – just quiet and thoughtful…nothing wrong or anything. I feel like I have finally adjusted to my new life as a work at home person, but sometimes I get lonely and I miss having crazy co-workers and chit chat in my day! It is hard to find a routine, isn't it? For my entire life I was up and out the door in a flash every morning! I sure like having my coffee with Buddy each day. Sorry to ramble on! Hope everything is good with you!! 

    Well, something happened the other afternoon…. I stamped just for the heck of it! I didn't have any current commitments or assignments for anyone and Lord knows I have loads of uninked stamps laying about! So I put on some tunes in the studio and made this card to share today. Have you noticed that succulent stamps are H-O-T right now? All the big companies have super cool and fun succulents for us to stamp and make cards with! Who knew this would be a thing? I am liking it though! For this card today, I used two of the Succulent Stamps from Hero Arts and a sentiment stamp from Savvy Stamps (links at the bottom). I had a lot of fun water-coloring with my Distress Inks too!

    Here's the finished card! I used a kraft card base (you know that's one of my fav things to do) and then layered watercolor paper with some pretty teal cardstock.  

    Hero Arts succulents stamps. Distress Ink watercoloring. Card by Wanda Guess


    I started by stamping the two succulent stamps in Rusty Hinge Distress Ink onto a watercolor panel. Then I took a water brush and went around the images to soften the edges. Next I splattered some Crushed Olive Distress Ink onto the panel. Then I used a sponge dauber and Antique Linen Distress ink to gently ink the edges all the way around. I set that part aside to dry.I stamped my two main images in Archival Black ink onto watercolor paper. I used my Mini Distress Inks and a water brush to color the pots and the plants. Turns out that Rusty Hinge ink and Walnut ink make the perfect terra cotta pot! I added some touches of Evergreen Bough Distress Ink for some blue tones. I cut the images out by hand since I do not have the matching dies. I adhered them to the main panel using foam squares. 

    Hero Arts succulent stamps. Card by Wanda Guess. Distress Ink Watercoloring


    The sentiment was stamped in Walnut Stain Distress Ink and then softened again with my water brush. Here's a close up!

    1


    1


    1


    Some pretty natural cord and a few enamel dots finished off the whole card! 

    1
    1

  • Watercolor butterfly friends….

    Happy Sunday crafty peeps! Have you been able to get crafty this weekend? I worked in my studio all day yesterday and it was grand! I made some projects for the Simon Says Stamp blog for later in the week and then made a pretty watercolor card to share with you for today! Can you tell I am already dreaming of Spring colors and flowers? I'm sorry to say that I am/was over Christmas crafting!! In our creative world it seems like Christmas crafting lasts for months… I'm ready for aqua and lavender and yellow! Hahahaha. So today's card is full of butterflies and leaves. I hope you like it! I used my Distress Inks and some favorite SSS stamps and dies to make this friendship card…

    1 Simon Says Stamp Leaves and Butterfly. Watercolor with Distress Inks. Card by Wanda Guess


    The background was made by using the large background leaves stamp from SSS (Supply links at the bottom of my post). I inked directly onto the stamp with my Distress ink pads. Then I took a water bottle and misted the stamp all over. Then I stamped onto some watercolor paper, letting the stamp sit on the paper for just a few seconds to let the colors run together. I used Wilted Violet, Twisted Citron and Peacock Feather. YUM! I dried the image with my heat tool after stamping. Then, I sprinkled some water color droplets on top. Tip: Do the water splashes/drops after the initial image is dry! 

    1 Simon Says Stamp Leaves and Butterfly. Watercolor with Distress Inks. Card by Wanda Guess


    I die cut the Chrissy Butterfly die three times out of watercolor paper. I watercolored the butterflies using a water brush and Distress Inks. After they were dry, I used Mister Huey's white mist to add some visual interest. The friends die was cut out of crisp black paper. 

    1 Simon Says Stamp Leaves and Butterfly. Watercolor with Distress Inks. Card by Wanda Guess


    1 Simon Says Stamp Leaves and Butterfly. Watercolor with Distress Inks. Card by Wanda Guess


    I glued the butterflies down only in the center and gently folded their wings upward with my fingers. I added Doodlebug Glitter Sprinkles to the centers of the butterflies. 

    1 Simon Says Stamp Leaves and Butterfly. Watercolor with Distress Inks. Card by Wanda Guess


    1 Simon Says Stamp Leaves and Butterfly. Watercolor with Distress Inks. Card by Wanda Guess


    1 Simon Says Stamp Leaves and Butterfly. Watercolor with Distress Inks. Card by Wanda Guess


    1 Simon Says Stamp Leaves and Butterfly. Watercolor with Distress Inks. Card by Wanda Guess


    Thanks so much for coming by to see me! Hope you have a happy Sunday and hope your week ahead is a great one! I cannot believe tomorrow is February 1st already! Yikes! I don't have a ton going on in my life next week, so hopefully there will be lots of stamping time! XOXO 

    Simon logo
    Simon logo

  • Color Pop! Candied Apple!

    Happy Color Pop Day! I have a super fun Valentine Project to share today with bright red hearts! I am so happy every month when I get to share my Color Pop feature with you! Thanks for being there with me all year as we crafted with the new Distress colors on the Simon Says Stamp Blog! Sadly, this is the last new color! I can't believe it's been an entire year and twelve colors already. What a cool project! Today's final installment of Color Pop is live on the SSS Blog right now. There is a lot of news and also some updates on the fabulous Simon Says Stamp Blog and I hope you will pop over there and leave some love.

    The last Color Pop post is for the ink color for December, which is Candied Apple! Another pretty shade of red to add to our stash. It's bright, clear, and oh so pretty. It is truly candy apple red! It's perfect for Valentine's Day…and I know I'll be using it for Christmas projects too. Lovely! 

    You know if it's Simon Says Stamp, then there must be cool prizes…and there are! Leave a comment over on my SSS Blog Post post for some prize swag! Sweet! Big thanks to Heidi and the rest of the crew at SSS for giving away such great prizes!

    Here is a very sneaky peek at my project:  

    10

    CLICK HERE TO SEE THE ENTIRE PROJECT! 


    Here is my color swatch for this month. Candied Apple fits right in with all the pretty red tones in the Distress Ink family. It is very vivid and clear. CLICK on the photo below to see all the different mediums it comes in. It's the perfect warm-toned red. OOH LA LA.  

    1


    In case you didn't see it - CLICK HERE to see last month's project tutorial. It features the gorgeous Lucky Clover Ink. Here is the coffee themed card I made!  

    1 Lucky Clover SSS Blog 12-30-15


    Thanks for following along with me on this Color Pop adventure for the new colors of 2015!

    Stay tuned, I might just keep it going! Have an awesome day.

    Until we meet again – happy crafting! 


    Simon logo
    Simon logo

  • A bright and colorful Birthday card in the middle of Christmas crafting!

    Hey everyone! I've been going a hundred miles an hour non stop the past few days! I stayed up until midnight the other night addressing Christmas cards — and only got about half of them done! YEEKS! I'm still waiting for some online orders to come in so I can wrap gifts and get those in the mail too. Yesterday was my hubs' birthday and he chose for his birthday activity a trip to the San Francisco Zoo! So we had a really nice day outside all day in the fresh air. The zoo was deserted so it was like it was open just for us! CLICK HERE if you would like to see some of my photos from the Zoo! Today we are heading out to one of the little mountain towns near our house – they have a real old fashioned Santa Parade every year and we are going to see that and get some more holiday spirit! I hope you have a really fun weekend planned! 

    Today it's another edition of Weekender with Wanda on the Simon Says Stamp Blog! Here's a sneak peek of my project. CLICK HERE to go over and see my tutorial for making watercolor roses with the new dies from SSS. I hope you like it! (Also leave a comment for a chance to win a prize!)


    Simon Says Stamp Single Roses Dies. Diecember release. Card by Wanda Guess. Distress Inks watercolor

    3
    3


  • Color Pop #9!

    Happy Color Pop Day! I have some rustic and homey Thankgsiving place cards to share today, with pretty Autumn colors. I love sharing my Color Pop feature with you every month. Thanks for always joining in the fun with me here and on the Simon Says Stamp Blog too. What are we going to do once there aren't any more new colors!? The color for November has been announced (Lucky Clover) and then there is only one more! 

    Today is installment number nine in the Color Pop Series on the SSS Blog. There is a lot of news and also some updates on the fabulous Simon Says Stamp Blog and I hope you will pop over there and leave some love.

    Today is the post for the ink color for October, which is, appropriately enough, Carved Pumpkin! What a perfect shade of orange! Warm, rich, vibrant! I was inspired to use fall colors – I love fall colors (always).  

    You know if it's Simon Says Stamp, then there must be cool prizes…and there are! Leave a comment over on my SSS Blog Post post for some prize swag! Sweet! Big thanks to Heidi and the rest of the crew at SSS for giving away such great prizes all the time. Right!? 

    Here is a very sneaky peek at my project: 

    8


     CLICK HERE TO SEE THE ENTIRE PROJECT! 


    Here is my color swatch for this month. Carved Pumpkin fits right in with all the pretty warm orange tones in the Distress Ink family. It is very vivid and clear. CLICK on the photo below to see all the different mediums it comes in.   

    1


    In case you didn't see it - CLICK HERE to see last month's project tutorial. It features the gorgeous Wilted Violet Ink.  Here is the tag I made!  

    1


    Next month's color is the awesome Lucky Clover!  It's already in the studio and I'm anxious to ink it up. Thanks for following along with me on this Color Pop adventure! Have an awesome day. Until we meet again – happy crafting!  

    Simon logo (2)

    Signature typewriter

  • It’s my birthday! And I’m so thankful!

    Wooooot wooooooot! It's my birthday today! Gonna party, like it's my birthday…. Yep, I'm a November baby! (A Scorpio! EEK!) It's my favorite month of the year! What is better than November? Um, nothing! There is my birthday (of course), and Football, and Leaves, and Thanksgiving, and sweaters, and Pumpkin Spice Lattes! It's all wonderful! It is the month when we try the most to be thankful and grateful and that is foremost in my mind as we start this new month. How sweet Autumn truly is. I'm so blessed…and so thankful for everything that has happened this year so far. Right now the hubs and I are on a mini getaway to the ocean – my favorite place. I've been looking forward to it for months. It's such a great time of year to travel – hotels are empty and inexpensive and it's more quiet everywhere. As you read this, I hope there is fog in my hair and that I'm wearing a big ole sweater at the beach! I'll be back soon! 

    In honor of the start of November, I made a card using some of my very favorite leaf dies – from Lawn Fawn. Now there are two sizes, regular stitched leaves and mini stitched leaves. Yay! They are the perfect sizes for cards. (Supply links below). I used a pretty sentiment stamp and let the leaves be the star of the card…. 

    Autumn Card using Lawn Fawn Stitched Leaves and Distress Inks. Card by Wanda Guess


    I die cut the leaves out of Papertrey Ink Confetti White cardstock. Then I inked them up with many shades of Mini Distress Inks using a sponge dauber. Here you can see that I ended up edging all of the leaves with Barn Door ink. That was a mistake! I meant to grab the Corduroy ink! But, you know what? I reallllly like it with the red! A happy accident! 

    1


    I tacked my sentiment strip down with glue on either end and left the center open to tuck my leaves in. The background paper is from Stampin' Up from a few years ago. Presently hoarding a roll of that stuff. Delicious! The pretty twine is from Lawn Fawn. The sentiment is from Impression Obsession. 

    1


    Autumn Card using Lawn Fawn Stitched Leaves and Distress Inks. Card by Wanda Guess


    Now, you did not think I was going to make a card without any enamel dots did you???!!! The leaves are all mounted onto the card using foam squares for a bit of dimension. 

    Lawn Fawn Stitched Leaves Dies


    1


    1


    Autumn Card using Lawn Fawn Stitched Leaves and Distress Inks. Card by Wanda Guess


    SO….one of my birthday presents was a TATTOO!!!! Yes! Me! It's very small, and kinda cool, and it is 100% me. ***CLICK*** So, here's my 51st birthday portrait! (Taken on Halloween!) 


    CLICK - Wanda Guess photo


    Oh, sweet Autumn indeed! Where every leaf is a flower!

    Happy November everyone. Best wishes for an awesome week. XOXO 

    Signature typewriter

  • Papertrey Ink Customer Blog Hop – Fall Chalkboard!

    1

    Happy Friday! Fri-yay! How was your week? Hope it was excellent! I've had a wonderful week with lots going on. Tuesday I was able to finally get to San Francisco to meet my sweet friend's new baby boy! (I got a cold the last time I was supposed to go, and didn't want to make him sick). We had a marvelous visit and he is cute as a button! It's been about a million years since I held a tiny baby. I loved it. I've been doing lots of stamping, reading and pondering also. There are three excellent books I've been studying and reading (CLICK HERE) and they are opening my mind to an entirely new way of thinking about being an artist and creative person. God is sending me exactly what I need, and it is magical. I'm feeling super positive and blessed right now. Lucky me. Grateful me. 

    Today I'm sharing the card I made for the Papertrey Ink Customer Blog Hop for this month! YAHOO. The inspiration image is GORGE. I was all on board right away. The hard part with this one is that I had TOO many ideas! One of my favorite stamp sets from PTI is called Graceful Greetings and I used that set with the chalkboard stamping technique. Then I accented my card with the (new to me) Branching Out die. Hope you likey.  

    Papertrey Ink Blog Hop. September 2015. Graceful Greetings stamps. Chalkboard stamping technique. Card by Wanda Guess


    Instead of using pure black paper, I went with the Smokey Shadow paper (also from PTI). I think it's just a shade lighter than black and that makes it look more like a chalkboard. And, it's just a bit softer. For my leaves, I die cut the image with watercolor paper and then used several shades of Tim Holtz Distress Inks and a water brush. (Squeezed Lemonade, Mustard Seed, Spiced Marmalade and Ripe Persimmon) (now I'm hungry, LOL). Then, I layered my card with a small edge of bright yellow. 

    Papertrey Ink dies and stamps. Watercolored with Distress Inks. Card by Wanda Guess


    PTI Branching Out die


    Here is the Inspiration Image for this month! 

    CLICK HERE to see Betsy's tutorial on Chalkboard technique.

    1


    After I stamped my main sentiment, I added a heart and some swirls from different stamp sets. I also used some dots too. The main images were all heat embossed with Versamark Ink and white embossing powder. I used my finger and added some very light smudges of white ink around the words to really look like chalk. I wanted to mimic the berries in the photo so I used a few right red enamel dots.

    1


    The Branching out die is very large, so after I inked it up, I ended up cutting two of them into pieces to layer around my focal point. 

    1


    Papertrey Ink Customer Blog Hop. Wanda Guess September 2015


    Check out the Papertrey Ink Blog to see all the other entries – and to enter your own creation! It's open to anyone and everyone and it's so fun to play along! Have a great weekend. XOXO

    1

  • Stamp-tember Exclusive from Hero Arts and Simon Says Stamp!


    Herostamptember15


    Hello my sweet crafty friends! Happy weekend! YAY! The Stamp-tember awesomeness continues! Hasn't it been such a fun month of new surprises and new stamps every week? There is still more to come! This week we had the release of an exclusive stamp and die set collaboration between Hero Arts and Simon Says Stamp. I know I will use this set a lot. It's perfect for many occasions when you need to let someone know that you're thinking of them and lifting them in prayer. 

    I made a clean and simple card using the beautiful Stitched Daisies Dies and the new stamp set called Prayers. This card layout can be made in any color palette and is easy to pop in the mail. My finished card is four and a half inches square.  

    Herostamptember15


    I die cut my flowers out of white paper and then colored them with Squeezed Lemonade and Wild Honey Distress Inks and a sponge dauber. I die cut the prayers die from crisp black paper. I always have loved the combination of yellow, white and kraft together. I think it feels friendly and sweet. I added the tiny hearts to the flower centers (they come with the stamp set) 

    Herostamptember15


    Here is the graphic for the entire stamp and die set.

    Click the image to order it from SSS!

    Herostamptember15

    Thank you for once again joining me in the Stamp-tember festivities! Hope you have a marvelous Fall weekend planned. See you soon! XOXO

    Herostamptember15
    Herostamptember15

  • Happy STAMP-tember Blog Hop!


    Stamptember15bloghop


    Hello my dear crafty friends! It's Stamp-tember! Click here to read more about what amazing fun that means for us! Stamp-tember is a month long creative celebration put on by the lovely folks at Simon Says Stamp. This is the seventh year of Stamp-tember! I love it because it's a time for all of us to share inspiration and creativity with each other. All month there will be prizes and tutorials and inspiring things. You don't want to miss any of it!! Our creative community is so fun and it's great when we can all celebrate together. Many thanks to Heidi for this wonderful event. XO 

    CLICK HERE TO SEE THE ENTIRE NEW RELEASE!

    For me, Stamp-tember is always the kick off to my favorite crafting seasons….Fall and Winter. There are so many beautiful products this year. Wow. And, all month long there will be new products rolling out. There are special and limited edition product collaborations with many of our favorite companies. I literally cannot wait! I feel so very fortunate to be a part of all of it! Truly. 

    Today is the big Stamp-tember Blog Hop! Woooo hoooo! What a great way to kick off the festivities. CLICK HERE to see the entire blog line up. Did you arrive here from Lisa's Blog? Yeah, isn't she fabulous??At the end of my post, I'll give you the link to the next stop of the hop – amazing Yoonsun! 

    You guys know me by now, and you know I can't share just ONE card with you right? I have three to share today. Two Fall cards and one CAS floral card. I'm featuring so many of my favorite new items from the collection. Okay, let's get started! 

    Fall hugs! I used the Stitched Pumpkins, the Alphabet Blocks, the Stitched Ovals, and the Scripty Big Hugs dies for this project. I also used the pretty leaf stamp as an accent from the Oh Happy Day stamp set. I added just a touch of pretty plaid paper and some kraft cardstock. MMMMM. 


    Simon Says STAMPtember 2015. Card by Wanda Guess Stitched pumpkin dies. #sssfave


    I cut out my pretty stitched oval and used a sponge dauber to ink the edges with Antique Linen Distress Ink. I stamped my background leaves also in Antique Linen ink. I die cut the stitched pumpkins from vanilla cardstock. I colored the pumpkins with three shades of yellow and orange distress inks and a small sponge. The quick and easy way to have "highlights" is to leave some white space in the middle of all of your inking! I colored the leaves the same way and mounted them onto my oval with foam tape. I REALLLLLLY love these pumpkins!! 

    1


    1


    Autumn card with pumpkins, Simon Says Stamp exclusives. Card by Wanda Guess


    Next up are some pretty Autumn sunflowers! For this one, I created my own loose gingham background paper with the new Basic Stripes stamp set and some SSS Willow Ink. I also used the new Radiant Sunflower Dies (swoon) and the Oh Happy Day stamp set with matching dies. 

    Simon Says Stamp STAMPtember new release. Sunflower dies and stripe stamps. Card by Wanda Guess #sssfave


    I cut the die shapes out of brown Bazzill cardstock and the flower petals out of white cardstock. I inked the flowers with a few shades of SSS Inks – and the leaves too. I used the same color of green (Willow) on the leaves and the gingham – to tie my project together. The background was easy to make using the stripes stamps! 

    1


    The sentiment is stamped in rich brown ink onto cream cardstock and cut out with the matching tag die. I added some rustic twine and some bright yellow enamel dots to finish it off! 

    1


    1


    Last, but not least, I HAD to use this gorgeous new Stitched Daisies die! It's sooooooo pretty! I used a sheet of Lawn Fawn printed paper and then matched the ink to it. I used the Best Hugs stamp set for my bold crisp sentiment. This is a quick and CAS card that would work for just about any occasion! 

    Simon Says Stamp STAMPtember exclusives 2015. Floral clean and simple card by Wanda Guess #sssfave


    1


    Whew! Thank you so much for coming by today and sharing my excitement about Stamp-tember! Next up on this super fab blog hop is the wonderful Yoonsun Hur! I guarantee you're going to love what she made! Get to hoppin! And, remember, there are LOTS OF PRIZES so be sure to leave comments on every blog! Until we meet again my friends….. Here are your links for today: 


    11

  • Papertrey Ink Customer Blog Hop – Fall Leaves!

    Hello friends! It's time for another fun Papertrey Ink Customer Blog Hop! Yeah! I had lots of fun making this card with my new PTI supplies that arrived on Saturday. I used the new Leaf Silhouette Dies and the pretty saying from the new stamp set called Pumpkin Patch. The inspiration image has the most beautiful warm, rich color palette and I used the colors as my 'take off' point for my card. All of my dies were cut with watercolor paper and then colored with different shades of Ranger Distress Inks. YUM. My finished card is a five and a half inch square.  

    Papertrey Ink Blog Hop - August 2015 - card by Wanda Guess


    I never would have thought to include pink in a Fall color palette, but I absolutely LOVE it! I chose each of the tones from the inspiration photo and made a leaf. Then I added a few of the leaf overlays in dark rich brown. 

    1


    Here is the inspiration image with all the gorgeous colors!
    1
    1


    For my background paper, I used watercolor paper and then speckled brown ink all over it. Then I distressed around the edges with Antique Linen Distress Ink and a sponge dauber. I used a medium tone orange for my layering piece. I slightly offset the top leaf layers for kind of a 'funky' look. 

    1


    I wanted to somehow incorporate the rope/twine/yarn in the photo so I made a circle of jute in the center of my leaves before I mounted my sentiment. For the sentiment, I stamped it in dark brown ink and then freehand cut out a banner on cream cardstock. 

    1


    1


    Papertrey Ink leaves - card by Wanda Guess - Distress watercoloring


    The leaves were mounted on to the card using foam tape, for just a bit of dimension. Here's the top down view. I am seriously smitten with this color combination. So much fun to play along with this challenge every month! 

    Papertrey Ink Blog Hop - August 2015 - card by Wanda Guess


    Be sure to pop over to the Papertrey Ink Blog and enter your own card! 

    Have a splendid week! 

  • Color Pop #5!

    Hi everyone! Hope your week is going great so far. Summer keeps rolling on and there's no stopping it! EEEK, but if you go to Target, I think it's Fall already! LOL. I'm not ready yet…. Still enjoying those lazy days of Summer with lots of daylight and Farmers Markets and sunshine….   

    Today is installment number five in my fun Color Pop series. I love sharing this with you each month! I have with some news and updates about my this feature over at the fabulous Simon Says Stamp Blog! Today is the post for new ink color #6, which is the dark and mysterious Hickory Smoke! I have to tell you that this color stumped me at first, but then as soon as I started using it I realized that, yes, I love this color too! It's the perfect cool grey… Like steel or fog or sterling silver. YUM. Then, how to decide what colors to "pop" with it! I decided on a retro fifties color palette (using Spun Sugar and Squeezed Lemonade inks) and created a gift box that would be great for a wedding present, a birthday gift, or Mother's Day gift card. (jewelry would fit perfectly inside!)  

    You know if it's Simon Says Stamp, then there must be cool prizes…and there are! Leave a comment over on my SSS Blog Post post for some Tim Holtz swag! Sweet! Big thanks to Heidi and the rest of the crew at SSS for giving away such great prizes all the time. 

    Here is a very sneaky peek at my project: 

    Hickory Smoke by Wanda Guess - gift box

      CLICK HERE TO SEE THE ENTIRE PROJECT!


    Here is my color swatch for this month. Hickory Smoke fits very nicely into the bluish grey color family. It is very moody and cool. A soft grey that will work for so many different projects. Click on the photo below to see all the different mediums it comes in!  


    Hickory Smoke color swatch by Wanda Guess


    In case you didn't see it - CLICK HERE to see last month's project tutorial. It features the lovely Twisted Citron Ink! I used it with some bright Summer colors to create a beachy themed card. 

    Twisted Citron project


    Coming up next month is the super awesome Blueprint Sketch! It is the exact color of blueprints. A gorgeous true blue with just a slight hint of purple undertones. You're gonna love that one too. I've already made a project or two…. Thanks for following along with me on this Color Pop adventure! Have an awesome day. XOXO 


    Simon logo (2)

    Signature typewriter

  • Hello Little Prince – A special baby card!

    HEEEEYYYYYYYY! I'm back! Where did I go? Who knows? Whew, been super busy and not crafting a whole lot. But here I am. And I have a really fun and special card to share today! There is so much going on in my life right now. Dang. I'll share more, but let's just say that I'm inside a Ninja blender the past couple of weeks. But things are going to calm down here soon and that's a good thing. Plus, this weekend I'm going to an AWESOME crafty class with two of my very favorite crafty gurlz. I'll be sure to post about it too! 

    Anyhoo, today's card! One of my very dear and sweet friends had a baby on Saturday! A 4th of July baby! How cool is that? I met her 7 years ago when we used to work together and all she really ever wanted was to find a good guy and be a mom. I have seen her date, then we went to her wedding and now she has a beautiful baby. The circle of life! (Anyone have a lion cub to hold aloft?) LOVE it. And her dreams have come true! I am so very happy for her and she is going to be such a good mom. I cannot wait to meet the little man soon. But, until then, I had to send a card (of course!)

    I busted out this adorable stamp set from Lawn Fawn and my trusty baby blue gingham paper….and my new Kuretake Clean Color Markers and made this card. I make tons of cards and I love doing that – design teams, blog hops, etc. But, what is the BEST about being a stamper is to make a special card filled with love for a specific person. It fills my heart and reminds me of the purity of what we do. Send hugs in the mail. 


    Lawn Fawn Stamp Set Hello Baby. Card by Wanda Guess


    It's been a while since I made a circle card. I used a big scalloped circle die from Sizzix (From Stampin' Up) and cut out three gingham circles. Two are glued back to back for the bottom piece of the card and the other one is for the top of the card. The circles are held together with a brad. I stamped my frog and colored him with Kuretake Clean Markers. The cat tails and lily pad were stamped with Distress Inks. 

    Baby Card with Lawn Fawn stamps


    Here are my two pieces before I hooked them together with a brad. And, you can see the inside of the card. For the blue background behind the frog I gently sponged some Salty Ocean and Tumbled Glass Distress Inks and then swirled the color around with some water on a paint brush. Nice and soft. 

    1


    The stamp set has matching dies….of course. Here you can see the brad up close. The card just sort of swings apart on the brad, like a hinge. 

    1


    I made a matching gingham envelope with my Envelope Punch Board. I cut out a stitched rectangle in white and stamped the baby's name on it. The alphabet stamp set is from Lawn Fawn and it's called Violet's ABC's. The tiny stars are part of the stamp set. 

    1


    Baby Boy Card by Wanda Guess. Lawn Fawn Hello Baby Stamp Set


    The envelope is 5×5 inches square, so that gives you some scale as to how big the card is. Can't wait to get this in the mail tomorrow. Yay! 

    Baby Card and envelope. Lawn Fawn stamps. Card by Wanda Guess


    Thanks for stopping in to see me and see what I'm up to. Hope you are having a fantastic week so far. Sorry to be so silly in my post. I had A LOT of coffee today and I've been up since 4:30 am. Yikes. Love you guys. XOXOXO

    1 

  • Color Pop #4!

    Hi everybody! Happy Summer! It's officially the middle of Summer and there is a lot going on! Hope your week is going well. I'm excited for a three day holiday weekend. No big plans – the hubs and I are thinking of taking a photography class on Friday but we're still undecided. Something about it being 110 degrees outside kinda cooks my brain and slows me down! Do you have fun 4th plans?? Be sure to check in with me later in the week because I have a neat-o patriotic project to share!  

    I am blogging today with some news and updates about my monthly Color Pop Feature over at the fabulous Simon Says Stamp Blog! Today is the post for new ink color #4, which is the beautiful Twisted Citron! OOOOH. I think I say this every month…but this green is my favorite! LOL. It's yummmmy! 

    You know if it's Simon Says Stamp, then there must be cool prizes…and there are! Leave a comment over on my SSS Blog Post post for some Tim Holtz swag! Sweet! (It's a cool Tim Holtz tote bag!)

    Here is a very sneaky peek at my project: 

    Simon Says Stamp Color Pop Twisted Citron - by Wanda Guess


       CLICK HERE TO SEE THE ENTIRE PROJECT! 


    Here is my color swatch for this month. Twisted Citron fits very nicely into the green color family. It is very bright and citrusy. In other words…it's perfection. A very good addition indeed! Click on the photo below to see all the different mediums it comes in! 

    Twisted Citron Color Swatch - for Simon Says Stamp - by Wanda Guess


    In case you didn't see it - CLICK HERE to see last month's project tutorial. It features the lovely Fossilized Amber Distress Ink! I paired it with fabulous Picked Raspberry to make some bright flowers. MMMM.  

    Fossilized Amber Color Pop Project by Wanda Guess


    Coming up next month is the super awesome Hickory Smoke. It's a perfect shade of cool soft grey. Not too dark…just right.  So I'll be back next month with a new project featuring Hickory Smoke! Thanks for following along with me on this Color Pop adventure! Have an awesome day. XOXO


    Simon logo (2)
    Instagram not square

  • 12 Tags of 2015! Fresh Brewed Coffee!

    Hello crafty people! How are you this week? Whatcha craftin lately? I've been making a little of this and a little of that. Got a cool project to share with you for 4th of July….and some other stuff too. Lots going on at work and I'm just kinda tired this week. It's been over 100 degrees too, which really slows me down! I just want to lay around and watch tv in the air conditioning!

    Today I'm excited to share my 12 Tags of 2015 tag for June. It's all about COFFEEEEEEE! As soon as I saw Tim's tag I knew I had to make one this month. Cuz, you know, I loves me some coffee…. Coffee stamps, coffee dies, coffee anything! LOL. Did you make a tag this month? There's still plenty of time to enter your own version. There are so many cool ones in the gallery already. Can't wait to post mine in there.  


    12 Tags of 2015 - Coffee Tag by Wanda Guess


    Hee hee! I {heart} coffee! I stamped the coffee mini blueprint stamp in brown ink onto some cream paper and then cut it out and put it into a heart charm. I love that it fit perfectly in the heart. Of course, I dyed my own ribbon in the gorgeous shade of Twisted Citron. YUM. I added some Linen ribbon and a pearl bauble to finish off my tag topper. 

    Coffee Tag by Wanda Guess - Tim Holtz heart charm


    These new coffee cup dies are the perfect size for a tag or a card. The set of dies comes with a 'hot' coffee and an 'iced' coffee cup. I used the hot cup and cut it out of watercolor paper. I colored it using Distress Inks in Twisted Citron, Linen and Corduroy. I added a bright star to the center of my green circle. 

    1


    Here is the inspiration tag from Tim Holtz: 

    1


    The featured technique for Tim's tag this month was a super cool plaid background. He made it using a stencil. I don't own that particular stencil, so I thought 'how can I make my own plaid?' and I came up with my own technique! I used gorgeous shades of blue and green Distress markers and a ruler to draw a free form plaid on my tag….keep reading! 

    I heart distress markers!!


    I used my ruler as a straight edge and took my Distress Markers and drew horizontal and vertical lines in varying widths across my tag. No rhyme or reason to my colors, either. Very free form….

    1


    Here is my plaid! (And the exact colors I used)

    1


    Now the fun part! I spritzed the entire tag with water! I have to be honest, I wasn't really sure if this was going to work. I got it pretty wet – you can see here. 

    1


    I kind of let it all sit wet for a minute and run together. Then I dried my tag using my heat tool. And, voila! I love how it came out! 

    Create your own plaid background technique - tag by Wanda Guess


    Now the good part – putting it all together. I used my Tiny Attacher to put some 'coffee' words onto the bottom of the tag and onto some Linen ribbon. I added the 'GOOD' letters after coloring them with Distress Inks (they are also cut out of watercolor paper). 

    1


    1


    1


    Tim Holtz 12 Tags of 2015 June Tag by Wanda Guess - coffee tag


    The coffee cup is popped up with foam tape, and then the center piece of the cup is popped up with more foam tape. Here you can see my layers. I used glossy accents to glue the star onto the paper.

    1


    1

    1

  • This n that!

    Hello my creative and lovely friends! Where have I been? Oh my…. Lots going on in my world. First of all, didn't you enjoy the Reverse Confetti release last week? I did! And, I have more Reverse Confetti projects coming this month and next month so stay tuned for that. I am so grateful to be invited to be a guest!

    My energy is super low and I am totally going through something right now. I am like a roller coaster inside. You see, there is soooo much to be grateful for, and so many positive things are happening in my life… And on the other hand I have soooo much work stress that I feel like I'm barely hanging on in that regard. I am having a difficult time sorting all of that out internally. The highs and the lows are coming at me too fast lately. What's a girl to do? Buckle up and hang on? I dunno…but if I figure it out, I'll let you know!

    One of the (many) very positive things is that this past weekend the hubs and I went on a mini getaway. I signed up for the Bay Area Illustrated Faith Workshop and that was on Saturday afternoon. Met some really nice ladies and had a lovely afternoon – thanks to Shanna! The hubs dropped me off there and then came back for me. He went out and did some walking and took some surfing pictures. We stayed the night in the beautiful Hotel Valencia on Santana Row in San Jose. Had a great dinner Saturday night, slept in Sunday, and shopped the afternoon away before heading home along Highway 1 – where I got to see my favorite things: fog and ocean! It was a great weekend together. Click over to my Instagram to see some of our adventures from the weekend.

    So then Monday happens and I feel like crying. Right? You guys probably really don't want to hear about that. It's dreary and gloomy. But it's real. Don't we all just try and hold it together all the time? I see some of my seams coming apart. Good thing I can sew! God is good and merciful and I will be fine. I know that with all my heart. It's part of the plan. Thanks for listening to me and letting me vent.

    Because I'm so topsy turvy, I feel like my crafty mojo is askew…. I came home tonight from work and went straight into the studio. I didn't allow myself to linger or dwell…or over analyze. And guess what? A happy little card came out. Just like that. And here it is! 


    Savvy Stamps Floral Jar stamp. Card by Wanda Guess


    These are some new Savvy Stamps I picked up at Paper Garden last weekend. They were just the cheery thing to inspire me tonight! I have a couple of tips to share. First, that sentiment was too big for my card – you can see the entire stamp…So I taped off part of it and just stamped the 'hello' part! My image was stamped in Archival Black Ink and then loosely water colored with Distress Inks and a water brush. 

    1


    1


    Second tip – I thought the black in the image was a bit harsh for this card. I put some yellow enamel dots on the one black flower to brighten it up. You can see I also took a white pen and made little highlight dots on the black leaves (Tip three). 

    Savvy Stamps card by Wanda Guess


    1


    Thanks for being there for this girl! I hope that your week gets off to a splendid start! Not sure what I'm cooking up next. What are you working on? XOXO

    1


  • Fun new project to share – and a card too!

    Howdy! How is your week going so far!? I am REALLY happy to finally share a cool new collaboration project I'm starting today with my amazing friends at Simon Says Stamp!  Over on the Simon Says Stamp Blog each month, I am going to be making a project to feature the newest color added to the Distress Ink family! Ranger and Tim Holtz are releasing a brand new ink color each month for this entire year and it is so much fun to anticipate what the new color will be! 

    Simon logo (2)

    In my first project for this feature I used the new colors for January and February – and those are Cracked Pistachio and Abandoned Coral. The color for March is Mermaid Lagoon, and as soon as I can get the inks in my studio, I'll be featuring it next! YEAH!

    I hope you will follow along with me over there every month to see the new color. I'm going to be making a swatch chart too, so you can easily see how the new color fits in with the existing colors. CLICK HERE TO SEE THE PROJECT. You can leave a comment to win a prize!! Thanks so very much to my friends at Simon Says Stamp! 


    Here is a sneak peek!

    Simon Says Stamp color feature - coral and pistachio - by Wanda Guess


    And a sample of the color swatch chart!

    New Distress Inks color chart - coral and pistachio - by Wanda Guess


    Since I'm sharing my excitement today about my new collaboration with Simon Says Stamp, I thought I would share another card I made for their blog a while ago. I never got it posted here on my blog, and today seems like a good time to post it! This one is a shabby chic card I made with supplies from my friends at Taylored Expressions! (There is a link list at the bottom of the post)…. I hope you enjoy this one too! YOU CAN CLICK HERE TO SEE THE ORIGINAL POST! 


    1 Simon Says Stamp Guest - TE


    1 Simon Says Stamp Guest - TE


    1 Simon Says Stamp Guest - TE


    1 Simon Says Stamp Guest - TE

    THANK YOU FROM THE BOTTOM OF MY HEART – for stopping by here today – and for supporting me in all of my crafty adventures! I couldn't do this without your love and support! Blessings to you for a great week. XO