


Hi everybody! How are you my crafty friends!? I've been a busy bee in my crafty hive this week! I'm here today to announce the brand new release for Holiday 2016 from Simon Says Stamp! Dies, Stamps, Inks, and Watercolor cards! Everything you need to start making your Christmas and Holiday cards and projects. I love the name of this new release. It's called Believe in the Season! I have two cards to share today, two more tomorrow for a blog hop, and then a couple more to post maybe on Sunday! Whew! I told you I've been busy. I have a great head start on my Christmas cards now. Too much fun and so much good stuff. Be sure to check back in here with me in the next few days! I hope you had a great week so far!
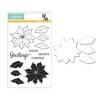
The two cards I have for today were both made using the Poinsettia stamp set. I colored the flowers two totally different ways to show you alternative looks and ideas to try. The first card I used white heat embossing, and then watercolored with Distress Inks onto watercolor paper. In the second card I heat embossed with gold, and then used Copic Markers to color on vellum – a technique I always love. Let's take a look!
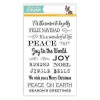
I started by stamping, embossing and die cutting the elements for this card. I die cut several leaves out and two poinsettia flowers. You can see that I've layered two flowers together, and cut out some sections of the top flower for a dimensional look. I used several shades of Distress Inks (colors listed below) and water to watercolor in the flowers and leaves. Then I created a soft golden watercolor wash for the background – also using Distress Inks. I stamped the sentiment using my MISTI to get a good solid impression on the watercolor paper. Works like a charm every time!

I really love the font in this new sentiment! Beautiful!

After my flowers and leaves were dry, I used some Perfect Pearls powder and water to make shimmery splatters onto them! I love this look. It's kind of hard to photograph the subtle and pretty pearl shimmer.

Here is a close up of the finished flower. I used a yellow Copic Marker to color the flower center. Did you know that Copics will color on any surface? Even heat embossed areas!!

This next card is very classic and timeless Christmas. Plaid and bright red…. How can you go wrong?! I started by stamping, heat embossing and die cutting my flowers and leaves with SSS Vellum paper. Then, I turned the pieces over, and colored on the back with shades of red and green Copic Markers. This technique kind of ends up looking like stained glass! I added white snow splatters to the flowers using Copic Opaque White. For the sentiment, I die cut it out of nice thick cardstock and heat embossed it three times using SSS Gold Embossing Powder. To re-emboss for a thicker look simply add more ink and more powder and keep heating until you get the look you want! I think it's so rich….

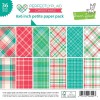
I used Lawn Fawn plaid paper for a nice crisp border of color at the bottom of my card. I think it looks so nice with the red!


And, as I like to do, a few gold enamel dots and some pretty twine finished off the card!

Thank you so very much for stopping by today! I hope I've inspired you to start getting ready for Christmas crafting! There's lots more to come in the next few days. Hope to see you soon. XOXO


CLICK HERE TO SEE THE ENTIRE NEW RELEASE!
SHOPPING LINKS FOR TODAY'S CARDS ARE BELOW!
Thank you for clicking and supporting my business!
 |
 |
 |
 |
 |
 |
 |
 |
 |
 |
 |
 |
 |
 |
 |
 |
 |
 |
 |
 |
 |
 |
 |
 |
 |
 |
 |
 |
 |
 |
 |
 |
 |
 |
 |
 |
 |
 |
 |
 |
 |
 |


