Tag: concord & 9th

  • Concord & 9th October Guest Designer – I like you more than coffee!

    Hi friends! Happy Friday! Woot! Hope you had an awesome week. I had a lot of fun this week taking over the Pretty Pink Posh Instagram Stories! Did you see my videos? I really enjoyed it. That's the second time I've done that for PPP. I'm thinking of maybe incorporating some weekly videos over on Instagram… Maybe talking about that weeks' projects, or showing a card up close. What do you think? Do you follow along with me or other crafters on Instagram? I'm pretty addicted. And I really love watching IG Stories! Seeing where people live, and their craft rooms, and their pets… Makes me feel closer to them. So, I'm already off on a tangent here. 

    As you know, I'm one of the guest designers for Concord & 9th for the month of October! Yeah! My assignment was for four Feature Fridays using their brand new release. Today is week #3 of Feature Friday. I have two cards to share with you today. I'm featuring the awesome new Coffee Blend stamps and dies. OH and the brand new Coffee Blend Turnabout! Let's get to gettin'.

    First up is a big square card! It's 5.25 x 5.25 square. I did that in order to feature more of that cool background/turnabout image. I wanted it ALL to show! I started with a kraft card base and then layered my stamped panel (with a strip of my fav gingham) onto the kraft. I used foam tape so it's popped up just a bit.

    Concord & 9th Coffee Blend Turnabout stamp and dies. Coffee Card. Wanda Guess


    The new Coffee Blend Dies Set features this cool coffee mug, with extra dies to create a heart foam art top! And a little heart too! I die cut the cup out of aqua paper and then ink blended the edges with a sponge and ink pad. If I like you more than coffee, then I like you A LOT. A WHOLE LOT! Hahaha.

    Concord & 9th coffee cards. Turnabout stamps. Heat embossing. Coffee card ideas


    I stamped the sentiment onto black cardstock with embossing ink, and used white embossing powder. I created this little strips to use as a fun way to decorate the front of the mug.

    Coffee cards with stamps and dies. Concord & 9th


    Can we talk about this new Turnabout stamp??? OMG. I LOVE IT! Coooooffffeeeeee! Do you have any Turnabout Stamps? I have six or seven in my collection now. They are super fun to use and you can get so many looks by switching up the colors of the inks and papers. 

    Coffee Blend Turnabout Stamp from Concord & 9th


    I used warm colors and then added a pop of aqua (as I'm known to do)… Here is a photo of the stamping in process. Using the MISTI makes it easy!

    Turnabout stamps - Concord & 9th


    Coffee card. Wanda Guess guest designer Concord & 9th


    Next up I made a second coffee card using the Coffee Blend Dies and the new Sew Striped Die. I started with an A2 white card base and layered red gingham. For the top white layer, I used the Sew Striped Die three times to create that dotted background. I love how the red shows through the dots. I used foam tape to mount the white layer over the gingham.

    Concord & 9th Coffee Blend Turnabout stamps and dies. Coffee card. Handmade. Wanda Guess


    I die cut the mug out of red cardstock and then heat embossed the sentiment with white embossing powder…

    Thanks a latte card! Coffee card with Concord & 9th


    I tied on a cute little heart onto the handle. I love this as a thank you card! It would be easy to mass produce a lot of these and keep on hand. Maybe in different colors?

    Concord & 9th Sew Striped die. Coffee card


    Coffee card ideas. Stamping and embossing

    Thank you so much for stopping by my blog today! Now, let's go get some coffee! (My favorite!) I hope you have a fabulous weekend! I will see you back here real soon! XOXO

    CLICK HERE or on the graphic below to see the supply links for today's projects! (Affiliate Links Used). CLICK HERE to shop the new release over at Concord & 9th! Let's get creative!

    Concord & 9th Coffee Card supplies

  • Concord & 9th October Guest Designer – You’re my Type!

    Hey guys! Happy happy Friday! I'm back with another "Feature Friday" from Concord & 9th! So happy to be one of their guest designers for the Month of October! I have today's project, and then two more Friday's too! Yippeee! Each Friday I'll be showcasing one of the product bundles from their awesome October New Release. I'm loving it…and I can't wait for you to see everything I made! Today I'm featuring the Talk Type Bundle, which has a cool retro typewriter and all kinds of perfect sentiments and interactive parts. In other words, it's amazing. The best thing about Concord & 9th is that everything is always innovative and clever. I love it!! I combined the Talk Type Bundle with one of my other fav products from Concord & 9th – Rainbow Wishes! (If you don't have this set, you need it!) 

    Today's card is very clean and graphic. Lots of white space too. I tried this card a few different ways, but ended up really liking it with the only color being the rainbow. The finished card is an A2 sized white card base. One white layer die cut with a stitched die, and then the design elements…

    1


    Concord & 9th October Release


    Here's a side view to show the dimensional parts of the card. I stamped and die cut the typewriter and the paper with hearts. I set those aside and made my rainbow in bright tropical colors. The rainbow sections are glued directly onto the card. The typewriter is attached to the card with foam squares.

    1


    Before assembling the card, I splashed some black paint over the layer to look like flying ink! Then I stamped the sentiment directly under the rainbow. Tip: Attach your rainbow sections before die cutting the stitched rectangle – for a clean edge!

    1


    I added a few clear gems because I always want a little sparkle!

    1


    1

    Thank you SO MUCH for stopping by my blog today! Always happy to see you here! Welcome new subscribers! Thanks for following along with me – let's have some fun! Hope everyone has a great weekend planned! XOXO See you soon!

    CLICK HERE or on the graphic below to see the supply links for today's project. (Affiliate Links Used). Have fun creating! CLICK HERE to go directly to the Concord & 9th Store!

    1

  • Concord & 9th October Release! I’m a Guest Designer!

    Holla! Hey! Hello! Happy Friday! I'm super excited to say that I am one of the guest designers for the month of October for Concord & 9th! I'll be sharing projects every Friday for the next four weeks, using new stamps and dies from the October New Release. YIPPEEEE! I've known for a while, and now I'm excited to share the news and show you some projects. CLICK HERE to visit the Concord & 9th Blog!

    I hope you had a good week – and are looking forward to a fun weekend too. My week was busy and full of activities and creating. Some of you have emailed or messaged me about this crazy power outage situation here in Northern California. UGH. So I live in Sacramento County. When you look on the big power outage map, my county is the only one that has power. We are not on PG&E grids for electricity. We have SMUD. So I've been good here. About five miles east – all my foothill friends have zero power. It's the strangest thing I can remember happening around here. Thank you for checking on me tho. Now, back to cards! 

    The first product bundle I'm showcasing is the Annuals Bundle. A beautiful stamp set, matching dies, and calendar pages. You can create your own beautiful calendars with it (there are monthly words), make cards, and use it in your bullet journals and scrapbooking. Super versatile! I chose to make a card with the gorgeous florals and the pretty word dies. I used a graphic color palette of black, white, grey and pops of bright pink. 

    Concord and 9th new release. Annuals Bundle. Guest designer. Wanda Guess. Copics, florals, CAS cards


    Concord & 9th new release October 2019


    My finished card is A2 sized with a white card base. I layered dark grey cardstock, and then vellum. The top layer is white cardstock that I stamped with the graphic image from the stamp set. Basically making my own patterned paper! I love doing that!

    Concord and 9th new release stamps and dies


    I stamped and die cut the floral image and colored it with my Copic markers. I die cut the words dies from pink and black cardstock. The friend word was stamped in Versamark ink and embossed with white embossing powder. I love this look of sharp contrast.

    1


    The center rectangle part of the card is mounted onto the card with foam tape. Then the floral is mounted on with foam tape also. I added a few sequins for just a bit of sparkle!

    Concord & 9th


    clean and simple card ideas

    Thank you so much for visiting today! If you're new to my blog and came over from the Concord & 9th Blog – welcome! Happy to meet you! Happy crafting! I'll see you on Sunday or Monday – not sure when I'll get posting! LOL. 

    CLICK HERE or on the graphic below to see they supply list for today's card. (Affiliate Links Used). CLICK HERE to shop the new release over on the Concord & 9th website!

    concord and 9th new release

  • Your Friendship Warms My Heart!

    Hi crafty friends and Happy Monday! I hope you had a most delightful winter weekend! We have been very busy – that's how December is right? Going, going, going all the time! I love it though. There are so many fun things to do! Craft shows, lights, shopping, coffee, friends… It's awesome. This weekend we went to a beautiful barn market not too far from our house, and I'll share some photos of it at the bottom of my post, after the card. I loooove stuff like that! Being outside on a beautiful winter day, seeing the handmade goods. I'm going to wrap up the rest of my Christmas cards this coming week I think. Time to start the process of addressing and mailing them out. (I'm bad at that part)! 

    Now, on for my card for the day. I COULD NOT WAIT TO SHARE THIS!!! OMG these new stamps from Concord & 9th called "Winter Wear" are maybe the most adorable stamps everrrr. I was smitten like a mitten right away! I bought them and had them sitting on my desk when I woke up one night at 2am with an idea! Ha! So that next morning I stamped and colored and tried again until I was able to execute my idea. I'll explain later! Here's the finished card…

    1 Concord and 9th Winter Wear Stamps and Dies. Swirls Dies. Copic Markers. Winter Friendship card.


    These stamps!! Oh gosh, how much fun to make this card! The face, the scarf, the hat and the glasses are all different stamps so you can mix and match. There are two girl faces and several other accessories – so you can make it however you want. I love it when I can customize things. So I made this girl to look like me! She has glasses…and she loves buffalo plaid and she's wearing a snowflake pin – just like me! So the idea that woke me up at 2am was that she needed a buffalo plaid scarf! This scarf stamp is NOT checkered. I did that with my Copic Markers. Yes, it took a while, but I love the result!


    2 Concord and 9th Winter Wear Scarf girl card with Copics


    This card started with an A2 card base is vivid Christmas red! I layered vellum and then kraft paper. On the vellum paper I splattered Copic Opaque White with a toothbrush to look like snow flurries. On the kraft layer, I used the Concord & 9th Swirls Dies to make snow swirls. Then I stamped snowflakes in white over that. Finally, I used sponge and white ink to go around the top edges. 

    3 Concord and 9th swirls dies. friend card for winter

    I stamped and die cut the pieces out and colored them all with markers. Then I heat embossed the sentiment with white embossing powder onto black paper. I like that look on a sentiment. It makes it pop! In this photo you can see all the layers. 

    4 heat embossing concord and 9th winter wear

    For accents I added some die cut snowflakes and pearls. I also added a bit of glitter shimmer to the brim and pom pom on the hat. It's frosty out there, you know! One of my signature pieces during winter is to wear a snowflake brooch. I have two that I love and I wear them all the time. So I die cut a tiny snowflake and made her (me!) a brooch. 

    6 copic markers concord & 9th


    6 copic markers concord & 9th

    Supplies for this card are at the bottom of my post! You're going to want these fun stamps and dies I know it! Endless combinations of fun cards for gal pals!! Can't wait to make some more! IN the photo below you can where I got my ideas! LOL. Mark took this photo at the Barn Market on Friday. My new haircut is kinda short but I'm happy and that's what matters. XOXO


    Wanda Guess A Blog Called Wanda


    Here are a few photos I took at the H3 Barn Market on Friday. It's in Rescue California, which isn't too far from my house. Mark and I had a delightful time there! So peaceful and beautiful. The vendors were great and so so talented. The weather was perfect. It reminded us of an old fashioned Christmas – lovely! Big shout out to Laura, the proprietor, for creating something so special. I can't wait to go back.

    2 H3 Barn Market Rescue California


    2 H3 Barn Market Rescue California


    2 H3 Barn Market Rescue California


    2 H3 Barn Market Rescue California


    2 H3 Barn Market Rescue California


    2 H3 Barn Market Rescue California


    2 H3 Barn Market Rescue California


    2 H3 Barn Market Rescue California

    I hope you have the best, blessed, happy, fun and creative week ahead! XOXO

  • Merry, Merry, Pretty Layered Trees!

    Hey everyone! How was your Thanksgiving!? And, did you go shopping yesterday?? Our Thanksgiving was really nice. We stayed home all day, and it rained ALL DAY! It was fabulous and cozy and perfect. Since it's just two of us here, I made us an Italian dinner for Thanksgiving. Baked rigatoni, salad and garlic bread…and of course pie! Sometimes I cook us an entire turkey dinner but this year I wasn't in the mood. We watched movies and I crafted… No running around all crazy like we do some years. Usually on Black Friday we are the crazy ones up at 4am and out shopping, but this year we didn't go! Again, it was pouring rain all day and we both felt like staying in and relaxing. Mark ran out to Lowe's and got us a new Shop Vac but other than that we didn't buy anything! Go us! I have been spending so much time decluttering and it felt good to not bring more stuff into our home. I'll venture out shopping next week sometime. Anyhoo – happy weekend! I've been doing lots of crafting, so I have projects to share!

    I'm pretty quick to know what I like when I see new crafting supplies. Something usually grabs my attention right away or it doesn't. Well…when I first saw a project on Instagram made with the new Pretty Pink Posh Layered Tree Dies….I was like POW! Yes! I need that asap! Hahahaha. It's a set of dies that make a beautiful Christmas tree that you can layer. Genius and so so pretty. I chose to ink up some trees using Distress Inks… Then later I made some backgrounds for them – also with Distress Inks. Here are my two finished cards. Both cards are on white A2 card bases. 

    Pretty Pink Posh Layered Tree Dies. Concord and 9th Swirls Dies and Distress Ink Background.


    To make the trees, I used shades of green Distress Inks on the pieces. I used the small sponge daubers to do the blending. Each piece is not very big by itself so the small daubers are perfect. After the ink was dry, I splattered white ink over them to look like snow! I also used a clear Wink of Stella pen to splash shimmer onto the tree pieces. I attached the pieces together using foam tape. The star, trunk and some ornaments are all included in the die set. 

    Pretty Pink Posh Layered Tree dies. Christmas card with distress inks


    For the backgrounds I used the brand new Swirls Dies from Concord & 9th. Another awesome genius product. I used them on another card too – to share later. I die cut the swirls into the paper layer and then inked shades of blue ink, keeping the color lighter in the center. I also splashed Wink of Stella pen onto this background layer. SOOOOO pretty! I added the Wink of Stella to the star too. 

    Concord & 9th Swirls Dies with ink blending


    The Merry word was die cut from silver cardstock from my stash. The die is very large and actually says Merry and Bright! I used a pair of detail scissors to cut the word Merry out of the bigger die cut. It's the exact right size for this space! I glued it on using clear glue. 

    Concord and 9th merry and bright word dies


    Here is my tree in my work space. You can see the dies in the background. LOVE. 

    Distress Ink blending on Christmas trees. Pretty Pink Posh Layered Tree dies new in 2018


    Distress inks


    The next card has a super bright red background! I made the card the same exact way as the first one. But with a red background and a gold word die. I also decided to add a snippet of black paper with the word Christmas embossed in white. I felt like that was A LOT of red so I wanted to break it up with some black. 

    Handmade christmas card diy


    Those swirls….sigh… They are so pretty! 

    Concord & 9th swirls dies and ink blending

    Okay, that's it for me! I'll be back on Monday with a really cute coffee themed card made with supplies from Right at Home! Looking forward to sharing so much with you in the coming weeks. Take care and have a wonderful day! XOXO

  • Autumn cards with Concord & 9th!

    Hi everyone! Happy Monday! I hope you have a great week ahead of you. I had a super fun weekend with a trip to San Francisco to the farmers market and a foggy ferry ride. It's one of our favorite ways to escape the heat here in Sacramento. We are so lucky that we can go about 75 miles away and it's 40 degrees colder! We love going to the ferry building and hanging out for the day. My favorite photos from the day are on my Instagram! I really enjoy taking photos of flowers and gorgeous produce… I find all that color and natural beauty so inspiring. God truly is the master artist! 

    Lots of my crafting friends are already knee deep in Christmas crafting! I am so grateful that I can wait on that this year and enjoy the natural flow of the seasons in my art and creating. I can feel the light changing ever so slightly in the evenings signaling the first glimpse of fall… And that has me super excited and anxious for Fall cards. Because Fall is my favorite time of year. I'm sharing two cards today with Fall colors and themes. I couldn't help myself- couldn't wait! LOL. 

    There were two amazingly awesome new stamp sets that caught my eye from Concord & 9th recently. Angie and Greg were kind enough to send them to me so I could play! (they literally are the nicest people and I'm so glad they are my friends). I've seen lots of projects with both of theses sets (City Stacks and Furry Friends)… But I wanted to put my own twist on them – I made them Fall themed!  

    First up is a card using the beautiful and innovative City Stacks Stamps and Dies. One of the things at the very top of my life bucket list is to visit Central Park in New York in Autumn. I soooo want to do this one day. Until then, I've created a card to look like Central Park might look in October! I stamped and die cut and layered and water colored and had the best time making this! 

    Concord & 9th City Stacks stamps and dies. Watercolor by Wanda Guess


    I tried out some new watercolor paper for this project – for the city pieces and the trees/ground pieces. It has a nice linen texture to it, instead of the typical bumpy texture. It colored very nicely! Coloring the city was easy with my MIjello Mission watercolors. I mixed black with indigo blue to create a steely blue grey color like buildings. I did a wet on wet technique and really didn't fuss over it too much. I die cut them out with the matching dies. The dies include a pretty cloud border that I used at the top of my layers. 

    ***One note about my watercolors… I got this set of watercolors about a year ago. They have been so 'life changing' to my crafting. Yes, they are expensive! But I have not regretted spending the extra money on them. The tubes are still about 80% full and I've been painting with them all year. So I figure that they will last me at least 6-7 years. They are creamy and vivid and beautiful. I never thought I would be able to see the difference but I can!! Just wanted to put that out there for some of you who are on the fence about the Mijellos. I like the set I bought because it comes with a palette and everything. XO

    This finished card is a slightly modified A2. My card measures 5.5 x 4.5 inches. 

    Concord & 9th City Stacks stamps and dies. Watercolor by Wanda Guess


    The stamp and die with the ground and trees has three trees on it. I stamped and die cut out three of these pieces so I could have extra trees to put in my scene. I water colored the ground with a few shades of green and water colored the trees using vivid yellow, orange and a touch of red. This is how my brain sees Fall trees! LOL. The welcome die comes with the set. The stamped and heat embossed sentiment is from an old set that I don't know the name of! 

    Mijello Mission Gold watercolors and stamping


    Here's a close up of the trees/coloring. The biggest tree stamp has a tire swing on it, so I just trimmed that part off.  This is how the city scene looks when stamped and die cut.

    Watercolor


    This photo shows how I layered everything…. You know I love layers!!! More is more!

    Concord & 9th


    If you look closely at the ground pieces you can see where I trimmed off the trees. Then I used foam tape to attach them where I wanted them! Never be afraid to play and change things up!

    Fall themed watercolor card. Stamping and die cutting.


    For this second card I used the awesome Furry Friends stamps and dies. This stamp set is SO GREAT!!! It has a deer, a bear, a fox and a horse and matching accessories. I love a good woodland creature stamp set, yes I do! I immediately wanted to make a deer with a flower crown! I mean, right?? I had just gotten some new Fall paper pads too, and I used two of them for the paper layout of this card. I combined it with my favorite wood grain paper too. Yes! 


    Concord & 9th Furry Friends stamps and dies. Fall theme. Wanda Guess


    This finished card is A2 size. I started by layering my paper pieces. I used cream paper instead of bright white for this one. I used a bit of brown twine to add texture and softness to the overall feel of the piece. And, as I am known to do, I got some gingham in there. 

    Concord & 9th Furry Friends


    I stamped and die cut out the deer, the antlers and the flowers/leaves. I colored them with inks and also with Copics. For the sentiment and the circle, I used Distress Ink and a sponge to ink the edges and make it look more vintage. I finished with a few enamel dots from my stash, picking up that pretty blue color from the paper pad. 

    Concord & 9th stamps and dies. Deer with flower crown. Fall


    Handmade Fall Card

    That's it for my first Fall projects of 2018. I'll be back to making Summer projects later in the week! LOL. But I literally could not wait to stamp these stamps and bring these ideas to life. Thank you for stopping by my blog today! CLICK HERE TO shop Concord & 9th! I hope you have a great week. See you soon! XOXO

  • Stamping for Autism Awareness – Blog Hop 2018!

    Hello everyone and Happy Monday! I am participating today in a giant blog hop in recognition of World Autism Awareness Day.  CLICK HERE to read more about WAAD. We are blog hopping to bring awareness to the topic of Autism because it truly affects all of us. Our cards today are meant to be cheerful and encouraging because we want to celebrate the warriors out there doing the best for their loved ones. There are lots of crafters joining in today, lots of company sponsors, and lots of prizes. If you're new to my blog today, welcome! Nice to see you here. 

    To start at the beginning of the hop, and to read more about it, please go to Veronica's Blog! At the bottom of her post is the link to all the designers AND prize information! Also, two companies have designed stamp sets just for this cause. All the details HERE! 

    My card today was made with the beautiful new Concord & 9th stamp and die set called Rainbow Wishes, and LOTS of mini Distress Inks! I really piled on the color and brightness today! I've been wanting to use this stamp set, and this seemed like the right occasion. I loooooove the font, and the sentiments in it. And I always love rainbows in crafting – I call these 'wonky rainbows' because they are not perfect and I love that too. (Just like me. LOL. Maybe I'M a wonky rainbow!) Supplies are linked at the bottom of my post. 

    Concord & 9th Rainbow Wishes

    Autism Awareness Day Blog Hop


    My card is an A2 size and I made my own card base from bright white cardstock. I layered on a pretty shade of aqua blue and then my top layer. The top layer is Bristol paper and all the rainbow pieces and the cloud are also Bristol paper. I knew I was going to use lots of ink and some shimmer spray so I wanted that thick paper. The 'bright' word is die cut from black cardstock.  die cut the rainbow pieces and then used a sponge and mini Distress Inks to coat them with ink. I dried them really quickly with my heat tool. For the cloud, I edged it with distress ink for just a touch of color. The yellow background was made with Lemonade Distress Ink and a sponge! LOTS of ink! After all the pieces were dry, I sprayed them with Shimmer Mist! All the rainbow pieces, the cloud, the background, the hearts and the black die cut! (It's VERY sparkly!!)

    Handmade card Rainbow with distress inks


    I popped up one of the hearts with a bit of foam tape. I added small droplets accents to look like water on the rainbow. 

    Concord and 9th stamps and dies


    In this photo you can see the shimmer mist on the pieces! LOVE it!

    Distress Ink rainbow and background. Bright spot card


    I used a glue pen and my tweezers to attach the die cuts to the paper. I am never far from my tweezers in the craft room!

    handmade rainbow card


    Thank you SO very much for joining us on this World Autism Awareness Day creative blog hop! It's our pleasure to spread a little joy and love today! See you soon! XOXO  CLICK HERE to see the entire Blog Hop Lineup!  Next stop is my talented friend Jill! 

  • Pink Pineapples on a Monday!

    Hi everyone! Happy Monday creative party people! A fresh new week awaits us! What kind of trouble can we cause this week? I'm not sure yet for me! I have some fun meet ups planned with gal pals this week which always restores my spirit and soul. And, lots of Easter crafting awaits me, too! I hope you had a nice weekend. Thank you for all the love you shared on my last post for the A Blog Named Hero Blog Hop. That was a super fun hop! I was happy to be part of it. It's fun to hear from people and share the excitement of prizes, etc. I hope some of my readers win prizes from the hop! Good Luck! Today I have to confess my new love affair….with Tonic Nuvo Gilding Flakes. OOOOOH MYYYYY GOSSSSHHHH! I am hooked… Totally 100% hooked on this new to me product. I bought these a couple of weeks ago and my brain has been trying to come up with a cool idea. Well, Friday night it came to me in my sleep! Pineapples! Pink and Gold pineapples! LOL. Yes, I do dream up card ideas when I'm sleeping. Very Random. Don't judge me. Haha. I even have a notebook on my nightstand for just such occasions. 

    So here's the thing. I also LOOOOOVE the Pop Art Pineapples Stamp Set from Concord & 9th and thought the little triangles stamp that goes over the main pineapple image would be awesome in gold foiling! I kinda like how it came out. Very retro-palm-beach-fifties-cabana style. Pink and mint are a favorite color combo and mixed with gold?? Yay! Here's the card, and I'll talk a little bit more about the Gilding Flakes as we go along.  

    Concord & 9th Pop Art Pineapples. Nuvo Gilding Flakes. Clean and Simple one layer card by Wanda Guess


    This is a very clean and simple one layer card that I jazzed up with some gold flakes and pretty Nuvo Glitter Drops! I started with a panel cut to size on an A2 card base. I stamped the pineapples in bright pink ink and the leaves in a soft minty green ink. I dried this part with my heat tool to set the ink before using the gold leaf. Otherwise, I was worried the leaf might stick to the ink.

    Concord & 9th Pop Art Pineapples. Nuvo Gilding Flakes. Clean and Simple one layer card by Wanda Guess


    I used the triangles stamp that fits over the pineapple stamp to do the gold leafing. I used Versamark Ink and Ranger Sticky Embossing Powder and heat embossed the image. If you've never used this before, it's very cool! After the heat embossing, the image will be clear, but sticky. Then you can adhere glitter, embossing powder, leafing, whatever!! I used the gilded flakes from the Nuvo line. I was real messy with it. Just smush the gold flakes onto the embossed sections and rub it in with your fingers. The next trick is to use a nice quality, stiff brush. I bought these cool brushes at the same time as the gilding flakes and they work perfectly. Just keep brushing and swirling the gold leaf away from the non sticky parts, and you are left with this! Squeee!

    Concord & 9th Pop Art Pineapples. Nuvo Gilding Flakes. Clean and Simple one layer card by Wanda Guess


    This stuff is SUPER messy but totally worth it! It is light as air, and can get a bit unruly! Hahaha. It's just gorgeous though. I think this tub will last me five years. Very generous! I bought silver also. And it comes in copper, so I might have to get that one too. The gold is a rich, warm buttery yellow, just like 24k gold. Very bright!! 

    Tonic Nuvo Gold Gilding Flakes and brush


    Tonic Nuvo Gold Gilding Flakes and brush


    And, because I couldn't just leave it be…I added some pretty pink sparkly accents with Nuvo Glitter Drops in Sherbert Shimmer! I stamped the sentiment in rich black ink and left it simple! I layered the white panel onto a matching mint card base (Using my favorite cardstock) using foam tape. Set it aside for the Glitter Drops to dry. 

    Concord & 9th Pop Art Pineapples. Nuvo Gilding Flakes. Clean and Simple one layer card by Wanda Guess

    Now I'm just spinning thinking what else can I foil? Foil all the things! Have you tried this yet? I'd love to hear what you think and what you used it for. The possibilities are endless! Have an awesome week. Thank you for spending part of your day with me. XOXO
    1


    SUPPLIES FOR TODAY:

    Products shown twice are available in two shops!

  • Starting the new year off right with a $75 giveaway!

    UPDATED FEBRUARY 1, 2017

    I have pulled my lucky random winner….Geneva! 

    Hi crafty friends! I have been thinking up ways to do some giveaways and prizes starting with the new year, and brainstorming business ideas too! I wanted a way to say thank you to you, my blog readers, and also say thank you to my shopping affiliates! I am grateful to the companies that allow me to be part of their businesses all year and I am grateful to you for the love and support you show me! ***On a personal note, I only link to companies that I utilize, love and support. Every company that I connect with is a proven winner in my opinion. I will never recommend a company that I do not shop with myself! 

    PRIZE DRAWING!

    Starting now, and going through the end of January I am having a $75 shopping spree prize drawing. I will draw one lucky winner at the end of the month and the prize will be a $75 gift certificate to the company of your choice listed below in the links! Yes, that's right, you choose the prize too! 

    DETAILS: 

    Click on any of the logos below for my affiliate companies and when you place any order of $75 or more, you will be entered in the prize drawing. Here's how: Once you finish your order, email me (STAMPCATWG@AOL.COM) with the date and time of your order, and the company you ordered from. I will save all the emails over the month and draw one winner on January 31st and notify the winner! The more shopping orders you place, the more entries you have into the drawing. In order to be entered, you need to click through the links below. GOOD LUCK! 


    Heroarts-logo-e1417433753342


    C9


    Download 


    Blick-logo-2014-sponsor 


    Blick-logo-2014-sponsor 


  • 2017 Calendar Project with Concord & 9th Stamps!

    Hey everyone! Happy (almost) New Year! I hope you had a really wonderful Christmas this year! It's always strange the week after Christmas, don't you think? It's like soooo many days (months?) of build up, and then poof, it's all over! I usually feel a bit of Christmas let down in the days after. Then it's time to begin the process of putting everything away and saying good bye to all the festivities. I miss it!! But, the one good thing about this week, is that we can plan and get excited for the new year to come! I'm excited because in three weeks I'll be in Phoenix with about 10,000 of my closest crafty friends at the annual CHA Convention! I cannot wait. So that is the first thing I put down in my new planner!!

    I shared a New Year's Card on the SSS Blog this past Saturday. CLICK HERE if you want to check it out! It's very bright and cheerful. Today I'm sharing a calendar project made with awesome products and  supplies from Concord & 9th! They came out with a bundle that has an awesome pre-printed calendar and a calendar stamp set in their signature font. I was super excited to ink this up. I worked on this on Christmas day, and now I'm happy to share with you. After I stamped all the pages, I cut a piece of chipboard to match the size (5×7) and then bound it with my Cinch. Now it will stand up on my desk.  

    Here is the cover! I used the Flourish Stamp Set to add a big, bold colorful floral bouquet! 

    Concord & 9th Flourish Stamp Set. 2017 calendar


    The next two collage photos show each of the 12 month pages I made! All the stamp sets are listed below in the supply links. 
    Concord & 9th 2017 calendar pages


    Concord & 9th calendar pages

    And here are a few close ups of some of the pages! First up is this adorable bear holding his sign! I colored this with just a few Copic Markers. 

    1 blog


    1 blog


    1 blog


    1 blog


    For the back, I used white chipboard. I added a little sticker to the back with the name of my business! 

    1 blog


    Here are all the pages laid out on my table! Ready to assemble!

    1 blog


    I love my Cinch tool! It's SOOOO easy to bind your own books, calendars, scrapbooks, etc. I used the 3/4 inch size silver coil for this project. Here is a photo of the holes punched in the top before binding. 

    1 blog


    The Cinch - binding calendar


    1 blog

    Thank you for being part of my 2016! You all mean so much to me! Thank you for all the kind comments and uplifting words! Let's cheers to a great 2017! Full of creativity and joy! I'll be back on New Year's Eve posting as part of a GIANT blog hop that has prizes at each stop. I hope to see you then! XOXO

    Signature typewriter


    SUPPLIES FOR TODAY! 

    Thank you for supporting my business by using my Affiliate links! 


  • Wanda’s Top 10 Favorite Crafty Things for Christmas 2016!

    Howdy crafty people! It's Black Friday! Shop til you drop! I loooooove shopping and having fun this time of year. It's a 20 year tradition now for me and my husband to go out and shop on the day after Thanksgiving! We have a good time and drink lots of coffee and enjoy watching the ice skaters at our local rink and, well, all of it! We had a nice relaxing Thanksgiving, and I hope you did too! 

    A few years ago I did a post about my favorite things for Spring crafting, and I thought it would be fun to do it again with a Winter theme. I have been 'wowed' this year by all the beautiful and innovative craft products released for Christmas. So… Today I would like to share with you Wanda's Top 10 Crafty Things for Christmas 2016! I love a good top ten list… I have a new project to share today too – made with some of the items on the list. Links to everything are at the bottom of my post. Have fun! 

    PRIZE ALERT! PRIZE ALERT! (Edited 11/28 my winner is LC from Ottawa Canada! Congrats LC!)

    Leave a comment on this post and tell me what is YOUR favorite crafty thing for 2016? That way, we can all share, and maybe find more cool crafty things we need! I will choose a random winner to receive a fun prize package of Christmas stamps and dies valued at more than $75! Leave your comment by Monday, November 28th at 9pm PST. I will notify the lucky winner via email on Tuesday the 29th. Good Luck! 

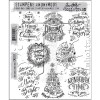
    Before doing the top ten list I want to share a retro Christmas card I made with #3 on the list – Kitsch Christmas from Avery Elle! In my mind, when I sat down to create this, I was going to make a clean and simple card to showcase the cute stamps. Well, one thing led to another and I ended up using silver glitter paper, an embossing folder, Distress Ink, Wink of Stella, a white gel pen, Copics and twine! LOL. So much for this old girl making a clean and simple card! I do love how it came out though! 

    Avery Elle Kitsch Christmas stamps and dies. Card by Wanda Guess


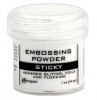
    I colored everything with Copic Markers and then accented with white gel pen and Clear Wink of Stella. I used some pretty pink twine as an accent. The background was inked with Cracked Pistachio Distress Ink and then embossed with the Taylored Expressions Snowfall Embossing Folder!

    Avery Elle Kitsch Christmas stamps and dies. Card by Wanda Guess


    These two remind me of Rudolph and Clarice! She thinks I'm cuuuuuuuuute! I adore that big pink bow!! 

    Avery Elle Kitsch Christmas stamps and dies. Card by Wanda Guess


    I love all the color going on here! I used a pink card base and layered silver glitter paper, cuz, you know, glitter paper!! Why not?!

    Avery Elle Kitsch Christmas stamps and dies. Card by Wanda Guess

    That's it for the new project for today!

    Let's get on with the Top Ten List! 

    1

    Number one on my list is the Simon Says Stamp Magical Christmas Stamp set and dies! This stamp set was part of the holiday release for 2016 and I love it so much. I made one of my favorite cards ever with this stamp set! It is fun and masculine and pretty all at the same time. Not even sure how that is possible but it is! There are many beautiful samples made with this set. Here are the two cards I made with it. It pairs perfectly with woodgrain and plaid and snowflakes. Sigh.. Simon Says Stamp Magical Christmas stamps and dies. Project by Wanda Guess

    1

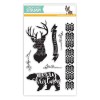
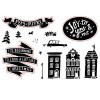
    Number two on the list is the awesome sentiments stamp set from Tim Holtz Called Mini Doodle Greetings. These sentiments are perfectly vintage Christmas as only Tim can do. They are the perfect size for cards and tags both. I LOVE them! Just released for Holiday 2016. I made a card for one of my Weekender With Wanda posts using this stamp set! To see how I made this card CLICK HERE!!

    Tim Holtz Mini Doodle Greetings stamps. Card by Wanda Guess
    1

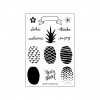
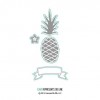
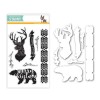
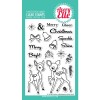
    Number three is the SUPER cute Kitsch Christmas stamp set from Avery Elle! This stamp set totally reminds me of growing up in the 60's and watching Rudolph and Clarice on TV! The moment I saw this set I knew I had to have it…but it sold out so fast! It's back in stock now at SSS so get it while it's hot! 

    Avery Elle Kitsch Christmas stamps and dies. Project by Wanda Guess
    1

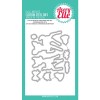
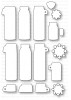
    Number four on the list is actually a product from last Christmas! But I didn't buy it until the very end of the season last year, so it's new to me again! It's the Take A Bough Dies set from Concord & 9th. This is such a cool and innovative product!! (Like everything they make). It's so easy and fast. WOW. I want to make pink ones, and white ones and blue ones…. CLICK HERE to see their awesome product video using these dies! Concord and 9th Take A Bough Dies 1

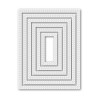
    Number five on my list is a GORGEOUS new Eyelet Cover Panel Die from Reverse Confetti! This die is so beautiful! It has a kind of mod flair to it, but also very feminine and pretty at the same time. This time Jen knocked it out of the park! So clever! CLICK HERE to see Jen's blog post about this gorgeous card!

    Reverse Confetti Eyelet Cover Panel Die

    1

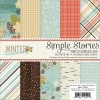
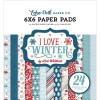
    Number six is actually three things! My three favorite 6×6 paper pads of this season. Lawn Fawn Christmas Plaid, Simple Stories Winter Wonderland and Echo Park I Love Winter! YAY for card sized paper pads. This is practically the only size paper I buy now. They are easy to store and inexpensive too. Perfect. 

    6x6 paper pads for Christmas

    1

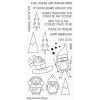
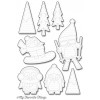
    Next up is number seven! The cutest dang penguin stamps you ever saw in your life! It's the Chill Wishes Stamp Set from My Favorite Things! These guys really make me smile big! 

    MFT Chill Wishes 

    1

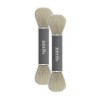
    Now on to number eight, which has nothing to do with stamping! I learned to crochet recently, and so of course I totally fell in love with yarn…. And then TOTALLY fell in love with making Pom Poms! In the old days I used to make these with my mom using a donut made out of cardboard. Boy, things have changed and now there are official Pom Pom Makers! So quick, fun and addicting! 

    Clover Pom Pom Makers                                                                                                                  {photo credit for deer photo}

    1

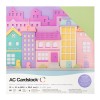
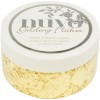
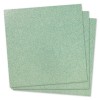
    Now we're down to number nine already! Are you having fun with me? It's actually two products from Close To My Heart! Their Sea Glass Glitter Paper (YUM, my favorite color) and the Joy To You and Me stamp Set! One of my friends is a CTMH demonstrator and I already bought both of these cute items! Now I just need to use them! I'm thinking I need to make some sparkly green snowflakes or something! Close To My Heart stamps and paper1

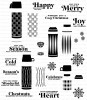
    Last, but not least, is number ten on the list! I went kinda cray cray when I first laid eyes on this gorgeous stamp set from Papertrey Ink! It's called Cozy Christmas and it's, of all things, thermoses! WHAT?? Yes, the funkiest, coolest thermos stamps! You're kind of getting the hint that for Christmas especially I love all things vintage and retro and funky! I think it's because I grew up in the 60's and 70's and these things have so much warm nostalgia for me! My friend Kay made the card featured in the photo below. CLICK HERE for her post about it.

    Papertrey Ink Cozy Christmas

    Whew! I hope I've shared some new things with you that maybe you hadn't seen yet…or maybe let you know about a new company! I had a lot of fun compiling this list for you today. Best wishes for delightful happy Christmas crafting!! I will see you soon! XOXO


    SHOPPING LINKS FOR THE TOP TEN! 


  • Color Throwdown #406 – August Guest Designer!

    Hi everyone! Hope you're having a great week! As I've been blogging all month, I am the lucky guest designer on the awesome Color Throwdown Blog for the month of August! Woot! That means that each week, on Wednesday at midnight EST, I'll be posting a new project inspired by a specific color palette. I LOOOOOVE Color Throwdown and love the fun and fabulous designers on that team. I'm so happy to get to stamp with them all month. Today is card #3 for the month! Yay! 

    The way Color Throwdown works is that each week a new inspiration image and color palette is posted. Then, we all play along! It is really fun to see what everyone else makes, and I definitely encourage you to play along! 

    The colors for this week are green, orange, soft pink, and white! You can use generic colors (so any brand, type – whatever you have will work) and you can feel free to add in other neutrals (cream/black/etc) to make your creation pop! Anyone can play! Just add your beautiful project to the links list on the Color Throwdown Blog! And, if you upload your creation to a public gallery, please use the keyword CTD406, and please use #CTD406 and #colorthrowdown on social media so they can find your gorgeous creations!  When linking up your creation using the linky tool below, please be sure to add a link to your specific post, not a general link to your blog.  All of the "rules" are on the CTD Blog, and you can always check there to be sure! 

    So here is my card, inspired by Green, orange and pink! That color combo is so fresh and citrus-y so I knew just what set to grab! The Hugs stamp set from Concord & 9th! It has beautiful citrus slices and great sentiments! I paired it with some blossoms from the Wildflower stamp set too (to add the pink!). I colored my images with gorgeous Kuretake Clean Color Markers for bright, clear colors!  I like how this card came out! Now I want some orange juice! LOL.  

    Concord & 9th Hugs and Wildflower stamp sets. Color Throwdown challenge. Card by Wanda Guess


    Here is the inspiration image! 

    10


    I started by stamping and heat embossing with white embossing powder onto the smooth side of watercolor cardstock. I used my Kuretake Clean Color markers and a water brush to paint all the orange slices and the flowers. then I cut them out with my detail scissors and se them aside. Next I die cut a watercolor panel using the Stitched Rectangles die set. I stamped my sentiment in rich black ink. For the leaves, I wanted them to be on the card, and not dimensional. I used the Kuretake Brush Marker directly on the leaf branch stamp and stamped it to the paper. The way the marker interacted with the clear stamps made the image look watercolored – which was perfect! 

    Concord & 9th Hugs stamp set


    Then I layered my papers and also layered my flowers and orange slices. I used foam squares to pop them off the paper! 


    10


    10


    Consider YOURSELF freshly squeezed! 

    10

    Hope you have a happy week! My husband and I are out of town right now having some fun! I'll be back next week with another Color Throwdown Project! I hope you will enter your card on the Color Throwdown Blog!! On Saturday I have my first Autumn themed post going up on the SSS Blog – using Tim Holtz supplies! Take care! XOXO
    10 10

    AWESOME COLOR THROWDOWN DESIGNERS! 

    Amy Rohl

    Amy Rysavy

    Barbara Anders

    Broni Holcombe

    Joan Ervin

    Jodi Collins

    Lisa Henke

    Lori Tecler

    Lynn Put

    Vickie Zimmer

    Wanda Cullen

    Wanda Guess (August Guest Designer!)


    SUPPLIES FOR TODAY'S CARD:  


  • Concord & 9th Guest Designer!

    Hi everyone! Welcome to my blog today! So glad to have you here! I am very excited today to post my second of two posts as a guest designer for Concord & 9th! CLICK HERE to see my first guest designer post! Their stamps are unique and cool and so fun. I think I might have every set now! LOVE. Thank you to Greg and Angie for inviting me to be a guest designer for June! Please CLICK HERE to visit the Concord & 9th blog and see all the other beautiful projects everyone is sharing there. 

    For today's post I made two cards using the same supplies – but with very different looks! I used the "You're my Person" stamp set on both cards. 

    BADGE

    You guys know that I like LOTS of color! So this first card might be a bit shocking to you! LOL. I had this idea to make a floral pattern in greys and black! I think that look is super elegant in textiles and artwork and I wanted to give it a try too. I accented the white, grey and black with a pretty clear blue…

    You're My Person stamp set from Concord & 9th. Floral card by Wanda Guess


    I started by stamping and heat embossing the main floral image with white embossing powder. I love this look!! Then I used Kuretake Clean Color Brush Markers in shades of greys to color the images. I used a water brush to move the color around on the paper until I achieved the look I liked. It was very strange coloring in these tones! I think it's good to push yourself to try new things though! What do you think?

    BADGE


    I used slate grey cardstock as my card base to for an elegant look. I used that same paper to die cut the lovely word out so it would all match together. I die cut the friend word and layered the top part onto the blue…. And then added ink splatters and clear gems!

    BADGE


    BADGE


    So when that card was finished, I still had all my supplies out, and I figured I would make another version of the same card! This time my focal floral image is offset up in the corner of the top layer… Oh, and I used TONS of bright colors!

    You're My Person stamp set from Concord & 9th. Floral card by Wanda Guess


    I used the exact same technique here, and the same markers. I like the look of the soft aqua surrounding the edges of the flowers. In my opinion, the best way to achieve this look is wet on wet watercoloring. Wait for the main image to completely dry. Then take a paint brush or your water brush and put plain water on the paper where you want the color. While it's still wet, come back with a wet paintbrush full of color and let the ink flow into the water that's already there. This give a really nice organic feel to the color wash. I literally could do this all day! 

    BADGE


    BADGE


    BADGE

    Sending a big thank you to Angie and Greg of Concord & 9th for inviting me to be a guest designer this month! I really enjoyed getting to know them and their company better though this process. Have a great week everyone! XOXO
    BADGE


    SUPPLIES FOR TODAY'S POST! 

  • I’m Guest Designing for Concord & 9th! Yay!

    Hi everyone! Welcome to my blog today! So glad to have you here! The week is almost over and the sun is shining! Summer marches on and I am very into tropical, Summer, happy crafting projects. I am very excited today to post my first of two posts as a guest designer for Concord & 9th! I met one of the owners at CHA and liked their products immediately. Their stamps are unique and cool and so fun. I think I might have every set now! LOVE. Thank you to Greg and Angie for inviting me to be a guest designer for June! My other post will be up on the 28th. Please CLICK HERE to visit the Concord & 9th blog and see all the other beautiful projects everyone is sharing there.

    C9-guest-designer-button-charcoal1Since I am reeeeeaallllly into Summer themes lately, I thought I would continue along those lines! This post is about Pineapples and Popsicles! Two Summer favorites. Pineapples are HOT right now and so on trend. I love them too! My first card today is made with the Pop Art Pineapples stamp set. The second card is made with the Sweet and Cool stamp set. Let's get started! 

    One thing that I love is vintage Hawaii stuff! Our master bedroom is decorated with this look even! That vibe from the 50's and early 60's when it was all tiki chic and so cool! I tried to capture that vibe in my pineapple Aloha card today! I used Distress inks on watercolor paper to make a series of three pretty pineapples all in a row. Then I added pops of bright pink! 

    Concord & 9th Pop Art Pineapples stamp set. Card by Wanda Guess. June guest designer


    I used two shades of gold and two shades of green for my stamping, and then went over the stamped images with a water brush to blend them together. Kind of loose watercoloring you might say. I splattered some brown ink for effect. My edges were inked with a sponge dauber and Antique Linen Distress ink…

    PINEAPPLES 1 WANDA


    PINEAPPLES 1 WANDA


    The little greeting banner is popped up with some foam squares. I added gold enamel dots and some rustic twine to finish my details. 

    PINEAPPLES 1 WANDA


    Okay -put on your sunglasses for this next card! It's super bright and happy! Remember being a kid and running out to meet the ice cream man? I sure do! One of my favorite childhood treats was the Bomb Pop! Remember that one? Red, white and blue popsicle that would turn your tongue and lips blue!! Good times! LOL. So when I knew I wanted to use this popsicle stamp set I thought of making Bomb Pops!! I used Distress Inks in Blueprint Sketch and Candied Apple to make these cool treats. I stamped on the stamp, then misted with the Distress Sprayer, and then stamped on watercolor paper. Voila! 

    Concord & 9th Sweet and Cool stamp set. Popsicles card by Wanda Guess. June guest designer


    I created a soft blue icy background using Tumbled Glass Distress Ink. Here is a close up of the popsicles. After the initial ink was dry, I dropped water drops onto the ink and blotted them up to give me a mottled effect. I added some glitter later to make them look shiny. 

    PINEAPPLES 1 WANDA


    One neat thing about this set is that all the sentiments are separate so you can spell out whatever you want to say. It even has a "brain freeze" sentiment! 

    PINEAPPLES 1 WANDA


    PINEAPPLES 1 WANDA


    PINEAPPLES 1 WANDA

    Now, don't you want a treat! I do! I hope this post brought you some Summer time cheer! Have a great day and a fantastic weekend! I'll see you soon my friends! XOXOXO

    Signature typewriter 

     SUPPLIES FOR TODAY: 

                                                                                                                                           
  • Let’s Chat! A sweet coffee card just for you!

    Hey crafty pals! Let's Chat! How are ya? I'm posting today about a new company that has some awesome products….and I finally got my hands on some of them! My card for today was made with stamps from Concord & 9th. I had the opportunity to meet one of the owners at CHA and talk to him a bit about their company. I'm really impressed, and their stamp images are very unique and cool. I ordered some up last week and they came super fast. I was sitting at my work table today trying to decide what to make – and decided to ink up this pretty coffee set. It's called Let's Chat….appropriately enough! You know I love coffee!! 

    I used some of my ginham paper stash (From Amuse Studio) with some pretty bright aqua paper…

    Concord & 9th Let's Chat. Coffee stamp set. Card by Wanda Guess


    The saucer, the leaves, the cup, and the coffee are all separate stamps. Then there is a separate stamp for the latte art heart! I stamped the coffee part in brown ink and then white heat embossed the white heart on top after. I put my sentiments in circles to continue the circular theme of the cup and saucer. I gently inked the edges of my circles with Antique Linen Distress Ink and a sponge dauber…. Just to soften a bit. I colored my images with watercolors and a water brush. Kept it sweet and simple. Not too fancy. The Femme Frames dies make the perfect scallop background layer. 

    Concord & 9th Let's Chat. Coffee card by Wanda Guess


    1


    Concord & 9th Let's Chat stamp set. Card by Wanda Guess


    This card is nice and flat for easy mailing! Are you proud of me for not using twine and enamel dots? LOL! 

    1


    Have a super wonderful fabulous week my friends!! I'm SOOOOOOOO excited because my city (Sacramento) is getting a Container Store finally! OMG! The Grand Opening is this Saturday! This makes me very happy. XOXOXO What's making you happy this week? 

    1