Category: Blog

  • Happy Memorial Day Weekend 2012!

    Hi friends! Happy Memorial Day Weekend! Hope you are planning fun times with friends and family. It's always a good idea to stop and remember the reason for the holiday. As you might know, if you've been reading my blog for a while, the DH and I are both military children. My father served in the Navy and my husband's father served in the Army. We are grateful for the service of our parents and for the sacrifices made by all military families. I salute our troops and I'm proud to be an American!

    I made a card in honor of the holiday, using the new paper collection from Bo Bunny, called Liberty. It's perfect for Memorial Day and 4th of July!


    2


    I adore this denim ribbon from Stampin' Up! Don't you love red and denim together…always? I think the button is from Doodlebug.

    3


    This sentiment is from a patriotic Stampin' Up set that was released in 2001. It says it all… I stamped the stars background in versamark ink onto kraft cardstock. Added some red gems to the centers of the stars and also on the patterned paper for some shine.

    4


    5


    Here is a flag picture I took in San Francisco back in March…there are actually two flags! Can you see the tiny one in the background? Is there anything more moving that a giant flag blowing in the wind? This one was a beauty.

    1

    Happy Memorial Day Everyone!


    Birdie signature!

  • Happy Birthday, Cupcake!

    Greetings and Salutations! How are ya? Today is one of my days to post for Taylored Expressions and I have a fun cupcake birthday card to share with you! I used one of the most versatile sets from Taylor, called Build a Treat and you can use it to make ice cream and cupcake treats…to your heart's desire! I also incorporated Jen's Sketch #51 for a fun layout. I needed a birthday card this week…and that is where my inspiration came from. I went through my stash and found some happy papers to match my mood.


    IMG_2854


    Here is the Sketch Image from Jen – you really much check out her blog, and there is still time for you to put in your entry for this great sketch!


    Sketch51


    This set is so much fun. I love how each element is separate, so you can choose your colors. This set also comes with matching dies – which are also a lot of fun! I used the TE Medium Scallop Die for my bottom scallop edge. Put some twine on and a cute Doodlebug button to match….

    IMG_2855


    Here is the stamp set image….

    BuildaTreatpkg2


    Happy Birthday Cupcake!

    IMG_2856


    Thank you for coming by today! Have a good one!

    Birdie signature!

  • Taylored Expressions May Release Day!

    May2012releaseday                            

    TE RELEASE DAY!                                           

    • All of the new products are now available for purchase! Check out the Fresh Out of the Oven Department to see everything in one place!
    • More projects from the Baker's Dozen to inspire you. Just follow the link list below.
    • Be sure to check the TE Current Specials page for May Release Bundle options. The new Father's Day Digi Image and inspiration sheet is available FREE with purchase of any Bundle!
    • Did you win one of the Mystery Baker's Dozen Blog Giveaways? Find the list of winners on Taylor's Blog.


    Today I'm featuring a new set from the Whimsical Wishes line of stamps by Nancy McKinney. It's called Oops A Daisy and it's beautiful. It is a full size set of 20 images and sentiments and is another gorgeous floral set from Nancy. This set also has four coordinating dies. Once again, Taylor has given us a choice of solid or open line images for coloring and stamping. Truly something for everyone! This is the perfect set for Mother's Day.

    For my card, I chose to use the solid images and emboss them on watercolor paper for a soft effect. Hope you like it!


    4


    Here's a close up of the watercolor wash I put over the images. I stamped in white pigment ink onto watercolor paper and then heat embossed with white powder. Then, I wet the entire sheet of paper and chose some colors of watercolor pencils and just played around with it until I got the look I wanted. This is a very forgiving technique. At the end, I chose to distress the edges just a bit to "ground" my image.  

    4a


    This is how it looked before watercoloring….

    4b


    I kept the layout clean and natural and simple. I think this looks nice with yellow and kraft. Just a touch of twine…

    4c


    4d


    For my second card for today I have a (not really) funny story! I was supposed to make TWO cards yesterday! I spaced out and made this card on the wrong day. It kind of worked out that today ended up being a very daisy day…with two card using beautiful new daisy stamps! Is it Friday yet? This next stamp set was illustrated by the lovely Nancy McKinney and is another gorgeous Petite set in the Bouquet series – this is Daisy Bouquet, a set of 6 stamps for the Whimsical Wishes line.  This set included sentiments that coordinate perfectly with the new Mini Tags Dies, which is a set of 9 tags in super cute shapes. I chose a more traditional tag and attached it to my card using some twine. These little tags are awesome!


    5


    5a


    My Copic color choices for this card….

    5b


    One trick to making things look white (the daisy petals) is to color them grey! I know this sounds counterintuitive…but it works! It tricks your eye into seeing white. Try it some time!

    5c

    Here is the image of the Mini Tags….

    Mini Tags
    Thank you for coming by this week. It is always fun to share sneak peeks with you. I just know that you have found some things you want to buy today! I hope the rest of your week is awesome. Now, get to shopping! 🙂

    Here are the last linkys of the week:


  • Charmaine Ikach
  • Jami Sibley
  • Jen Shults
  • Jodi Collins
  • Karen Giron
  • Melissa Sauls
  • Michele Boyer – Guest Designer
  • Nancy McKinney – Illustrator
  • Regina Mangum
  • Sankari Wegman
  • Stephanie Kraft –
  • Taylor VanBruggen
  • Tori Wild
  • Wanda Guess  Birdie signature!
  • CHA Day Two!

    Hi everyone! Day two of CHA was just as much fun as day one! Today was full of celebrity sightings and good stuff. What a complete blast this experience has been. I am going to need at least a week to process all of this! Tomorrow is the last day of the show, and then I will drive home on Wednesday. I hope you are all having a good week too. I have some more pix to share.

    First up this morning we saw David Tutera talking about his new wedding crafty stuff. Jami got her picture taken with him!

    image from https://ablogcalledwanda.com/wp-content/images/6a0120a7861a18970b0168e6657f05970c-pi.jpg

    I really want this punch!

    image from https://ablogcalledwanda.com/wp-content/images/6a0120a7861a18970b0163006e9a4e970d-pi.jpg

    The Anna Griffin booth was to die for! That's her sitting at the table. The samples were truly works of art.

    image from https://ablogcalledwanda.com/wp-content/images/6a0120a7861a18970b0163006e9a5b970d-pi.jpg

    image from https://ablogcalledwanda.com/wp-content/images/6a0120a7861a18970b0168e6657f16970c-pi.jpg

    Here's a good shot of the floor.


    Floor

    Brand new Epiphany tool – banner shape. Have to have this!

    image from https://ablogcalledwanda.com/wp-content/images/6a0120a7861a18970b0167616441d6970b-pi.jpg

    I won a giant pink tape gun in the 3M raffle!


    1a

    Amy Tangerine!

    image from https://ablogcalledwanda.com/wp-content/images/6a0120a7861a18970b0167616441e7970b-pi.jpg

    The crew from Papercrafts! They were so nice! Regina won a copy of their brand new book.

    image from https://ablogcalledwanda.com/wp-content/images/6a0120a7861a18970b0167616441f0970b-pi.jpg

    Tori Spelling talking about her new jewelry crafting line. She was so sweet in person. I got some better pictures on my camera. She's adorable.

    image from https://ablogcalledwanda.com/wp-content/images/6a0120a7861a18970b0168e6657f34970c-pi.jpg

    Taylor took us out for a nice team dinner in Downtown Disney and we got to share thoughts on the day. That's it for tonight! I probably won't blog tomorrow night. I have a fun post already scheduled for Wednesday. Thanks for all the nice comments! It's been so fun to share with all of you. Hugs.

  • Greetings from CHA!

    Hi Everyone! Whew, I'm so exhausted and happy and overwhelmed all at the same time tonight. Day one of the giant CHA convention was amazing! I'm trying out the whole blogging from my iPhone thing tonight. Let me know how it goes.

    I met Taylor, Jami, Melody, and Regina from the Baker's Dozen team and everyone is so great. We had the best time walking the show today. I saw lots of friends and lots of bloggers I admire. Truly a crafty girl heaven.

    Last night we had dinner in Newport Beach right on the water.

    image from https://ablogcalledwanda.com/wp-content/images/6a0120a7861a18970b0168e6560d39970c-pi.jpg

    Then this morning we were off to the show!

    image from https://ablogcalledwanda.com/wp-content/images/6a0120a7861a18970b0163005f1c0a970d-pi.jpg

    Woohoooooo!

    image from https://ablogcalledwanda.com/wp-content/images/6a0120a7861a18970b0168e6560d3d970c-pi.jpg

    Here are pix of some of my favorite things from the day. First up, the Pebbles booth.


    Pebbles

    Crate Paper is always great!

    image from https://ablogcalledwanda.com/wp-content/images/6a0120a7861a18970b0168e6560d46970c-pi.jpg

    Awesome new polka dots from Doodlebug.

    image from https://ablogcalledwanda.com/wp-content/images/6a0120a7861a18970b01676154d7f6970b-pi.jpg

    Twelve new colors of Memento ink!

    image from https://ablogcalledwanda.com/wp-content/images/6a0120a7861a18970b0168e6560d56970c-pi.jpg

    Regina, Jami and Melody at the Tombo make n take!

    image from https://ablogcalledwanda.com/wp-content/images/6a0120a7861a18970b0168e6560d60970c-pi.jpg

    I am in love with this new paper from October Afternoon. It's called Cakewalk.

    image from https://ablogcalledwanda.com/wp-content/images/6a0120a7861a18970b01676154d80a970b-pi.jpg

    Gorgeous new line from Websters Pages called Palm Beach.

    image from https://ablogcalledwanda.com/wp-content/images/6a0120a7861a18970b0168e6560d6b970c-pi.jpg

    Prima!

    image from https://ablogcalledwanda.com/wp-content/images/6a0120a7861a18970b01676154d814970b-pi.jpg

    Want these!!

    Markers1

    I am where exactly???


    Map1

    Love the new Jillibean Soup stamps and paper.

    image from https://ablogcalledwanda.com/wp-content/images/6a0120a7861a18970b0168e6560d84970c-pi.jpg

    image from https://ablogcalledwanda.com/wp-content/images/6a0120a7861a18970b01676154d823970b-pi.jpg

    New Basic Grey Konnichiwa collection is so pretty.

    image from https://ablogcalledwanda.com/wp-content/images/6a0120a7861a18970b0163005f1c3c970d-pi.jpg

    Yumminess inside!

    image from https://ablogcalledwanda.com/wp-content/images/6a0120a7861a18970b01676154d82c970b-pi.jpg

    Martha is everywhere!

    image from https://ablogcalledwanda.com/wp-content/images/6a0120a7861a18970b0168e6560d8f970c-pi.jpg

    I want alllllll of this!

    image from https://ablogcalledwanda.com/wp-content/images/6a0120a7861a18970b01676154d834970b-pi.jpg

    image from https://ablogcalledwanda.com/wp-content/images/6a0120a7861a18970b0168e6560d98970c-pi.jpg

    Cute stuff!

    image from https://ablogcalledwanda.com/wp-content/images/6a0120a7861a18970b0163005f1c4e970d-pi.jpg

    Twelve new Copic colors!

    image from https://ablogcalledwanda.com/wp-content/images/6a0120a7861a18970b0168e6560da2970c-pi.jpg

    All the new stuff from MME was beautiful!

    image from https://ablogcalledwanda.com/wp-content/images/6a0120a7861a18970b01676154d83c970b-pi.jpg

    I adore this!

    image from https://ablogcalledwanda.com/wp-content/images/6a0120a7861a18970b01676154d842970b-pi.jpg

    Can you say 'crafty overload?!' what a fabulous day! Tomorrow I want to take some pictures of all the wonderful projects on display. I hope you have a great day! Let me know what you think!

  • Grab Boxes For Sale!

    Hi everyone! It’s time for a new year and that means time for some cleaning and reorganizing in my craft studio!  I am very blessed to have so many awesome crafty things to play with…but alas…there isn’t room for it all anymore. So, I thought I would sell some grab boxes. It’s like a grab bag, only bigger – and better!!

    I’m putting together some goodie boxes…the big, flat priority mail boxes from the post office (see more info below) filled with stamps, stamp sets, paper, ribbon, doo-dads, glitter, dies, stickers, flowers, magazines, embellies, etc… The stamps are either brand new or gently used. (I’m pretty careful with my crafty things.) I think I have enough stuff to do twelve boxes.

    Here are the details:

    1. USPS Priority Mail Flat Rate Box (13-5/8″ x 11-7/8″ x 3-3/8″) filled with stamps, stamp sets, paper, dies, glitter, flowers, magazines, ribbon, embellies, and/or stickers.

    2. $55.00 – which includes the $10.95 shipping charge and much more than $55.00 worth of goodies! OR, if you’re local, and I’ll be seein’ you, choose the paypal option for a Grab Box for $44.05 (no shipping)!

    3. Payment via Paypal to United States addresses only. I will use Paypal shipping so you can track your goodies.

    If you are interested, please click below!


    Shipping Options


  • Happy New Year! Welcome 2012!

    Happy New Year! WOOOOO! It's time for another year and a fresh start and a time of renewal. To me it's also a time of reflection and thought. I like to look back on the year and think what worked, and what didn't work, and prepare myself to begin again. Do you do that? I don't really make resolutions per se, just more of an effort to have a consciousness about what I'm doing and where I'm going. I truly hope that 2012 is a year of many blessings for you and your family. I wish all of you health, happiness and success in the coming year. Thanks to everyone who's been leaving me Happy New Year's wishes!


    ImagesCABN416E                                                             {photo from weheartit.com}


    From the standpoint of being a blogger, New Years will always mark another year of blogging. I purposely started my blog at the beginning of the year…and now it's been exactly two years. I'm still here, typing away, sharing what I love to do and enjoying the comraderie and love. I can't even imagine not blogging anymore!

    I find it interesting to note the changes since last year… Last January 1st,  I wrote: "In the past year, I have written 195 blog posts, received 889 comments from readers, and had 30,324 "hits" here at A Blog Called Wanda!" As of today I can say that I have written 387 blog posts, received 3104 comments from readers, and had 221,000 "hits"! Isn't that amazing!? I find it truly amazing. So much fun…it should be illegal. I really am so excited every time someone leaves me a comment. THANK YOU!

    The past year presented me with so many wonderful opportunities and I just want to say a big thanks to the people who believed in me enough to let me be a part of their companies. I don't ever take that for granted.

    2012 will start off with a trip to my first CHA Convention in Anaheim at the end of January, where I will get to meet some of the other Baker's Dozen Designers. CAN'T WAIT for that! I'm trying to figure out how to (properly) blog from my iPhone so I can share photos with you of any cool new stuff I spot there. I have wanted to go to a CHA convention forever!

    I don't know what else 2012 has to offer…but I'm so looking forward to finding out! Thank you for sharing this journey with me, for coming along with me, and crafting with me! I appreciate it so much more than I can write. Thank you…and HAPPY NEW YEAR!!!

    Birdie signature!


  • MERRY CHRISTMAS EVERYONE!

    "And there were in the same country shepherds abiding in the fields, keeping watch over their flocks by night. And lo, the angel of the Lord came upon them, and the glory of the Lord shone round about them, and they were so afraid. And the angel said unto them, Fear not, for behold, I bring unto you good tidings of great joy, which shall be to all people. For unto you this day is born in the City of Bethlehem, a Savior, which is Christ the Lord. And this shall be a sign unto you; you shall find the babe wrapped in swaddling clothes and lying in a manger. And suddenly there was with the angel, a multitude of the heavenly host, praising God, and saying, 'Glory to God in the highest, and on Earth peace, good will toward men'".

    That's what Christmas is all about, Charlie Brown.


  • Chocolate + Peppermint = YUM!

    Well…Christmas time is fast approaching! Are ya ready?! I think I am finally ready and winding down a bit. I'm posting some food today instead of a card. One of my very favorite flavor combinations is chocolate + peppermint. I love anything with those two flavors! REALLY love me a peppermint mocha or some chocolate covered Altoids, or Ghirardelli Peppermint Bark squares…Mmmmmm. Okay, now I'm hungry again! Usually I like to make Peppermint Bark at the holidays, but it just didn't happen this year. My other favorite thing to make is Chocolate Mint cupcakes. I made two batches this week! I use Devil's Food cake as the base and then add Pure Peppermint extract to a basic frosting recipe. Crunch up some candy canes and sprinkle them on top…voila!


    1


    2

    Every year, I can't wait to get out my few prized Spode dessert plates. I only have 10 of them, and they make me happy! We bought them several years ago when we used to have an annual dessert party at our house. Aren't they pretty?

    3


    4

    One batch was to bring up to my brother's house for us to eat, and the other batch was for our Annual work Holiday Potluck, which was Monday. Here is the batch all ready to go on Monday in my pink carrier!

    6


    7
    Do you have a favorite holiday treat that you make? What is your specialty? I would love to hear about it…leave a comment with a link to your recipe. Have a great day today! Thank you for visiting!

    Christmas banner signature

  • Poppystamps goodies….

    Hi peeps! I'm trying like crazy to post all my Christmas projects! Who knew I would run out of time to share?! As you guys know, I work over at the Poppystamps blog too, and I've been sharing projects over there…but I really wanted to post them here too! Today I'm posting a couple of cards…I will link you back over to the Poppystamps blog for the supplies, etc.

    This first card is called "Let it Snow" and features one of the window dies that Dave created! This is the larger of the two and I LOVE it! Just wait until you see what he added for Spring time to go with the windows…you won't be disappointed!


    1 copy


    2


    3


    4

    The second card is "Holiday Birdie" and features new Winter stamps and my favorite gingham papers! He is so fun to color. I used colored pencils for this one…but it would be a good Copic project too.

    5 copy


    6


    10


    8

    I took a clear diamond stickles and added a line of snow for him to stand on…and then made small dots all over to look like falling snow.

    7
    Have a fabbie, creative day! Hugs to you!

    Christmas banner signature

  • MMMMM….a yummy cupcake card!

    Hello! I'm here today to share a fun card made with some of my favorite Taylored Expressions stamps and supplies! I LOVE the TE dies….they match the stamps….but sometimes I just use the dies! In this case I used the uber cute cupcake dies from the Build a Treat  set and the Tiny Toppers too!  I combined them with the sentiment from another one of my favs…the Labels of Love II set. It's clean and simple… 

    1


    I simply adore that holly leaf from the Tiny Toppers Dies! I used it all over the place on this card! It's the perfect size for cards. I have used it for many other projects too!  This is an A2 sized card, to give you reference on the size of the dies.

    2

    You know I'm a girl who loves some glitter! I covered the entire top of the cupcakes with ultra fine glitter before putting them on my card. Makes them look so yummmmy!

     4

    Thank you for visiting today! Have a blessed day! 

    Christmas banner signature

  • One last Halloween card!

    Hey there blog friends! Hope you're having a most fabulous Saturday! I'm in the crafty cave here for just a bit and then I'm dragging the hubs over to our BRAND NEW Hobby Lobby store that just opened this week! YAY! This is a new thing for us here in Northern California and I'm excited to get over there and see what's up! I'm sure the hubs is thrilled too…hee hee.

    I have one last Halloween card to share today… Monday starts TE Sneaks for November… Yes, already! This Halloween card is for a special friend of mine…the fabulous and crazy Corky! She loves Halloween and also Dia de los Muertos. She makes such coooool projects and quilts and shrines. OMG I wish she had her own blog. Maybe I'll share the fun story of how I met Corky?? We met 16 years ago at a Rubber Stamp Convention! We were both looking at the same project display and started talking to each other. She said something like "No one ever sends me cool mail like that." So I said "Give me your address, and I'll send you some mail!" So I got her address….went home that night and whipped up a card for her using the neato 'A Stamp In The Hand' fruit stamps (awesome) and sent it the next day! I am sure she was quite surprised by that!! SO, for the past 16 years we have been pen pals and friends. Cool story huh? I love that story! Stamping girls ROCK!

    Anyhoo, since Corky loves Dia de los Muertos and Halloween, I am always scouting for things to send her. This card today was inspired by a letterpress greeting card I found. I jazzed it up some, took it apart, and mounted it on her card.


    1


    2


    Here is my inspiration palette of tihngs…You can see that letterpress card was only black and white. You know I had to add some orange to it!  

    3


    I wanted a uniform color scheme so I needed some orange flowers! I had to make them from some plain white ones. I carefully covered each petal with glue and then submerged them in ultra fine glitter. I like that they came out sort of imperfect and vintage looking. This technique will be used again! 

    4


    I used a dark orange Copic marker to color just the banner on the card. I used YR14.  

    5


    I felt that the background paper was too plain so I got out a swirly stamp from Judikins and added some black accents to the paper.  

    6


    And here it is…all done… 

    7
    I hope that you all enjoy a fun Halloween weekend! See you soon!

    Birdie signature!

  • Caramel Apples for Fall…

    Hi friends! Today I'm not posting a card…I'm posting some food fun! This past weekend I got a bee in my bonnet to make some fancy schmancy caramel apples. I was trying them out to see if they were something I could make to bring to work for Halloween. Well…before I get too deep into this post I will tell you two things. One, they were FREAKING delicious! Two, I will never be making them again! It was a total sticky, gooey, chocolately, caramely mess that took all day! I will have to think of some other treat to bring to work! Have you ever seen THESE?  A few years ago someone gave us some of these and they were the most decadent and yummy creations. So, Miss Wanda thought she could make them at home and save fifty bucks! I now know they are worth every penny! Okay, on to the food fun…

    You need nice pretty green granny smith apples, caramels, chocolate chips and mini chocolate chips. Sounds easy so far right?


    IMG_8932


     IMG_8935

    Unwrap all the caramels (have the DH do this part) and put them in a pan with a tiny bit of water and melt them very slowly, stirring a lot! This part will turn into cement later!

     IMG_8939


    IMG_8940
     

    It takes quite a long time to turn to molten lava…but be slow about it. If you burn it, the entire thing is ruined! I would say it took at least 10-15 minutes.

    IMG_8941
     

    To dip the apples, I put them right into the pan on the stove and then used a spoon to spread the caramel over the apples. Be sure to let it run off for a while or you will get giant puddles of caramel on your wax paper. (This was my second attempt).

    IMG_8942
     

    Put them in the fridge right away to chill the caramel and harden it. I left them in the fridge for about an hour and then double dipped them in caramel again. It seemed too thin with just one coat.  Put them back in the fridge for another hour….

    IMG_8944
     

    Now the chocolate! Melt semi sweet or milk chocolate in the microwave on low – stirring a lot also. I dipped the apples right into the container and spooned the chocolate over them. Then put mini chocolate chips on the apples! YAY!

    IMG_8945


    IMG_8946


    IMG_8948
     

    Then you put them back in the fridge for another couple of hours….

    IMG_8950
     

    And then go and read a stamping magazine and take a nap…and wait to eat the yummy apples…. 

    IMG_8952
     

    Finally! Here is the finished product all gussied up for my photo shoot! MMMMMMM…. They are not quite as shiny when they come out of the fridge. But that's okay.

    IMG_8952a


    IMG_8955
     

    And…about five seconds after this photo was taken, these pieces were GONE!  So delicious! If you have more patience than I do – you should try it!

    IMG_8958 

    What is your favorite Fall recipe? If you have one to share, leave me a link…I would love that! Have a wonderful weekend everyone! Thanks for stopping by my blog!
    Birdie signature!


  • Taylored Expressions August Sneak Peeks Day 2!


    TuesdayAugust2nd copy
     

    AUGUST RELEASE AT A GLANCE:

    • We have more sneak peeks to share Today and tomorrow! All of the new products will be available for purchase on Thursday, August 4th at 8 am PST. You'll find it all in the Fresh out of the Oven Department at the Taylored Expressions Store.
    • Join us as a fan on Facebook for an early peek at the stamp sets, as well as a SPECIAL Facebook GIVEAWAY, on Wednesday night beginning at approximately 6 pm PST.
    • Angel Bundle Prize Drawing: We're very excited to be supporting the Angel Tree with Joy to the World, the newest set in the TE Giving Tree Program.  If you'd like to be entered to win our Angel Bundle Prize Pack (Joy to the World Full Sized Stamp Set, Angel Kisses Taylored Card Kit, and the Musical Swirls Taylored Impression Plate) simply click over to the Angel Tree website and find the answer to this question: "Name the founder of Angel Tree." E-mail Taylored Expressions with the answer in the subject line of your e-mail by Wednesday at 6pm PST.  The winner will be announced on Taylor's blog at approximately 10 pm PST Wednesday night.

    Today we're introducing TWO stamp sets! The first is "Embrace Beauty" and the second is "Bugabee!" There are very cool matching dies for both sets. LOVE.

    "Embrace Beauty" was concepted by Jami Sibley (yay!) and illustrated by Nancy McKinney for the Whimsical Wishes Collection. It is a full sized set on a 5.75" x 8.5" sturdy storage panel and it includes 9 images/sentiments. It was designed for use with Spellbinders Fleur de Lis dies, Spellbinders classic circles, and a 1 ¾” circle punch. One word for this – AWESOME! It also coordinates with the Summer Afternoon and Discover Your Wings full sized stamp sets if you have those already!


    7 EMBRACE BEAUTY TUESDAY WANDA copy 
     

    This set is so pretty! I love the font for the sentiments – don't you? The main image fits perfectly into a circle Nestie and then I added some more layers of color and finally that gorgeous Fleur de Lis Nestabilities set! OMG. I cut out the butterfly in a different color and added some glitter glue.  

    8
     

    This card has lots of dimension to it. I couldn't help myself layering…The inspiration was the MME designer paper!

    9


    10 


    The "Bugabee" set was concepted by Charmaine Ikach and illustrated by Taylor VanBruggen for the *TE* Collection (this is Charmaine's first stamp set for TE!) WOOOOT! It is a full sized set on a 5.75" x 8.5" sturdy storage panel and includes 27images/sentiments. It is a super fun set! You can combine and layer images to create lady bugs, bees, butterflies, and flowers.  big bold sentiments to create happy greetings. The matching dies are equally wonderful (I used the bugs and the flowers for my project):

    Bugabee Bug Dies – set of 6 dies to create layered ladybugs, bees and butterflies

    Bugabee Flower Dies – set of 6 dies to create flowers with our without the coordinating stamps

    Grass Border Die -  6 " long – this is a die you'll use and use and use!

    My card using "Bugabee" is a little different! I made a refrigerator card!!! When I first saw the stamps and the dies I thought…wow…those would make the cutest little magnets! So I knew I wanted to make magnets out of them. Then I was trying to figure out a clever way to give the magnets to the recipient… And, there you have it, a refrigerator card was born! hee hee. So funny.  


    11 BUGABEE TUESDAY WANDA copy
     

    I made the freezer and the fridge part open seperately! The swirls come with the set and are supposed to be for the flight of the bugs…but I used them to make some cooooolllddd air! Love the big, fresh, fun sentiments with this set.  The finished card measures 8 x 4 inches.

    12 BUGABEE TUESDAY WANDA


    I attached part of the little magnets to the fridge and the other part of the magnets to the backs of the bugs and flowers. The person can move them around. Or…I was thinking they would be cute on a cubicle ledge at work too.  They all come off!

    13 BUGABEE TUESDAY WANDA


    14


    Did you notice something important on my tiny shopping list!?

    15 copy


    Thank you for popping in. These cards were fun to share with you!  Here are the links to the other Baker's Dozen Designers! You will definitely want to see what everyone else has made!

     Birdie signature!


  • Taylored Expressions May Previews – Day Two!

    TuesdayMay3rd 
    Hi! Today is Sneak Peek Day #2 for the May Taylored Expressions release! All of these sets will be available for purchase on Thursday morning at 8am PST. You can get the full stamp set reveal on the TE facebook page Wednesday night: https://www.facebook.com/#!/tayloredexpressions

    In keeping with our baby theme for May, today's release features the stamp set "Bringing Home Baby" which is full of nursery items. Here is my second card for the week, using this cute set. As soon as I saw the stamps, the first idea that "popped" into my head was…pop-up card! All these images just made for the sweetest nursery scene! I had so much fun making this one. Haven't made a pop up card in years. I had fun cutting, coloring, stamping and creating! That little window is just the most fun thing ever!


    IMG_6514 
     

    Here is the card when it is closed. It is a 5 1/2 inch square. The paper collection is My Mind's Eye Stella Rose Hazel Collection.   These paper collections I'm using this week are divine…and they come in 6×6 packs which are perfect for us card makers. Everything was colored with my Copics (of course)!

    A
     

    Here is the card 1/2 way open so you can see the inner structure of it. For the window, I mounted it on foam tape to stand up off the "wall" a bit. This card is THICK and juicy!

    IMG_6511
     

    Here is the top view so you can see my little oval area "rug" with the sentiment! Also, you can see how the pop-up mechanics work. Super simple…just cut out a slit from the middle of the fold (or two as I did here) and voila…pop-up!

    Here are some easy directions: http://www.ehow.com/video_4971702_make-popup.jpg-card.html

    IMG_6516
     

    IMG_6513 
    Taylor's stamp sets come on a 5.75" x 8.5" full color sturdy storage panel that fit into a binder. They are super easy to store and I love the colored images on the storage panels.  They are deeply etched red rubber on EZ Mount – already trimmed and ready to use! 

    "Bringing Home Baby" was illustrated by Nancy McKinney for the Whimsical Wishes line -  it has  23 images  – so many possibilities for building your own nursery scene like I did! The other sneak peek set for today is called "Baby Cakes" and features baby images with our favorite Cuppie!! hee hee.

    As with every day…please go and check out what the rest of the Baker's Dozen has for you!

    Charmaine Ikach
    Danielle Lounds
    Jackie Pedro
    Jami Sibley
    Jodi Collins
    Karen Giron
    Karen Motz
    Melissa Sauls
    Regina Mangum
    Sankari Wegman
    Taylor VanBruggen
    Tori Wild
    Wanda Guess

    Nancy McKinney – Guest Designer

    Birdie signature!
     

  • Tea and Scones… It’s wedding day!

    Congratulations William and Kate!

    File_12_7_1 
     
    'Cheerio Lords and Ladies! It's Royal Wedding Day! What a lovely day and how nice to see some good news on the tele today. In this day and age of constant change I think it is so great to see tradition in action. I don't really have an opinion one way or the other about Monarchy in a political sense…I just know that I love all the ceremony and elegance that comes from doing things the same way for hundreds of years. The gorgeous gothic architecture of the church, the uniforms, the hats, the crowns and carriages…all of it is interesting to me. It is also a wee bit personal, as my father's family name is from Wales!

    I remember staying up all night in 1981 (I was in high school) to watch Diana and Charles' wedding. That was way back when and my family didn't own a VCR yet! It was a big deal. This year, I set the DVR for about 10 hours worth of BBC America and am now watching it in the background as I go about my day.  In honor of this very British day…I decided to make scones and tea! Pip Pip!


    1

    I found the recipe on All Recipes.com….click here to link to it…   I made the recipe exactly as it is listed, no changes. I cooked them for 17 minutes exactly. With scones, be careful not to over cook them. They will look like they're not cooked enough…but they are! If you cook them too long, they get dry. I like that this recipe has sour cream in it. You can't really taste it, but it makes them moist.

    Here they are before going into the oven. I like to leave mine together instead of cutting them apart before cooking. I added dried apricots instead of raisins. I think it would taste good with dried cherries or blueberries, too.

    A
     

     You MUST have English Breakfast tea and marmalade!

    B 


    Bb
     

     Here they are just out of the oven….mmmm….

    Cc


    Dd


    F


    This is just perfect!

    William-kate-kiss-balcony 
    Did you watch the wedding? I hope you have a wonderful weekend!

    Please stop by my blog on Sunday morning for a BIG announcement! Next week there will be a lot of activity here on the bloggy blog. I hope you will join me! I've been keeping a crafty secret and I can finally tell you! 

    Birdie signature! - Copy 
     

  • Thanks a bunch card!

    Hello! How are ya?! It's been a rainy Sunday here in Northern Cal. I've been holed up in the craft studio busy as a little worker bee…making design team projects for Eat Cake Graphics and iCopic! I will have some fun stuff to share with you in the weeks ahead. I've been a copic-coloring fool…all day… What have you been up to this weekend? I hope you've been having fun and doing whatever it is you like to do.

    I have a sweet, pretty thank you card to share today. I made this card for Stephanie, the owner of Paper Garden, to thank her for so graciously having me be a guest instructor at her fab store last weekend.


    A


    Here are my supplies! I cut the black and white card base out of a big Sizzix square scallop die. The flowers were cut using a flower die from Papertrey Ink. The buttons and bees were in my stash already. The embossing on the white is a Cuttlebug folder. I couldn't decide between branches/birds or polka dots and ended up choosing the branches/birds one.
     

    Bb

    You can see I added the tiniest pink border around the white…just makes it pop off the black! I added one pretty leaf and one little bee.  

    C


    D


    IMG_5751


    IMG_5752
     

    Birdie signature!  

  • Some stuff…

    HI!! Haven't seen me around here for a few days!! It's been a very busy weekend…full of good times, stamping and great friends. I'm just sitting down to watch the Oscars and update the old bloggy blog. My stamp classes at Paper Garden over the weekend went really well. A good mix of people. I had a dad show up to stamp with his daughter…which was super adorable! I met lots of new people. Many of my friends took class too. It was a blast! I snapped just a few pics so I wanted to share with you. Thanks to everyone who came – for making it so much fun!


    A


    IMG_5793


    IMG_5794


    IMG_5795


    IMG_5796
     

     This is some pretty new silk ribbon from Japan – oh my!

    Z


    I have a quick and easy project to share today too. I needed a clipboard for my classes – to use for my email sign up sheets and such. You know, being a crafty gal and all, I couldn't just have a plain old clipboard! I had purchased a bunch of these plain clipboards on ebay a while ago and they were super cheap. I got out some patterned paper and some cool stickers that all went together…and voila! A cute clipboard in about an hour!
     

    A


    B
     

    IMG_5740


    IMG_5741

     
    IMG_5742 
     Okay peeps! Have a great week! Thank you for stopping by today!

     Birdie signature! 
     

  • CLASS INFORMATION

    COPIC MARKER INSTRUCTION

    I am a certified Copic instructor and do Copic Marker classes from my home. I can also come to your house or to your stamp club meetings and give a demonstration or a full class. Please contact me on my email: stampcatwg@aol.com

    OTHER CLASSES

    I have been stamping for 17 years, I have taught stamping classes for approximately 8 years – both at my home and in my local stamp stores. If there is something you would like to learn – I’d love to help! We can arrange personalized classes for individuals or for a gathering of stamping friends. Let me arrange a party for you, too! Just contact me and we can set up a fun event…

  • Stuff I can’t live (stamp) without!

    Hi there! Well, here we are…almost to another year! Hope your week was a good one and I hope you have a fun and happy time tomorrow night, whatever you're doing! Today's post does not have a project, cuz girlfriend is tired tonight!  From time to time, people will email me and ask me what kind of camera I have, or what kind of ink I like best, etc… I wanted to take some time to answer those questions and I wanted to share my favorite crafting supplies! If you have a question about something, please don't hesitate to email me or leave a comment after a post…I'll be happy to help!

    Every crafty girl has those few things that she cannot live without. These are mine:

    1. My camera is a Canon G11 that the DH bought me for Christmas last year. I am never without it in my purse or in the car…she goes everywhere! LOVE this camera. Small enough to fit in your bag and it is fully manual or automatic.  


    Canon_g11_powershot
     
     2. Come on now, you knew Copic Markers were second, right? Hee hee. Ever since discovering these markers, life has not been the same. Best. Tools. Ever. 


    Copic_marker_set2 


    3. My trusty Cuttlebug! I use it all the time with my embossing folders and my Nestabilities. Also, lots of stamp companies are starting to make dies and this is small enough to leave on my desk.
     

    Pro-cuttlebug
     

    4. My Genesis Paper Cutter…Where do I begin with this? Everything you've ever heard about it is true. It was very very expensive and worth every penny. These used to be hand made by a family in New England somewhere and when you ordered it you got put on a waiting list…it took ten months to get it! That was about 6-7 years ago. Now, they are advertising instant shipping! I have never had to sharpen it or do anything to it. Cuts like a dream.
     

    GenesisphotoED 


    5. Martha Stewart Scoring Board. Gotta love Martha…and this! It even comes with an envelope template. Buy it at Michael's with a 40% off coupon! 

    Martha-Stewart-Scoring-Board-Large 


    6. My favorite go-to inks, especially for stamping my images when I am going to use my Copic Markers. Gives a nice, crisp image and doesn't bleed with my markers. Comes in a ton of colors.

     Memento%20Tuxedo%20Black%20copy 
     
     
    Distress inks for, well, distressing! haha. Love this color for sponging around the edges to give that shabby chic feeling.
     
    Tim19497 


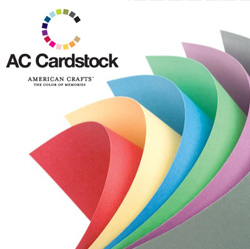
    7.  Lately, this is my favorite cardstock. I like that it is packages in three different sizes and by color families. My favorite ones are "tropical" and "primary" colors. Stores nicely and is colored all the way through. Vivid, pretty colors.


    Ac_cardstock


    8. Scor-Tape! Egads, how did I live without this before? This is great stuff. Comes in many sizes and is super strong. You can tear it with your fingers so you don't have to use scissors like some other double sided tapes. I like it because I can adhere a very heavy piece of a project and it won't come apart.
     

    Scor-Tape%20201


    9.  Martha Stewart craft punches! Oh, Lawdy…don't get me started on this… I did an entire blog post already about my obsession with these. Fun times.


    ImagesCAOFP9PZ


    10. Paper Source note cards/paper and envelopes in yummy colors. I like buying big, thick, juicy envelopes from them in colors that match my projects exactly. The closest Paper Source store is about 80 miles away so I don't make it there as often as I would like. This place is incredible. The store is a visual extravaganza for us paper lovers. Check it out!


    Colorscope_0109 

    I won't even try to decide what my favorite stamps are, or what my favorite kind of patterned paper is…because I love them all! There are so many great stamps and paper collections! I try to mix it up in that regard and try different things. I hope you had fun reading this post. I would love it if you would leave a comment and tell me what your favorite tools are! That way, we can all learn from each other! I'll be back this weekend with some photographs I've been saving for you and an end-of-the-year wrap up post. Hugs. 

    Birdie signature!