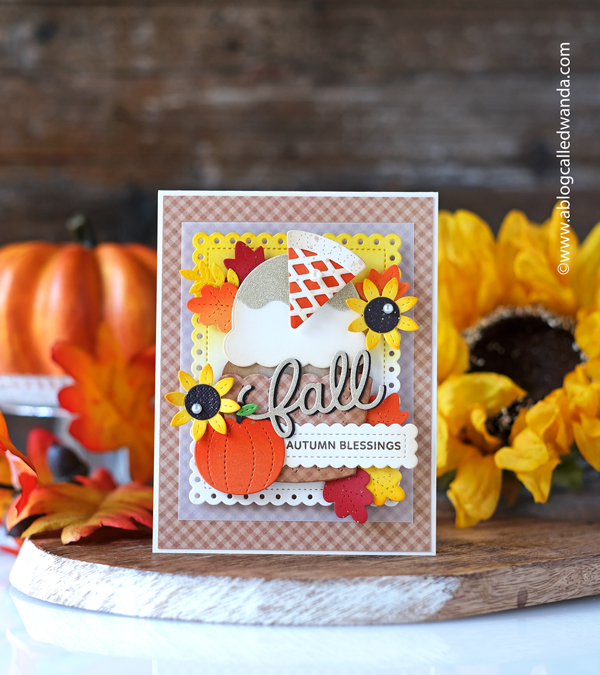
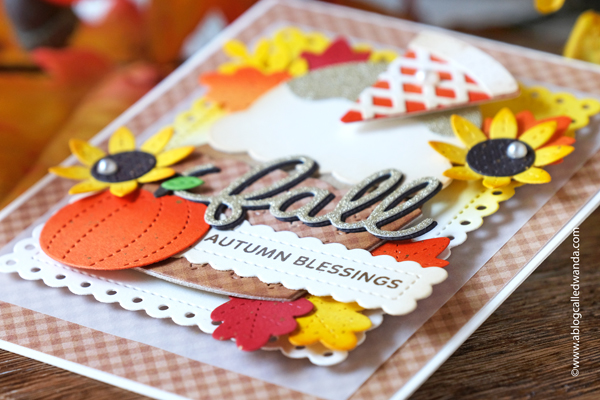
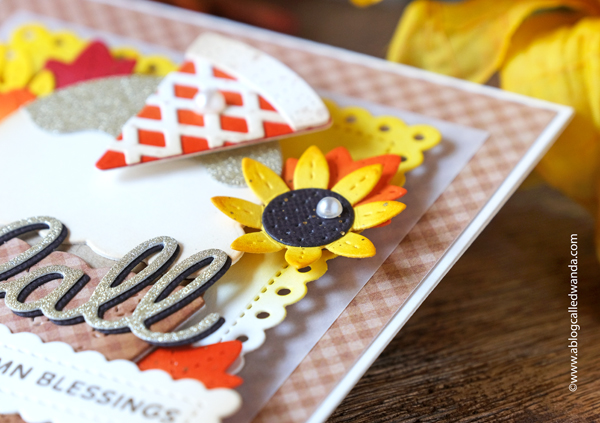
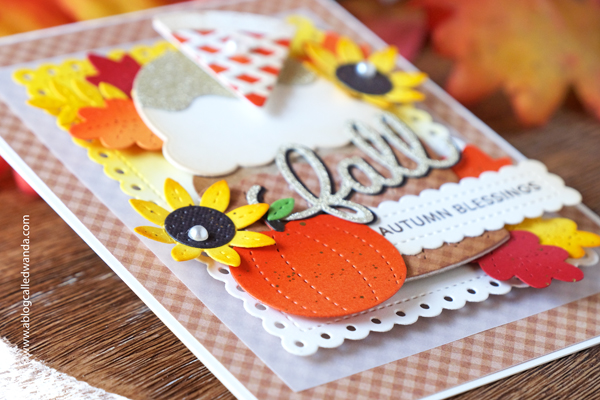
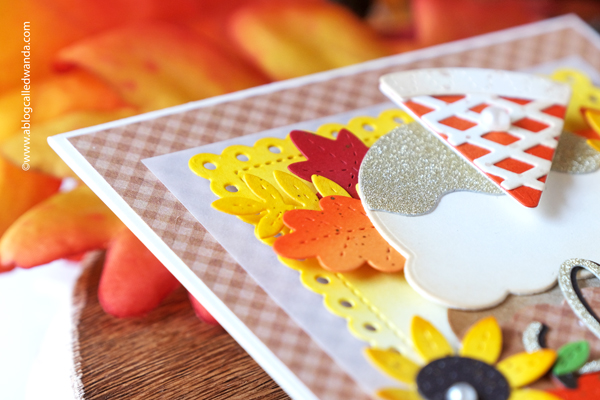
Hello my friends! How's your week going? Can you believe it's almost October?! Gosh! I do love this time of year and wish it would go by slower!! We've been out and about enjoying the nice weather and Fall activities!! Hope you're doing great! As promised, I'm back with another Autumn card I made with the awesome new release from Pretty Pink Posh! Yippeeeee! Today, my card combines two yummy things – cupcakes and pie! Hahaha. Today is also a big Instagram Hop for the new release, so if you're on Instagram, be sure to pop over and leave a comment for a chance to win a prize!!
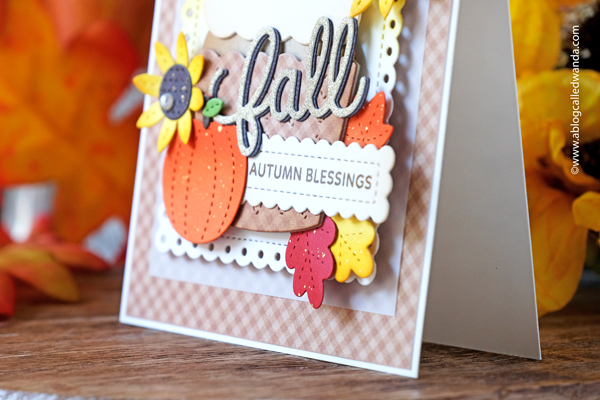
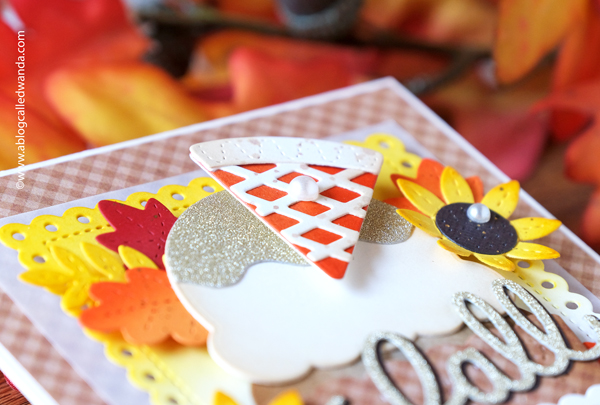
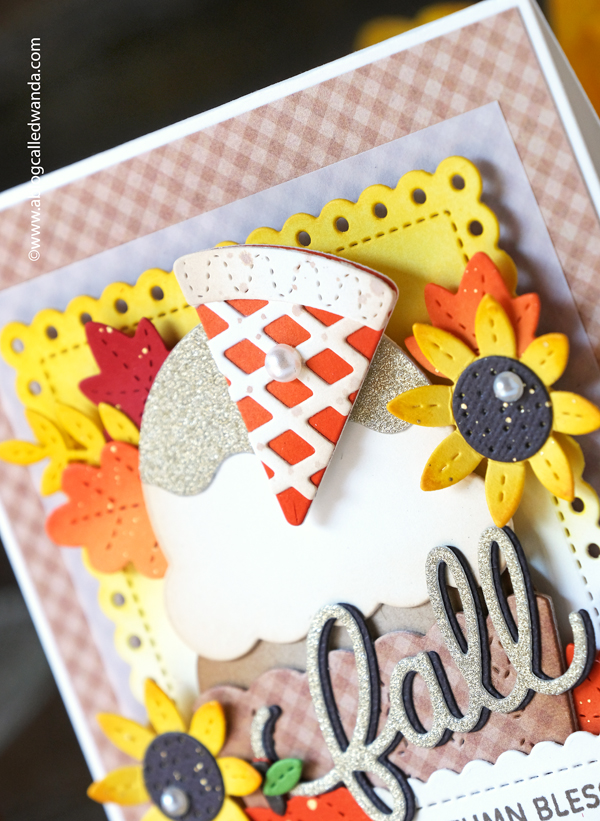
My card today features the brand new Big Fall Cupcake Dies set and the brand new Fall Script Die, along with lots of my previously released PPP favorites! My finished card is a cream card base in A2 size. I layered vellum, gingham, and a pretty eyelet panel. Then my cupcake is the star of the show! There are so many fun details on this card. Boy, was it fun to make!! I die cut all the pieces from several dies sets (SEE my supply list). I inked each piece of the dies for shading and ink splattered some pieces too. My eyelet panel in ombre inked with Distress inks and a blending brush. Bits of gold, and then some pretty pearl accents complete the look. Makes you hungry, right?! That little pie slice is seriously the cutest thing ever!!
That's it (for now) of my projects for the new PPP Fall 2024 release! Boy, I hope you can tell how much fun I had making everything. Truly a joy to create with these stamps and dies. I am ready for Fall and all the things…. Take care today friends and be blessed!! XOXO
Hi everyone! It's officially going to be FALL this week! And I am here for it! I hope you had a great weekend and hope you're doing well! I am SO EXCITED about Fall and Halloween crafting! We had a great weekend – we went to a Fall Vintage Show at one of our favorite places and we went for a mini road trip to some crafting places, and out for coffee and church, and the weather has been amazing! I started a HUGE cross stitch project this week (my biggest one ever) and it's a Halloween Sampler. I will definitely not finish in time for this Halloween, but maybe next year's Halloween! It's so cool. Once I get some done, I'll share it with you!
I saw this quote the other day from the artist Georgia O'Keeffe: “I have done nothing all summer but wait for myself to be myself again.” And this is me totally! I am renewed by the Autumn breezes and the changing light….
Today I'm sharing four fun projects I made with the new Halloween collections from Photoplay Paper! Their Halloween stuff is awesome! And everything is such nice quality and easy to work with. Three of my projects today have a vintage theme and one is pastel Halloween (Love this trend)… I have a list a mile long of all the things I want to make in the next six weeks or so. Better get bizzzyyyyyyy.
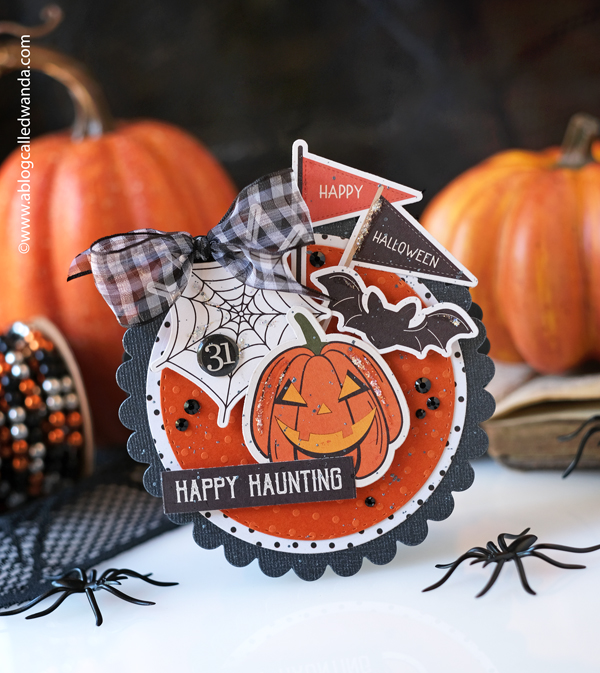
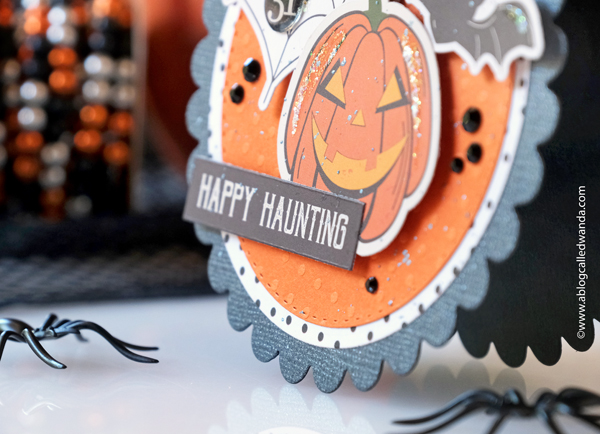
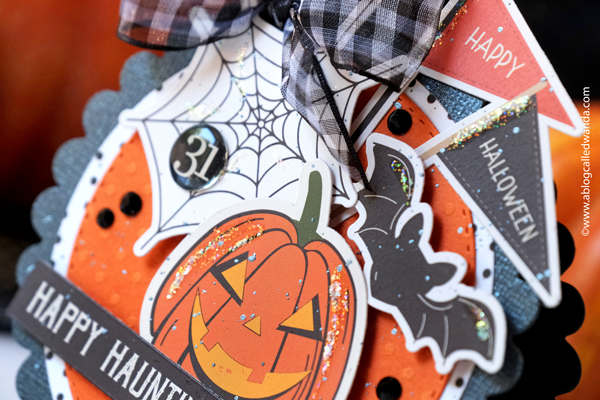
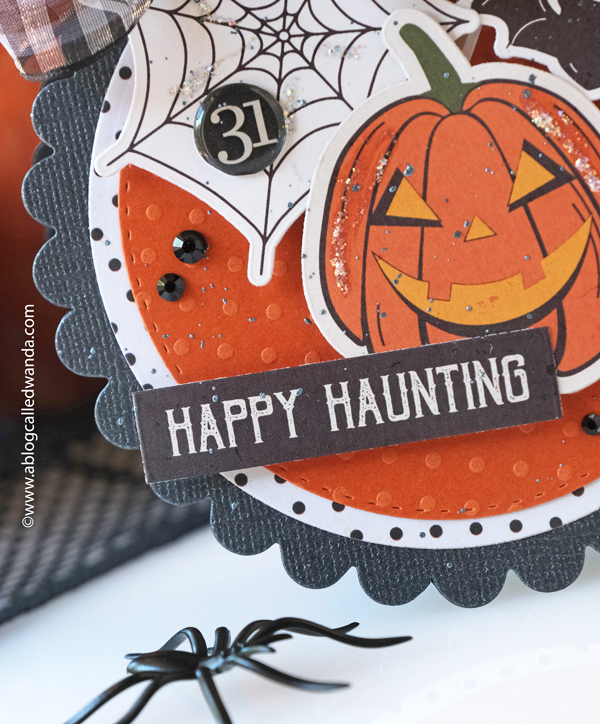
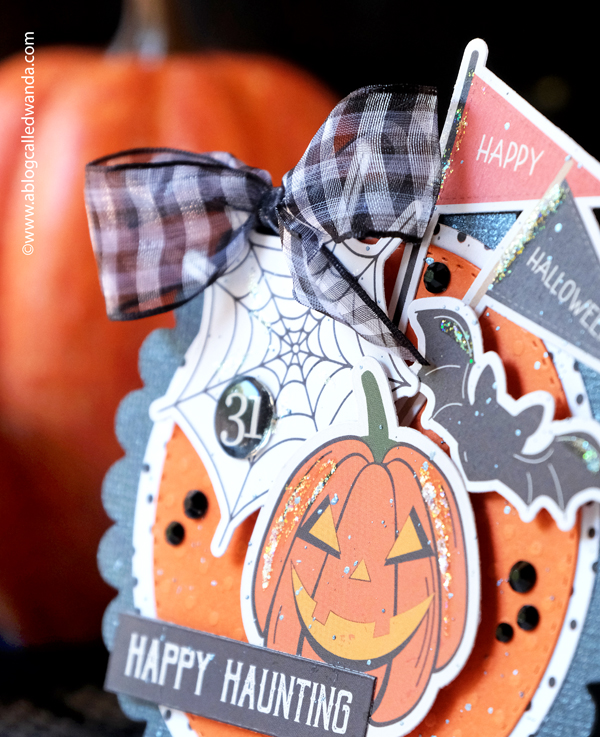
First up today is a circular card! I always forget how fun it is to create a circle card! I used all papers from Photoplay and mixed and matched papers, stickers, gems and a bit of ribbon from my stash. I die cut the card base from black shimmer paper, then layered polka dots in black and white and orange. Everything is splashed with dark silver ink. I added gems and an epoxy shape too. Bits of glitter glue on each piece add the right amount of sparkle. The card opens at the top and there's plenty of room inside for a message. The collection is called Creepin' It Real! Traditional colors and themes for spooky season!
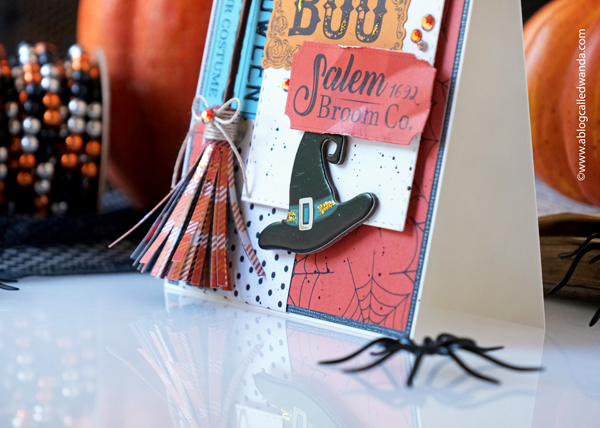
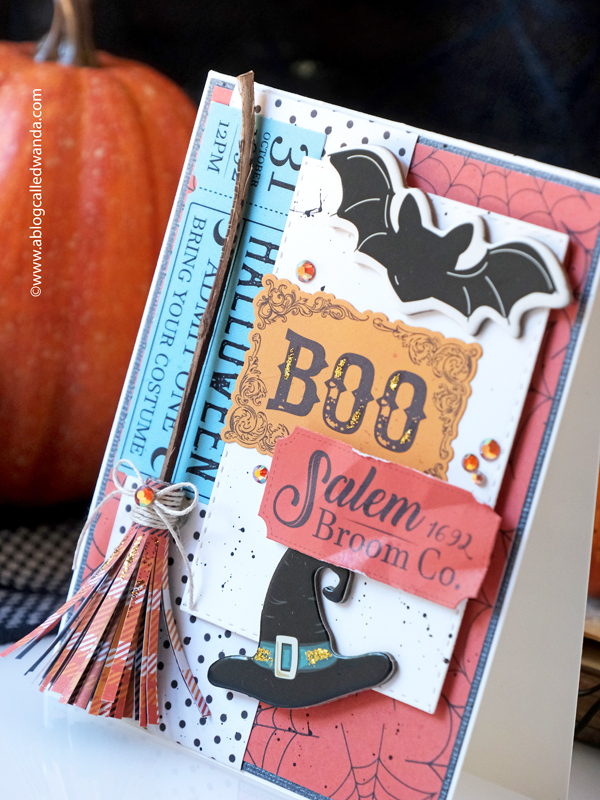
Next up is a cool witchy poo card! This card is an A2 card base layered with black shimmer paper and orange spider web papers… Then I used ephemera and stickers from the collection, and gems and glitter…..and more papers! It's kind of a mixed media piece! I made the broom myself with a stick from our front bushes! I'll talk more about that in a minute…
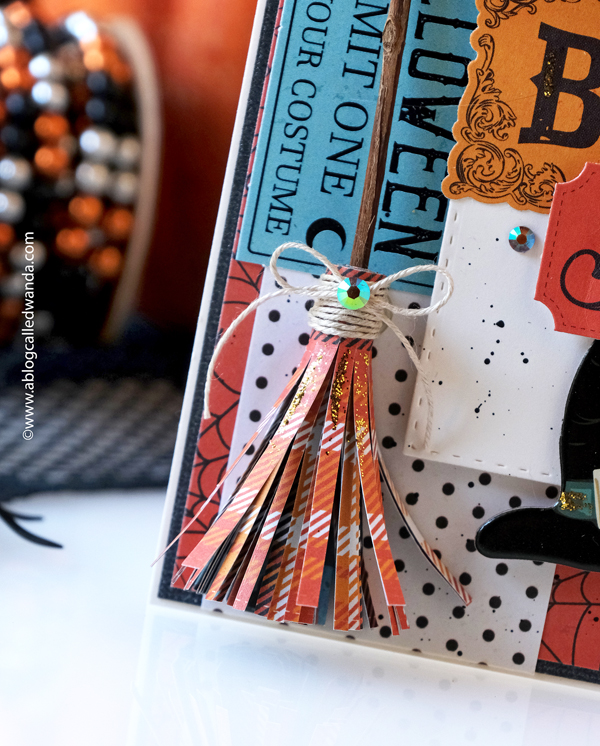
Here's a close up of my handmade broom! EEK. So fun to make!! I got a small twig from our front yard…. I cut a strip of the plaid patterned paper about two inches wide. I used scissors to cut into the paper strip about three quarters of the way up. Then I glued the strip onto the twig by carefully wrapping it tightly around the twig. I glued the entire way to keep it nice and tight/compact. After it was dry, I spread the 'bristles' out with my fingers. I wrapped the top with twine and a bow and a gem. And then I added a little bit of glitter glue to it! LOVE this part of my project!
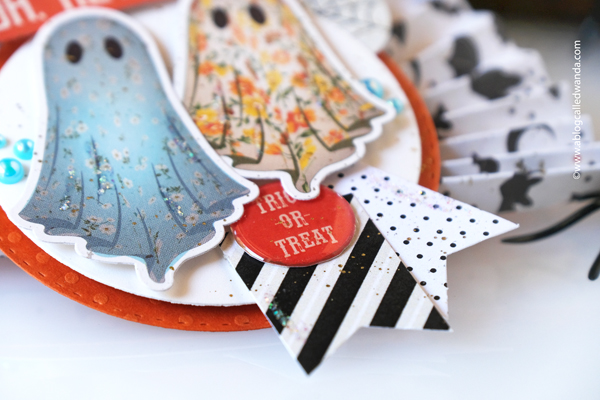
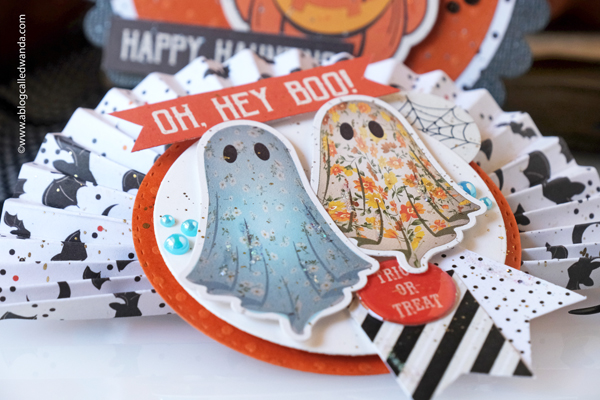
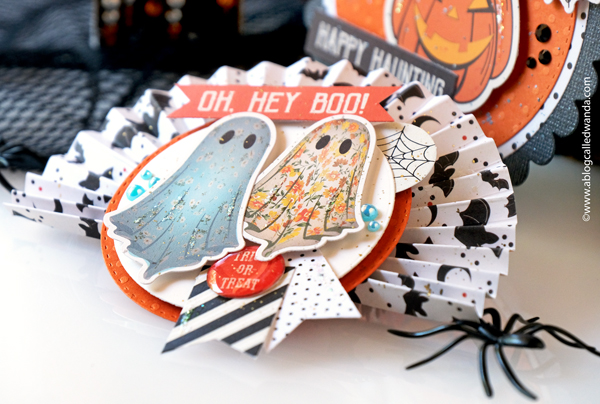
Next up is a little half medallion/rosette decoration! Instead of making a large round rosette, I just made a half one! I added circles to the top and then decorated with stickers and ephemera…. And another epoxy shape…. Aren't those ghosties sill in their florals? So fun!! The whole thing is splashed with gold paint for good measure. Love that bat paper!!
I might end up gluing this onto a card front – or maybe decorating a Halloween project!!
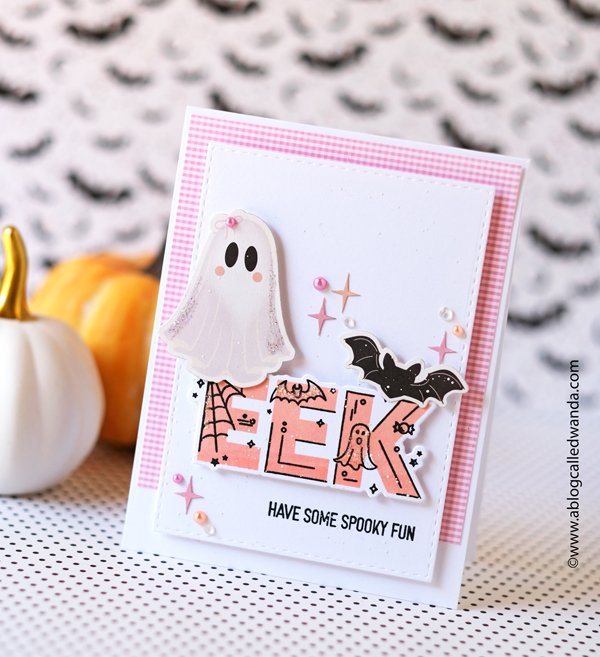
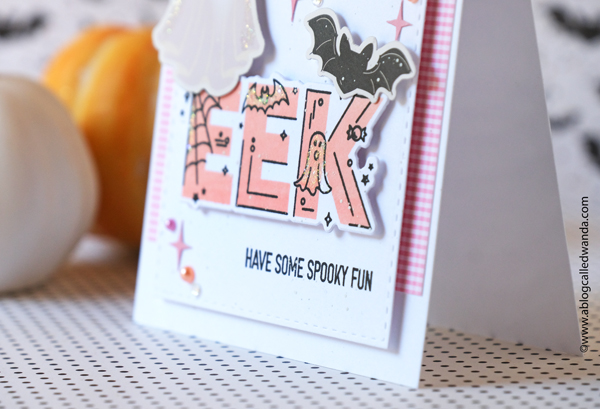
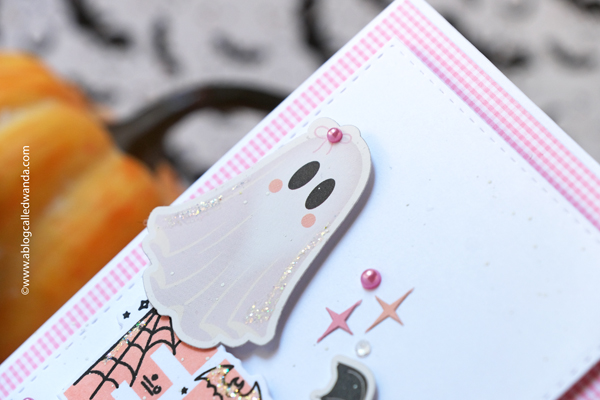
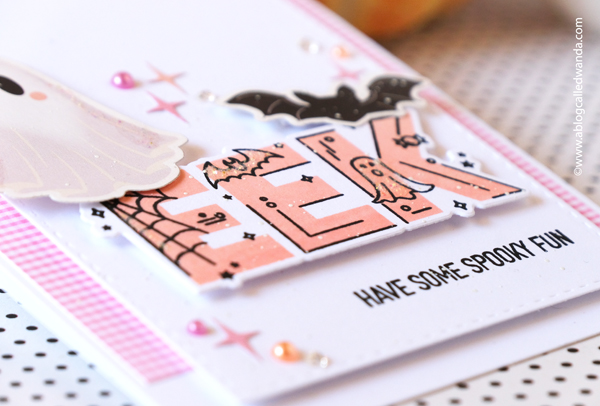
And lastly for today – another cute little ghostie! I again used new stamps and dies and stickers from Photoplay Paper!! I love the trend of using pink in Halloween cards so I used pink and peach here. Clean and simple design with a bit of gingham and lots of white space. Super fun and easy!!
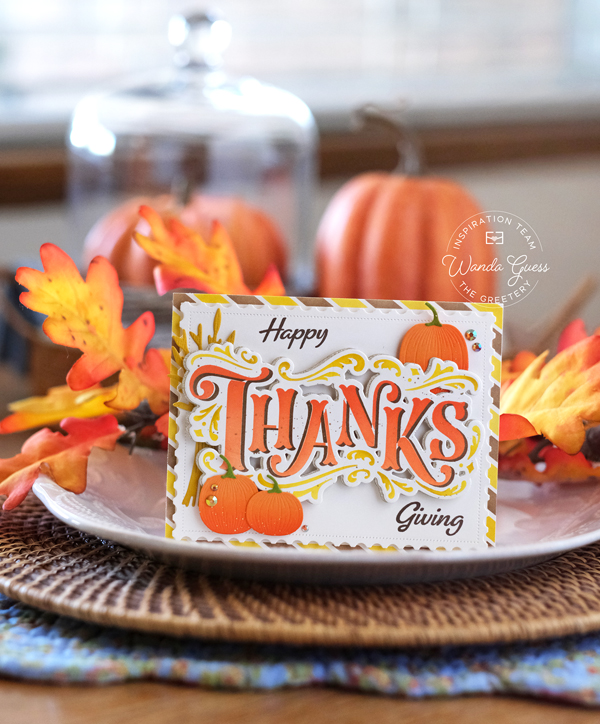
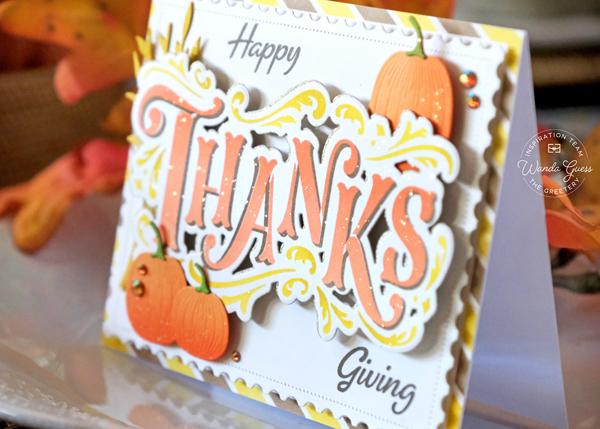
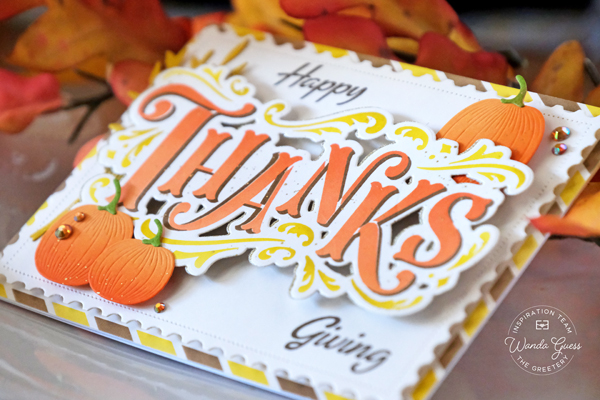
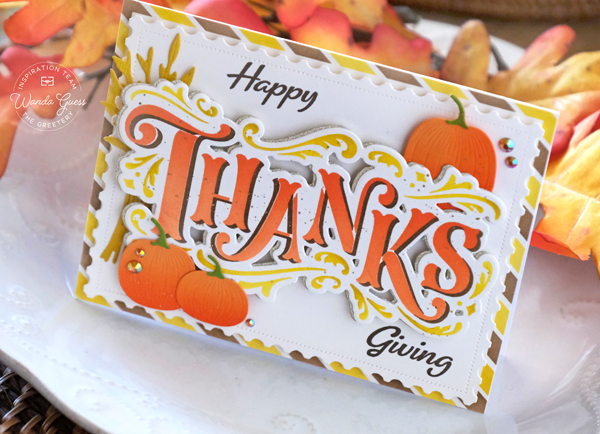
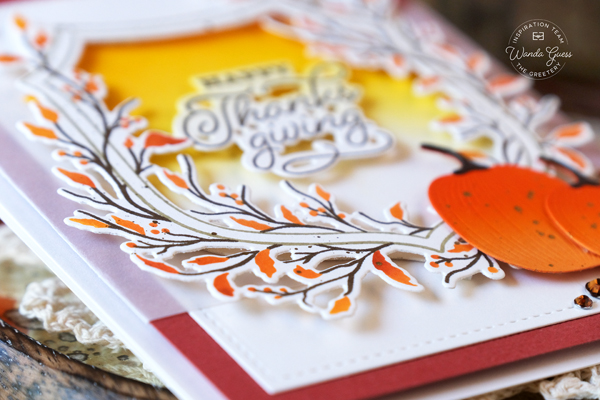
Hi there my creative and crafty friends! Happy Friday! It is FINALLY starting to feel a bit like Fall here in Sacramento! It's my turn up on The Greetery Blog today to share a project with you! And of course I'm sharing here too! I am always so excited and happy to share with you. As you are well aware (LOL) I absolutely love Autumn…. So for my project today, I am continuing the Fall theme from last month's Greetery release, with warm colors and touches of gold. My card features the brand new Flourished Phrases – Thanks – stamps/stencils/dies. And also some of my previously released favorites! I'm getting a jump on Thanksgiving cards!
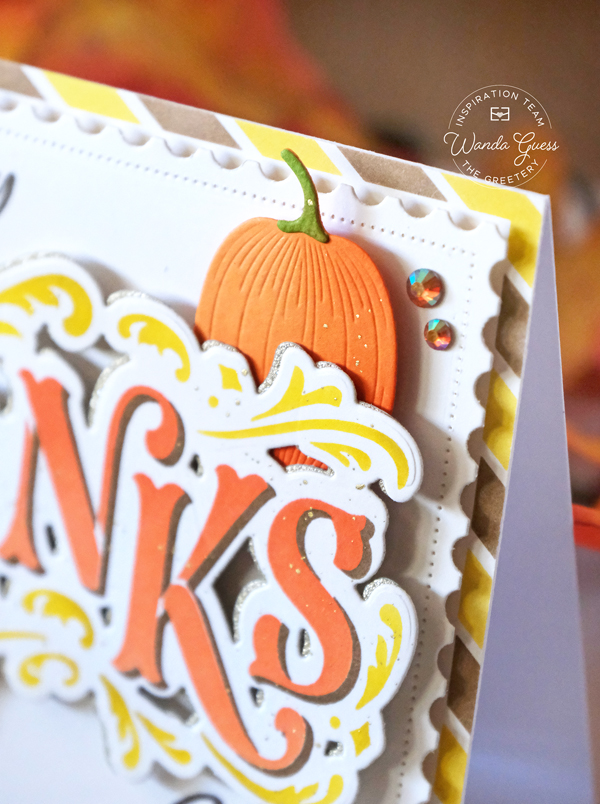
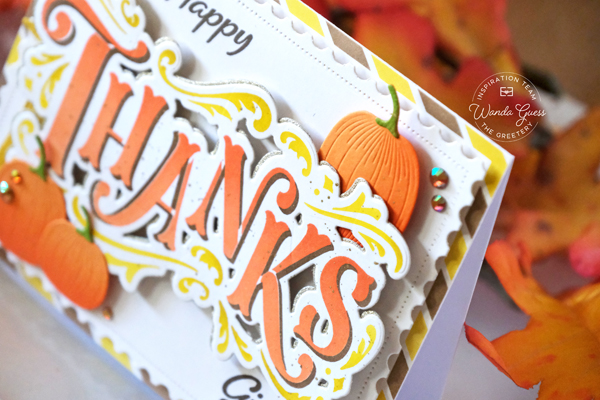
My finished card is a cream A2 card base. I started by stenciling the Airmail Border in yellow and brown inks to make the base layer for my card. Next I die cut a cream postal panel – keeping it clean and elegant. I stenciled the Flourished Phrases "Thanks" word in orange, brown and yellow – because those colors say Thanksgiving to me. I splattered on some gold paint too! I die cut the Thanks out with the matching Flourished Phrases Thanks die. I die cut a second piece using gold cardstock and layered them for just a touch of a gold shadow.
Next I die cut some pumpkins and corn stalks using the Autumn Harvest Dies. I gently inked the edges of those pieces to add a bit of contrast. I stamped Happy and Giving around the Thanks word to spell out Happy Thanksgiving! It's perfect! I assembled the card using foam tape to add layers and depth. I finished by adding just a few dark orange gems. It's all really warm and cheerful!
OOOOHHHHH I feel all warm and cozy inside now! And I want pie! Ha! I do love these Flourished Phrases – they are so pretty and fill up the entire card. You just have to add a few accent pieces…. I hope I've inspired you to do some fun Fall crafting! Have an awesome weekend my friends! XOXO
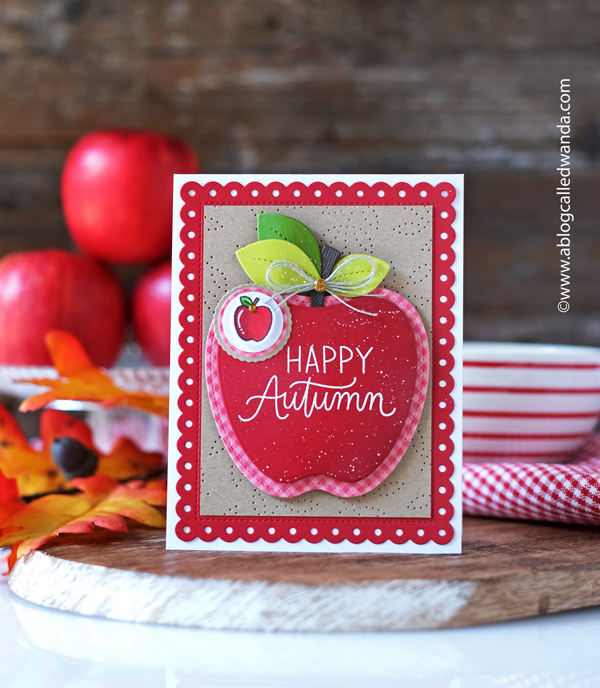
Hello sweet crafty people! How are you doing this pre Autumn day!? It's so nice to have you visit me at A Blog Called Wanda! If you're new here – welcome! We like to have a good time here! Today is a fun celebration BLOG HOP of the new release for September – Fall/Autumn 2024 from Pretty Pink Posh! I am excited to be part of a big multi day blog hop to celebrate the awesome Fall new release – stamps, dies, stencils, and more! All with a whimsical, cute, happy Fall vibe. I do love everything crafty for Fall – leaves, pumpkins, apples, and sunflowers… Great news -the new release is available for shopping now! Enjoy the hop, and I'm excited to share a card with you today! I made another card with the new release and I'll share that next week! (hint, there's pie) Can't start early enough on the fall crafts!
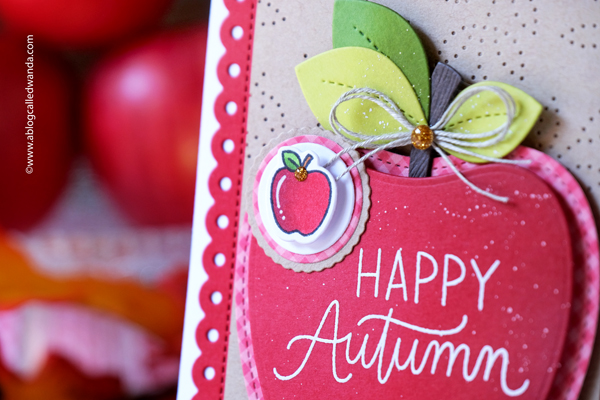
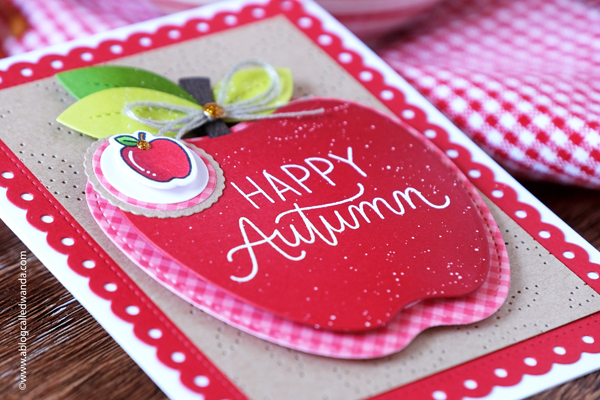
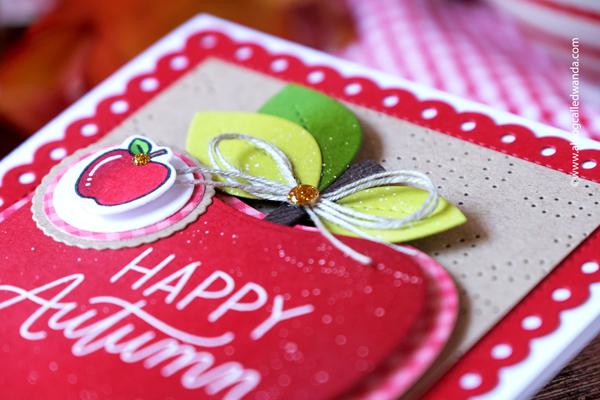
My card for today features the brand new Apple Shaker Dies and the brand new Fall Icons and Fall Foliage stamps and dies. September to me says "apple picking" and "apple donuts" LOLZ. How do you like them apples? Well, I like them very much! My finished card is a white A2 card base. Layered with classic red and classic gingham…. The kraft layer was die cut with the gorgeous Leafy Vines die. (love) I used the Apple Shaker Dies – but not as a shaker! I heat embossed that pretty new sentiment right on the front of the apple… It's SO cute. I stamped, colored and die cut out the little apple from the Fall Icons set and used that as an accent. A bit of twine and some paint splatters make it complete.
Well, I truly hope this new release puts you in the mood for the new Fall season!! It's so fun being part of this great blog hop!! The links to the other bloggers for today are at the very bottom of my post! Be sure to visit all the blogs and leave your comments!! Remember to come by next week and see the rest of my projects! It's my pleasure to share with you today! XOXO
PRIZE INFO: There are THREE $30 gift certificates up for grabs (one winner each day). Winners will be picked randomly from comments along the blog hop. All comments must be left by 11:59 PM PST on 9/16/2024. Winners will be announced on the PPP blog. GOOD LUCK!!
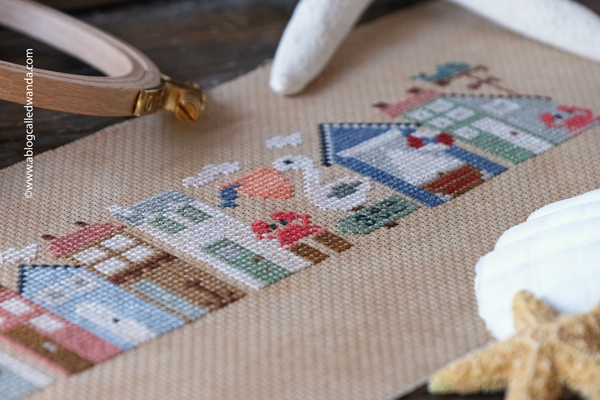
Hello creative party people! Happy Friday! Happy Labor Day Weekend! The official end of Summer! Wishing you a wonderful long weekend full of fun in the sun! You know that I love Labor Day because that means that the “ber” months are here and Fall is right around the corner! What are you doing this weekend?? We are going to an 80’s concert Sunday night and I’m looking forward to fun and dancing in the aisles! Other than that I think we’re just hanging out here at home – and probably crafting!! I have my final Summer Cross Stitch of the year! And I finished last week -just in time to post. Now it’s going to be full – on Halloween stitching and then Christmas stitching! As you may remember, I have been working on the Tiny Town series and now I have completed three of them! I finished the Valentine Tiny Town this year and the Halloween Tiny Town last Fall! CLICK HERE to see all of the Tiny Towns patterns! I think I’ll do the Frosty Tiny Town Next!!
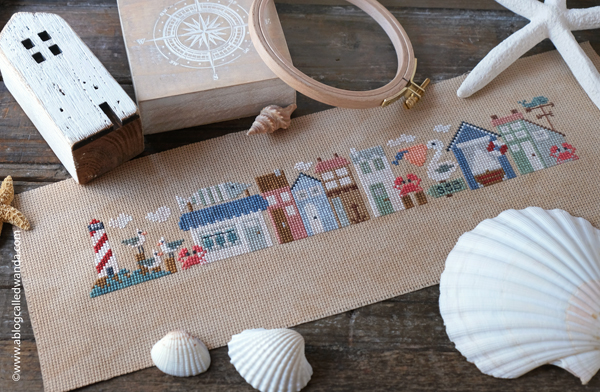
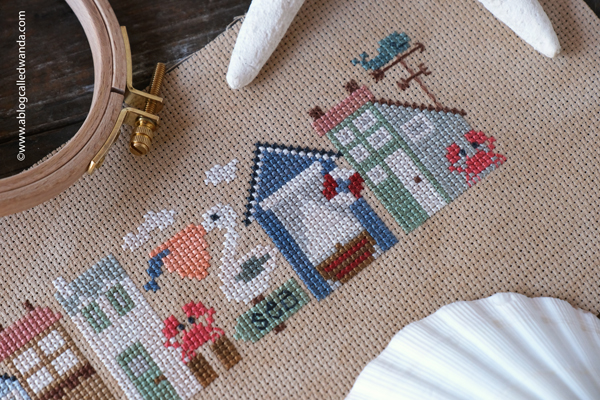
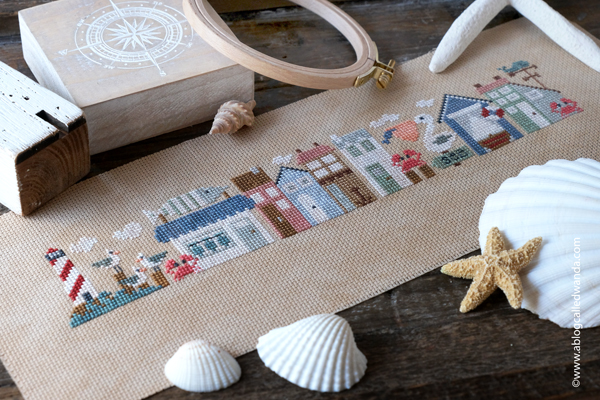
I just completed Seaside Tiny Town! It’s full of cute seashore buildings, crabs, a lighthouse and even a weathervane! I looooove the colors in this one!! One of my very favorite things about cross stitch is that it is easy to put in your tote and bring with you. I stitch in the car a lot – when waiting for appointments etc., or at the coffee shop (It always sparks a conversation and I have met the nicest people that way), at a friend’s house….anywhere! My friend and I have been meeting on Tuesdays to stitch and have coffee together! If you are a beginner, these Tiny Town patterns are super fun and easy to learn on!!
I wish I was going to this adorable seaside tiny town this weekend!! I can almost hear the seagulls and feel the cool breeze!! I hope you have a wonderful weekend! See you soon with more projects! Take care, and happy crafting! XOXO
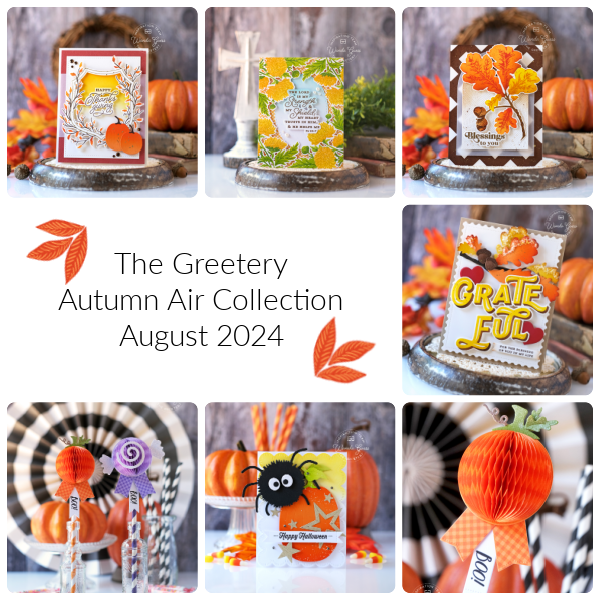
It was my pleasure to introduce the brand new and beautiful Autumn Air Collection to you this week!! And, I hope you love it as much as I do!! Happy Crafting!! If you scroll back to my last two blog posts – from yesterday and Tuesday, you can see all my projects from the new release, and the accompanying supply lists. If you have any questions – reach out!! Thanks for all the love and kind comments this week! Happy Creating! Can't wait to see what YOU make!
Welcome back to day two of the new Autumn Air release week from The Greetery!! How did you like yesterday's cards and theme? What do you love so far?? Are you an Autumn girlie like me? I'm so excited for fall to arrive. We had a day of rain last week and it was so delightful!! Thanks for the comments and for being here to share the excitement with me this week! It's my pleasure to be able to introduce the new Autmn Air items to you!! Be sure to look at yesterday's post to see my first three cards. I have three more projects to share today!! And then release day will be tomorrow, Thursday August 29th at 10am EST! Prize information, Supplies, and the links for today are all at the bottom of this post! Join me in some more fun today! I am super excited to share one fall card and two Halloween projects! Let's go!
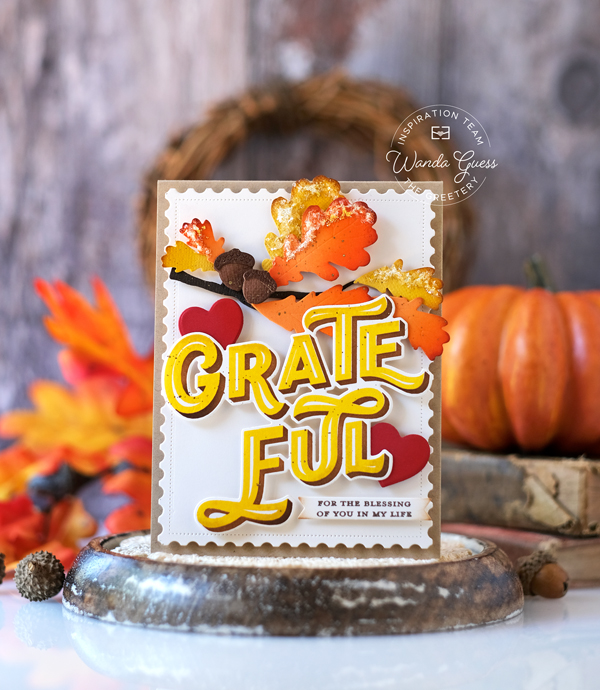
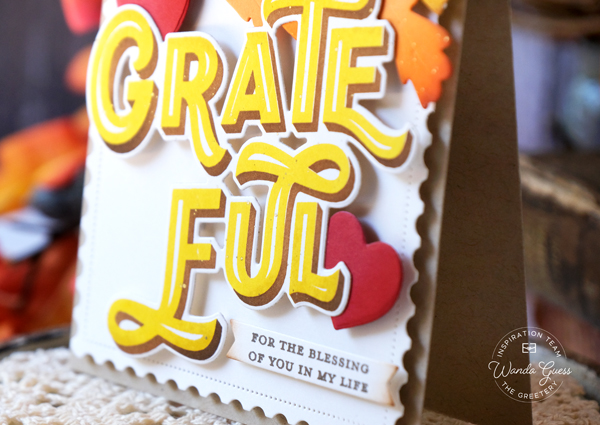
Today's first card features the brand new Grateful Greetings stamps/stencil/die combo and the brand new Autumn Crest stamp set. I also used previously released Might Oak Botanical Dies! (A favorite) My finished card is an A2 kraft card base. I layered a cream panel and then my focal images. I stenciled and die cut out the Grateful word and added a smaller sentiment on a banner. I used warm fall colors…. The leaves were die cut from colored cardstock and then ink blended and covered in coarse glitter!! A few hearts complete the look. This is a wonderful and special card for Thanksgiving. Makes me feel cozy!
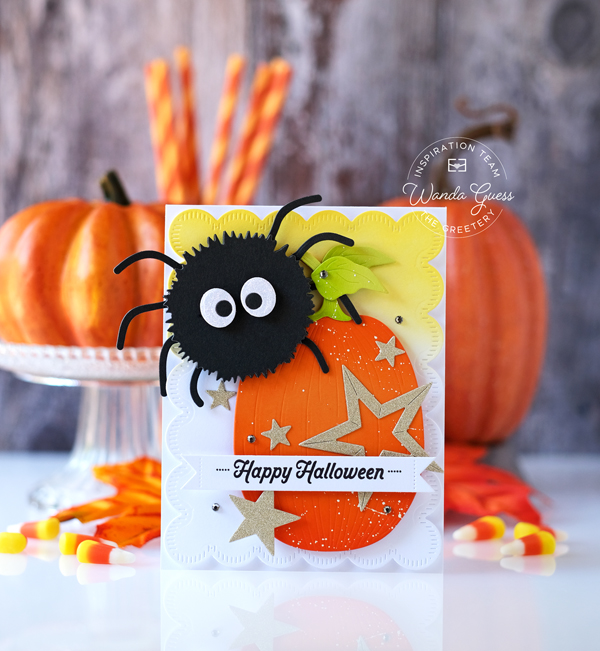
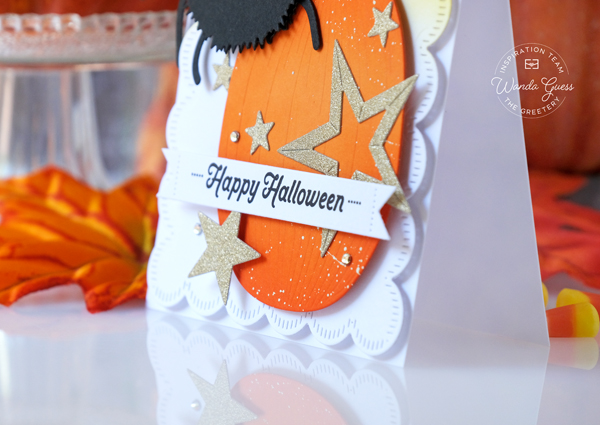
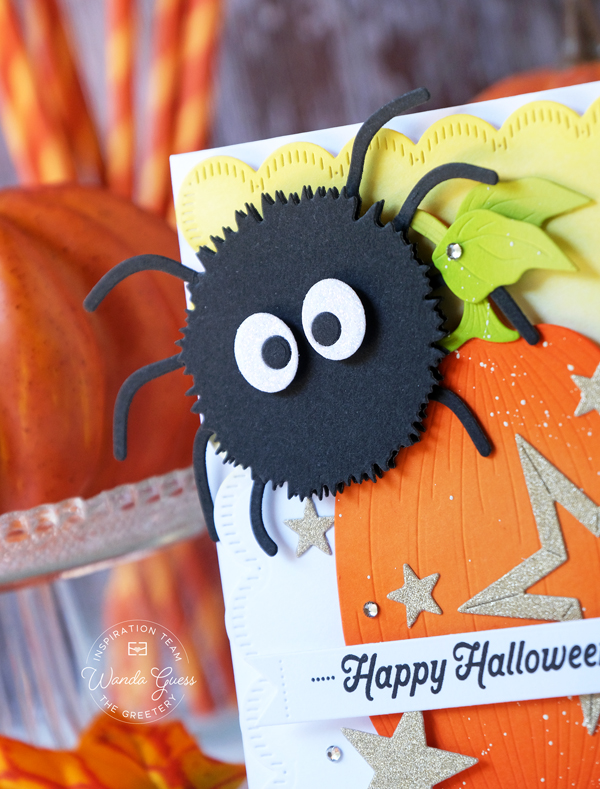
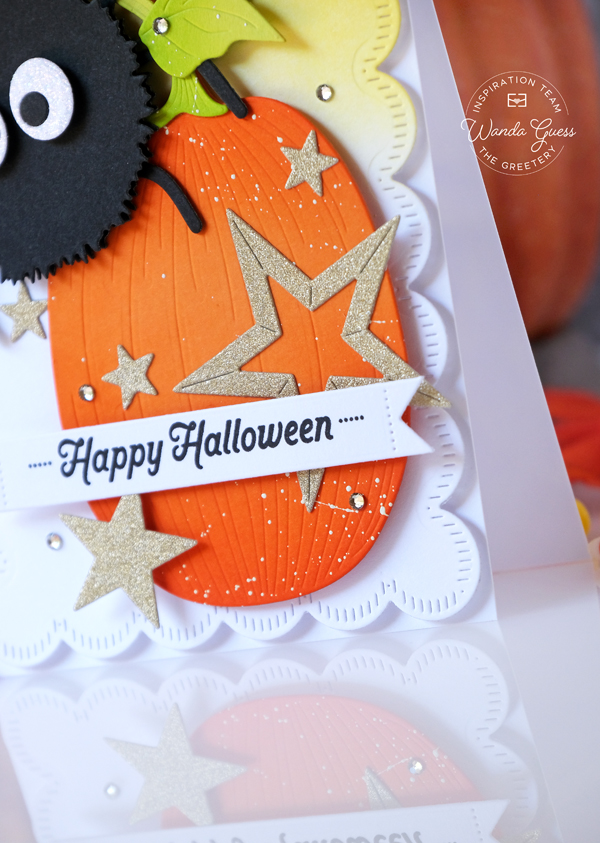
This release includes some new Honeycomb products! Yeah! There are new Halloween Honeycombs – a spider, a pumpkin, a candy, and more! For my next card I featured the brand new Honeycomb Spider – but without the honeycomb. He is not a scary spider – he's friendly with his sparkly eyes!! I used the Plump Pumpkin dies and the Rustic Stars to create a happy Halloween greeting! I ink blended some yellow on my background scallop layer…. A few gems and white paint splatters are my accents.
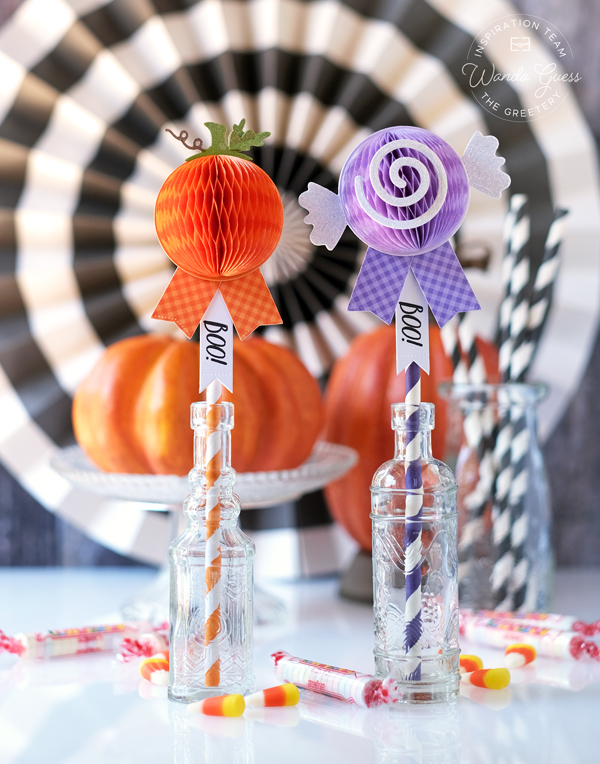
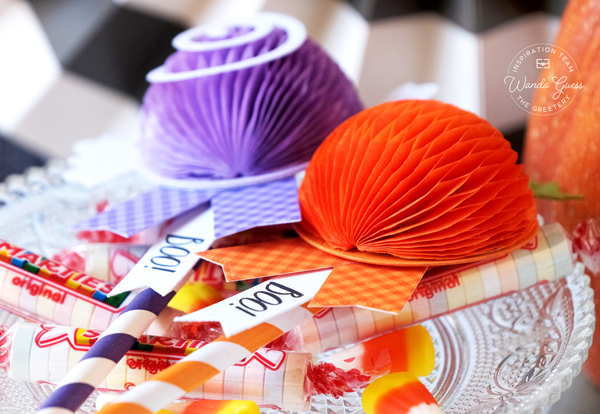
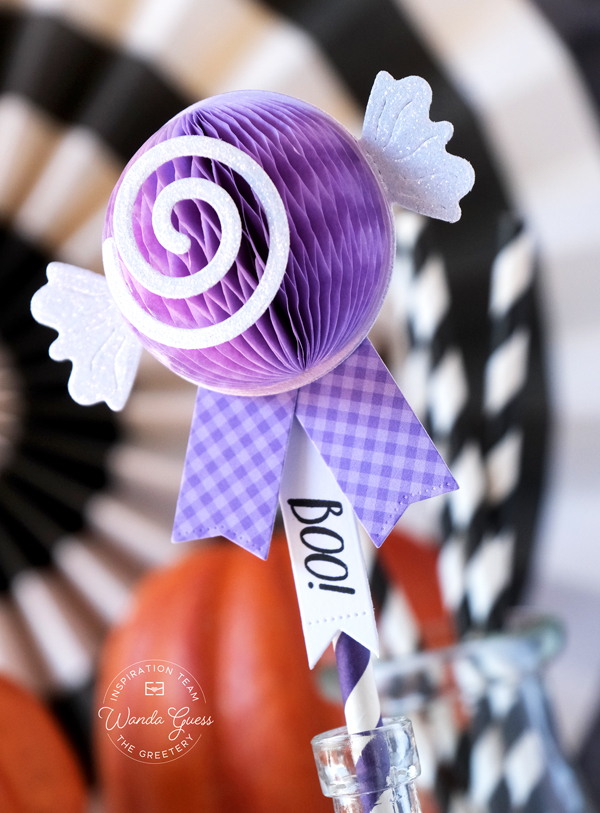
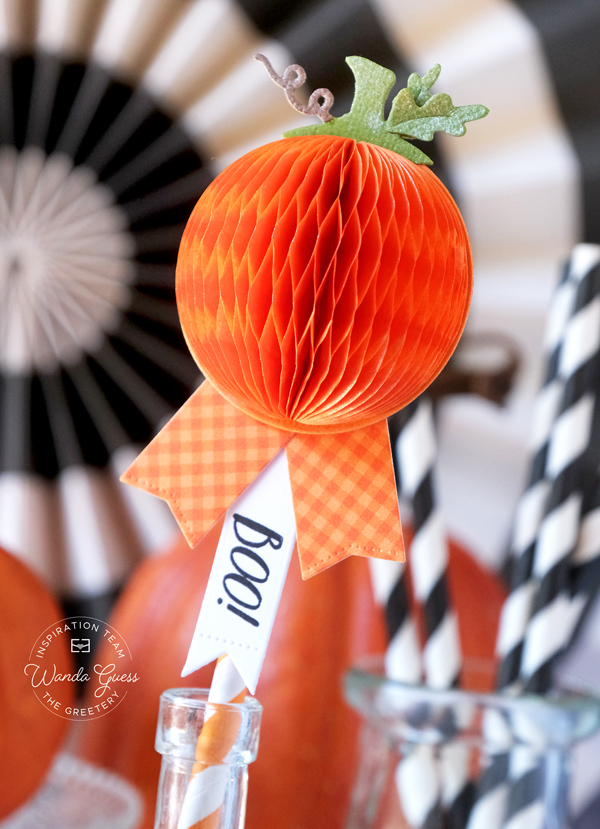
My final project for today also features the brand new Halloween Honeycombs! I used the pumpkin and the candy ones to create some fun decorations. This is such a happy and cheery project!! I die cut the paper pieces from colored and glitter cardstock and then affixed the matching color honeycombs… I sprayed the honeycombs with shimmer spray, but it's kind of hard to see in the photo – it's a subtle touch that looks pretty in person! I made banners from the Tear Strip Tags and added BOO! to each one, using the Tear Strip Tags Halloween stamp set. These would be great in some cupcakes (trim the straws shorter) or as table decorations. I used paper straws and attached the honeycomb elements to the straws using my hot glue gun.
That's it friends! It's been a pleasure sharing the AUTUMN AIR Collection new release with you! Thank you for your support and kind comments – and for sharing my enthusiasm for The Greetery. We all love The Greetery! Have a great day! Happy Shopping tomorrow!! And Happy Labor Day weekend this weekend! XOXO
PRIZES INFO: Betsy will be giving away $50 gift cards as part of the new release week. To enter to win, please leave a comment on everyone's blog posts for today and yesterday! She will announce the winners on The Greetery Blog!! YEAH!!
Hello, my creative, talented and crafty friends! It's a gooooood day today! It's time for a warm, wonderful, classy and amazing new release from The Greetery! The new release is just in time for us to celebrate Fall and it's VERY pretty!! It's also FUN – because there are some cute Halloween items too! The release is called Autumn Air! Think leaves and florals, and beautiful sentiments, and more! You're gonna love it. It's warm and inviting and you know me, I used LOTS of fall colors!! The design team will be sharing products and projects today and tomorrow and then the new release will be available for shopping on Thursday, August 29th at 10am EST! Just two more days to wait. I had a really fun time with this release – it's right up my alley! Because we all know I'm a Fall girlie! I'm excited to share it with you.
I will be sharing three cards today, and two cards and one other project tomorrow. The cards for today all have a theme of gratitude and warmth Perfect for all the Fall occasions and holidays. Every card has golden yellows and pretty oranges… Loads of beautiful inspiration from the entire design team for the next two days. My supplies, prize information, and links to everyone's blogs are all at the bottom of this post. Let's get started! YEAH!
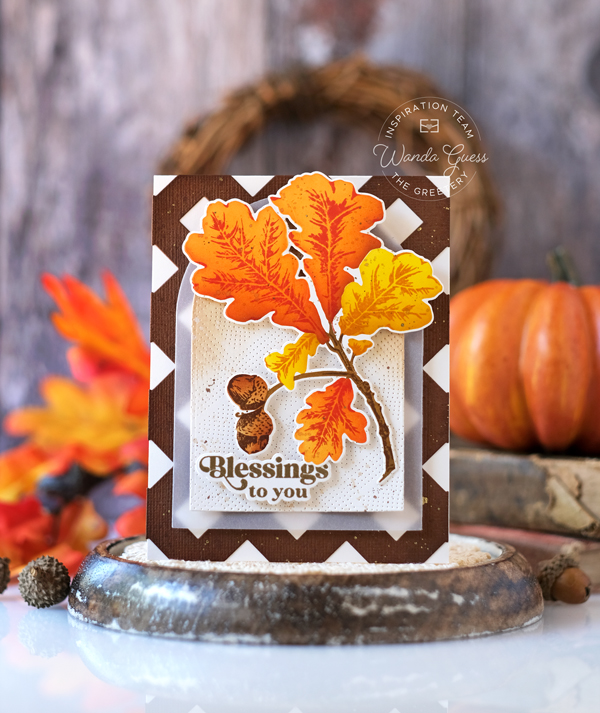
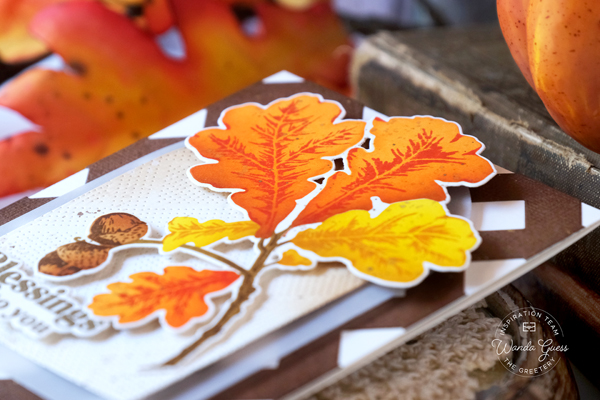
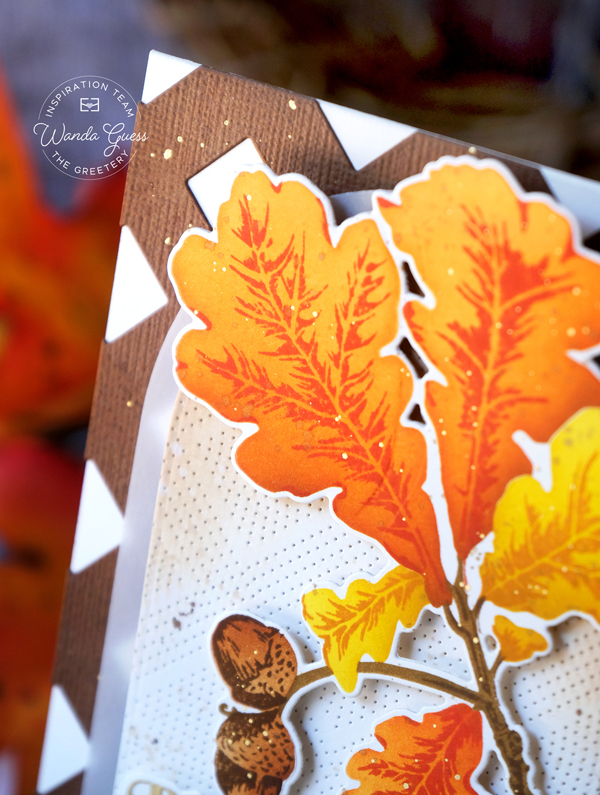
My first card today features the brand new Oakwood stamp/stencil/die combo in a GORGEOUS leaf cluster! My card also features the brand new Pierced Plaid die for the background on the arch. My finished card is an A2 cream card base and I stamped and stenciled with autumnal toned Distress Inks. I used my MISTI to get the perfect placement of the leaf veins… I heat embossed the sentiment in gold embossing. I used the Square Dance Die for my background. Pretty arches, a touch of vellum, and gold paint splatters complete the look. This is one of my favorite things Betsy has ever made – those leaves are divine!!!
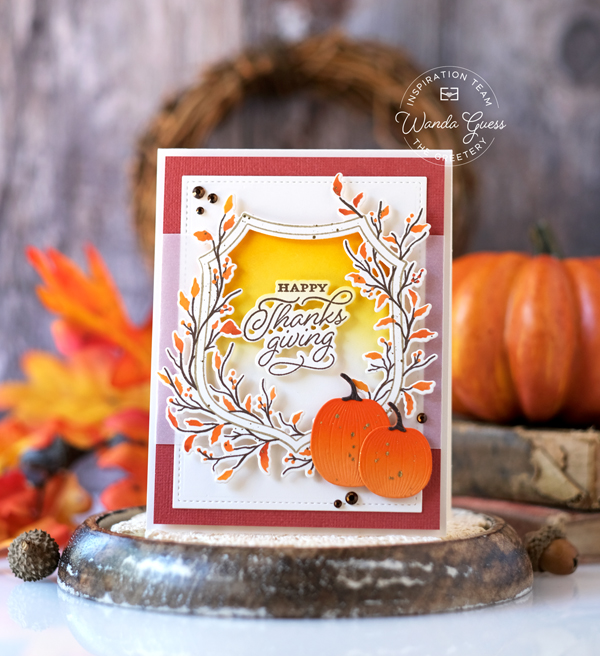
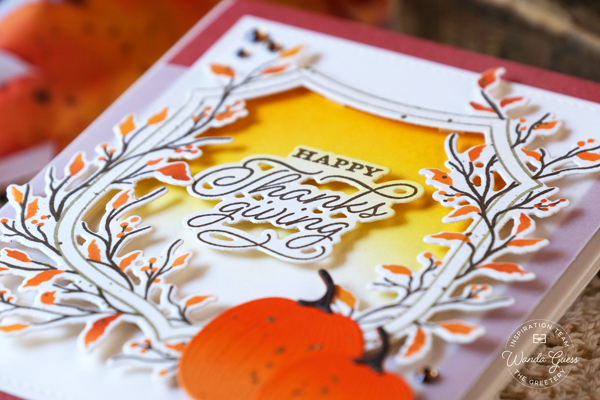
My second card today features the brand new Autumn Crest stamp/die/stencil combo along with the brand new Crest #1 die. I also featured the previously released Autumn Harvest Dies for the pumpkins… My finished card is an A2 cream card base layered with rust paper, more cream cardstock and just a touch of vellum. I ink blended the crest background to make the sentiment pop out more! I used brown gems as accents and also (you know me) gold paint touches. These branches are so elegant and pretty – perfect for a Thanksgiving greeting.
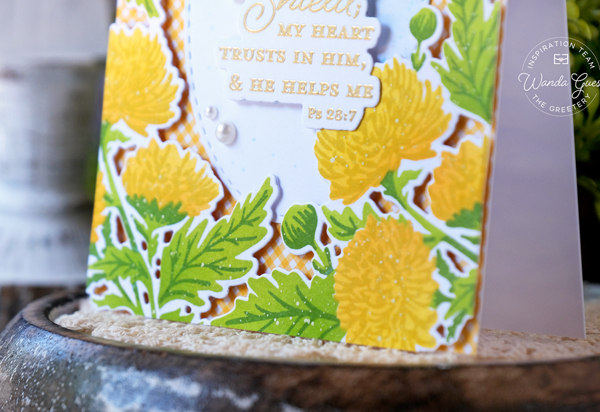
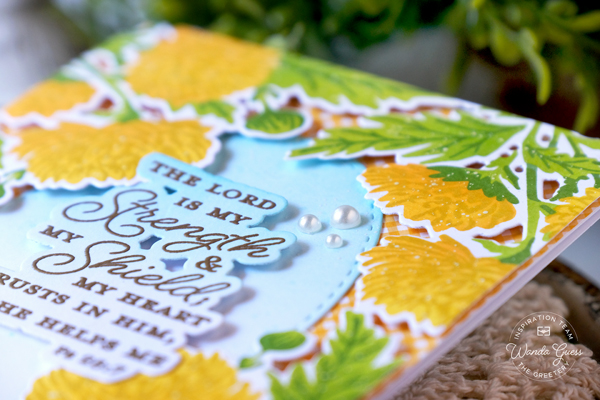
My third card for today features the brand new Mum's The Word stamps/stencil/die combo along with the brand new Strength for Today stamps and dies (LOVE). My finished card is a white A2 card base, layered with gingham and then a pretty stitched oval inside to highlight the sentiment. The sentiment is heat embossed in gold and I added a bit of aqua ink blending to balance out all that delicious yellow. I am a November baby so this is my birth month flower! So old fashioned and feminine…. This is a really pretty set, and when you use the dies, it makes a perfect flower frame. I used pearls as my accents here…
That's all for today, but I'll be back tomorrow with the rest of the new release! Thank you for your support and kind comments – and for sharing my enthusiasm for The Greetery. We all love The Greetery! Have a blessed and happy day! See you tomorrow bright and early! XOXO
PRIZES INFO: Betsy will be giving away some $50 gift cards as part of the new release week. To enter to win, please leave a comment on everyone's blog posts for today and tomorrow! She will announce the winners on The Greetery Blog as usual!! YEAH!!
Hello my friends! As promised, I'm back with MORE Halloween projects I made with the awesome new release from Pretty Pink Posh! Yippeeeee! Today, it's all about the candy! Candy corn, and candy buckets! Today is also a big Instagram Hop for the new release, so if you're on Instagram, be sure to pop over and leave a comment for a chance to win a prize!! I have two more projects to show you today and they are both classic Halloween! Bright and colorful and plain old fun. To see my other projects from the new release – CLICK HERE!
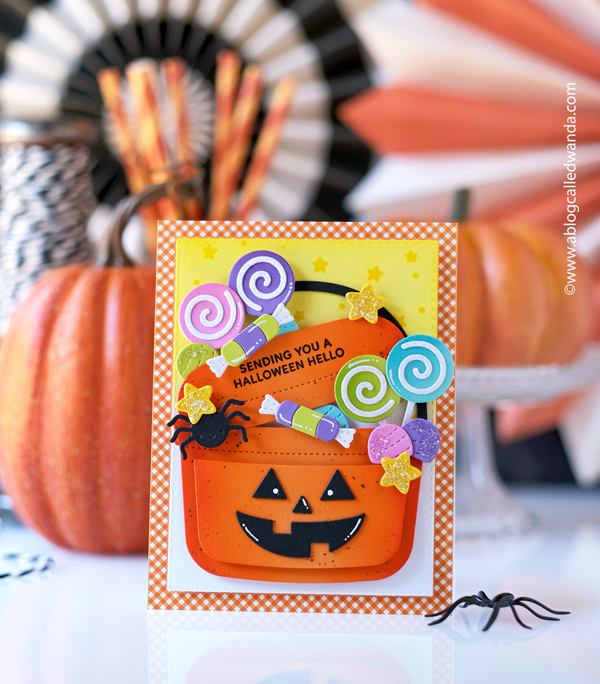
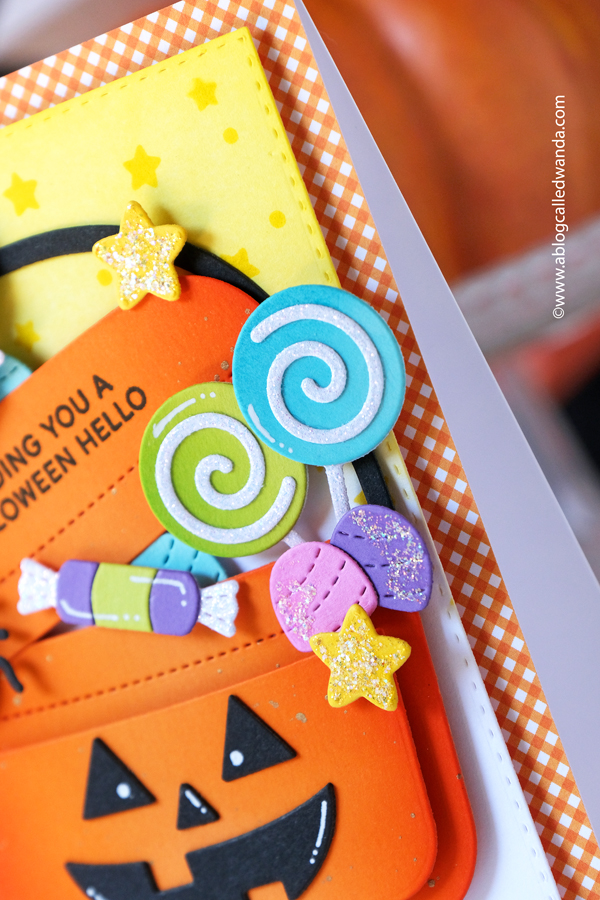
First up is this overflowing candy bucket that looks just like a happy meal pail from years gone by. PPP nailed this concept and this die set is so great! I die cut out a bright orange pail and filled it with lots of candies, stars and more! Just what you want your pail to look like when you get home from trick or treating! I ink blended and stenciled the background in golden yellow and put the sentiment right onto the lid. Lots of glitter paper and glitter glue, some splatters, and white gel pen accents complete the look. Oh and a spider too! Ha. My finished card is an A2 white card base layered with orange and white gingham of course. This card is a party!! All the supplies are HERE or at the bottom of my post.
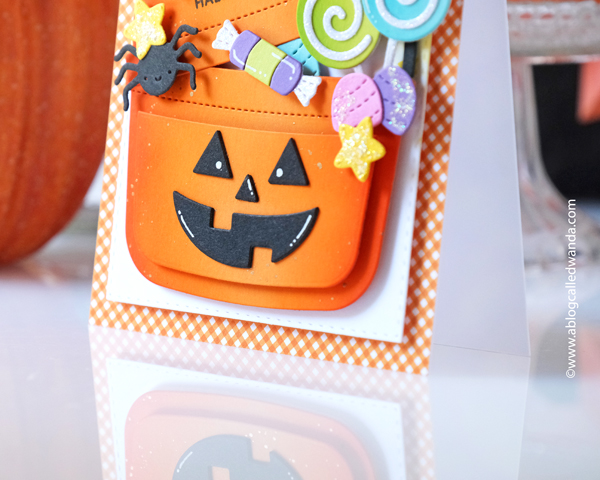
Here's a side view to see my layers and assembly. And you can see all the shimmer and shine!!
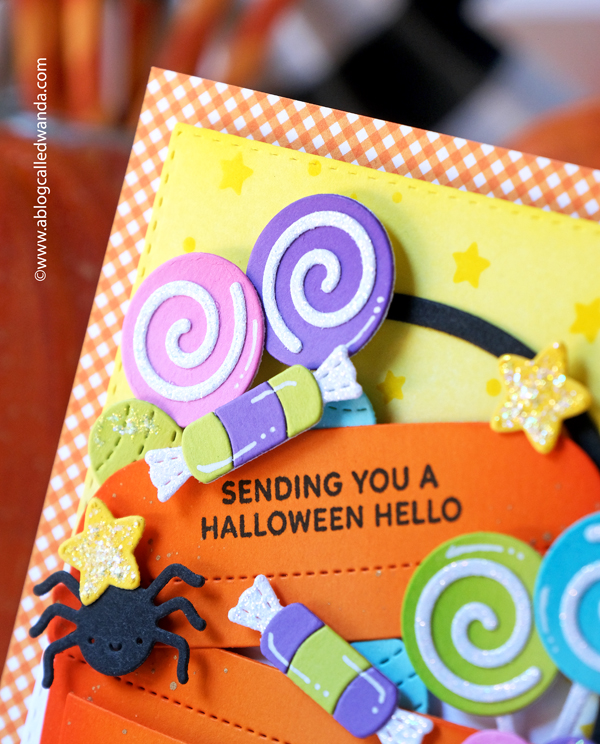
Here is my ink blended and stenciled background layer. The yellow makes it all 'glowy' I think!
I stamped the sentiment directly onto the pumpkin bucket lid…and it fit perfectly. Such a cheery card!
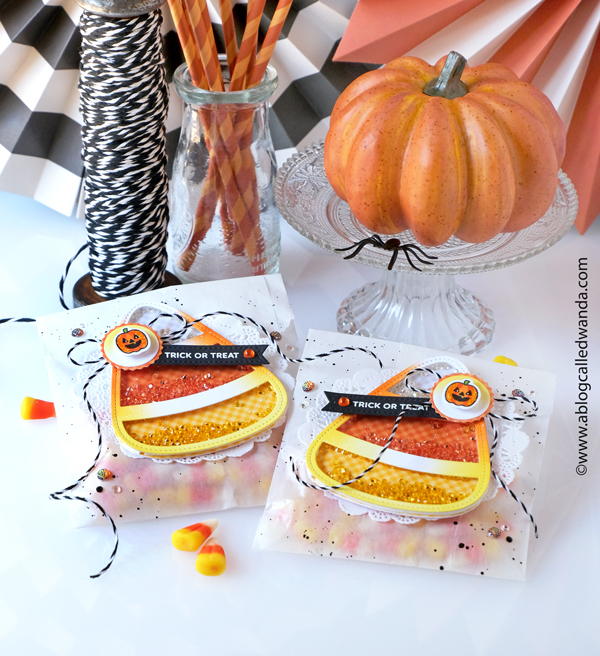
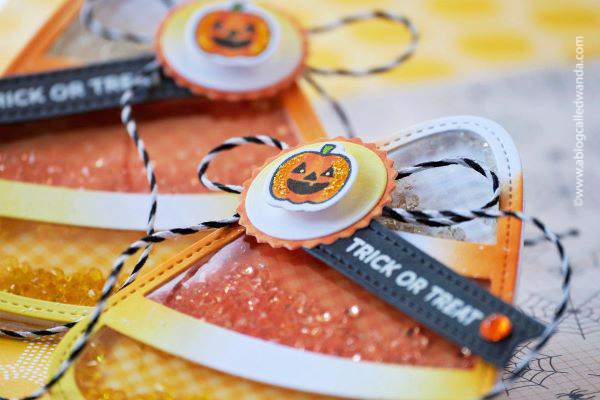
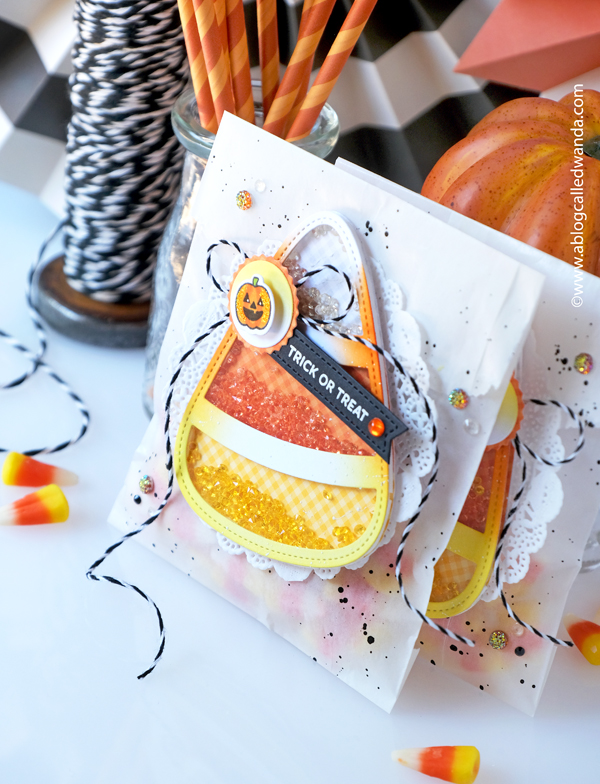
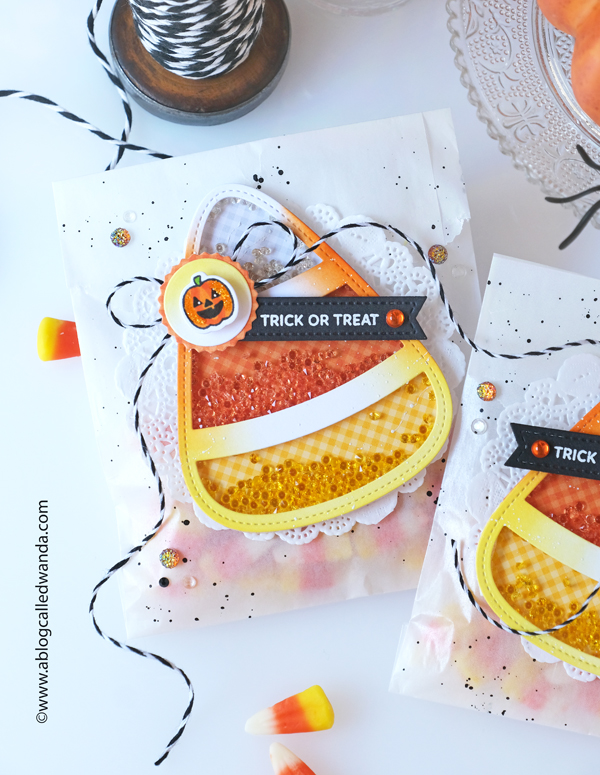
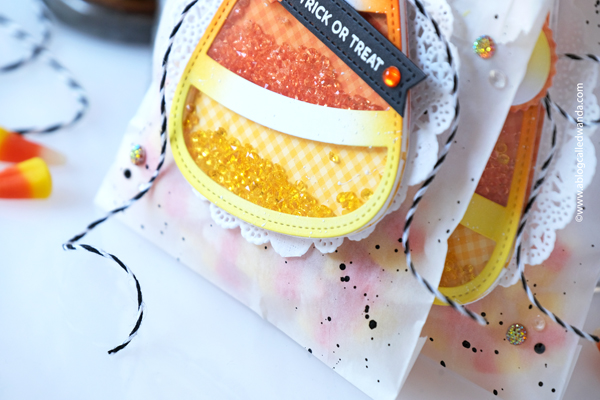
Next up I made some pretty and retro Candy Corn treat bags! I used the new Candy Corn Shaker Dies along with the Halloween Icons stamps and dies and the Halloween Sentiment Strips. I used glassine treat bags and filled them with Candy Corn – it's prefect! The candy corn shapes are lined with gingham papers in the yellow, orange and white color scheme. I filled each section with sparkly gems from my stash and ink blended the white outer shape to match the colors of the candy. I stamped and die cut little pumpkins to put on the twine bows. The sentiments were heat embossed on black paper using white embossing powder – again – keeping it classic. I do really love to make these glassine bags!! I always include some doilies for the right look. The bags were splattered with black paint and then I also added some gems… Can't wait to give these away! All the supplies for this project are HERE or at the bottom of this post.
A close up of the tiny little tags! LOVE!!
That's it (for now) of my projects for the new PPP Halloween 2024 release! Boy, I hope you can tell how much fun I had making everything. Truly a joy to create with these stamps and dies. I am ready for Fall and all the things…. Take care today friends.
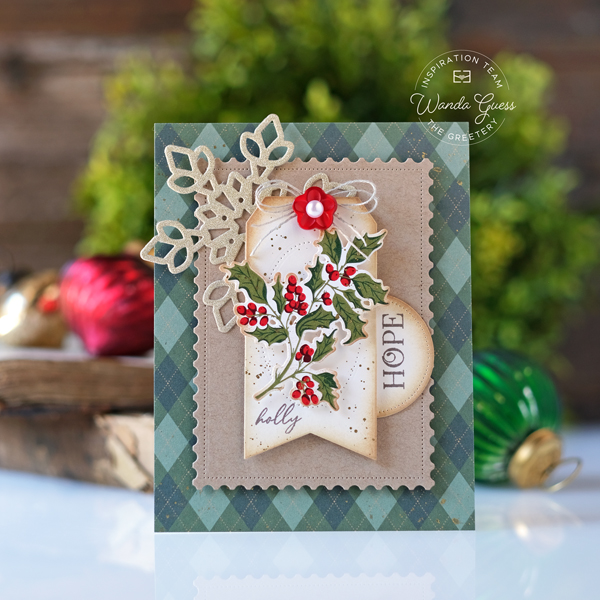
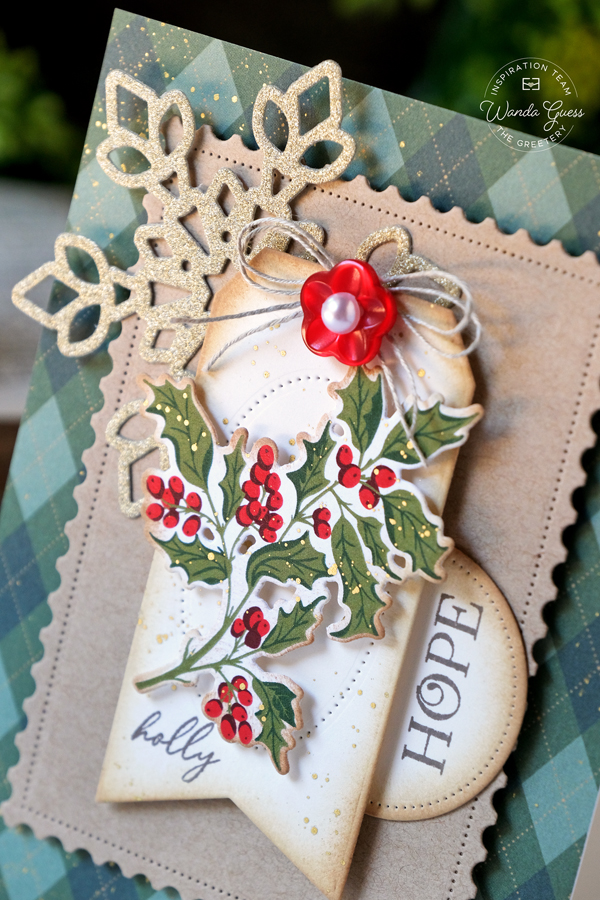
Hi there my creative and crafty friends! I'm back – two days in a row! August is always that strange time each year…when one day I'm posting Fall projects, one day it's Halloween projects and the very next day it's Christmas projects! Ha! Everyone is trying to get all their holiday new releases out in time for us all to make our cards and other things! So today….it's Christmas! Today is my day up on The Greetery Blog today to share. And of course I'm posting here on my blog too. The inspiration came from the beautiful Birth Month Blooms Cuttables from the recent new Greetery release. I just loved the Holly graphic and felt a vintage Christmas card would show it off! It's never too early to start making your holiday cards, right?!
My finished card is an A2 cream card base, layered with green argyle patterned paper, a kraft layer, and then a pretty tag. I went with a vintage vibe in rich classic holiday colors, with gold accents. All my supplies are listed HERE or at the bottom of my post!
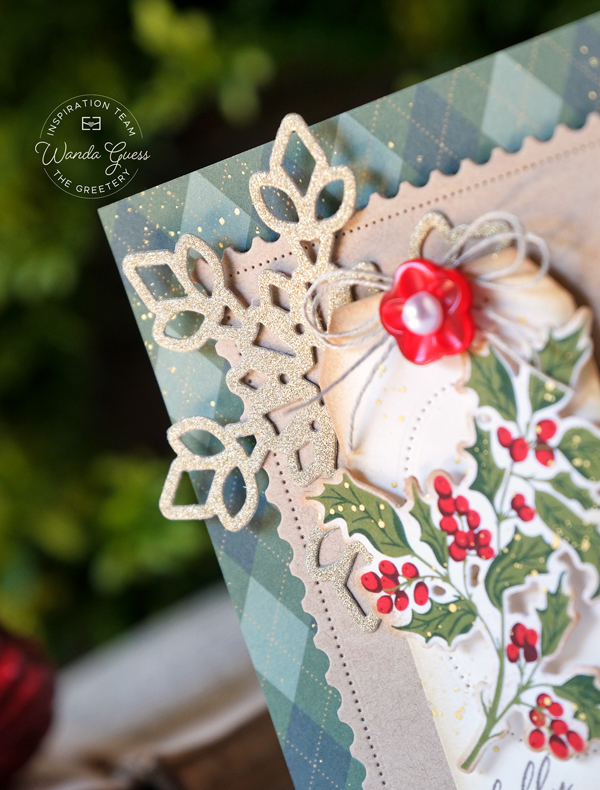
I started by die cutting out the cream tag using the Speed Tagging Die Set, and a cream circle using the Sentiment Suite Basics Die Set. I also die cut the Holly Cuttables using the matching dies. I die cut a gold snowflake using the Snowflakes #2 Dies and gold glitter cardstock.
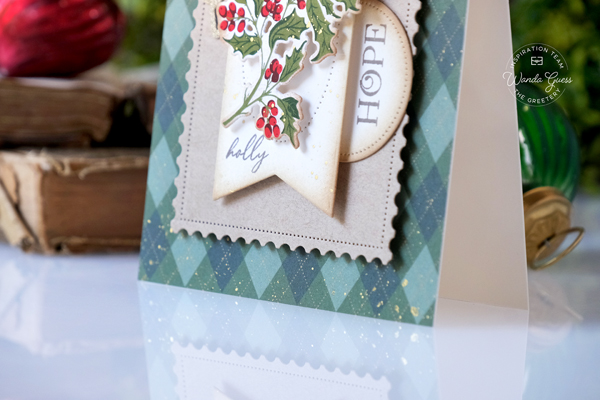
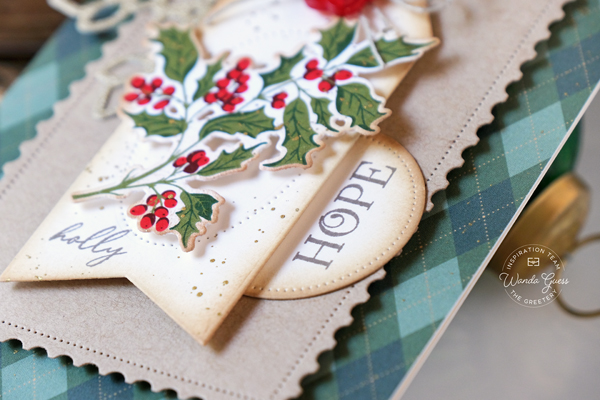
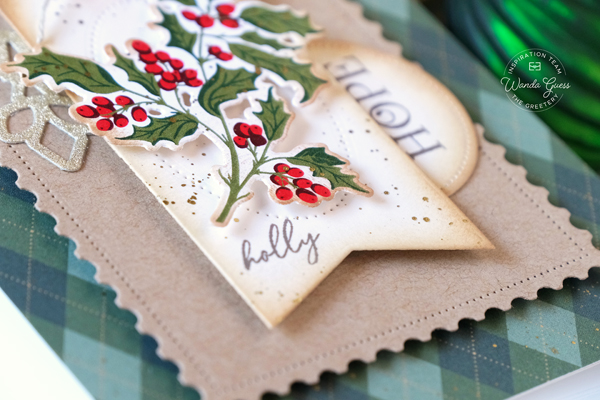
I inked the edges of the tag and the circle using Distress Inks and a foam dauber. I stamped the words Holly, and Hope using the Birth Month Q4 stamp set and the Comfort and Joy stamp set. I used brown ink to stamp the words for a more vintage look. Here's a side view of all my layers and pieces.
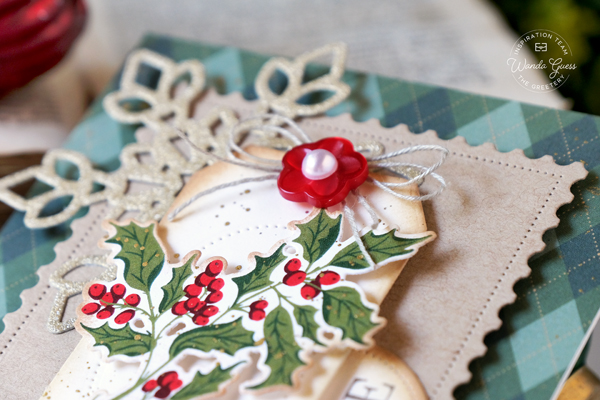
I splattered the tag and holly using gold paint and I also splattered gold paint on the green argyle part. I used twine, a button and a pearl from my stash to embellish the top of the tag. I assembled everything using foam tape for dimension on the card.
That's it for my project for today! I hope you have a fantastic and creative day! I look forward to sharing with you again soon. In the meantime, happy crafting! XO Wanda
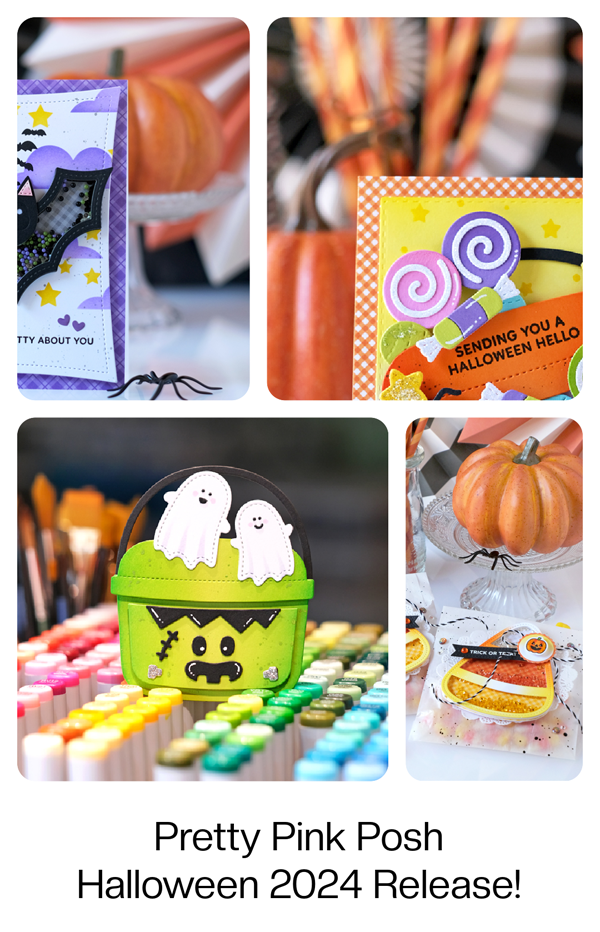
Hi ghoulfriends! How are you this lovely late Summer week?! It's so nice to have you visit me at A Blog Called Wanda! If you're new here – welcome! We like to have a good time here! Today is a fun celebration BLOG HOP of the new release for August – Halloween 2024 from Pretty Pink Posh! I am excited to be part of a big multi day blog hop to celebrate the awesome Halloween new release – stamps, dies, stencils, and more! All with a fun/cute/spooky vibe. It's adorable, and bright and cheerful and happy with just a bit of spooky!! Great news -the new release is available for shopping now! Enjoy the hop, and I'm excited to share some cards with you today! I made LOTS of projects and I'll be sharing the rest of them next week. Can't start early enough on the fall crafts!
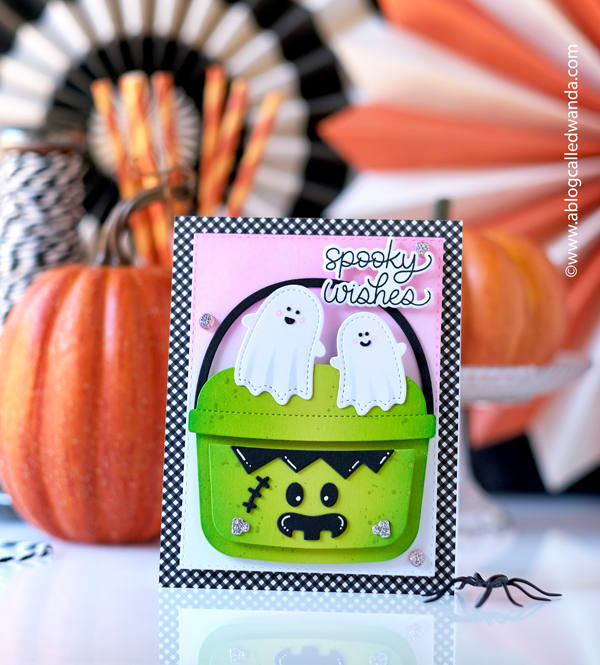
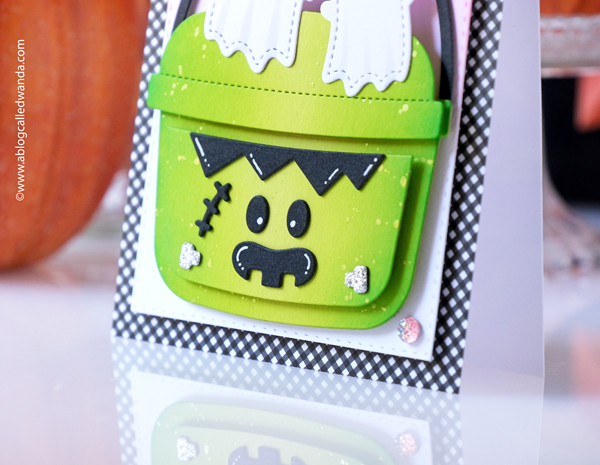
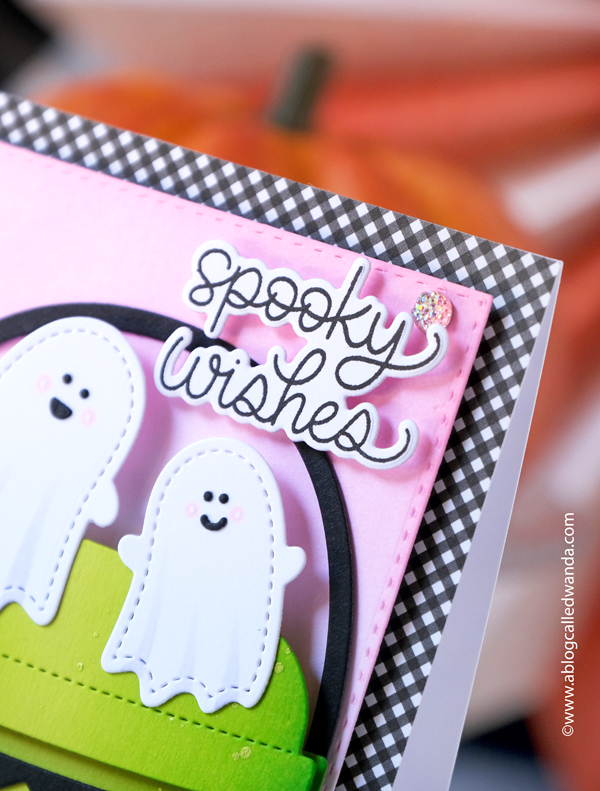
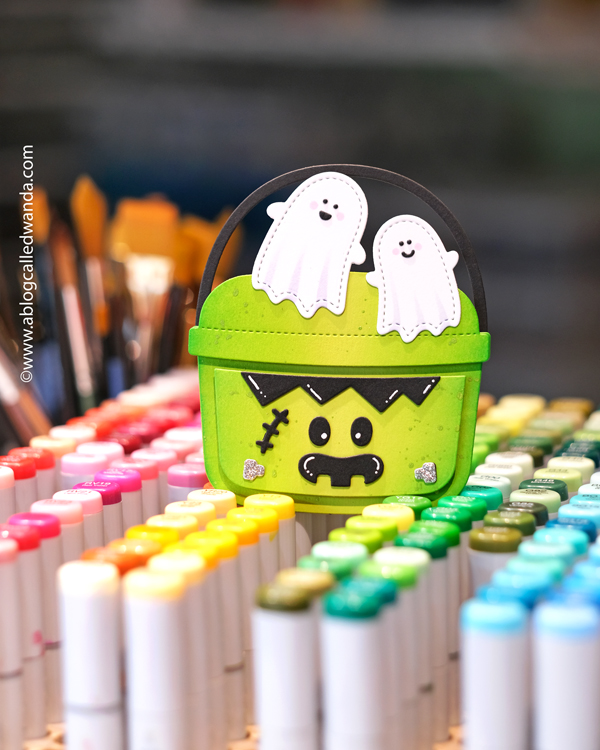
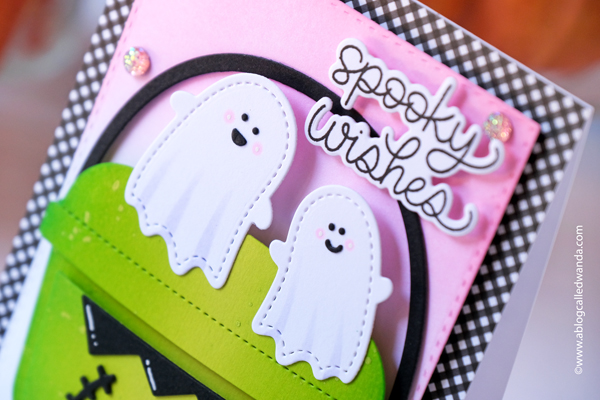
My first card today features the awesome new Candy Bucket Dies and the new Stitched Ghosts Dies! Gosh, these dies are SO great! It's a set of buckets that look like the old Happy Meal buckets of days gone by. Such fun memories! I used bright lime green to make a Frankenstein bucket and it came out so cool! I added some cute ghosties coming out of the top and a fun sentiment too! I tried something different and used PINK for my background ink blending! I kinda like it because it's different…. And pink and green is always a winning color combo. I used graphic gingham, white gel pen accents and a few gems to finish it off. The finished card is an A2 white card base. All the supplies are HERE or at the bottom of my post!!
A side view to show the layers and assembly…
The sentiment is perfection!!!
My craft room is haunted! (They're cute though!!) Hee hee.
I ink blended just the top of my white panel and faded to white at the bottom….
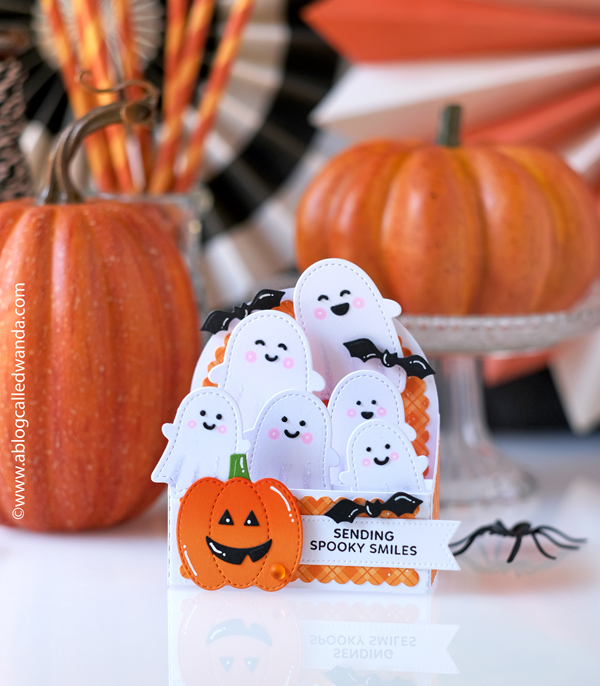
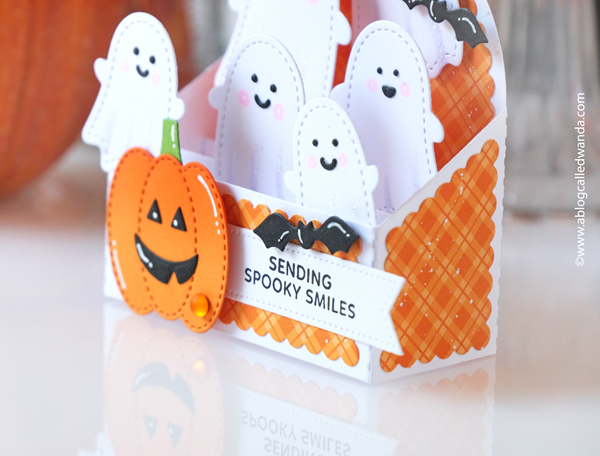
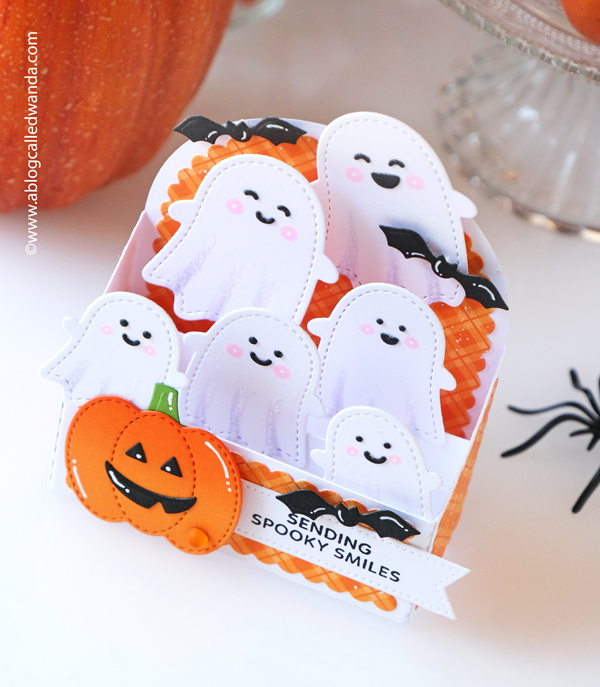
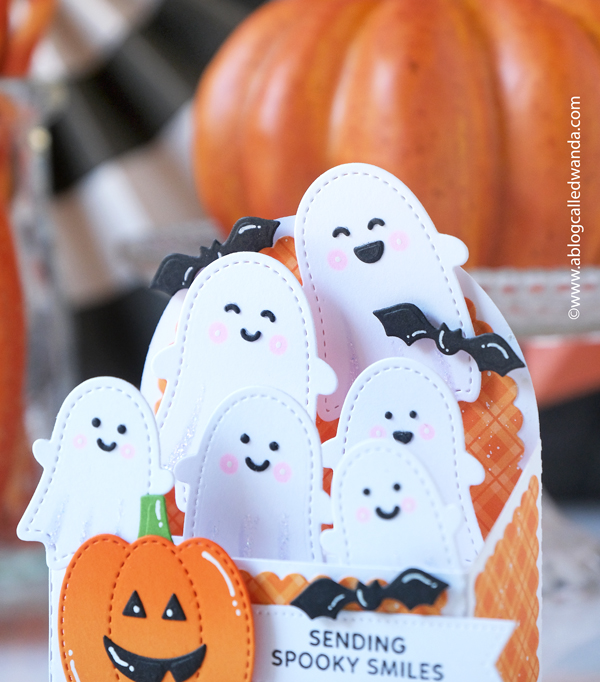
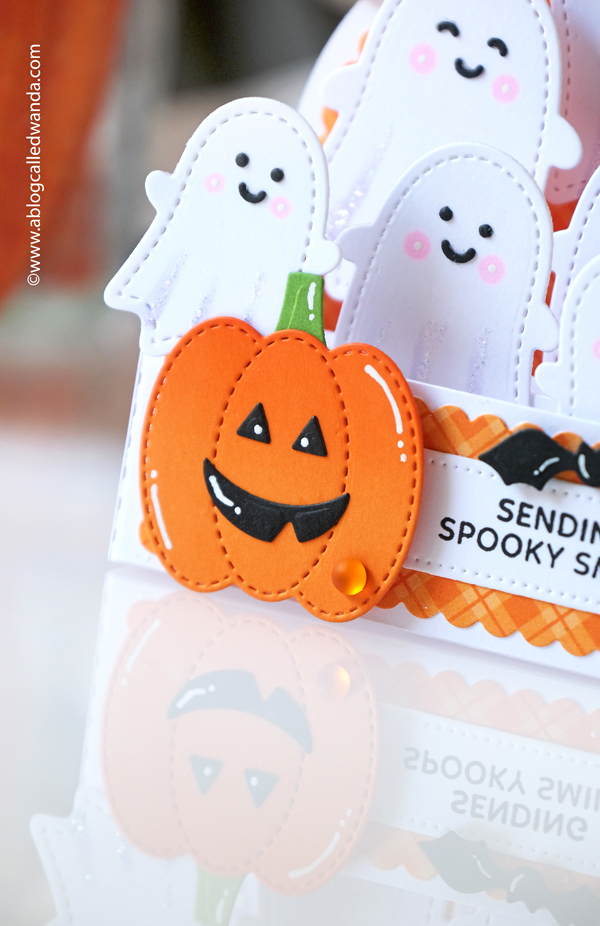
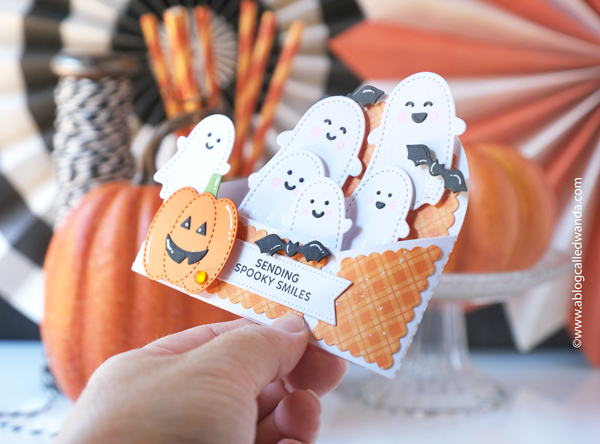
My second card is a POP UP card, again featuring those SUPER cute ghosties!! This was the first idea that popped into my head when I saw the ghost dies! A gang of ghosties! I just adore their facial expressions. They are having a GOOD time for sure! I assembled my pop up card base using white cardstock and used orange plaid for the accent papers. I used the new Batty about You set for the sentiment and a bright orange Stitched Pumpkin for the front. Oh, and I couldn't resist a few bats too! This card folds down flat and I would use an A4 envelope to make sure it fits in – since I extended over the top of the back panel. It's hard to see, but the ghosties have glitter accents on them, and cute pink cheeks done with Copics. All the supplies for this card are HERE or at the bottom of my post!
A side view of my layers and assembly…
And a top down view so you can see how I placed them inside the pop up base.
I shaded the pumpkin with a bit of orange ink and a blender brush. White pen accents on everything too!
Here is the card folded down flat for mailing!
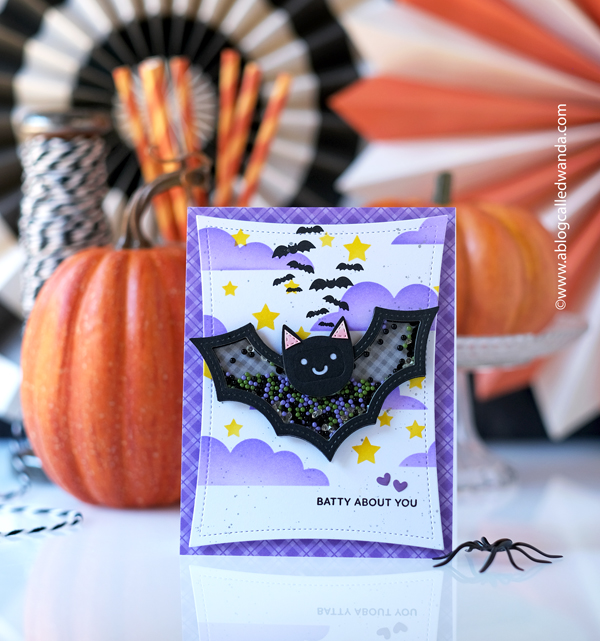
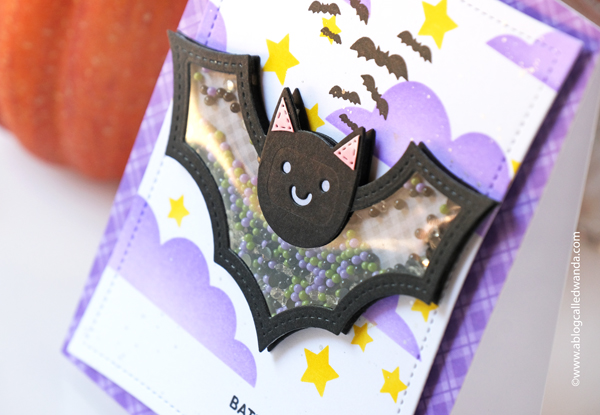
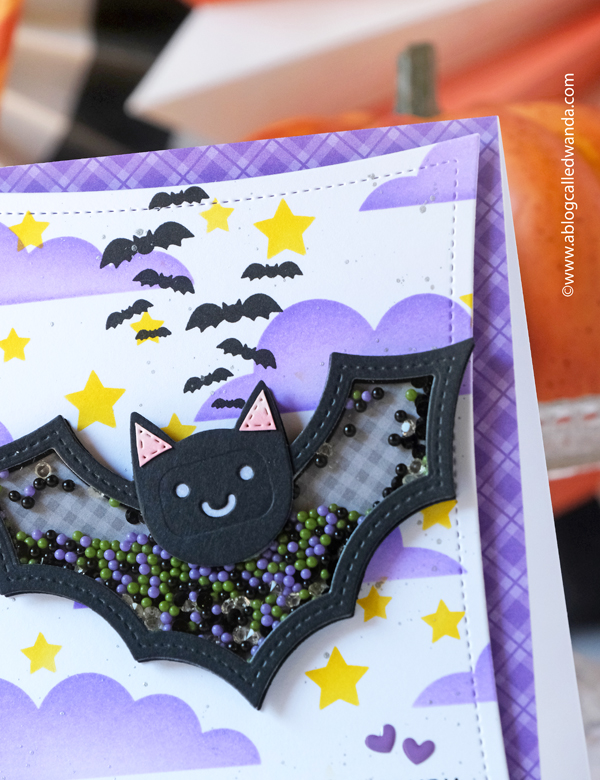
My third card for today! I couldn't stop making things! This card features the brand new Bat Shaker Dies and the Batty About You Stamp set!! I chose purple and black for a moody color palette. My finished card is an A2 card base layered with purple plaid! The background of the bat shaker is grey gingham and I filled it with the new Halloween Magic Beads. I stenciled the background using purple and yellow inks… And stamped some extra bats behind the big shaker bat. Can a bat be cute? I think he is! LOL. All the supplies for this card are HERE or at the bottom of my post.
Here's a top down view of the shaker bat!!
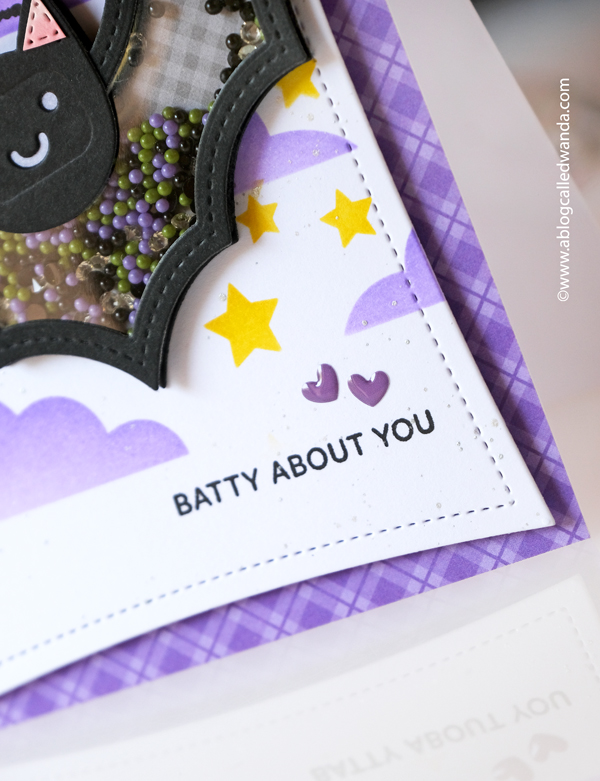
The perfect sentiment!!
Well, if this new release doesn't put you in the mood for spooky season, I don't know what will! LOLZ. That's it for my projects for today!! It's so fun being part of this great blog hop!! The links to the other bloggers for today are at the very bottom of my post! Be sure to visit all the blogs and leave your comments!! Remember to come by next week and see the rest of my projects! It's my pleasure to share with you today! XOXO
PRIZE INFO: There are THREE $30 gift certificates up for grabs (one winner each day). Winners will be picked randomly from comments along the blog hop. All comments must be left by 11:59 PM PST on 8/19/2024. Winners will be announced on the PPP blog. GOOD LUCK!!
One of my favorite releases of the year every year – the PPP Halloween Release – is LIVE now! Here are some sneak peeks. I've made five projects (so far) and I'll be sharing everything starting tomorrow. If you want a jump on shopping – here's your cue! It's SO GREAT!! See you tomorrow morning with my first set of cards! XOXO Happy Monday!
Hey friends! Happy Friday! And, today is the 9th of the month, which means that there is a NEW RELEASE from Concord & 9th today! Yahoooo! The new release is available today, August 9th, at 11am EST! It's SO GOOD! And also, Concord and 9th today is celebrating their NINE year anniversary! Congratulations to some of the best people and creativity out there! I'm so very happy for their continued success! I have a card to share today made using the new release, and then, since it's their anniversary, I thought I would share some of my favorite C9 cards from the past nine years! Yay! The release today is their Autumn release and it's really good!! (As always!)
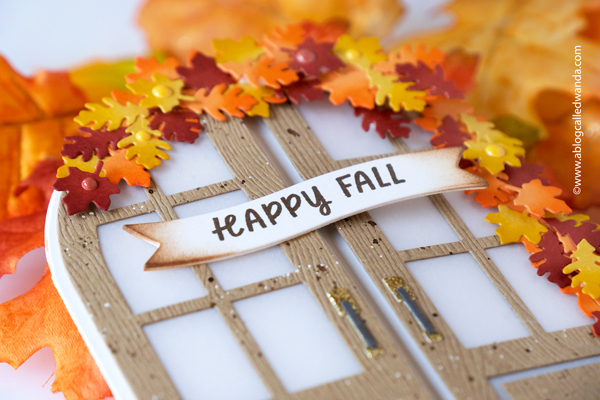
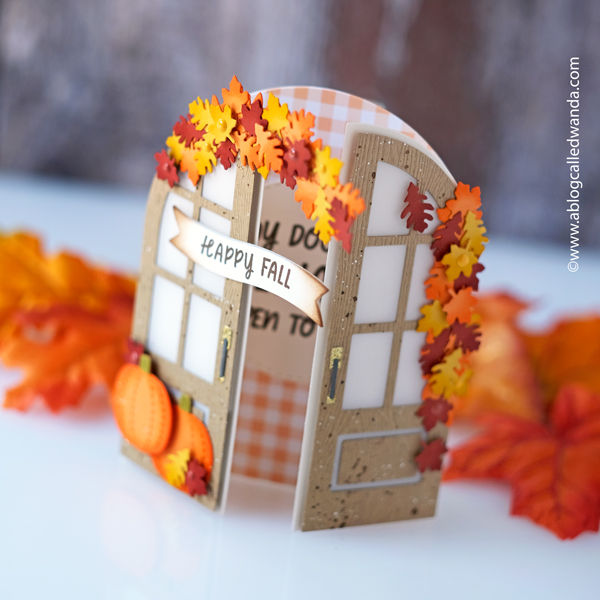
My card today features the brand new Door Decor stamps and dies, along with the lovely Playful Pumpkins Dies from last year. I created a warm and inviting Happy Fall card and I love how it came out! My finished card is not a rectangle! But it will fit into an A2 envelope…. You could also attach the door to an A2 card front if you want. I kind of like the different shape! I used warm Autumn tones for my color palette. I would sure wish that my front door was this pretty!
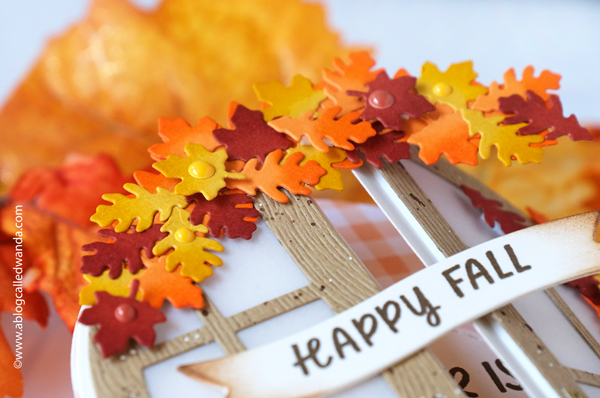
I started by die cutting out all the pieces! I cut the base from cream cardstock and then I die cut the doors from woodgrain cardstock. I lined the back of the windows with vellum for just a bit of a frosty touch! The matching stamp set has sentiments that fit perfectly onto a little banner…. I die cut the leaves from yellow, orange and rust cardstocks (all from C9)….
I die cut some Playful Pumpkins out to adorn the front porch. For the doors I splattered on some brown and white inks to make it look a bit weathered.
The doors open wide and welcoming! I lined the inside with some gingham cardstock and then stamped a second sentiment onto a stitched circle… SO CUTE!
As usual, the dies are genius! There is an arched leafy piece and a straight leafy piece. You die cut out the base and then layer on the leaves on top! You can make this greenery for Christmas too! It's really all so lovely.
I die cut out a whole bunch of leaves. I inked each leaf with a small dauber and my C9 ink pads. Then I just glued them onto the arch base! Easy and fun.
Now, if you want your card to open, be sure to only glue down one side of your banner and your leaf arch!! Here's the inside of my card…
In honor of Concord and 9th's anniversary, I went back through my blog posts and found some of my favorite cards I've made for them over the years! I'll show the photos here and if you want to learn more about a card, just click the photo and it will take you over to that blog post for more information! Yeah!
Let's party indeed!! It's Friday!! There are new stamps and dies!! So much good stuff. Have a blessed and happy day, and a wonderful weekend!! Keep on crafting, my friends! XOXO
Hi friends! How is your week going?! I hope you’re doing great! We are in the middle of a (another) heat wave and I’m just counting down the days until Fall arrives and cooler weather returns. It’s been a hot summer, and a fun summer too! On Monday my hubs had the day off work and he took one look at my beleaguered, hot face, and said – let’s drive to the ocean today! Boy, that was just what I needed – Vitamin Sea. We didn’t know it beforehand, but we arrived at our fav beach to find MANY whales swimming in the cove! Humpback whales…. They were everywhere – and surprisingly close to the shore. We watched them for hours!! Magic! California is weird, and expensive, but boy do I feel blessed by the nature that surrounds us here! My post for today is another example of that!
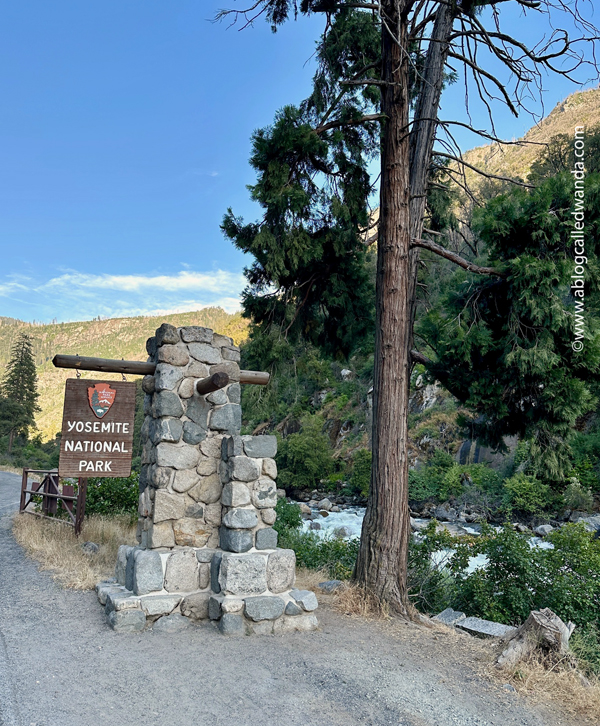
Today I’m finally getting around to sharing our trip to Yosemite back in June! My post is a photo essay featuring the gorgeous Yosemite National Park in Central/Northern California! We went on a day trip on June 12th and it’s taken me a while to get it posted here! Grab a cuppa and spend a little time with me! We are very very lucky that we live fairly close to Yosemite! It’s easy for us to do a day trip down and back so that’s what we did on this trip. We’ve been here many times, but each time it feels new again and I never tire of the awesomeness of God’s creation. It’s a special place and I hope if you haven’t already, that you get to visit here one day!
All my photos today were taken with my iPhone! I have lots of very good camera equipment, but I find if I use my phone instead of all my gear, that it helps me stay more present in the moment. Gotta travel light sometimes, literally and figuratively. I was really looking for a quiet peaceful simple day, so I left all my gear at home. We filled up the cooler with drinks and yummy snacks, and hit the road at 2am! YES 2am! Ha. It takes about three hours to drive there, and you know we had to stop for coffee along the way. We saw the sun rise on the trip and that makes my husband happy! He is not only an early bird, but he is the earliest bird that wakes up the other early birds! LOL. (I am an exhausted night owl….) I hope you enjoy the photos. I’ll put some information before each one for a bit of history and context. CLICK HERE for the NPS website to read more.
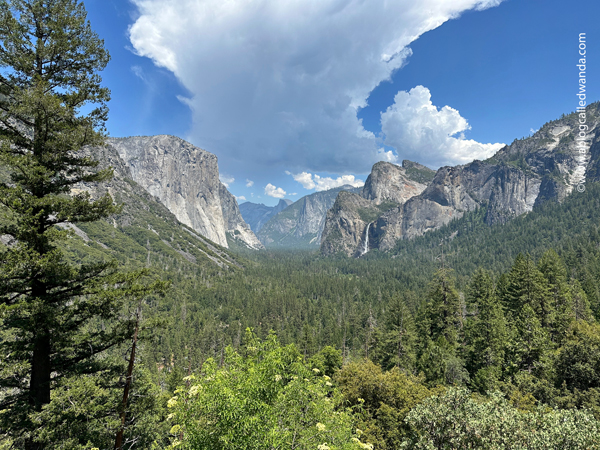
This is the famous Tunnel View! Because this vista opens up right after you emerge from a short tunnel on your way into the park. It’s AMAZING! And, it’s where everyone stops for a photo op!! The waterfall you see there is Bridalveil Fall…. Lots of times there is a rainbow in the mist, but not this day. That waterfall that looks small in the photo is 600 feet tall! Does that give you some perspective on the size of this beautiful valley!?
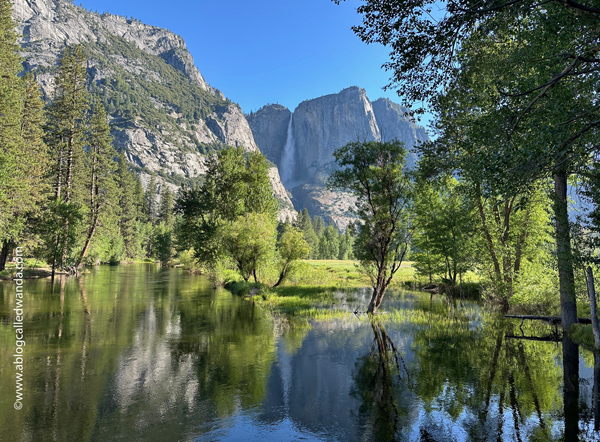
This is Yosemite Falls (Upper)…. As reflected in the river. This in particular is one of my favorite views in the park. Gotta come early to get the reflection just right!
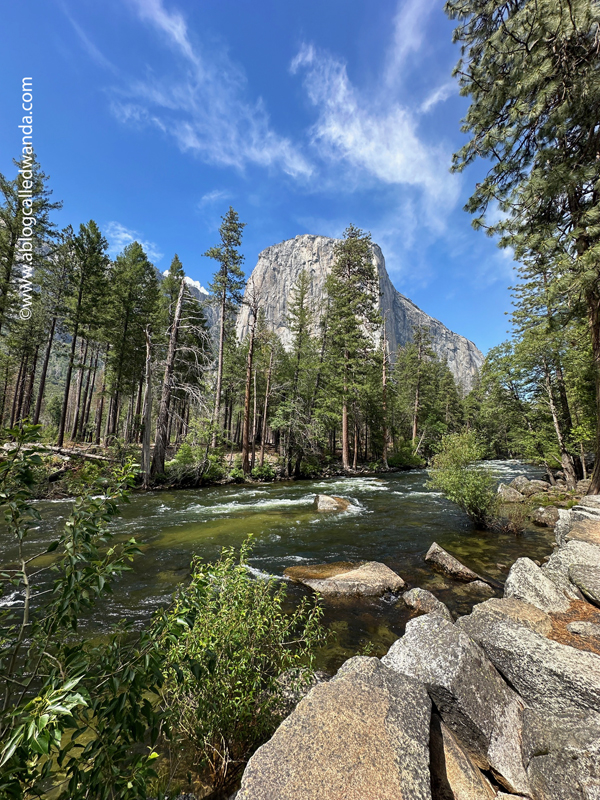
This is the famous El Capitan Granite Formation! This is the “rock” that you see all the movies of the rock climbers on! This tiny rock is about 3000 feet tall from the base. That’s about three times the Eiffel Tower! And people climb it! (Not me!) It’s pretty remarkable!
This is the view from the top of Glacier Point. The top waterfall in the photo is Nevada Fall, and the bottom waterfall in the photo is Vernal Fall. For perspective, Nevada Fall is 600 feet tall and Vernal Fall is 325 feet tall! They look tiny! Fun fact – I have hiked almost to the top of Nevada Fall once! And a couple of times to the top of Vernal Fall (The MIST trail which is one of the highlights of my entire life)!
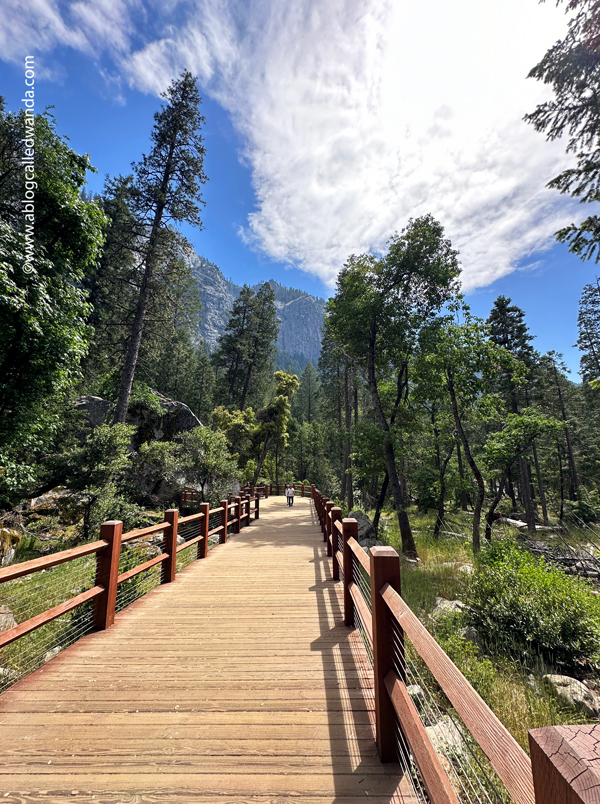
Here’s a closer view of Bridalveil Fall from the path up to it! The sound of it is so powerful and the air is cool and crisp from the mist…. You can walk right up to the bottom of it and feeeeel it!
The peaceful and clear Merced River….
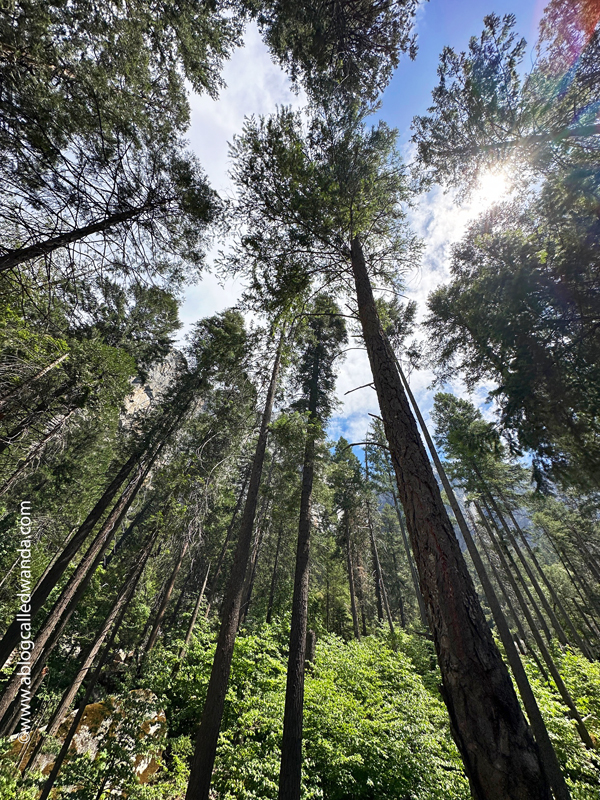
Beautiful trees and clouds! The air is so fresh and clean and smells like trees!
One more view of Bridalveil Fall!
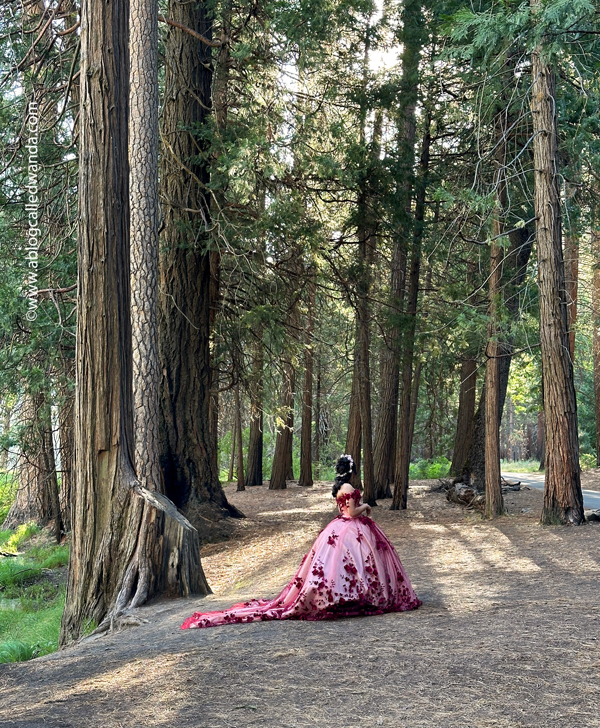
Early in the morning, by the river, this pretty young lady was having her Quinceañera photos taken!
My boyfriend of 31 years!! A rare photo of my husband smiling! LOL. This is his favorite place on earth and he was so happy in this moment. Behind him is the famous Half Dome… And he and his friend Randy climbed to the top of it several years ago. So incredible!!
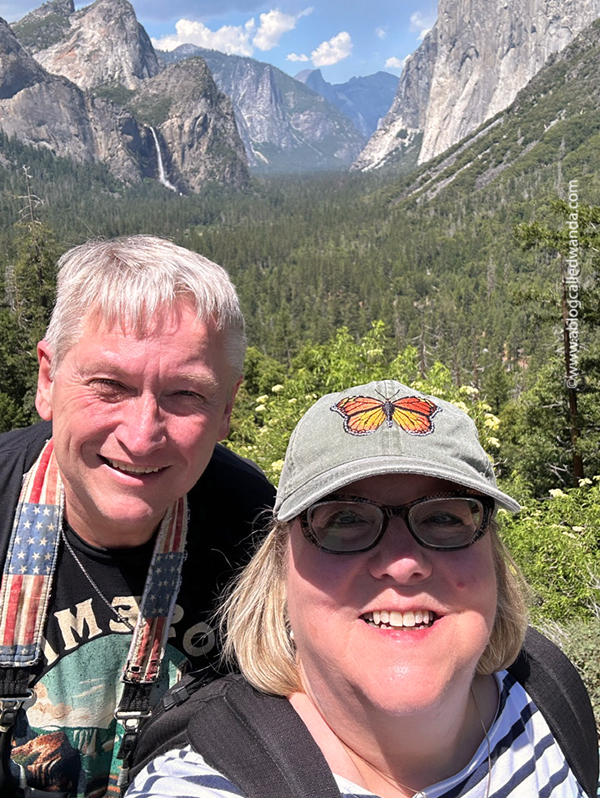
And here we are – all smiles!! What a glorious day it was!
Ain’t no interwebs here…. Gotta go old school if you need to make a phone call!!
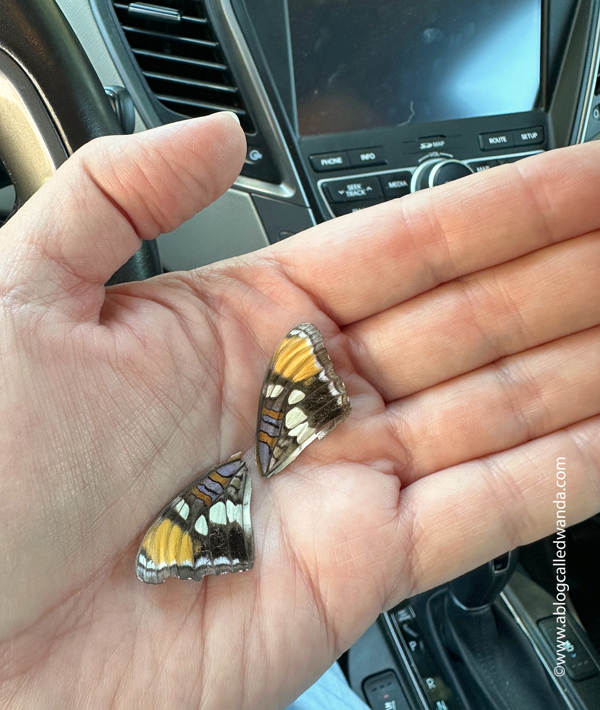
We found some butterfly wings in the grass – they were perfect.
Another slightly different view of Yosemite Falls (Upper and Lower)…. It’s very hard to convey the extreme scale of everything. It’s like you’re so small in the midst of this amazing place. This is one of the places where I really feel God. If I’m in the right mode it actually makes me cry.
One more view of Half Dome taken from Glacier Point…
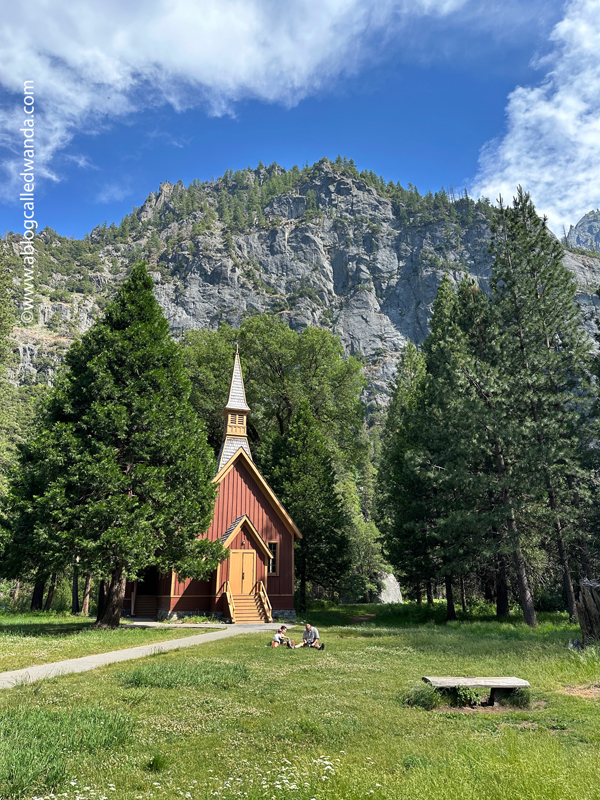
There is a lovely chapel near the meadow in the valley floor. They have services, and you can get married there too! We have been there before when a beautiful bride and groom were out front having photos done. Magic!
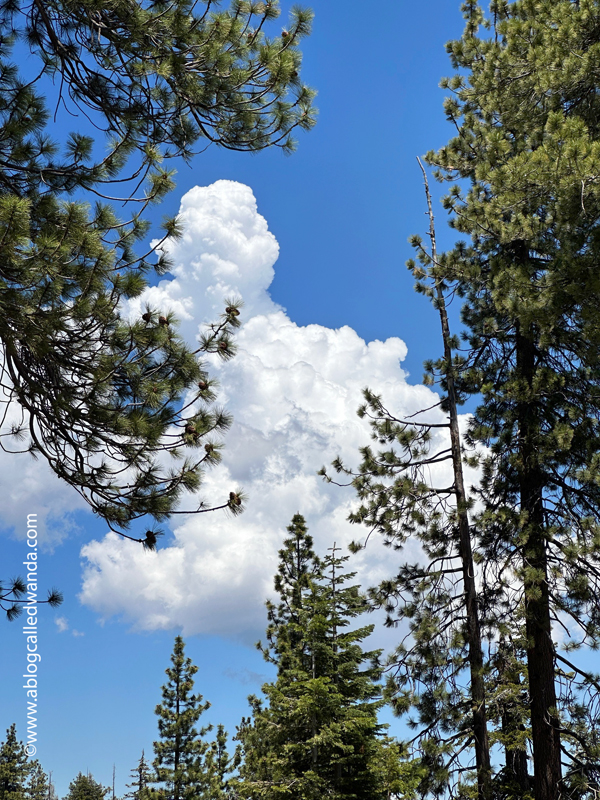
The trees! The clouds! The amazingly blue sky! A quick note – you do not have to be a hiker to see all of these things!! Of course, there are way more sights to see if you’re willing to hike even a little bit. I like that the park is accessible to everyone! There are a lot of places to stay surrounding the park – and a semi big town (Oakhurst) with hotels and even a Starbucks… AND A STAMP STORE!!! (The Cat’s Meow)! There are many camping options, but you really need to plan ahead if you want to camp – spaces fill up fast! We usually don’t visit in the height of Summer – we prefer early June or September!!
Another view of the River!
I bet these trees have stories…. Simply majestic!
I made a video of our Yosemite trip too! I’m really trying to get better at videos! If you’d like to see my Yosemite video on YouTube – CLICK HERE! It’s about two minutes long and I compiled my favorite videos of the day!
Thanks for visiting my page today and sharing in my love of our golden state, beautiful California! Have you been to Yosemite before? Let me know in the comments! Have a blessed and wonderful day my friends! XOXO
Hey friends! Happy Monday! Happy August! I have a fun project to share with you today! There's an awesome blog hop today! If you're new here today because of the Blog Hop – welcome! Today's post is part of a giant blog hop to celebrate the new Magical Holiday Collection from Pinkfresh Studio!! Beautiful, classy, cheerful stamps, stencils, dies and hot foil plates just in time for your holiday projects! So happy to be here in the lineup to share a card with you. The blog hop links, prizes information, and supplies information is all at the bottom of my post. Enjoy the hop everyone! Wishing you a heart filled with joy! XO
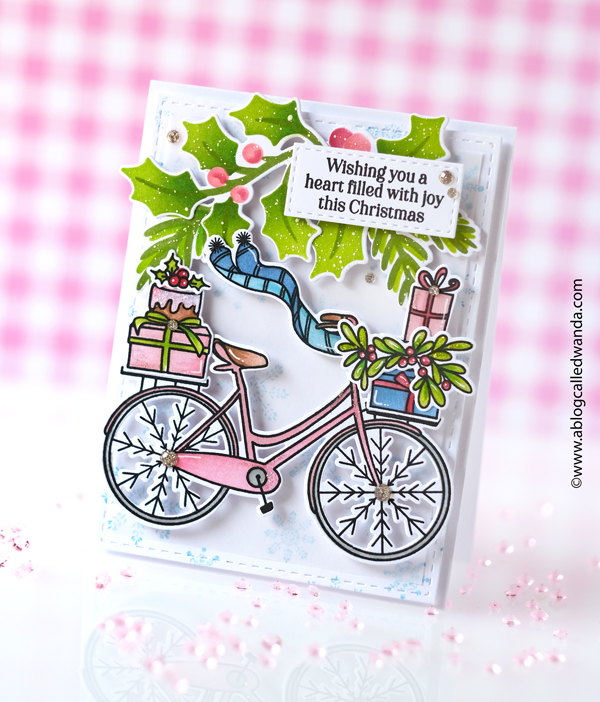
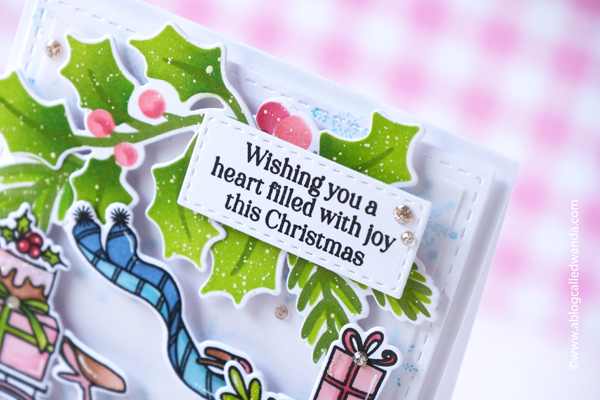
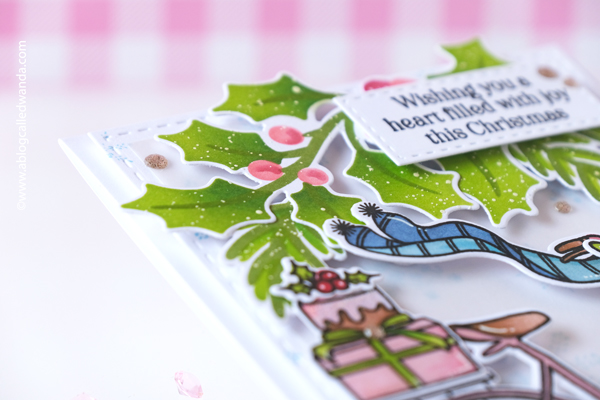
My finished card is an A2 white card base, layered with white + snowflakes, then vellum, then the festive images! This card features the brand new Holiday Bicycle stamps, stencils, dies combo along with some of my previously released Pinkfresh Studio favorites. I chose bright, happy colors and added some sparkle too!
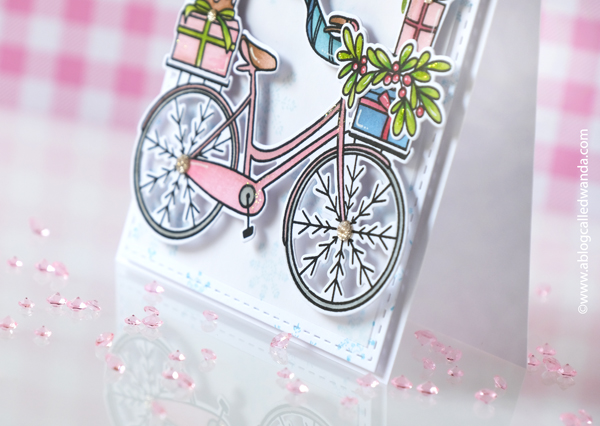
I started by stenciling and die cutting out the holly and pine branches for the top of my card. After I stenciled/die cut them, I used my wonderful Pinkfresh Studio ink cubes and small and large blending brushes. I used white paint spray to add some snow! Then I stamped and stenciled the bicycle/packages and die cut them out with the matching dies. I made a cute little pink bicycle!! This image is just so adorable, with those snowflake spokes!
Here's a close up of the leaves clusters at the top of the card and that perfect sentiment…. Love the saying, and the font!
The bottom layer was stamped with the Snowflake Background stamp and pretty aqua ink…. Adds just a touch of snow!
Thank you so much for stopping by my blog on this fun blog hop day! It's always my pleasure to bring you new things, and to work with my friends at Pinkfresh Studio! Wishing you a happy and creative day, my friends!
PRIZE INFO:Pinkfresh Studio will be giving away the full new release on the Pinkfresh Blog & YouTube channel!! They will also be giving away a total of TEN $25 gift cards along the hop. The lucky winners will be picked from the comments left on all the blog hop stops! Pinkfresh Studio will pull the winners & post them on August 13, 2024 on the Pinkfresh Studio GIVEAWAY PAGE. You must check that page & claim your prize within 2 weeks. Don't forget to look! Good Luck!
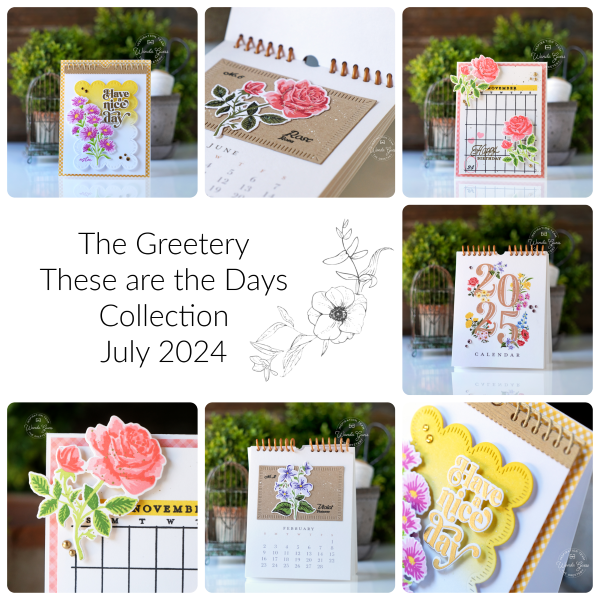
It was my pleasure to introduce the brand new and beautiful These are the Days Collection to you this week!! And, I hope you love it as much as I do!! Happy Crafting!! If you scroll back to my last blog post – from yesterday, you can see all my projects from the new release, and the accompanying supply list. If you have any questions – reach out!! Thanks for all the love and kind comments this week! Happy Creating! Can't wait to see what YOU make!
Hello, my creative, talented and crafty friends! It's going to be a great day today, because I'm here to tell you about a NEW RELEASE from The Greetery! The new release is called These are the Days! It's calendar/planner themed – which is so perfect and fun. Are you a planner girlie? I am! And Betsy has created a suite of products for us the use to make our own calendars and also calendar themed cards and planners. I love this idea so much and I know you will too. One of the best parts of the new release is a collection of florals called Birth Month Blooms. There are flowers for every month of the year and corresponding words that make gorgeous botanical projects! SO much good stuff.
This month only has one release day – today – and the entire team will be sharing our projects and the new products on our blogs. TOMORROW is release day and the release will be available for shopping at 10am – July 30th!
I will be sharing three projects today – two cards, and a calendar!! Loads of beautiful inspiration from the entire design team today. My supplies, prize information, and links to everyone's blogs are all at the bottom of this post. Let's get started!
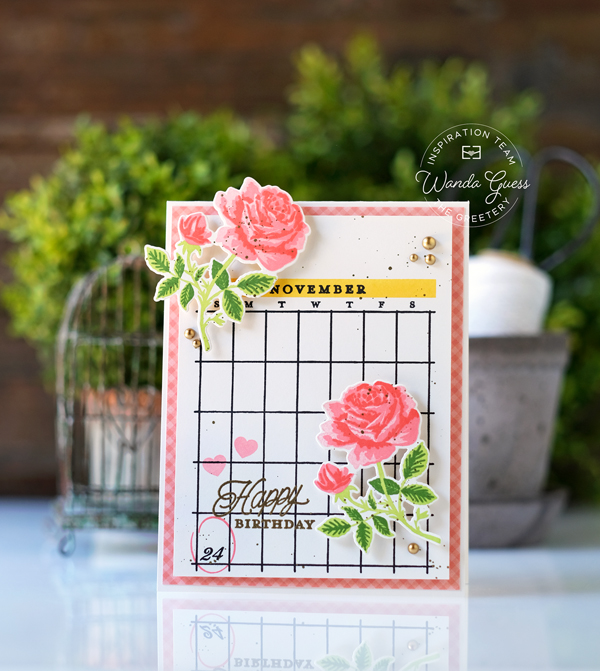
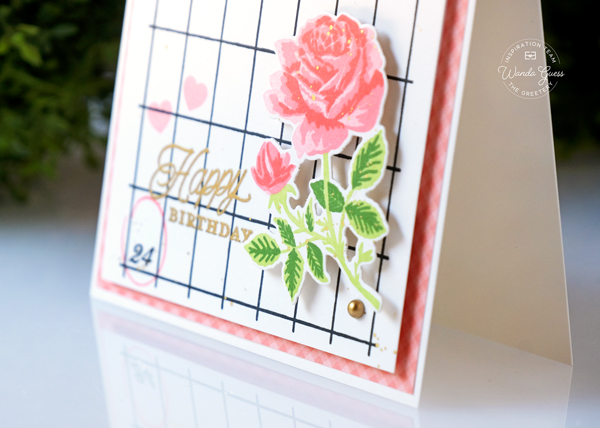
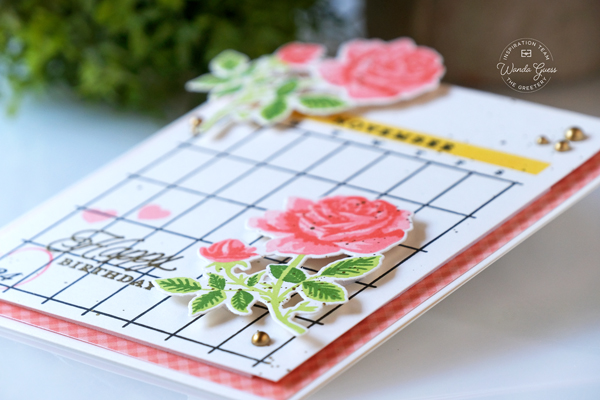
My first card today is a special birthday card – and I used the calendar items to show the recipients birthday! This card features the brand new Calendar Basics stamp set, and the brand new Birth Month Q2 stamps and dies. My finished card is an A2 cream card base, layered with some pretty rose gingham. I wanted a bit of a vintage feel to this card – with the roses and the gold….
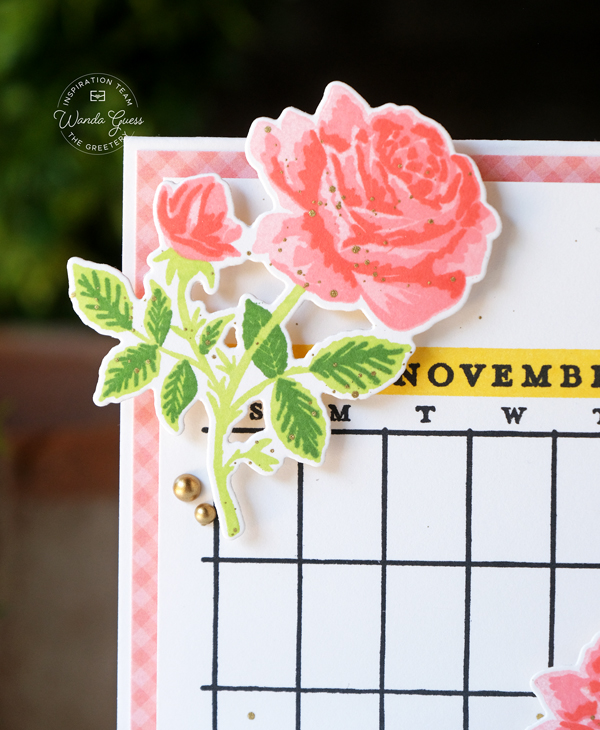
I started by stamping two gorgeous rose clusters using pink and green inks. (THESE ARE MY FAVORITE INK PADS FOR 2/3 STEP STAMPING) I die cut the roses using the matching dies. I stamped the vertical calendar grid in black.
Here's a close up of the beautiful roses stamps! I splattered gold paint on them too!
The roses were affixed to the calendar using foam tape. I heat embossed happy birthday in gold, and circled my friend's birthday date! This is a GREAT way to mark a special date – birthday, wedding, anniversary, Christmas….by circling it on the grid! Love this!
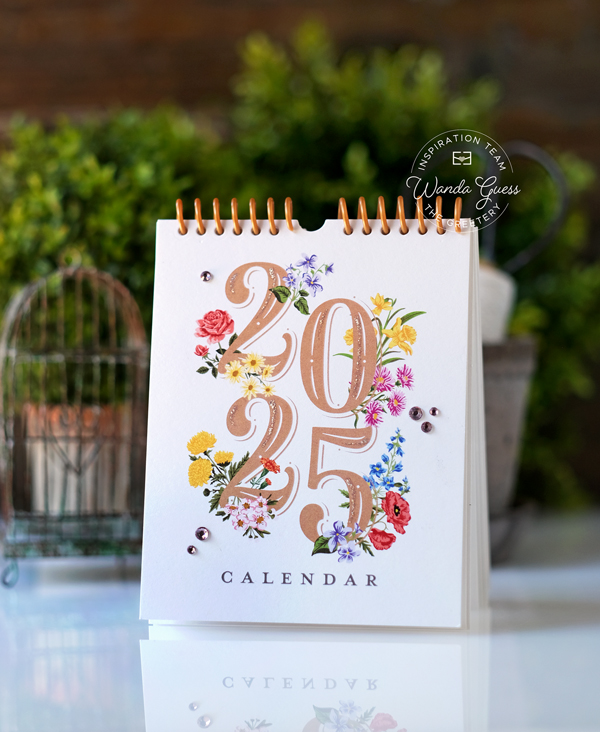
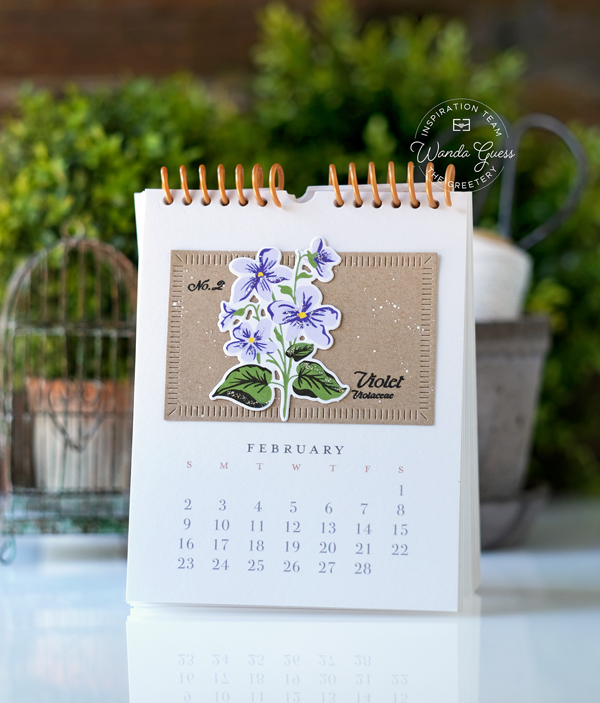
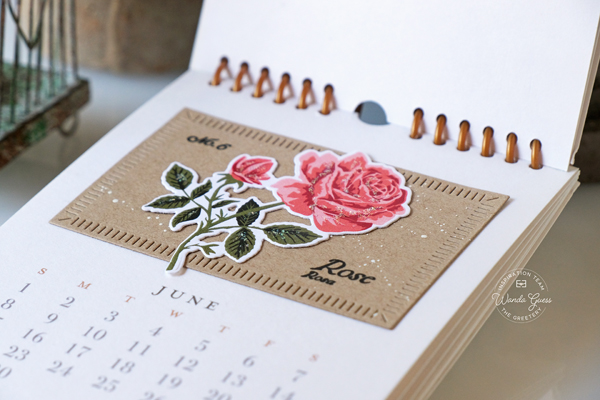
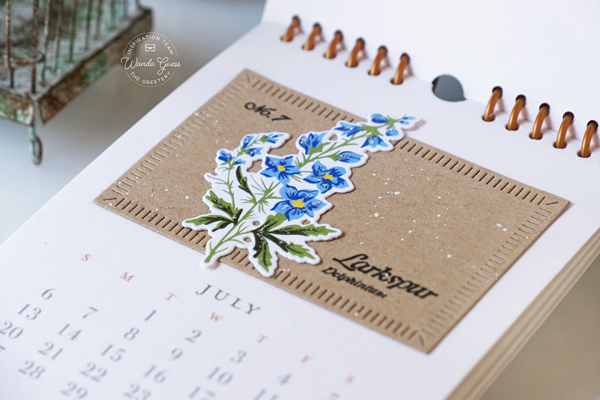
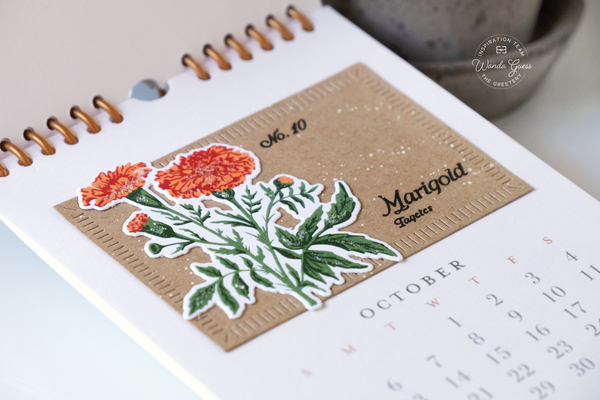
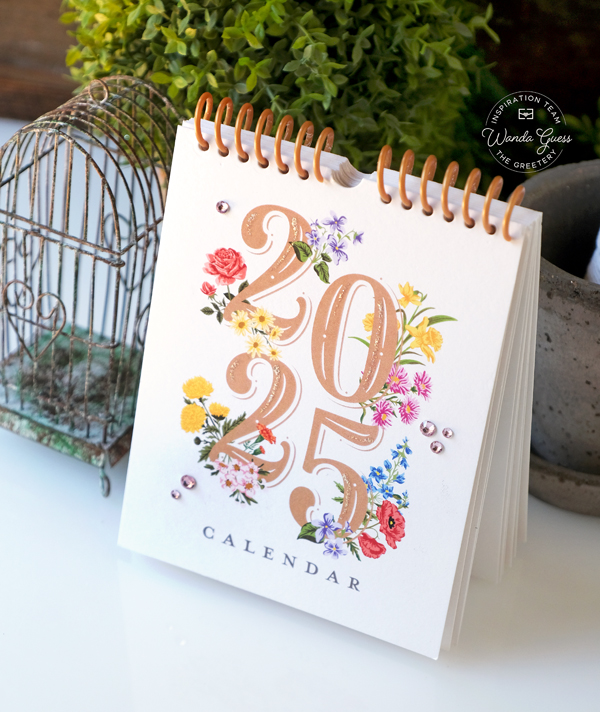
My next project is a lovely 2025 calendar! Gosh I really really like this concept! There are new Pre-Printed calendars that you can decorate as gifts or for your own desk. I used the 2025 calendar and decorated each page using the new preprinted monthly flowers!!! This is awesome. The Spiral die cut cuts out holes at the top of the calendar and then you use the binding to wind it through the holes to make it able to flip!! Betsy thought of everything. I'm going to show you a few of the pages….
For each page, I die cut a kraft rectangle and stamped the name of the flower onto it. I then die cut out the preprinted flowers for each month… My first thought for this project was mass production as friend gifts – so I went with the preprinted florals instead of stamping them – much faster!!
On each page I used Stickles glitter glue to add little bits of shimmer and shine. I also splattered white paint onto each rectangle.
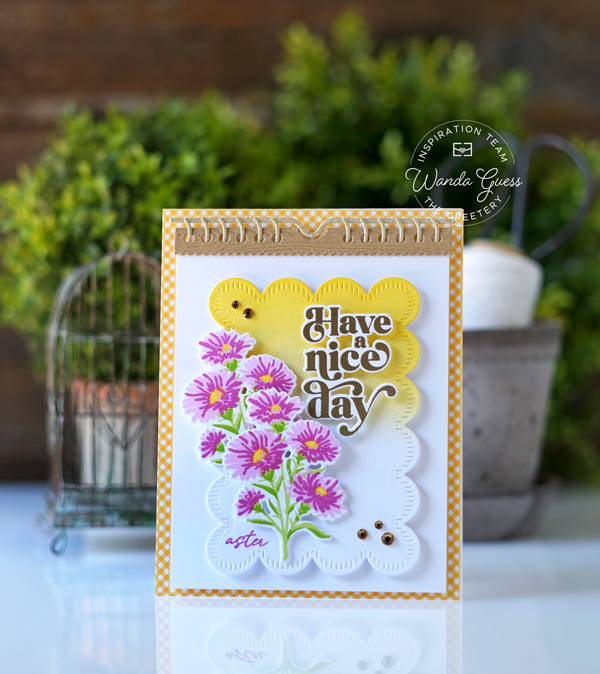
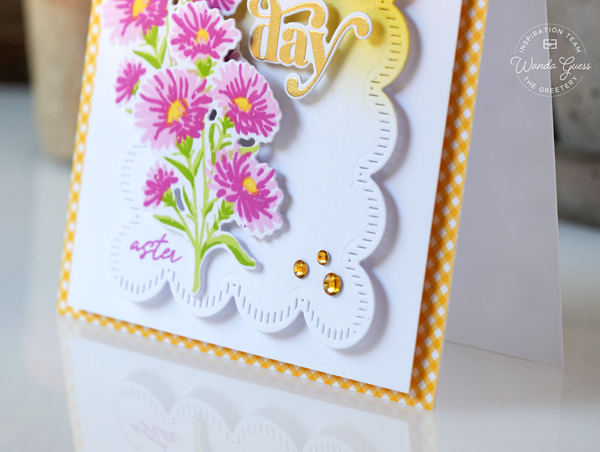
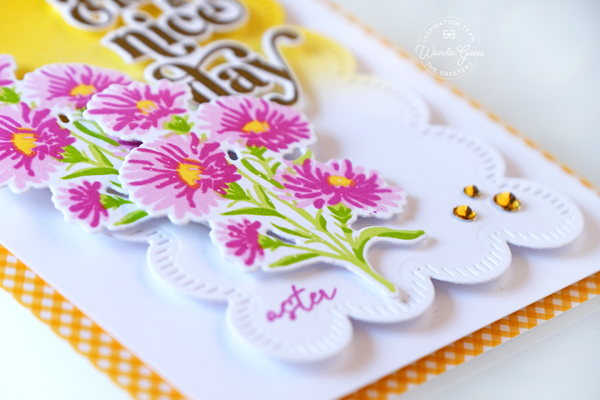
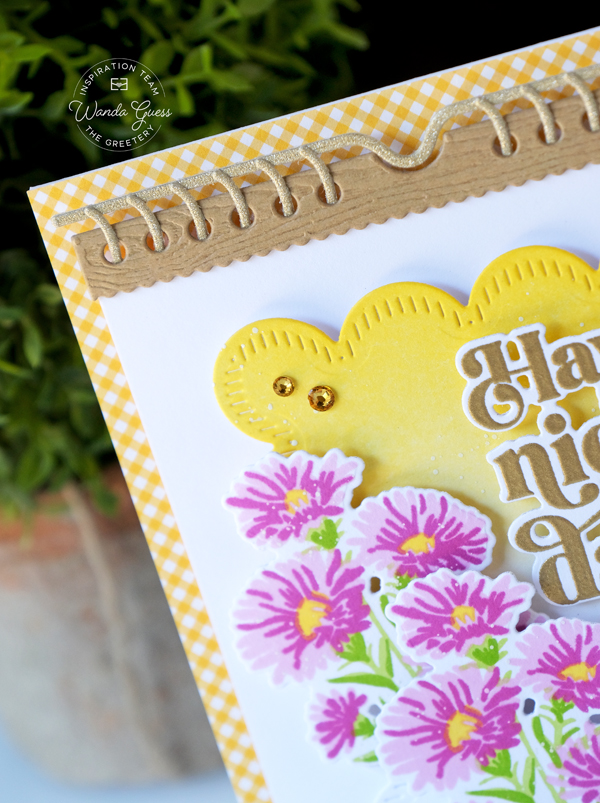
My final project for today is a card made using the brand new Birth Month Q3 stamps and dies, and the new Spiral Bound Die…. The sentiment is from the brand new One Fine Day stamp set. I used pretty shades of yellow and magenta and a bit of ink blending. My finished card is an A2 white card base….
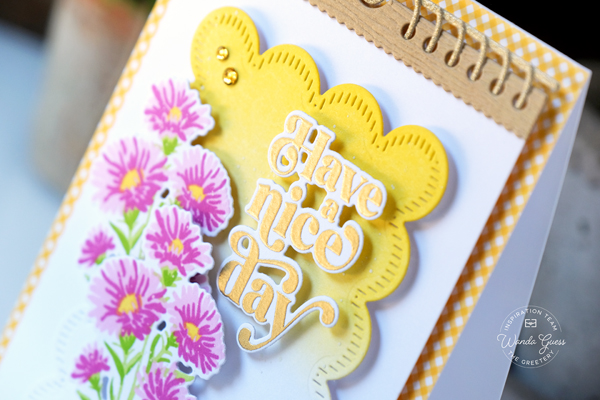
I die cut a scalloped rectangle and ink blended just the top part using bright yellow ink… The lovely sentiment is heat embossed with gold and then die cut with the matching die.
These colors together just say SUMMER to me! So fresh and cheerful.
Here is a close up of the die set that looks like spiral binding – genius!!
I hope you're loving this calendar themed release! Here is another photo of the calendar cover. I decorated it with Stickles and a few gems just to jazz it up!!
That's all for my introduction to the new release! Thank you for your support- and for sharing my enthusiasm for The Greetery. We all love The Greetery! Have a blessed and happy day! See you tomorrow for Release Day.
Betsy will be giving away gift certificates to some lucky winners as usual (Awesome)! To enter to win, please leave a comment on everyone's blog posts for today! She will announce the winners on The Greetery Blog. Good Luck!!
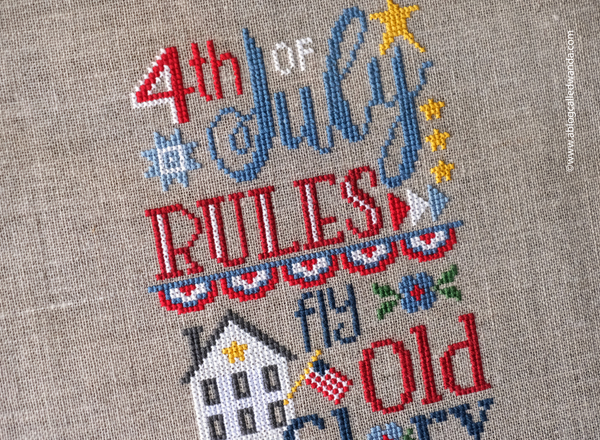
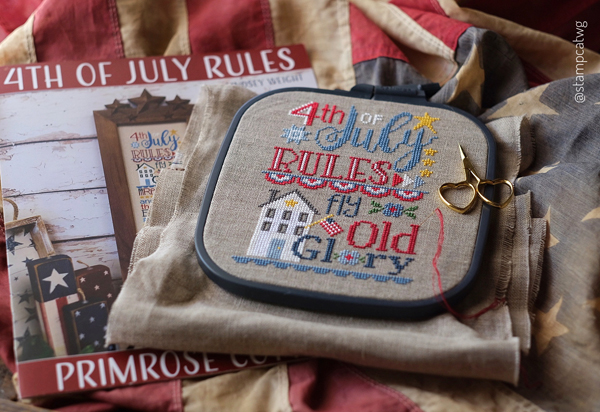
Hi everyone! Let’s kick off a new week! The world has gone mad and crafting is a good way to escape right now. I’m so grateful I have a hobby (hobbies) that help keep me in the moment and keep my mind occupied. I hope that you are doing well and that you have a happy week this week. Today’s project is a ‘better late than never’ project! I had high hopes to finish and frame this cross stitch piece for the 4th of July this year… But alas, I finished it just this morning at around 1am! Oh well, it will be ready to hang next July! Ha! I really wanted to share it with you today. I do love a patriotic cross stitch.
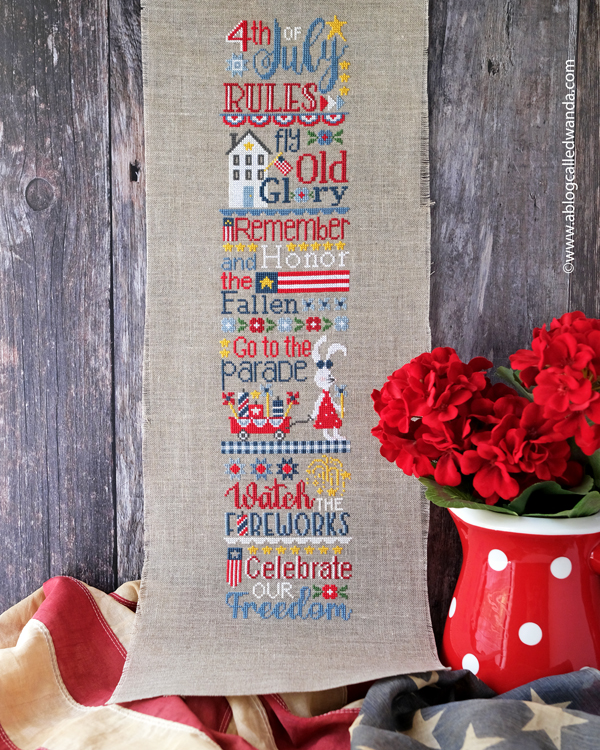
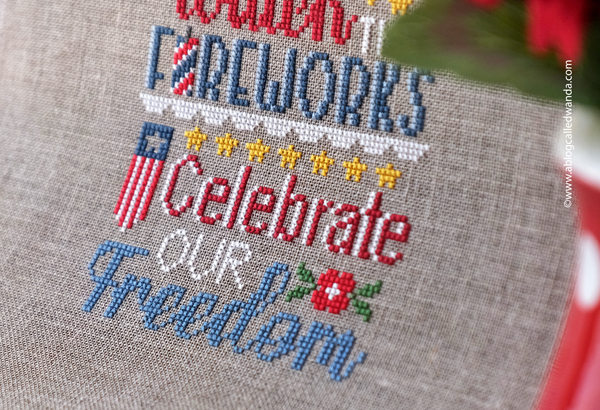
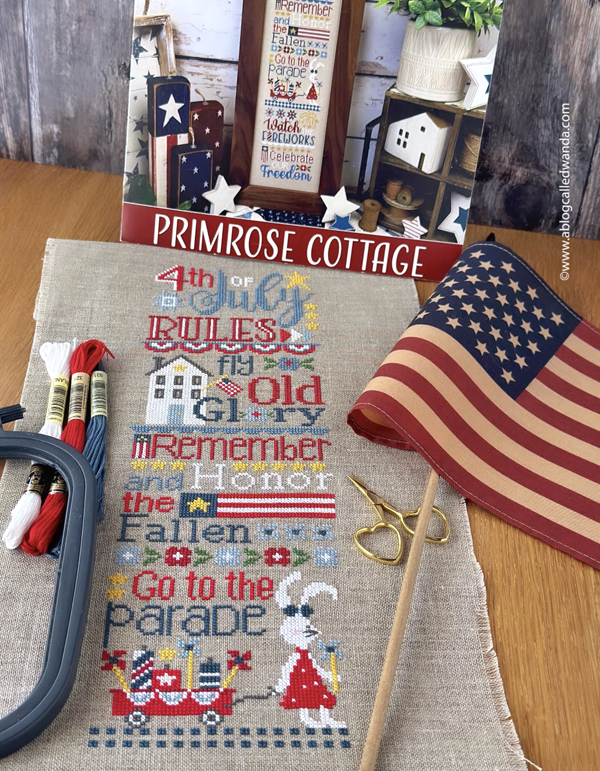
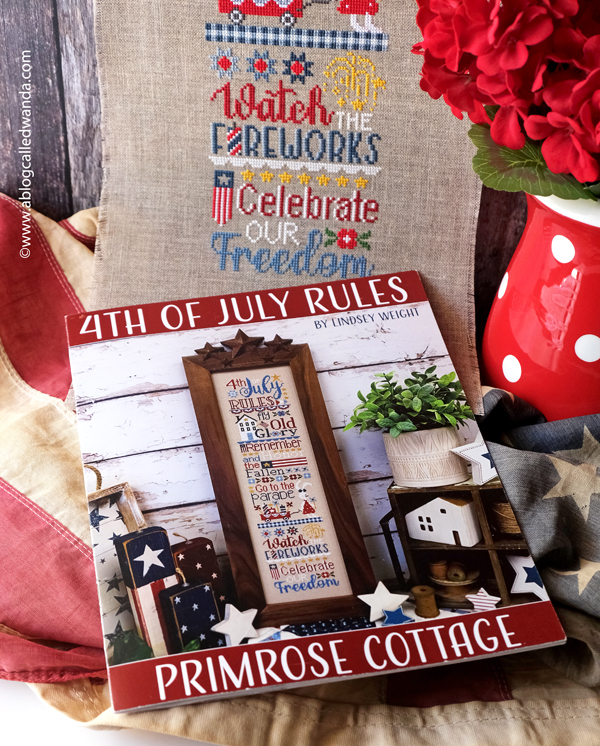
This pattern is called 4th of July Rules and it’s by Primrose Cottage. FULL SUPPLIES are HERE or at the bottom of my post! I stitched on natural 30 count fabric and used DMC floss in my own chosen colors. I love brighter yellows and reds!! Here is my completed piece! Finished stitching size is approximately 5″ x 20″ so it’s a long narrow piece. I’m not sure if I will put it inside a frame, or maybe make it a wall hanging on a string?? I have time to decide, don’t I?? LOL.
This was a fun stitch – not too hard and not too easy. Just enough colors, but not too many colors…. Lots of my favorite elements – a tiny flag, some bunting, pretty words….and patriotic colors!
In stamping, and in cross stitch, I really love to combine different fonts and I love how this all comes together with the wording!!
A cute little bunny pulling her wagon full of fireworks! EEP.
And, most importantly, Celebrate our Freedom!
This next photo was one I posted when I first started out… I think my favorite part is the house and flag image!!
And one more in process photo!
Here is a photo of the pattern book! Let me tell you – this book is SO NICE!!! The pattern is broken down into six segments, and each page is one segment and it’s in full color! And the pattern is HUGE so it’s very easy to see and read. I really appreciate this type of format since I have very bad eyesight. It was a dream following this pattern!!
That’s it for today! I hope you’ll be inspired to start a cross stitch project! (Or if you’re like me, finish some!) Wishing you a lovely, happy, and creative day my friends. XOXO
Hey friends! Happy weekend! I hope you're doing great! I'm relieved that yesterday here in Sacramento we broke our two week streak of days over 100 degrees! Whew, that was hard! It's been so hot, and literally that just shuts down my brain! We had a cool morning on Saturday and it was enough to renew my spirit! You know what else renews my spirit? The thought that Fall is just a moment away! Yeah – my favorite season is next! And, today, I have something super duper fun and exciting to show you! The first Halloween cards of 2024! And a FABOOOLOUS card kit Boo Box from Catherine Pooler!
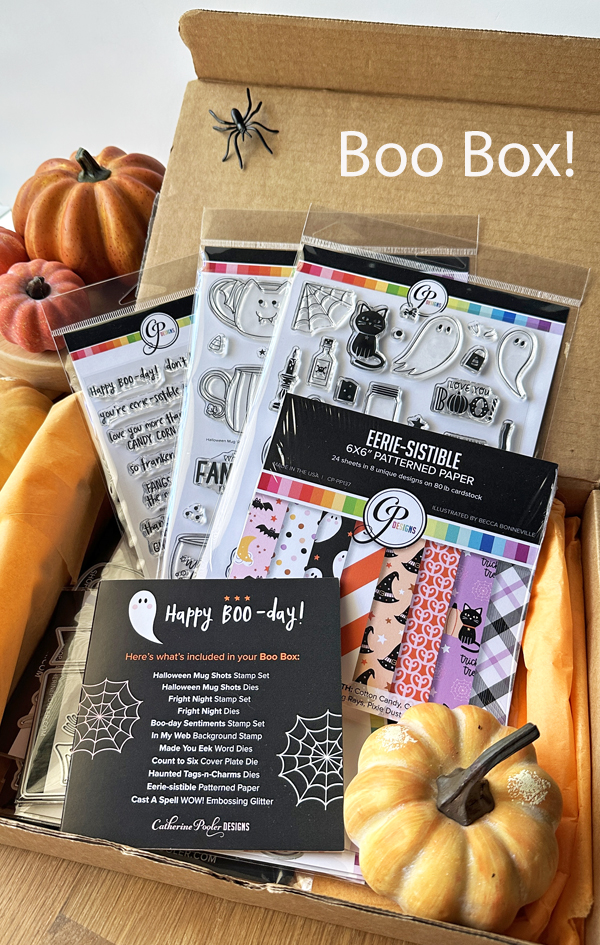
The CP BOO BOX is a Limited Edition card kit full of stamps, dies, patterned paper, embossing powder and more! If you buy the kit you will also get access to videos and ideas from different designers! The items in the kit are ONLY available in the kit and won't be released separately later. And when the kits are gone, they're gone. I'm predicting a sellout for sure. This is the best box of this type I've ever seen and well worth the price. On my Instagram Stories later this morning I will be posting a full unboxing video to show you everything!
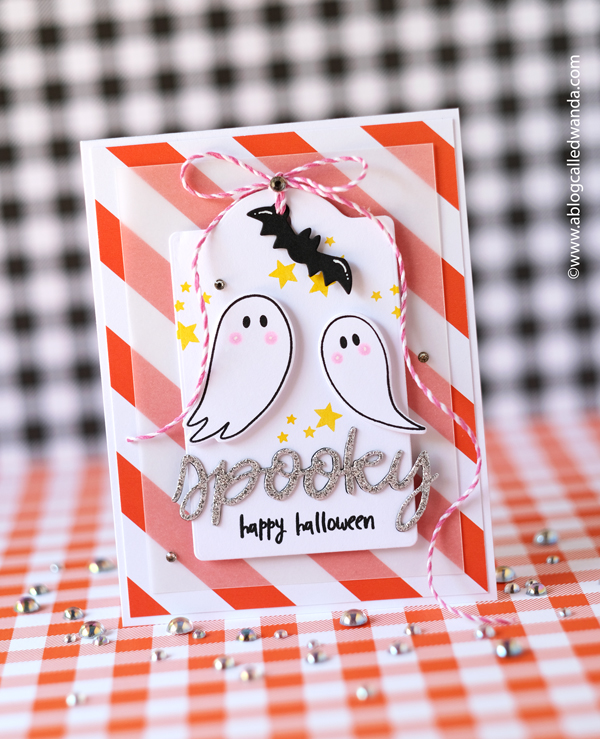
I'm sharing two cheerful and bright Halloween cards today that I made with supplies from the Boo Box! Let's get started! First up is some spooky cute ghosties and a bit of sparkle too! My finished card is an A2 card base layered with gorgeous orange stripes, vellum and a tag! This card is so fun!
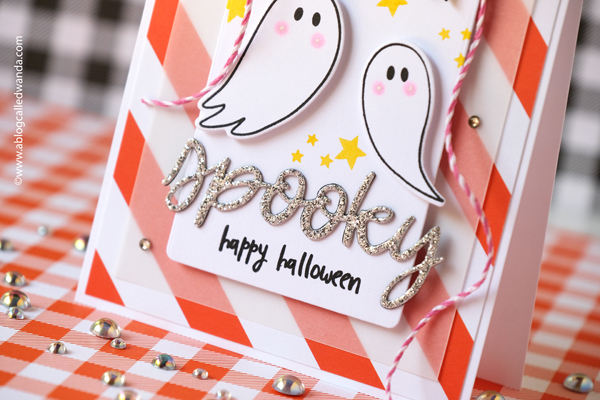
The Boo Box has two large stamp sets and one sentiment stamp set, along with lots of standalone dies and a big background stamp. I think my favorite images are these adorable ghosts! I stamped and die cut them out and added pink cheeks with a Copic Marker! I die cut the spooky die from both glitter paper and black paper and stacked them. I stamped some yellow stars in the background….
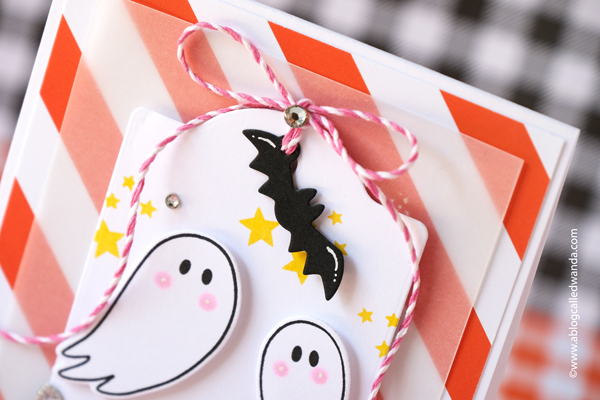
The Boo Box includes a die set with a great tag and add ons for the tag!! Love that! The little bat is included in the tag dies set…. I tied a bow at the top and attached the bat!
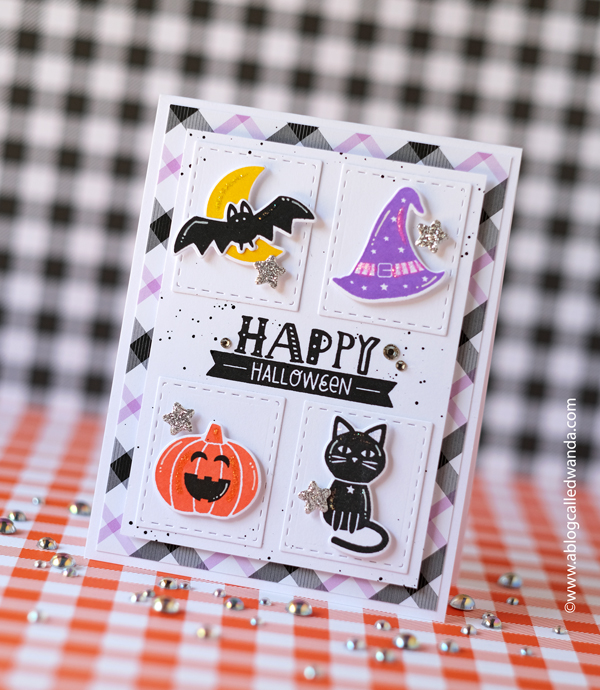
My second card for today features lots of Halloween icons in a grid pattern…. My finished card is an A2 white card base layered with that awesome plaid patterned paper… The Boo Box includes a great grid die set and I die cut out some of the grids and added the classic Halloween icons – cat, bat, witch hat and pumpkin!
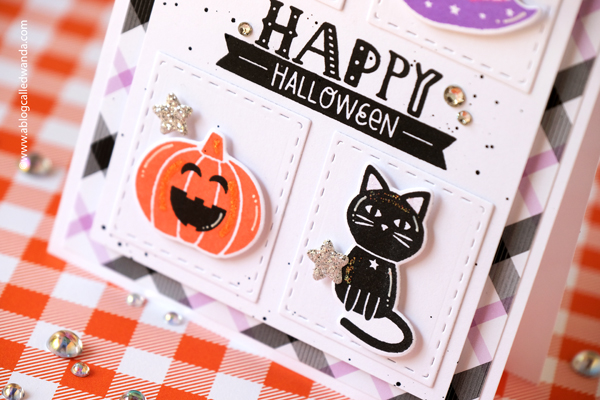
That little cat makes me smile! I added the sentiment in the center of my card and placed the grids around the sentiment. A few splatters of black paint and some glitter stars complete the look!! I added glitter glue accents to all the images too.
Here's the BOO BOX! And not everything is shown! It's AMAZING – so many great things – literally everything you could need to make your 2024 Halloween cards!
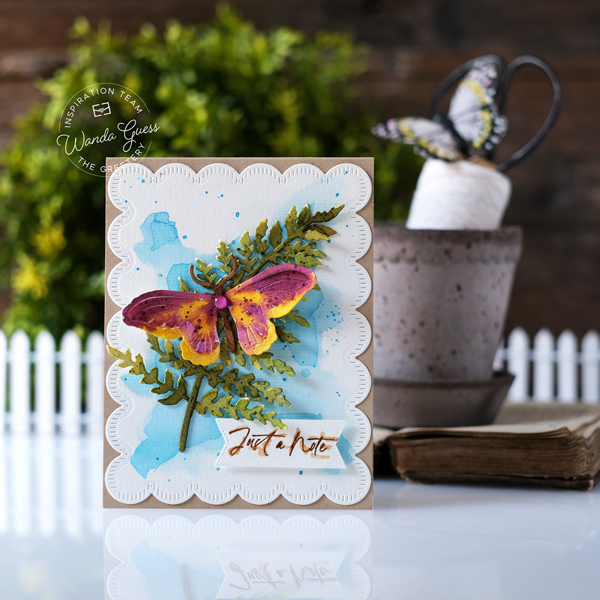
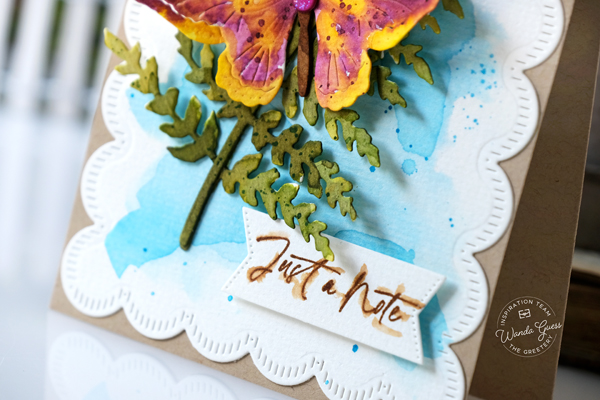
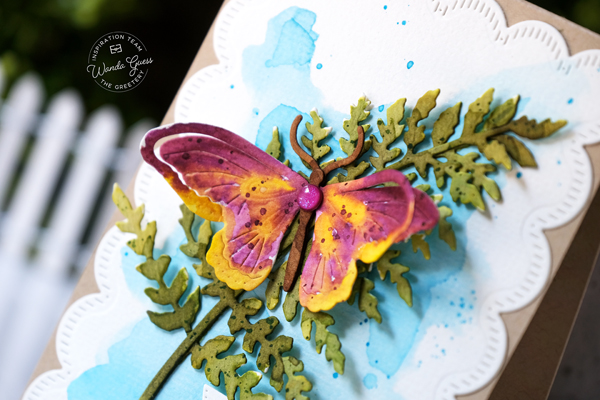
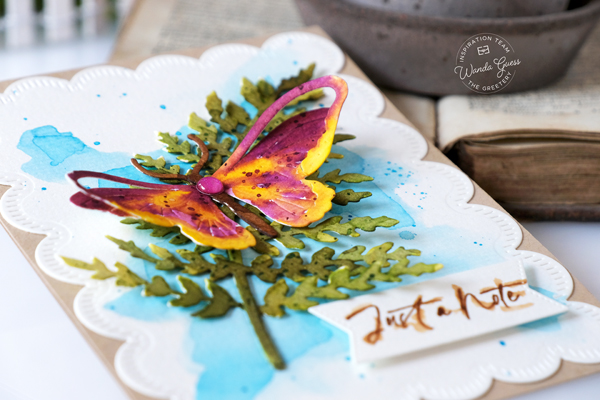
Hi there my creative and crafty friends! I'm up on The Greetery Blog today to share a project with you! I am always so excited and happy to share with you over there! And of course, sharing my card here too. Hope you had a great 4th of July! Sacramento has been HOT. Gosh, so hot. We are set to break an all time record for most days over 100 degrees. I think my brain is cooked! I'm laying low and moving slow…. For my project for today I created a watercolor card with a nature theme and an all purpose sentiment. I haven't made a watercolor card in a while and I was inspired by the pretty butterflies of Summertime…. Simple and airy for the season….
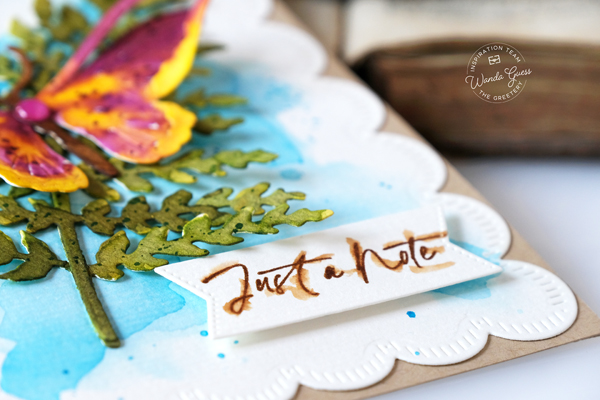
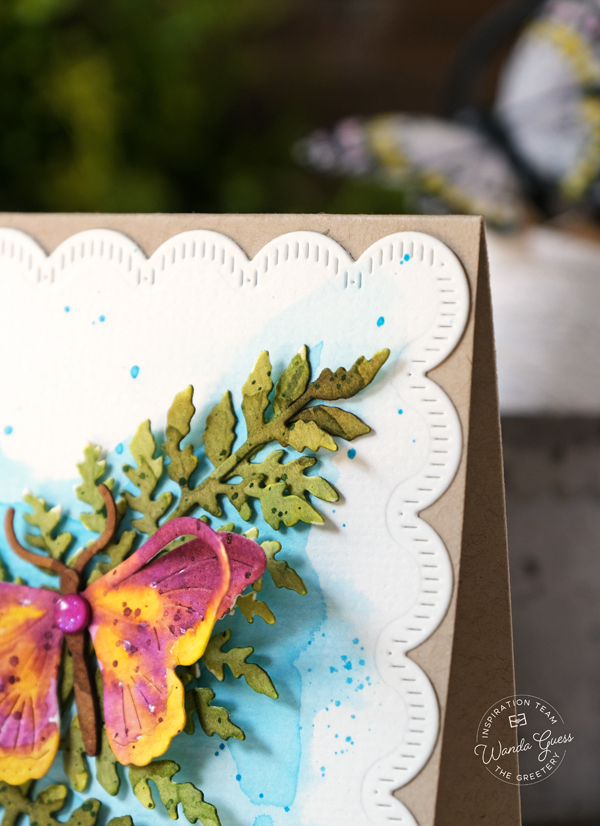
My finished card is an A2 size Kraft card base, layered with watercolor paper die cut with the beautiful A2 Scallops Dies. All the die cut pieces on this card were made using watercolor paper. I kept the design clean and simple and let that pretty purple butterfly shine! All the coloring was done with my set of Mini Distress Inks and a water brush… I do love this technique.
I started by die cutting the Fern Dies, the Butterfly Dies, the background panel and the sentiment panel from watercolor paper. I used Distress Inks and water brushes to color all the pieces and set them aside to dry. For the background I used a wet on wet watercolor technique: Put down a good amount of clear water onto the paper, then add the blue ink into the water and let it spread out into a free form shape! I use a large brush for the plain water and lots of water…. You never know what you'll get with this and I love that!!
After all my pieces were dry, I glued together the Fern and the Butterfly using liquid glue. I added a purple enamel dot to the butterfly. I stamped the sentiment in brown Distress Ink and then went over the writing with a detail water brush to make it 'messy.' I assembled all the elements together and I used foam tape to attach the sentiment. I do love the greens against the bright purple butterfly….
That's it for my project for today! I hope you have a fantastic and creative day! I look forward to sharing with you again soon. In the meantime, happy crafting! XO Wanda