Author: stampcatwg

  • The Greetery – Release Day – Garden Variety May 2022!! Yippeee!

    Hi crafty friends! One last reminder! It's The Greetery Release Day! AWESOME!

    THE GREETERY NEW RELEASE IS FOR SALE

    THURSDAY, MAY 26TH AT 10AM EST!

    CLICK HERE TO SHOP!

    ****I'm sending this message out early this morning so you get notice asap. Trust me when I say that you will want to shop early! 10am EST! There is a surprise waiting for you on The Greetery Website!! And it's a good one!!

    ****I am always incredibly grateful when you use my shopping links! THANK YOU! It helps me out so much more than you know! Have fun shopping and creating with your new goodies! It's been my pleasure to share with you this week! XO


    Blog new release collage the greetery


  • The Greetery – Garden Variety Release – Day 2!

    Hi friends! Welcome to Day Two of ideas, projects and product reveals for the gorgeous new "Garden Variety" release from The Greetery! The anniversary celebrations are continuing! What did you think of yesterday?? Do you have a favorite item yet? I love this release!! The only word I keep thinking is FRESH! Guess what?  I have three more cards to show you today! I am SO excited! Today is day two, the final day, of reveals. All of the new items will be available for shopping tomorrow, Thursday May 26th at 10am EST! Start making your list now! And there will be a big surprise when the new release goes live – so set your alarm for early shopping!! Yay!!

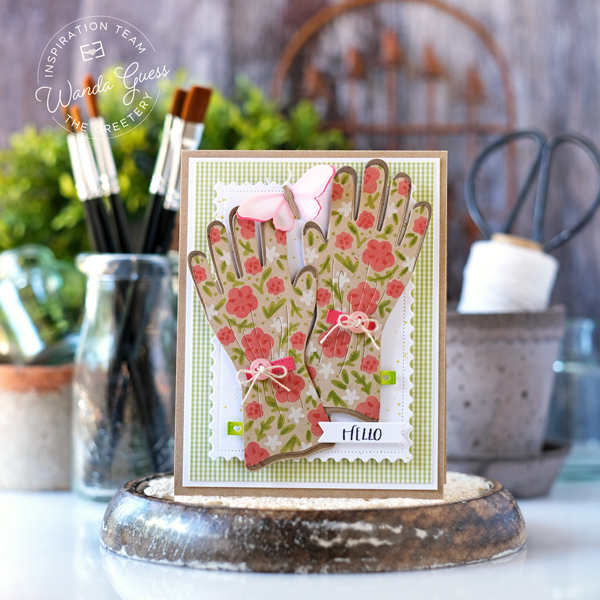
    My first card for today features the brand new Garden Gear – Gloves suite of products! Pretty, perfect gardening gloves! LOVE! (Maybe my favorite thing from the new release). My finished card is an A2 card base layered with kraft and white and gingham… 
    the greetery, the greetery new release, the greetery stamps and dies, the greetery stencils, the greetery garden variety, the greetery garden gear gloves, the greetery garden gear tools, the greetery botanicuts, the greetery posy pocket, diy, handmade cards, card ideas, make your own cards, greetery design team, wanda guess, a blog called wanda


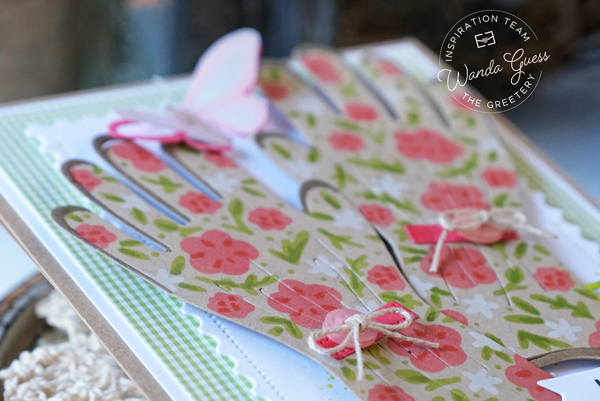
    The gloves are a set of dies that has two gloves, two little tabs with the hearts and two longer little tabs for the top of the gloves. The stencils set makes a beautiful floral pattern in the right size and scale! In this photo you can see a close up of all the die pieces and my layers. I used the stencils, and stenciled white, pink and green inks onto kraft paper. Then I die cut out the gloves and the accompanying pieces. 

    the greetery, the greetery new release, the greetery stamps and dies, the greetery stencils, the greetery garden variety, the greetery garden gear gloves, the greetery garden gear tools, the greetery botanicuts, the greetery posy pocket, diy, handmade cards, card ideas, make your own cards, greetery design team, wanda guess, a blog called wanda


    I used the Market Fresh words to make my sentiment. I added some twine and buttons to the gloves also. If you look closely you can see I added accents to the stenciling with Copics. I used the same ink pads as for my projects yesterday! (Supplies are listed at the bottom of my post).

    the greetery, the greetery new release, the greetery stamps and dies, the greetery stencils, the greetery garden variety, the greetery garden gear gloves, the greetery garden gear tools, the greetery botanicuts, the greetery posy pocket, diy, handmade cards, card ideas, make your own cards, greetery design team, wanda guess, a blog called wanda


    As a finishing touch, I die cut a pretty butterfly from the Summer Curio die set. 

    the greetery, the greetery new release, the greetery stamps and dies, the greetery stencils, the greetery garden variety, the greetery garden gear gloves, the greetery garden gear tools, the greetery botanicuts, the greetery posy pocket, diy, handmade cards, card ideas, make your own cards, greetery design team, wanda guess, a blog called wanda


    We all have that one friend or family member who loves to garden! The possibilities of fun cards is endless!!
    the greetery, the greetery new release, the greetery stamps and dies, the greetery stencils, the greetery garden variety, the greetery garden gear gloves, the greetery garden gear tools, the greetery botanicuts, the greetery posy pocket, diy, handmade cards, card ideas, make your own cards, greetery design team, wanda guess, a blog called wanda


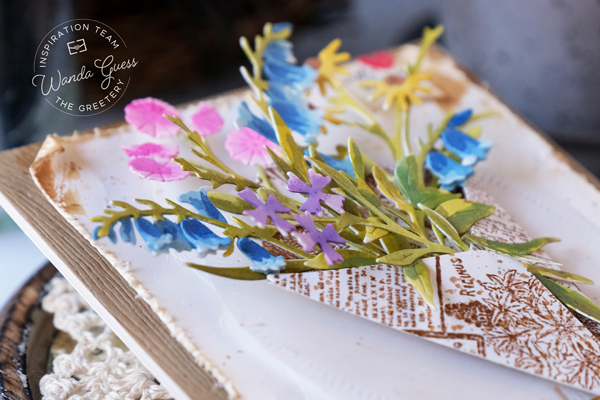
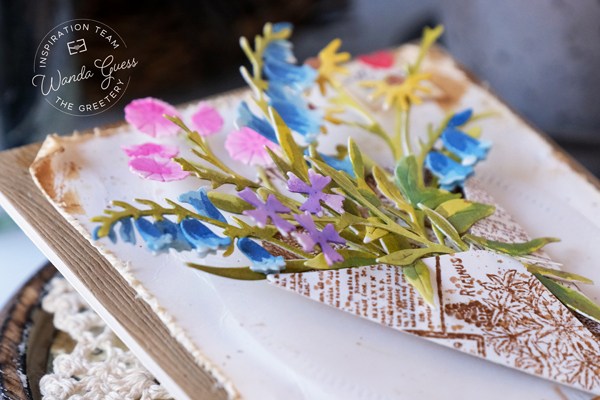
    My next card is a floral explosion!!! I think you're going to love these new dies and stamps!!! I am featuring the new Posy Pocket Dies with the new Seed Catalog Stamp on it, and the new Botanicuts Bluebells! I mixed in the previously released Wildflower Mix Dies and the new Plucked Dies. Oh gosh!! The perfect bouquet! And, of course, because Betsy is a genius, there are TWO sizes of Pocket Posy Dies! I used the large one on this card. My finished card is an A2 card base. Layered with cream and vellum, and lots of vintagey watercolory goodness!
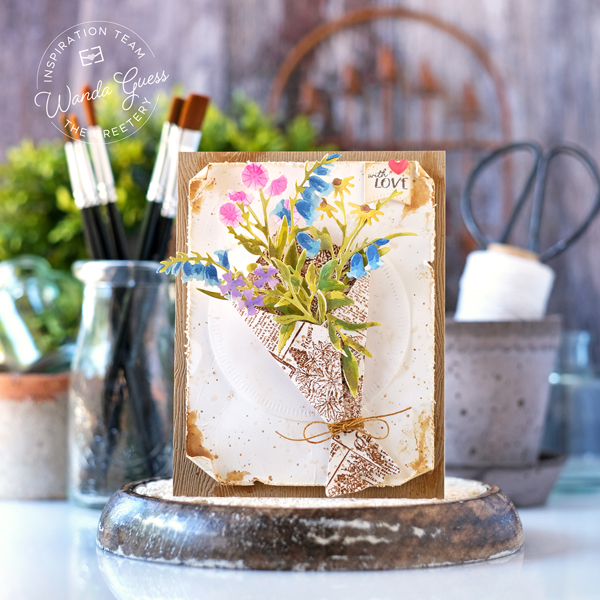
    the greetery, the greetery new release, the greetery stamps and dies, the greetery stencils, the greetery garden variety, the greetery garden gear gloves, the greetery garden gear tools, the greetery botanicuts, the greetery posy pocket, diy, handmade cards, card ideas, make your own cards, greetery design team, wanda guess, a blog called wanda


    Here is a close up of my bouquet. All kinds of flowers! The Bluebells are brand new with this release!! I die cut everything from cream cardstock and water colored with my Mini Distress ink pads and a water brush. Super easy.
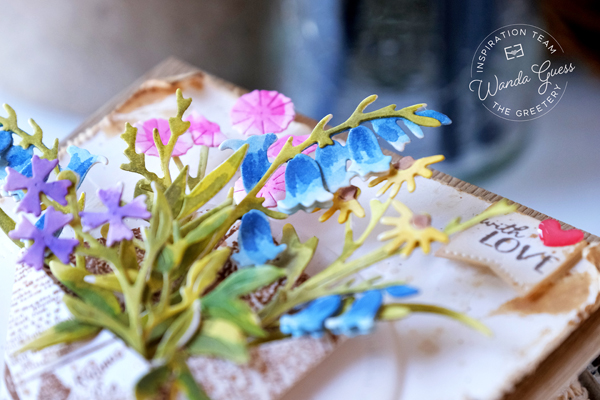
    the greetery, the greetery new release, the greetery stamps and dies, the greetery stencils, the greetery garden variety, the greetery garden gear gloves, the greetery garden gear tools, the greetery botanicuts, the greetery posy pocket, diy, handmade cards, card ideas, make your own cards, greetery design team, wanda guess, a blog called wanda


    And a close up of the Posy Pocket!!!! I stamped it in brown ink onto cream cardstock using the new Seed Catalog Background Stamp. The way Betsy designed the Posy Pocket, if you stamp a large image, it will remain in the right orientation after you put it together. I'm sure Betsy will do a video of this – it's so well designed and simple to put together.

    the greetery, the greetery new release, the greetery stamps and dies, the greetery stencils, the greetery garden variety, the greetery garden gear gloves, the greetery garden gear tools, the greetery botanicuts, the greetery posy pocket, diy, handmade cards, card ideas, make your own cards, greetery design team, wanda guess, a blog called wanda


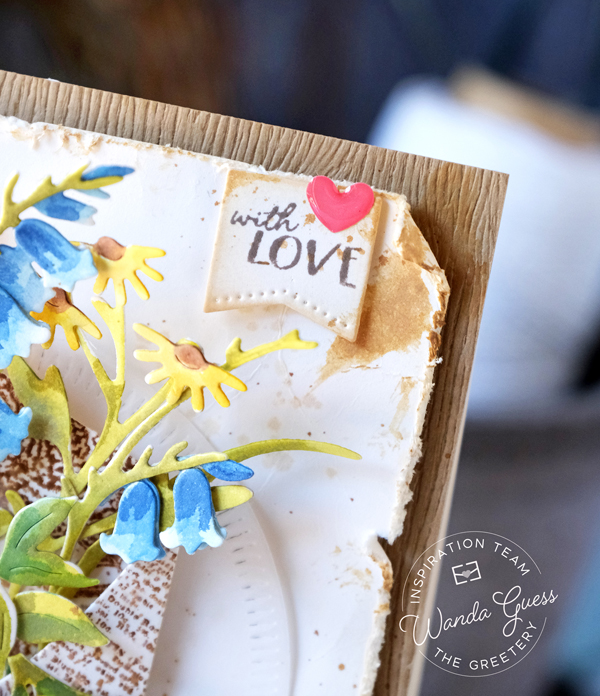
    My sentiment is a tiny little banner up in the corner with a heart… The layer on top is cream cardstock. I wrinkled it in my hands gently and then splashed on some Vintage Photo Distress Ink and water. I also used a distressed tool to make the edges frayed. (Supplies are listed at the bottom of my post) and made it look old and worn…
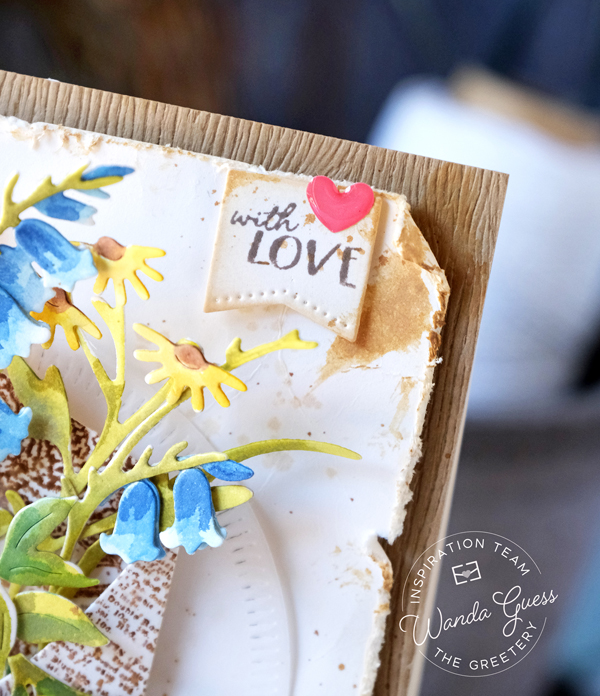
    the greetery, the greetery new release, the greetery stamps and dies, the greetery stencils, the greetery garden variety, the greetery garden gear gloves, the greetery garden gear tools, the greetery botanicuts, the greetery posy pocket, diy, handmade cards, card ideas, make your own cards, greetery design team, wanda guess, a blog called wanda


    the greetery, the greetery new release, the greetery stamps and dies, the greetery stencils, the greetery garden variety, the greetery garden gear gloves, the greetery garden gear tools, the greetery botanicuts, the greetery posy pocket, diy, handmade cards, card ideas, make your own cards, greetery design team, wanda guess, a blog called wanda


    It was easy to tuck my flowers inside the wrap and attach the whole piece to my card. 

    the greetery, the greetery new release, the greetery stamps and dies, the greetery stencils, the greetery garden variety, the greetery garden gear gloves, the greetery garden gear tools, the greetery botanicuts, the greetery posy pocket, diy, handmade cards, card ideas, make your own cards, greetery design team, wanda guess, a blog called wanda


    the greetery, the greetery new release, the greetery stamps and dies, the greetery stencils, the greetery garden variety, the greetery garden gear gloves, the greetery garden gear tools, the greetery botanicuts, the greetery posy pocket, diy, handmade cards, card ideas, make your own cards, greetery design team, wanda guess, a blog called wanda


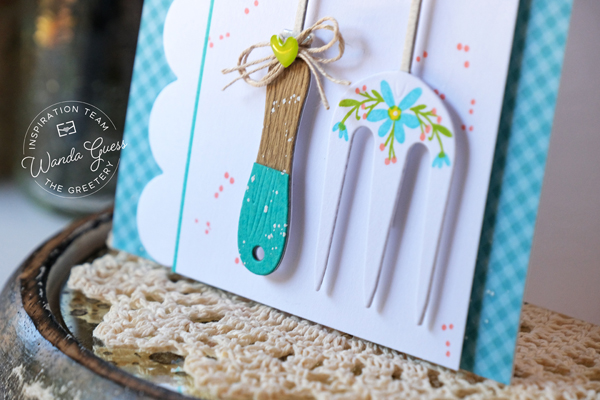
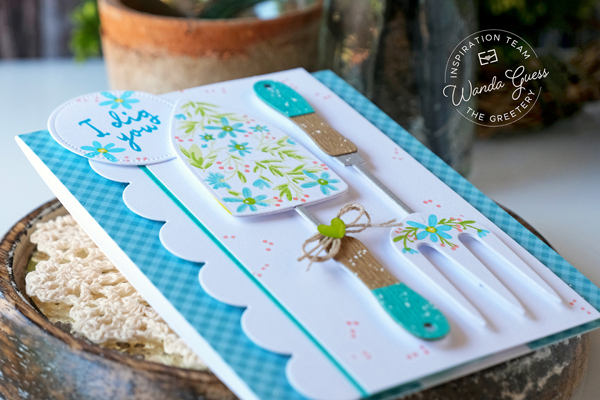
    My third and final card for the new release features the new Garden Gear – Tools dies and stencils/stamps!! CUTE gardening tools?? Are you kidding??? Such a great idea!! My finished card is an A2 white card base. I layered some gingham and some pretty scallops too…. The sentiments are so adorable – I dig you!!
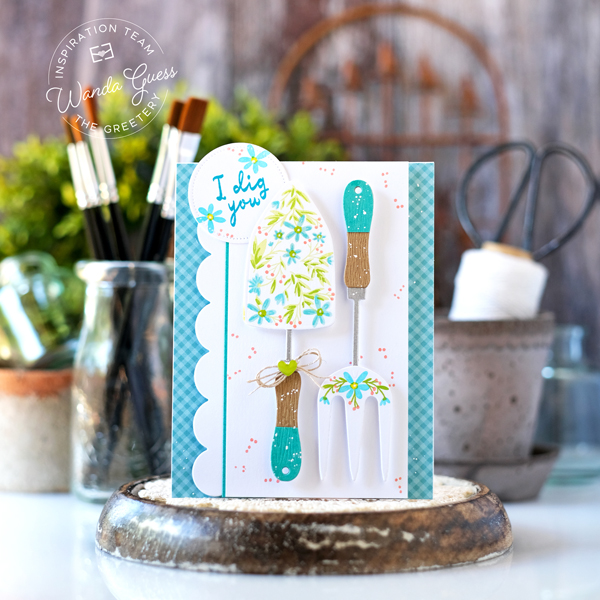
    the greetery, the greetery new release, the greetery stamps and dies, the greetery stencils, the greetery garden variety, the greetery garden gear gloves, the greetery garden gear tools, the greetery botanicuts, the greetery posy pocket, diy, handmade cards, card ideas, make your own cards, greetery design team, wanda guess, a blog called wanda


    Here is a close up of the layers I used for the handles. I die cut the entire spade out of white cardstock and then layered another set of each part on top. I die cut silver, white, woodgrain and teal cardstock and glued the pieces onto the main piece. The top was made using the stencils and stamps that match up so perfectly!!! I used the SSS ink pads for my pretty colors….
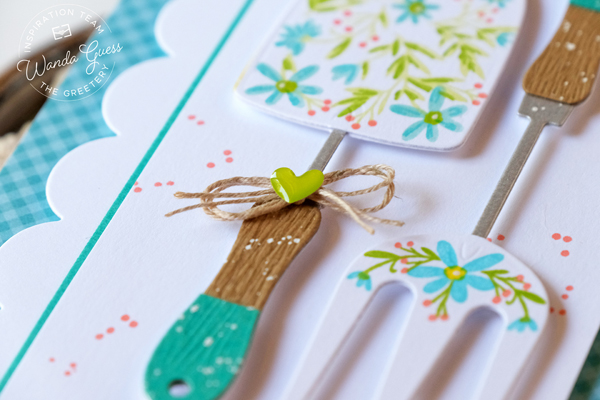
    the greetery, the greetery new release, the greetery stamps and dies, the greetery stencils, the greetery garden variety, the greetery garden gear gloves, the greetery garden gear tools, the greetery botanicuts, the greetery posy pocket, diy, handmade cards, card ideas, make your own cards, greetery design team, wanda guess, a blog called wanda


    For my sentiment I did cut a circle and stamped some flowers and the sentiment onto it! EEP. I assembled some white cardstock, teal, and gingham along with a row of scallops to create my card layout. This card is so happy and cheerful!
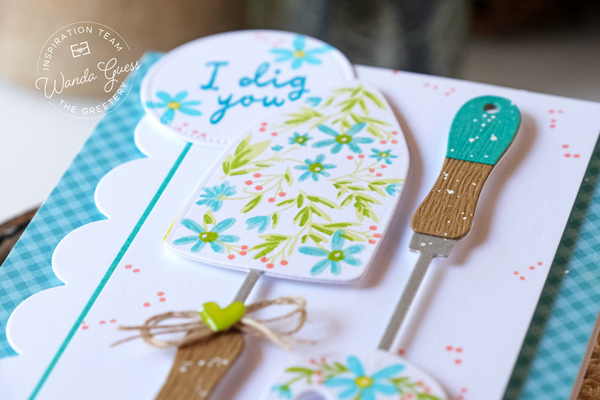
    the greetery, the greetery new release, the greetery stamps and dies, the greetery stencils, the greetery garden variety, the greetery garden gear gloves, the greetery garden gear tools, the greetery botanicuts, the greetery posy pocket, diy, handmade cards, card ideas, make your own cards, greetery design team, wanda guess, a blog called wanda


    I used one of the small accent stamps to add little bits of color all over the white layer!
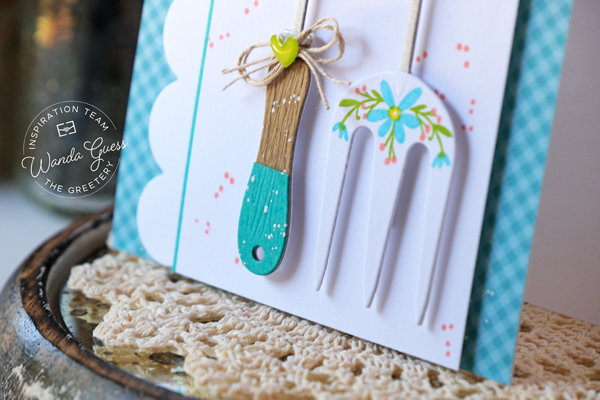
    the greetery, the greetery new release, the greetery stamps and dies, the greetery stencils, the greetery garden variety, the greetery garden gear gloves, the greetery garden gear tools, the greetery botanicuts, the greetery posy pocket, diy, handmade cards, card ideas, make your own cards, greetery design team, wanda guess, a blog called wanda


    the greetery, the greetery new release, the greetery stamps and dies, the greetery stencils, the greetery garden variety, the greetery garden gear gloves, the greetery garden gear tools, the greetery botanicuts, the greetery posy pocket, diy, handmade cards, card ideas, make your own cards, greetery design team, wanda guess, a blog called wanda

    Okay, friends, that's it for day two! I have thoroughly enjoyed showing you all the new goodies! I would LOVE to know what your favorite thing is?!! Remember the new release is live for sale tomorrow – Thursday May 26th at 10am EST! I am so excited for you to create with these pretty supplies! I know they will bring you joy as they did me. 

    PRIZE INFORMATION!!!! The Greetery will be giving away three complete Garden Variety collections, comments from all the blogs are included in the giveaway so be sure to leave a comment on each designer blog!! GOOD LUCK! Wow, what great prizes!!!! The winners will be announced on The Greetery Blog just before the release goes live. XO

  • The Greetery – Garden Variety Release – Day 1!

    Hi there! It's a very exciting day! We are here to celebrate the three year anniversary of The Greetery! Congratulations to Betsy! I am so honored to have been part of this awesome company since the very first release. It is a true joy to work with The Greetery! And I am so happy to celebrate this occasion! It's release week! 

    Today, the team is kicking off a brand new, beautiful release from The Greetery! The new release is called "Garden Variety" and it is perfect for early Summer and anyone who loves flowers and gardening! It's all so very very pretty! Flowers, Garden Tools, New Botanicuts, New word dies…. I can't wait to share my projects with you! Today and tomorrow are project and product reveals, and then the release will go live for shopping on Thursday May 26th at 10am EST. I am quite sure you're gonna like it! Are you excited? I am! Be sure to read all the way to the bottom of my post for prize information and links to the other designers!

    Today I have two cards to show you and they are made with the two brand new Print Shop products!! Print Shop Garden Goodness and Print Shop Daisy Days! Stamps, Stencils and Dies that all match together like a dream. I have really come to love stenciling!!

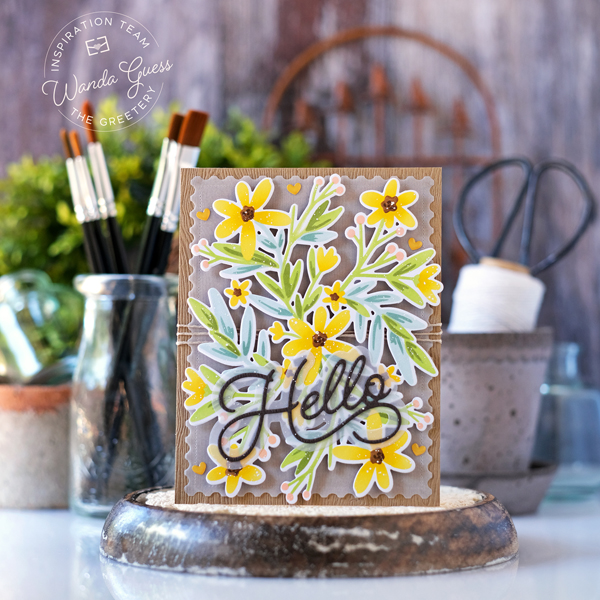
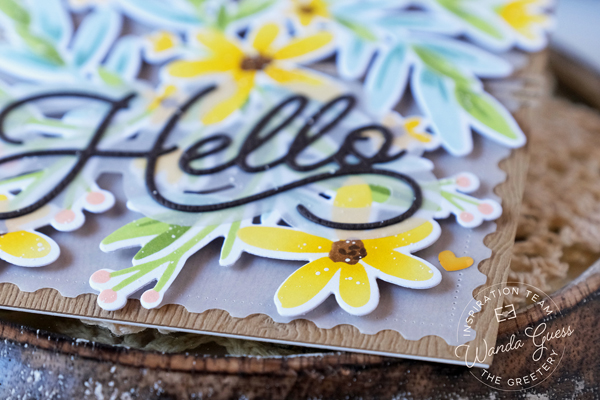
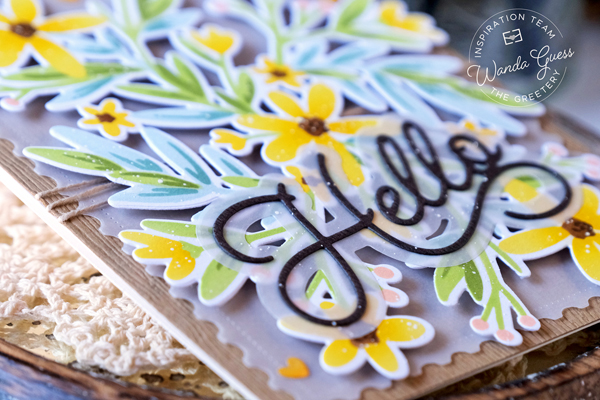
    My first card features the brand new Print Shop Daisy Days Stamp/Stencil/Die combo! I also used the new Scripty Hello Dies! The florals fill the front of an A2 card perfectly and you can make your daisies any color combination! Or you could not die cut it out and use it as a full panel… My inspiration for my card was a country Summer… Yellow and Kraft!!  My finished card is an A2 white card base, covered with woodgrain cardstock, vellum, and then the florals. 

    the greetery, the greetery new release, the greetery garden variety, the greetery stamps and dies, the greetery print shop garden goodness, the greetery print shop daisy days, the greetery stencils, garden theme, diy, handmade cards, card ideas, stamping, the greetery scripty hello die, greetery design team, wanda guess, a blog called wanda


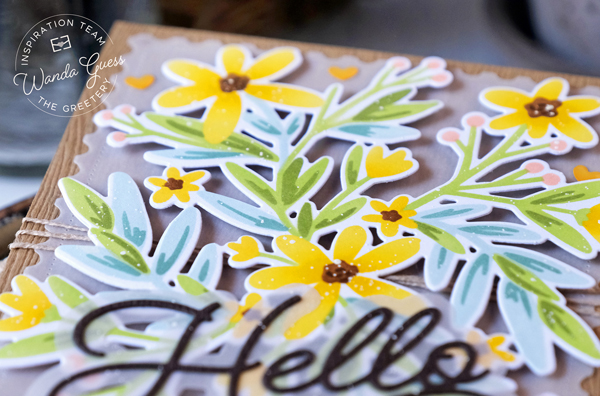
    I started the card by stenciling the Daisy Days panel. OMG so so pretty!!! I used yellows and greens to make my bouquet! The stencils are so super easy to use and line up. Perfect every time. I splashed on some white paint on top and used the matching die to cut it out. It fills the entire front of the card. I love the detail in the cut out of the die. VERY classy.

    the greetery, the greetery new release, the greetery garden variety, the greetery stamps and dies, the greetery print shop garden goodness, the greetery print shop daisy days, the greetery stencils, garden theme, diy, handmade cards, card ideas, stamping, the greetery scripty hello die, greetery design team, wanda guess, a blog called wanda


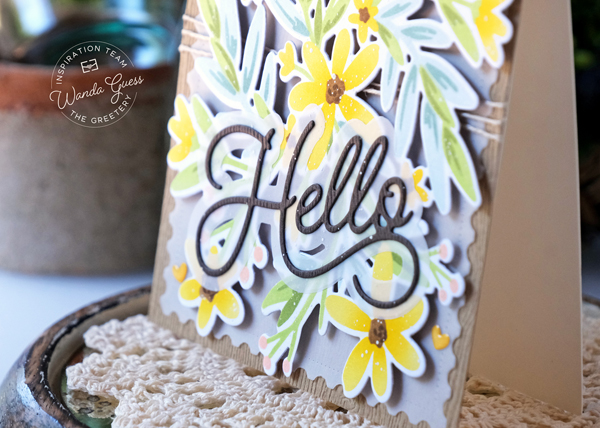
    I layered a vellum piece over my woodgrain layer. Then I wrapped a bit of twine around it. The floral piece is attached to the card with small foam squares.

    the greetery, the greetery new release, the greetery garden variety, the greetery stamps and dies, the greetery print shop garden goodness, the greetery print shop daisy days, the greetery stencils, garden theme, diy, handmade cards, card ideas, stamping, the greetery scripty hello die, greetery design team, wanda guess, a blog called wanda


    The sentiment is a new word die set – Scripty Hello and I layered dark brown paper and vellum. It's really nice – the perfect size!!

    the greetery, the greetery new release, the greetery garden variety, the greetery stamps and dies, the greetery print shop garden goodness, the greetery print shop daisy days, the greetery stencils, garden theme, diy, handmade cards, card ideas, stamping, the greetery scripty hello die, greetery design team, wanda guess, a blog called wanda


    Some of my stenciling tips: I use two sizes of blender brushes! I do the large areas with the bigger brushes and then go back with the smaller brushes to add shading and do the little flowers. For both of my cards today I used the SSS Pawsitively Ink Pads. The colors are vivid and clear and bright. They make sets of threes in each color for shading and they are awesome!! I really love the colors.  I am slowly collecting all the color sets – I buy three or four of the three packs each time. I loooove them both for stamping and for stenciling. I have a lot of ink pads and these are my favs right now!

    the greetery, the greetery new release, the greetery garden variety, the greetery stamps and dies, the greetery print shop garden goodness, the greetery print shop daisy days, the greetery stencils, garden theme, diy, handmade cards, card ideas, stamping, the greetery scripty hello die, greetery design team, wanda guess, a blog called wanda


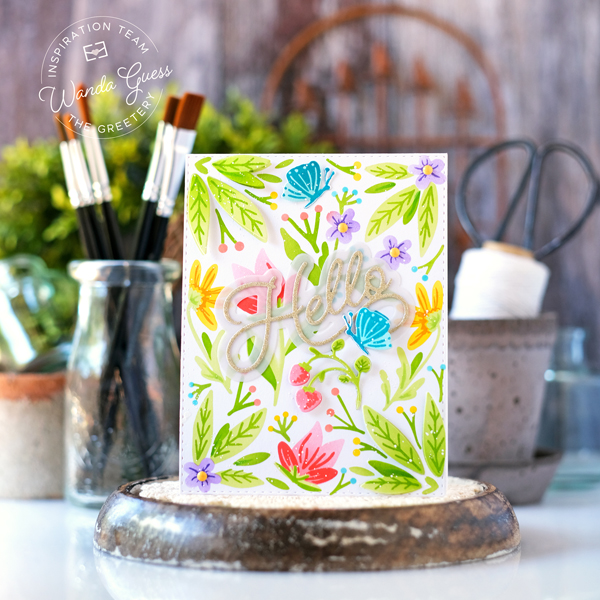
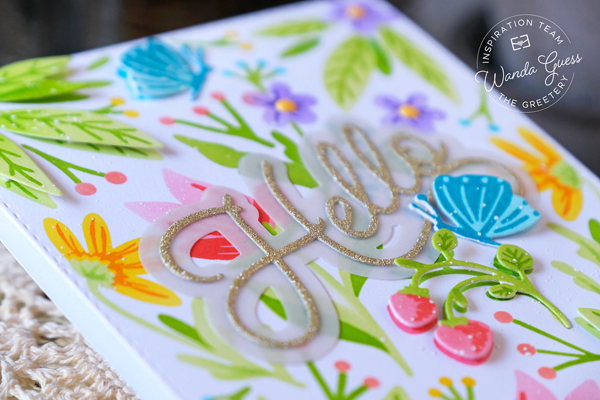
    My next card features the brand new Print Shop Garden Goodness Stamp/Stencil/Die combination! This suite is really cool and has a bit of a different twist… You can make the whole panel your card (as I did here), or you can die cut out the panel and it makes each element a separate piece! Then you can mix and match the small images however you like. Genius!!! My finished card is an A2 card base in white. I die cut a stitched edge around it and kept it super simple…

    the greetery, the greetery new release, the greetery garden variety, the greetery stamps and dies, the greetery print shop garden goodness, the greetery print shop daisy days, the greetery stencils, garden theme, diy, handmade cards, card ideas, stamping, the greetery scripty hello die, greetery design team, wanda guess, a blog called wanda


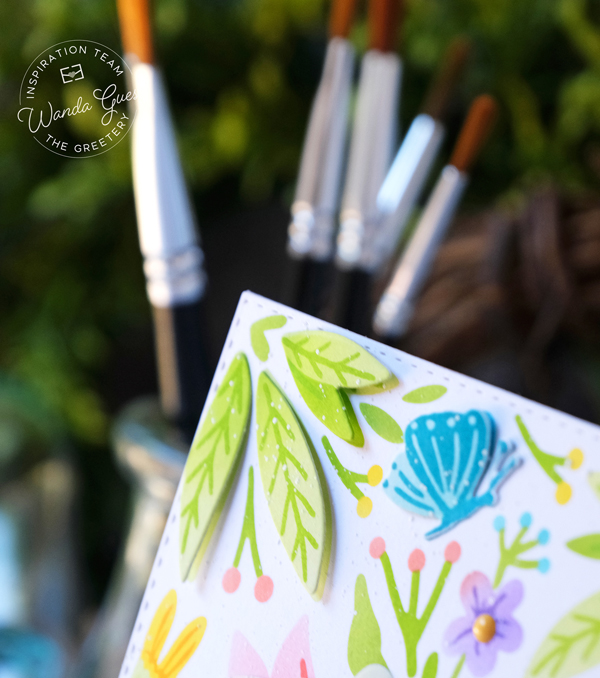
    After I stenciled the whole panel, I went back and stenciled a few leaves, the strawberries and the butterflies to add as accents!

    the greetery, the greetery new release, the greetery garden variety, the greetery stamps and dies, the greetery print shop garden goodness, the greetery print shop daisy days, the greetery stencils, garden theme, diy, handmade cards, card ideas, stamping, the greetery scripty hello die, greetery design team, wanda guess, a blog called wanda


    I shaded the leaves with two shades of green and then stamped the veins in a third color. Doing the shading really brings it to life I feel!!

    the greetery, the greetery new release, the greetery garden variety, the greetery stamps and dies, the greetery print shop garden goodness, the greetery print shop daisy days, the greetery stencils, garden theme, diy, handmade cards, card ideas, stamping, the greetery scripty hello die, greetery design team, wanda guess, a blog called wanda


    For my sentiment I used vellum and gold glitter cardstock and that pretty new Scripty Hello Die!

    the greetery, the greetery new release, the greetery garden variety, the greetery stamps and dies, the greetery print shop garden goodness, the greetery print shop daisy days, the greetery stencils, garden theme, diy, handmade cards, card ideas, stamping, the greetery scripty hello die, greetery design team, wanda guess, a blog called wanda

    Okay, friends, that's it for day one! We will be back tomorrow with more inspiration and more new items!! Can't wait to share more with you. And remember the new release is live for sale on Thursday May 26th at 10am EST.

    AMAZING PRIZES!!! The Greetery will be giving away three prize packages that include a $50 gift card to spend right away, plus a Greetery tumbler with a 25% off code to use at a later date of the winner's choosing. To enter to win a prize, visit all the designers' blogs! The winners will be selected from comments left on all the blog posts! Good Luck!! 
     

    CLICK HERE or on the graphic below to see the supply list for these cards! (Affiliate Links Used)


  • Doodlebug Shadow Box Frame – Cute & Crafty!!

    Hello my sweet and crafty friends! I'm here to share a super fun project with you! I think you're going to love it! I am so excited to share my Cute and Crafty Shadowbox project!! Have you seen the awesome Doodlebug shadow boxes and inserts? What a cool concept! I knew right away I wanted to make one for my craft room. So of course I chose the Cute and Crafty Insert!! This came together so quickly and easily and it looks cute on the shelf in my room. I also think this would make an excellent gift. There are so many inserts – for a baby shower gift, or a Christmas gift, or for someone who loves Halloween! I also really think this could be a fun group project to do with your friends. Be sure to check out all of them! (Here's a direct link to all the inserts)! Doodlebug has made it so easy to make this. I think it took me 30 minutes total! Yay for quick and cute, right?? 

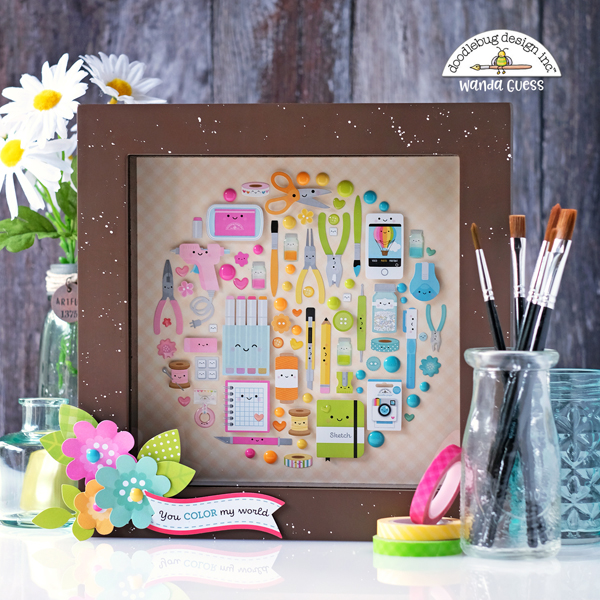
    I chose the brown frame for my project. I splattered on some white paint for a bit of an artistic look. (you know me with the splatters!) You could also easily paint your frame any color – and I may paint mine – but I'll decide later! The key is you can buy one frame and then you just switch out the inserts as the season changes…. The frames come in white, black and brown. The insert pack comes with everything you need to put it together. Here's my finished project!

    Doodlebug, Doodlebug Design, Doodlebug Shadow Box Frame, Doodlebug Shadow Box Insert, Doodlebug Cute and Crafty Collection, Craft Room, Craft Room decorations, shadow box project, diy shadow box, craft room inspiration, easy projects, wanda guess, a blog called wanda, doodlebug blog


    I added some cute flowers and a sentiment to the bottom corner of my frame! Adorable paper flowers from Doodlebug of course! I tacked them on lightly with glue globs so I can take them off when/if I switch out the insert. 

    Doodlebug, Doodlebug Design, Doodlebug Shadow Box Frame, Doodlebug Shadow Box Insert, Doodlebug Cute and Crafty Collection, Craft Room, Craft Room decorations, shadow box project, diy shadow box, craft room inspiration, easy projects, wanda guess, a blog called wanda, doodlebug blog


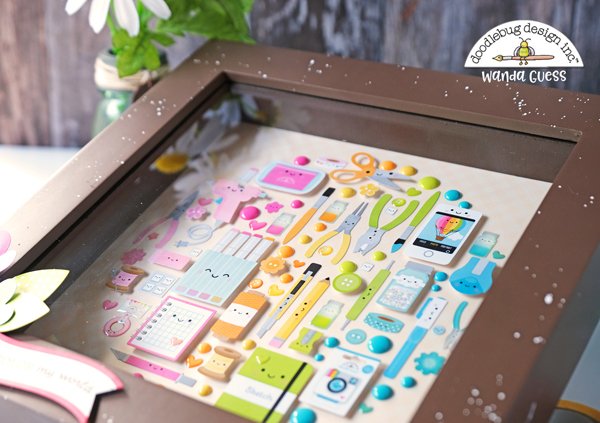
    In this photo you can see the finished shadow box effect! Isn't this the most fun thing ever???

    Doodlebug, Doodlebug Design, Doodlebug Shadow Box Frame, Doodlebug Shadow Box Insert, Doodlebug Cute and Crafty Collection, Craft Room, Craft Room decorations, shadow box project, diy shadow box, craft room inspiration, easy projects, wanda guess, a blog called wanda, doodlebug blog


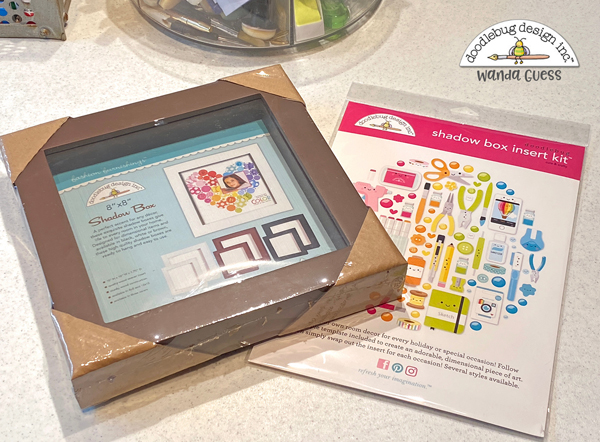
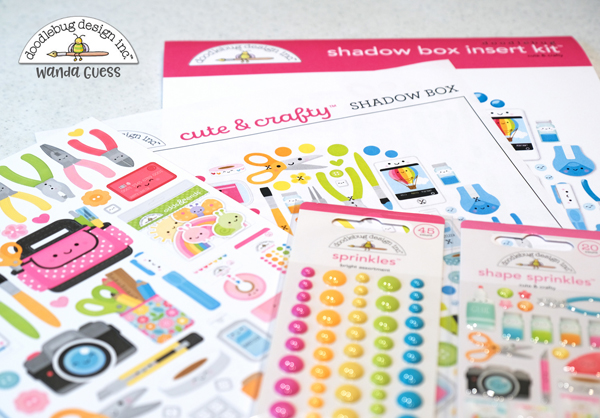
    Here is the frame and the insert kit….

    Doodlebug, Doodlebug Design, Doodlebug Shadow Box Frame, Doodlebug Shadow Box Insert, Doodlebug Cute and Crafty Collection, Craft Room, Craft Room decorations, shadow box project, diy shadow box, craft room inspiration, easy projects, wanda guess, a blog called wanda, doodlebug blog


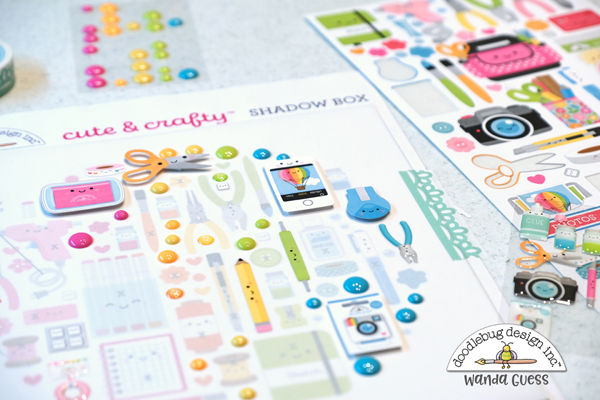
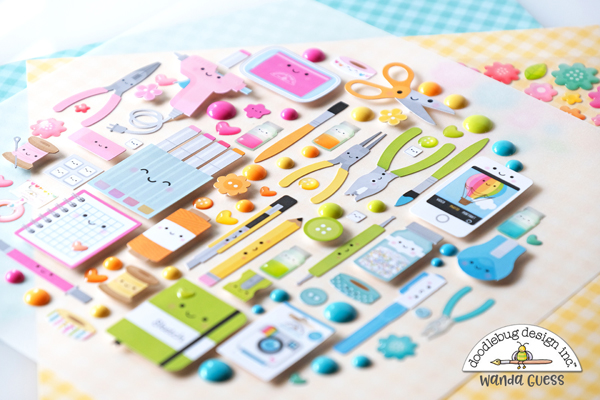
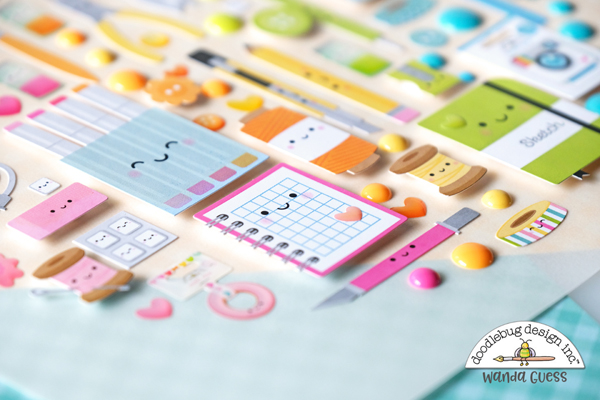
    The kit comes with a sheet of vellum and a pattern… Then you place the pattern behind the vellum as a guide, and attach all the goodies!! I swapped out some of the stickers with glossy hearts and glossy flowers from other Sprinkles packs. Some of my elements are popped up with foam tape. The guide shows you where!! 

    Doodlebug, Doodlebug Design, Doodlebug Shadow Box Frame, Doodlebug Shadow Box Insert, Doodlebug Cute and Crafty Collection, Craft Room, Craft Room decorations, shadow box project, diy shadow box, craft room inspiration, easy projects, wanda guess, a blog called wanda, doodlebug blog


    Here is my started project…. See how I attached the vellum to the guide sheet with washi? SO SIMPLE!

    Doodlebug, Doodlebug Design, Doodlebug Shadow Box Frame, Doodlebug Shadow Box Insert, Doodlebug Cute and Crafty Collection, Craft Room, Craft Room decorations, shadow box project, diy shadow box, craft room inspiration, easy projects, wanda guess, a blog called wanda, doodlebug blog


    And here it is DONE!! Before you place it in your frame you need to back the vellum with paper… You can choose white paper, or any other color. OF COURSE I chose some cheerful yellow gingham to back mine!!! 

    Doodlebug, Doodlebug Design, Doodlebug Shadow Box Frame, Doodlebug Shadow Box Insert, Doodlebug Cute and Crafty Collection, Craft Room, Craft Room decorations, shadow box project, diy shadow box, craft room inspiration, easy projects, wanda guess, a blog called wanda, doodlebug blog


    This makes me ridiculously happy….

    Doodlebug, Doodlebug Design, Doodlebug Shadow Box Frame, Doodlebug Shadow Box Insert, Doodlebug Cute and Crafty Collection, Craft Room, Craft Room decorations, shadow box project, diy shadow box, craft room inspiration, easy projects, wanda guess, a blog called wanda, doodlebug blog


    Doodlebug, Doodlebug Design, Doodlebug Shadow Box Frame, Doodlebug Shadow Box Insert, Doodlebug Cute and Crafty Collection, Craft Room, Craft Room decorations, shadow box project, diy shadow box, craft room inspiration, easy projects, wanda guess, a blog called wanda, doodlebug blog


    Doodlebug, Doodlebug Design, Doodlebug Shadow Box Frame, Doodlebug Shadow Box Insert, Doodlebug Cute and Crafty Collection, Craft Room, Craft Room decorations, shadow box project, diy shadow box, craft room inspiration, easy projects, wanda guess, a blog called wanda, doodlebug blog


    My shadow box frame is sitting on a shelf in my craft room!! A great gift for your crafty friends!!! 

    Doodlebug, Doodlebug Design, Doodlebug Shadow Box Frame, Doodlebug Shadow Box Insert, Doodlebug Cute and Crafty Collection, Craft Room, Craft Room decorations, shadow box project, diy shadow box, craft room inspiration, easy projects, wanda guess, a blog called wanda, doodlebug blog


    Doodlebug, Doodlebug Design, Doodlebug Shadow Box Frame, Doodlebug Shadow Box Insert, Doodlebug Cute and Crafty Collection, Craft Room, Craft Room decorations, shadow box project, diy shadow box, craft room inspiration, easy projects, wanda guess, a blog called wanda, doodlebug blog


    The back comes allllllll ready for framing! A nice touch!!

    Doodlebug, Doodlebug Design, Doodlebug Shadow Box Frame, Doodlebug Shadow Box Insert, Doodlebug Cute and Crafty Collection, Craft Room, Craft Room decorations, shadow box project, diy shadow box, craft room inspiration, easy projects, wanda guess, a blog called wanda, doodlebug blog

    That's it for me today! This is going to be a VERY busy week!!! I have blog posts almost every day! I told you I was busy making a lot of things!! Thanks for hanging out here with me. Let's have an awesome week together! Love ya! XOXO

  • Hello Bluebird May 2022 New Release!

    Hi everyone! I have some exciting newsssss! There is a fun and fabulous new release available from Hello Bluebird! Yipppeeee! New stamps, dies and the adorable critters we all love from Hello Bluebird!! I am lucky enough to be a guest whenever there is a new release and I get so excited because I know it will bring a big smile to my face. The new release is NOW available now for shopping only at the Hello Bluebird Website!! I made three bright, cheerful and colorful cards to share with you today. Lots of Copic coloring and some ink blending too. Yay!

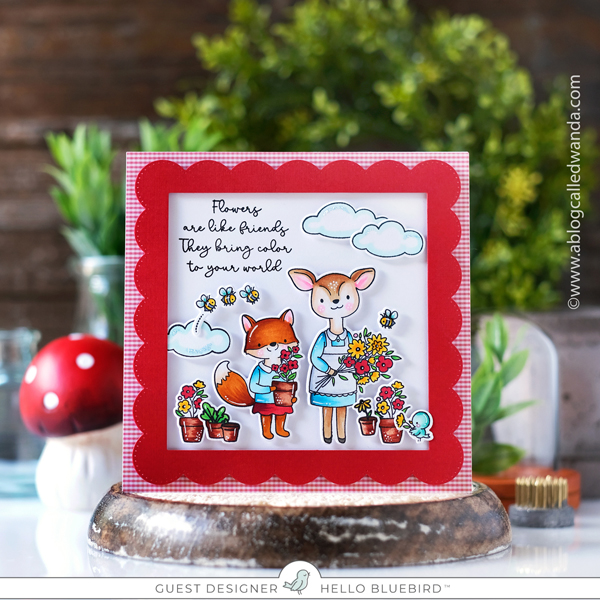
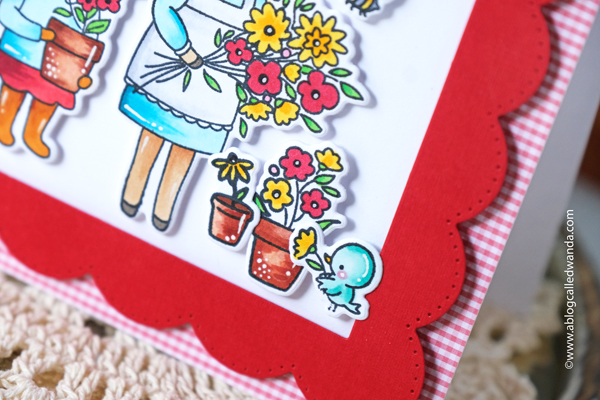
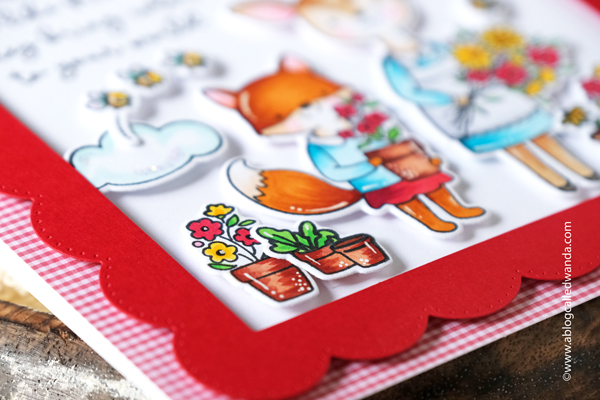
    First up is a big square card 5.25"x5.25" finished size…. I made a white card base and covered it with tiny gingham. I used the brand new Rainbow Square Die to make the red frame. The images are from the new Flower Friends Stamp Set and the previously released Bloom and Grow Stamp Set! I love that the scale is the same every time so it's easy to mix and match old and new stamp sets together. 

    hello bluebird new release, hello bluebird stamps, hello bluebird dies, copic coloring, card ideas, card layouts, gingham, cute animal stamps, friendship cards, make your own cards.


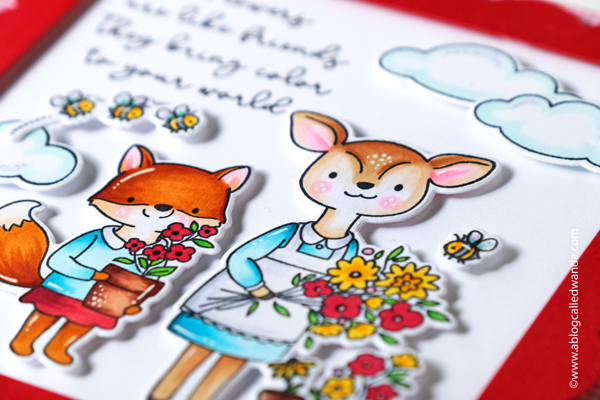
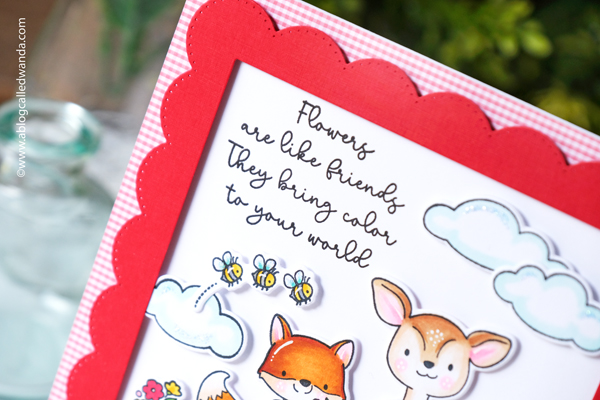
    I stamped and die cut out everything and colored with my Copic Markers. I love to color! I kept a uniform color palette of red, yellow and aqua to make the card look polished. I adore that sentiment font!! 

    hello bluebird new release, hello bluebird stamps, hello bluebird dies, copic coloring, card ideas, card layouts, gingham, cute animal stamps, friendship cards, make your own cards.


    This is so sweet! I stamped the sentiment directly onto the bottom layer of my card. The frame was attached to the card with foam squares to pop it up.

    hello bluebird new release, hello bluebird stamps, hello bluebird dies, copic coloring, card ideas, card layouts, gingham, cute animal stamps, friendship cards, make your own cards.


    hello bluebird new release, hello bluebird stamps, hello bluebird dies, copic coloring, card ideas, card layouts, gingham, cute animal stamps, friendship cards, make your own cards.


    Those teeny tiny bees! Be still my heart! 

    hello bluebird new release, hello bluebird stamps, hello bluebird dies, copic coloring, card ideas, card layouts, gingham, cute animal stamps, friendship cards, make your own cards.


    I made up a bunch of flower pots and then scattered them around the images to look like the gals are out in the garden! 

    hello bluebird new release, hello bluebird stamps, hello bluebird dies, copic coloring, card ideas, card layouts, gingham, cute animal stamps, friendship cards, make your own cards.


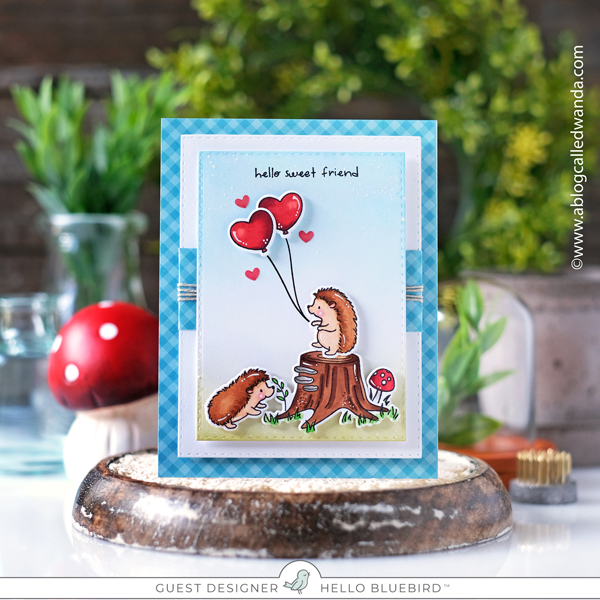
    Next up is a more clean and simple card… The finished card is an A2 white card base, covered in teal gingham and then two layers of white. I ink blended the top layer with blues and greens using Distress Inks and Blender Brushes. The adorable images are from the Forest Friends Stamp Set. I used the balloons from the previously released Moose and Friends Stamp Set.

    hello bluebird new release, hello bluebird stamps, hello bluebird dies, copic coloring, card ideas, card layouts, gingham, cute animal stamps, friendship cards, make your own cards.


    I created a little scene for my sweet hedgies…. And there must be mushrooms!! All the images were colored with Copic Markers and then I added white gel pen accents. 

    hello bluebird new release, hello bluebird stamps, hello bluebird dies, copic coloring, card ideas, card layouts, gingham, cute animal stamps, friendship cards, make your own cards.

    I used my MISTI to perfect line up the stamps for the balloon ties. 🙂


    hello bluebird new release, hello bluebird stamps, hello bluebird dies, copic coloring, card ideas, card layouts, gingham, cute animal stamps, friendship cards, make your own cards.


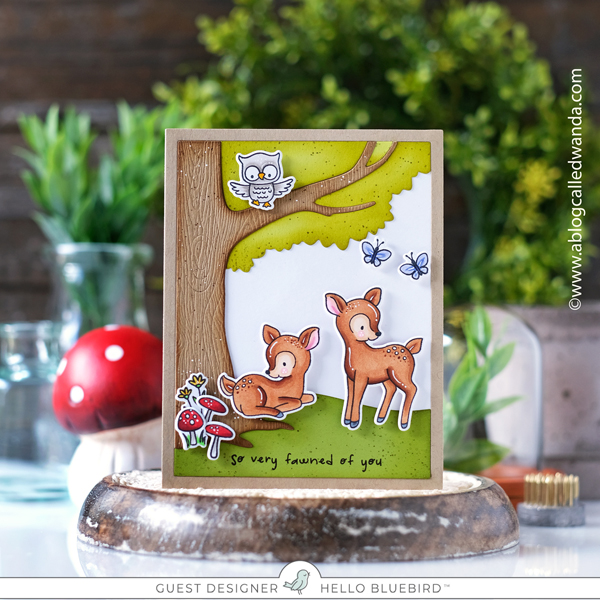
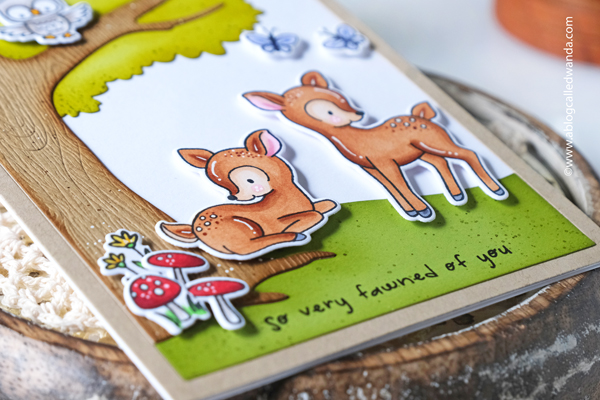
    And last, but not least, some cuties pie deer out in the forest frolicking around! This finished card is an A2 white card base. The Oak Tree Frames Dies covers the entire front of the card. The critters are from the new Forest Fawns Stamp Set and the Moose and Friends Stamp Set. 

    hello bluebird new release, hello bluebird stamps, hello bluebird dies, copic coloring, card ideas, card layouts, gingham, cute animal stamps, friendship cards, make your own cards.


    I stamped and die cut everything and colored with Copic Markers…. I die cut the pieces of the oak tree and used Distress Inks and mini sponge daubers to add some color to the pieces.

    hello bluebird new release, hello bluebird stamps, hello bluebird dies, copic coloring, card ideas, card layouts, gingham, cute animal stamps, friendship cards, make your own cards.


    How adorable is that sentiment???!!!

    hello bluebird new release, hello bluebird stamps, hello bluebird dies, copic coloring, card ideas, card layouts, gingham, cute animal stamps, friendship cards, make your own cards.


    hello bluebird new release, hello bluebird stamps, hello bluebird dies, copic coloring, card ideas, card layouts, gingham, cute animal stamps, friendship cards, make your own cards.

    Okay friends – that's it for today – and the new release from Hello Bluebird! Thanks for stopping by to spend some creative time with me here!! I hope you have a wonderful day and I'll see you soon! XOXO

  • Concord & 9th May New Release – Good Vibes and Posies!

    Hi gang! Happyyyy Fridayyyyy!!! Oh man, it's been 95 degrees here already! Not ready! But Summer is coming! Hope you had a great week! Good to see you! I am a guest designer for Concord and 9th's beautiful May 2022 new release. Yippee! I have two projects to share with you today made with the new goodies. Everything is already in the store for shopping so I hope you find some inspiration and maybe something that you want to create with. My personal favorite thing from the new release is the Picked Posie Dies and Stamps. Pretty, modern, classic florals. Right up my alley. Let's take a look!

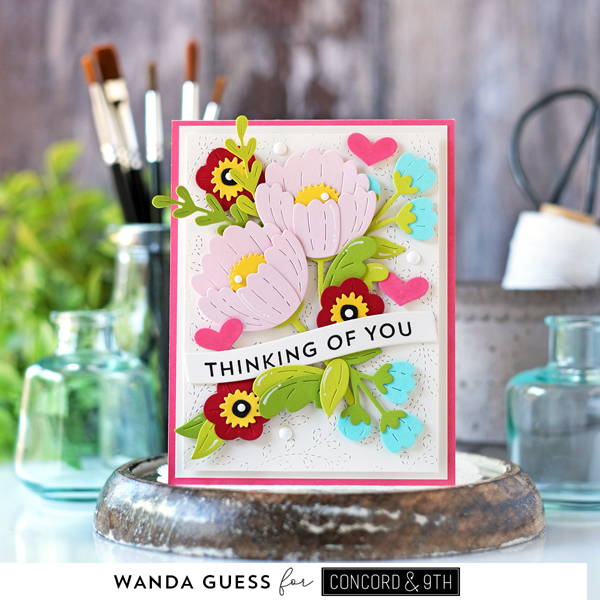
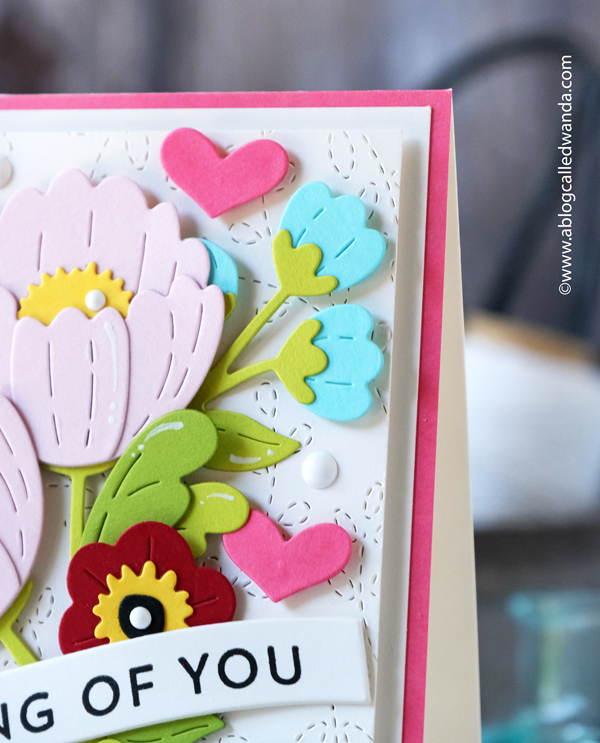
    My first card was made with the new Picked Posie Suite and also the Stitched Vines background (another favorite thing of mine from C9). I used Concord and 9th beautiful cardstock also. My finished card is an A2 card base. I covered it with deep pink paper. My 'white' parts are actually cream cardstock for more of a soft/vintage feeling. I used kind of a different color palette for me. I popped in that deep red. Again, I felt like that was sort of vintage. What do you think??

    concord & 9th, concord and 9th, picked posie dies, good vibes dies, good vibes turnabout, Stitched Vines Background, Concord and 9th stamps and dies, Concord and 9th ink pads, Guest designer, card ideas, card layouts, handmade cards, stamping, rubber stamping, wanda guess, a blog called wanda


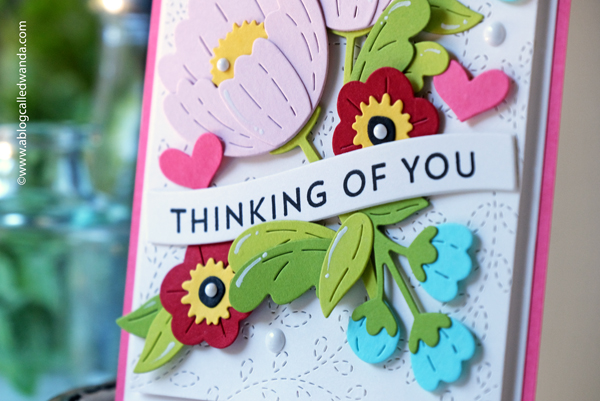
    For the sentiment banner, I die cut three of them from cream cardstock and glued them together for more of a statement. I stamped that gorgeous sentiment onto the top one. SO FRESH!!! 

    concord & 9th, concord and 9th, picked posie dies, good vibes dies, good vibes turnabout, Stitched Vines Background, Concord and 9th stamps and dies, Concord and 9th ink pads, Guest designer, card ideas, card layouts, handmade cards, stamping, rubber stamping, wanda guess, a blog called wanda


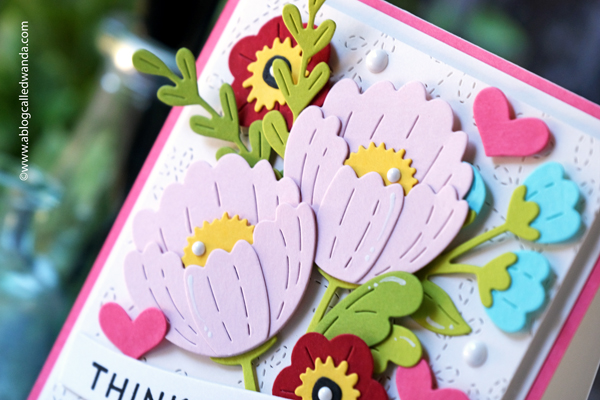
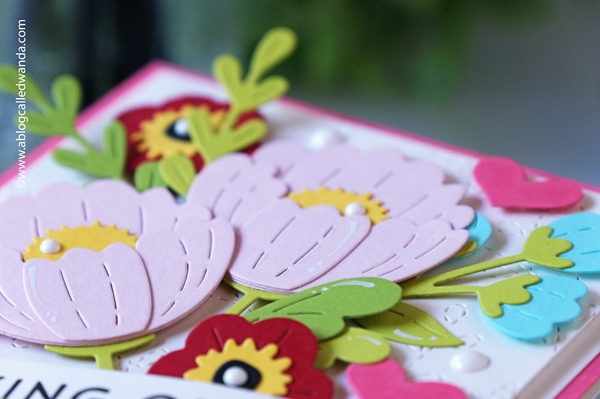
    The dies are in separate pieces so you can mix and match florals for any type of layout. I wanted a big floral spray focusing on those soft pink posies.

    concord & 9th, concord and 9th, picked posie dies, good vibes dies, good vibes turnabout, Stitched Vines Background, Concord and 9th stamps and dies, Concord and 9th ink pads, Guest designer, card ideas, card layouts, handmade cards, stamping, rubber stamping, wanda guess, a blog called wanda


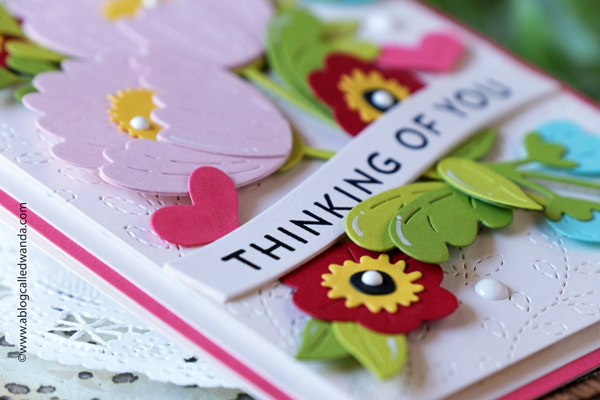
    Here's a close up of that Stitched Vines Background Die – perfection!!

    concord & 9th, concord and 9th, picked posie dies, good vibes dies, good vibes turnabout, Stitched Vines Background, Concord and 9th stamps and dies, Concord and 9th ink pads, Guest designer, card ideas, card layouts, handmade cards, stamping, rubber stamping, wanda guess, a blog called wanda


    I added some white gel pen accents onto the flowers and leaves and also finished off with some white enamel dots. You know I love all the little details. 

    concord & 9th, concord and 9th, picked posie dies, good vibes dies, good vibes turnabout, Stitched Vines Background, Concord and 9th stamps and dies, Concord and 9th ink pads, Guest designer, card ideas, card layouts, handmade cards, stamping, rubber stamping, wanda guess, a blog called wanda


    concord & 9th, concord and 9th, picked posie dies, good vibes dies, good vibes turnabout, Stitched Vines Background, Concord and 9th stamps and dies, Concord and 9th ink pads, Guest designer, card ideas, card layouts, handmade cards, stamping, rubber stamping, wanda guess, a blog called wanda


    All the flowers were attached to the card with foam dots for dimension. I put the flowers down first and then tucked the leaves in between. 

    concord & 9th, concord and 9th, picked posie dies, good vibes dies, good vibes turnabout, Stitched Vines Background, Concord and 9th stamps and dies, Concord and 9th ink pads, Guest designer, card ideas, card layouts, handmade cards, stamping, rubber stamping, wanda guess, a blog called wanda


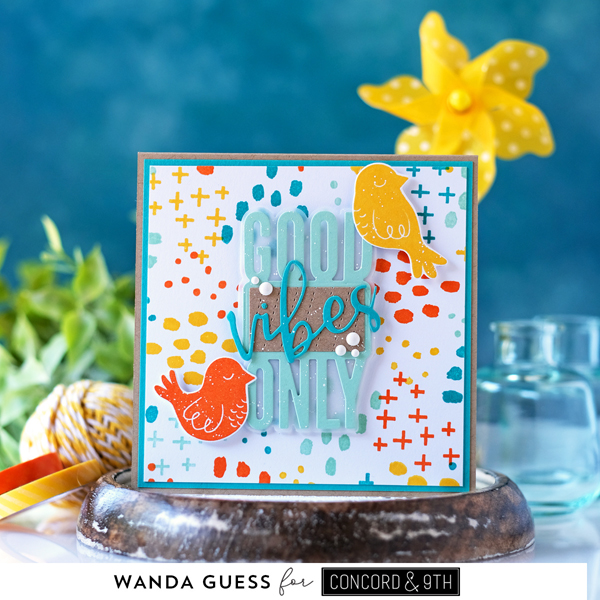
    Next up is a fun and funky Good Vibes card! The finished card is a 5" x 5" square card from kraft paper. I used a retro 70's good vibes color palette and the new Good Vibes turnabout stamp and dies. I also put in some funky cute birds!! 

    concord & 9th, concord and 9th, picked posie dies, good vibes dies, good vibes turnabout, Stitched Vines Background, Concord and 9th stamps and dies, Concord and 9th ink pads, Guest designer, card ideas, card layouts, handmade cards, stamping, rubber stamping, wanda guess, a blog called wanda


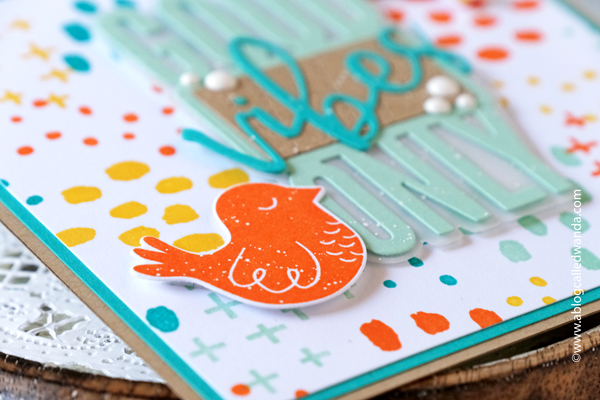
    I used only C9 ink pad colors and cardstock for this card. Yummy orange, yellow, aqua and teal. Reminds me of the OP shirts I used to wear in junior high school! I used vellum as the background for the dies….To let that pretty background show through. I splashed on a little bit of white paint and also used some white enamel dots as my details. This would make a great 'cheer up' or 'get well card' I think. 

    concord & 9th, concord and 9th, picked posie dies, good vibes dies, good vibes turnabout, Stitched Vines Background, Concord and 9th stamps and dies, Concord and 9th ink pads, Guest designer, card ideas, card layouts, handmade cards, stamping, rubber stamping, wanda guess, a blog called wanda


    concord & 9th, concord and 9th, picked posie dies, good vibes dies, good vibes turnabout, Stitched Vines Background, Concord and 9th stamps and dies, Concord and 9th ink pads, Guest designer, card ideas, card layouts, handmade cards, stamping, rubber stamping, wanda guess, a blog called wanda

    I'm wishing you only good vibes today and a very very happy weekend!! Thanks for stopping by today to see me! Happy Crafting! Love ya! XOXO

    CLICK HERE or on the graphic below to see the supplies for my cards today (Affiliate Links Used)

  • Hi everyone! Happy Monday! Quick Update!

    Hi everyone!! Happy Monday!! I wanted to pop in real quick and check in with ya! I've been busy busy busy crafting here behind the scenes and I have so much fun stuff to share with you! My last two posts for last week and today have been delayed by the companies for various reasons – mostly having to do with logistics and products etc. SOOOOO I've got those things on pause. LOTS of good things are coming soon! It's making me crazy not sharing! Ha. On a very very positive note, there will be a new release from The Greetery later this month!! OMG you guys are going to love it so much. My cards are almost done and it's all so beautiful (as you can imagine)! So I'll just say hi and wish you a great week! Take care! XOXO

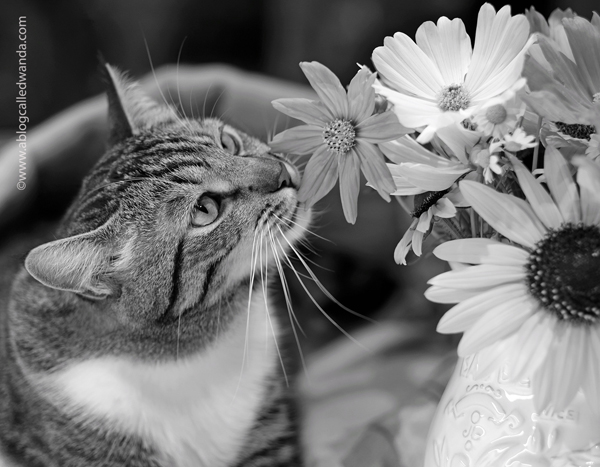
    In the meantime, make sure to take time to stop and smell the flowers!

    5E724795-1DD4-413A-B58F-25B66A453CBF


  • French Flower Pot with Resin and Chalk Paints!

    Hi everybody! Hope your week is going great! I've been crafting night and day the past 2-3 days! I have so many projects and cards to make and share! Stay tuned! Today's project is something completely new and different for me! I made a resin/paint/wax project a couple weeks ago! My first one (except for the one I made in a class to learn how)! SO EXCITING! I have been a stamper and card maker for 28 years!!! Yikes! So I loooove making paper things of course. But I have been an overall crafty person since I was very small. I remember one time when I was around eight years old I made my own magazine. I still totally recall sitting on the floor gluing and pasting and writing articles. I used to do loom beading as a little girl too! And pretty much anything else. When I got to high school I discovered photography and that became my first artistic soulmate. I used to make cards from my self printed black and white photographs. Man how I miss being in a darkroom! Anyhoo I am doing the time machine rewind with you! All this is meant to say that it's time for me to explore again, and try some new things. Get the creativity flowing in new ways… Well, I have discovered resin and molds and chalk paints and transfers – oh my!! I'm having a lot of fun, and maybe I'll inspire you to try something new too!

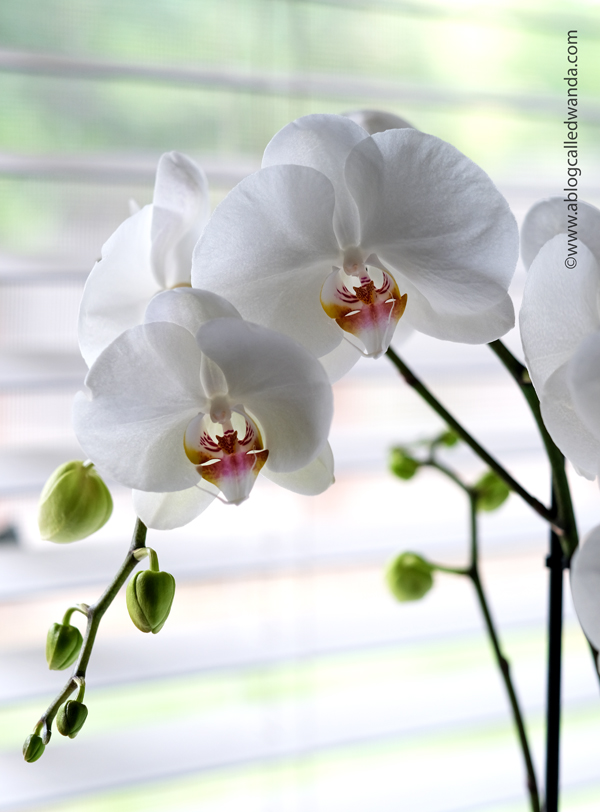
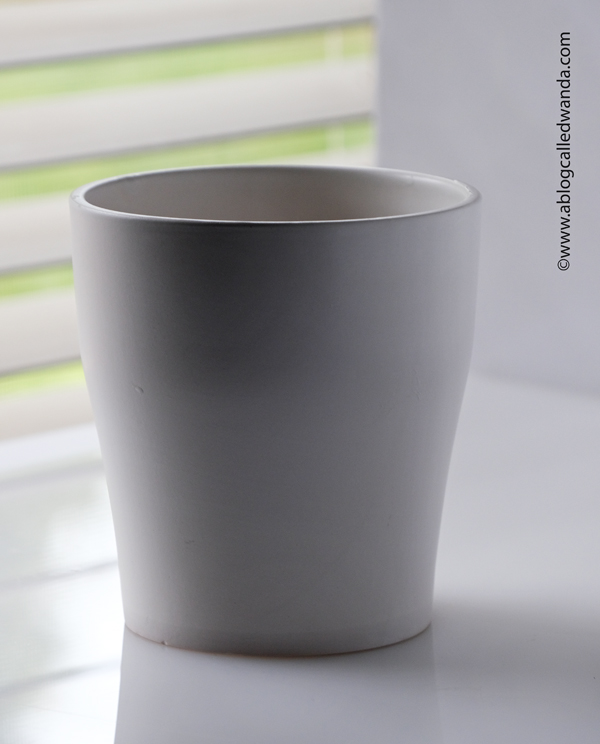
    Today's project started out as the necessity for a nice gift for my friend Liz. I bought this GORGEOUS orchid at the nursery to give her as that gift. But, me being me, I wanted to make her something… The idea came to me to 'make' her a pot for the orchid. The pot that the orchid came with was a plain white ceramic pot. I changed it into a faux stone French Fleur-de-lis pot! Let's look – lots of pictures ahead.

    iron orchid designs, iron orchid molds, iron orchid designs ideas, orchid pot, iron orchid fleur de lis mold, resin casting, resin in iron orchid molds, annie sloan chalk paints, decorate a flower pot, gift ideas, annie sloan black wax, clear wax, annie sloan paris gray, ideas for resin, wanda guess, a blog called wanda

    This was literally the most perfect orchid I have ever seen! Pristine and beautiful! 


    1


    And here is the white pot that it came with….

    iron orchid designs, iron orchid molds, iron orchid designs ideas, orchid pot, iron orchid fleur de lis mold, resin casting, resin in iron orchid molds, annie sloan chalk paints, decorate a flower pot, gift ideas, annie sloan black wax, clear wax, annie sloan paris gray, ideas for resin, wanda guess, a blog called wanda
    iron orchid designs, iron orchid molds, iron orchid designs ideas, orchid pot, iron orchid fleur de lis mold, resin casting, resin in iron orchid molds, annie sloan chalk paints, decorate a flower pot, gift ideas, annie sloan black wax, clear wax, annie sloan paris gray, ideas for resin, wanda guess, a blog called wanda


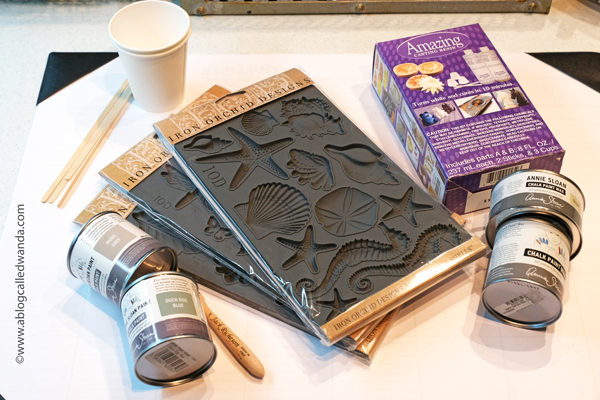
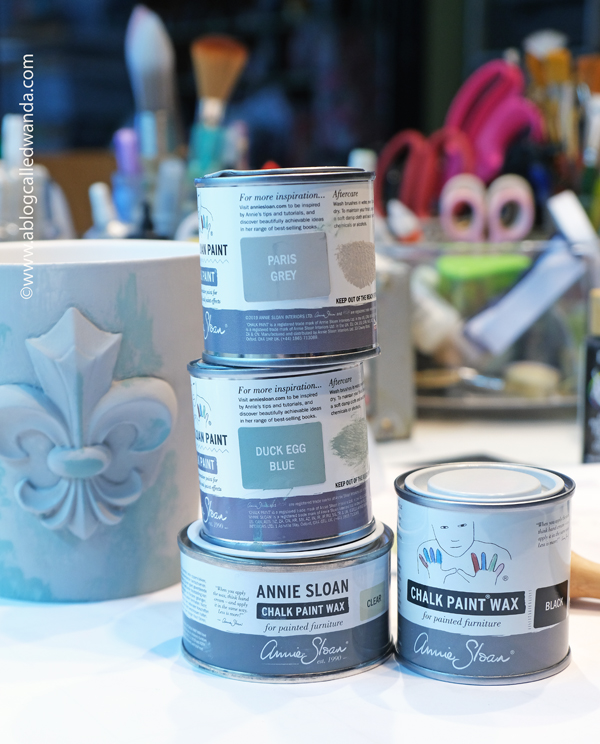
    So now the fun part!!!! Look at all these fun supplies!!!

    iron orchid designs, iron orchid molds, iron orchid designs ideas, orchid pot, iron orchid fleur de lis mold, resin casting, resin in iron orchid molds, annie sloan chalk paints, decorate a flower pot, gift ideas, annie sloan black wax, clear wax, annie sloan paris gray, ideas for resin, wanda guess, a blog called wanda


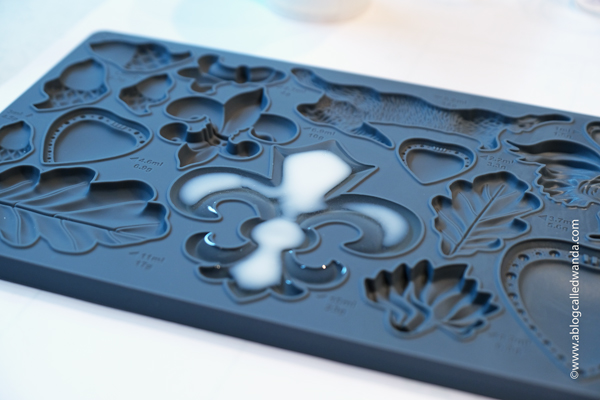
    I decided to use that big chunky Fleur-de-lis mold!!!! It was the perfect size and scale for the pot.

    iron orchid designs, iron orchid molds, iron orchid designs ideas, orchid pot, iron orchid fleur de lis mold, resin casting, resin in iron orchid molds, annie sloan chalk paints, decorate a flower pot, gift ideas, annie sloan black wax, clear wax, annie sloan paris gray, ideas for resin, wanda guess, a blog called wanda


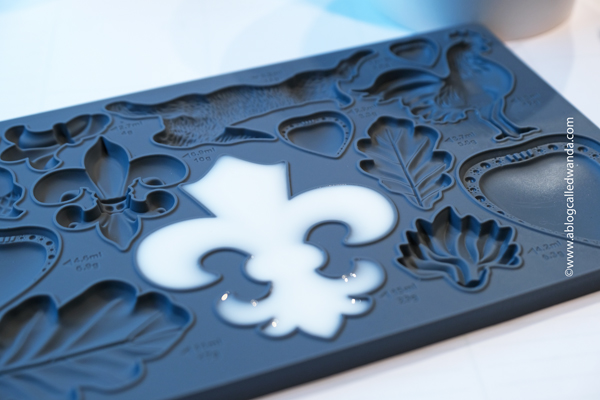
    The resin is a two part mixture. You mix equal parts of two different liquids and still it well… It pours into the mold totally clear, and then over a period of about ten minutes it turns white! It's realllllll fun to watch this happen. It takes around 10 minutes is all.

    iron orchid designs, iron orchid molds, iron orchid designs ideas, orchid pot, iron orchid fleur de lis mold, resin casting, resin in iron orchid molds, annie sloan chalk paints, decorate a flower pot, gift ideas, annie sloan black wax, clear wax, annie sloan paris gray, ideas for resin, wanda guess, a blog called wanda


    Here it is ready to pop out of the mold! At this point, it is still malleable so you can curve it or make it form to something else. But you only have a little bit of time before it hardens. 

    iron orchid designs, iron orchid molds, iron orchid designs ideas, orchid pot, iron orchid fleur de lis mold, resin casting, resin in iron orchid molds, annie sloan chalk paints, decorate a flower pot, gift ideas, annie sloan black wax, clear wax, annie sloan paris gray, ideas for resin, wanda guess, a blog called wanda


    I used Lock Tite Glue to affix the Fleur-de-lis to the pot. It has a gentle curve to it so I taped it while the glue dried. This is how it looked before any paint, etc. 

    iron orchid designs, iron orchid molds, iron orchid designs ideas, orchid pot, iron orchid fleur de lis mold, resin casting, resin in iron orchid molds, annie sloan chalk paints, decorate a flower pot, gift ideas, annie sloan black wax, clear wax, annie sloan paris gray, ideas for resin, wanda guess, a blog called wanda

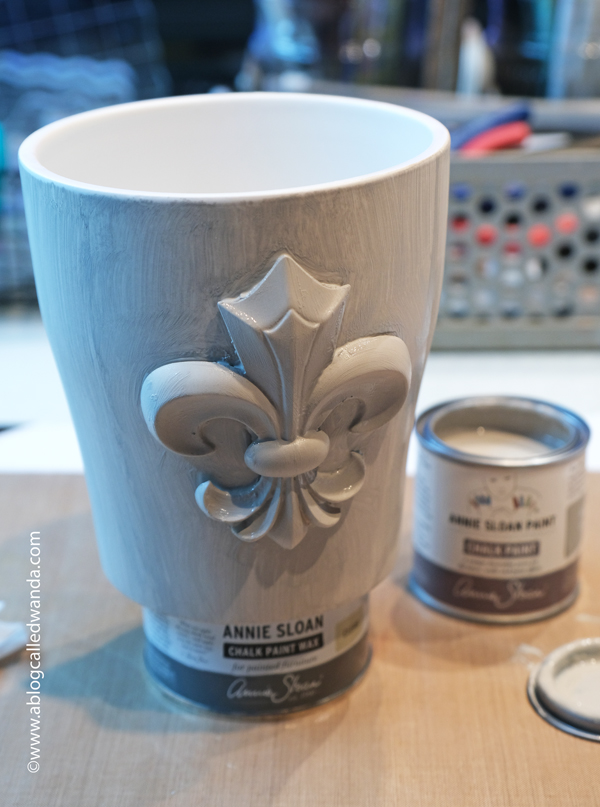
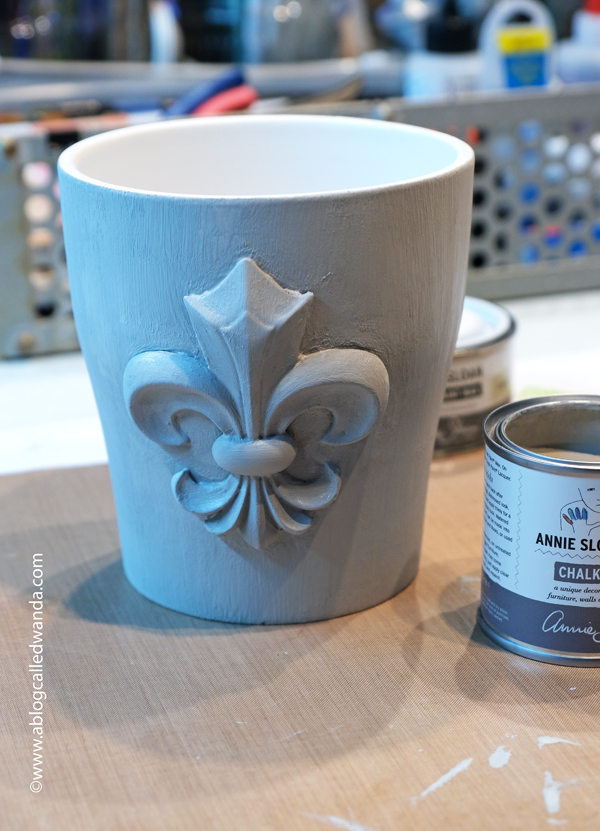
    I used Annie Sloan Chalk Paint to paint the pot. I used three coats and let it dry in between each coat. I was surprised how nicely the paint 'took' to the ceramic.


    iron orchid designs, iron orchid molds, iron orchid designs ideas, orchid pot, iron orchid fleur de lis mold, resin casting, resin in iron orchid molds, annie sloan chalk paints, decorate a flower pot, gift ideas, annie sloan black wax, clear wax, annie sloan paris gray, ideas for resin, wanda guess, a blog called wanda


    iron orchid designs, iron orchid molds, iron orchid designs ideas, orchid pot, iron orchid fleur de lis mold, resin casting, resin in iron orchid molds, annie sloan chalk paints, decorate a flower pot, gift ideas, annie sloan black wax, clear wax, annie sloan paris gray, ideas for resin, wanda guess, a blog called wanda


    Here are the supplies and colors I used to make this project…

    iron orchid designs, iron orchid molds, iron orchid designs ideas, orchid pot, iron orchid fleur de lis mold, resin casting, resin in iron orchid molds, annie sloan chalk paints, decorate a flower pot, gift ideas, annie sloan black wax, clear wax, annie sloan paris gray, ideas for resin, wanda guess, a blog called wanda


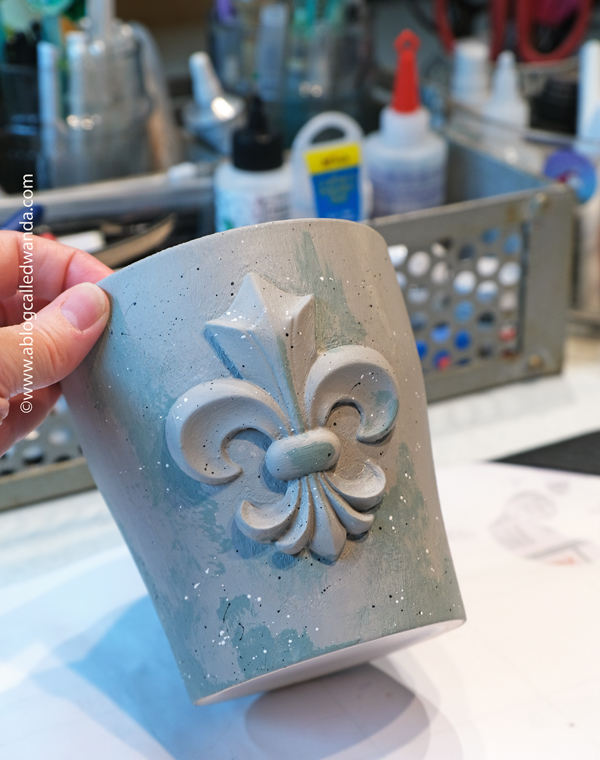
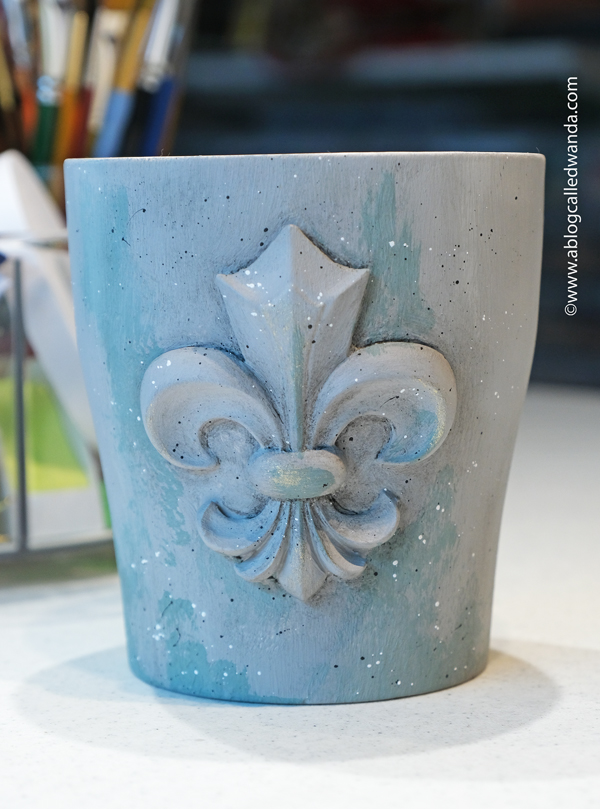
    I painted the pot with gray and green paints and then splattered on white and black spatters to make it look like stone. Then I put on two coats of clear wax over the paint.

    iron orchid designs, iron orchid molds, iron orchid designs ideas, orchid pot, iron orchid fleur de lis mold, resin casting, resin in iron orchid molds, annie sloan chalk paints, decorate a flower pot, gift ideas, annie sloan black wax, clear wax, annie sloan paris gray, ideas for resin, wanda guess, a blog called wanda


    iron orchid designs, iron orchid molds, iron orchid designs ideas, orchid pot, iron orchid fleur de lis mold, resin casting, resin in iron orchid molds, annie sloan chalk paints, decorate a flower pot, gift ideas, annie sloan black wax, clear wax, annie sloan paris gray, ideas for resin, wanda guess, a blog called wanda


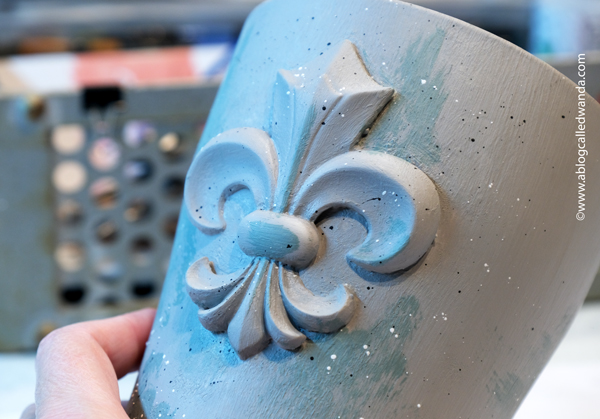
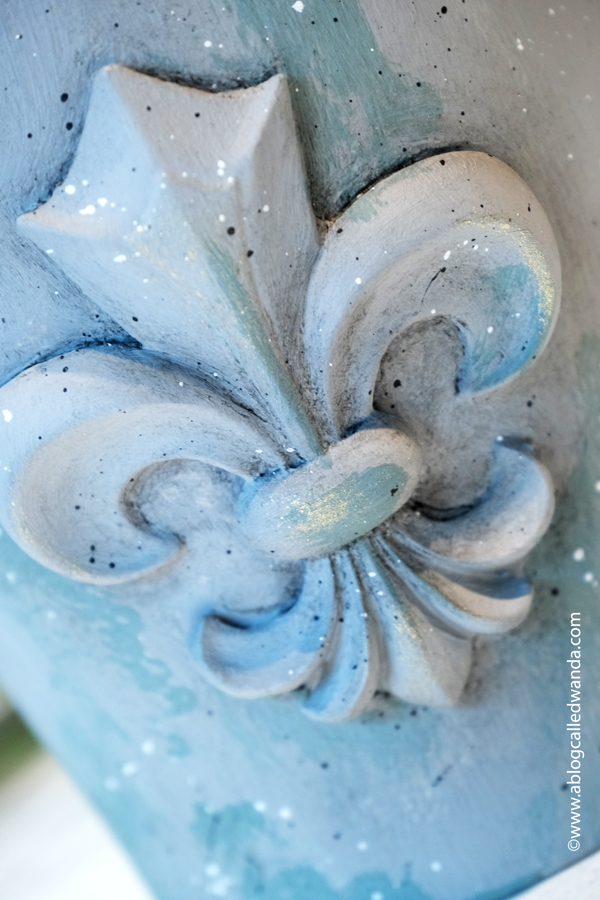
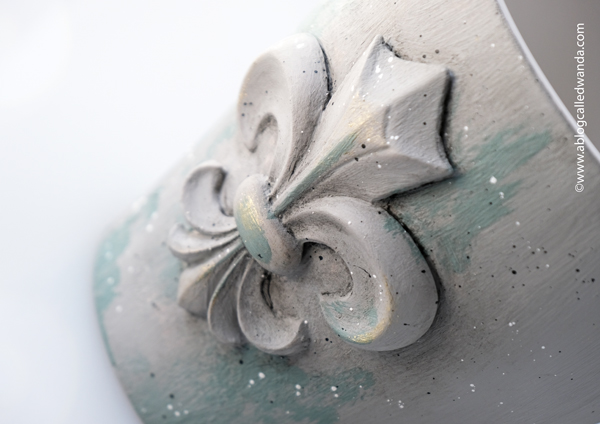
    The final step after everything is completely dry, is to put on black wax!! I rubbed it with a stipple brush and a q-tip into the crevices and joints…. Looks so cool!!

    iron orchid designs, iron orchid molds, iron orchid designs ideas, orchid pot, iron orchid fleur de lis mold, resin casting, resin in iron orchid molds, annie sloan chalk paints, decorate a flower pot, gift ideas, annie sloan black wax, clear wax, annie sloan paris gray, ideas for resin, wanda guess, a blog called wanda


    iron orchid designs, iron orchid molds, iron orchid designs ideas, orchid pot, iron orchid fleur de lis mold, resin casting, resin in iron orchid molds, annie sloan chalk paints, decorate a flower pot, gift ideas, annie sloan black wax, clear wax, annie sloan paris gray, ideas for resin, wanda guess, a blog called wanda


    It's amazing what a difference the finishing touches make… This is the pot with only paint on it….

    iron orchid designs, iron orchid molds, iron orchid designs ideas, orchid pot, iron orchid fleur de lis mold, resin casting, resin in iron orchid molds, annie sloan chalk paints, decorate a flower pot, gift ideas, annie sloan black wax, clear wax, annie sloan paris gray, ideas for resin, wanda guess, a blog called wanda


    And this is the pot after splatters, clear wax and black wax, and just a touch of gold too!!

    iron orchid designs, iron orchid molds, iron orchid designs ideas, orchid pot, iron orchid fleur de lis mold, resin casting, resin in iron orchid molds, annie sloan chalk paints, decorate a flower pot, gift ideas, annie sloan black wax, clear wax, annie sloan paris gray, ideas for resin, wanda guess, a blog called wanda


    iron orchid designs, iron orchid molds, iron orchid designs ideas, orchid pot, iron orchid fleur de lis mold, resin casting, resin in iron orchid molds, annie sloan chalk paints, decorate a flower pot, gift ideas, annie sloan black wax, clear wax, annie sloan paris gray, ideas for resin, wanda guess, a blog called wanda

    That's it for me today, friends! Hope you enjoyed something a little different from me! It was such a cool project to make and I'm very happy with how it came out. Now I want to make all the molds and paint all the things. I just need more time!! What have you discovered lately? Do you have a new crafty hobby you're loving? I want to hear – leave me a comment! I'll be back soon with some paper projects. Until then, take care and keep on creating! XOXO


  • Doodlebug Down on the Farm Collection – Pop Up Card!

    Hi friends! Happy Monday again! How did that happen? And how is it May already? I hope you had a really nice weekend! We have been super busy lately and I love that – getting out and doing fun things and going places. It's been so good to get fresh air and be amongst other people having fun! Last week we went to a two day conference at church and it was AMAZING! The first day we were at church from 7:30am to 10:00pm! I think I'm still tired! LOL. Saturday we went to a beautiful Spring Market and out to breakfast. It's been good here and I'm very grateful. Hope you are doing great too! I have SOOOO many things coming up this month. I am terribly behind and I'll be crafting from sun up til sun down this week. It's all good and I'm looking forward to sharing it all with you my friends!! 

    Today is my day to post over on the Doodlebug Blog! I'm sharing my project here too, of course!! There are some new things coming soon (I can't wait) from Doodlebug, but until the new goodies arrive, the design team is working with the Down on the Farm Collection. I do love bringing new life and new ideas to some older products. 

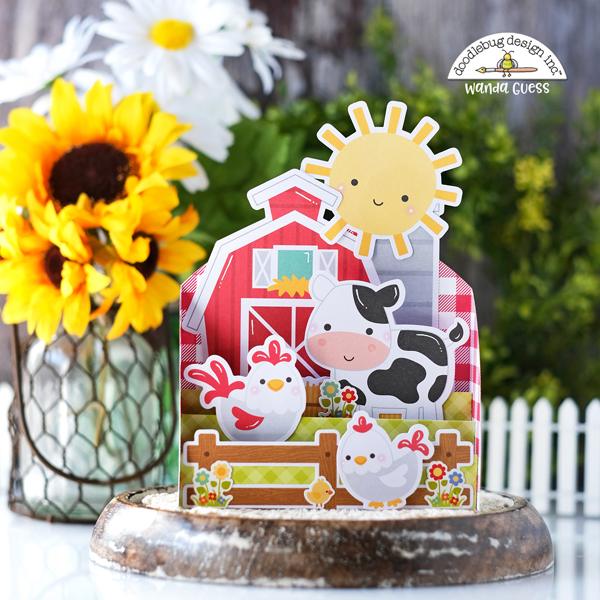
    Today's card is an awesome pop up made with dies from C9, and a custom envelope too! It's all super fresh – farm fresh! I used the Concord & 9th Card Stacks Die Set to make this card. The other elements are all papers, scrapbooking pieces and embellishments from Doodlebug of course! The main base of the card was made with the pretty red buffalo check paper. The bottom or 'ground' of the pop up was made using 12×12 green gingham. All the supplies are listed at the bottom of my post!

    doodlebug, down on the farm collection, doodlebug farm, gingham, buffalo check, honey bee scallop a2 dies, concord and 9th card stacks, concord & 9th pop up card, we r memory keepers envelope punch board, card ideas, pop up card ideas, farm, scrapbooking, die cutting, card layouts, wanda guess, a blog called wanda


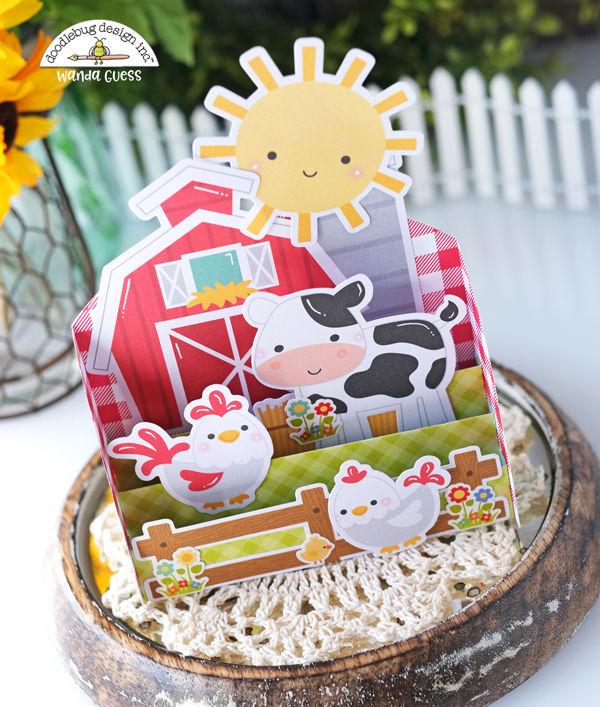
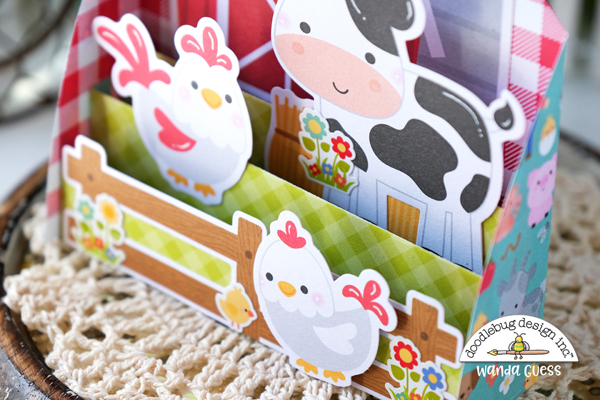
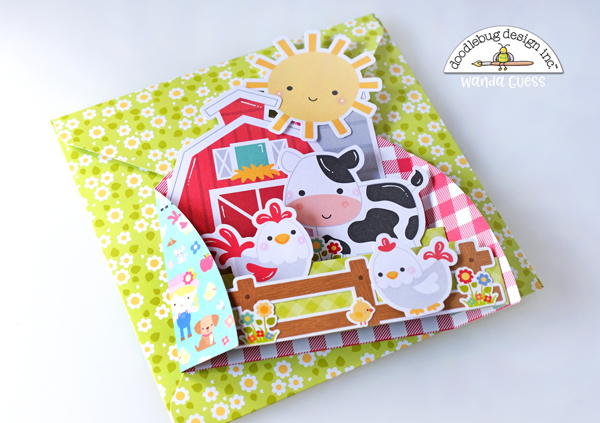
    Here's a top down view…. I started with the barn and sun in the back, then the fence in front. Then I filled in everything with hay, the cow, flowers and chickens. Everything is SO cute! I used a white gel pen to add accents to each element. 

    doodlebug, down on the farm collection, doodlebug farm, gingham, buffalo check, honey bee scallop a2 dies, concord and 9th card stacks, concord & 9th pop up card, we r memory keepers envelope punch board, card ideas, pop up card ideas, farm, scrapbooking, die cutting, card layouts, wanda guess, a blog called wanda


    Here's a close up of the construction of the pop up card…. 

    doodlebug, down on the farm collection, doodlebug farm, gingham, buffalo check, honey bee scallop a2 dies, concord and 9th card stacks, concord & 9th pop up card, we r memory keepers envelope punch board, card ideas, pop up card ideas, farm, scrapbooking, die cutting, card layouts, wanda guess, a blog called wanda


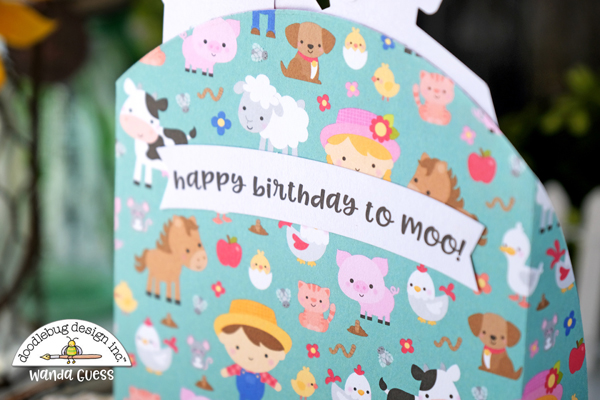
    Since the paper is double sided, the back is already decorated!! I use the "happy birthday to moo" sentiment to make this a birthday card!

    doodlebug, down on the farm collection, doodlebug farm, gingham, buffalo check, honey bee scallop a2 dies, concord and 9th card stacks, concord & 9th pop up card, we r memory keepers envelope punch board, card ideas, pop up card ideas, farm, scrapbooking, die cutting, card layouts, wanda guess, a blog called wanda


    AND….the whole card folds flat for mailing! The barn and sun elements extend over the top of the back of the pop up die…. That means that I had to make my own envelope (which I love to do anyway)… If you don't extend over that back part, this folding card would fit into an A2 envelope.I used my envelope punch board and a sheet of paper from the collection to make a 6"x6" square envelope. My envelope perfectly matches the card and that's something I really like!! Makes it feel even more special.

    doodlebug, down on the farm collection, doodlebug farm, gingham, buffalo check, honey bee scallop a2 dies, concord and 9th card stacks, concord & 9th pop up card, we r memory keepers envelope punch board, card ideas, pop up card ideas, farm, scrapbooking, die cutting, card layouts, wanda guess, a blog called wanda


    doodlebug, down on the farm collection, doodlebug farm, gingham, buffalo check, honey bee scallop a2 dies, concord and 9th card stacks, concord & 9th pop up card, we r memory keepers envelope punch board, card ideas, pop up card ideas, farm, scrapbooking, die cutting, card layouts, wanda guess, a blog called wanda

    Okay friends, that's it for today's project! Thanks for coming by my little farm today! I hope you have a great week!! XOXO


  • Pinkfresh Studio April 2022 Blog Hop – Pretty and Graphic Florals!

    Hi everyone! Happy Happy Happy Friday! I've got something fun to share today! Welcome to my stop on the awesome Pinkfresh Studio April 2022 New Release Blog Hop! If you're new here – welcome! This hop is so great – so many stops – so much inspiration! The link to all the stops is at the very bottom of my post so be sure to see everything! This new release, as usual, is full of gorgeous florals, beautiful hot foil plates, Innovative dies and more! They never seem to run out of ideas! Yay! I'm featuring a new floral set called Simplest Gestures (I used the stencils, hot foil, and dies) and the new Floral and Diamond Tiles Cover Plate. I also used the wonderful Pinkfresh Studio Ink Cubes and some of my previously released favorite products. All the supplies are listed at the end of my post. Let's get started!

    My finished card is an A2 white card base. I layered black and vellum and gold! This card did not turn out at all like I planned – it kind of took on a mind of it's own and ended up super bold and graphic! That cover plate in black is to die for!!

    pinkfresh studio, pinkfresh studio blog hop, pinkfresh studio flowers, hot foil, pinkfresh hot foil, spellbinders glimmer system, matte gold hot foil, cardmaking, paper crafting, make your own cards, card ideas, pinkfresh studio small butterflies, pinkfresh studio perfect sentiments, pinkfresh studio ink cubes, pinkfresh studio stencils, pinkfresh studio simplest gestures, jewels mix, wanda guess, a blog called wanda


    Pinkfresh Studio Blog Hop


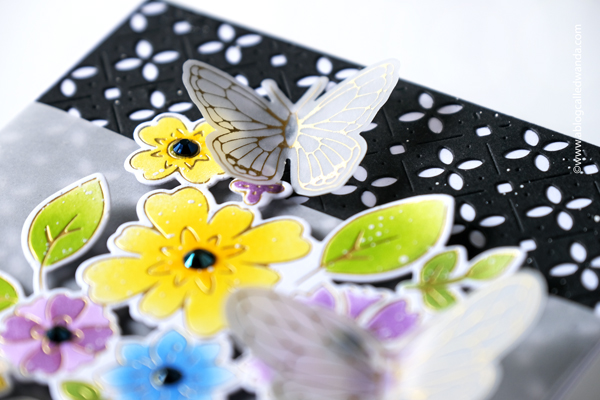
    Here's a close up of the design of the cover plate. SO nice! I splattered on some white paint and mounted it right onto my white card base. The black and white contrast really shows the design off.

    pinkfresh studio, pinkfresh studio blog hop, pinkfresh studio flowers, hot foil, pinkfresh hot foil, spellbinders glimmer system, matte gold hot foil, cardmaking, paper crafting, make your own cards, card ideas, pinkfresh studio small butterflies, pinkfresh studio perfect sentiments, pinkfresh studio ink cubes, pinkfresh studio stencils, pinkfresh studio simplest gestures, jewels mix, wanda guess, a blog called wanda


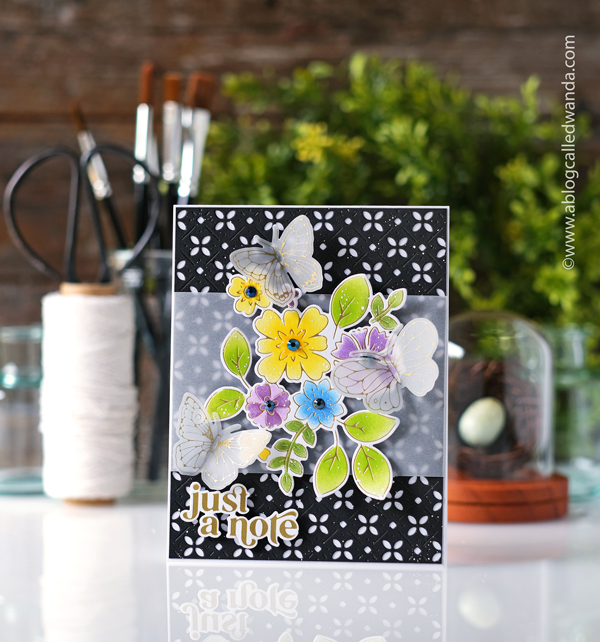
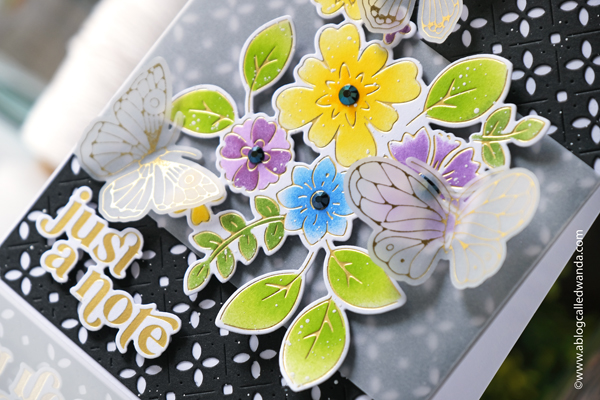
    The main event is the beautiful floral spray! I hot foiled it in Matte Gold foil and then used the stencils to color in the flowers and leaves. I used the Pinkfresh Studio Ink Cubes and die more of a soft blend than an all over color. I added black gems to the centers of the flowers. I also splattered on some white ink here. I wanted another element and it came to me – butterflies! I used the same foil and the Small Butterflies hot foil plate – on vellum! They came out perfectly. I have never foiled on vellum before. LOVE. 

    pinkfresh studio, pinkfresh studio blog hop, pinkfresh studio flowers, hot foil, pinkfresh hot foil, spellbinders glimmer system, matte gold hot foil, cardmaking, paper crafting, make your own cards, card ideas, pinkfresh studio small butterflies, pinkfresh studio perfect sentiments, pinkfresh studio ink cubes, pinkfresh studio stencils, pinkfresh studio simplest gestures, jewels mix, wanda guess, a blog called wanda


    The sentiment was also hot foiled using the Perfect Sentiments set. Just a note!

    pinkfresh studio, pinkfresh studio blog hop, pinkfresh studio flowers, hot foil, pinkfresh hot foil, spellbinders glimmer system, matte gold hot foil, cardmaking, paper crafting, make your own cards, card ideas, pinkfresh studio small butterflies, pinkfresh studio perfect sentiments, pinkfresh studio ink cubes, pinkfresh studio stencils, pinkfresh studio simplest gestures, jewels mix, wanda guess, a blog called wanda


    pinkfresh studio, pinkfresh studio blog hop, pinkfresh studio flowers, hot foil, pinkfresh hot foil, spellbinders glimmer system, matte gold hot foil, cardmaking, paper crafting, make your own cards, card ideas, pinkfresh studio small butterflies, pinkfresh studio perfect sentiments, pinkfresh studio ink cubes, pinkfresh studio stencils, pinkfresh studio simplest gestures, jewels mix, wanda guess, a blog called wanda


    With a different sentiment on it, I think this could make a really classic wedding card or shower card…or Mother's Day card!

    pinkfresh studio, pinkfresh studio blog hop, pinkfresh studio flowers, hot foil, pinkfresh hot foil, spellbinders glimmer system, matte gold hot foil, cardmaking, paper crafting, make your own cards, card ideas, pinkfresh studio small butterflies, pinkfresh studio perfect sentiments, pinkfresh studio ink cubes, pinkfresh studio stencils, pinkfresh studio simplest gestures, jewels mix, wanda guess, a blog called wanda


    Here's a sneak peek pic I took for my Instagram of just those pretty butterflies!

    pinkfresh studio, pinkfresh studio blog hop, pinkfresh studio flowers, hot foil, pinkfresh hot foil, spellbinders glimmer system, matte gold hot foil, cardmaking, paper crafting, make your own cards, card ideas, pinkfresh studio small butterflies, pinkfresh studio perfect sentiments, pinkfresh studio ink cubes, pinkfresh studio stencils, pinkfresh studio simplest gestures, jewels mix, wanda guess, a blog called wanda

    Pinkfresh Studio will be giving away the full release on their Pinkfresh blog & YouTube channel!! They will also be giving away a total of TEN $25  gift cards along the hop. As per usual with blog hops – the winners will be picked from the comments from all the blogs! Pinkfresh Studio will pull the winners & post them on May 10th on their GIVEAWAY PAGE. You must check that page & claim your prize within 2 weeks! Good Luck!! 

    CLICK HERE TO SHOP THE NEW RELEASE AT PINKFRESH STUDIO!

    CLICK HERE or on the graphic below to see the supplies used for today's card! (Affiliate Links Used)

  • Howdy Y’all! Doodlebug Down on the Farm Collection Card and Gift Box!

    Howdy cowgirls!! How are y'all today!? I hope you're having a lovely day so far, full of sunshine and laughter! Today, I'm up on the Doodlebug Blog with a project featuring an older collection – called Down on the Farm! It's ADORABLE and happy and fun! So many cute themes from this collection and it's perfect for scrapbooking too! Farm animals and gingham and florals…country themed for Summer!! I have several friends who have horses and love horses, so I decided to go with a horse themed card and gift box for my project today. Yee haw!

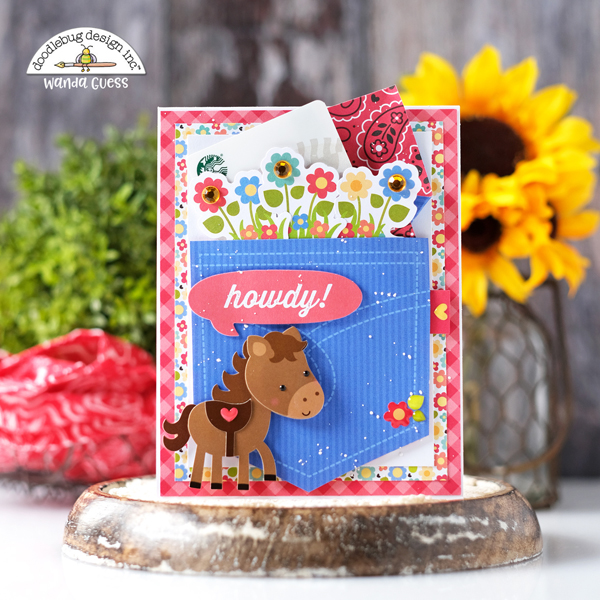
    My finished card is a white A2 card base, layered with gingham, floral paper and white paper. Then I attached a pocket for a gift card! The gift box was made with the WRMK Pillow Box Punch Board and that can hold candy, or money or a small gift! I think the little pillow boxes would be cute as favors for a country party too! 

    doodlebug down on the farm, doodlebug farm collection, doodlebug card and gift, doodlebug supplies, horse theme card and gift, party favors, howdy card, gift card holder, cards with pockets, country theme, crafting scrapbooking, farm scrapbook ideas, card ideas, wanda guess, a blog called wanda


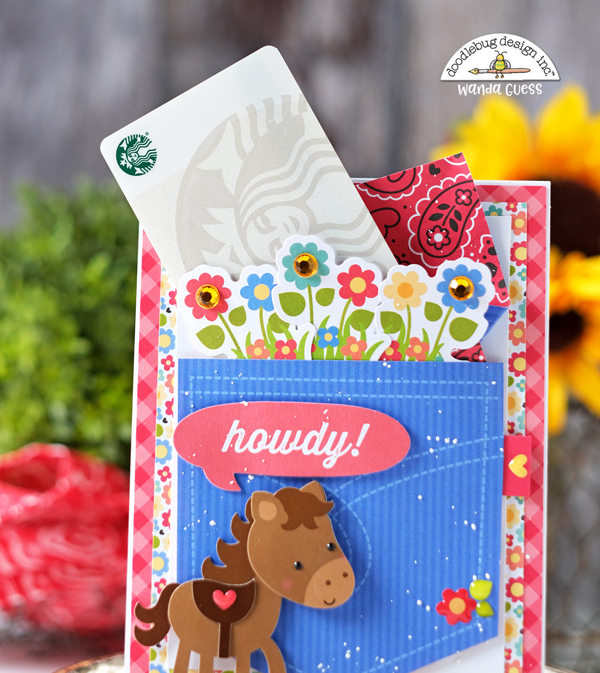
    Here is the card – with a little paper bandana tucked inside with the coffee gift card! F-U-N!

    doodlebug down on the farm, doodlebug farm collection, doodlebug card and gift, doodlebug supplies, horse theme card and gift, party favors, howdy card, gift card holder, cards with pockets, country theme, crafting scrapbooking, farm scrapbook ideas, card ideas, wanda guess, a blog called wanda


    And here's the little pillow box gift box! I made the box from blue patterned paper and then wrapped a strip of bandana paper around it. I used my awesome Deckle Edge Trimmer (supplies listed at the bottom of my post) to trim the edges of the bandana paper. I wrapped it with some chunky twine and glued on the horse embellishment!

    doodlebug down on the farm, doodlebug farm collection, doodlebug card and gift, doodlebug supplies, horse theme card and gift, party favors, howdy card, gift card holder, cards with pockets, country theme, crafting scrapbooking, farm scrapbook ideas, card ideas, wanda guess, a blog called wanda


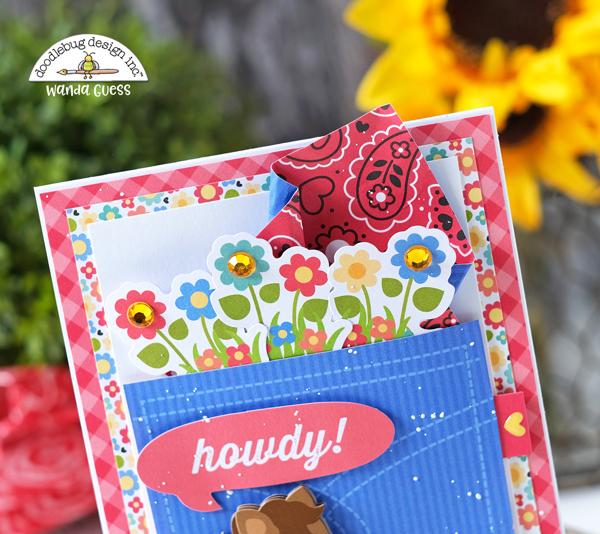
    When I attached the pocket to the front of the card I used foam tape only around the perimeter. That left the top open to tuck in the gift card. I glued the flowers to the inside of the pocket before attaching it to the card. The little paper bandana was made from a square of paper that I hand crumpled. The pocket was cut from one of the 12×12 papers in the collection and it's the perfect size for the front of a card.

    doodlebug down on the farm, doodlebug farm collection, doodlebug card and gift, doodlebug supplies, horse theme card and gift, party favors, howdy card, gift card holder, cards with pockets, country theme, crafting scrapbooking, farm scrapbook ideas, card ideas, wanda guess, a blog called wanda


    I attached the cute horse Doodle Pop to the front of the pocket and then added the 'howdy' word bubble. Since it's not specific, this could be a birthday card, grad card or just because card!

    doodlebug down on the farm, doodlebug farm collection, doodlebug card and gift, doodlebug supplies, horse theme card and gift, party favors, howdy card, gift card holder, cards with pockets, country theme, crafting scrapbooking, farm scrapbook ideas, card ideas, wanda guess, a blog called wanda


    doodlebug down on the farm, doodlebug farm collection, doodlebug card and gift, doodlebug supplies, horse theme card and gift, party favors, howdy card, gift card holder, cards with pockets, country theme, crafting scrapbooking, farm scrapbook ideas, card ideas, wanda guess, a blog called wanda


    doodlebug down on the farm, doodlebug farm collection, doodlebug card and gift, doodlebug supplies, horse theme card and gift, party favors, howdy card, gift card holder, cards with pockets, country theme, crafting scrapbooking, farm scrapbook ideas, card ideas, wanda guess, a blog called wanda

    Thanks, cowgirls, for stopping by today! Hope you have a happy and fun day today! I'll see you back here real soon, ya hear! XOXO

    CLICK HERE or on the graphic below to see the supplies used for today's project! (Affiliate Links Used).

    20

  • Ahoy, Mates! It’s the weekend!

    Ahoy, Mateys!! Happy Weekend!! Do you have some fun stuff planned? We're going to a big craft fair event tomorrow morning outside in the fresh air and I am so excited! Then church after (we go to 7pm service)! Today is all about getting caught up on chores and laundry and all that jazz. I'm here today with a super fun and silly card made with adorable stamps from Rubbernecker! I picked these up at the Stamp and Scrapbook Expo a few weeks ago and have been anxious to color them in! I hope they make you smile – I mean c'mon – that little crab with a pirate hat and those crazy eyes? A pirate shark? It's all good! 

    Side note – remember I did this blog post with Rubbernecker Dies – and a lot of them were sold out? Most of the dies are back in stock so if you wanted something, check again. The supplies are all listed at the bottom of that post!

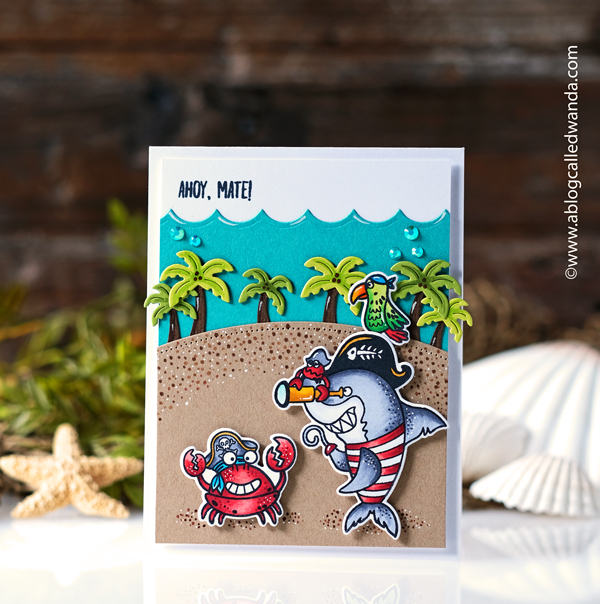
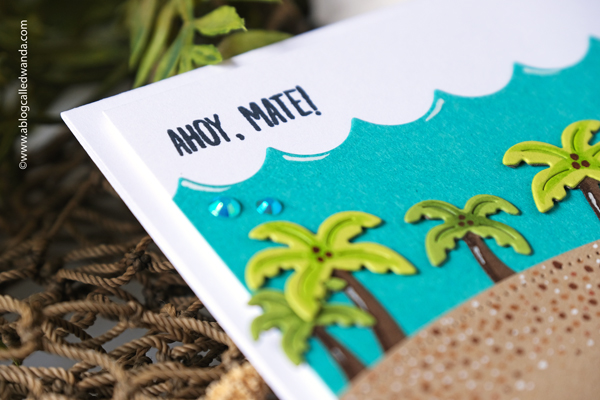
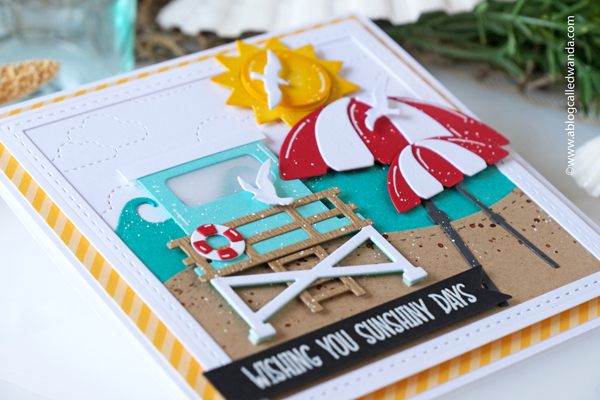
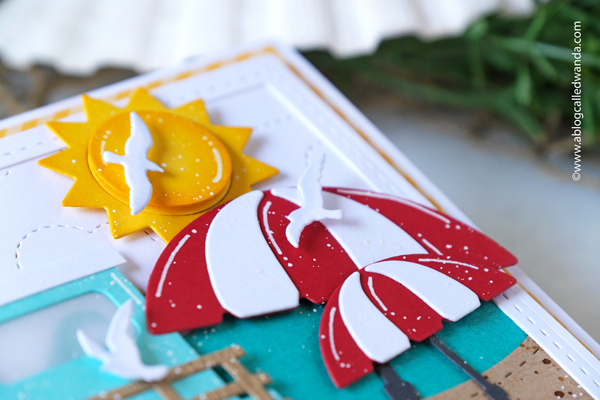
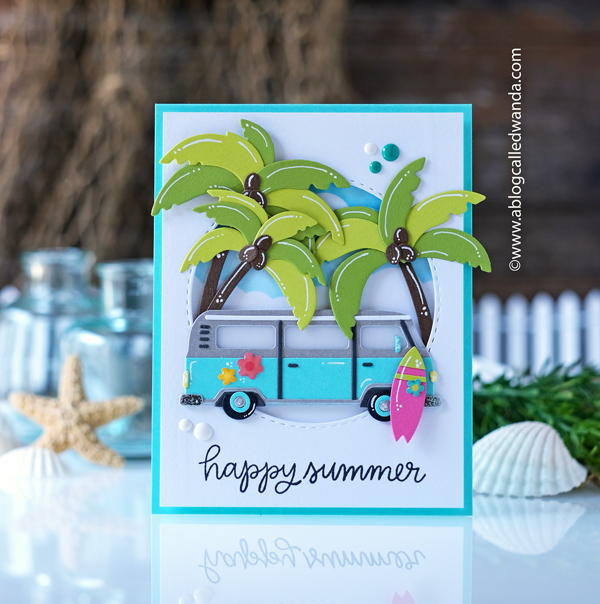
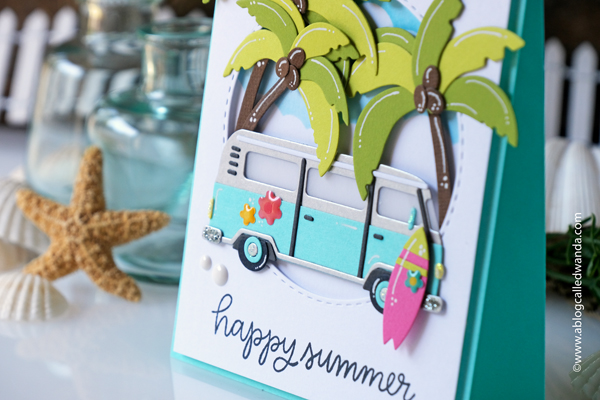
    Today's card is a beachy card for any occasion! It's time to start thinking about Summer crafting. My finished card is an A2 card base. I layered some waves and the Palm Tree Border (something I use all the time) and then the fun critters. Everything is colored with Copic Markers!

    Rubbernecker stamps, rubbernecker stamps and dies, pirate stamps, pirate card, copic markers, handmade card, fun card, lawn fawn palm tree border, waves, sharks, diy cards, card layout ideas, card ideas, wanda guess


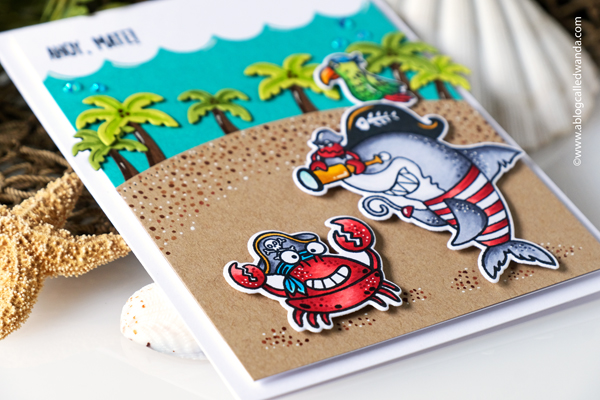
    Here's a close up of my paper layers! The blue waves, the palm trees, and the beach! I added accents to the palm fronds using Copics. And I added white gel pen to everything. To make the beach, I used kraft cardstock and then a bunch of different colors of Copics to make dots to mimic sand! I kinda like how it came out. This made the perfect scene for my pirates.

    Rubbernecker stamps, rubbernecker stamps and dies, pirate stamps, pirate card, copic markers, handmade card, fun card, lawn fawn palm tree border, waves, sharks, diy cards, card layout ideas, card ideas, wanda guess


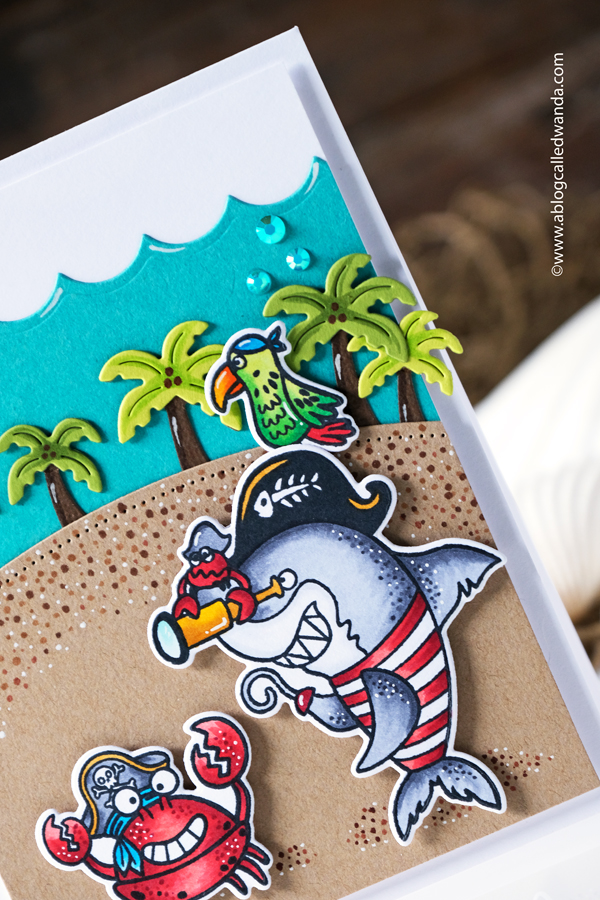
    I stamped and die cut out the shark, crab and parrot and colored them all in bright colors. They are attached to the card using foam tape to pop up off the page. 

    Rubbernecker stamps, rubbernecker stamps and dies, pirate stamps, pirate card, copic markers, handmade card, fun card, lawn fawn palm tree border, waves, sharks, diy cards, card layout ideas, card ideas, wanda guess


    The palm tree die set is three dies so it comes together perfectly! One die does the kraft part, one does the brown part (tree bases) and then the third die does the green tops. LOVE.

    Rubbernecker stamps, rubbernecker stamps and dies, pirate stamps, pirate card, copic markers, handmade card, fun card, lawn fawn palm tree border, waves, sharks, diy cards, card layout ideas, card ideas, wanda guess


    I created a fun little scene for Instagram!

    Rubbernecker stamps, rubbernecker stamps and dies, pirate stamps, pirate card, copic markers, handmade card, fun card, lawn fawn palm tree border, waves, sharks, diy cards, card layout ideas, card ideas, wanda guess


    Rubbernecker stamps, rubbernecker stamps and dies, pirate stamps, pirate card, copic markers, handmade card, fun card, lawn fawn palm tree border, waves, sharks, diy cards, card layout ideas, card ideas, wanda guess


    A few teal gems and that cute sentiment finish off the card!

    Rubbernecker stamps, rubbernecker stamps and dies, pirate stamps, pirate card, copic markers, handmade card, fun card, lawn fawn palm tree border, waves, sharks, diy cards, card layout ideas, card ideas, wanda guess

    That's it for today! Wishing you a fun weekend filled with sunshine and margaritas! (And no pirates!) I'll be back on Monday with a Doodlebug project. Until then, keep it crafty my friends! XOXO

    CLICK HERE TO SHOP AT RUBBERNECKER!

    CLICK HERE or on the graphic below to see the supplies used in today's card (Affiliate Links Used).

    1

  • Pretty Vintage Pinwheels!

    Hi friends! Happy Monday! Did you enjoy a nice weekend? Did you celebrate Easter or Passover? We had a really lovely Easter weekend! We did tons of church activities and rested and enjoyed a rain shower and it was all good! We also binge watched every episode of The Gilded Age on HBO! Gosh, it was soooo good. If you were a fan of Downton Abbey then you have to check out The Gilded Age too! The same writer/creator as DA and this time the story is set in 1882 New York City. Marvelous!! This week is pretty busy here in the studio with lots of good things happening. I hope you have a great week! XO
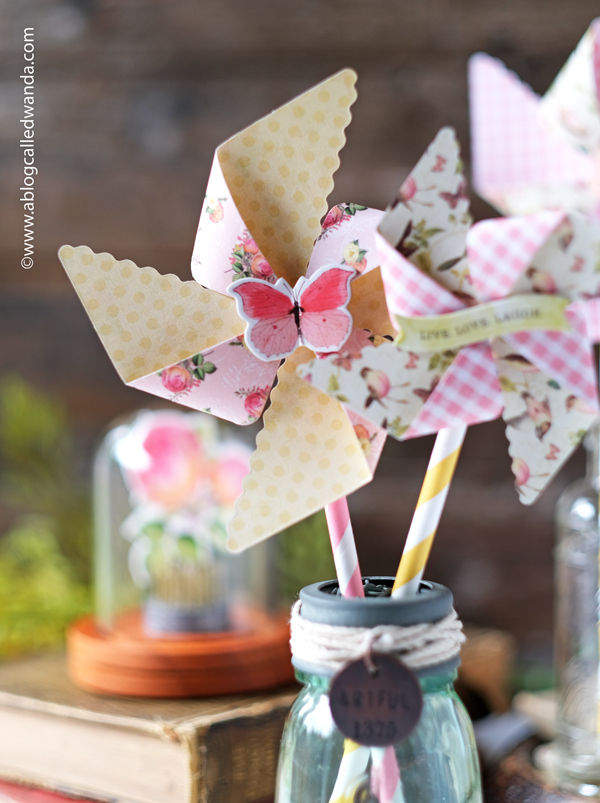
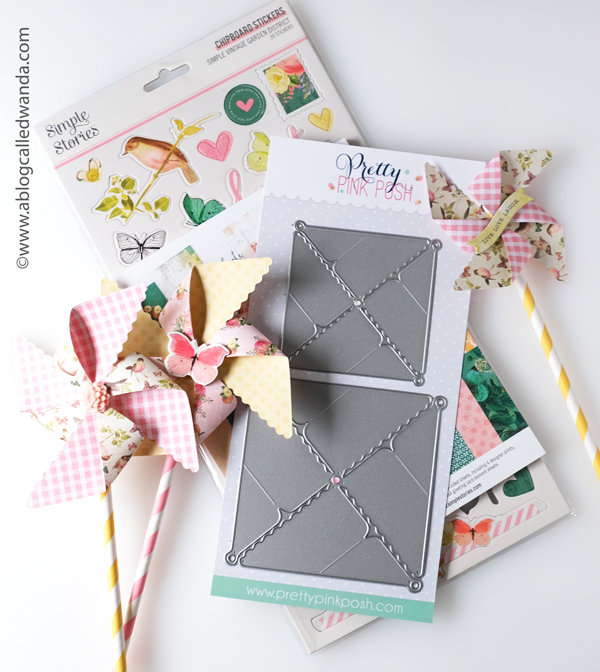
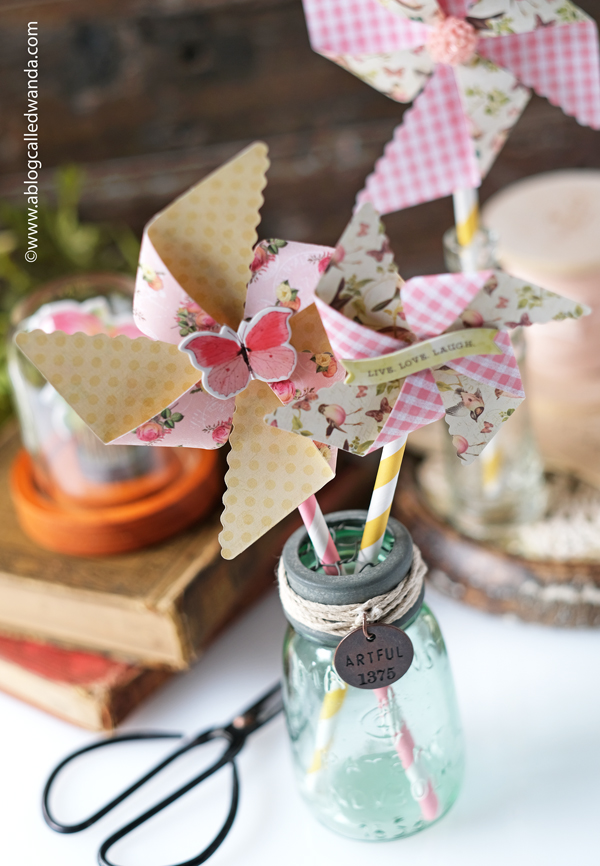
    Today the mail arrived and in the mail was an awesome package from Pretty Pink Posh! And I finally got my set of 3D Pinwheel Dies! Well, you know I ripped open that package and made pinwheels on the spot! Ha! I was so excited to get these pretty dies. I stopped everything! I mean, pinwheels, but with scalloped edges??? Yes please!! Sign. Me. Up. I made some vintage looking pinwheels out of a beautiful paper collection from Simple Stories. These are great for decorations: cupcakes, place settings, packages….even cards! You can use them on anything! Here are my pretty vintage pinwheels!

    pretty pink posh, pretty pink posh pinwheels, pretty pink posh 3d pinwheels, pretty pink posh pinwheel dies, make your own pinwheels, party decorations, simple stories, simple stories vintage garden district, papercrafting, crafting ideas, party decorations, pretty party, bridal shower, wanda guess, a blog called wanda


    I can't even tell you how easy these are to put together! Paulina thought of everything – One die cut, one brad, done! The edge makes it perfectly festive.


    pretty pink posh, pretty pink posh pinwheels, pretty pink posh 3d pinwheels, pretty pink posh pinwheel dies, make your own pinwheels, party decorations, simple stories, simple stories vintage garden district, papercrafting, crafting ideas, party decorations, pretty party, bridal shower, wanda guess, a blog called wanda


    These look the best I think with double sided papers!! SO PRETTY!!! I used my glue gun to attach the pinwheels to some paper straws. So easy to just stick in a cupcake and poof – you have a party! 

    pretty pink posh, pretty pink posh pinwheels, pretty pink posh 3d pinwheels, pretty pink posh pinwheel dies, make your own pinwheels, party decorations, simple stories, simple stories vintage garden district, papercrafting, crafting ideas, party decorations, pretty party, bridal shower, wanda guess, a blog called wanda


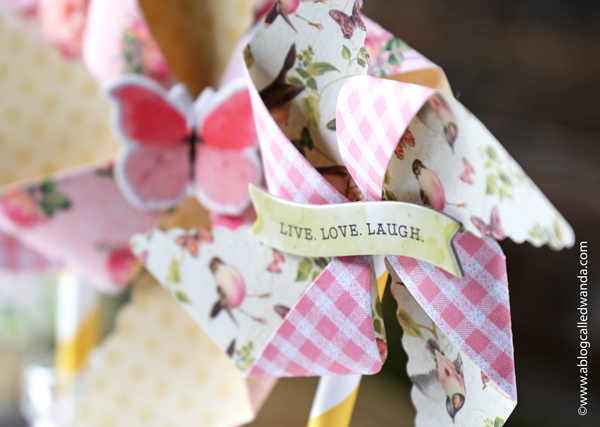
    I used the stickers that match the papers to add embellishments to the centers of some of the pinwheels.

    pretty pink posh, pretty pink posh pinwheels, pretty pink posh 3d pinwheels, pretty pink posh pinwheel dies, make your own pinwheels, party decorations, simple stories, simple stories vintage garden district, papercrafting, crafting ideas, party decorations, pretty party, bridal shower, wanda guess, a blog called wanda


    Supplies for this project!

    pretty pink posh, pretty pink posh pinwheels, pretty pink posh 3d pinwheels, pretty pink posh pinwheel dies, make your own pinwheels, party decorations, simple stories, simple stories vintage garden district, papercrafting, crafting ideas, party decorations, pretty party, bridal shower, wanda guess, a blog called wanda


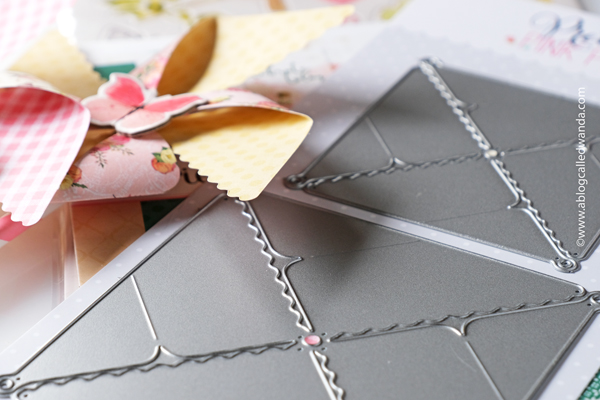
    PPP really did this right – see that small crease/embossed line?? That makes it so your pinwheels are perfect – without trying to curve the paper. Genius.

    pretty pink posh, pretty pink posh pinwheels, pretty pink posh 3d pinwheels, pretty pink posh pinwheel dies, make your own pinwheels, party decorations, simple stories, simple stories vintage garden district, papercrafting, crafting ideas, party decorations, pretty party, bridal shower, wanda guess, a blog called wanda


    pretty pink posh, pretty pink posh pinwheels, pretty pink posh 3d pinwheels, pretty pink posh pinwheel dies, make your own pinwheels, party decorations, simple stories, simple stories vintage garden district, papercrafting, crafting ideas, party decorations, pretty party, bridal shower, wanda guess, a blog called wanda


    pretty pink posh, pretty pink posh pinwheels, pretty pink posh 3d pinwheels, pretty pink posh pinwheel dies, make your own pinwheels, party decorations, simple stories, simple stories vintage garden district, papercrafting, crafting ideas, party decorations, pretty party, bridal shower, wanda guess, a blog called wanda


    pretty pink posh, pretty pink posh pinwheels, pretty pink posh 3d pinwheels, pretty pink posh pinwheel dies, make your own pinwheels, party decorations, simple stories, simple stories vintage garden district, papercrafting, crafting ideas, party decorations, pretty party, bridal shower, wanda guess, a blog called wanda


    pretty pink posh, pretty pink posh pinwheels, pretty pink posh 3d pinwheels, pretty pink posh pinwheel dies, make your own pinwheels, party decorations, simple stories, simple stories vintage garden district, papercrafting, crafting ideas, party decorations, pretty party, bridal shower, wanda guess, a blog called wanda


    I'm definitely in the mood still for pretty Spring colors and butterflies!

    pretty pink posh, pretty pink posh pinwheels, pretty pink posh 3d pinwheels, pretty pink posh pinwheel dies, make your own pinwheels, party decorations, simple stories, simple stories vintage garden district, papercrafting, crafting ideas, party decorations, pretty party, bridal shower, wanda guess, a blog called wanda


    pretty pink posh, pretty pink posh pinwheels, pretty pink posh 3d pinwheels, pretty pink posh pinwheel dies, make your own pinwheels, party decorations, simple stories, simple stories vintage garden district, papercrafting, crafting ideas, party decorations, pretty party, bridal shower, wanda guess, a blog called wanda

    Okay, sweet crafty friends, that's it for today! I also made my next Doodlebug project for next week. Stay tuned. I might make something else in the meantime…. What are you working on?? Stay crafty! XOXO

    CLICK HERE or on the graphic below to see the supply links for today's project! (Affiliate Links Used)

    21


  • Happy Easter 2022!


    HE IS RISEN!

    Happy Easter 2022!

    From our home to yours!


    Blog


  • Good Friday 2022 – Cross Project!

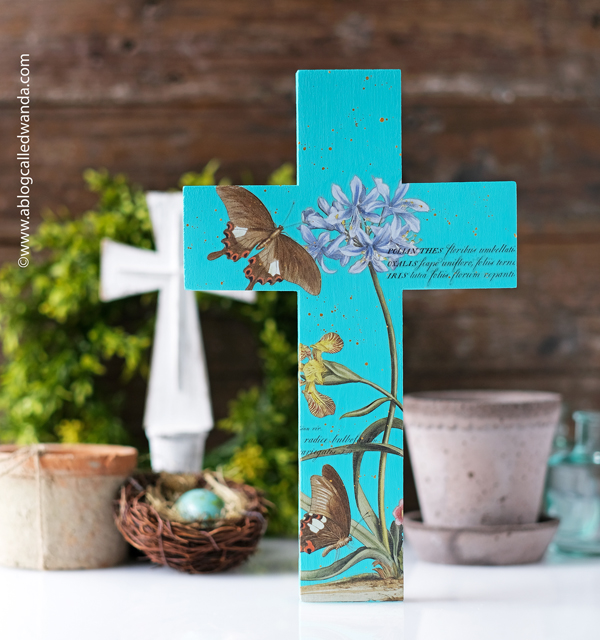
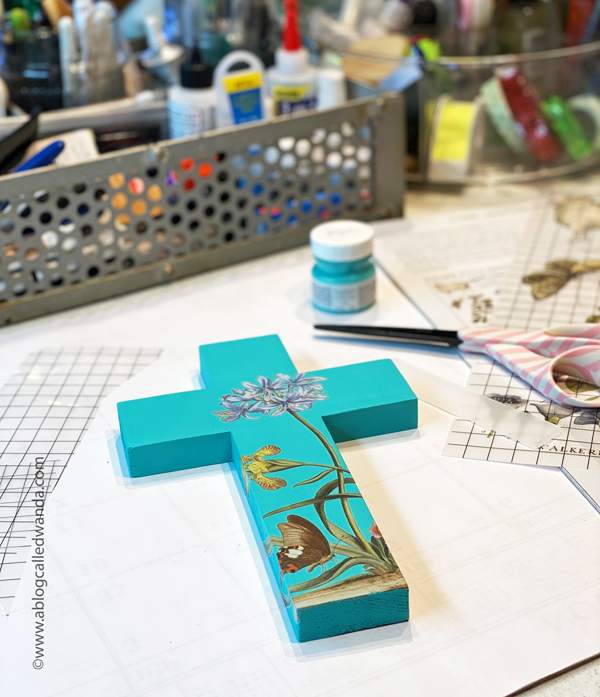
    Hi everyone! Happy GOOD Friday! Easter weekend is here, can you believe it? The year is whizzing on by so fast! It will be Summer in a minute. I love Easter and I'm excited for all the activities and moments this weekend will bring. I have one final Easter project to share with you before the holiday comes and goes. I made this pretty cross to put in our bedroom. I used my favorite color and some pretty flower transfers. It was a quick and easy project and I love how it came out! 

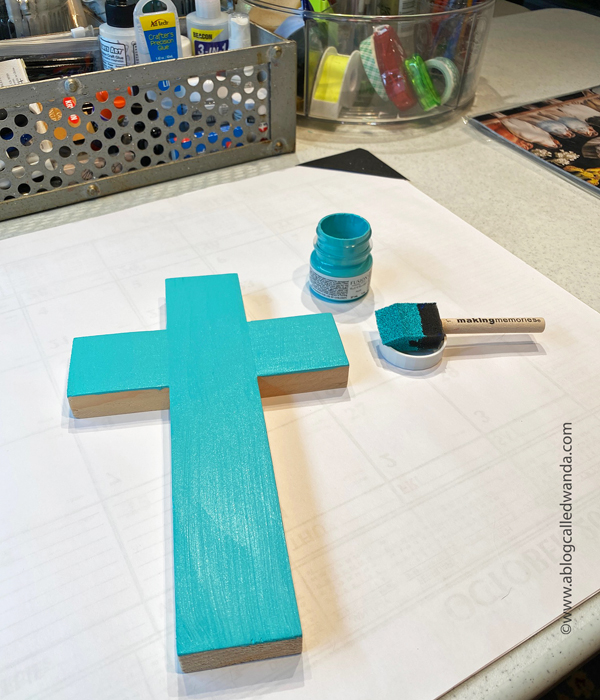
    I started with a wooden cross from the craft store. I painted it (three coats) with Fusion Mineral Paint in the color Azure. The transfers are the Brocante pack from Iron Orchid Designs. I also used my favorite gold paint for the splatters. Just a few supplies and about two hours. I love projects like this!! 

    iron orchid designs, iron orchid transfers, fusion mineral paint, cross, diy cross for easter, easter crafting, iron orchid flowers, iron orchid brocante, crafting


    These transfers are SO incredibly pretty!!! 

    iron orchid designs, iron orchid transfers, fusion mineral paint, cross, diy cross for easter, easter crafting, iron orchid flowers, iron orchid brocante, crafting


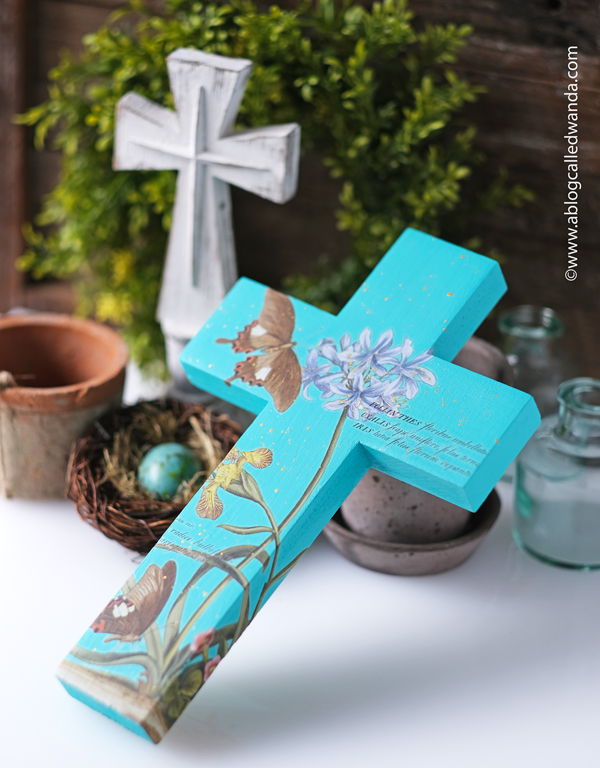
    I wrapped the transfer all the way around to the back of the cross, so it looks pretty from every angle.

    iron orchid designs, iron orchid transfers, fusion mineral paint, cross, diy cross for easter, easter crafting, iron orchid flowers, iron orchid brocante, crafting


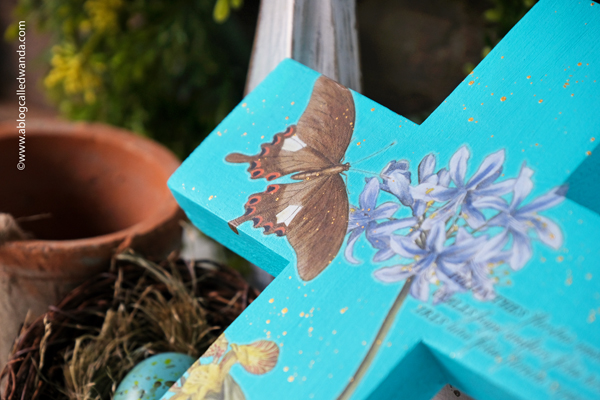
    I layered flowers, and butterflies, and some text too. In this pic you can see my gold splatters shimmering in the light.

    iron orchid designs, iron orchid transfers, fusion mineral paint, cross, diy cross for easter, easter crafting, iron orchid flowers, iron orchid brocante, crafting


    iron orchid designs, iron orchid transfers, fusion mineral paint, cross, diy cross for easter, easter crafting, iron orchid flowers, iron orchid brocante, crafting


    This paint goes on like a dream! I like using a sponge/foam brush instead of bristles – just my preference.

    iron orchid designs, iron orchid transfers, fusion mineral paint, cross, diy cross for easter, easter crafting, iron orchid flowers, iron orchid brocante, crafting


    iron orchid designs, iron orchid transfers, fusion mineral paint, cross, diy cross for easter, easter crafting, iron orchid flowers, iron orchid brocante, crafting


    iron orchid designs, iron orchid transfers, fusion mineral paint, cross, diy cross for easter, easter crafting, iron orchid flowers, iron orchid brocante, crafting

    That's it for today's project! I am sending out lots of love your way and best wishes for a beautiful Easter weekend! He is Risen!! XOXO


  • Doodlebug Easter Carrot Treats!

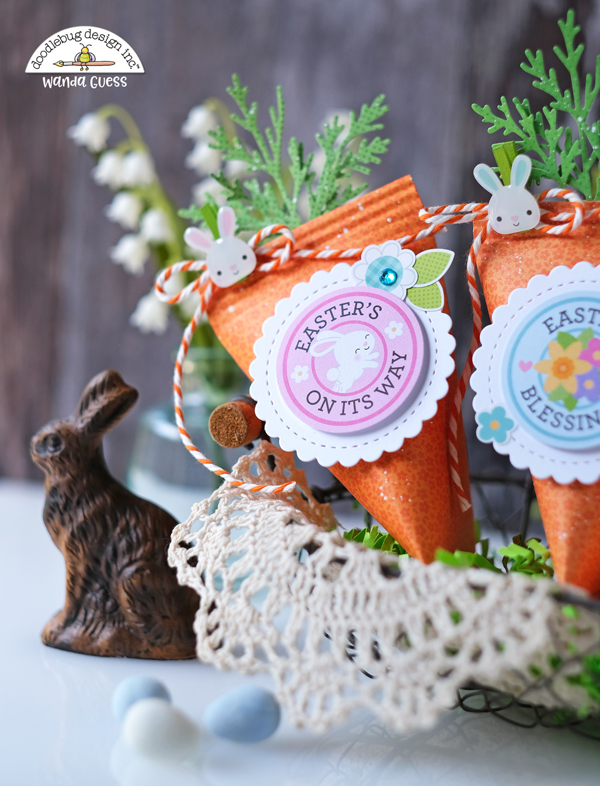
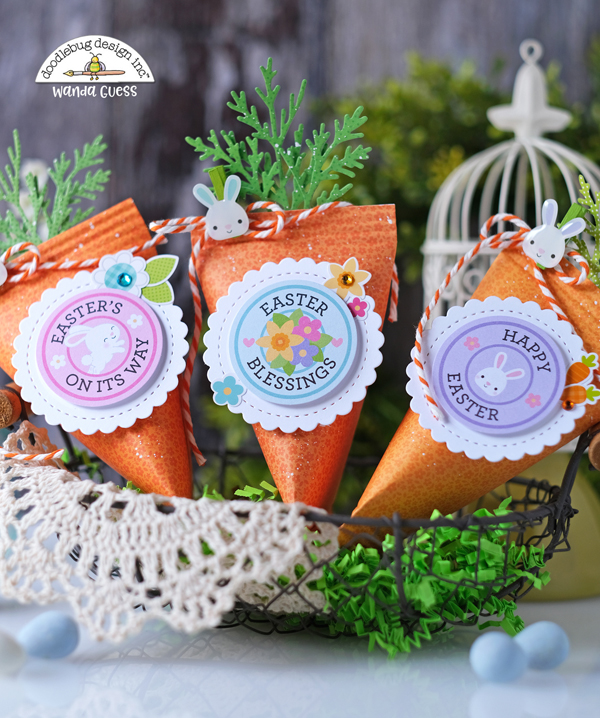
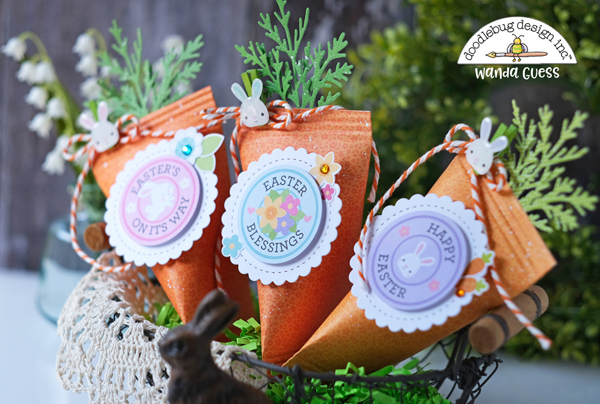
    Hi crafty friends! Happy Monday and Happy Easter Week! I'm up on the Doodlebug Blog and here on my blog today to share some cute Easter carrots I made with the Doodlebug Hippity Hoppity Collection! Just in time for some Spring and Easter crafting. These fun paper carrots would be great at each place setting for your holiday table, or little gifts for friends and co-workers. They are super easy to make and fun too! I filled my treat carrots with chocolate eggs and can't wait to give them away! CLICK HERE for the simple directions to make the shape/template. This would also be a really fun project to do with the kids or grandkids! 

    I used orange and green papers from the Doodlebug Floral Graph 6×6 Paper Pad and the Doodlebug Swiss Dot 6×6 Paper Pad. I used the carrot die cut from The Greetery to make the greens on top. I glued the greens inside before I sealed up the top end of the carrots. (Be sure to tuck the candy inside!)

    Doodlebug Design, Doodlebug paper, Doodlebug Easter, Doodlebug Hippity Hoppity, Easter crafts, Easter carrots treats, Ideas for kids Easter, Easter place settings, Easter crafting, scrapbooking, die cutting, make your own Easter treats, sour cream containers crafts, wanda guess, a blog called wanda, crafting for Easter


    This is such a cheerful project!! 

    Doodlebug Design, Doodlebug paper, Doodlebug Easter, Doodlebug Hippity Hoppity, Easter crafts, Easter carrots treats, Ideas for kids Easter, Easter place settings, Easter crafting, scrapbooking, die cutting, make your own Easter treats, sour cream containers crafts, wanda guess, a blog called wanda, crafting for Easter


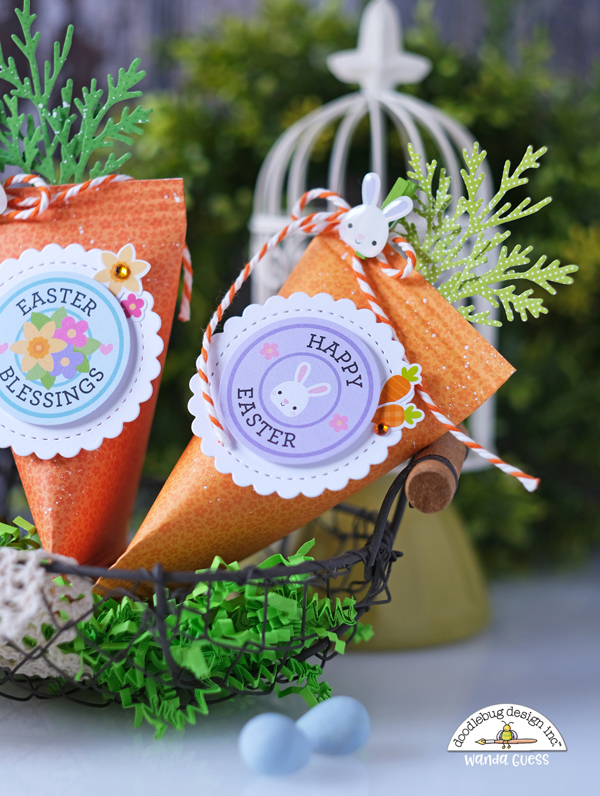
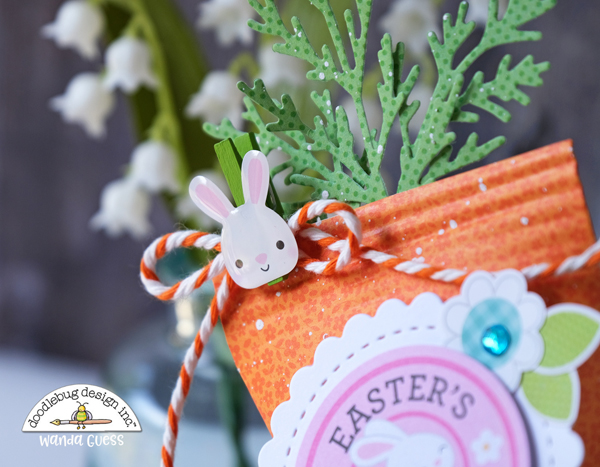
    I used pieces from the Hippity Hoppity Collection Chit Chat pack to decorate the front of the carrots. I used some Chunky Twine, Bunny Sprinkles, and small green clothespins to add at the top for more decorations. I die cut pretty scallop circles in white cardstock to be the base for the messages.

    Doodlebug Design, Doodlebug paper, Doodlebug Easter, Doodlebug Hippity Hoppity, Easter crafts, Easter carrots treats, Ideas for kids Easter, Easter place settings, Easter crafting, scrapbooking, die cutting, make your own Easter treats, sour cream containers crafts, wanda guess, a blog called wanda, crafting for Easter


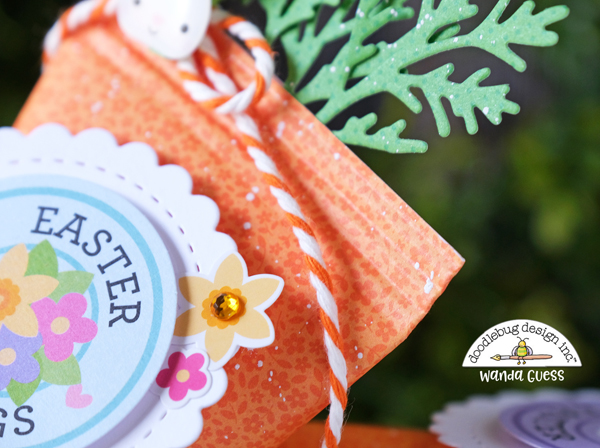
    I added stickers to the front and a few mini jewels too, for a little bit of shine! I used my paper crimper to crimp the top and bottom of the carrots and add a decorative element. Crimping also secures the tape holding them together. I die cut the carrot top pieces from different shades of green polka dot papers! So festive and fun. 

    Doodlebug Design, Doodlebug paper, Doodlebug Easter, Doodlebug Hippity Hoppity, Easter crafts, Easter carrots treats, Ideas for kids Easter, Easter place settings, Easter crafting, scrapbooking, die cutting, make your own Easter treats, sour cream containers crafts, wanda guess, a blog called wanda, crafting for Easter


    Doodlebug Design, Doodlebug paper, Doodlebug Easter, Doodlebug Hippity Hoppity, Easter crafts, Easter carrots treats, Ideas for kids Easter, Easter place settings, Easter crafting, scrapbooking, die cutting, make your own Easter treats, sour cream containers crafts, wanda guess, a blog called wanda, crafting for Easter


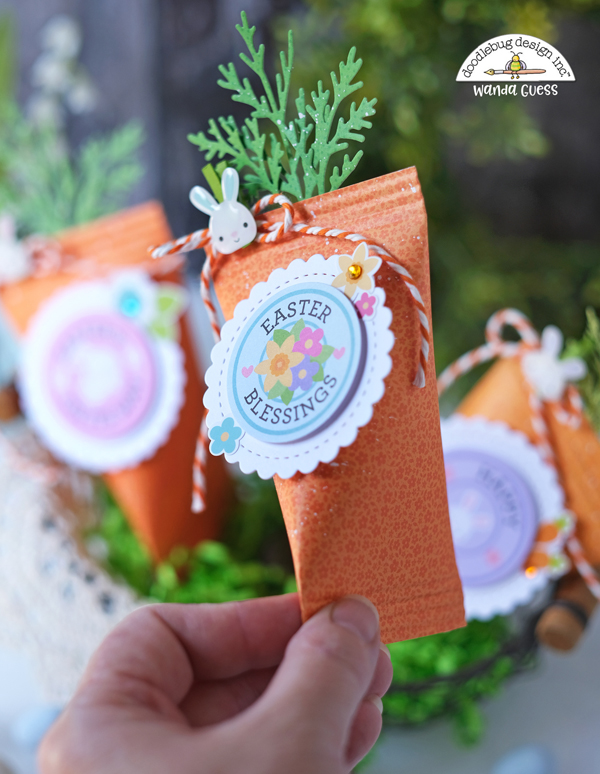
    Here is the carrot in my hand to show you the size and scale. I used the full 6×6 sheet of paper for each one. 


    Doodlebug Design, Doodlebug paper, Doodlebug Easter, Doodlebug Hippity Hoppity, Easter crafts, Easter carrots treats, Ideas for kids Easter, Easter place settings, Easter crafting, scrapbooking, die cutting, make your own Easter treats, sour cream containers crafts, wanda guess, a blog called wanda, crafting for Easter


    Here's a close up of the top portion!

    Doodlebug Design, Doodlebug paper, Doodlebug Easter, Doodlebug Hippity Hoppity, Easter crafts, Easter carrots treats, Ideas for kids Easter, Easter place settings, Easter crafting, scrapbooking, die cutting, make your own Easter treats, sour cream containers crafts, wanda guess, a blog called wanda, crafting for Easter


    Doodlebug Design, Doodlebug paper, Doodlebug Easter, Doodlebug Hippity Hoppity, Easter crafts, Easter carrots treats, Ideas for kids Easter, Easter place settings, Easter crafting, scrapbooking, die cutting, make your own Easter treats, sour cream containers crafts, wanda guess, a blog called wanda, crafting for Easter


    And here's a close up of the paper crimping! My paper crimper is like 25 years old!! I haven't used it in a long time, but I feel like I need to think up some other ideas! I can't believe I found it in my craft room! LOL. 

    Doodlebug Design, Doodlebug paper, Doodlebug Easter, Doodlebug Hippity Hoppity, Easter crafts, Easter carrots treats, Ideas for kids Easter, Easter place settings, Easter crafting, scrapbooking, die cutting, make your own Easter treats, sour cream containers crafts, wanda guess, a blog called wanda, crafting for Easter


    If you don't want to put them at each place on the table, I think they would be cute in a basket with some Easter grass as a cute decoration.

    Doodlebug Design, Doodlebug paper, Doodlebug Easter, Doodlebug Hippity Hoppity, Easter crafts, Easter carrots treats, Ideas for kids Easter, Easter place settings, Easter crafting, scrapbooking, die cutting, make your own Easter treats, sour cream containers crafts, wanda guess, a blog called wanda, crafting for Easter

    That's it for today! Have a super happy and wonderful Easter week! I looooove Easter week and can't wait for all the activities at church this week/weekend. I will see you back here real soon. Until then, happy crafting! XOXO

    CLICK HERE or on the graphic below to see the supply list for today's project! (Affiliate Links Used)

    50

  • Simple Stories Full Bloom Card!

    Hey everyone! Happy Friday! Hope you have a great weekend!! I am popping in today to quickly share a card I made with the BEEEEEE-utiful new collection from Simple Stories! It's called Full Bloom and I'm in looooove! I will probably make some more cards later, but I wanted to share this one in case you want to check out the collection for your Spring and Summer cardmaking and scrapbooking! 

    This finished card is an A2 white card base. I layered and mixed and matched elements from the collection, and some of my older supplies…and just a touch of vellum. Because vellum makes everything more pretty! 

    simple stories paper, simple stories full bloom collection, spring, scrapbooking, cards, handmade, diy, scrapbook paper, ideas, card layouts, wanda guess, a blog called wanda

    I'll be back on Monday! CLICK HERE for more information on the supplies for this card! XOXO


  • Sowing Seeds of Kindness cards!

    Hellllloooooooo friends! I'm here today to send you some seeds of kindness!! Remember a couple weeks ago I made the cute market cart card with the Honey Bee Stamps new release?? Well, today, I'm using more goodies from their new release! Yay! My two cards use the brand new Seeds of Kindness Stamp Set and the Seed Packet Die. I love anything that has that vintage seed pack vibe and these stamps are SO pretty! 

    I made two cards that are basically the same – one in yellow and one in red. My finished cards are A2 card bases in woodgrain cardstock. I layered red and yellow cardstock and then a pretty scallop layer. I wrapped each card in vellum and twine before I attached the main elements…

    honey bee stamps, honey bee dies, stamping, die cutting, cards, make your own cards, watercolor, seed packets, seeds of kindness, honey bee new release, card ideas, vintage, mijello watercolors, wanda guess, a blog called wanda


    In this photo you can see all the paper layers…. And isn't that lemon image beautiful!!?? I used my favorite watercolor paints to color the image. I cut out the image with small detail scissors. The kraft part is actually a seed packet!! I made it from kraft cardstock and lined it with gingham. I put the image on the top using foam tape. I gave a little splash of white paint too.

    honey bee stamps, honey bee dies, stamping, die cutting, cards, make your own cards, watercolor, seed packets, seeds of kindness, honey bee new release, card ideas, vintage, mijello watercolors, wanda guess, a blog called wanda


    I put a doily under the vellum wrap and added some little flower and heart embellishments from my stash. I do love the watercolors with these images!! 

    honey bee stamps, honey bee dies, stamping, die cutting, cards, make your own cards, watercolor, seed packets, seeds of kindness, honey bee new release, card ideas, vintage, mijello watercolors, wanda guess, a blog called wanda


    Here is a photo of just the seed packets before I put them onto the cards. They would perfectly fit a small note and/or a gift card. I could see putting one of these on a skewer in a plant to give someone??!! 

    honey bee stamps, honey bee dies, stamping, die cutting, cards, make your own cards, watercolor, seed packets, seeds of kindness, honey bee new release, card ideas, vintage, mijello watercolors, wanda guess, a blog called wanda


    For me, it's all about the small details….

    honey bee stamps, honey bee dies, stamping, die cutting, cards, make your own cards, watercolor, seed packets, seeds of kindness, honey bee new release, card ideas, vintage, mijello watercolors, wanda guess, a blog called wanda

    I have enjoyed sharing my take on the new Honey Bee Stamps release! Please take good care, and have a blessed and happy day today! Love you! XOXO

    CLICK HERE or on the graphic below to see the supplies used in today's cards! (Affiliate Links Used)

    1

  • Easter Tumblers and Tags!

    Hello! Greetings and Salutations crafty friends! My project for today is happy and cheerful for Easter giving! I made a few super cute Easter tags to go onto tumblers as gifts for some of my friends in my Bible Study group. I wanted a simple and sweet little something to bring with me to share a bit of Easter joy. I bought the bright tumblers at Walgreens and added some Easter grass and a few candies inside. Then I made Easter tags to put on each one. I used supplies from Pretty Pink Posh, Lawn Fawn and Simon Says Stamp to make this project. All the supplies are listed at the bottom of my post! Cheers!

    Here are my finished tumblers. I used double sided tape to mount the tags onto the front of them. The letters are their initials so it could be somewhat personalized for each person. A little bit of my favorite gingham paper and that ribbon… That ribbon said 2006 on the package! LOLZ. You never know when you might need something! Ha. 

    easter mugs, easter tumblers, easter tags, easter gifts, easter basket, easter crafts, crafts for kids, easter candy, make your own easter projects, stamping, die cutting, scrapbooking, diy, crafty, pretty pink posh easter wreath, pretty pink posh stamps, lawn fawn oliver's abc, simon says stamp, wanda guess, a blog called wanda


    Here are my finished tags! I die cut the tags from white cardstock and then used separate dies to add that pretty edge at the bottom. I stamped and die cut out the chicks and bunnies… I die cut out the circles and letters to make the initial part.

    easter mugs, easter tumblers, easter tags, easter gifts, easter basket, easter crafts, crafts for kids, easter candy, make your own easter projects, stamping, die cutting, scrapbooking, diy, crafty, pretty pink posh easter wreath, pretty pink posh stamps, lawn fawn oliver's abc, simon says stamp, wanda guess, a blog called wanda


    I colored those adorable critters with Copic Markers and added white gel pen accents to everything. I stamped the pretty sentiment at the bottom of the tags. I used two circles to bring emphasis to the initials.

    easter mugs, easter tumblers, easter tags, easter gifts, easter basket, easter crafts, crafts for kids, easter candy, make your own easter projects, stamping, die cutting, scrapbooking, diy, crafty, pretty pink posh easter wreath, pretty pink posh stamps, lawn fawn oliver's abc, simon says stamp, wanda guess, a blog called wanda


    I added a few little hearts to each one, and the ribbon at the top. It's all very Spring-y and Easter-y!! Makes me smile.

    easter mugs, easter tumblers, easter tags, easter gifts, easter basket, easter crafts, crafts for kids, easter candy, make your own easter projects, stamping, die cutting, scrapbooking, diy, crafty, pretty pink posh easter wreath, pretty pink posh stamps, lawn fawn oliver's abc, simon says stamp, wanda guess, a blog called wanda


    Here are the tumblers with the candy inside – before the tags.

    easter mugs, easter tumblers, easter tags, easter gifts, easter basket, easter crafts, crafts for kids, easter candy, make your own easter projects, stamping, die cutting, scrapbooking, diy, crafty, pretty pink posh easter wreath, pretty pink posh stamps, lawn fawn oliver's abc, simon says stamp, wanda guess, a blog called wanda


    easter mugs, easter tumblers, easter tags, easter gifts, easter basket, easter crafts, crafts for kids, easter candy, make your own easter projects, stamping, die cutting, scrapbooking, diy, crafty, pretty pink posh easter wreath, pretty pink posh stamps, lawn fawn oliver's abc, simon says stamp, wanda guess, a blog called wanda


    easter mugs, easter tumblers, easter tags, easter gifts, easter basket, easter crafts, crafts for kids, easter candy, make your own easter projects, stamping, die cutting, scrapbooking, diy, crafty, pretty pink posh easter wreath, pretty pink posh stamps, lawn fawn oliver's abc, simon says stamp, wanda guess, a blog called wanda


    easter mugs, easter tumblers, easter tags, easter gifts, easter basket, easter crafts, crafts for kids, easter candy, make your own easter projects, stamping, die cutting, scrapbooking, diy, crafty, pretty pink posh easter wreath, pretty pink posh stamps, lawn fawn oliver's abc, simon says stamp, wanda guess, a blog called wanda


    easter mugs, easter tumblers, easter tags, easter gifts, easter basket, easter crafts, crafts for kids, easter candy, make your own easter projects, stamping, die cutting, scrapbooking, diy, crafty, pretty pink posh easter wreath, pretty pink posh stamps, lawn fawn oliver's abc, simon says stamp, wanda guess, a blog called wanda

    I love making gift projects like this! It lets me share my love of crafting with others and I like to make people smile when they get a little unexpected surprise. Have a fantastic day, and I'll see you back here soon with some more craftiness! XOXO

    CLICK HERE or on the graphic below to see the supply list for today's project! (Affiliate Links Used)

    1a

  • Summer Vibes Beach Cards with Rubbernecker!

    Hi friends!! Hope your week is going great so far!! Another warm week here in Sacramento. I love the nice weather but I'm really hoping for a little more rain before Spring ends! We had beautiful rain on Monday! And we've already mowed the lawn a few times! On to today's post… A couple of weeks ago we went to the Scrapbook Expo and it was so fun. Super fun to be out and about at a crafting event! There weren't really too many booths – I think everyone was just coming out of Covid hibernation. I'm hopeful there will be more booths at the shows later in the year… However, the largest booth was the amazing Rubbernecker Stamps booth. It had SO many products and SO many dies and SO many samples! I was inspired to say the least. I got a huge haul of goodies and I was so excited to create! I'll be posting my projects in the coming weeks and I get around to using everything. I have been a fan of Rubbernecker for the entire 28 years I've been stamping. I have lots of their old stamps! Back in the day they used to sell unmounted red rubber at the stamp shows and we would all stand around the bin with a mirror to try to see what the image was!! (Anyone else remember doing that??!) I was very impressed (pun intended) and their FRESH look and fun products. 

    My first two cards with my new supplies have totally rad Summer surfing vibes! These cards were really fun to create. All the different dies are the right scale for perfect mixing and matching. And there are even tiny seagulls! Love. My first card for today was inspired by Miami Beach. Have you ever been there? One of the cool things is that all the lifeguard stations are painted differently with themes and colors. As you walk along the beach it's fun to check them all out. You can see some of them in THIS OLD POST from my blog! 

    The finished card is a 5"x5" square card. I used several of the dies to create a beach day out theme!! Cheerful umbrellas and cool waves…what I'm longing for right now! My card base is white, then some yellow stripes, then a frame for my scene. All the supplies are listed at the bottom of my post. 

    rubbernecker stamps, rubbernecker dies, handmade cards, summer cards, beach cards, handmade card ideas, stamping, make your own cards, beach van die, lifeguard tower, palm trees, how to make your own cards, party invitations, summer vibes, wanda guess, a blog called wanda


    Here's a side view to see all the different layers. My sandy beach, the waves, the lifeguard tower…. So fun. The sentiment is from a discontinued Avery Elle stamp set and I thought it was perfect!

    rubbernecker stamps, rubbernecker dies, handmade cards, summer cards, beach cards, handmade card ideas, stamping, make your own cards, beach van die, lifeguard tower, palm trees, how to make your own cards, party invitations, summer vibes, wanda guess, a blog called wanda


    I die cut out all the pieces from Bazzill Smooth Cardstock. I splattered and inked and used a white gel pen to add all the finishing touches. The background is clouds!! I used a small piece of vellum to make the lifeguard tower window. Those fun seagulls have just a swipe of C1 Copic Marker to add some shading.

    rubbernecker stamps, rubbernecker dies, handmade cards, summer cards, beach cards, handmade card ideas, stamping, make your own cards, beach van die, lifeguard tower, palm trees, how to make your own cards, party invitations, summer vibes, wanda guess, a blog called wanda


    Here's a close up of my paper layers and also the sun dies…

    rubbernecker stamps, rubbernecker dies, handmade cards, summer cards, beach cards, handmade card ideas, stamping, make your own cards, beach van die, lifeguard tower, palm trees, how to make your own cards, party invitations, summer vibes, wanda guess, a blog called wanda


    I love these beach umbrellas… You can make them in so many different color combos!! I love crisp red and white.

    rubbernecker stamps, rubbernecker dies, handmade cards, summer cards, beach cards, handmade card ideas, stamping, make your own cards, beach van die, lifeguard tower, palm trees, how to make your own cards, party invitations, summer vibes, wanda guess, a blog called wanda


    Here's a close up of the Lifeguard Tower dies! The sentiment was heat embossed with white embossing powder onto a black banner. Everything is popped up on the card with foam squares. Don't you wish you were here right now??!! I do!!

    rubbernecker stamps, rubbernecker dies, handmade cards, summer cards, beach cards, handmade card ideas, stamping, make your own cards, beach van die, lifeguard tower, palm trees, how to make your own cards, party invitations, summer vibes, wanda guess, a blog called wanda


    My next card is a sweet surfer beach van! My finished card is an A2 aqua card base. I layered white cardstock and then a white frame to create my scene. My beach van is in my favorite color, and I embellished it with some cute flowers and a surfboard! These are all my favorite Summer colors. I love those palm trees swaying by the sea.

    rubbernecker stamps, rubbernecker dies, handmade cards, summer cards, beach cards, handmade card ideas, stamping, make your own cards, beach van die, lifeguard tower, palm trees, how to make your own cards, party invitations, summer vibes, wanda guess, a blog called wanda


    There are a lot of pieces to making the van, and there is a guide sheet graphic on their website to show you where each piece goes. LOVE it when companies do that. Also, on unique thing about Rubbernecker is that their die sets are all on one sheet of metal….so you never lose a tiny die!!!! (I lose them all the time!) 

    rubbernecker stamps, rubbernecker dies, handmade cards, summer cards, beach cards, handmade card ideas, stamping, make your own cards, beach van die, lifeguard tower, palm trees, how to make your own cards, party invitations, summer vibes, wanda guess, a blog called wanda


    I used two shades of green cardstock to make the palm tree leaves and layered them all together.The van even has little pieces for the mirror and the air vents. SO detailed and realistic. I die cut a little surfboard and decorated it too!

    rubbernecker stamps, rubbernecker dies, handmade cards, summer cards, beach cards, handmade card ideas, stamping, make your own cards, beach van die, lifeguard tower, palm trees, how to make your own cards, party invitations, summer vibes, wanda guess, a blog called wanda


    rubbernecker stamps, rubbernecker dies, handmade cards, summer cards, beach cards, handmade card ideas, stamping, make your own cards, beach van die, lifeguard tower, palm trees, how to make your own cards, party invitations, summer vibes, wanda guess, a blog called wanda


    Let's go surfing!! 

    rubbernecker stamps, rubbernecker dies, handmade cards, summer cards, beach cards, handmade card ideas, stamping, make your own cards, beach van die, lifeguard tower, palm trees, how to make your own cards, party invitations, summer vibes, wanda guess, a blog called wanda


    The sentiment is from a cute set from Pretty Pink Posh! I die cut a circle frame out of the top layer and popped it up on foam tape, It's hard to see, but I also stenciled some pretty puffy clouds at the top of the base layer. 

    rubbernecker stamps, rubbernecker dies, handmade cards, summer cards, beach cards, handmade card ideas, stamping, make your own cards, beach van die, lifeguard tower, palm trees, how to make your own cards, party invitations, summer vibes, wanda guess, a blog called wanda


    Here's a pic of my favorite stamp set I got!!! I absolutely go crazy for anything crafty themed!!!

    rubbernecker stamps, rubbernecker dies, handmade cards, summer cards, beach cards, handmade card ideas, stamping, make your own cards, beach van die, lifeguard tower, palm trees, how to make your own cards, party invitations, summer vibes, wanda guess, a blog called wanda