Tag: heat emboss

  • Hero Arts Summer Party Suite!

    Hellllooooooo! I hope this day finds you happy and smiling! What are you up to this week? I don't really have a lot going on right now! It's been a quite couple of weeks which is fine with me. It's super hot here (over 100 every day) and that totally zaps my energy. I'm thoroughly enjoying spending lots of time with my sweet kitten. He makes me so happy and we have fun together all day in the studio. He alternates between Mach Five energy, and completely asleep! LOL. There is no in between with him! He is developing his little personality and I love him lots. He's a happy guy and very loving – follows me from room to room. I kind of feel bad because even if he is sound asleep, if I leave the room, he will wake up and come see me! It's so cute. He is already four months old! I don't want him to grow up!!! How come they grow so fast!!?? 

    Today I'm sharing a neat project — a pretty party invitation suite. An invitation, a thank you card, and a favor box! All made with matching beautiful florals from Hero Arts! A few months ago Hero Arts commissioned me to make this set of projects for them to use in some advertising, etc and I was so happy for the assignment! I used some wood stamps, some clear stamps and some dies….all coordinating florals from the Hero Arts collections. This set of projects would be great for a Summer Tea Party, a Bridal Shower, or a Birthday Party. So feminine and classic. I hope you like it!  

    Hero Arts Summer Florals party invitation with peonies and watercolors


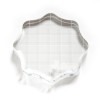
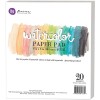
    The favor box is from the big box crafting store and was inexpensive to buy. I like starting with a blank kraft canvas and then adding color! I coordinated everything with the beautiful Hero Arts Liquid Watercolors and bright pink and crisp white. For the box I stamped and die cut out the large peony and some leaves. I wrapped paper and vellum around the box and "sealed it" with the florals. You could put a small cake inside, or a present, or a note!

    Hero Arts peonies and liquid watercolors. party favor


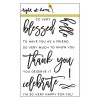
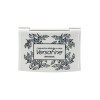
    The thank you note is a flat card easy to mail and easy to write a note on the front. It coordinates with the invitation to carry the theme even after the party is over. I think sending thank you notes is such a lost art – and means so much to the recipient! The Thank You sentiment is heat embossed with Hero Arts Gold Embossing Powder. 

    Hero Arts stamps and dies. Peony watercolor


    I used gold embossing on all three projects – this really ties it all together nicely! Gold embossing is so classy and timeless. Everyone appreciates this look!

    Hero Arts liquid watercolors


    Here is a close up of the invite! The Hero Arts Invitation stamp set allows you to choose which things you want on your invite…. Date, time, place, etc. Totally customizable and in a pretty font. I use this set a lot actually. 

    peonies rubber stamps. invitation and gold embossing

    Do you enjoy making your own invitations? I love to do that! I believe that the invitation sets the tone and mood for the entire event. Don't you just get so excited when you get a gorgeous invitation in the mail? You just already know someone put a lot of care into the party! The ones I've shared today can be made in any color palette to match your theme or party colors. Super easy to mass produce and no extra postage needed. I hope I've inspired you to plan a party! CLICK HERE to shop at Hero Arts! Have a wonderful week, until we meet again! XOXO

  • #blessed

    Hi crafty and creative friends! Happy Friday!!! Man, I had a great week and that's the reason behind the title of this blog post! I am feeling so very very blessed today. Sitting in my studio counting all of the blessings from a wonderful week and feeling lucky and grateful. This week had loads of fun things in it! Monday  night (Halloween) we went over to our friends' beautiful home and helped pass out candy to a bazillion trick or treaters! It was a cool, crisp evening with fun and fellowship! Tuesday night I took my first beginner crochet class at the local yarn store here in Sacramento. I thoroughly enjoyed myself. I met some nice ladies in class, and we had a good time laughing at ourselves and learning something new. I have wanted to (re) learn how to crochet for a long time and I'm very happy to have a new hobby! (Because I need another hobby and more craft supplies, lol) I have two more crochet classes and then we'll see if I'm ready for the advanced series. Wednesday night my dear and sweet friend Jane took me out for a fabulous birthday celebration. She spoiled me with presents, cocktails, a yummy dinner, and her wonderful company.

    Yesterday was my birthday!! Yay!! I love a birthday, whether it's mine or someone else's. Heck, let's celebrate life, right? My husband and I enjoyed a beautiful day together in San Francisco and we went some places that I've had on 'my list' to go to. Some awesome antique stores, the ginormous new Apple Flagship store, coffee (of course) and a nice delicious pizza for dinner. I am BLESSED beyond measure and blessed far more than I deserve. Thank you GOD for my friends and family, and my many blessings! AMEN!! And, I still have some more fun things planned in the next week with more friends. YAY again! The best present for me is time with my peeps. I got so many beautiful cards in the mail, and text greetings… Oh, and nothing like Facebook on your birthday to make you feel like a celebrity!! Thank you to everyone who sent me love yesterday!! XOXO

    Today I sat down in the studio in this very blessed frame of mind. What to create?? Hmmmmmm. So I said to myself "use the stuff in your 'new' basket." Do you have a 'new' basket in your studio? It's that basket on my work table where I put fabulous new stamps that I want to use right away. But, sometimes life gets in the way and right away turns into a long time… Am I the only one this happens to? The card I'm sharing today was made with three stamp sets that were in my new basket! YIPPEEEEE! They just all worked together. I made a cool watercolor card in a new style for me. I often talk myself out of making artistic looking cards….convince myself I can't do it. Well, I did it! I'm happy with the way the card came out and anxious to try my hand at some more watercoloring in this style. 

    Penny Black Muse Cling Stamp. Distress Inks. Rubbernecker Poppies stamps. Card by Wanda Guess


    I started with a watercolor pad and inked the Muse Cling Stamp in Versafine Onyx Black ink. This is the girl stamp, and it's a BIG stamp. For reference, my finished card is six inches by 4.5 inches. She is a great size for cards and mixed media projects both. Her shirt is plain so you can add whatever you want inside of it. Paper piecing, other stamps, plain color, anything really! I used the Field of Poppies stamps from Rubbernecker and stamped them inside her shirt. This stamp set is in two pieces – the color part and the outline part. LOVE. I lined them up using my stamp positioner. (all supplies at the bottom of my post). Rubbernecker has a whole serious of these gorgeous watercolor florals – CLICK HERE to see more. They are super fun and easy to stamp and the results are awesome!! Makes you look like a professional painter! 


    Penny Black Muse Cling Stamp. Distress Inks. Rubbernecker Poppies stamps. Card by Wanda Guess


    The sentiment is from a beautiful set from Right at Home Stamps! Blessed – the perfect word for this card! I heat embossed it onto a strip of vellum and then layered it over my final watercolor piece. Gives just a hint of shimmer to the card. 

    Right At Home Script Greetings stamp set. Card by Wanda Guess


    Here is my work in progress! I used two shades of distress ink to stamp the color part of the poppies. Isn't this cool?? 

    Penny Black Muse Cling Stamp. Distress Inks. Rubbernecker Poppies stamps. Card by Wanda Guess


    I used Distress Inks to color my image. Just used plain clear water and some of my old paint brushes. I use my clear blocks as watercolor palettes! Easy to clean up too. I used the Distress Sprayer to soften the edges of the poppies image. I inked the Distress inks right onto the stamp and then spritzed it with the sprayer before stamping onto the watercolor paper. 

    Using Distress Inks to watercolor. Project by Wanda Guess


    I used Weathered Wood Distress Ink for her blouse background and her tiny bit of eye shadow! The pink cheecks are Picked Raspberry ink. Her skin is a combination of Antique Linen and Vintage Photo Distress Inks. The background is a mixture of Broken China and Tumbled Glass Distress Inks. Thes are such beautiful shades! Her eyes are green like mine!

    Distress Ink


    Penny Black Muse Cling Stamp. Distress Inks. Rubbernecker Poppies stamps. Card by Wanda Guess


    Since this is going to be a Thank You card, I used more of the stamps from the Right at Home Script Greetings stamp set to stamp the inside! I again used the poppies stamps to add an accent in the corner. 

    Right at Home Script Greetings stamp set. Thank You card by Wanda Guess


    My card today was inspired by Jill Foster and her amaaaazzzzzzing work for Penny Black Stamps. She is just about as talented as can be, and also a really beautiful human being. CLICK HERE to see the post that inspired me today! 

    Penny Black Muse Cling Stamp. Distress Inks. Rubbernecker Poppies stamps. Card by Wanda Guess


    For my birthday I got an iPhone case and some Starbucks Merchandise (holiday) and these gorgeous roses from my husband!! Thank you honey!! 

    Red rose bouquet!


    Here is my tiny crochet stash. The bits in aqua are what I finished in class – not too bad. I bought the other two skeins of yarn in hopes that I can make a couple of pretty scarves as I get better. Yarn these days is about a million times prettier than when I learned to crochet the last time….MANY years ago!! 

    Learn to crochet!
    1


    SUPPLIES FOR TODAY'S CARD!

    Thanks for clicking and supporting my business!