Tag: halloween

  • I’m batty about Halloween! Fun project with Tim Holtz supplies!

    Hello crafty friends! Happy Monday! Boo! Did I scare you? I'm sharing a Halloween card finally! Did you have a nice weekend? It was 85 degrees here yesterday! And, lots of my friends are posting photos on Facebook of SNOW! Sheesh. I wish it would cool down here and warm up there. October is a crazy month. I had a really nice weekend. I stamped all day on Saturday (for my post on Thursday). Then on Sunday we went for coffee and a nice drive and out to dinner. A perfect weekend. My husband is working really hard on a work project so I tried to get him out of the house for a bit and get his mind off things. This week has some fun things coming… It's the Stamp/Scrap Expo here in Sacramento and I have a friend coming from Canada and one from San Diego and some from the Bay! A full weekend of girls and crafting awaits me! But first things first…today's card!

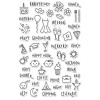
    This card was inspired by two things: I HAD to make a Halloween card and I just got this awesome new Diamond Shifter Stencil in the mail and wanted to ink it up! So I started by inking the diamond background….then I rummaged up some cool bat stamps….and it all kind of came together. I'm sure you'll recognize the supplies are all from Tim Holtz. He really knows how to do Halloween right. Vintage and cool. 

    Tim Holtz Halloween Card. Distress Inks. Diamond Shifter Stencil. Blueprints stamps.


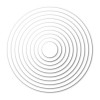
    The project started with stenciling the diamond background using the new Diamond Shifter Stencil. It's SO EASY to stencil this!! I used olive and gray for a kind of spooky color palette. You simply stencil the first color (for me olive) and then shift the stencil over and stencil the second color (for me the gray). Seriously so simple and such a great result! To complete the background I added some text stamps and some black and grey ink splatters. I set that aside to make everything else. The finished card is a green A2 card base. 

    Tim Holtz Mini Halloween Stamp Set. Diamond Stencil. Halloween Tokens.


    I stamped the bats (small and large) in black ink and then cut them out by hand. I colored them with grey, black and purple Distress Inks and a paint brush with just a bit of water. Kind of let it all flow together. I think it's more spooky with the purple in there. 

    Tim Holtz Halloween Blueprints. Card, distress inks, stencils..


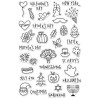
    I stamped the Happy Halloween stamp onto some cardstock and then really inked the edges with Vintage Photo Distress Ink. Then I splattered clean water over it and let that dry. To make the words blurry I used a paint brush and clean water and gently went over the letters. I think it makes it look old or something. And that font is AWESOME. I also inked the edges of my diamond panel with the same Vintage Photo Ink. I added a jump ring and a Tim Holtz 31 Halloween Token charm. Cool. 

    Tim Holtz Halloween Tokens. Stamps, distress inks, bats, card


    I dyed my own crinkle ribbon using distress inks and water. I haven't done this technique in a while and I always love the results from this! Never comes out the same way twice. 

    Tim Holtz crinkle ribbon and distress inks


    When I attached the bats to the card I used a bit of foam tape just in the middle. Then I used my fingers to gently curve the wings upwards to look like they're flying right at ya! 

    Tim Holtz blueprints stamps. Halloween Card. Diamond stencil.


    Tim Holtz Halloween


    Mr. Lucky was VERY interested in this project…until he fell asleep! LOL! He just turned seven months old the other day. Can you believe it? He is growing so fast and has been such a wonderful studio companion. He keeps me company and is the sweetest thing ever. 

    Studio Cats

    Okay, so I need to try to make something else for Halloween but we're running out of time! YEEKS! Are you done with Halloween cards? Have you started? LOL. I got behind this year because we were on vacation. Oh well, it was worth it! I have some fun things to share on Thursday so I hope to see you then. Have a fabulous week and thanks for stopping by today! XOXO

  • Happy Halloween Kitty!

    Hi friends! Dang, just a few more days until Halloween! I'm trying to get some more cards made really quickly! I bought some cute stamp sets at the Scrapbook Expo and there was one in particular I wanted to use right away. It's called Purrfect Halloween and has the cutest cat and accessories that go with her! I think this is a discontinued older stamp set, because I got it really cheap. I found one on Ebay and it's in my supply links below. It's from Close To My Heart! I love their stamp sets! I had this awesome plaid paper on my desk and I just thought these two crafty things were a match made in heaven! Are you done with your Halloween cards yet? I think is probably going to be my last one for this year. Happy Saturday – hope you have a wonderful weekend! 

    Happy Halloween Card with Distress Inks coloring


    I started with an A2 card base made from orange Cardstock. I layered the Carta Bella plaid paper on top of the orange and then a layer of white that I die cut with a stitched rectangle die. I stamped directly onto the paper, masking the hat to the top of her head. The mask was stamped on a different piece of paper and then cut out with detail scissors. I stamped the sentiment onto a banner die. I used Archival Ink because I knew I was going to use water with my coloring. 

    Close To My Heart Purrfect Halloween stamp set


    To do the coloring, I used a water brush and mini Distress Ink Pads in Halloween colors. I went slightly out of the lines for a more casual look. I added pops of Stickles to the mask, the bats and the hat for a little sparkle. 

    Carta Bella Hello Fall Plaid Paper


    I also used watercolor and distress inks to add orange to the sentiment banner. In this photo you can better see the coloring. It wasn't fussy at all! Super fast. 

    Halloween Card


    At the top, I used some pretty twine cord and a cute Halloween brad! EEEEEK! 

    Distress Ink Watercoloring

    Thanks for coming by today! Have a super fabulous weekend! I'll see you soon my friends! XOXO

  • PTI Throwback Thursday – Featuring Stenciled Alphabet Dies!

    Hi friends! Just a few more days until Halloween…and only a week until my birthday! YAY for Fall! I'm having a great week – lots going on this time of year – and I love it all. We went to this cool thing Tuesday night called Pumpkin Nights and it was so fun and festive. Got us way in the mood for Fall things! (Like I needed to be put in the mood! Ha) Check it out here! It's vest season in my world. I looove to wear vests – it's kind of a weird thing about me. I just had the hubs bring them down from the attic. I am always hot, so in the winter I never wear a coat! I love to accessorize with a vest instead. I call it A Vestivus for the rest of us! Plaid, buffalo check, floral, strips, houndstooth…. Today I'm doing some private photography lessons for one of my favorite local crafty girls and I can't wait to hang out with her. What are you up to? Are you pumpkin carving or costume planning yet?? 

    Today is Throwback Thursday for Papertrey Ink! Yes! Today the design team is featuring the older die set called Stenciled Alphabet Blocks. We like to bust out some of our favorite older supplies and make them new again. I've combined the blocks dies along with two sets released this year to make a fun Fall banner card. These Alphabet Blocks dies are perfect for making banners. You can spell out the season, or a person's name, or anything! I used a Fall color palette and had fun paper piecing with 6×6 paper pads. 

    Papertrey Ink Autumn Scarecrow. Wanda Guess. PTI Design Team. Autumn card.


    My card base is an A2 size made from kraft paper. Then I layered canyon clay plaid on top, and then a vintage cream panel. I die cut the FALL letters from kraft cardstock to match the card base. Kind of ties it all together. I gently inked around the edges of the cream panel with Antique Linen Ink and a sponge. I stamped the sentiment in black in the upper left corner to leave room for the banner. 

    PTI Stenciled Alphabet Blocks Dies


    The banner pieces were attached to the card using foam squares. After I had them attached, I used clear glue to affix the twine across the top of them. I tied a bow on one end and tucked the other end underneath Mr. Scarecrow's arm.

    Paper Piecing project. Fall Card Echo Park and Carta Bella paper


    I had a lot of fun paper piecing this one! I just used tons of patterns and colors. I colored his face and arms, and the pumpkins and leaves, with Copic Markers (E000, RV10, YR12, YR16, YR18, Y15 and E17) Isn't he the cutest? 

    Fall card


    I added a couple of leaves to the banner and the card. They are so tiny and cute!

    Warm Autumn Wishes Card. Fall 2017 Papertrey Ink


    1

    Thank you so so so much for stopping by today, and for your continued support of me, my blog, and my business. it's a time of year to be grateful and I am grateful for all of you, and the kindness you show me. I hope you have a wonderful day! XOXO

  • Flying by to say BOO!

    Greetings from my studio on this lovely Sunday afternoon! Got some nice tunes on (Basia Radio on Pandora) and Buddy is asleep at my feet. Getting caught up on blogging, photos and generally organizing today. I had colored some stamped images at the retreat I went to last weekend, and wanted to make them into a card today – so that's what I have to share! At the end of my post are some photos from our weekend too. Mark was gone last week for work and I missed him so much! We didn't waste any time getting out to do some fun things and get caught up with each other. The weather is amazing and it finally rained and cleared the air from all the fires. Life is good! What are you doing lately? 

    My card for today was made using the ADORABLE stamp set from Waffle Flower called Boo! It's from Big Bear & Bird, one of my favorite artists that designs for Waffle Flower. LOVE. Smitten. I had colored the bear and the bats last weekend and they've been sitting on my desk ever since. (Or on the floor after a cute cat wiped them off with his tail). Today was the day to make a card! I went with a clean and simple card layout and some Halloween colors….

    Waffle Flower Boo stamp set. Card by Wanda Guess. Big Bear & Bird


    Like, seriously, how adorbs is that flying bear??? So cute, and I see that he has his trick or treat bucket ready! Kind of reminds me of me! LOL. Same body shape!! I made some grey poofy clouds using the Mama Elephant Landscape Trio Dies (my go-to clouds) for him to fly in. I made a big bright yellow moon. The card base is white, in A2 size. I used a bit of patterned paper for the bottom because I wanted some orange in the card. 

    Halloween card. Waffle Flower. Copic Coloring


    The bear and bats were colored with Copic Markers and attached to the card with foam squares. I used the matching dies for the stamp set to get a perfect cut. 

    Mama Elephant Landscape Trio dies clouds


    Just a few sparkly rhinestones to finish it off – to look like he's flying through the stars! 

    Halloween Card Wanda Guess


    Big Bear & Bird stamps Waffle Flower


    On Saturday morning we went to the Open House at the UC Davis Veterinary School Raptor Center and saw the gorgeous animals. This is a rescue facility that houses and cares for injured raptors. SO cool. Owls, Eagles, Osprey, and others. These creatures are so amazing and we got to be about 12 inches away from them! It's free to visit here and if you're local I definitely recommend it. The kids would love it too. CLICK HERE for their website.  

    This guy is named Forrest and he's huge – about two feet tall. One thing I learned is that owls cannot move their eyes…that is why they can, and do, turn their heads all around on a swivel. Also, they can, at will, change the size of their pupils!! Isn't that amazing??? I was geeking out, because I love owls. 

    Great Horned Owl - California Raptor Center


    This little guy is named Wes! My first boyfriend was named Wes! LOL. He is tiny, but he is fully grown. I wonder if he hates it that everyone calls him cute?? But he totally is cute. He's probably thinking "I'm a grown man!" Hahaha. 

    California Raptor Center


    Sacramento got a Starbucks Reserve Bar recently and Mark and I went to check it out. WOWZA! It's like a Starbucks, only fancy. It's huge inside with lots of places to sit and hang out. They have Nitro coffee, Siphon coffee, Pour over, and all kinds of cool espresso drinks. We sat there for a couple of hours and the baristas talked to us about all the different drinks and the types of coffees. Really a neat experience. We will be back for sure! 

    Starbucks Reserve Bar Sacramento

    That's what I got today! I hope you've had a great weekend! XOXOXO I'll be back on Thursday!

  • Kicking Off World Card Making Day (week) 2017 with a Scrapbook.com Giveaway and a fun Fall project!

    UPDATED 10-9-17: Winners are Sally K, LC, and Vicki M! Check your emails ladies for your gift certificate codes! XO

    Hi everyone! Sorry to have been absent for a little bit. I really wasn't feeling that great last week and had way too much on my plate. I've been busy behind the scenes though, getting all kinds of fun things ready for the next couple of weeks. This is my first creative post of October! Happy October! And, this coming Saturday is World Card Making Day! So, the kind folks at Scrapbook.com invited me and some other card makers to share projects with you today to kick off the fun week before WCMD 2017…. They also gave us some blog prizes to give out! YAHOOO! I have three $25.00 Scrapbook.com gift certificates to award to three lucky winners! I'll put all the prize details at the bottom of this post. Are you going to be doing something special with your crafty friends to celebrate the day? I'm not sure what I'm doing yet! There is always so much going on online for this fun day!! Scrapbook.com will be having a sale and free gifts with purchase on WCMD too!! 

    Since it is my first post of October, I thought it would be fun to post a not-so-spooky Halloween card made with some of my favorite Tim Holtz supplies – stamps, inks, embossing folders, papers, etc. I love vintage Halloween, and that's the look I was after with this card. It was fun to create and I am loving the vintage vibe created with the distressing and embossing. These Pumpkinhead stamps are going to stay in my Halloween crafting bin forever! LOVE. 

    Tim Holtz Pumpkin Stamps. Pumpkinhead. Vintage Halloween Card. Distress Inks


    See what I mean about these pumpkins? Aren't the perfect?! The center panel is cream cardstock. I started by stamping the center pumpkin directly onto the cardstock. They I masked it off and stamped the other two next to it using my stamp-a-majig tool. That gave me the placement and the bottom 'ground' part of the images. Next I stamped all three pumpkins a second time onto cream cardstock and colored them and cut them out with scissors. My card base is an A2 size made from Kraft cardstock. My layers are orange cardstock (embossed with the Tim Holtz Rosettes Folder and inked) and then Tim Holtz Halloween Paper Stash paper. 

    Tim Holtz Halloween Pumpkins card. Distress Ink. Rosettes embossing folder


    When I attached the pumpkins to the card I used foam tape. For the center one, to make it look rounded, I added a second layer of foam tape under just the center part of it. This makes it 'bump' out! The sentiment was stamped in the same black archival ink as the pumpkins. 

    Halloween Card using Tim Holtz Supplies


    I used Squeezed Lemonade, Vintage Photo, and Carved Pumpkin Distress Inks to color the pumpkins. I used small sponge daubers to add the color. First up I used the Vintage Photo to do the stems. For the pumpkins I inked Squeezed Lemonade over most of the image. Then I used Carved Pumpkin to go around the edges. Keep blending until you get the result that you like! The yellow in the center makes it look like they're glowing! 

    Distress Ink blending


    After I embossed the orange cardstock, I used the large size sponge dauber and Vintage Photo Ink to gently brush ink over the raised portions. This shows the design better. I also used the larger sponge dauber to ink around the edges of the cream card layer. I used a water brush to splatter Vintage Photo ink onto that layer also. I LOOOOOVE Rock Candy Distress Glitter so I used that to give the pumpkins a bit of retro sparkle! 

    Halloween 2017. World Card Making Day


    This little spider came in on his twine web! I felt like the card need a little something there at the top – and this Halloween Ideaology Adornment was perfect! EEEEK! 

    1


    Halloween retro vintage card

    Thank you for joining me today as we kick off World Card Making Day (week) 2017! So happy to share a project with you and I'm delighted to be able to offer you some cool prizes today! 

    PRIZE ALERT PRIZE ALERT PRIZE ALERT

    Here's the details for the prizes! To enter, please leave a comment here on this post telling me your favorite Fall Crafting tradition OR what you have planned for WCMD 2017!! You have until Next Sunday, October 8th at 6pm EST to leave your comment. I will randomly select THREE LUCKY WINNERS to receive a $25.00 Gift Certificate to the Scrapbook.com store. I'll email the winners with the code for your certificate! I can't wait to read your comments on this one. 

  • More Papertrey Ink August 2017 Release: Introducing Halloween Hugs Kit & Wicked Elixir

    Hi crafty friends! Welcome back to day three of my posts for the August Papertrey Ink new release! Are you ready for more sppooookkkkyyyy fun?! Today's projects are all about Halloween and treats. Today we are introducing the new Make it Market Mini Kit called Halloween Hugs! This new kit has tons of papers and matching stamps and dies. The possibilities are endless! Be sure to pop over to the Official Papertrey Ink Blog to see all the inspiration. CLICK HERE to shop this month's new release and this great kit! 

    Instead of making treats with my kit, I used the elements to make a clean and simple graphic card – one that would be easy to reproduce into mulitples. Sometimes it's nice to have a bunch of cards ready – for class mates, teachers or coworkers. I used the awesome new stripes paper along with some edgers dies for this one. The image in the center was die cut with the matching die that comes with the kit. I stamped some bright green stars from the stamp set! Easy peasy, but oh so fun. 

    Papertrey Ink Make It Market Mini Kit  Halloween Hugs. Halloween card by Wanda Guess


    I started with a white A2 card base folded at the top. Then I covered the entire card base with the orange stripes paper. I used two different edgers dies – and black and white paper – to make the top layer of the card. The focal element is attached to the card with foam tape. 

    Papertrey Ink Halloween Card - Halloween Hugs kit


    I added a mirrored star to the center of my twine bow at the top of the card (see supply list). I love those stars for almost any occasion and thought it matched nicely back to the stamps and graphics. 

    Papertrey Ink Halloween


    1 BLOG


    Today on the PTI blog we are also featuring the Wicked Elixir stamp set. I posted about that stamp set a week ago! In case you missed it, here are my two cards I made with that stamp set! Tooooo fun. Love all those potions and tonics!!! LOL.  All three cards I'm sharing today use the new patterned papers!! YEAH!! Can't wait for more colors to come out. 

    Papertrey Ink Wicked Elixir


    Papertrey Ink Halloween card Wicked Elixir

    Thanks for coming by today and for sharing the excitement with me all week! So happy to share with you! Tomorrow it's all about kitchen fun! You're gonna love it! Have a very happy weekend! (but I hope to see you tomorrow!) XOXO

  • More Papertrey Ink August 2017 Release: Introducing Autumn Scarecrow & Kind of Corny!

    I'm back for day two of five new release posts for the August Papertrey Ink release! WOOHOOOO! All of the products are available now in the Papertrey Ink Store. Did you already get some things? What was your favorite from the new release? I am loving everything so far because it's all about Fall! I hope you're having a good week so far. Last night I went to a cool event at a local studio and had a great time with fellow creatives and bloggers. The event is called Wide Open Walls and it's a mural festival! CLICK HERE to see more about it! Tonight I'm off to another creative meet up. Sacramento has so much going on lately. I'm loving it! And I'm loving being busy on these cooler nights. I'm taking tons of photographs lately too. Life is good. I am grateful. 

    Today the PTI design team is introducing two more new stamp sets and I have cards made with both of them: Autumn Scarecrow and Kind of Corny. The Autumn Scarecrow set is the most adorable scarecrow you ever did see, and Kind of Corny is anything but corny – it's classic and beautiful. If you're like me, and you love Autumn, today's post is for you! Let's get to it.  

    Papertrey Ink Autumn Scarecrow card by Wanda Guess. PTI new release August 2017. PTI Design team


    I told you he was adorable! Orange and blue are opposites on the color wheel, so these two colors always look good together. I decided to use accents of blue in this Fall card. I paper pieced the scarecrow's shirt with some gingham paper from my stash. The rest of him, and the other images, are colored with Copic Markers. I added yellow and orange Stickles as accents to the card too. I used the PTI Picket Fence Die cut to give the card some depth. This is a die I use all the time! (Info in supply links)

    Papertrey Ink Autumn Scarecrow card by Wanda Guess. PTI new release August 2017. PTI Design team


    The other thing I adore about this stamp set is the sentiments and the beautiful fresh fonts!! I will be using these sentiments with lots of other stamp sets for sure. LOVE. And they stamp so crisp and clean. 

    Papertrey Ink Autumn Scarecrow card by Wanda Guess. PTI new release August 2017. PTI Design team


    I added one little red enamel dot heart from my stash to his shirt. He looks like such a friendly fellow!

    Scarecrow Autumn card. Copic marker coloring


    1 BLOG


    This next card features the Kind of Corny stamp set, and I went crazy with distressing and antiquing this one! I used rich Autumn colors and the new PTI paper! 

    Papertrey Ink Kind of Corny Autumn card by Wanda Guess. PTI design team. New release


    For the corn image – it is several stamps that go together. Three images for the corn – you can see that I used red, orange and yellow, and two images for the leaves….and two more images for the bow. I die cut out the bow and popped it up with foam tape. 

    Papertrey Ink Kind of Corny Autumn card by Wanda Guess. PTI design team. New release


    For the sentiment banner, I stamped onto Vintage Cream cardstock and then hand cut the banner out with some small scissors. Makes it more old looking. I splattered paint and ink all over the entire project. The edges of everything are sponged with Distress Inks. 

    Papertrey Ink Kind of Corny Autumn card by Wanda Guess. PTI design team. New release


    Papertrey Ink Design Team

    Thank you very very much for stopping by today! CLICK HERE to see all the newest stamps and dies released this week!  I will see you right back here tomorrow! Tomorrow we are introducing a new kit from Betsy Veldman and it's ADORABLE!! XOXO

  • Papertrey Ink August 2017 Release Week: Introducing Wicked Elixir & Radiant Die Collection!

    Hi creative and crafty friends! Happy Saturday! Did you have a great week? I hope you did! I've been pretty busy and that is a very good thing! The weather finally turned and it's been cool in the mornings which I love. I've been going to lots of meetings and doing some photo shoots and I'm super grateful to be this busy with work! Looking forward to a creative weekend as well. What are you up to? Have you been following along on the Papertrey Ink Blog looking at all the posts from the new release? 

    It's time to start the festivities here on my blog for the August Papertrey Ink Release!! The fun started on the 9th with our monthly intro/sneak peek video and we will continue to share projects on our design team blogs and on the PTI blog all the way through the 20th. So, lots of inspiration coming your way in the next week or so! All of the new release items will be available for purchase in the Papertrey Ink Store on August 15th at 10pm EST. This month has LOADS of Autumn and Halloween inspiration and that's right up my alley. I love it all! I will be sharing more than ten projects in the next ten days. I hope you're ready! LOL. Thanks for following along with me!

    Today I'm helping launch a fun and creepy Halloween set called Wicked Elixir – it's full of potions and tonics perfect for a mad scientist's laboratory! TOO fun! I'm also helping introduce the Radiant Die Collection which is a really pretty series of three dies that make starburst or sunburst patterns. Really pretty. 

    First up today is a Halloween card with lots of patterns and colors going on! I used the brand new dots stencil to make my background layer. My card base is kraft paper in A2 size. The black and white plaid paper is also new for this month as part of the Halloween Hugs kit! The sentiment is from the Autumn Scarecrow stamp set and the bottles and potions are all from the Wicked Elixir stamp set!  

    PAPERTREY INK WICKED ELIXIR STAMP SET. HALLOWEEN CARD NEW RELEASE. WANDA GUESS


    This card was funnnnnn to make! I used lavender, lime green and orange as my colors! The Wicked Elixir stamp set has matching dies for the bottles AND the tiny labels. Just makes everything look so nice and crisp!! My polka dot background was made using the new Stencil (Dots) and Antique Linen Distress Ink. Just a soft loot for this project. 

    PAPERTREY INK HALLOWEEN CARD

    I mixed and matched a lot of the new stamp sets for this card. I love to do that! The stars are from the new kit and I stamped them in deep black for nice contrast. The images were stamped on Vintage Cream cardstock for a vintage feeling. 

    PTI WICKED ELIXIR STAMP SET HALLOWEEN CARD


    WICKED ELIXIR HALLOWEEN CARD


    BLOG 10 WICKED ELIXIR


    HAPPY HALLOWEEN CARD


    Next is a scary and spooky card also made with the new Wicked Elixir stamp set! Look at those blood splatters!! EEEEK!! I used a very graphic color palette of orange (Canyon Clay), black and grey for this card. SPPPPOOOOOKKKY! The new Bite Size Tags dies are the perfect size for the front of a card. 

    PAPERTREY INK WICKED ELIXIR AND BITE SIZE TAGS


    BLOG 10 WICKED ELIXIR


    BLOG 10 WICKED ELIXIR


    Now this next card is TOTALLY different from the first two! I used bright white and Buttercup yellow to make a sunshiney card! This card features the new Radiant Die Collection and the new Hey Stacks Stamp set!  

    PAPERTREY INK RADIANT DIE COLLECTION AND HEY STACKS STAMPS


    I cut the dies directly out of my layering paper and then slid Bright Buttercup cardstock underneath the cut out images. SO fresh! I heat embossed in white onto black cardstock to make my sentiment banner. I thought it needed just one more pop of color so I die cut out some pretty red hearts and that just did the trick! 

    PAPERTREY INK


    The sentiment banner was put on the card using foam tape. The hearts too. I added just a few clear gems at the end. This would be a great card for get well or just generally encouraging someone. 

    PTI SUNSHINE CARD SUNNY DAYS WANDA GUESS

    That's it for me for today! Remember, everything new is for sale on the 15th at 10pm EST.  If you don't want to miss anything from the new release, make sure to visit the official PTI blog!  I'll be back on Wednesday, starting five days of sharing PTI projects with you. Until then – have a great weekend! Thanks for stopping by today! XOXO

  • Hero Arts 2016 Planner Release Blog Hop!

    Bloghop_600_logo

    Hello! And welcome to my stop on the Hero Arts 2016 Planner Release Blog Hop! Yippppeeeee! New stamps from Hero Arts, one of my favorite companies! I'm really happy to be part of the big hop today, as we introduce you to the new 2016 Planner Catalog. So many fun things to use for your planners, or just for fun and cards too!! There are lots of awesome designers making projects today to show you different ways to use the new items. To start at the beginning of the hop –CLICK HERE for the Hero Arts Blog. Or, follow through to the next stop at the bottom of my post (Full Links List there). 

    Hero Arts is generously giving away three $25 shopping sprees, drawn from comments left across all blogs in the hop. Leave your comments by Wednesday, October 19 at 11:59pm PT and they will announce the winner the following week on the Hero blog. Make sure to leave a comment on each stop for more chances to win! Good Luck! 

    I am a total planner girl!! Are you a planner girl? I love all the pens, and stickers, and stamps and clips! So fun! I used a Franklin Covey Planner for almost 20 years for my corporate job. I Recently I switched over to an Erin Condren Planner since my needs are more creative oriented instead of corporate oriented. I write really big, so I don't have a lot of room for stamping!! I stamp in the margins and some of the extra spaces on the monthly tabs. For today's blog hop I wanted to think of another clever way to use the totally adorable small sized stamps….. So, I decided to use them to decorate fun Halloween Treat Boxes! These little stamps are really versatile – for making your own background paper, for tiny tags, for the backs of your cards, and on envelopes too!  

    Here are my treat boxes! I used the Pillow Box Punch Board and Kraft cardstock as the base. Then I used Copic Markers to color the images! Coloring on Kraft is a fun technique – a completely different look from coloring on white cardstock.


    Hero Arts Planner Stamps. Blog Hop. Halloween Treats with Pillow Box Punch Board. Project by Wanda Guess


    Here is a close up of one of the boxes. I started with a 6×6 piece of cardstock for each one. I die cut a window in the center using the SSS Stitched Circle Die. Then I layered some happy Doodlebug patterned paper and also die cut the same circle in that to form a band. There is acetate window plastic covering the circle (kind of like you would do for a shaker card) and that let's you see the candy! 

    Hero Arts Planner Stamps. Blog Hop. Halloween Treats with Pillow Box Punch Board. Project by Wanda Guess


    All the images are from the new Hero Arts Planner sets! I stamped and colored all the images before assembling the boxes. After I colored with my Copic Markers I added tiny accents of white ink with a gel pen. Then I added dots of Stickles for some shimmer. To make the halloween banners I stamped the sentiment on white cardstock and then hand cut them with a small pair of scissors. No need to be exact with this!! I stamped, colored and cut out another pumpkin image and attached the banner and the pumpkin using foam squares. 

    Hero Arts Planner Stamps. Blog Hop. Halloween Treats with Pillow Box Punch Board. Project by Wanda Guess


    Some of the supplies for today! I LOOOOOOVE my punch boards!! I think I have managed to collect all of them now, except the alphabet one!! They are easy to use. If you ever get stuck, just go on YouTube and search for it and there are so many helpful videos!

    Hero Arts Planner Stamps. Blog Hop. Halloween Treats with Pillow Box Punch Board. Project by Wanda Guess


    After I created the boxes with the punch board, i die cut out the circle in the front panel. Here you can see that I adhered the acetate to the back of the window using tape runner. Easy as pie! 

    Hero Arts Planner Stamps. Blog Hop. Halloween Treats with Pillow Box Punch Board. Project by Wanda Guess


    Here is the finished box before I added the twine and accents! 

    Hero Arts Planner Stamps. Blog Hop. Halloween Treats with Pillow Box Punch Board. Project by Wanda Guess


    Hero Arts Planner Stamps. Blog Hop. Halloween Treats with Pillow Box Punch Board. Project by Wanda Guess


    Hero Arts Planner Stamps. Blog Hop. Halloween Treats with Pillow Box Punch Board. Project by Wanda Guess

    Thank you so much for visiting my blog today! I hope you have a great time on the blog hop! We have worked really hard to bring you inspiration and fun today! XOXO 

    Here is your FABULOUS link list for today's Hop!

    The Hero Arts Blog

    Kelly Purkey

    Jennifer McGuire

    Yana Smakula

    May Sukyong Park

    Mariana Grigsby

    Amy Tsuruta

    Amy Tan

    Wanda Guess

    Lydia Fiedler

    Jen Carlson

    Barbara Picinich

    Brooke Takara

    Krista Wells

    Jamie Waters

    Nadia Azni

    Kari Stiles

    Libby Hickson


    SHOPPING LINKS FOR TODAY!

    Thanks for clicking and supporting my business! 

     
    Signature typewriter
  • Fall Treat Boxes with my favorite new paper collection!

    Howdy friends! The week is almost over! Happy Thursday and here's hoping you had a great week! The weekend is in sight now! I have been scurrying around trying to make all the Fall ideas that I have in my head. SO many ideas, SO little time! I absolutely love this time of year, and it just goes by so quickly. I love to make treat boxes, and cards with leaves on them, and use Autumn colors….

    Today I'm sharing some treat boxes I made with the amazing Lawn Fawn Scalloped Treat Box die. It's been on my desk for a few weeks and I stayed up late Tuesday night making these so I could share with you. I also used my new very FAVORITE paper collection. It's from Doodlebug and it's called Flea Market. Okay, so don't tell anyone (just you guys) that I bought three packs of the paper and ALLLLLLLL the embellishments that go with this one!!! SO dang adorable. Pretty much everything from Doodlebug lately is the bomb. Sigh. 

    Okay, so back to my project for today…. I used woodgrain paper that I bought at my local stamp store to make the base of the boxes. I ran into a bit of a snag… The die does not fit on a 6×6 piece of paper. Hmmmmm. I was going to make the boxes out of the 6×6 paper pad but had to go with plan B. So I made the box bases from the woodgrain and then wrapped the patterned paper around it. In the end, I kind of like this way better! To make one box, you need a sheet of paper 6×11 inches. You will cut two of them and tape them together to form the box. Then the fun part is adding your own decorations and personal touches.  

    Lawn Fawn Scallop Treat Box Die. Doodlebug Flea Market paper. Project by Wanda Guess. Fall Treat Boxes!


    I used some cute Doodlebug mini clothespins to attach a twine bow accent. Then I added a flower sticker! In this shot, you can see the pretty scalloped edge of the top of the box. 

    Lawn Fawn Scallop Treat Box Die. Doodlebug Flea Market paper. Project by Wanda Guess. Fall Treat Boxes!


    Lawn Fawn Scallop Treat Box Die. Doodlebug Flea Market paper. Project by Wanda Guess. Fall Treat Boxes!


    I layered two circles for my main focus. On the white one I stamped my sentiment (from the Lawn Fawn Into the Woods stamp set). I used leaves stickers to accent the words. The little crows are dimensional stickers from the same paper collection. EEEP. 

    Lawn Fawn Scallop Treat Box Die. Doodlebug Flea Market paper. Project by Wanda Guess. Fall Treat Boxes!


    Lawn Fawn Scallop Treat Box Die. Doodlebug Flea Market paper. Project by Wanda Guess. Fall Treat Boxes!


    Lawn Fawn Scallop Treat Box Die. Doodlebug Flea Market paper. Project by Wanda Guess. Fall Treat Boxes!


    The twine box is not wrapped around the handle. I left it loose and attached it with the clothespin to allow for easy access into the box. The box seals without tape at the top, so the recipient can open and close it to get inside. A gift card and a few candies fit perfectly inside! (or just candy LOL)! 

    Lawn Fawn Scallop Treat Box Die. Doodlebug Flea Market paper. Project by Wanda Guess. Fall Treat Boxes!


    Lawn Fawn Scallop Treat Box Die. Doodlebug Flea Market paper. Project by Wanda Guess. Fall Treat Boxes!


    Lawn Fawn Scallop Treat Box Die. Doodlebug Flea Market paper. Project by Wanda Guess. Fall Treat Boxes!


    Lawn Fawn Scallop Treat Box Die. Doodlebug Flea Market paper. Project by Wanda Guess. Fall Treat Boxes!

    Thank you so much for stopping by today! This project is so versatile! I'm thinking Christmas gift cards, Valentine treats…. and on an on. I hope you have found some inspiration!! What are you working on right now? Have a great weekend and I'll see you soon! I'm in a fun blog hop next Wednesday. I will try to blog again before then, but I'm not sure!! XOXO
    1


    SHOPPING LINKS FOR TODAY!

    Thanks for clicking and supporting my business! 

  • Simon Says Stamp 2016 Halloween Card Kit – Blog Hop!

    Simon Says Stamp Halloween Card Kit 2016

    BOO! Did I scare you!? Welcome to the super spooky and fun Ghostly Greetings Blog Hop! As part of the STAMPtember festivities, Simon Says Stamp has created a limited special edition card kit just for you! This is separate from the regular monthly kit and will not be automatically sent to you! Even if you subscribe, you need to buy this one on its own. And, believe me, you're going to love it and want it. There is so much stuff in this kit! An adorable stamp set, ribbon, Nuvo crystal drops, sequins, a stencil, tea lights, and awesome Doodlebug Halloween papers! Such a great deal all in one kit for you to start Halloween Crafting! CLICK HERE to see/buy the kit. The kit sells for $39.95 and that is such a good deal, considering all the wonderful supplies included! Supply links are also at the bottom of my post. 

    Did you arrive here from Debby's blog? You can start the hop from the beginning by going to the Simon Says Stamp Blog too!

    I'm excited to be part of the hop today and there are so many cute projects! Have fun today checking them all out. I was totally inspired by the custom sequin mix, so I decided to make a ghostly greetings shaker card! Shaker cards are so much fun to make. Take a look!  

    Simon Says Stamp Halloween Card Kit. Ghostly Greetings blog hop. Card by Wanda Guess


    I ended up using three of the cute patterned papers for this card! I started with a jet black A2 card base (from the included cardstock). Then I layered the orange polka dot paper on top of that. I used a strip of the bright plaid to go across the bottom of the card. And, I used the spiderweb paper as my background for the shaker part of the card. This paper is way too cute not to use all of it! LOL. I die cut a stitched oval out of white cardstock and stamped two of the sentiments together…. and added a spider too! 

    20 BLOG


    I added some spider webs and spiders using the small accent stamps. Here is a good close up of the included sequin mix.


    20 BLOG


    I colored my smiling ghost using just a few Copic Markers.

    20 BLOG


    20 BLOG


    20 BLOG


    Make sure to enter the contest for the Simon Says Stamp Dream Craft Room Giveaway! CLICK HERE or on the photo below for all the details! Good Luck!


    STAMPtember_Dream-Craft-Room-Giveaway_2-013-600x600 

    Simon Says Stamp Halloween Card Kit. 2016 Ghostly Greetings

    Thank you so much for stopping by today! Have a great weekend! Enjoy the hop, and I'll see you soon! XOXO 

    Next up on the hop is Nina-Marie!

    20 BLOG
    20 BLOG


    SHOPPING LINKS FOR TODAY!


  • Spooktacular Pumpkins!

    Hey friends! Happy Friday! How are you? Did you have a good week? I've been a busy bee and that's just fine with me! It's been nice weather and I'm getting a lot done in the studio for upcoming projects! It's my birthday in a couple of weeks and we have a little mini ocean getaway planned. It's all good! October in the craft studio is sort of wonky…. Here's what I mean…. My brain is thinking Halloween, and leaves and Thanksgiving, but in the crafting world it's full-on CHRISTMAS! Do you know what I mean?? The floor in my studio is a big jumble of pumpkins and santas and bats and snowflakes! It seems like every other post on my blog is orange, then red, then orange again! It's a funny thing. Yesterday I was thinking about putting all the Halloween crafty stuff away and I thought I would make one more card. I bought these adorable stamps a month or so ago and I really wanted to color them. The artist of the stamps is the lovely Lindsay Ostrom – and she is here locally. Sometimes I see her at events. She's uber talented and designs stamps for Impression Obsession! 

    Anyhoo, I rambled on again. I haven't used my Prismacolor pencils in a long time and thought that might be nice for this project. Some really nice bright colors! 


    Spooktacular Halloween card! Impression Obsession stamps. Card by Wanda Guess. Colored with Prismacolor pencils and Gamsol.


    I colored my images using lots of vivid Prismacolor pencils and then smoothed out the color with Gamsol. Have you tried this before? It's really neat. The Gamsol is an art solvent/solution that you use with a Fantastix and it smudges the color around and makes it smooth. This is hard to explain! I really think you should try it!! There are tons of good YouTube videos and Gamsol is available at any art store. Here is a close up….

    1


    So when I put my card together, I felt like it needed something up there in the corner. I had just bought this TEENSY punch set (EEEP) from EK Success and I ended up making a tiny banner with tiny bats! OMG – I love this!!! LOL. Each little banner is only 1/2 an inch. I put them on some orange and white twine. I mounted them to my card using tiny foam dots. 

    1


    I cut the pumpkins out by hand and mounted them on my card with foam tape. I stamped the sentiment on kraft paper with crisp rich black ink.

    Spooktacular Halloween card! Impression Obsession stamps. Card by Wanda Guess. Colored with Prismacolor pencils and Gamsol.


    Paper Banner. EK Success. Bats and gingham!


    Halloween Card


    I think this will have to be the final Halloween project for 2015. (sad face) There's just not enough time to make everything! Next week I have fun things to share with you. Another guest designer spot at MFT and also my Color Pop feature for Wilted Violet!

    1


    On Wednesday I got to have lunch with my friend and her totes adorbs baby boy! (Remember I made her this card?) We had a very lovely time together, us three amigos. Here is a pic of me holding my new boyfriend. (I think he's a little cozy for our second date!! LOL) How blessed I feel to be able to go meet my friends in the middle of the day and actually have a conversation that's not via text. I feel like that is such a treat. Have a super weekend everyone! XOXO

    Me n mitch 10-21-15

    1

  • Halloween Ghosties! Sure to make you smile! — Lawnscaping Challenge

    Hi peeps! Happy Monday! Today when I woke up it was cold in our house! YAY! That makes me so incredibly happy! The weather has turned….I hope! I always sleep so much better when it's cold outside. I had a very nice and busy weekend…and hope you had a great one too. Friday I got to see Rob and Judi from Judikins who were here in town, and I had date night with my friend Stephanie at our favorite restaurant. Saturday night I had dinner with the very lovely Cindy Lawrence who was here all the way from the East Coast! She was in Sacramento, teaching Copic classes. We had a great visit and a tasty dinner. I got in some stamping time, and also a visit to the Scrapbook Expo. Wow – so much going on!

    I started a Lawn Fawn Halloween card Saturday but didn't get it quite finished…. Well, when I woke up this morning I saw that the Lawnscaping Challenge this week is "Too Cute to Spook!" That was the incentive I needed to get my card finished and posted today. I adore this stamp set – it's been sitting on my desk for weeks! Talk about fun! Here is my card….

      Lawnscaping Challenge! Halloween card using Lawn Fawn stamps - by Wanda Guess. Booyah stamp set


    Seriously! How cute are these ghosties!!!??? I'm dying! This stamp set is so fun. See the tiny stitches on Franken-ghost? Yes, that is a teeny tiny stamp!! Who does that? I love the sense of humor of this. Dracula-ghost has a red bow tie, and witchy-ghost has a teensy broom! OMG. LOVE. For my background I made some light grey clouds using this technique. I stamped some stars too. Every stamp for the ghosts has a matching die. 

    1


    All the images were colored with Copic Markers. I popped the ghosts with foam tape when I put them on the card. (of course I added Glitter Sprinkles enamel dots)

    Lawnscaping Challenge! Halloween card using Lawn Fawn stamps - by Wanda Guess. Booyah stamp set


    Lawnscaping Challenge! Halloween card using Lawn Fawn stamps - by Wanda Guess. Booyah stamp set


    CLICK HERE to enter your card in the challenge, and to see the other entries!  


    Lawnscaping graphic

    1

  • A visit to a magical place!! Theatre of Dreams, Port Costa California

    Good Afternoon everyone! One of the things I love about reading blogs is that my favorite bloggers take me along to places I would never be able to see, and show me wonderful things. Every once in a while I feel lucky enough to be able to do that too….to share something fabulous with all of you! To bring you along with me somewhere special! Today I'm sharing photos from a magical place I visited yesterday. It's called the Theatre of Dreams and it is in Port Costa, California. The amazing artist behind the Theatre of Dreams is Wendy Addison.

    The Theatre of Dreams is not open all the time, so you have to plan ahead to able to shop, and be swept away in the spectacle of it all. It happened that this weekend was her open house for Fall and Halloween and I did not want to miss my opportunity. I am so glad I was finally able to see her shop because it has been on my bucket list for a long time. Wendy has products at Tinsel Trading and I have seen her appear on the Martha Stewart Show also. Her style is vintage inspired and beautiful. I have been a fan! How cool to meet someone you admire! 

    I have this thing that happens to me when I see something really special and creative. I get tears! I am actually moved to tears. There is something so wonderful about seeing another person's creative vision come to life. The talent, the hours of thought, the art, the artistry, all of it. Well, that happened here as soon as I walked in the door. I felt like crying. I'm pretty sure my mouth was hanging open. Wendy and Ceil could not have been more gracious with me! Every last perfect detail creates a world you walk into…and you are transported to another time, another dimension of loveliness. I'm really having a hard time putting this into words right now. If you ever have the opportunity to come to this special place – do it. 

    It adds to the mystique that you have to go down a windy crazy road to get to Port Costa and then at the end of the road, you find this tiny village with just a few shops and restaurants, right on the water. The whole place is a movie set. Seriously. Magic. 

    They were kind enough to let me take photos to share with you. My photos do not come close to showing you everything there is to see. I tried to take photos that would capture the feeling I had there. That is what I want to share – the feeling. I hope you enjoy this photo essay. I'm not even going to put any photo captions, so you can use your imagination. 

    Please visit the Theatre of Dreams website to learn more about it!  


    Theatre of Dreams Port Costa California


    Theatre of Dreams Port Costa California


    1


    Wendy Addison creator of the Theatre of Dreams


    1


    1


    1


    Theatre of Dreams Port Costa California


    1


    1


    Theatre of Dreams Port Costa California


    1


    1


    1


    1


    1


    Thank you for visiting today! XO

    1

  • Halloween Medallion with Brenda Walton Dies!

    Hello creative friends! I have such a fun project to share today! It's my first official Halloween project for 2015! Yay! My super sweet, amazing and talented friend, Brenda Walton, has asked me to create some projects to showcase her awesome craft dies! So I'll be creating some Fall and Winter projects over the next couple of months and I could not be more happy about this! I'll be using the Brenda Walton dies from Sizzix and we are going to have big fun! The Brenda Walton style is pretty and whimsical and nostalgic in all the right ways, and it's a style I have long admired and used in my own crafting. 

    I love anything that is retro/old fashioned Halloween! Glitter and pom poms and rosettes and cute figurines. Love it all. My goal with today's project was to create a new piece that has that retro feeling. My finished item is a wall hanging that you can hang on the front door or use as interior decor for the holiday. Here it is on my front door!  


    Wanda Guess for Brenda Walton Studio Halloween 2015


    Wanda Guess for Brenda Walton Studio Halloween 2015


    Wanda Guess for Brenda Walton Studio Halloween 2015


    Wanda Guess for Brenda Walton Studio Halloween 2015


    For the base of the piece I used the Brenda Walton Large Medallion Die and cut eight pieces out. Then I folded each one along the creases. There are diamond shaped cut outs in the folds and I like it when the diamonds are at the top of the creases. I used some cool Halloween paper with cool script and big spiders on it! Here are my pieces ready to assemble. 

    Wanda Guess for Brenda Walton Studio Halloween 2015


    After I glued the eight pieces together I made my medallion and secured it with a scallop circle on the top and the bottom (made with a craft punch). For this step I use hot glue and put a lot of it on both the bottom and the top. The scalloped circles hide the glue, and give you a nice smooth base to attache your other goodies. 

    Wanda Guess for Brenda Walton Studio Halloween 2015


    After I made my main piece….I thought hmmmm…how can we add some orange!? So I cut out six medallion dies with orange harlequin paper (From an old Brenda Walton paper pad!) I cut 2 and a half inches off the bottom of each of the pieces and that made a smaller medallion. I glued it onto the first one as you see here. 

    Wanda Guess for Brenda Walton Studio Halloween 2015


    I die cut several of the Brenda Walton Celestial Stars Dies out of black paper and then covered them in dream black sparkly glitter. Spooky and pretty at the same time! This was the best part! (But there is currently black glitter everywhere in our house! LOL) I made some of the smaller size star and then one of the medium sized star which. If you glue two of the medium stars together it will make a 3-D star. The die set has three sizes. 

    Wanda Guess for Brenda Walton Studio Halloween 2015


    To attach my stars to my project I first glued them onto some long straight pins. I used glossy accents for this step. Then you can attach the stars and they look like they're floating on the project. 

    Wanda Guess for Brenda Walton Studio Halloween 2015


    In my stash I found an awesome spider web doily (I think from Michael's) and some pretty silver paper. The Happy Halloween stamp is from a Hero Arts clear stamp set. The banner is hand cut. In this photo you can see that I gently sponged the edges of my medallion pieces with jet black ink. I added some hanging paper flags on the bottom. 

    Wanda Guess for Brenda Walton Studio Halloween 2015


    I cut a scalloped circle from silver paper and mounted it over the spider web doily. Then I used the center label piece from the Brenda Walton Trophy Die set. It comes with an embossing folder for this very awesome effect! The numbers are from the Brenda Walton Numbers and Dies Thinlits set. Of course I made them from black paper! 

    Wanda Guess for Brenda Walton Studio Halloween 2015


    Wanda Guess for Brenda Walton Studio Halloween 2015


    Wanda Guess for Brenda Walton Studio Halloween 2015


    Wanda Guess for Brenda Walton Studio Halloween 2015


    Wanda Guess for Brenda Walton Studio Halloween 2015


    Please click here to see the entire Brenda Walton die collection from Sizzix!

    There are new dies about to be released next month and you can see those too!

    Thank you for spending some time with me today. I hope you'll make a fun Halloween medallion too! Or a Christmas one… Hmmm, the ideas are flowing! See you soon! XO

    Wanda Guess for Brenda Walton Studio Halloween 2015

  • Boo! Happy Halloween 2014!

    Hi! Happy Friday and Happy Halloween! I hope there are many bite-size candy bars in your future! LOL! This is a very fun and happy Friday indeed for me! After work today, I am on vacation for a week to celebrate my (ack) 50th birthday and I literally cannot stand it! We have a fun trip to the Oregon coast planned and I need to finish packing before we leave at o dark thirty tomorrow morning! Before we start moving on in the crafting calendar towards Christmas, thought I'd share one more Halloween card with you.

    I was totally inspired by THIS CARD on Splitcoaststampers and put my own twist on it. Shout out to Jingle for the idea – you should check out her gallery – yep, good stuff there. 

    BOO! 

    1


    I cut the trees out of the super fabulous Birch Trees Cutting Plate from Taylored Expressions then mounted the white die cut piece onto a piece of dark grey paper. I also cut a bright yellow circle and placed that in between the two layers…. The letter dies are from Memory Box!

    1


    These bat dies come in a set of three – also from Memory Box… I mounted some on foam squares and some flat to the page. After they were glued down, I gently pulled their wings up off the paper to add dimension and flight!

    1


    1


    1


    I couldn't resist adding some BLING! 

    1


    1

    Until we meet again…happy haunting and

    Happy Halloween!   


    Batty!

       Wanda 

  • Spooky Cats! Fun with Simon Says Stamp Halloween!

    Hey friends! I'm back from Iowa! (see bottom of my post for more deets) and spending some time in the craft room again! So I took yesterday off work to regroup from my trip, and I needed to get crafty! I have lots and lots of Halloween ideas in my head and I have to make some stuff! LOL. For today's project I used the uber cute Simon Says Stamp dies and stamp sets to make a pair of cute Halloween cats!  


    Simon Says Stamp Halloween Card by Wanda Guess


    I stamped and colored my spooky kitties with my Copic Markers. At the end I added some pretty Stickles! I created a window using two nesting oval dies. I like that pop of purple on Dracula kitty's cape against the black! 

    1


    I die cut the Halloween word die and then gently curved it with my fingers when gluing it down – so that it would match the curve of the oval. Then I stamped some cool black bats! 

    1


    1


    The cat images are popped up on foam squares for dimension…

    1


    1


    1


    A little more about my long weekend! It's so nice to be back here sharing with you after a SUPER fun, fabulous, exciting, crafty weekend. OMG my face hurts from smiling and laughing so hard. I got back late Sunday afternoon from my whirlwind trip to Des Moines, Iowa where I taught at Memory Bound Scrapbooks and then taught and helped out with Taylored Expressions Stamp Joy! WOW! The TE Event was amazing! Taylor worked so hard to put on a good day and she did just that. I got to see the TE warehouse headquarters (and go shopping) and meet the rest of the TE crew. I am SO very lucky to be affiliated with them. I saw old friends and made lots of new friends too. I came home renewed and relaxed. Thank you for all the hugs and kindness I received while I was in Iowa. To see all my photos of the event, and behind the scenes, please 'like' my A Blog Called Wanda Facebook page (link on left sidebar). 

    Here is a great photo of the group: Taylor, Jen, Me, Sankari, Stephanie, and Lori! {love}

    Taylored Expressions Stamp Joy


    Fall signature

    Okay, that's it for me for today! Have a great week!

    Here are my links for today's project:  

  • 12 Tags of 2014 – October – Trick or Treat!

    Wowza! First of all, let me just say a big thank you to everyone who left a comment on my last post! That was certainly crazy and fun! SOOOOO many kind people came by my blog. At last count I was approaching 500 comments! Yowza! Good luck on winning the prize package!! If you haven't left a comment on all of the posts in the Simon Says Stamp Blog Hop – be sure to do so by this Friday the 10th! CLICK HERE TO SEE MY POST!  There is a prize pack on each of the blogs…so generous of Simon Says Stamp dontcha think? 

    Today I'm sharing my Tim Holtz 12 Tags of 2014 tag for October! Lots of cool techniques on this one…and it really got me out of my comfort zone (again). Mr. Holtz is very good at that isn't he? I used embossing paste, and glossy accents, and glitter, and inks and all kinds of good stuff to make this one. I took lots of photos too. Hope ya like it! 


    100


    The Tim Holtz stencil I used is called "shatter" but I think it looks exactly like a creepy spider web! I put the stencil down and then used white embossing paste with it…. Makes a really cool texture. That was the basis for Tim's tag this month and I'm trying to use lots of his techniques. Another technique he used is to selectively use the glossy accents on your pieces…Here you can see I used the glossy accents on the bats! While they were drying I sprinkled in some black soot glitter for a little spice!  

    100


    Another technique Tim used on his tag was to put brads down to hold your words or, in my case, numbers. I like how this looks too! My bats were stamped in jet black archival ink and then watercolored with distress inks!  

    100


    Here is the inspiration tag!

    DSC07523


    You know how much I LOOOOOVE to color my own ribbon! The entire card is done in Marmalade, Preserves and Olive Distress Inks. This might be my favorite ribbon ever!!!!
    100


    Tim used alcohol inks on his tag for the color, but I don't have any alcohol inks yet. I was trying to come up with a way to re-create the same look…so here's what I did… I took my spritzer and the three shades of markers and really spritzed good and thoroughly over the embossing paste. It still didn't look quite right, so then I mised the entire thing lightly with plain water! Voila! Now it looks nice! I love the effect of the spray – see in the corner?

    100


    100


    I watercolored my bats with preserves and olive – totally creepy and funky!! See the tiny bits of glitter on their wings?

    100


    Close up of the ribbon! You can't really see it in the photo but I added some sprays of Heirloom Gold perfect pearls and it's so nice and shimmery! On the tag too!

    100


    Step one:  

    IMG_6282


    This stuff is tricky – but don't let it intimidate you! Do a nice thin, even coat…
     IMG_6282


    Here's what it looks like before coloring it:

    IMG_6282


    My color palette for this project:
    IMG_6282


    This is how the tag looked before I put everything else on it. LOVE it!!!
    IMG_6282


    Can you see the gold shimmer?

    IMG_6282


    I wanted my ribbon sort of color separated…does that make sense? So here's how I did it this time.

    IMG_6282


    And here it is after it's dry. Delicious!!!
    IMG_6282


    IMG_6282


    Here are my bats, watercolored, before cutting them out….

    IMG_6282


    I've gone batty! (With glossy accents)!

    IMG_6282


    IMG_6282


    IMG_6282


    I had the most marvelous weekend this past weekend! The hubs and I celebrated our wedding anniversary (which was Friday) by spending a lovely day together driving around on Saturday, followed by a great dinner out. Thought I would share a few of my Instagram shots from the weekend!

    We live not too far from Apple Hill (Placerville, CA) and we got up early to get in line for the apple donuts – still warm from the oven. YUM!


    Fall 3


    Here's a shot of some of the beautiful apples in the giant bins.
    Fall 3


    Here's me being silly, collecting leaves and putting them on a picnic table.

    Fall 3


    And here is a shot of my AWESOME anniversary present! I have been wanting an Origami Owl necklace for a really long time, and I finally got one! Yay!

    Fall 3

     
    Okay, this was a long post….

    Thanks for hanging in til the end! Love ya! XO

    I'm leaving Thursday for Iowa for the Stamp Joy event!

    IMG_6282