Tag: cross stitch

  • Snowman Cross Stitching Project!

    Hello lovelies and happy Christmas week! This project I’m sharing today has been delivered to it’s recipient so now I can post it! It’s a festive winter snowman cross stitching project! I always have big plans for lots of Christmas stitching…but alas…this is the only one that got finished and framed this year! I love how it turned out – cheerful and colorful. Who doesn’t love a big ol snowman?! I hope you are doing well and hanging in there. Grace. That’s where I’m at. Gotta slow down the anxiety and show grace. Most of all for ourselves. 

    This pattern is called Stylin’ Snowman and it’s by Kogut (Supplies are listed at the end of my post). I stitched on 14 count Aida. I used my own floss colors. They are pretty close to the pattern, but I swapped in lime green instead of the called for yellow. I used some fancy floss for his hat. It’s sort of furry!! I bought that floss to use on a Santa beard but used a touch here too. I framed it myself – I’ll talk more about that later in my post. You’ll see I incorporated some of my card making supplies!

    cross stitching, cross stitch, counted cross stitch, teresa kogut, stylin snowman pattern, dmc floss, ideas for framing cross stitch, wanda guess


    Here’s a close up of the colors and stitching… I adore his sweet grin and pink cheeks!

    cross stitching, cross stitch, counted cross stitch, teresa kogut, stylin snowman pattern, dmc floss, ideas for framing cross stitch, wanda guess


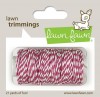
    I dyed my own ribbon with Distress Spray Stains and added shimmer too! I used an old Tim Holtz Token and twine to finish off my pink bow. I love the pink and the aqua of the frame together. Feels a bit vintage and cozy. 

    cross stitching, cross stitch, counted cross stitch, teresa kogut, stylin snowman pattern, dmc floss, ideas for framing cross stitch, wanda guess


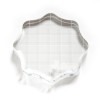
    I found this frame at Michael’s and it was the perfect color to match the stitching! I splattered some snow onto it with a paint brush! To frame my stitching I used two layers of natural cotton quilt batting under the fabric. This makes it ‘poof’ up a little bit from the frame backing. I like the look of it that way. I use archival tape to hold the stitching fabric around a backing board. It’s quite an easy process actually and very rewarding!


    cross stitching, cross stitch, counted cross stitch, teresa kogut, stylin snowman pattern, dmc floss, ideas for framing cross stitch, wanda guess


    I put him down in the bottom of the frame area so he would look like a family member in a frame! 

    cross stitching, cross stitch, counted cross stitch, teresa kogut, stylin snowman pattern, dmc floss, ideas for framing cross stitch, wanda guess


    cross stitching, cross stitch, counted cross stitch, teresa kogut, stylin snowman pattern, dmc floss, ideas for framing cross stitch, wanda guess

    That’s it for today! I’m not sure what else I will post before Christmas…we’ll all have to wait and see! Pretty sure no more cards, but maybe something else fun. Blessings to you for a great Christmas week! XOXO

  • Cross Stitch Vote Pin!

    Hi friends!! Happy Humpday!! I’m going to see my crocheting/knitting group tonight AND I’m going to wear a sweater! Yes! It’s finally cool here and it’s time to get out in the fresh air. I hope you’re having a good week so far. I have a cross stitching project to share today. I finished it at 2am on Monday night! I really needed to finish it in time for voting day! SUCH a fun project to make. It has a modern but yet vintage flair to it…

    VOTE! Yes, I made a voting pin to wear on my jacket (or bag) for the next few days. The pattern is called Sister Suffragette and it has a large piece and then these small vote buttons (for several countries!). I will stitch the larger piece later, when I have time. I used 18 count Aida to make the piece small -ish. Supplies are linked below if you’re a stitcher and want to make this too! 

    This will be my voting outfit! (We already voted weeks ago tho)…. As you know I am an Election Officer for my county and have worked the last two elections. I decided to sit this one out for several reasons. I feel very strongly about the privilege to vote, and I love my country.

    cross stitching, cross stitch, summer house stitche workes, stitched modern, sister suffragette pattern, voting pin, vote cross stitch, handmade pin, rock the vote, easy cross stitch, wanda guess


    I stitched the piece and then turned it into a pin. The idea/directions can be found on the Stitched Modern Blog! I changed it up to make it my own project and you know I had to use some paper in there too! I chose the thread colors from my stash…

    cross stitching, cross stitch, summer house stitche workes, stitched modern, sister suffragette pattern, voting pin, vote cross stitch, handmade pin, rock the vote, easy cross stitch, wanda guess


    cross stitching, cross stitch, summer house stitche workes, stitched modern, sister suffragette pattern, voting pin, vote cross stitch, handmade pin, rock the vote, easy cross stitch, wanda guess


    Here is my finished stitching…

    cross stitching, cross stitch, summer house stitche workes, stitched modern, sister suffragette pattern, voting pin, vote cross stitch, handmade pin, rock the vote, easy cross stitch, wanda guess


    Trimmed stitching, ready for making into a pin… Batting and backing ready…

    cross stitching, cross stitch, summer house stitche workes, stitched modern, sister suffragette pattern, voting pin, vote cross stitch, handmade pin, rock the vote, easy cross stitch, wanda guess


    To pull the stitching around into a circle, do a quick stitch around the edge so you can pull it tight…

    cross stitching, cross stitch, summer house stitche workes, stitched modern, sister suffragette pattern, voting pin, vote cross stitch, handmade pin, rock the vote, easy cross stitch, wanda guess


    The batting goes next to the stitching, then the paper circle underneath. After I pulled the stitching I used the extra threads to go back and forth to make it more sturdy.

    cross stitching, cross stitch, summer house stitche workes, stitched modern, sister suffragette pattern, voting pin, vote cross stitch, handmade pin, rock the vote, easy cross stitch, wanda guess


    I cut several strips of ribbon to wrap around the outside of the pin. I hot glued them to the kraft circle and then hot glued the top onto/over the ribbon. I used a pretty scalloped circle and golden cardstock just under the stitching.

    cross stitching, cross stitch, summer house stitche workes, stitched modern, sister suffragette pattern, voting pin, vote cross stitch, handmade pin, rock the vote, easy cross stitch, wanda guess


    You never know if this might end up in an antique store 50 years from now… So I always date my work!! (I love it when I find stitching or postcards that are dated and with the location!)

    cross stitching, cross stitch, summer house stitche workes, stitched modern, sister suffragette pattern, voting pin, vote cross stitch, handmade pin, rock the vote, easy cross stitch, wanda guess


    cross stitching, cross stitch, summer house stitche workes, stitched modern, sister suffragette pattern, voting pin, vote cross stitch, handmade pin, rock the vote, easy cross stitch, wanda guess


    cross stitching, cross stitch, summer house stitche workes, stitched modern, sister suffragette pattern, voting pin, vote cross stitch, handmade pin, rock the vote, easy cross stitch, wanda guess


    And, I’ve been so enjoying my new makeup table! My husband picked the very last of the hydrangeas the other day for me so I could put them on my table… It’s time to prune them down to nothing for winter. So happy to get a few last blooms.

    cross stitching, cross stitch, summer house stitche workes, stitched modern, sister suffragette pattern, voting pin, vote cross stitch, handmade pin, rock the vote, easy cross stitch, wanda guess

    Thanks for popping in today! Any other stitchers out there? I seem to know a lot of paper crafters that also like to cross stitch. I feel like it’s making a comeback. So many cute patterns out now!  Remember to get out and vote! Have a great day and I’ll see you soon! XOXO

    CLICK HERE or on the graphic below to see the supplies I used to make today’s project (Affiliate links used). If you have any questions – email me! 

    1

  • Snow Sampler Cross Stitch and Framing Project!

    Hi everybody! Happy day-after-turkey Day! How are you? How was your holiday? We had a very nice and calm day here at our house. We started decorating the house for Christmas and my husband decorated my car too! YAY! It’s full on pedal to the metal Christmas mode now! I hope you had a great Thanksgiving! Are you going shopping today? We are! In the past we were those crazy people who got up at 3am and went shopping on Black Friday. But now, we are more reasonable and go out later. Mostly because there isn’t much ‘stuff’ that we want! Now we go to enjoy the spirit of the day and listen to music and drink coffee! Cheers to a nice weekend!

    On Tuesday I worked on a project most of the day, and now I’m here to share it with you! I finished a cross stitch sampler maybe two weeks ago. I wanted to frame it myself and make it all fancy. I had the idea in my head. We headed out to Hobby Lobby Monday afternoon and picked out all the stuff. And Tuesday I went for it. And, you know what? It came out just like I wanted! I’m so happy with it! It was really fun to create and craft something different. Paint and glue and ribbon…all the good stuff. A LOT of people followed along on my Instagram Stories as I made it – and that was fun too. I saved the stories in a highlight in case you want to go back and watch the videos. 

    The pattern is called Snow Sampler and it’s from Country Cottage Needleworks. The fabric I used is Aida 14 in the color Raw. I used all the called for colors of DMC floss, except I made the house red instead of brown. This was a nice easy stitch and it came together quickly. All of the framing supplies are from Hobby Lobby. This is an 11×14 size frame.

    Country Cottage Needleworks Snow Sampler cross stitch. Framed and finished. Wanda Guess, a blog called wanda, ffo, finishing ideas for cross stitch, christmas cross stitch, winter,  aida, handmade christmas, diy, vintage


    I purposely made the little house red because I knew I wanted a red frame for this piece. The bow and greenery are attached to the top of the frame using a zip tie! I used two layers of quilt batting under the stitching to make it ‘puff’ out just a little bit.

    Country Cottage Needleworks Snow Sampler cross stitch. Framed and finished. Wanda Guess, a blog called wanda, ffo, finishing ideas for cross stitch, christmas cross stitch, winter,  aida, handmade christmas, diy, vintage


    Country Cottage Needleworks


    DIY make your own bow with wired ribbon


    Here are a few in-process photos of this project as I was stitching it!

    counted cross stitch wanda guess


    1


    Christmas cross stitch ideas


    Here are all my framing supplies from Hobby Lobby! The paint color is Country Red from Deco Art’s Americana Collection. The ribbon is wired. 

    How to frame and finish your cross stitch projects. diy painted frame and bow


    Country Cottage Needleworks Snow Sampler cross stitch. Framed and finished. Wanda Guess, a blog called wanda, ffo, finishing ideas for cross stitch, christmas cross stitch, winter,  aida, handmade christmas, diy, vintage


    I chose this frame specifically because I love that little bit of scroll work and the uneven edge of the outside of the frame.

    1


    Here’s the first layer of paint. I used a sponge brush.


    how to paint a frame


    This was after three coats of paint!

    deco art paint frame


    I ended up doing FIVE coats of paint before it was finally good and solid!!! I was really surprised at how fast the paint dried. I was able to just keep working without having to let it sit too long.


    13


    Now for that giant bow! I was a little intimidated by this part! I have never made a bow like this before. I ended up following this VIDEO TUTORIAL on how to make a wired ribbon bow. Guess what? First time! It was perfect!! I love this!!

    diy make your own bows with wired ribbon. christmas ribbons


    I’m pretty proud of this part!!! LOL.

    make a wired ribbon bow


    I used a little flat snowflake ornament and some greenery sprigs to finish off the decorations.

    13


    In this photo you can see the finished frame. I used some sandpaper and gently sanded away some of the red paint to make it look a bit more vintage or distressed. I am happy with how this looks!! The frame really looks like it came this way. I can’t wait to do more of this kind of project.

    do it yourself finish cross stitching projects


    I used a zip tie to hook the two sprigs together and another zip tie to attach the bow in the center. A long zip tie wrapped around the top of the frame to hold it on. Tip: Never use glass with stitching because it needs to ‘breathe’ and will get discolored faster under glass. (I learned this while researching for the project!)

    13


    hobby lobby gingham ribbon bow


    Country Cottage Needleworks Snow Sampler. Finished and framed by Wanda Guess


    FFO cross stitching ideas


    christmas cross stitch


    christmas photos

    Thank you for popping by my blog today! I have discovered that MANY of you who follow my blog and Instagram are also cross stitchers! I guess I am late to this party! I am totally hooked on stitching now! (Cuz you know I needed another hobby – LOL!) It’s so relaxing and pretty, and kind of old fashioned too. I am completely into it. 

    There are TONS of crafty Black Friday Sales!! Below are my links to all my favorite shops – including Target and Amazon! I am always SO GRATEFUL when you shop using my links. THANK YOU! Take care until I see you next!! XOXO

    13

  • Pumpkin Spice Stitching Project!

    Hi crafty people!! How are ya? I’m popping in here on a Sunday to share cross stitch project! Woohoooo! Lately, I have become kind of obsessed with cross stitching! I used to embroider and cross stitch when I was a little girl – with my mom and grandma. But it has been YEARS (like a lot of years) since I picked up a needle and some floss. There are so many fun and fabulous patterns now. I have quickly become entranced by another hobby! LOL. One of the many reasons I love cross stitching is that it’s easy to bring it with me everywhere. Just a few supplies in a small case and you’re ready to craft anywhere. Today I’m sharing the first one I’ve actually finished! LOL. It’s been delivered to its recipient so now I want to show you! Do you cross stitch?? I am loving it!

    Here is my piece, mounted and framed (and bowed!)

    Counted Cross Stitch. Pumpkin Spice by Frosted Pumpkin Stitchery. Made by Wanda Guess, a blog called wanda, ffo, finishing cross stitch, fall, autumn, pumpkin, stitching, beginner


    This adorable pattern is from The Frosted Pumpkin Stitchery. Their stuff is soooooooo cute!!! I used Aida 14 fabric for this one. I finished it with a frame from Hobby Lobby and some fabric from my local quilt store!

    Counted Cross Stitch. Pumpkin Spice by Frosted Pumpkin Stitchery. Made by Wanda Guess, a blog called wanda, ffo, finishing cross stitch, fall, autumn, pumpkin, stitching, beginner


    I used a bit of quilting batting and a easy press board to mat both the gingham and the cross stitch piece. Just looks a little nicer to me with a bit of puff. I used a hot glue gun to attach the pieces together, and then to the frame. Look at that tiny coffee cup!!! So sweet!!

    Fall cross stitch projects


    pumpkin spice cross stitch project by Wanda Guess


    cross stitch ideas

    Thanks for stopping by today! Hope you’re having an awesome weekend! Now I’m off to find something to craft! Love ya! See you soon. XOXO

  • Waffle Flower Stitched Roses Cards!

    Hi everyone! I'm happy to be here blogging today and sharing something fun. I've been absent for a bit. I've been super sick for about a week and a half now. Boo. Allergies led to a cold which led to a nasty bout of bronchitis. Whenever I get sick, it always settles in my lungs. So I have cooties. Just finally starting to feel a bit stronger today. The worst part is all the coughing, which has kept me up all night so I'm really loopy from lack of sleep. The other bad news about that is that I missed out on a trip to LA this week. Boo again. My husband is in Los Angeles for work this week and I was going to go with him. I had my list of museums and coffee shops and photo spots all mapped out and everything. But, we decided it was best for me to stay home and rest. Feeling kind of sorry for myself. But not too much. Buddy is awfully happy that I stayed home, so we are hanging out together just the two of us. You know, partying and such. LOL. 

    It's Easter week so I am contemplative and trying to really focus on the meaning of this week and all that it means to me as a Christian. The most important week of the year, and my favorite holiday. Spending time praying and reflecting about that holy week so long ago. The greatest gift. Mark will be home from his trip in time for us to spend a nice Easter together. I hope you have nice plans with your friends and family too. 

    I've spent some time in the studio getting ready for Papertrey Ink Release Week and I have lots of fun projects to share with you over the next days. CLICK here to see the sneak peeks so far on the PTI Blog! The other thing I worked on today is the project I'm sharing now! Yay! I have been crazy, wanting to ink up these Waffle Flower Stitched Roses Stamps! They are SO pretty and so unique. Been on my desk for a couple of weeks now. I enjoyed the process of making these very much. Hope you are inspired. 

    Here are my finished two cards – They are the same card in different colors and with different sentiments. All of the stamps are from the same stamp set.

    Waffle Flower Stitched Roses cards by Wanda Guess. Distress Inks and MISTI


    Here is the pink one….

    Waffle Flower Stitched Roses cards by Wanda Guess. Distress Inks and MISTI


    And the blue one. I tried to make a third one – in yellow. I tried a few different color combinations but could never get just the right look with yellow ink, so I scrapped that idea. It's really hard to layer yellow, evidently! I used Distress Inks for all the stamping since those are the inks that I have the most colors of. These are layered stamps and I would definitely recommend using a MISTI or the Tim Holtz Stamp Platform. I used my Mini MISTI for this project. Makes it easy to line up everything. 

    Waffle Flower Stitched Roses cards by Wanda Guess. Distress Inks and MISTI


    For the pink version of the card I used Spun Sugar, Worn Lipstick and Festive Berries Distress Inks! OOOH LA LA. The green leaves are Shabby Shutters and Peeled Paint Distress Inks. The roses are three different stamps and you layer them on top of each other to create a cross stitch look. The green leaves are only one stamp, so I shaded it by stamping the leaves a second time, but only inking the tips of the stamps with the darker color. 

    Waffle Flower Stitched Roses cards by Wanda Guess. Distress Inks and MISTI


    I thought it might be helpful to show you what the stamp set looks like here. See how the stamps are labeled so you know which ones go together? Great thinking on their part – whew! 

    Waffle flower Stitched Roses 

    I made my card bases out of Cream Cardstock. For the top layer I used a Square Die Cut to create a window to frame the florals. Then when I mounted the frame to the card, I used foam tape for dimension and interest. 

    Waffle Flower Stitched Roses cards by Wanda Guess. Distress Inks and MISTI


    Even the sentiments are cross stitched! LOVE. 

    Waffle Flower Stitched Roses cards by Wanda Guess. Distress Inks and MISTI


    Waffle Flower Stitched Roses cards by Wanda Guess. Distress Inks and MISTI


    For the blue version of the card I used Tumbled Glass, Broken China and Faded Jeans Distress Inks. What a pretty color combo! Before I made my final stamped images I got out some scratch paper and practiced lining up these stamps. After you stamp them a couple of times you will see how they all line up. The index sheet that comes with the stamps labels the stamps for you as well, so you know which order to use them in. It was fun to do this! 

    Waffle Flower Stitched Roses cards by Wanda Guess. Distress Inks and MISTI


    Waffle Flower Stitched Roses cards by Wanda Guess. Distress Inks and MISTI


    You just know I had to add some accents! I tied pretty twine bows at the tops of the cards and sprinkled a few pearls here and there. My layering paper matches the ink colors. Really pretty and graphic but still romantic. This stamp set is awesome! This is another one of those things I fell in love with at CHA. 

    Waffle Flower Stitched Roses cards by Wanda Guess. Distress Inks and MISTI

    Thank you so very much for stopping by today! I hope you are enjoying a wonderful Spring week where you live. Take care! XOXO

    BLOG 7 

     SUPPLIES FOR TODAY!*

    *The Stitched Roses stamps are finally back in stock. Woot!