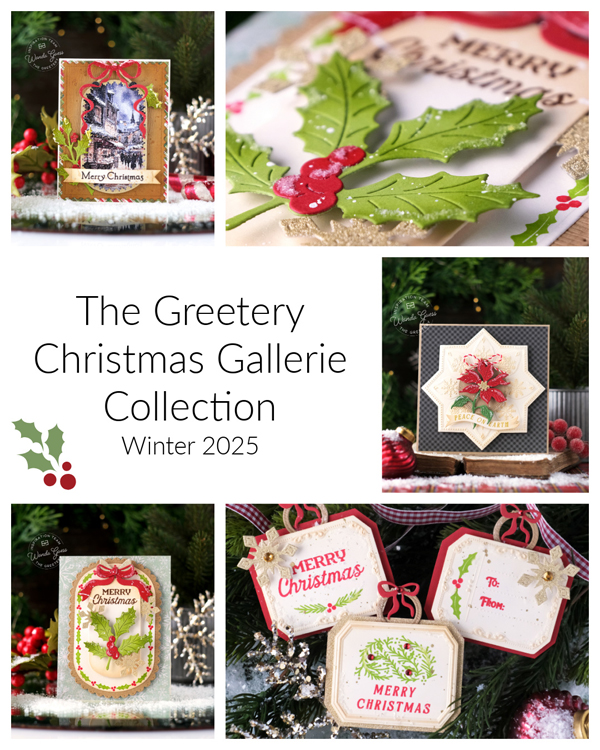
It was my pleasure to introduce the brand new and gorgeous Christmas Gallerie Collection to you this week! And, I hope you love it as much as I do!! Happy Crafting!! If you scroll back to my last blog post you can see all my projects from the new release! If you have any questions – reach out!! Thanks for all the love and kind comments! Happy Creating! Can’t wait to see what YOU make! Feeling the Christmas sparkle for sure!
Hello my dear crafty friends! Today is a fun and exciting day! There’s a new release coming from The Greetery this week! (Tomorrow in fact!)…. I do so love introducing a new release to you. It is my joy and pleasure to be among the first to show you all the beautiful products. The new release is called Christmas Gallerie Collection! Stamps, Dies, Embossing Folders and more! All with a Winter/Christmas theme. Perfect for making cards and tags or whatever else suits your fancy. The new release is class and elegant and I made it vintage too! These products just gave me vintage vibes!
Today I’m sharing FOUR projects here, and then TOMORROW you can shop it all! Yeah! I have lots of info and lots of pictures. At the end of my post you will find the prize info and the links to the other designers’ blogs.
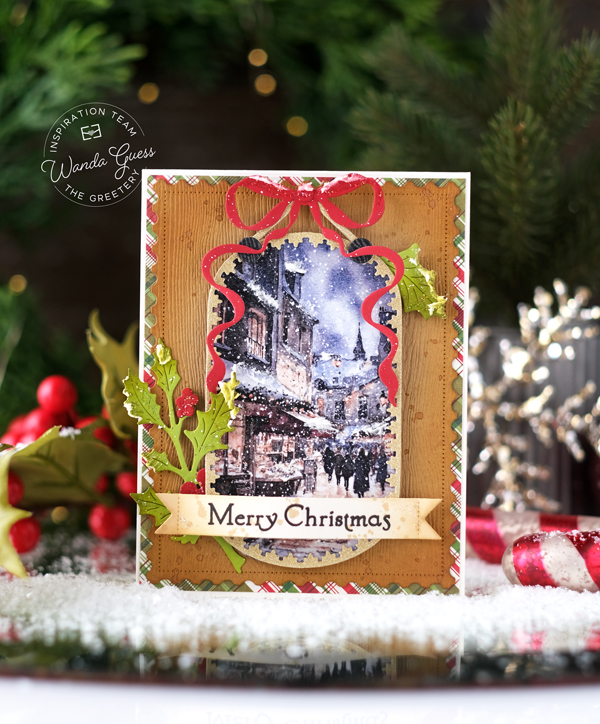
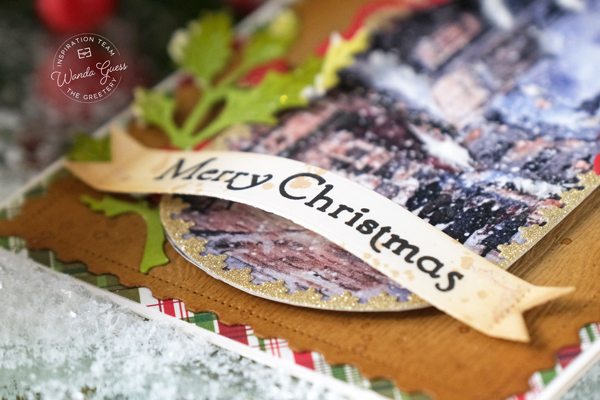
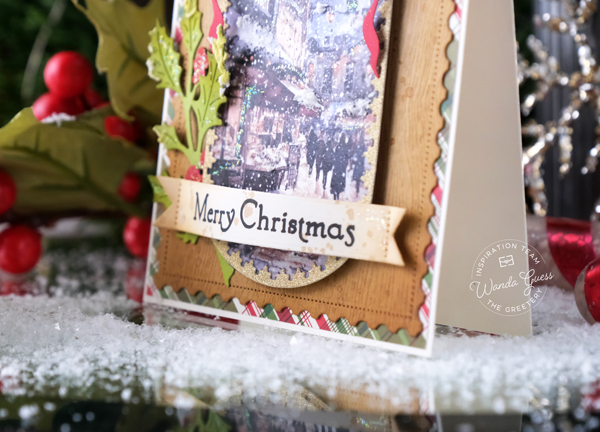
My first card for today features the brand new Capsule Christmas Gallery Prints, the brand new Capsule Filigree Dies, the new Regency Bow and the new Holly dies (and MORE)! Lots going on here and I couldn’t love it more. The Gallery Prints are gorgeous vintage Christmas images that you can use in your projects! I used the pretty street scene here. My finished card is an A2 card base layered with plaid paper and woodgrain paper….
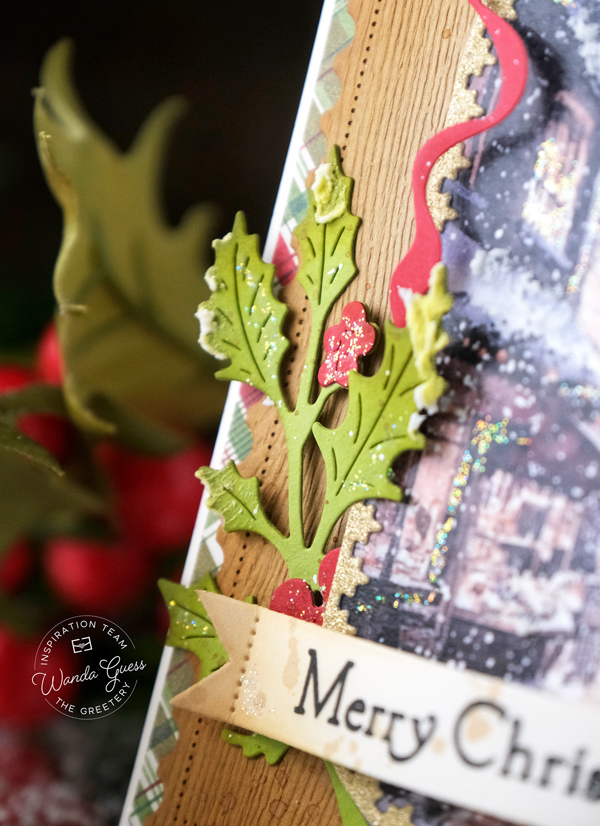
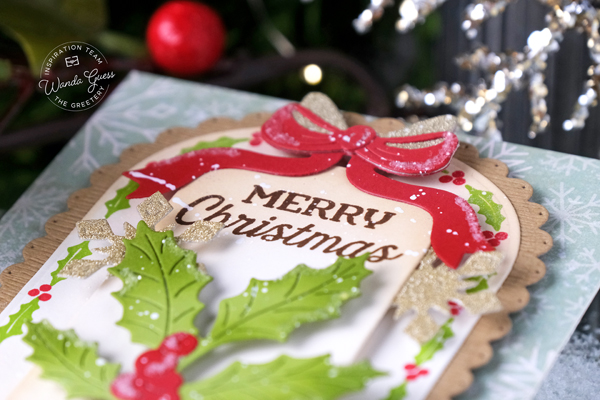
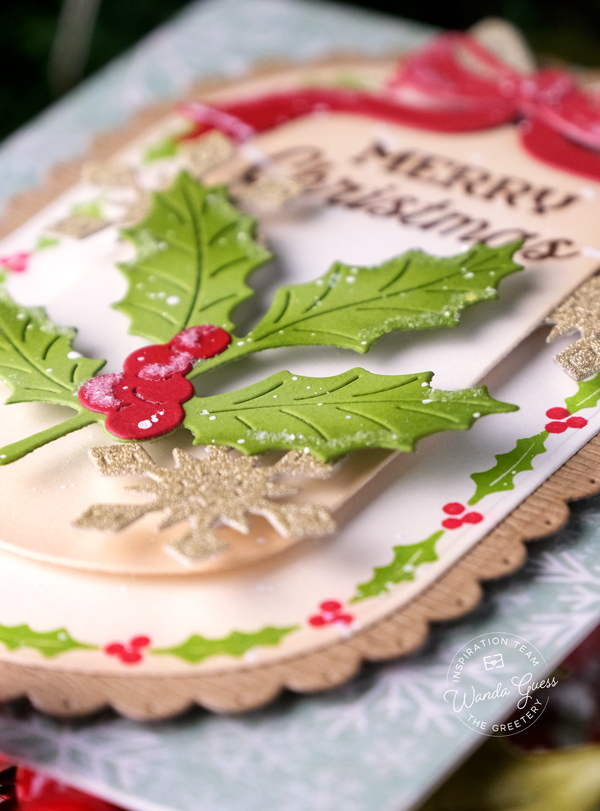
Here’s a close up shot of the perfect new Holly Dies! I inked them, and added snow and glitter, and all the yummy things to make it Wintery.
The sentiment is from last month’s new release – put onto a banner and inked with distress inks! I used foam tape to adhere just the ends and the bowed it out from the bottom of the card.
ACK! How much do you love this new bow?? There are TWO new bows in this release! They are called Regency Bows. I used red and gold for this one….
It’s kind of hard to see in the photo, but I used a small paintbrush and brushed on some paste/snow onto the actual picture. I also added sparkly glitter to make the scene look icy and cool.
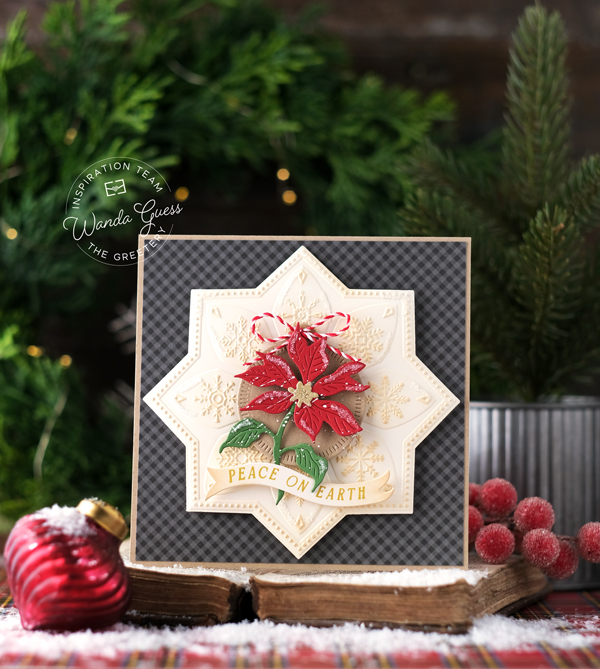
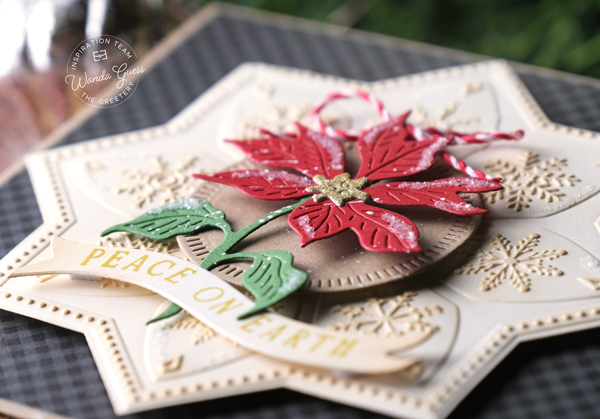
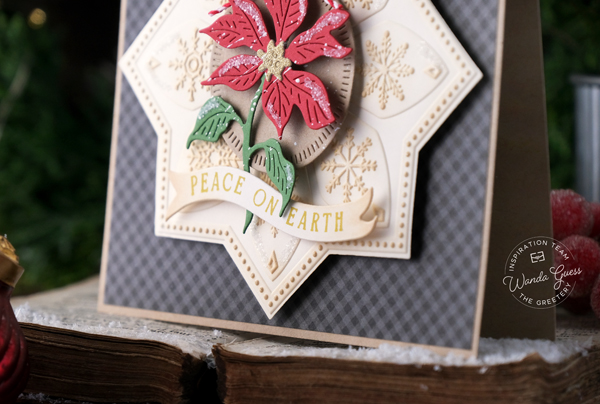
My next card features a new addition to the Shortbread Shapes – this one is called Shortbread Shapes Snowflake! Stunning!!! The embossing folder is lovely! My card also features the brand new Poinsettia Dies. My finished card is a 5.25″ x 5.25″ square kraft card base. I layered black gingham on top and then the center of the Shortbread Snowflake… With a classic poinsettia in the center…
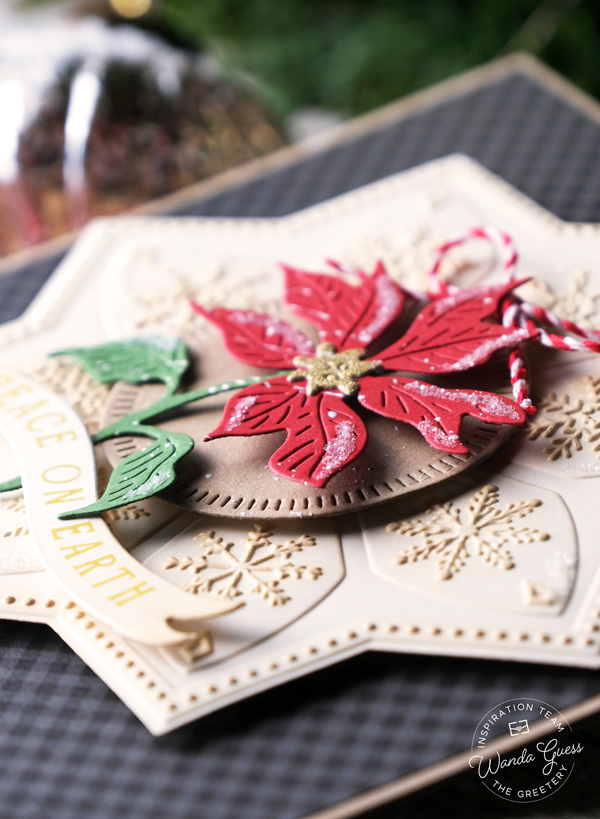
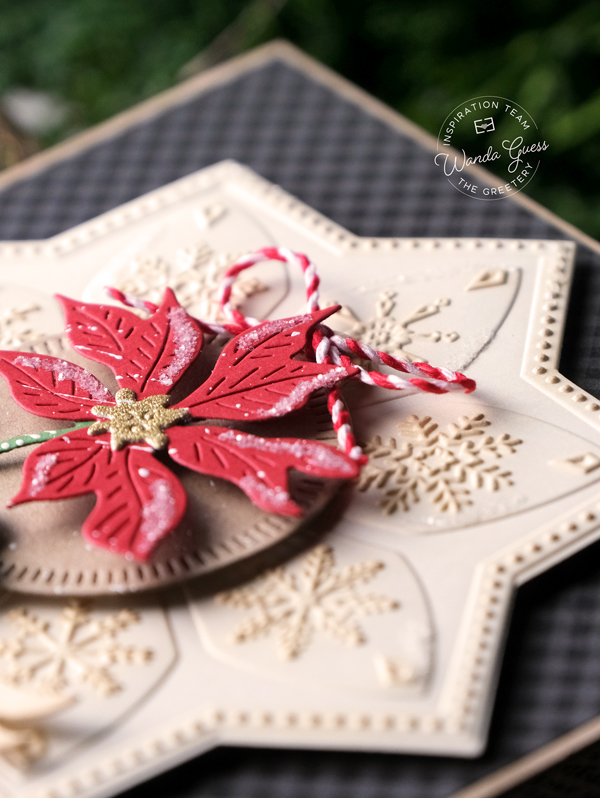
Here’s a close up of that perfectly perfect poinsettia! Of course I added snow splatters and icy rock candy glitter everywhere!
I used the embossing folder and die cut out the star shaped piece from the center. I used cream cardstock and then inked over it with Antique Linen distress ink for added detail on the design. I mounted a kraft circle tag and then the poinsettia.
My next card features the brand new Capsule products for winter…. The Capsule Holiday Borders!! My card also features the second of two new Holly Dies, and the second of two Regency Bows! My finished card is an A2 cream card base layered with snowflake patterned paper. My focal point is layers of the Capsule Basics with different elements added….
I die cut some gold glitter snowflakes and placed them on the card. I edged the pieces with distress ink to age it a bit. The new stamps stamp this pretty holly border perfectly around the capsule shape.
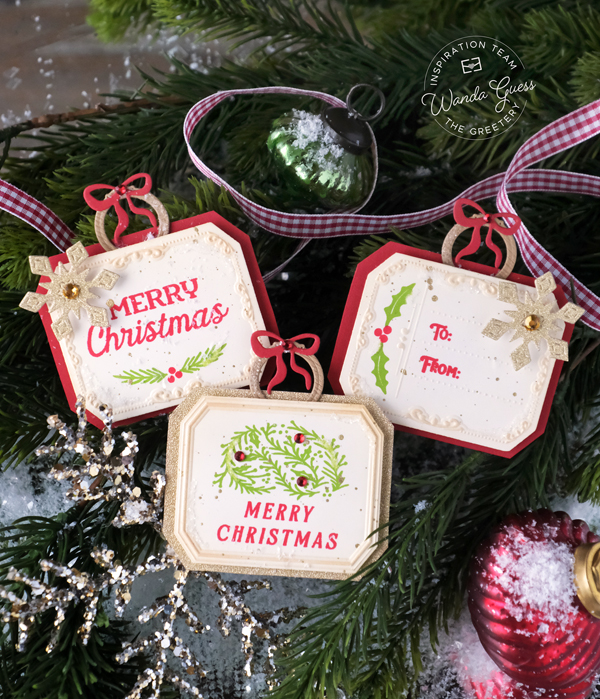
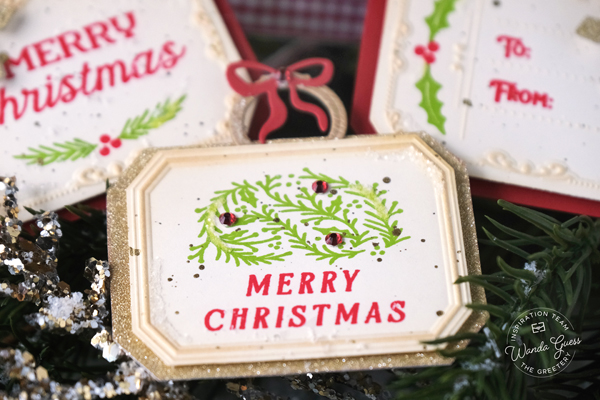
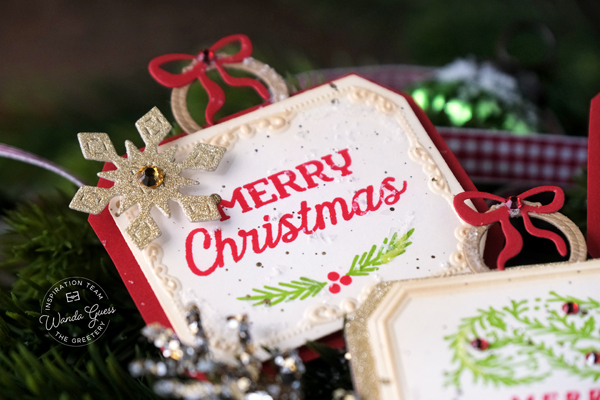
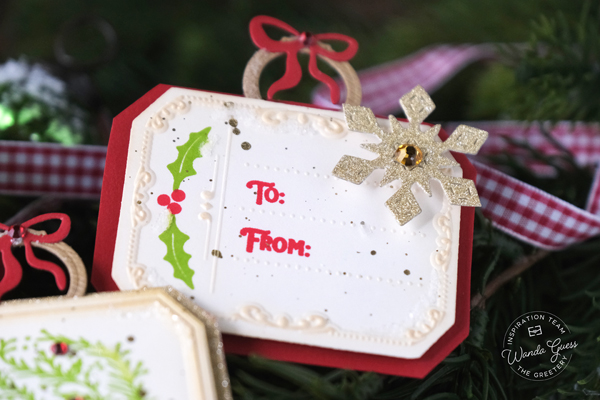
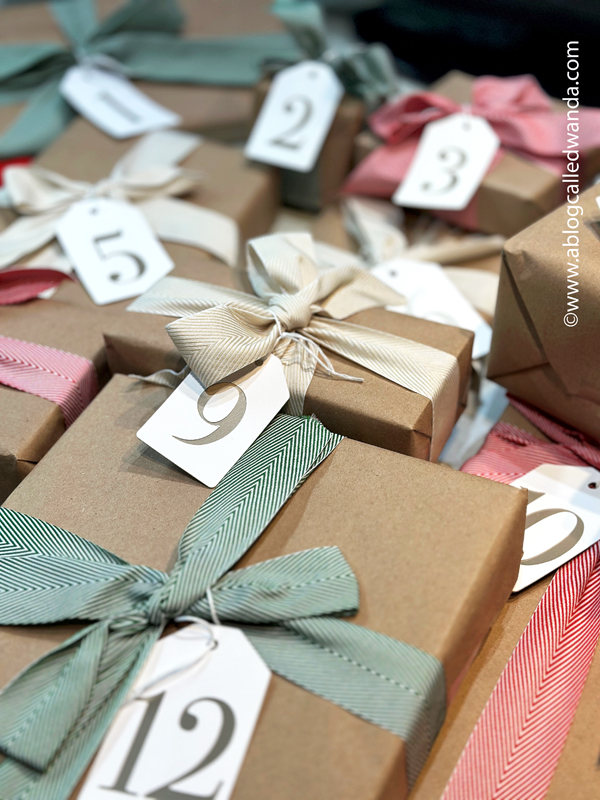
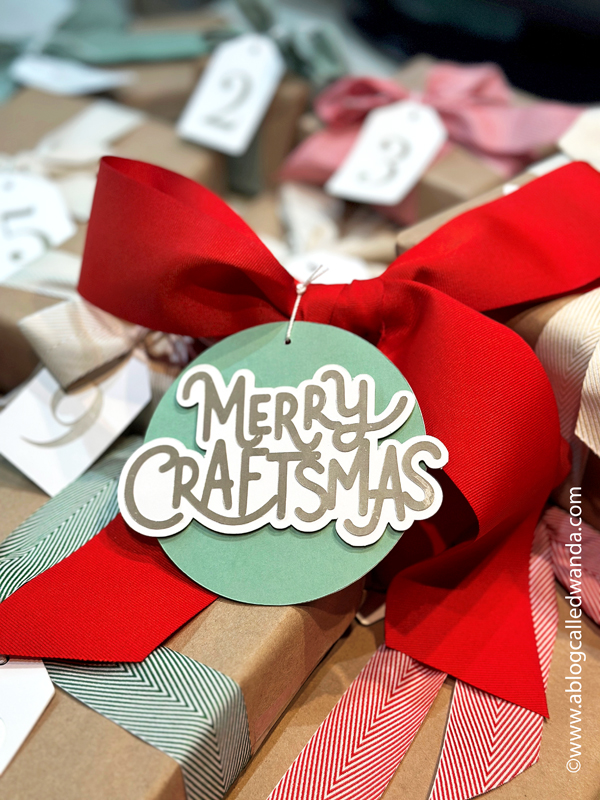
And finally – some Christmas tags! The Greetery always comes up with the most clever and beautiful ideas for tags every year… This year, there are two versions of tags! I used the Large Linked Labels (say that three times fast) to make these gift tags. I used the new Hang it Up dies for the tops! These are tags that die cut and then emboss like a dream in the matching embossing folder!
The details on these embossed portions is incredible! I used traditional cream, red, green and gold! Can’t wait to tie these onto some packages.
That’s it for today – and my showcase of projects for the Christmas Gallerie Collection! Thanks for stopping by to share with me today! It’s my pleasure to introduce the new release. TOMORROW is release day! Enjoy and happy shopping AND crafting! XOXO
Giveaway Information: The Greetery is giving away two $50 gift certificates! The comment deadline is 11/21 at 6:00am EST (comments from team blogs entered into giveaway). Winners announced on The Greetery blog on 11/21 at 9:30am EST (right before the new products go live) GOOD LUCK!!
COMMENTING NOTE: On my new blog – to leave a comment, you must open the post first. Then the comment box will appear at the bottom. You can click here to do that!
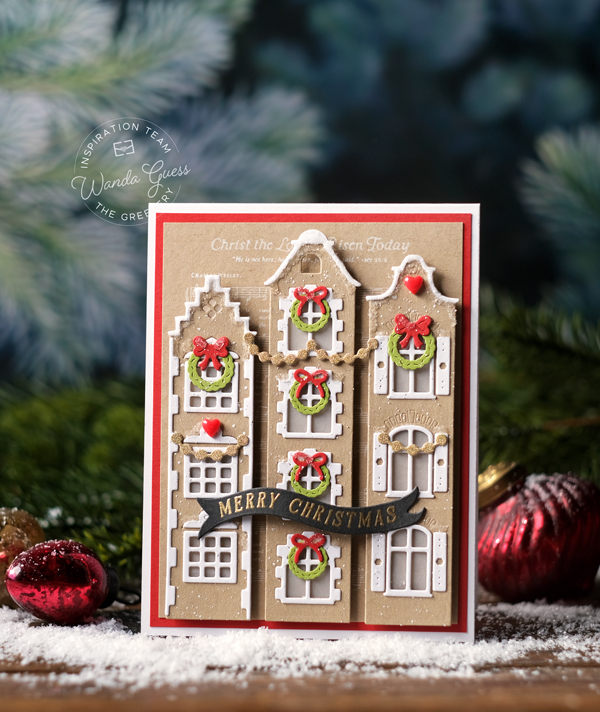
Hello crafty people! I’m up on The Greetery Blog today sharing my bonus card for November! How fast did fall go by this year? It’s going to be Christmas here very quickly! And that means time to finish (or start LOL) all the pretty Christmas cards! I had one other idea from the last new release that I didn’t get made in time for release week. So I thought I would share it with you today. Didn’t you just love the Marketplace Collection? Exquisite! My idea was to take the Marketplace buildings and make them gingerbread. That’s what I have for you today, pretty row houses with a classic gingerbread vibe.
My finished card is a white A2 card base, layered with red and kraft. For my color palette, I used mainly kraft and white to mimic traditional gingerbread houses. Little pops of red and green make it perfect for the holidays. My card features the brand new Marketplace Mini dies – which are now, thankfully, back in stock!
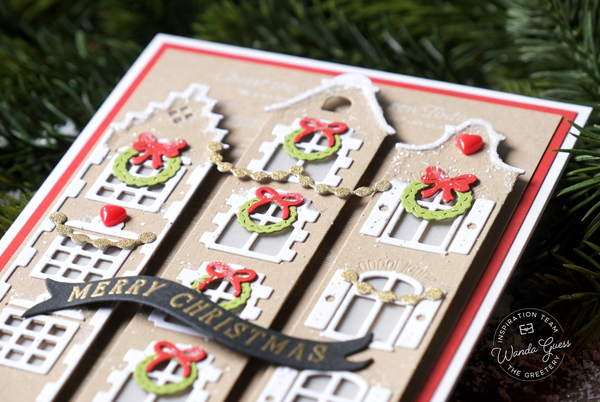
I started by die cutting out the three houses from kraft cardstock. I die cut out all the accent pieces from white cardstock to look like frosting! I next used the Holiday Festoons Dies set to die cut wreaths and bows from red and green cardstock. I assembled all the pieces and then generously splattered on some white paint snow! I used vellum behind the windows for a frosty look. I did also add some sparky, chunky glitter.
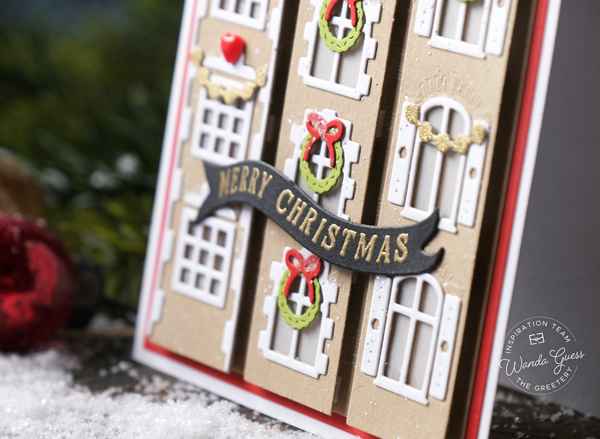
The sentiment was gold heat embossed onto black paper using the Rosemal Reflections Sentiments stamps and dies.
For the background layer I used white pigment ink on the kraft cardstock and stamped the lovely Hymn Sing stamp. I love that stamp! The perfect Christmas background…. I die cut a few gold accents also.
I attached the houses to the card using foam squared to make everything pop just a little. I added a couple of enamel hearts from my stash. This card is so yummy and Christmas-y!
That’s it for my project for today. I hope you have a very happy and creative day. It’s always my pleasure to share with you my love of The Greetery, and I look forward to sharing again soon! In the meantime, happy holiday crafting! XOXO
Hello friends! I’m here today with a second card I made with the lovely and cute new Winter 2025 release from Pretty Pink Posh! I shared my first card last week, and today I have another sweet penguin card! Today’s card is part of the huge multi day Instagram Hop for the PPP new release. I love a good Instagram Hop! Be sure to head over to my Instagram post today and leave a comment for a chance to win a prize! Woot!
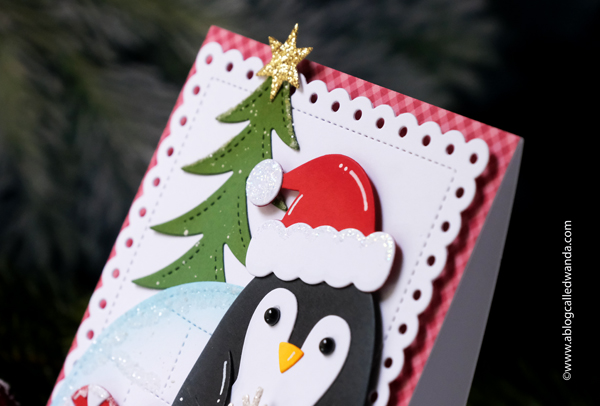
I feel like these fun new penguins are perfect for both generally Winter cards and for Christmas cards. Last week I made a winter card…. So today I made him a Christmas Santa Penguin. LOLZ. I also made him an igloo at the North Pole, complete with a candy cane decoration for his porch!
My finished card is a white A2 card base, layered with pretty red gingham and then a crisp white eyelet rectangle. My card features the brand new Penguin Holder dies, the new Igloo Shaker Dies, and the new Winter Trees! Of course, I also combined in some favorites from the Christmas release! I love his hat – and I always love a candy cane theme….
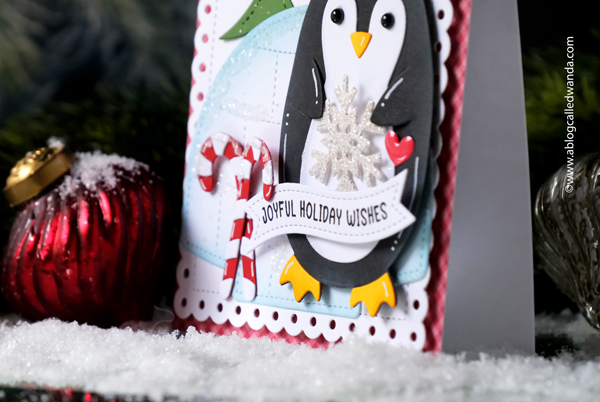
Here’s the side view of my layers… I die cut out everything and gently inked the edges of the die cut pieces. I used an icy blue to shade the igloo, and then coated it with sparkly glitter. I added white gel pen accents to everything too (of course)!
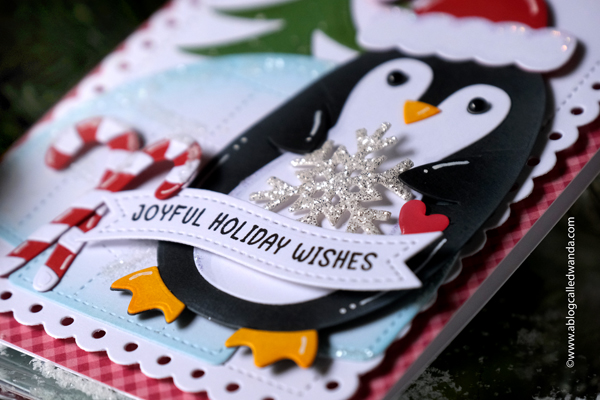
The candy canes are from the Christmas Holder Additions – they are perfect! In this pic you can better see the igloo too…. The sentiment is from the Christmas Banner Greetings set, and I do indeed think he looks joyful! I die cut a shimmery snowflake for him to hold.
I used black enamel dots for the penguin eyes – I think that makes them look more alive – when they are shiny like that.
Okee Dokee – that’s it for today’s card! Be sure to head over to Instagram to see the entire hop and enter to win a prize! CLICK HERE for the hop! I will see you soon – be well – and keep on crafting!
Well helloooooo there! Have I got a fun post for you today! I have been working on this post for WEEKS! And I finally get to share everything with you! I am so excited! I was lucky enough to receive a wonderful, amazing, cool PR box from my friends at Concord & 9th that contained their brand new Crafting Kits. Concord & 9th started a new subsidiary company called Crafted by C9 and wowza. It’s awesome! The concept is this – fully curated and contained crafting kits. You buy a kit, and that’s it! You need nothing else to create a project. The kits have everything – even down to the glue and the tape! Right now all the kits are Christmas themed, but if I know them, there will be more good things coming as the new year arrives. It was a joy to open everything up and see what they made for us! I think you’re going to love it. Everything is already available for shopping and shipping!
For these kits, I imagine a few things…. Beginning crafters who are maybe a bit shy about buying a ton of supplies…. Busy busy crafters who just have a little time to make some holiday magic…. Groups of friends, family, kids getting together to make projects and enjoy time together…. Presents for your favorite crafter! I put together ALL of the kits and I can say that they were SO easy to make. The directions are in both video and print format – all you need to do is click on the enclosed QR code and it takes you straight to the instructions. The videos are beautiful and so well thought out. Literally anyone can have fun making a project!
There are trees, and reindeer, and little holiday houses….and garlands. Lovely home decor with a handmade, homespun feeling. All the kits use signature Concord & 9th color palettes. Seriously. Awesome! Today I am going to share TONS of photos of my projects. I hope to inspire you to get some kits and share with your friends and loved ones!
Crafted by C9 is here! They were kind enough to give my blog readers a discount code too! Let’s get started, shall we!?
So one day while I was at work, a HUGE box arrived at my house! I mean huge! It was a true pleasure to open every single individually wrapped box of goodies. Merry Craftsmas indeed! I feel so spoiled and I know that’s how you will feel when your kits arrive! Thank you Crafted by C9!
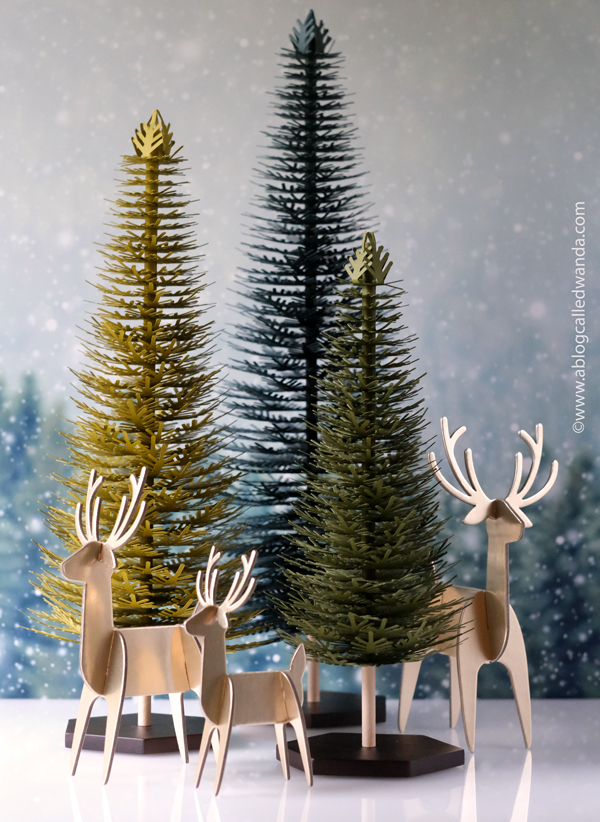
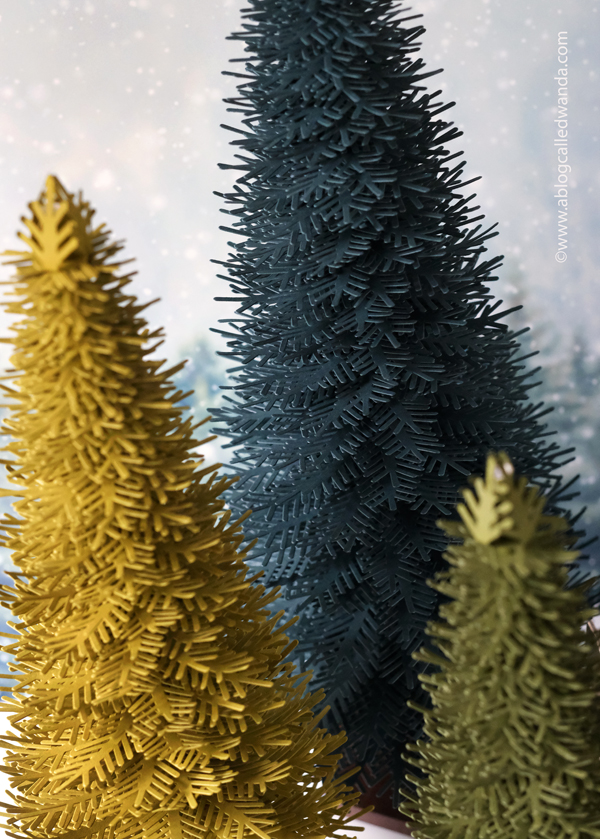
The first thing I put together was this beautiful tree! There are three trees, each a different size and color. Put them together and you have a mini forest for your home decor! Here are the contents of the kit – even the glue! The stand is such nice quality and beautiful wood.
Here are some step out photos of the process of building the tree. All three trees go together in exactly the same way. You build them from the bottom up by layering all the perfectly cut pieces. Could not be easier! My tree just grew and grew!
Here are all three of the trees together, so you can see the sizes and the colors. They are VERY pretty and sturdy!
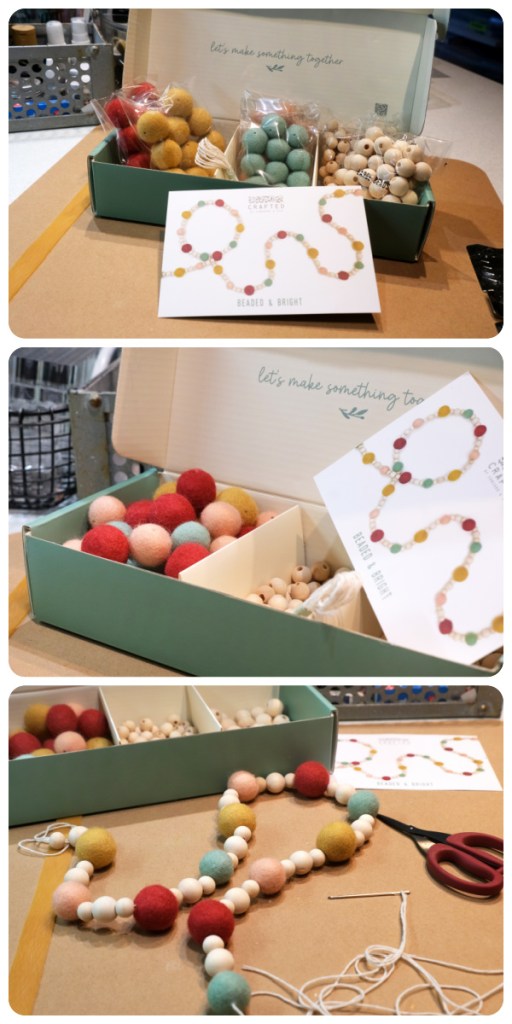
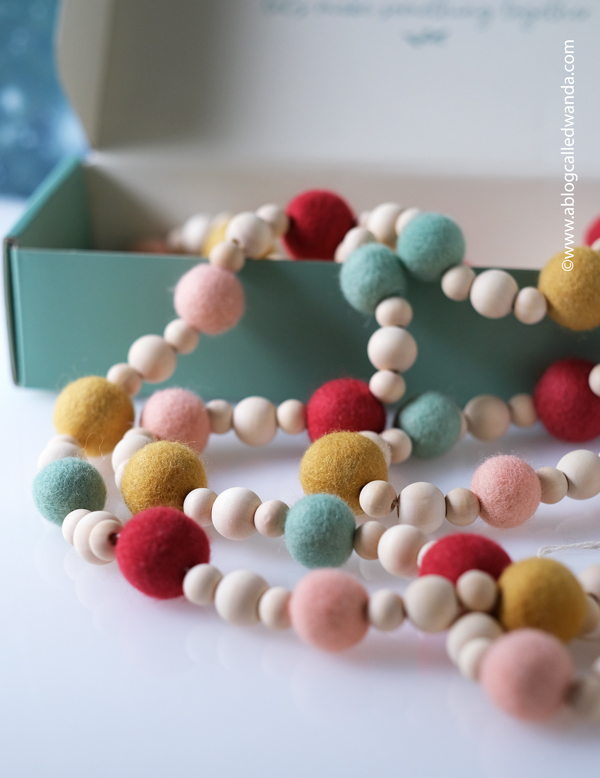
Next up I put together this wonderful garland! I do so love a felt ball! LOL. This is maybe my favorite one? (Or maybe the houses – hard to say)! Again, see how perfectly packaged it is?? Easy directions for a piece of home decor that will last forever. The needle and thread are in the box – nothing is forgotten…
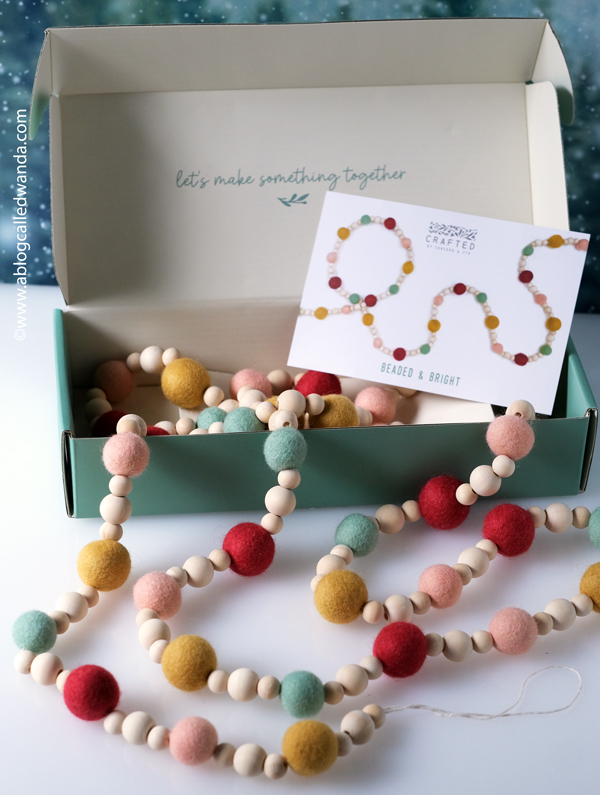
Here are some photos of my finished garland. I am kinda obsessed with this color palette, aren’t you? I think this could also be very pretty in a baby’s room or for a birthday. This one does not have to be only for Christmas!
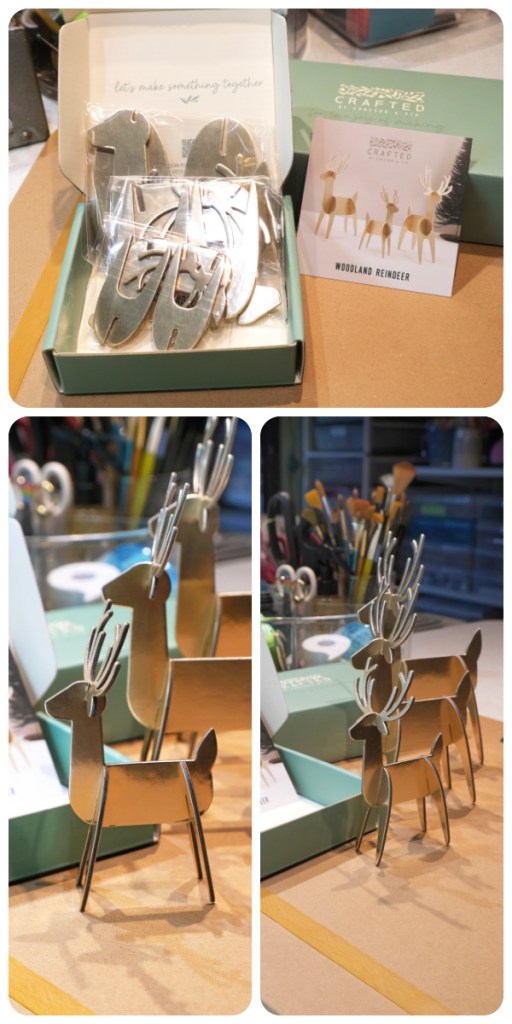
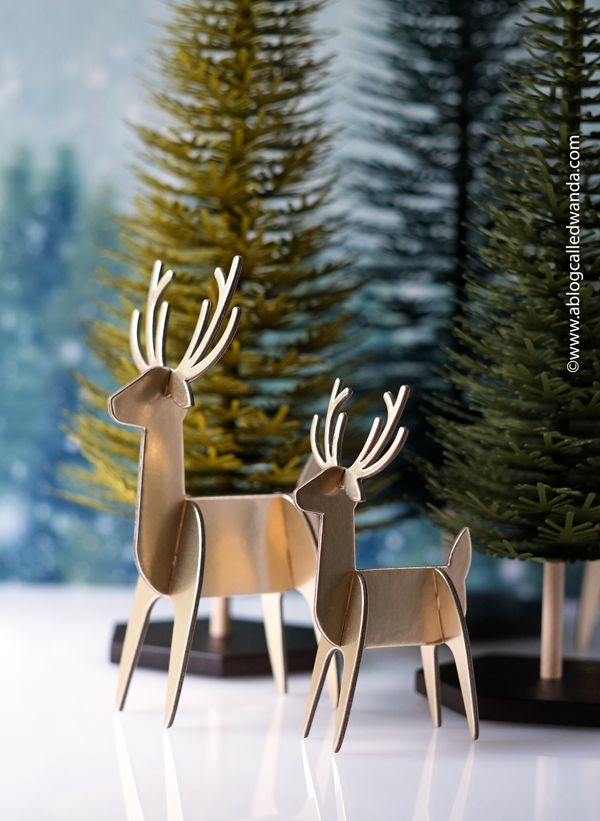
Next up, I put together this festive metallic reindeer! This kit is probably the simplest/easiest kit to put together. You assemble the reindeer by attaching the legs. That’s it! The kit comes with three festive reindeer in the prettiest shade of gold/platinum. They are sturdy and thick cardstock too. Lovely!
The trees and the reindeer are a perfect match! Voila – you’ve created a scene! Beautiful for a holiday table – just add some candles! I love this entire look!
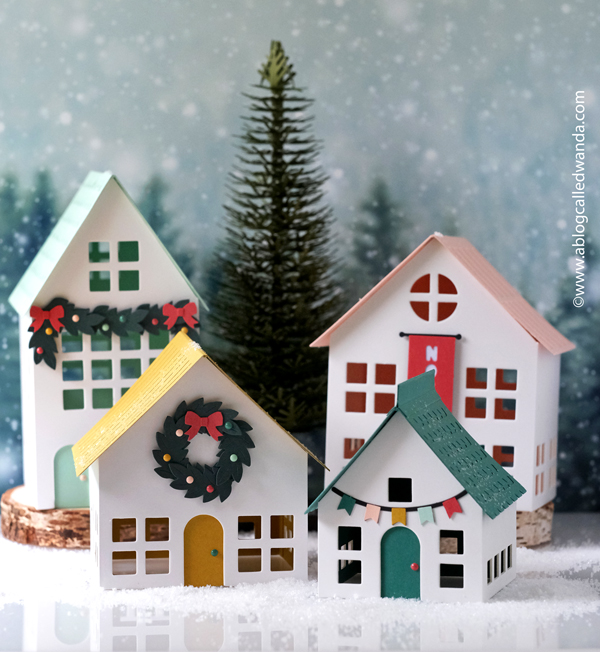
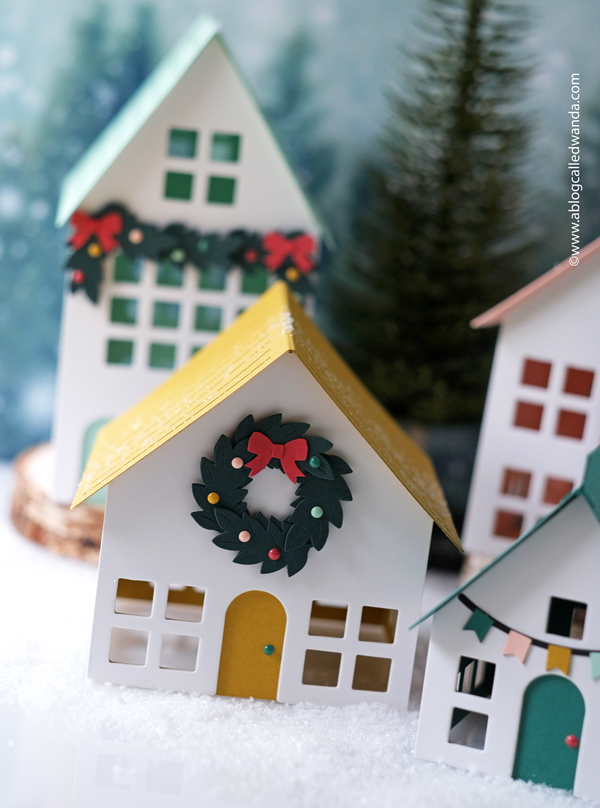
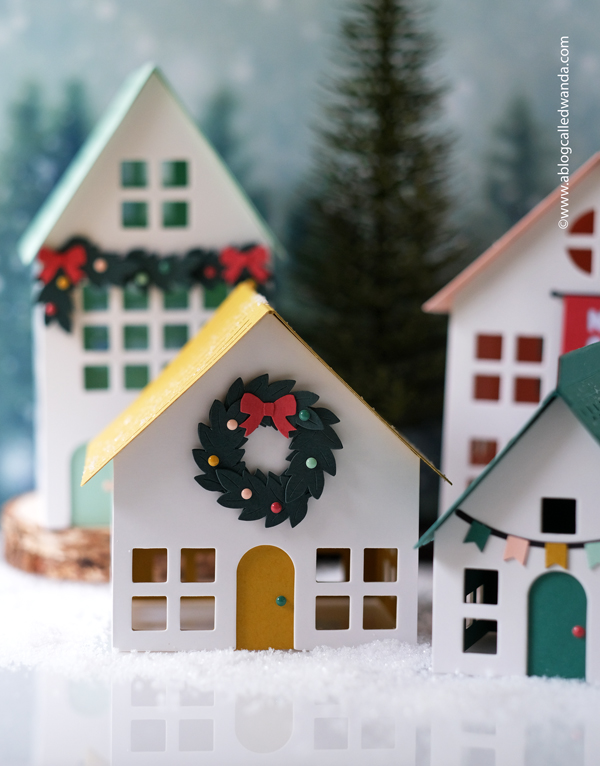
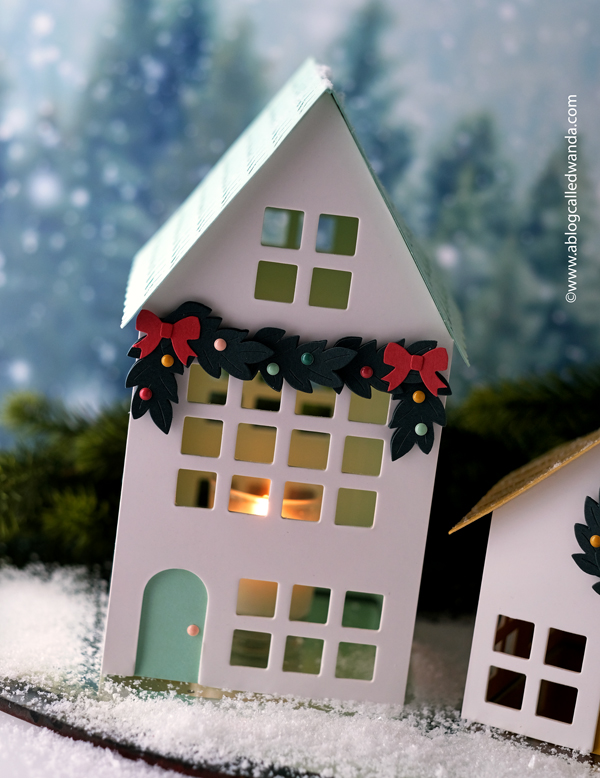
And….the finale! The amazing little holiday houses! This kit comes with FIVE houses! (It was late at night and I apologize I didn’t take a photo of the kit before I made them!)… The houses are white on the outside and each one is a different color on the inside. Each house is a different size and shape, and each one has a different embellishment. All the embellishments, the glue, the tape and even the enamel dots are in the box. READY to go! Here are four of the five houses and the large tree! EEP. So pretty together! I’ll tell you in a minute why only four of the houses are in the photo. Aren’t they just the sweetest thing ever!? I love this!! The quality is outstanding. These are THICK and sturdy.
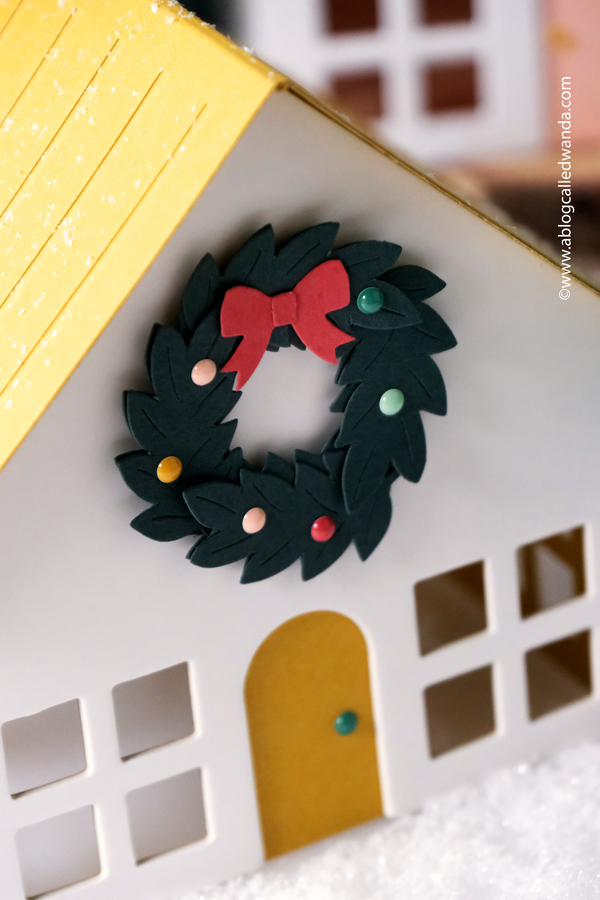
Here’s a close up of one of the embellishments – everything comes already cut out for you! Look at those tiny bows!
I sprinkled on some fake snow to make it look nice and wintery!
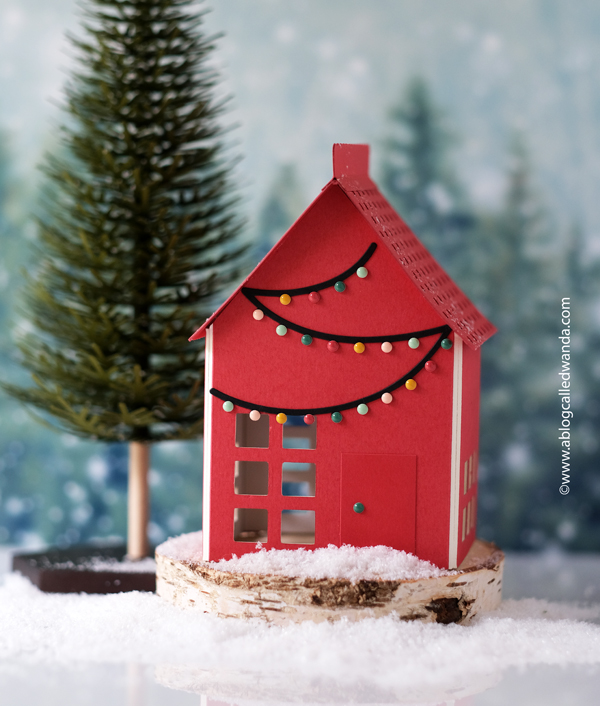
And this is house number five! I thought it might be fun to make it inside out! So instead of a white house, it’s a pretty red house! What do you think? I think it’s kinda cute! I should have put the door on the inside – but I still love it! And that tiny light garland? Get outta here!!
These next few photos are just close ups of all the different elements!
I thought it might be pretty to put some tealights inside! Love this look! Warm and cozy!
Truly, it is my pleasure to introduce the Crafted by C9 crafting kits to you! What a treat! I hope you are inspired to make some things and have some quiet time in the midst of holiday madness! I am very blessed by the crew at Concord & 9th. Some of the best people in crafting. I’m grateful and honored to share their new endeavor with you today. Let me know in the comments what is your favorite kit!!
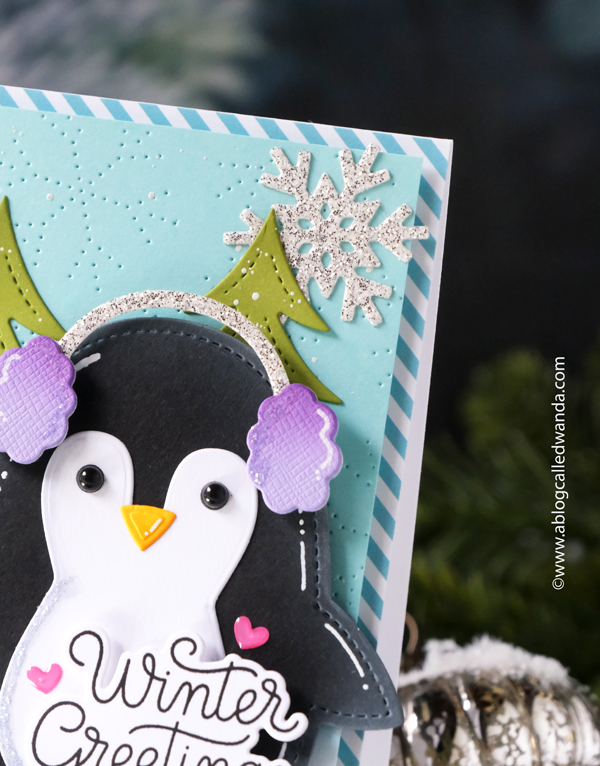
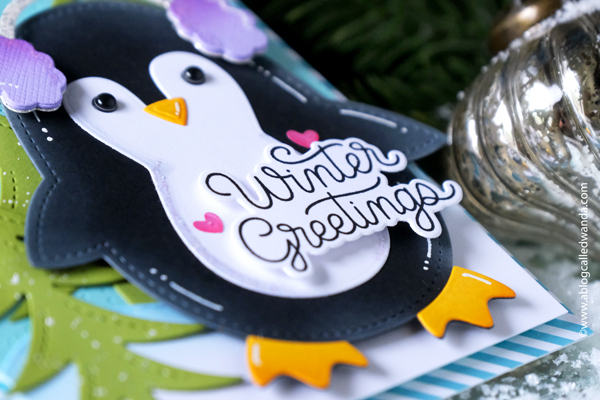
HEY HEY HEY! How are you today? Are you ready for some cute stamps and dies? I know you are! Our minds turn towards Winter crafting officially now that Halloween is over! I’m ready to ho ho ho a bit now! Today is release day for the brand new Winter release from our friends at Pretty Pink Posh. They already did their amazing Christmas release, and this release is more about Winter fun – think penguins and igloos and trees. CUTE!! The new release is available now! Yeah! I have a card to share today, and then another one next week for the big Instagram hop. I do adore a cute penguin – especially if she is wearing ear muffs!
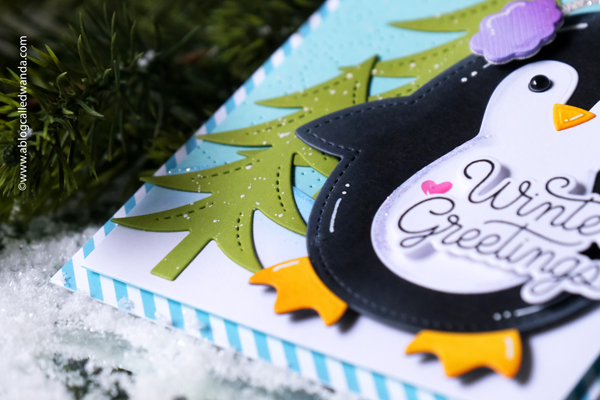
My finished card is an A2 white card base, layered with festive stripes and a snowflake background… I love a palette of minty blue and lavender. So fresh and icy. This card features the brand new Penguin Shaker dies, the new Snowy Hills dies, the new Winter Trees dies AND new sentiments too! I love it all!!
I combined some of my older favorites from PPP also! Like the beautiful snowflake background and this perfectly sized snowflake die….
Here’s a side view of my layers…. That penguin is too adorable. I made her some fluffy earmuffs… The new trees dies are really great and I know those will go in my crafty rotation forever…. I added white gel pen accents to the pieces and gently shaded everything with distress inks and small daubers…
The new sentiments are called Let It Snow and once again – that pretty PPP font! I die cut my sentiment with the matching dies. I always like to add a few enamel dots hearts to put some love into it! I used just a tiny bit of Diamond Stickles on the snow and his body. And I used enamel dots for his eyes because they are so shiny – makes his eyes pop!!
Hey everybody! Happy Halloween! I hope you had a great week and I hope you have fun tonight trick-or-treating or just hanging out with friends and family! We always have quite the display at our house and people come from all over the neighborhood to check it out. We love to sit outside and play spooky music (and start the fog machine) and pass out candy. It’s a nice time to chat with the neighbors. It’s so light hearted and reminds me of days gone by… My birthday is on Monday! EEK – more scary than Halloween – another birthday! And for the first time in a long time – I’ll be at work! Boo! Nothing fun planned but I’m sure my husband will think of something for us to do this weekend to celebrate just a little. Have a great weekend, my friends!!
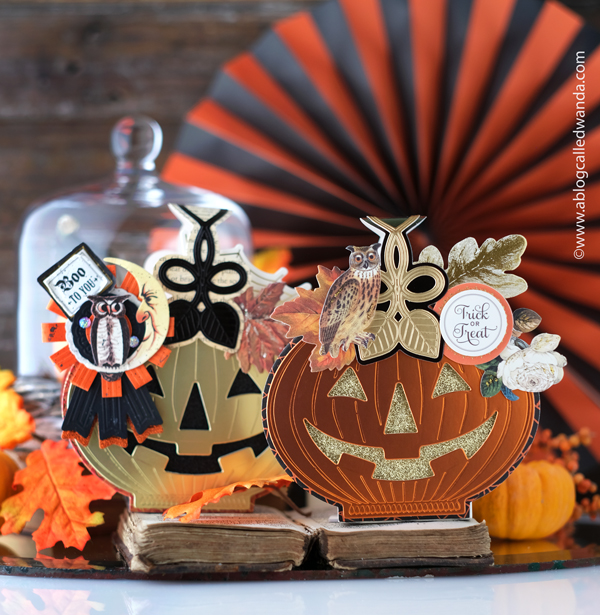
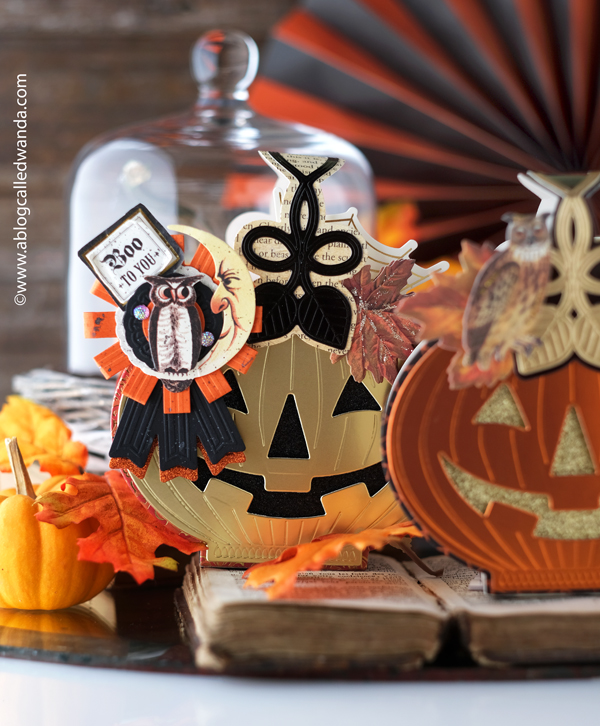
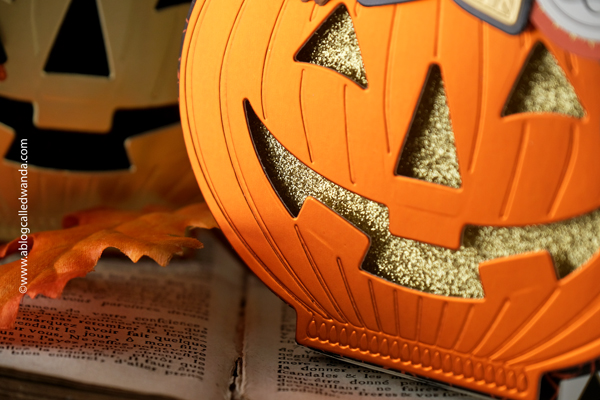
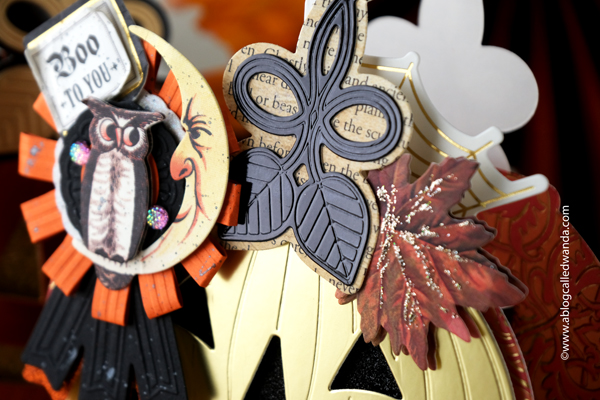
I have one final project to share for Halloween 2025! You guys know I LOVE Anna Griffin dies, embellishments, and papers for that really cool vintage Halloween vibe! I got these new dies months ago… to make jack-o-lantern treat boxes. They are super easy to put together, and you can really use your imagination adding different colors and embellishments. I am kind of loving that shiny deep orange…. I bought the dies straight from the Anna Griffin website, but I know that HSN also has a pretty great selection of Anna Griffin products.
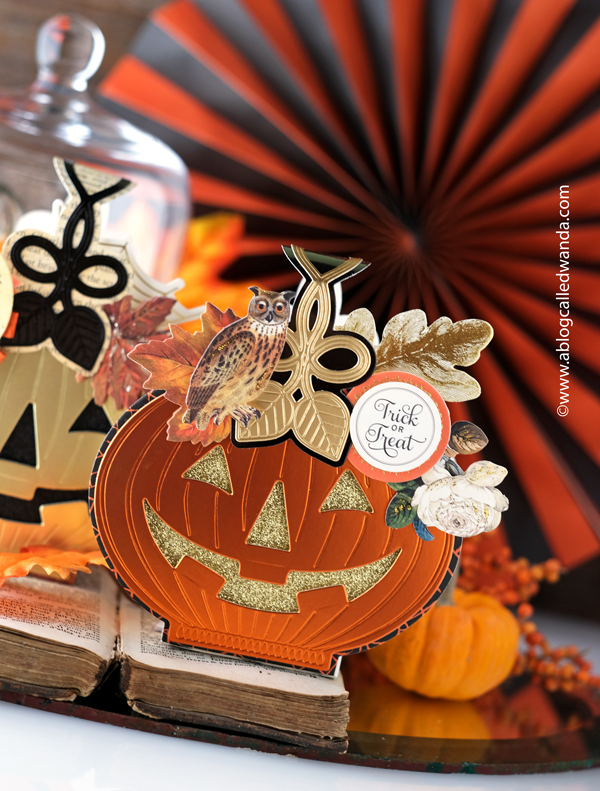
Here are my two treat boxes together – one orange and one gold! Super cute and not at all scary. Traditional pumpkin faces that are sure to please! The boxes hold a gift card and also maybe 4-5 small size candy bars too. I used some glitter paper from my stash and also some Stickles in various colors. Lots of photos ahead!
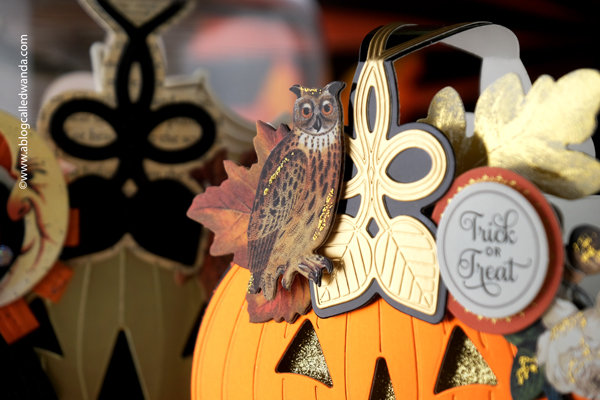
This is what I love! ALLLLL the small added details! An owl, some leaves, and roses too!? Oh, and a sweet little sentiment circle!
I am OBSESSED with this orange metallic!! Ack!!
These are the sides of the treat box portion. There is a jack-o-lantern on each side to create the box. More chances to customize all the different papers! That black and white harlequin print is delicious!
I used foam circles to pop the faces up from the background. I think it lets the glitter paper behind shine through a bit better. Oh, and you know I love that text paper!!
Happy Halloween my friends! November will be here tomorrow! And then Christmas! Next week I’ll be sharing loads of fun things from Concord & 9th! Have fun, be safe, love ya! XOXO
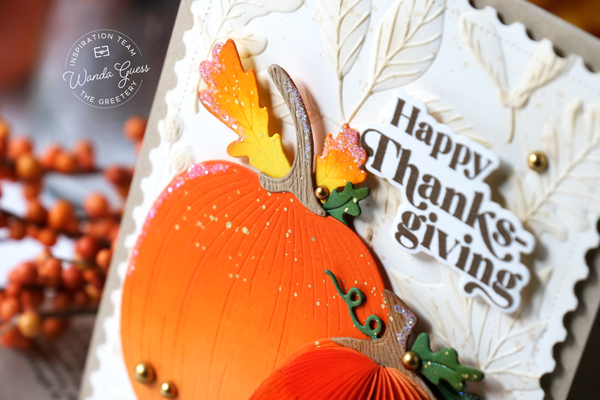
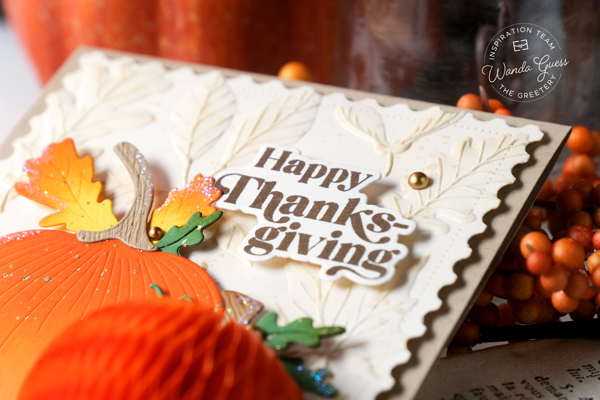
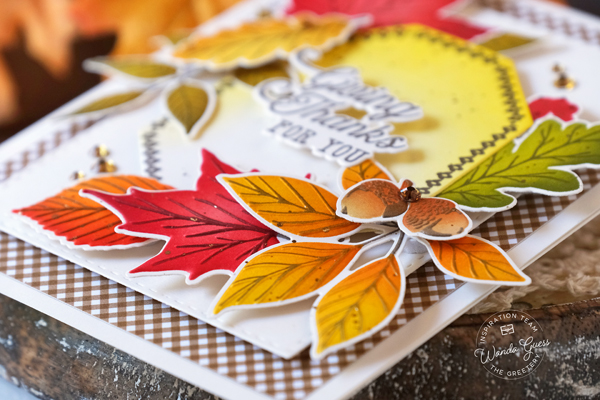
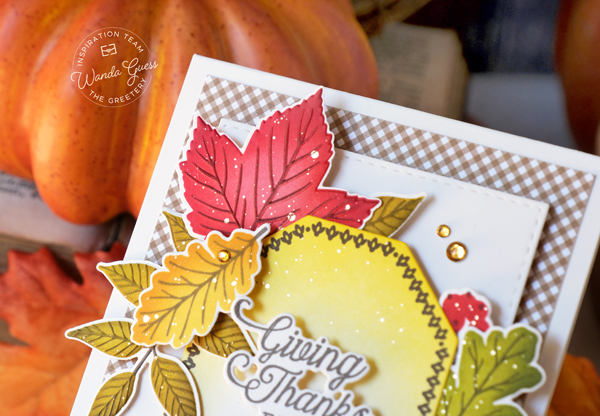
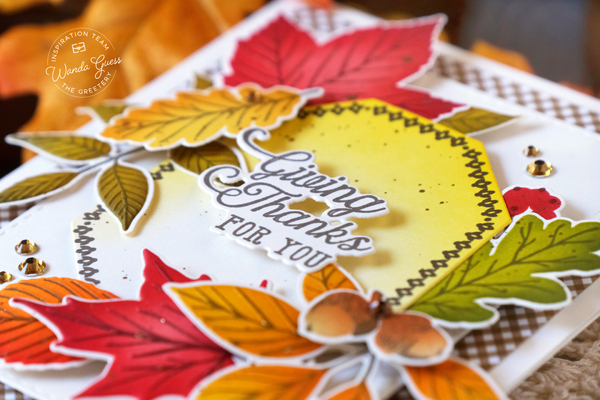
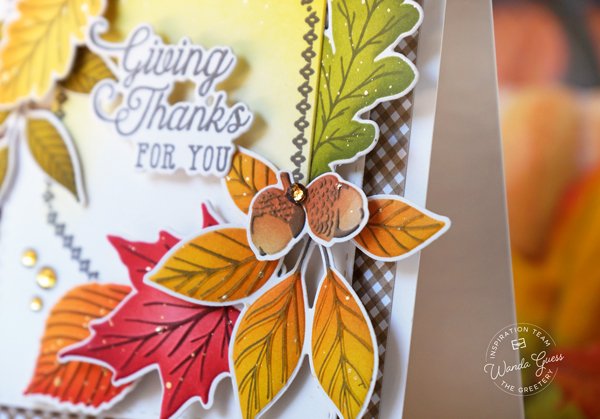
Hi there creative and crafty friends! Today is my day over on The Greetery Blog! It’s Full on FALL! And now that Halloween is almost here it’s time to plan ahead for Thanksgiving! This makes me so happy! All the Fall things – Lots of good things. It’s time to make those pretty Fall crafts for Thanksgiving, with leaves and pumpkins and golden color palettes. That’s just what I have for you today – a Thanksgiving card idea with favorite supplies from The Greetery.
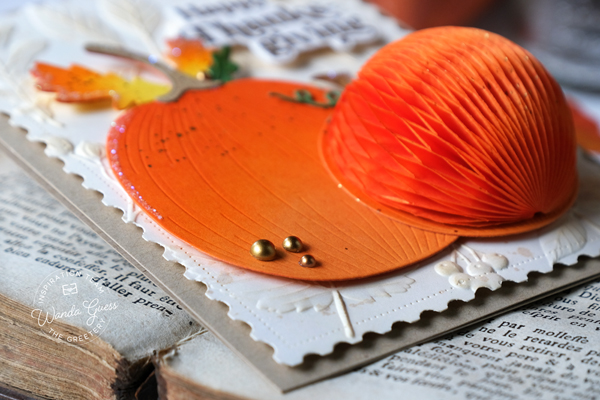
My finished card is an A2 card base made from kraft cardstock. I layered a cream layer that I embossed, and then the pretty orange pumpkins. I started the card by embossing my background layer. I used the Postage Die to die cut a cream panel. Then I used that amazing Herbarium Embossing Folder to emboss the panel. I used a blending brush and Antique Linen Distress ink and very lightly went over the embossed portions to make them stand out.
I die cut out the Plump Pumpkin and the Honeycomb Pumpkin dies from orange cardstock. I inked the pieces using dark orange Distress Ink. I also splattered them with gold paint. I die cut the leaves from the Mighty Oak Die set and inked those too…. And added bits of glitter to look like they are glistening in the sun.
I stamped the sentiment from the Oakwood set and die cut it out with the matching die. My sentiment was stamped in dark brown ink instead of black to keep that warm tone. I placed everything onto my card using foam tape.
That’s it for my project for today. I hope you have a wonderful and creative day. It’s my pleasure to share with you, and I look forward to sharing with you again soon. In the meantime, happy crafting and happy Autumn! Get ready for November!! XOXO
Hi Boo! How are you?! It’s Halloween week already! Yes, like usual, I am behind and I will not finish everything I had in mind for Halloween…. Such is my life…. So many ideas, so little time! Halloween came fast on me this year, especially with working full time! I want to squeeze in a couple more projects if I can! Right after Halloween it will be my birthday, and just like that the rest of the year will come!
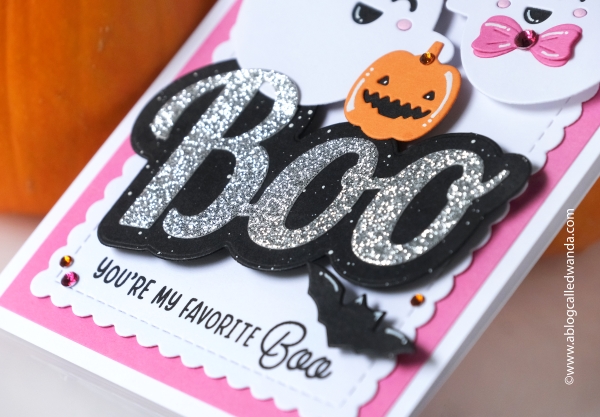
Today I’m sharing a super cute and fun Halloween card that won’t scare anyone! Cute little ghosties with smiles and pink cheeks. The absolutely most adorable stamps and dies from Waffle Flower. I had some time to stamp the other day and this is what I made! I used a color palette of traditional black and orange, but then I popped in some hot pink and silver glitter paper too.
My finished card is a white A2 card base, layered with hot pink and white…. The little ghosties are all decked out in their outfits to spook…
I started by die cutting out the boo (2 layers, silver and black), the ghosts, and the other smaller elements. I glued everything together. I added white gel pen accents to everything, and white paint splatters to the Boo element.
I gave her an orange and hot pink witch hat! She’s stylish you know!
I sprinkled a few bats for good measure. Everything is affixed to the card using foam circles for added pop and dimension. Supplies are listed at the bottom!
That’s it for today! I hope you’re having a beautiful Fall weekend! I’ll be back this week with a Greetery card and who knows what else! Love you, mean it. XOXO
Hello my friends! Happy Friday! I hope you had a great week. It’s been a gorgeous Autumn week here in Sacramento. Crisp air, a little rain, and the leaves are turning color. It’s my favorite! Halloween is in two weeks and my husband has been going crazy decorating our front yard. It’s kind of a neighborhood tradition – everyone loves to come by our house during the holidays. My husband is Mark Griswold (ha!) from now until new year’s!! It makes him happy and the kids love it. In two weeks it’s my birthday too. So many things to look forward to. As most of you know, I now work full time again away from home. So unfortunately there is not nearly as much time for crafting and creating. It’s been seven months since I started my new job, and I’m just now starting to feel that I have a new rhythm down. At first I was so so tired but now I’m coming back! There are going to be a lot of things left unmade this year, but I’ll get to them eventually! Thank you for all the love on my Greetery posts recently. Wasn’t that an amazing release?!
Today I’m briefly sharing something cool – a new company and new brand from our friends at Concord & 9th! They started a new line of GORGEOUS crafting kits. The new company is called Crafted by C9! I was lucky enough to receive an amazing PR box recently from them and what a joy! Gosh, I didn’t feel worthy! Everything went live on their new website this week, so you can finally shop it! These are the perfect thing to buy and craft with friends. The projects are simple and lovely, and each kit has literally everything you need, down to the glue. They thought of everything. I’m picturing a girls night with a cocoa bar and some good music – sitting around the table enjoying the holidays….
I will be putting my kits together to show you everything, and also I’ll do an unboxing on Instagram stories too! You’re gonna love it – I know for certain. Be well, have a lovely weekend! I’ll be back as soon as I can. XOXO
It was my pleasure to introduce the brand new and gorgeous Christmas Market Collection to you this week! And, I hope you love it as much as I do!! Happy Crafting!! If you scroll back to my last two blog posts you can see all my projects from the new release! If you have any questions – reach out!! Thanks for all the love and kind comments! Happy Creating! Can’t wait to see what YOU make! Feeling the Christmas Spirit!
Today is another fun and exciting day becauseit’s reveal and showcase day TWO for the new Holiday 2025 Greetery release! Oh Yeah! Did you enjoy day One projects? I really love sharing with you guys. I’m not quite there in my mind for Christmas, but it has a funny way of sneaking up on us. So better to be early than late! The new release is called Christmas Market Collection. Stamps, dies, stencils, embossing folders….with a lovely Winter theme! The new release was so easy to work with and brought a little Christmas spirit to my craft room. The design team and guests will be sharing our projects yesterday and today. Then release day will be TOMORROW – Wednesday 10/8 at 10am EST! Come along with me as I share three more projects today! I know you’re going to love it like I do! If you didn’t see my post from yesterday, go check it out now! (More projects!)
All the prize information, details, and design team links are at the bottom of my post. So exciting!!
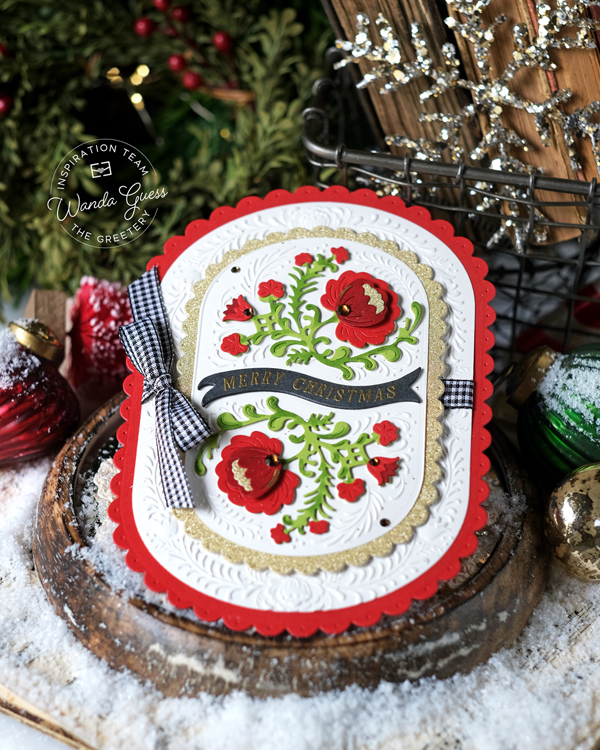
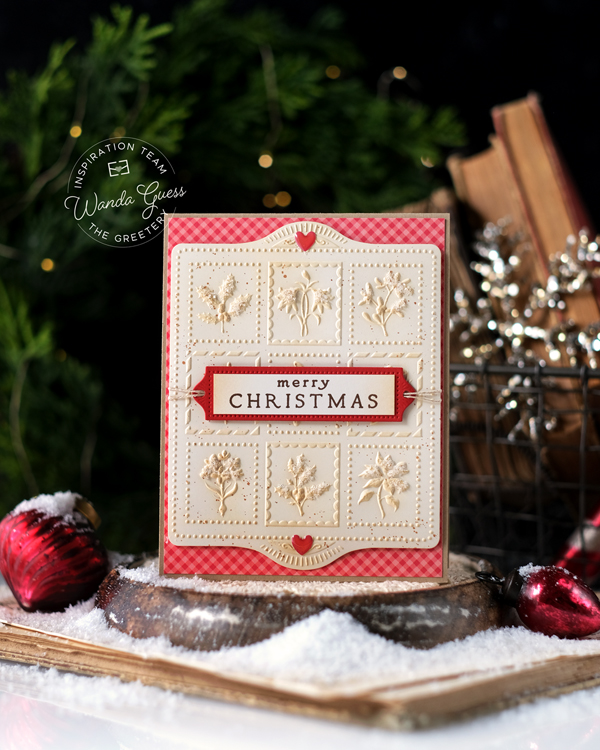
Hold onto your Christmas bonnets, because this first product suite is going to blow you away! Woo! My first card today features the brand new Rosemal Reflections Suite. Gorgeous stamps, dies, and embossing folder….. I made layers upon layers with this one. I used the Capsule Dies released in the last release to make the outline of my card. The new embossing folder embossed the most detailed and intricate design onto that largest capsule. Stunning – seriously. I used deep red and pops of black and gold for a really elegant look. Every little thing is so well thought out, down to that perfect sentiment banner. The possibilities are endless for layering and using the floral elements. In a lighter color palette I think these products would make a great wedding card….
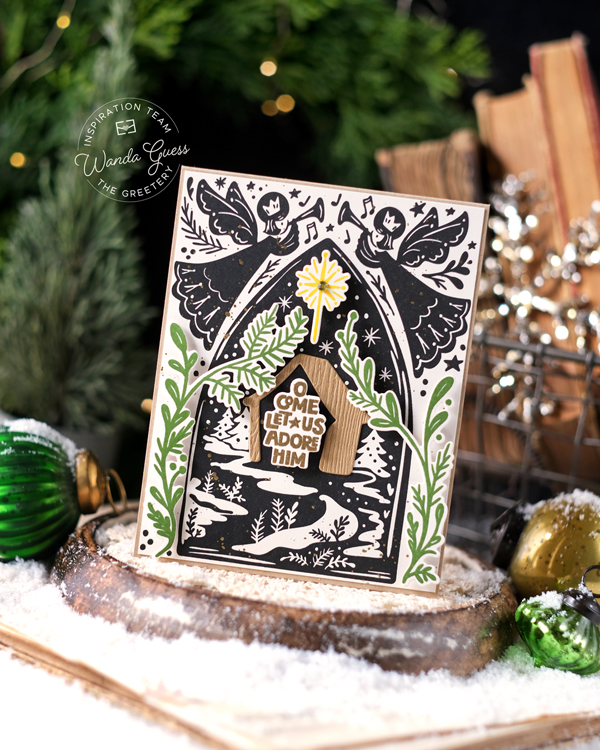
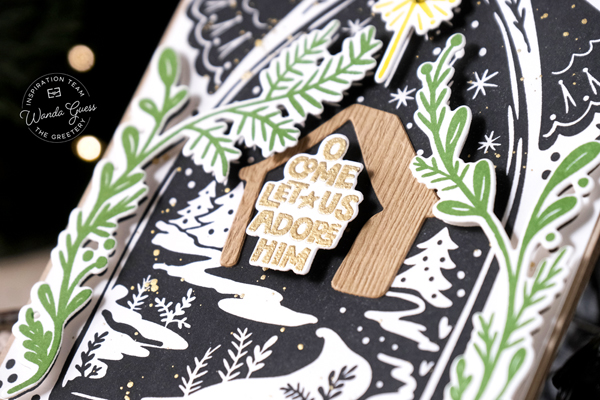
Next up today is a card featuring the brand new Lovely Linocuts Nativity Suite. Have you ever seen Linocuts before? They are so pretty and rustic and have that touch of handmade goodness. My finished card is an A2 card base. I decided to make my base stamped layer in black – because that’s what I immediately think of when I think of Linocuts. The large stamp is red rubber and stamps like a dream. I stamped the bottom layer first. Then I stamped and die cut out the star and the leafy border images. Kept a very rustic color scheme…. I splattered on gold paint and that was it – this would be a good card for mass producing/flat mailing for sure. And it’s the reason for the season. Love.
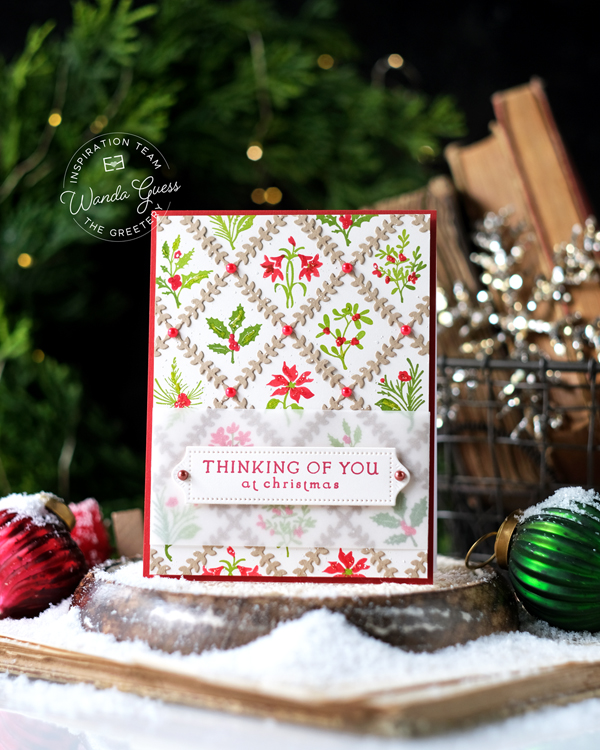
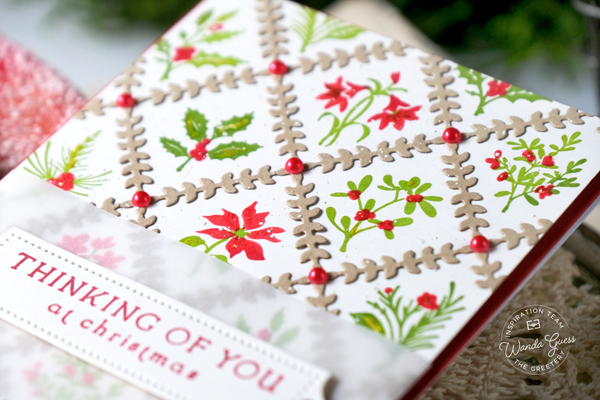
Finally for today is a card featuring the brand new Bitty Holiday Botanicals Suite. A Christmas version of the Bitty Botanicals! How lovely! I used a very traditional color palette for this one – thought it was evocative of traditional Christmas…. My finished card is an A2 card. base….layered with the beautiful botanicals and mixed with kraft too! Another fairly simple card design, but with a lot of impact. So many ways to use this lovely suite. You can use it with the Diamond Ribbons die from last release or with the new Diamond Foliage die as I did here!
That’s it for today – and day two of the reveals of this awesome new Christmas Market release! Thanks for stopping by to share with me today! It’s my pleasure to introduce the new release. TOMORROW is release day! Enjoy and happy shopping AND crafting! XOXO
Giveaway Information: The Greetery is giving away TWO $50 gift certificates, the comment deadline is 10/8 at 6:00am EST (comments from team blogs entered into giveaway). Winners announced on The Greetery blog on 10/8 at 9:30am EST (right before the new products go live) GOOD LUCK!!
On my new blog – to leave a comment, you must open the post first. Then the comment box will appear at the bottom. You can click here to do that!
Today is VERY exciting because it’s reveal and showcase day ONE for the new Holiday 2025 Greetery release! YEAH! If you are not quite ready for Christmas crafting, this release will get you in the mood for sure! The new release is called the Christmas Market Collection. It’s gorgeous, and carefully thought out and lovely…. Stamps, dies, stencils, embossing folders….all with an festive winter theme! The new items were a dream to create with and I used so much color, and glitter, and snow!! The design team and guests will be sharing our projects today and tomorrow. Then release day will be Wednesday 10/8 at 10am EST! Come along with me as I share three projects today, and three more tomorrow! I know you’re going to love it like I do! Don’t you just look forward to Greetery Holiday every year?
All the prize information, details, and design team links are at the bottom of my post. Ho Ho Holidays!
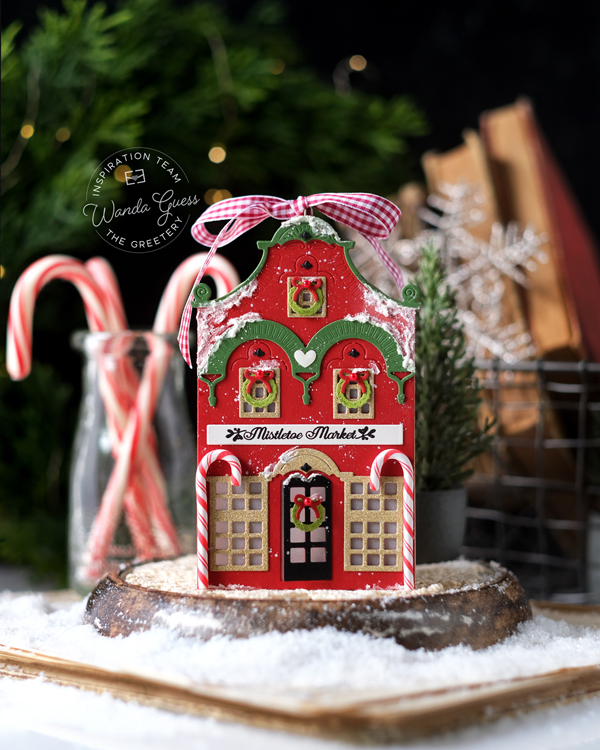
My first project today features the brand new Market Place Suite! I think this project is my favorite one from the entire release, so I thought I would show it to you first! Hee hee. The Market Place Suite has stamps and dies that create detailed houses or shoppes…. There are two sizes, small and large and you can use them in a million different ways. I created a village of treat boxes! As soon as Betsy told us that the larger Market Place buildings fit on the front of the Large Arch Box, I was in! You know how much I love a treat box/packaging project. I literally had 50 ideas immediately. I ran out of time! But I did make three shoppe treat boxes, using each of the three dies…. I am OBSESSED. Each one has a totally different color palette and embellishments. But together they look frosty and welcoming! (You of course knew I would make a coffee shop)!
One shoppe is traditional red and green, one shoppe is more masculine, and the third one is girly pink! I used tons of chunky glitter and fake snow. I really just had the most fun creating these. My process is pretty much the same as when I make a card, but I thought it might be fun to share how I built these. I started by die cutting out all the Large Arch Box pieces from kraft cardstock. Then I assembled the boxes and set them aside. Then I planned out my color palettes for the three buildings. I die cut all the pieces for each building at the same time, so that I would have everything ready when I put them together.
I glued all the pieces together on the buildings…. Now to decorate! I embellished each building before I put them on the boxes. So, white paint splatters, check. Glitter glue, check. Candy Canes, check. And lastly, SNOW!! I may have gone overboard a little, but word is a blizzard came through town! Lastly, I affixed the shoppes to the front of the treat boxes using foam circles. I tied each one at the top with pretty gingham. These boxes are actually pretty big, and some candies and a gift card fit perfectly inside. I am just giddy with anticipation to see what Betsy and the other ladies made with these dies!!
Look at those tiny wreaths!! The die set for that has three sizes of wreaths and bows, garlands and even Merry Christmas (like on the pink shoppe)
Here’s a top down view of my village – so you can see the structure of the arch boxes. I love this project!
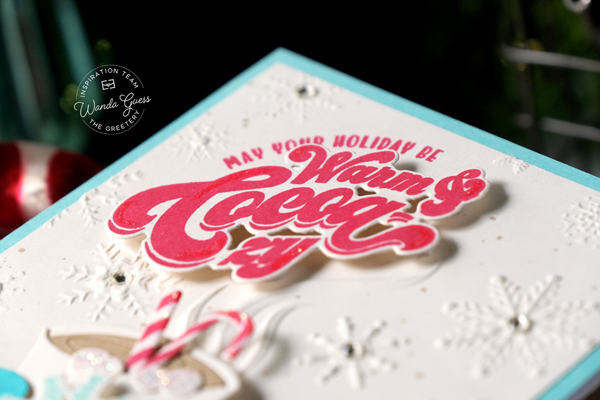
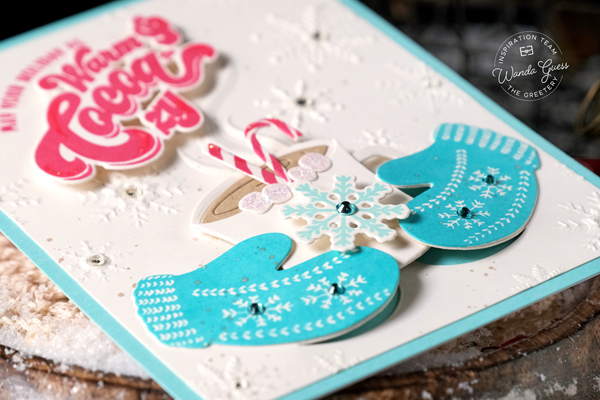
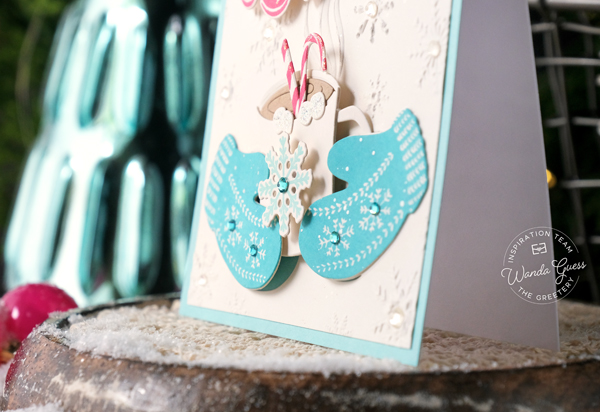
Next up is a card that features the brand new Cocoa Cozy suite of products! There are stamps, dies and a beautiful Embossing Folder! All the products work together to make a cozy scene with mittens, snowflakes and of course a warm bevvie. My finished card is an A2 card base and I used ALLLL the goodies. One of my favorite winter color palettes is pink and aqua….I know that sounds funny, but I love those colors together with snowflakes for some reason. I embossed the background first. Then I stamped the mittens, the candy cane/straw, and the sentiment (love) and die cut those out. I die cut out all the pieces of the mug and assembled that. There is a separate die that cuts out the mittens to perfection – and then you slide that cute mug into the ‘hands’ – it’s just so sweet. I embellished of course with some icy gems….
Finally, for today, my third project is a card featuring the brand new Shortbread Suite of products. There are stamps, dies and another amazing Embossing Folder. This suite creates a tray of perfect shortbread cookies. YUM! Good enough to eat for sure. My finished card is an A4 card base, and as I am know to do, a bit of gingham is layered on. I die cut the tray out, and then embossed the ‘cookies’ next. I used Antique Linen Distress Ink and a blender brush to add a bit of oven browning to the cookies. Just a tiny bit! Then of course, some chunky sugar glitter…. There are so many possibilities for this set – great for recipe books, and gift tags and all the things for the baker in your life. I love the sentiments that come with this suite too!!
That’s it for today – and day one of the reveals of this wonderful new Christmas Market release! Thanks for stopping by to share with me today! It’s my pleasure to introduce the new release. I will see you right back here tomorrow for three more projects!! Enjoy and happy crafting! XOXO
Giveaway Information: The Greetery is giving away TWO $50 gift certificates, the comment deadline is 10/8 at 6:00am EST (comments from team blogs entered into giveaway). Winners announced on The Greetery blog on 10/8 at 9:30am EST (right before the new products go live) GOOD LUCK!!
On my new blog – to leave a comment, you must open the post first. Then the comment box will appear at the bottom. You can click here to do that!
Hi friends! Hope your first week of Fall is going great! It’s still hot here, but Fall is in my heart already and I’m loving the change of season. Pretty Pink Posh launched their gorgeous Holiday 2025 new release last week and I am obsessed!! Paulina crushed Christmas this year. So many fun things. I enjoyed making three projects to share…. And there is a huge Instagram Hop this week so everyone can showcase their projects. Today is my day on the Instagram Hop – so be sure to head over there and leave a comment for a chance to win a prize. I’m sharing three things today – two cards, and one tag. Let’s get started!
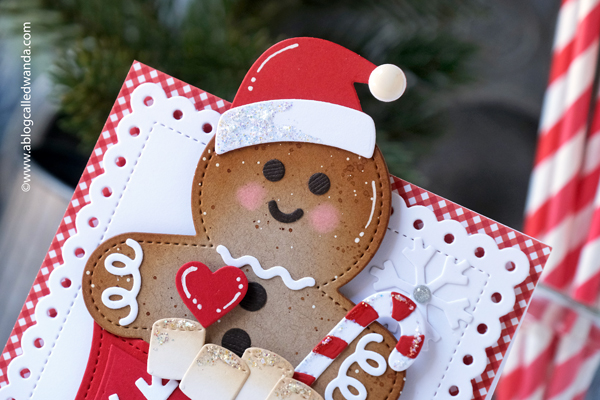
My first card features the completely adorable new GIngerbread Shaker Dies, the brand new Banner Greetings, and more old and new supplies from PPP. I love to mix and match my supplies because everything works perfectly together! My finished card is an A2 white card base, covered in red/white gingham, a white layer, and then my fun elements. I used traditional colors of red, white and green. Little pops of silver too! This card is definitely a more is more! He is swimming in a cup of hot cocoa and loving it! Hee hee.
I think he is just the cutest thing ever! I gave him a Santa hat and a heart… Some glitter accents and white gel pen accents too. I used some chalk to give him pink cheeks. I made a big red mug of cocoa with marshmallows and a candy cane. There are so many cute little pieces to add to all your projects!
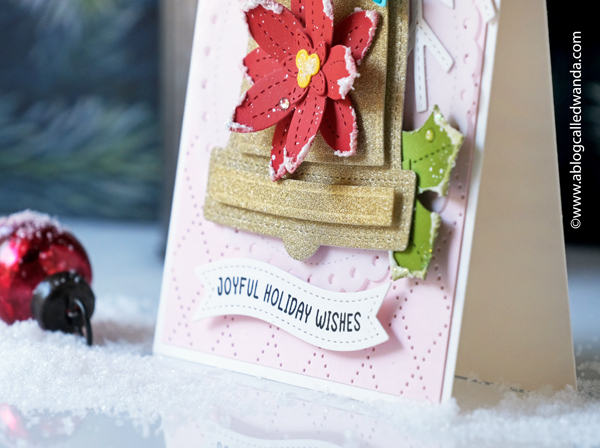
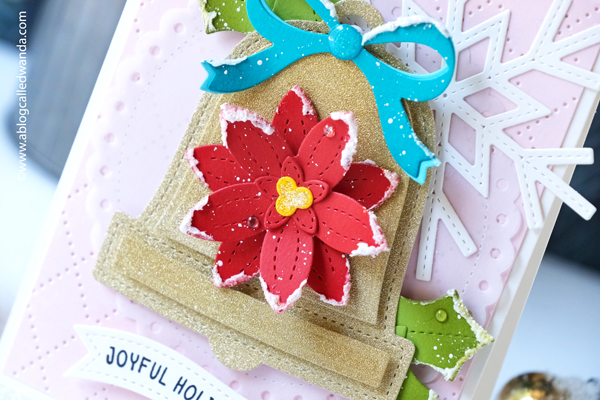
My next card features the brand new Christmas Bell Shaker Dies and the new Banner Greetings, and even more supplies from previous releases! I used a kind of 50’s retro color palette of pink, gold and aqua to make an ode to vintage Christmas! My finished card is an A2 cream card base. I layered the beautiful new Argyle Cover Plate in pink, then some vellum, and then my design elements. This card is really sweet and charming….
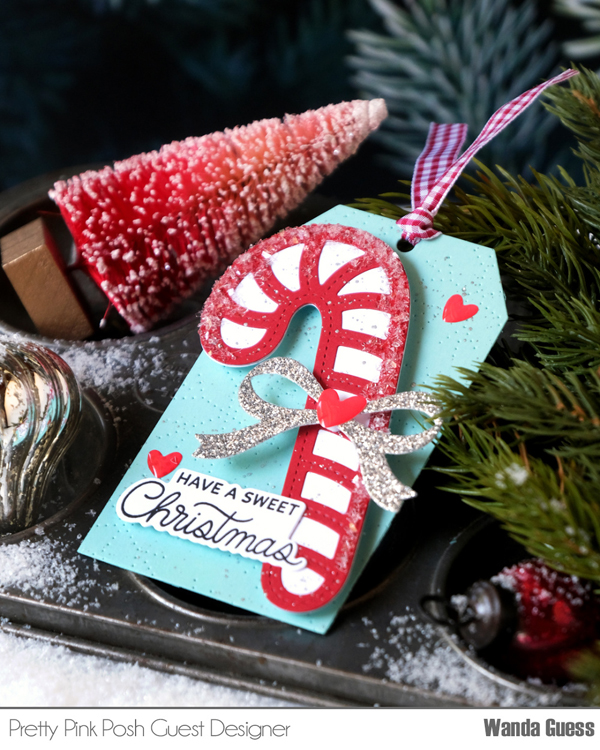
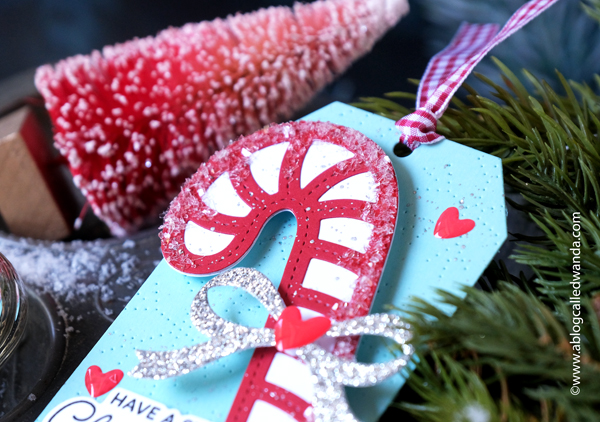
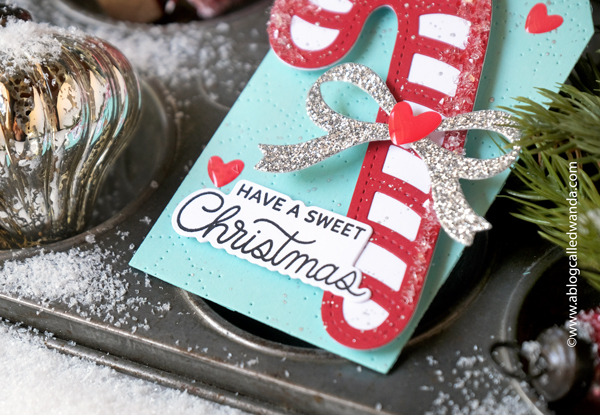
And finally, I wanted to use the new Candy Cane Shakers, so I created a cute gift tag using them! The tag features the sentiment from the new Gingerbread Friends stamp set and the focus is that big bold candy cane! I love aqua and red together so I made my tag from aqua cardstock. A pretty silver bow completes the look, oh and some chunky glitter too!
That’s it for me today! My first official blog post here on my new home! Man, if you didn’t read my last blog post, you should check it out. My stress level was so high, but somehow it managed to all turn out okay. I’m happy to have all my information safe here and happy to get some more content going! I hope you have a great day today! XOXO
If you would like to leave a comment (Please do!) you need to click on the title of the post and open the post. Then the comment box will appear at the bottom for you! Also, if you want to click around, the categories at the top, under my header, are clickable and will show you all the posts in each category. Be well!
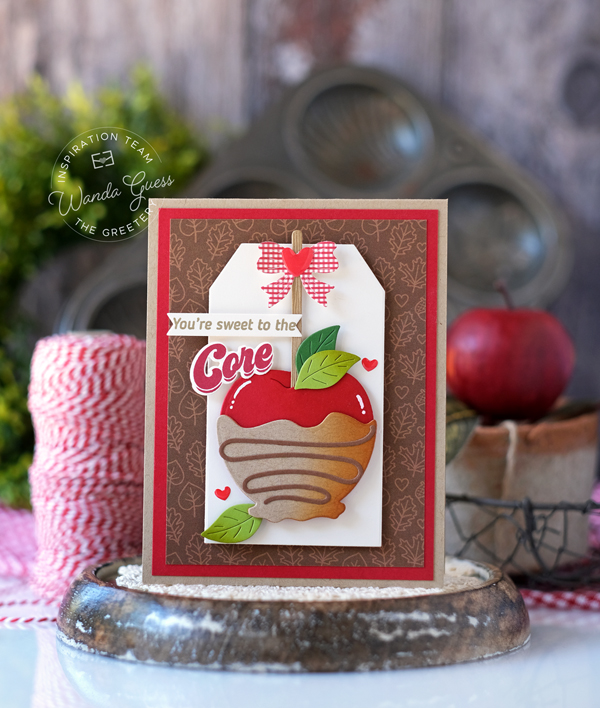
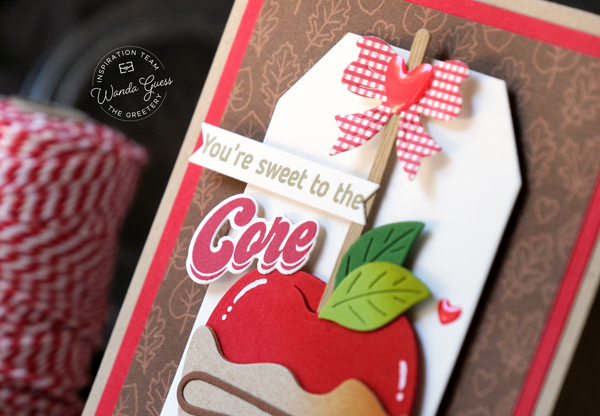
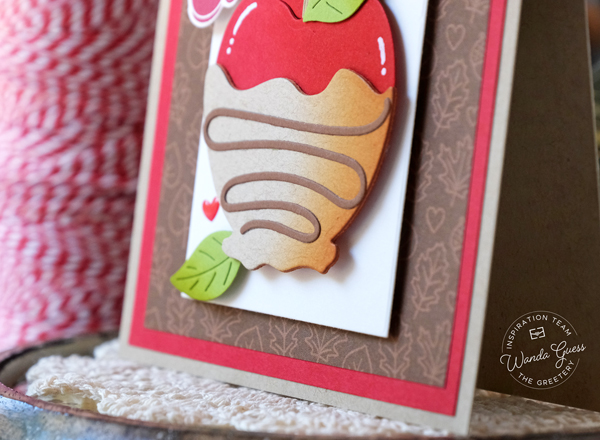
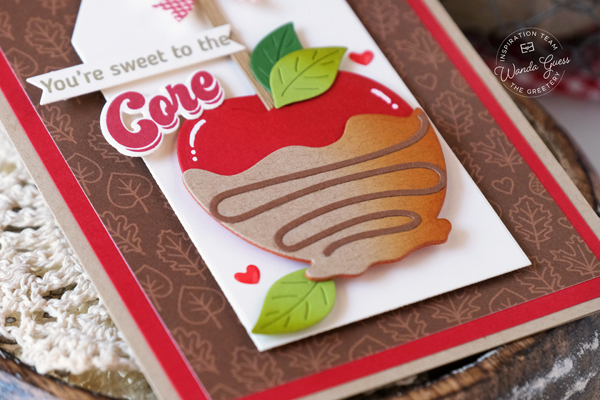
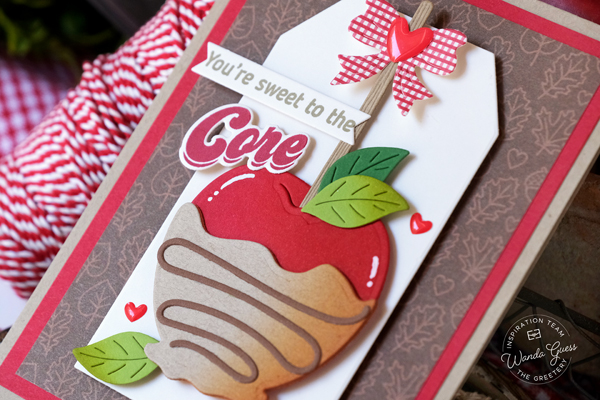
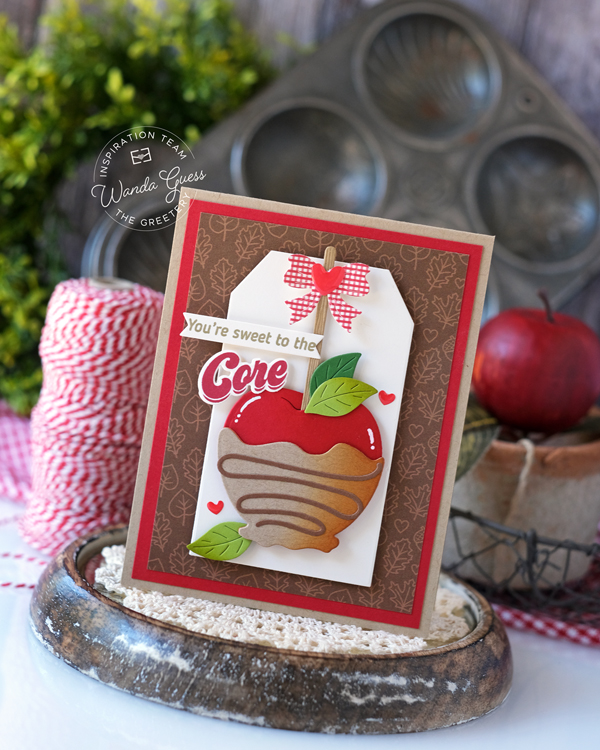
Hi there creative and crafty friends! Today is my day for September to be on The Greetery Blog! And… OMG it’s September! The ‘ber months are here and I am elated! September means the beginning of Autumn and thinking about all the things that accompany that. For me, one of those things is apple picking! We live near tons of orchards and we always make a trip for fresh cider, apple donuts, fun photos, and of course a caramel apple. That is the inspiration for today’s card! I used a warm color palette of browns and reds, with just a pop of green! I really have loved this Caramel Apple Die set ever since it came out. So fresh and yummy.
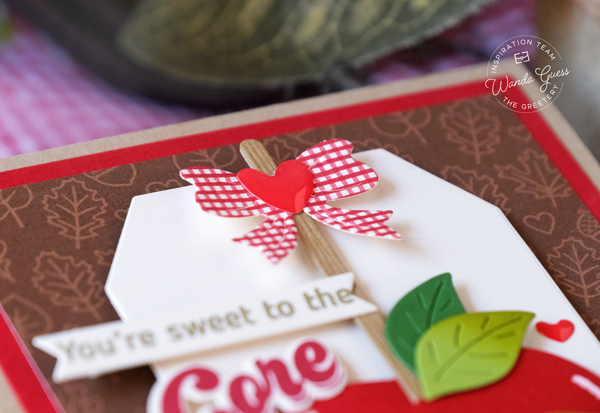
My finished card is an A2 card base made from kraft cardstock. I started the card by die cutting all the pieces of the Caramel Apple Dies (apple, caramel, stick, leaves, and bow). I gently shaded the pieces using matching Distress Inks and then glued all the pieces together. I stacked three caramel die cuts to make that part stand out more! I added white gel pen accents to the apple to make it appear shiny.
I die cut a cream tag using the Tag Team Dies. I stamped and die cut the word ‘core’ using the Fall Foodie Phrases stamps and dies. I stamped the matching smaller sentiment onto a Pretext Banner die and used light brown ink.
My finishing touches were a tiny bow die cut from gingham, and those pretty red hearts. This card makes me hungry! I used a simple card layout and lots of foam tape to make the pieces stand up off the card.
That’s it for my project for today. Crunch! I hope you have a wonderful and creative day. It’s my pleasure to share with you, and I look forward to sharing with you again soon. In the meantime, happy crafting and happy fall! XOXO
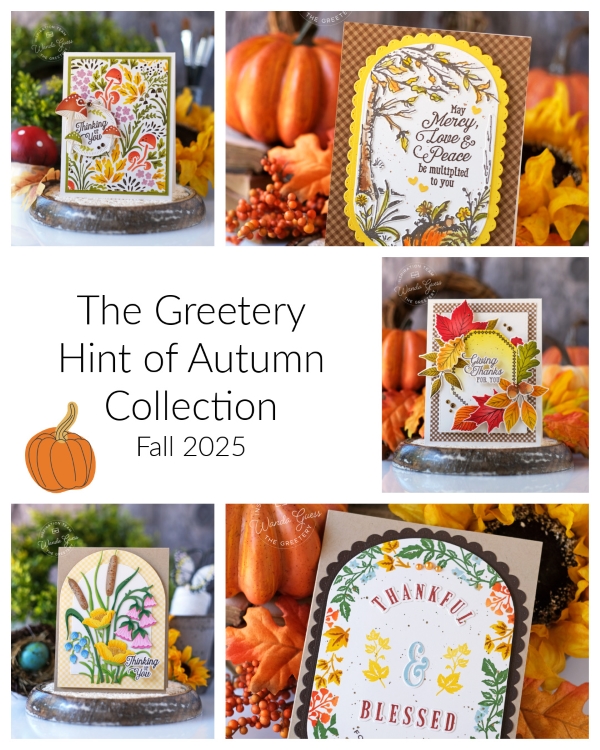
It was my pleasure to introduce the brand new Hint of Autumn Collection to you this week! And, I hope you love it as much as I do!! Happy Crafting!! If you scroll back to my last two blog posts you can see all my projects from the new release! If you have any questions – reach out!! Thanks for all the love and kind comments! Happy Creating! Can’t wait to see what YOU make! Happy Fall Y’all!
Today is another fun and exciting day because it’s reveal and showcase day TWO for the new Fall 2025 Greetery release! YEAH! I’m so happy it’s time for Fall crafting!! The new release is called Hint of Autumn Collection. Stamps, dies, stencils, foiling plates….all with an Autumn theme! Perfect for Thanksgiving greetings, Thank You cards, and general Fall gratitude. The new items were a dream to create with and I used lots of warm colors and textures with pops of gold. The design team and guests will be sharing our projects yesterday and today. Then release day will be TOMORROW – Wednesday 8/27 at 10am EST! Come along with me as I share three more projects today! I know you’re going to love it like I do! If you didn’t see my post from yesterday, go check it out now! (More projects!)
All the prize information, details, and design team links are at the bottom of my post. Bring on FALL!
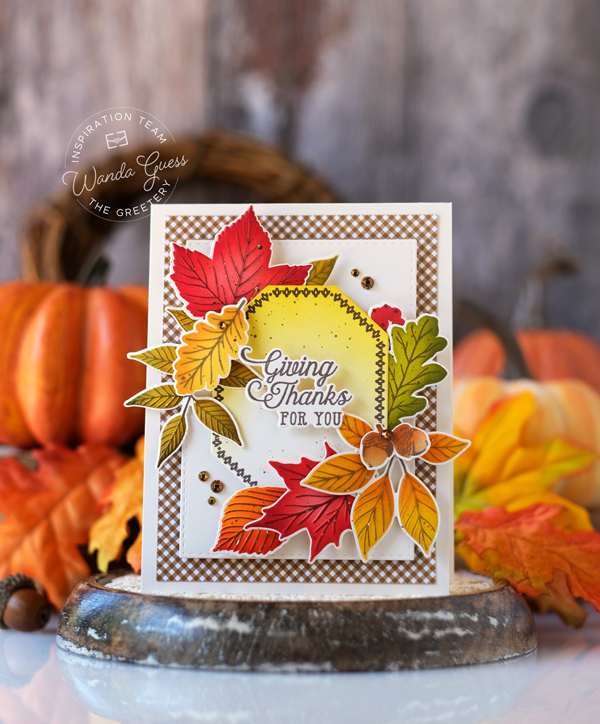
My first card for today features the brand new GORGEOUS Autumn Herbarium stamps, stencils, and embossing folder! I also used the brand new Oblong Octagon Labels stamps and dies, and the new Capsule Cameos (sentiment)! My finished card is a cream A2 card base layered with brown gingham and them more cream panels. Those leaves are the STAR of the show! I stamped and stenciled the leaves and then die cut them out and then ran them through the stunningly detailed embossing folder! The result is incredible! I love this so much! Lots and lots of gold splatters and some ink blending and gems… This card sparkles like a bunch of autumn trees! I think this is my favorite card from the new release!!
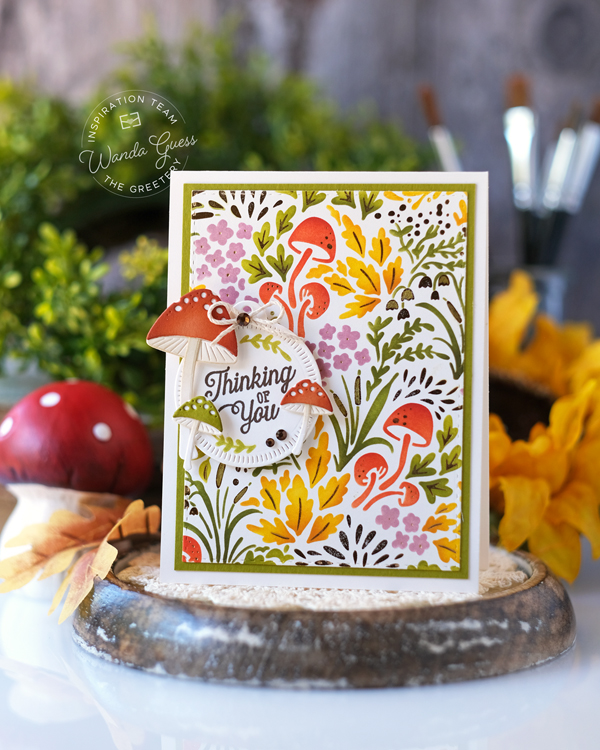
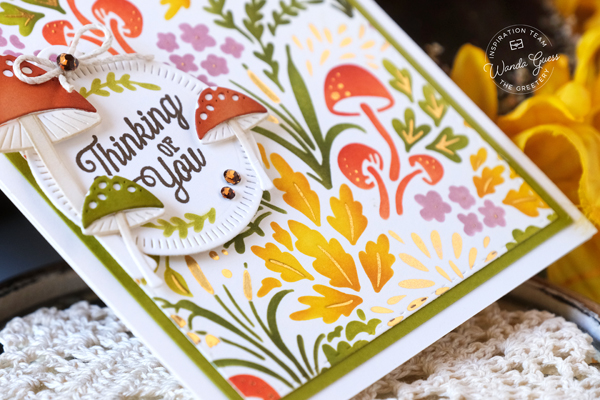
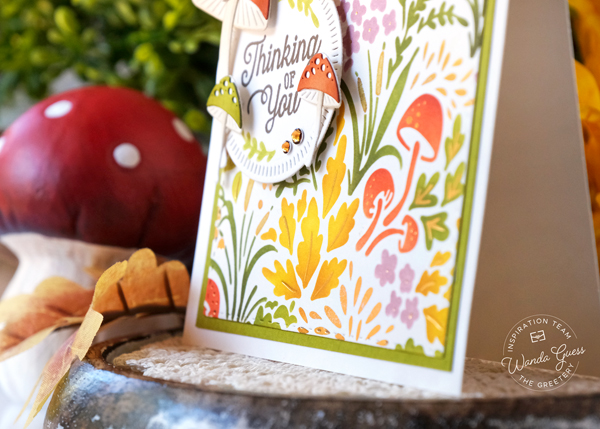
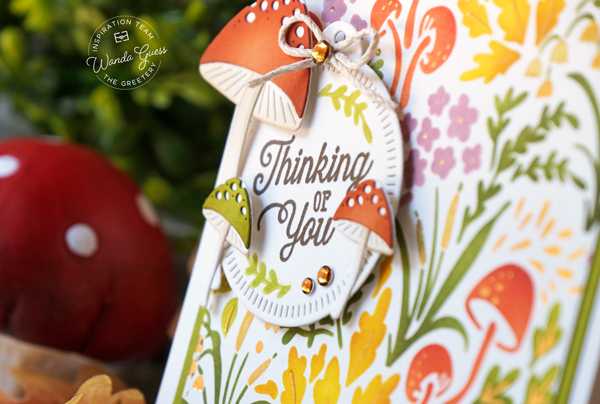
My next card for today features the brand new Mushroom Meadow stencils and hot foil plate! Again, another stunning result from using the products together! This card is a cream A2 card base layered with olive green and then the stenciled panel. I used the previously released mushroom dies to accent the theme of the products! The gold foiling is absolutely the perfect touch for this product suite!! I did the foiling first and then used Distress Inks for the flora and fauna. I created a circle tag for my sentiment and then a bit of twine and those pretty mushrooms in fall colors. I inked just part of the stencil to make a green floral accent on the tag.
My final card for today, and for the new release, features the brand new Wild Wetlands Dies! A giant floral spray that you can make in any color palette! Brights, pastels, rich tones…you could make this any color way!! My finished card is a kraft A2 card base layered with some arches and then the gorgeous floral bouquet!! I die cut out all the pieces and assembled each flower/leaf section (the package has easy instructions). I used Copic Markers to add shading to all of the pieces. I also used Stickles to add glittery accents to the finished card. Can you tell I am obsessed with these sentiments (that font!) from the Capsule Cameos set??
That’s it for today – and day two of the reveals of this awesome new Hint of Autumn release! Thanks for stopping by to share with me today! It’s my pleasure to introduce the new release. TOMORROW is release day! Enjoy and happy shopping AND crafting! XOXO
Giveaway Information: The Greetery is giving away TWO $50 gift certificates, the comment deadline is 8/27 at 7:00am EST (comments from team blogs entered into giveaway). Winners announced on The Greetery blog on 8/27 at 9:30am EST (right before the new products go live) GOOD LUCK!!
Today is VERY exciting because it’s reveal and showcase day ONE for the new Fall 2025 Greetery release! YEAH! I’m so happy it’s time for Fall crafting!! The new release is called Hint of Autumn Collection. Sigh. Stamps, dies, stencils, foiling plates….all with an Autumn theme! Perfect for Thanksgiving greetings, Thank You cards, and general Fall gratitude. The new items were a dream to create with and I used lots of warm colors and textures with pops of gold. The design team and guests will be sharing our projects today and tomorrow. Then release day will be Wednesday 8/27 at 10am EST! Come along with me as I share three projects today, and three more tomorrow! I know you’re going to love it like I do!
All the prize information, details, and design team links are at the bottom of my post. Bring on FALL!
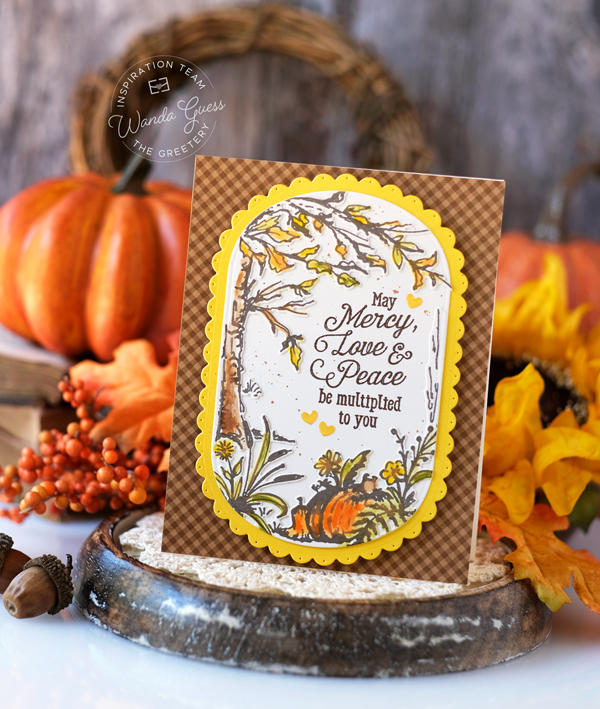
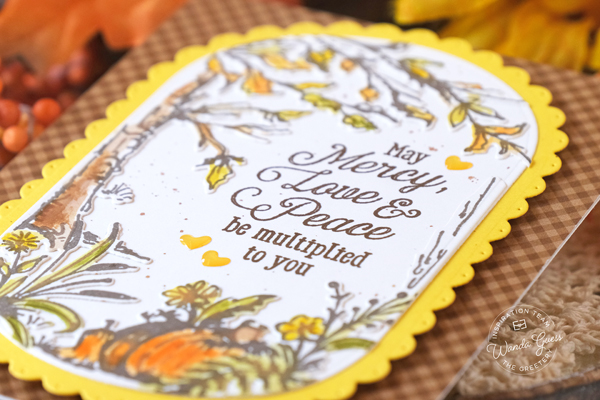
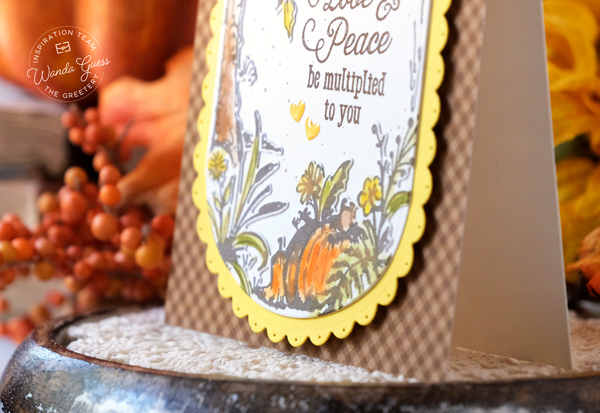
My first card today features the brand new Capsule Cameos: Autumn stamps and dies and the brand new Capsule Basics Dies! These are classy, elegant ovals that add such a nice touch to cards. The new capsule shape also has a beautiful scallop border outline die!! The stamps fit right inside the capsule. Genius! I used brown ink to stamp the design and then I used a water pen/brush and Distress Inks to gently color in the images. I wanted it to look like an illustration in a book or something! For scale, my finished card is an A2 cream card base. I used golden brown gingham and then yellow and orange tones.
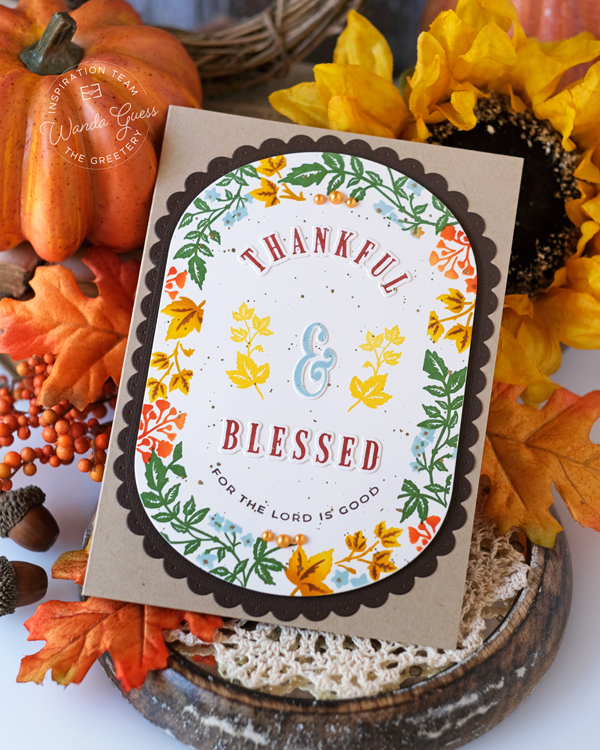
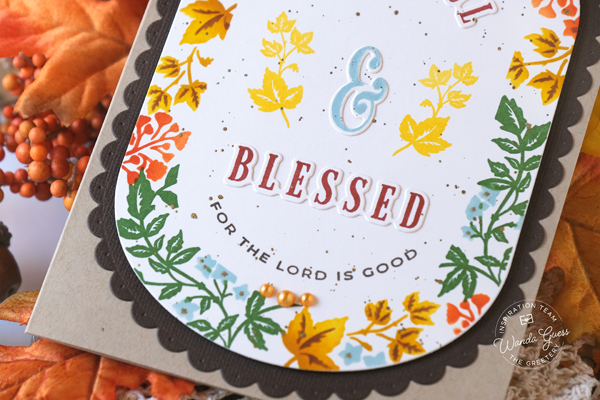
Next up is another card that features the Capsule Basics Dies….this time I used the BIG one! This card also features the brand new Thankful and Blessed stamp set and matching dies. This stamp set perfectly stamps a border just inside the edge of the capsule. However, this card is a big 5×7 size!! Lots of people like to make larger cards so Betsy designed this set for them. You can mix and match the different words and sayings inside the floral border. REALLY cool and so pretty too. I used my MISTI to line up all the stamps and it was so easy. I splattered gold paint over the design and added a few pearls…
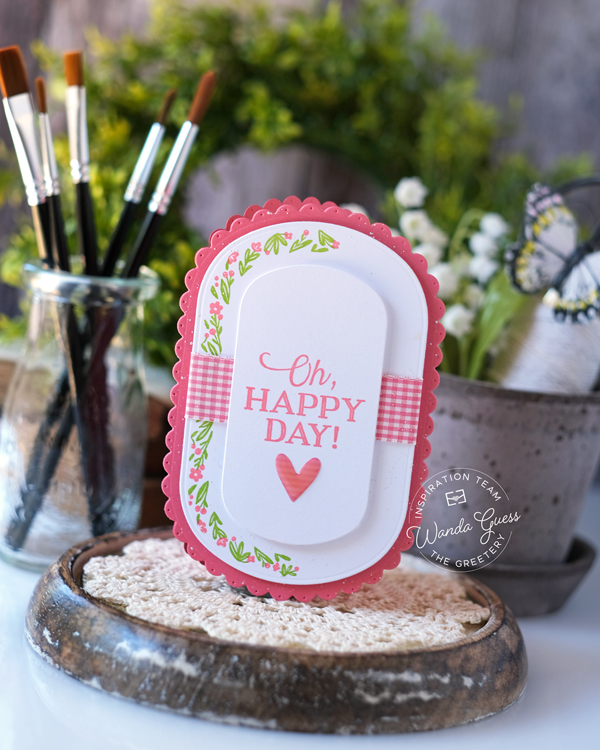
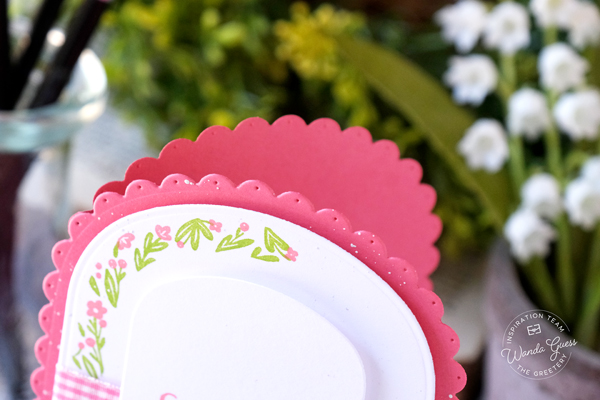
And lastly (for today) I used the capsule dies a third time, with a totally different look! This card features the brand new Capsule Collection Floral Borders stamp set!! I die cut two pink scallop capsules and made those my card!! I do love a shaped card, don’t you?? The shaped card will fit into an A2 envelope. I used pretty pink and green to create a cheerful greeting for any occasion. I wrapped a bit of ribbon around the layers for a pop of texture. I feel like this could also be a cute birthday card.
That’s it for today – and day one of the reveals of this awesome new Hint of Autumn release! Thanks for stopping by to share with me today! It’s my pleasure to introduce the new release. I will see you right back here tomorrow!! Enjoy and happy crafting! XOXO
Giveaway Information: The Greetery is giving away TWO $50 gift certificates, the comment deadline is 8/27 at 7:00am EST (comments from team blogs entered into giveaway). Winners announced on The Greetery blog on 8/27 at 9:30am EST (right before the new products go live) GOOD LUCK!!
Hi there sweet crafty friends! How are you?! It’s been a whirlwind of crafting here! I was so happy and excited to be one of the guest designers for the new August release from Concord & 9th! First of all, the release is AWESOME! Second of all, they are celebrating TEN years in business this month! You know I love that entire gang and this made me so happy to create for them this month!! I shared all six of my projects on Instagram in the past week, but I also wanted to get them on the blog. Everything is so great! A wide variety of stamps, dies and stencils – something for everyone. I put my Wanda twist on everything and smiled the entire time I was creating. Hope you find something to inspire you!! XO
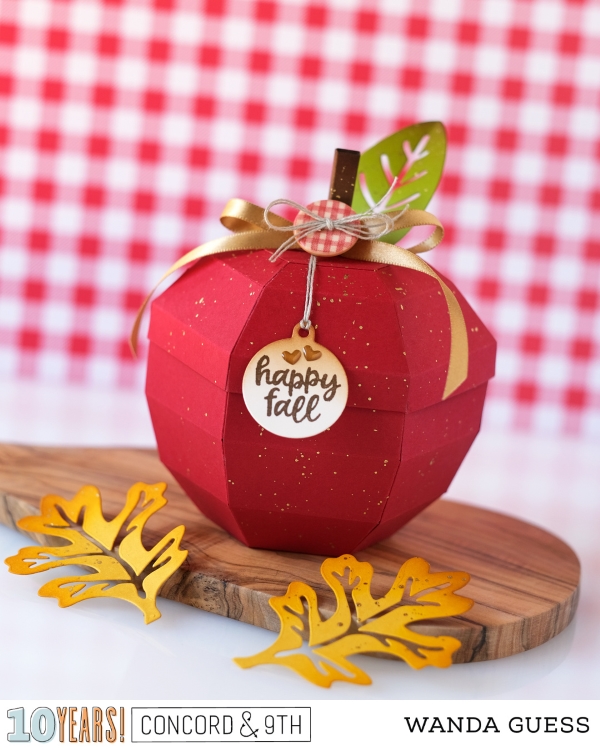
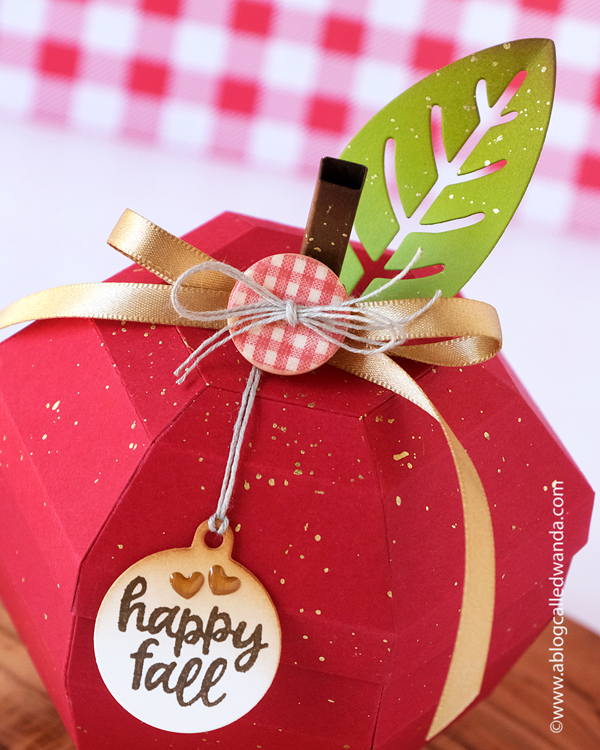
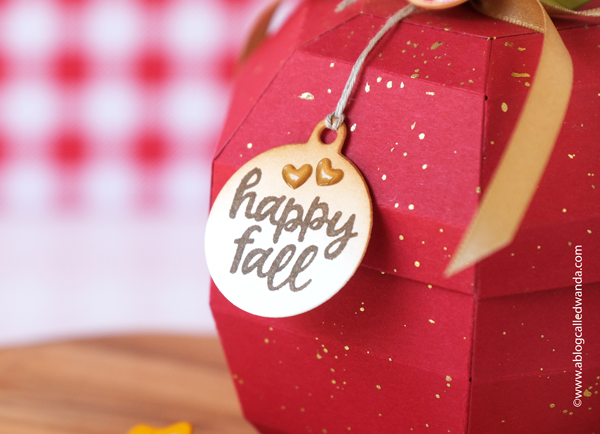
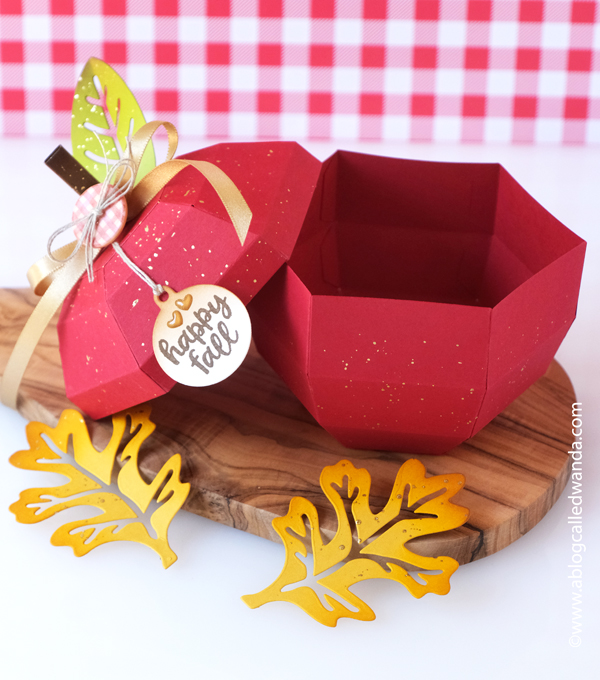
First up is (I think) my favorite project from the new release! I used the new Fall Favors dies to make this sweet red apple treat box! The box was easy to assemble, and it’s larger than most treat boxes, so you can fit a lot inside. The die set allows you to make an apple, a pumpkin, an acorn, or even a cute little succulent plant. So innovative! I will be re-using this one over and over.
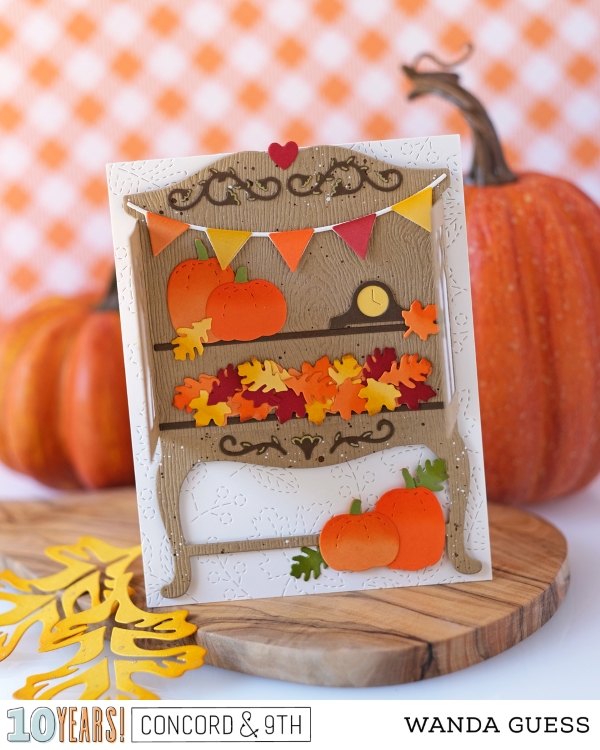
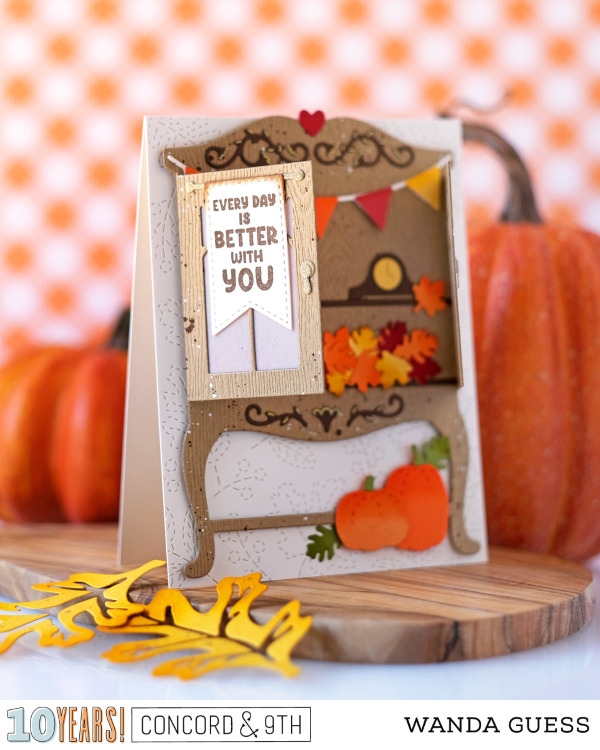
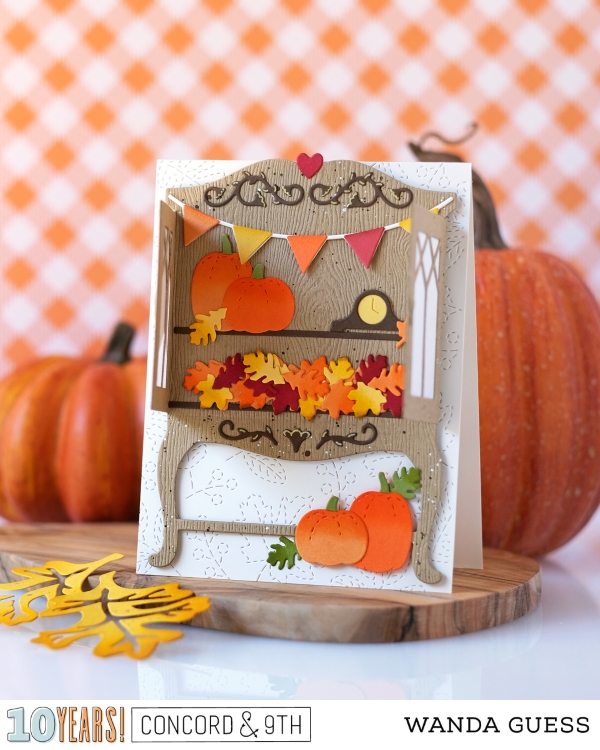
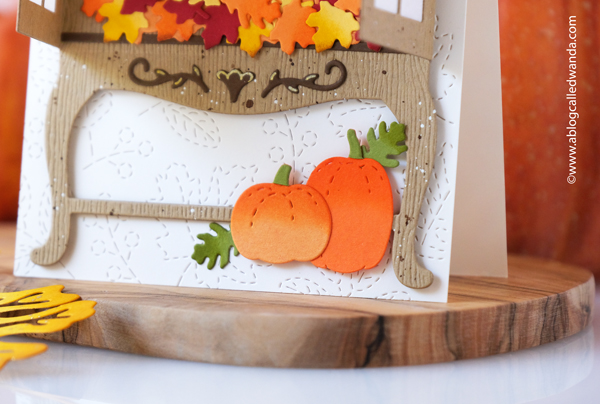
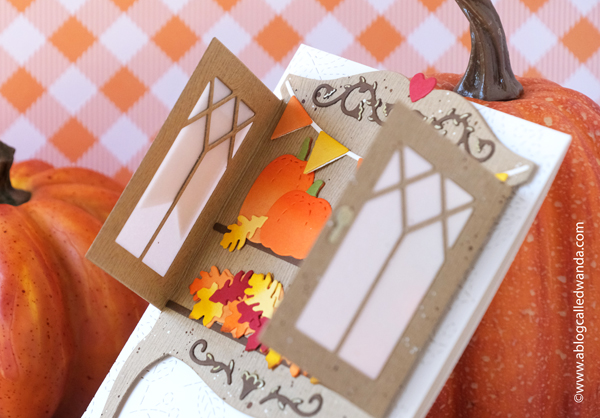
My next card project was made using the Brand new Curio dies! SO cute and fun! It’s a curio cabinet and accessories so you can make it whatever you want! Of course, I had to make a Fall Curio! Full of pumpkins and leaves, a banner, and the cute tiny clock! The windows are made with vellum and I added lots of little accents to make it my own… Isn’t this super cool?? The entire curio fits onto an A2 card!
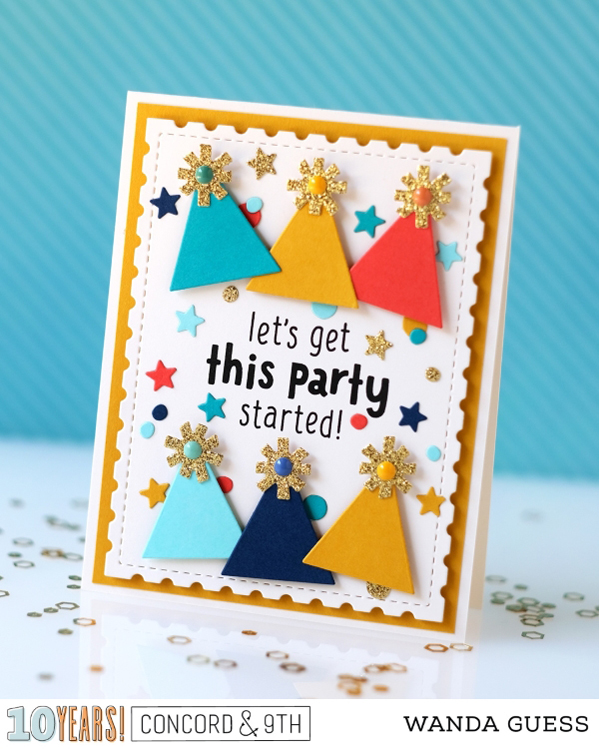
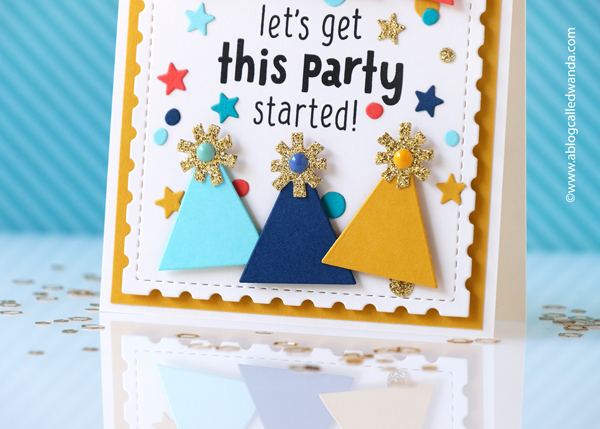
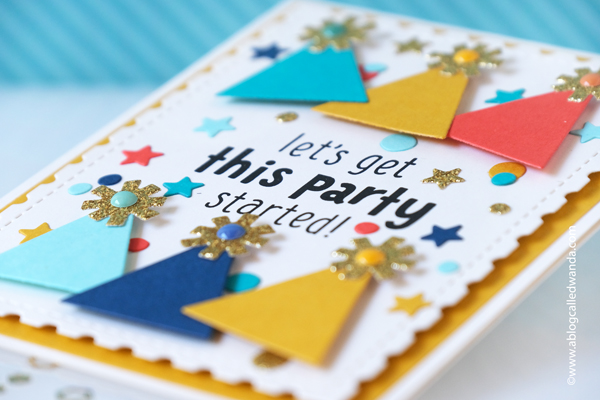
Next up is a fun and festive birthday card made using the brand new Party Time stamps and dies! I used just the party hats to create this bold and colorful scene. I used gold glitter paper for the pom poms on top! It’s so HAPPY! I like this color palette because I feel like it could be for a man, a woman or a kid! A universally happy color way! I think it would be cute in a monochromatic color scheme too! My finished card is an A2 card base…in cream!
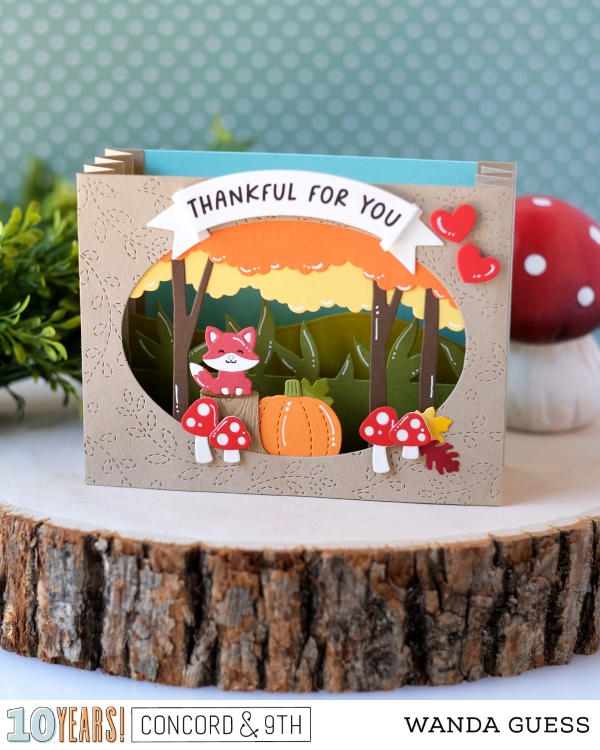
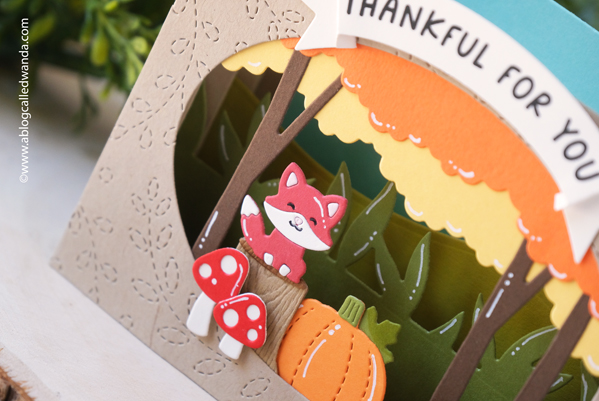
This next card is an accordion card! It folds up flat for mailing, and then pops open into a sweet 3D Fall scene! I used the brand new Accordion dies and the brand new Accordion Woodland stamps and dies. I made a woodland scene using warm colors and kraft. I put on some tiny hearts and die embossed the cover. That little foxy sitting amongst the mushrooms is so adorbs!
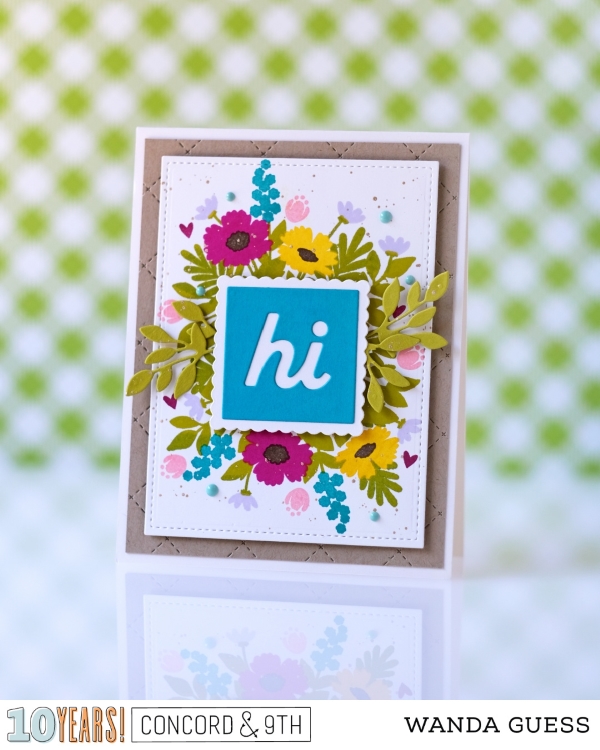
This sweet card features the brand new Sentimental Florals stamps and dies! I love how the floral spray comes together and then that bold graphic goes into the center. It’s bold and pretty at the same time. Again – an A2 card base. There are several options for the center of the card, but I really loved this big “hi” in teal…. I was kinda thinking of trying this one in a Christmas color palette too!
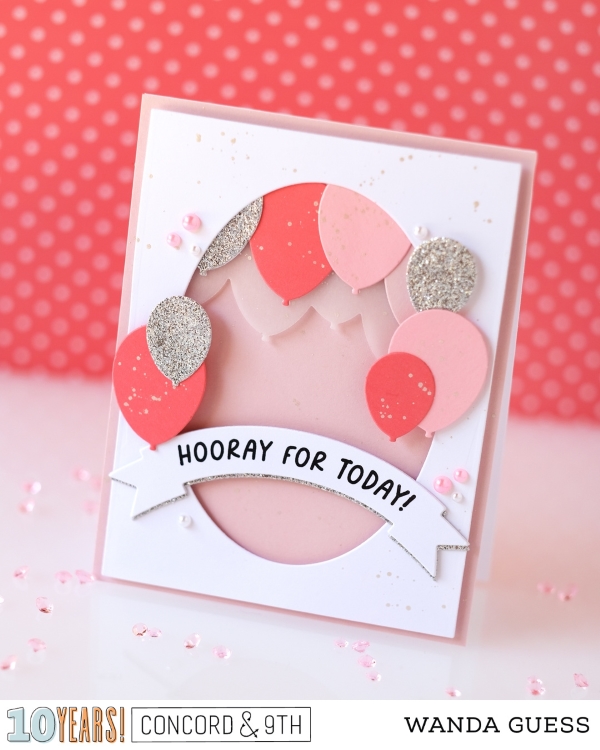
And finally! Project #6! A pretty in pink birthday card that features the brand new Accordion Birthday stamps and dies! The dies in this set also work with the accordion fold card dies! So you can layer balloons and streamers…. Love! I used pink and vellum and silver. Super festive and cheerful! My finished card is an A2 card base!
Those are all my projects from the new release! Thanks for hanging in there with all these pictures! Ha! Take care, and keep on crafting! I will see you soon, friends! XOXO
BOO TO YOU! Hello my friends! I am SO EXCITED to share some projects I made with the new Pretty Pink Posh Halloween 2025 release! You know I love this release every year, and I can’t wait to see what Paulina comes up with for us to craft! This year was as good as ever! Everything is cute and spooky (but not too spooky) and FUN. I made two projects so far, and I hope to make lots more. I hope you are doing well this week, as we are getting ready to transition into Autumn. We’ve had amazing weather here in Northern California, and I can feel the light changing which makes me super happy. My new job is going great and I’ve almost been there five months! I do miss crafting every day, but this job is a blessing for sure! So, I’ll craft and blog when I can, and enjoy sharing with you. XO
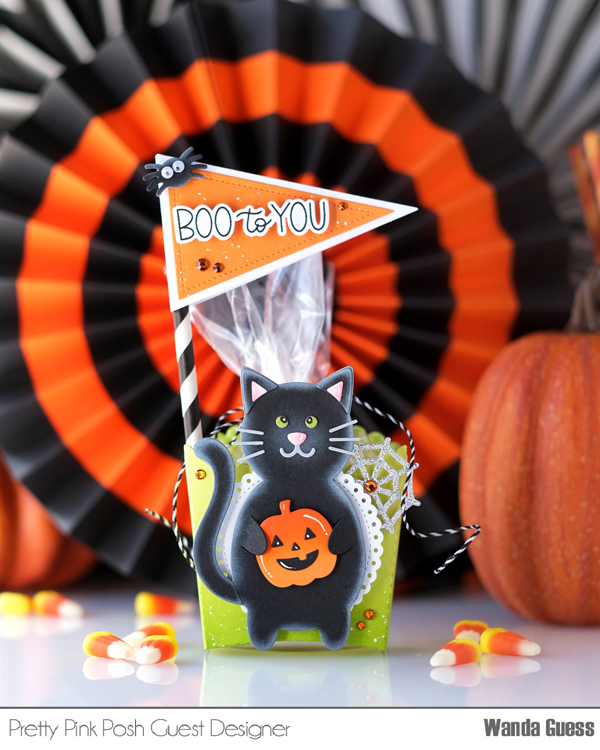
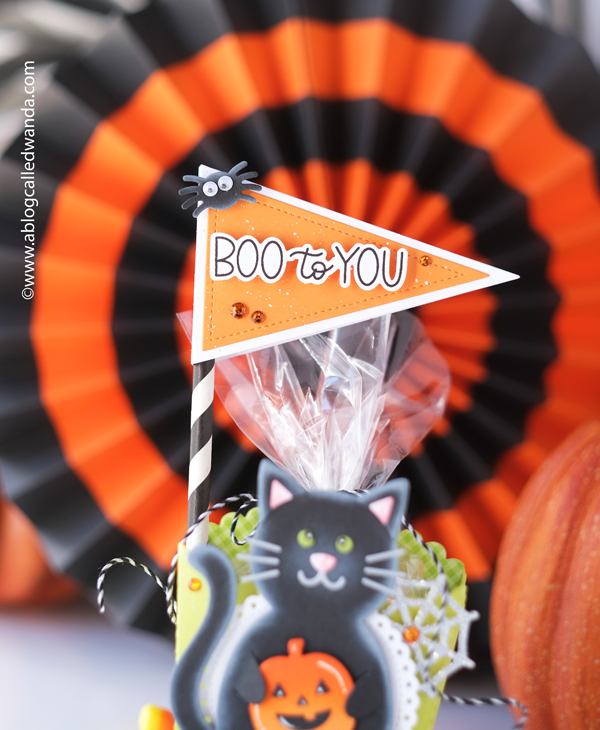
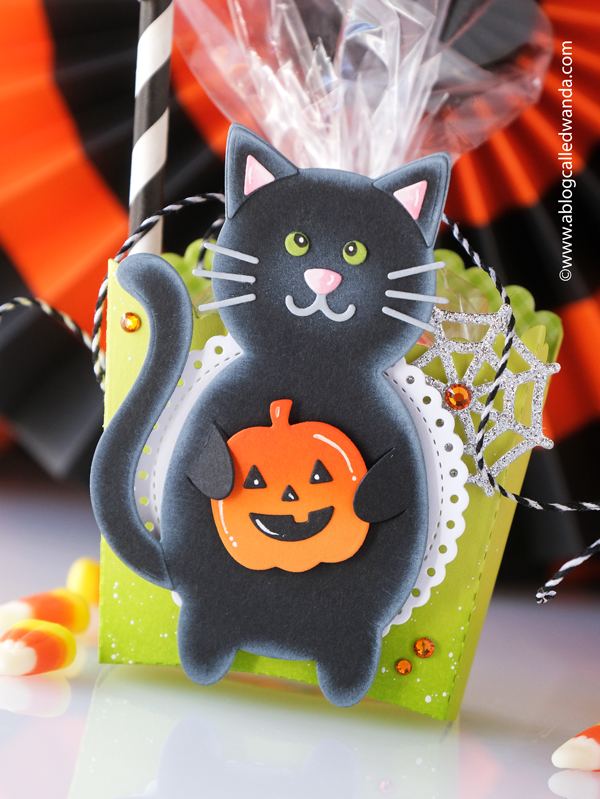
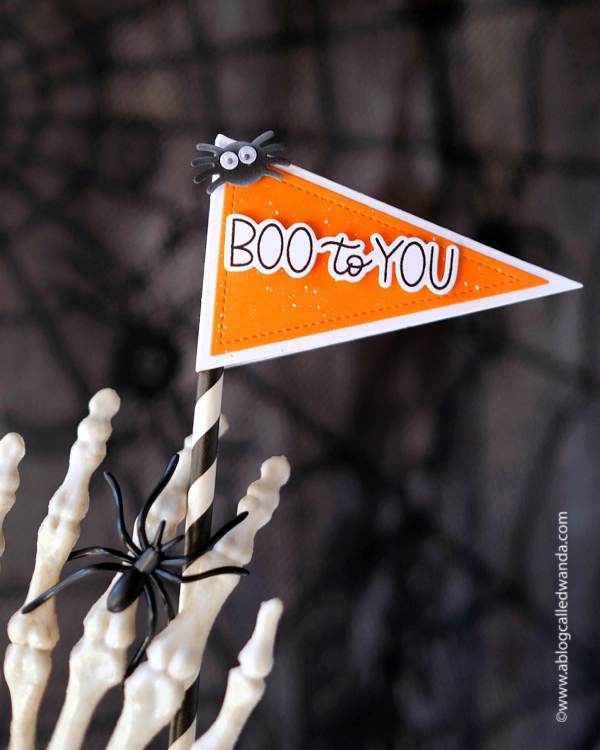
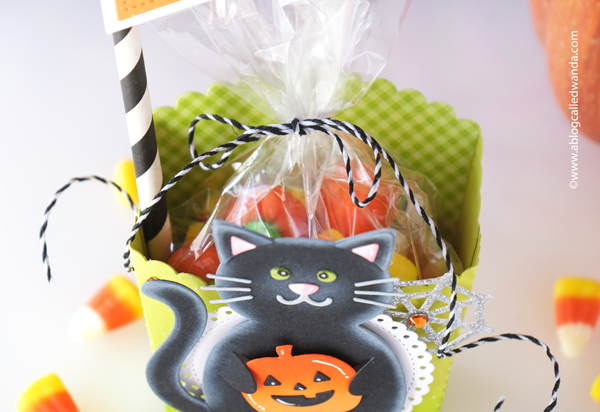
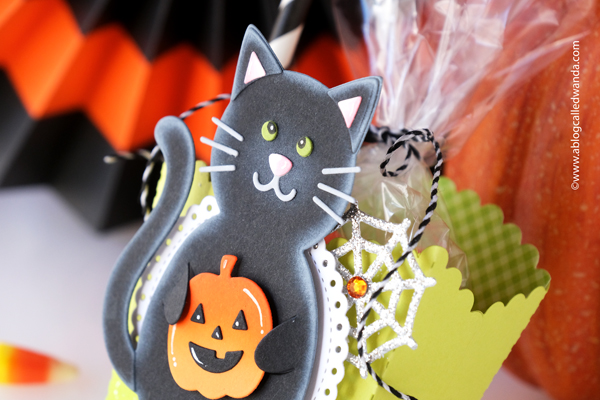
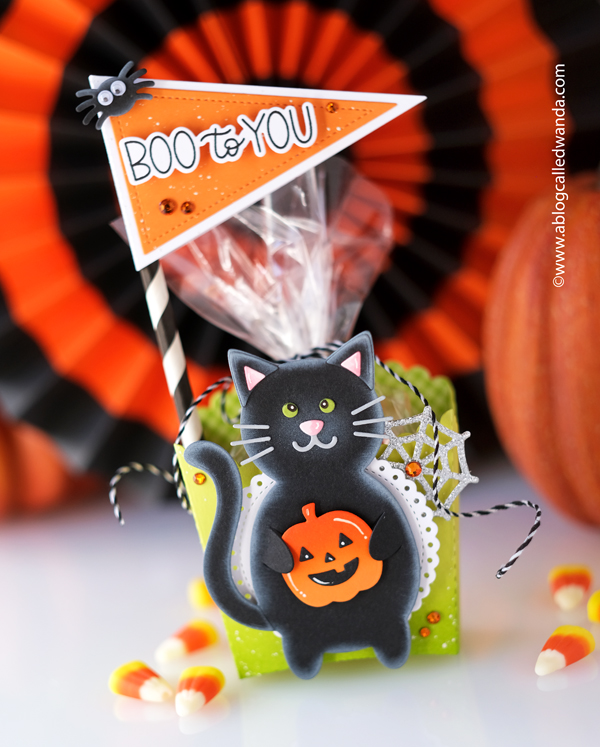
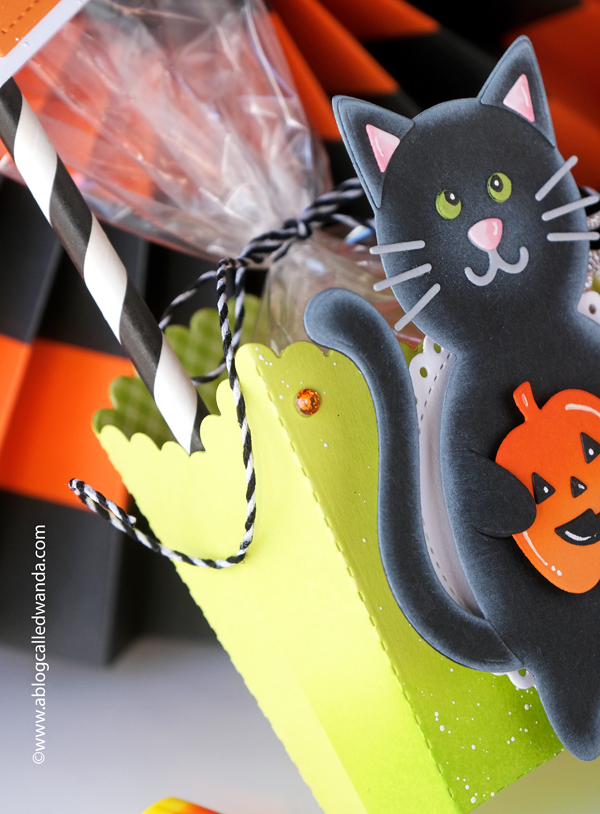
First up is this adorable treat box, well, because we know how much I love a treat box! Especially for Halloween! I used the brand new Cat Holder Dies and some old PPP favorites too. Traditional colors or black and orange, with a pop of lime green! Oh, and a sparkly spider web just because. I made a festive flag to tuck into my treat box, which I think makes the whole thing more fun. Googly eyes on a spider? Check! Candy? Check! A cross eyed kitty cat? Check!
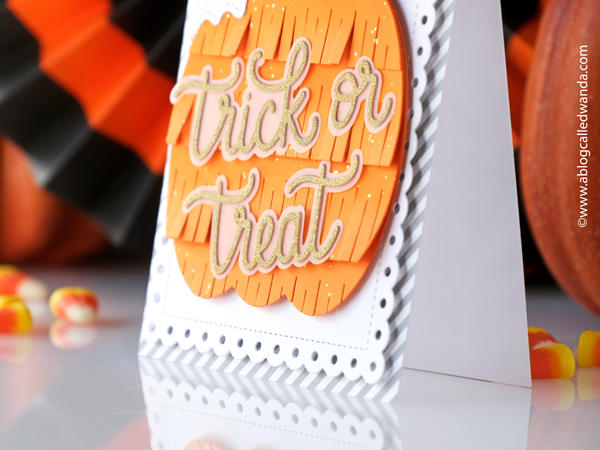
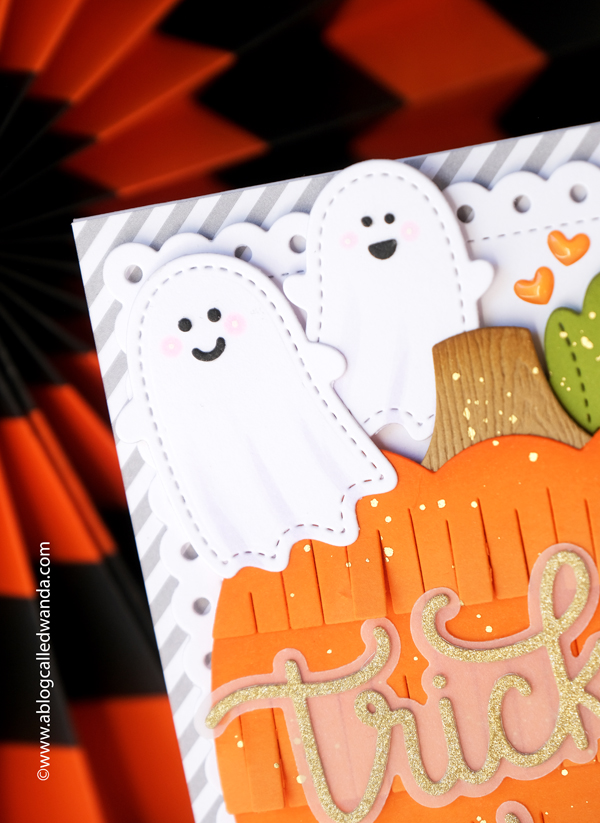
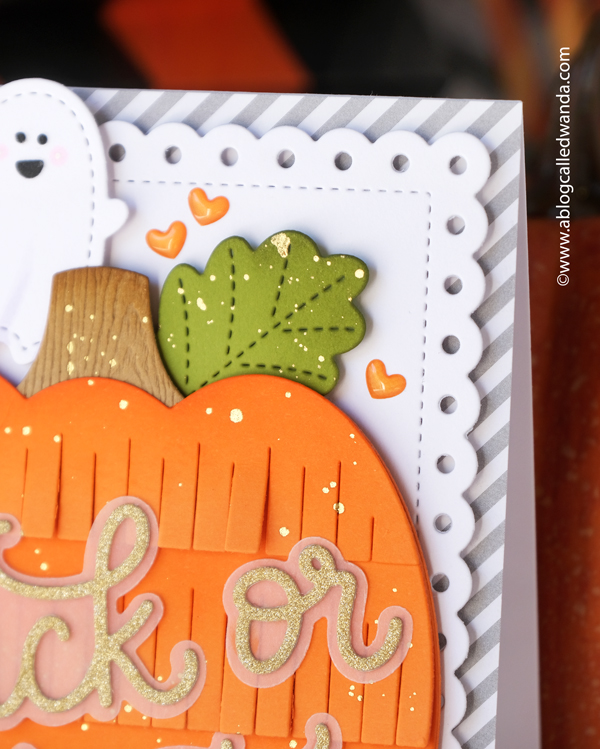
Next up today is a cool Halloween card! This card features the brand new Fringe Pumpkin Dies and the brand new Trick or Treat Shadow Dies…. And those ghosties that I adore! My finished card is an A2 white card base, layered with stripes and then an eyelet rectangle. The pumpkin is the star of the show, and I incorporated some gold sparkly bits… Who said candy?!