• Taylored Expressions January 2014 Sneak Peeks – Valentine Treat Toppers!

    Day Three of Taylored Expressions Release Week is here! Have you enjoyed the week so far? Anything in particular catch your eye? Thanks for having fun with us all week…. Tomorrow is RELEASE DAY! You can purchase all the new items tomorrow morning. Yippppeeeeee! 

    For today's project I used the super cool Candy Box Punch Board along wtih the new dies called Valentine Treat Toppers – to make some little treat boxes! Squeeeee! Love this project. I tucked some Hershey's kisses inside my boxes.  

    WANDAVALENTINETREATTOPPERSWED


    Red and white is so crisp for Valentine's Day…and you know I always love a pop of light blue with it. I added some sparkles to each one too. The Treat Toppers dies come in a set and are perfect for cupcakes, treat sacks, cards…anything. Those lips are so fab! 

    WANDAVALENTINETREATTOPPERSWED


    WANDAVALENTINETREATTOPPERSWED
    WANDAVALENTINETREATTOPPERSWED


    Here is your linky list for today! Hop around and see what everyone else is up to! Have a wonderful day! 


  • Taylored Expressions January 2014 Sneak Peeks – In My Heart!

    HEY! Welcome back for Day TWO of Taylored Expressions Sneak Peeks for the January 2014 Release! So happy to have you here! Today I am sharing one project – a sweet Valentine card that is sure to delight any valentine! I used the AWESOME new Heart Stacklets Dies and a fun new stamp set called "In My Heart."

    I like to make at least one CAS design card every release week – something that would be easy to mass produce and flat for mailing. This card fits the bill. I hope you like it! XO

    WANDAINMYHEARTTUES


    My card base is soft cream paper and I stamped the heart in bright red! I cut on the diagonal and put some pretty background paper as my bottom layer. This is a good card layout to save, too. You could use it for lots of things. 

    WANDAINMYHEARTTUES


    Here is a side shot so you can see how I layered my pieces! 

    WANDAINMYHEARTTUES
    WANDAINMYHEARTTUES


    Okay, that's what I got for you today. Please make sure to stop by all the other designers' blogs to see their cool projects and get a flavor for all the new items. See you tomorrow for more sneak peeks…and Thursday for Release Day! 

    Your Baker's Dozen Design Team: 


  • Taylored Expressions January 2014 Sneak Peeks – A Lovely View and Sack-it!

    YOWZA! It's time for Taylored Expressions Release Week already!!?? Yep! And, there are so many cute things in store for you this month! Lots of fun things for Valentine's Day and l-o-v-e! I hope you will join me all week as I showcase different new products! Everything is going to be available for purchase on Thursday morning – the 9th! 

    Today I am sharing two projects that use many of the new products – especially new dies. You're going to love everything – I just know it! First up is a silly owl card (you know I love owls) and second up is a candy confection of pink and red perfect for a valentine sweetie! 


    WANDASACKITOWLMON


    You're a HOOOOOT! How cute is this little set of owl dies? It coordinates with the "Sack It" collection but I made it into a card! I also used the new Tag die! YEAH! 

    WANDASACKITOWLMON


    I made my sweet little owl and then I thought…hmmm…she needs a little something. I know!! Spectacles! Don't laugh, because I used to wear glasses just like that! I love this retro color combo… Inspired by the Basic Grey Hipster paper pack. 

    WANDASACKITOWLMON


    WANDASACKITOWLMON


    Next up is a fun explosion of color and all things girlie! I used the new stamp set called "A Lovely View" combined with the new Display Window and Awning dies!! I colored the stamp in with my Copics and added a birdie. 

    WANDASACKITOWLMON


    This awning die is seriously too fabulous! It has a separate piece to make the stripes a different color! Awesomeness, Taylor! 

    WANDASACKITOWLMON


    WANDASACKITOWLMON


    WANDASACKITOWLMON

    WANDASACKITOWLMON


    Thank you so much for coming by today! And, don't forget to check in here every day this week for more sneak peeks. Here are the links to the rest of the Baker's Dozen Design Team – check out all the projects! Have a great day!  

      
  • Announcements!!

    Hello my bloggy friends! Whew…January is off to a fun start! I have so much to share with you and some announcements of things to come this month. Read on! 

    I am going to be one of the instructors for a fabulous online craft workshop! My friend May Flaum (amazing and talented) kindly invited me to join in on her Winter Creative Retreat! I am thrilled to teach with some of my favorite crafter/bloggers. There are nine instructors in all – and loads of projects. I wanted to share the information with you – maybe you will sign up!? The cost is lower if you sign up before January 9th. CLICK HERE TO GO TO THE INFORMATION PAGE!  There are bios on all the other teachers and more deets.  My project will be a card (of course) and it will be Vintage Valentine in theme! 


    Typewriter class button


    For a limited time this class is available for just $20!  

    The classroom will be active, with new content added and all of the lessons being posted, between January 20-31. Students will not be limited or cut off from access after this time and the classroom will remain open and available for you to enjoy the materials at your own pace. 

    What's included? 

    * Twelve separate lessons from different instructors, delivered between January 20-31st featuring projects and techniques ranging from scrapbook layouts to cards, to mixed media canvases!

    * Unlimited access to the classroom to re-visit these materials and work at your own pace and E-mail access to lead instructor May Flaum!

    * E-mails notifying you of new materials being added to classroom, as well as additional inspiration and ideas!


    CHA is coming next week! 

    In other big news….next week is Taylored Expressions Release Week! And…I will be on my way to Anaheim to see Taylor and the rest of the TE Crew at the CHA Convention! WOOOT WOOOT! I am beside myself with excitement to get there and start having fun! FOUR DAYS of girly, crafty, creative, inspiring fun! 

    I will be at the convention from Friday until Tuesday, and, like last year, I will be posting photos of new products, new innovations and your favorite craft-a-lebrities the whole time on my A Blog Called Wanda Facebook page. If you want to see the latest from the floor – "like" my page on Facebook. Just click on the Facebook link in my left hand sidebar. You can also check out my pictures from last year on there. 

    I hope that your year is off to a great start! Thank you for being a part of my creative journey! Blessings to you! XO


    Floral signature


  • ….Inspire Great Things….

    HAPPY HAPPY NEW YEAR! Happy 2014 Everyone! The new year is full of promise and possibilities and beginnings! I hope your year is off to a good start. We spent the day at home yesterday relaxing and watching the parade and football games and I got some much needed creative time. Hmmmm….I had no idea what I wanted to make,though. Something for the new year, but what? I went through my drawer of Papertrey Ink goodness and saw the Hands of Time stamp set and then I saw the sentiment that I used. I thought – that is a really nice saying for the new year – and voila! A card was born! 

    2


    It was really hard to pick a color scheme…but then I found the fern stamps and decided on a natural color palette of green, brown and mustard. And, my current obsession, wood grain paper! Isn't that a pretty saying for this week? 

    2


    It took me a while to decide what color to make the clock… I had a brown clock, a white clock and finally decided on the mossy green. 

    2


    2


    I cut the clock hands out of distress kraft core paper and then sanded them to look a bit worn. All my paper edges are inked with Antique Linen Distress Ink. 

    2


    Here's a photo that shows my layers…

    2

    Stamps and dies for this project are all from Papertrey Ink: Hands of Time stamp set and clock dies, Number dies, Meadow Greens stamp set and matching dies, and Love Lives Here stamp set and matching dies. The inks are all Tim Holtz Distress Inks: Antique Linen, Mustard, Peeled Paint and Corduroy.  See you soon! I'll have some news to share soon about an online card class I'm doing with May Flaum (and a giveaway)! Also, I leave next Thursday for CHA!!! And, next week is Taylored Expressions Release Week. 2014 is off to a busy start! XO


    2


  • FOUR year blogaversary! And, my end of the year wrap-up!

    Hi! Happy (almost) New Year! I hope and wish for many good things to come in the year 2014! New Year's is always a time to pause and reflect and take stock. For me, 2013 was a very hard year. Probably one of the hardest years of my entire life. I'm not really sad to see it go. Too much happened. I'm a very even keel sort of gal, and 2013 put me on a roller coaster ride – and I must say that I didn't really care for it. I am very grateful for what I have and the people I love. I am very strong in my faith that God is preparing me for a new chapter or a new phase in my life, and I had to walk through the "work" first. Do you know what I mean? Anyhoo, I digressed…

    I am looking forward to making 2014 a wonderful year. My words for 2014 are: Compassion (to seek it and give it), Flawed (recognizing that I am flawed and that's okay), and THRIVE (because that's what I intend to do!). I don't really do resolutions – do you? What's on tap for your new year? I wish you ALL THE BEST! Let's make it a banner year! 

    One of the things I love to do here on the blog at the end of the year, is to take a look back on my creative journey! Today is my four year blogaversary! Can you believe it? So many of you have been following along with me the entire four years and it's been so much fun! I continue to be so happily amazed at the love and kindness of the peeps in blog land. Warms my heart and soul. I'm so excited and happy that I get to share with you what I love to do. 

    My blog is my journal, in a way, and it keeps a record of my life and my progress. So, on that note, here are some fun stats from the year. At the end of 2012 I had written 560 blog posts, received 5413 comments, had 104,000 visitors, 365 email subscribers and 362,000 total blog hits. At the end of 2013… I have written 722 blog posts, received 7527 kind comments, had 185,000 visitors, 521 email subscribers… and…. drum roll please….506,000 total blog hits! YAY! I had a secret goal to try to make it to half a million blog hits before the end of the year! COOLEST thing ever! 

    Last year I started a new tradition of recapping my favorite projects from the year! I got so many nice comments about this! Here are my favorites from 2013!! 

    This card from January was my entry into a Hero Arts Contest! The smaller panel on the front is actually an ATC that can come off. That map stamp is a fav, and made other appearances throughout the year! 

    January2


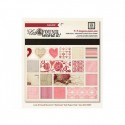
    For February I had to choose a Valentine favorite! This card was made in a color combo I love and using Papertrey Ink supplies…

    January


    This card from March just might be one of my favorite cards I've ever made! It took me hours to punch out and glue all those layers together – but I love the result. You guys can tell I love that shade of aqua….

    January


    In April I got the nautical bug! This trend was everywhere and I adore it! This card was made using Taylored Expressions stamps and dies…

    January


    In May, I made this card for my friend May! It was her birthday card and was full of an explosion of flowers. This one was really fun to make! 

    January


    June's favorite card had me keeping it clean and simple, with some awesomely cute stamps from Paper Smooches and my go-to gingham paper! 

    June2


    In July I tried out a new color combo for the patriotic holidays! Gold and cream, and a gorgeous TE tamp and die cut of the USA… 

    January


    In August, I was feeling like Summer bikes! I made the daisy out of some die cuts and used some new washi tape and fun dies….Love how this one came out. 

    January


    For September I started my Autumn crafting with a gorgeous new stamp and die set from Tim Holtz. This card actually got me a mention on Tim Holtz's blog! WOO HOOOOOO! That was fun! 

    January


    More leaves for October – Fall is my favorite time of year! This time, more leaves and inks from Tim Holtz in a yummy fall palette. 

    January


    For November's choice, here is a card made using some cute apple stamps and dies…

    January


    December had me feeling inky and glittery all over when I made these poinsettia pins from the tattered poinsettia die from Tim Holtz! I made a pink one too. Totally fun project! 

    January


    And now, just a few of my favorite photographs from 2013! First up is a butterfly captured in Golden Gate Park in San Francisco… 

    Butterfly


    Some pretty pink dogwood blooms in the foothills of Northern California….

    Butterfly


    Summer Farmer's Market time….

    Butterfly


    My favorite Instagram of the year, took when we went sailing in October…

    Butterfly


    Another favorite Instagram shot of some cupcakes I made this year….

    Butterfly


    A beautiful white dogwood bloom in front of church at Easter…

    Butterfly


    Our anniversary trip to Carmel…where we saw Jonathan! LOL! 

    Butterfly


    Our last trip to the beach in San Francisco – just a couple of weeks ago. This is why I love California! My last time to see the sunset over the ocean for the year. This is so peaceful. 

    Butterfly


    Gg65957867

  • New Year Cards for 2014!

    Hello my crafty friends! How was your Christmas? Was Santa good to you? I hope so! I must have been a very good girl because I got a new camera lens! Yay! Oh, and the Despicable Me 2 movie! It was a very very quiet Christmas for us since I was so sick all week. Today was my first day back at work and it really felt good to get out of the house and get some air and use my brain. I am tired though, and glad it's already Friday. Hopefully after the weekend I'll be good as new. 

    It's time to start thinking about the New Year, and I have had some ideas in my head for a couple of weeks about what I wanted to make for NY cards. Tonight I sat down for a bit in the crafty cave with some of my fav Papertrey Ink supplies and some glitter paper…. Here's what happened! 


    1a1


    I kept a basic, clean, classy color palette of white, black, gold and silver…. Those colors say New Year's Eve to me! I used some pretty papers for shine and sparkle….

    1


    I thought I would like the black one the best, but I ended up liking the white and silver one better! I think because the silver paper is much sparklierrrrrrrrr (I know that's not a word!) and prettier! 

    2


    I first cut my paper into a square and drew grid lines on with a pencil, dividing the paper into four squares. Then I used some washi tape to tape down my Papertrey Ink Number Dies in place before running the whole thing through my Big Shot. Then I mounted the top piece on foam tape over the glitter paper. 

    4


    2


    2


    I thought this was a GREAT message for the New Year…Celebrate Today…Celebrate EVERY day! I hope you have a fabulous weekend! If you got something cool and crafty for Christmas, leave me a comment and tell me about it. I'd love to hear! XOXO


    2

  • Merry Christmas from my home to yours!

    Hi friends! I want to take a moment to say a very Merry Christmas from my home to yours! I hope that you are going to enjoy the day surrounded by love and laughter and the people you care about the most! This time of year always makes me reflect, and I am so very happy to share my creative journey with you. Thank you for being special to me. 

    The universe decided to slow me down this week by giving me the gift of the stomach flu. I have been in bed for three days. All that last minute shopping, cooking, stamping and wrapping just didn't get done. And I have to be okay with that. God reminds us that we are not in control… 

    I am already looking forward to a new year with new beginnings and some fun crafty treats for you! In a couple of weeks I'll be off at the CHA convention scouting out new products. Later in January I will be guesting in a fun online class – my first time doing that. Lots to look forward to!

    Until then…

    MERRY CHRISTMAS! 

    Nativity-scene1

  • Key to my heart….

    I'm popping in with another Christmas card project today! It's made with some fabulous products from Taylored Expressions! You guys know that I love to take crafty items that are for one purpose, and use them for a different purpose…and that's what I did today! I took the super cute "Key to my Heart" dies, which I usually use for Valentine's Day…and made a Christmas card with them! Kind of a CAS yet vintage approach…

      1


    I went with a classic Christmas color scheme: Cream, Kraft and Red…but then popped in a bit of olive green too! I love these Sprinkles from Doodlebug. They are so shiny and pretty as my holly berries. 

    1


    This is one of my favorite techniques to do with die cuts – make my own embossed patterned paper to use as a background. I cut the keys out of cream cardstock, and then mounted them on cream cardstock. I took a dauber and some linen distress ink and lightly went over them afterwards. 

    1


    1

    All of YOU definitely warm MY heart! As we get closer to Christmas I hope you have a lovely time with your loved ones and I wish you all the blessings of the season. XO

    1

  • Poinsettia Pins!

    Hey crafty friends! One week until Christmas! The countdown is on! How are you today? I'm super super excited to share today's project with you. I made these a couple of weeks ago but I had to wait until I gave one away as a present before I could show you. Also, I had to find the time to edit about a million photos for this post! LOL. I am so inspired by anything vintage Christmas and no one does that like Tim Holtz. I finally bought the Tattered Poinsettia Die, and then finally sat down for a (two day) project. I made my pretty poinsettias into coat pins for Christmas. Can't wait for you to see….

    Here they are all finished…. 

    1


    I made a red one for me to wear and a pink one for a gal pal who loves vintage as much as I do. We met for dinner and a lovely concert Sunday night. Always good to spend time with the girls…. Here's a close up of the red one…

    1


    And here's a close up of the pink one…. The pink one has platinum glitter on it! ACK! 

    1


    1


    Okay, so here's the process…. First I cut out a BUNCH of die cuts with watercolor paper. I wanted really sturdy paper for this project. You could also use chip board or grunge board…

    1


    First step was to ink the petals using daubers and Distress Inks…

    1


    Here are all the colors I used!! How fun is that?? These are my pieces all inked and ready for the next step. 

    1


    I added some french script with brown ink – this is one of my all time favorite stamps from Stampin' Up! What a mess! 

    1


    1


    OOOOH LA LA! Now we're really getting into the fun! Glitter and bling! I swear that I could put that clear rock candy distress glitter on EVERYTHING!!! I used the yellow Stickles for the centers of the flowers. 

    1


    YUUUUUMMMMMMM! 

    1


    Before I glued all my pieces together I gently rounded the petals using my fingers – to give some dimension. I also used foam tape in between all my layers and used LOTS of glue! 

    1


    One of my favorite tips – Did you know you can use your Copic Markers to color your clear blings?? Yep! You can make them any color you want! 

    1


    Here is a shot of what the backs look like….

    1


    This might be one of the most fun projects I've ever made! It was nice to take my time, and layer and play… Hope I've inspired you to play too! 

    1

    1